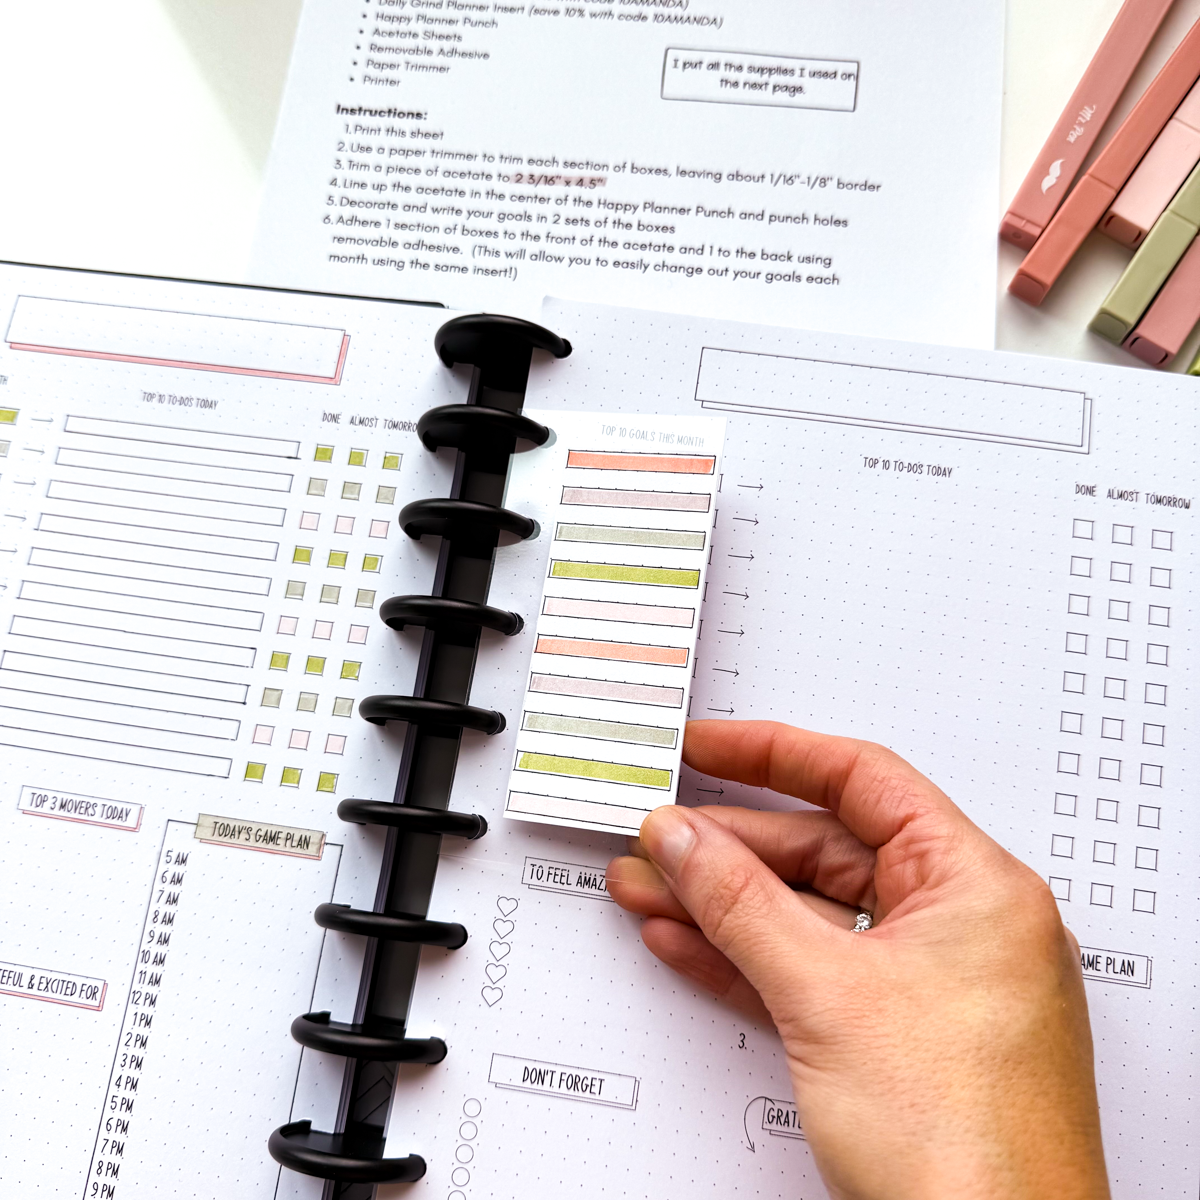
Hey guys! If you have a Daily Grind Planner, you’re definitely going to want this free insert guide! It has saved me SO much time and I hope it saves you time, too!!
I hope this printable helps you to save time like it does for me! You can always use code: 10AMANDA to save on your next (or first!) Daily Grind Planner purchase! That helps me to get a little commission from your purchase! I appreciate it if you decide to use my link and code!
Want to know how else you can support me? Click here.
Hey friends! I have a different kind of post to share with you today! Spring Break is coming up and we have a 10 hour drive ahead of us! My little ones are 6 and 8 and need some car activities to keep them occupied. Finding unique travel toys for kids older than 3 seems to be quite the challenge!
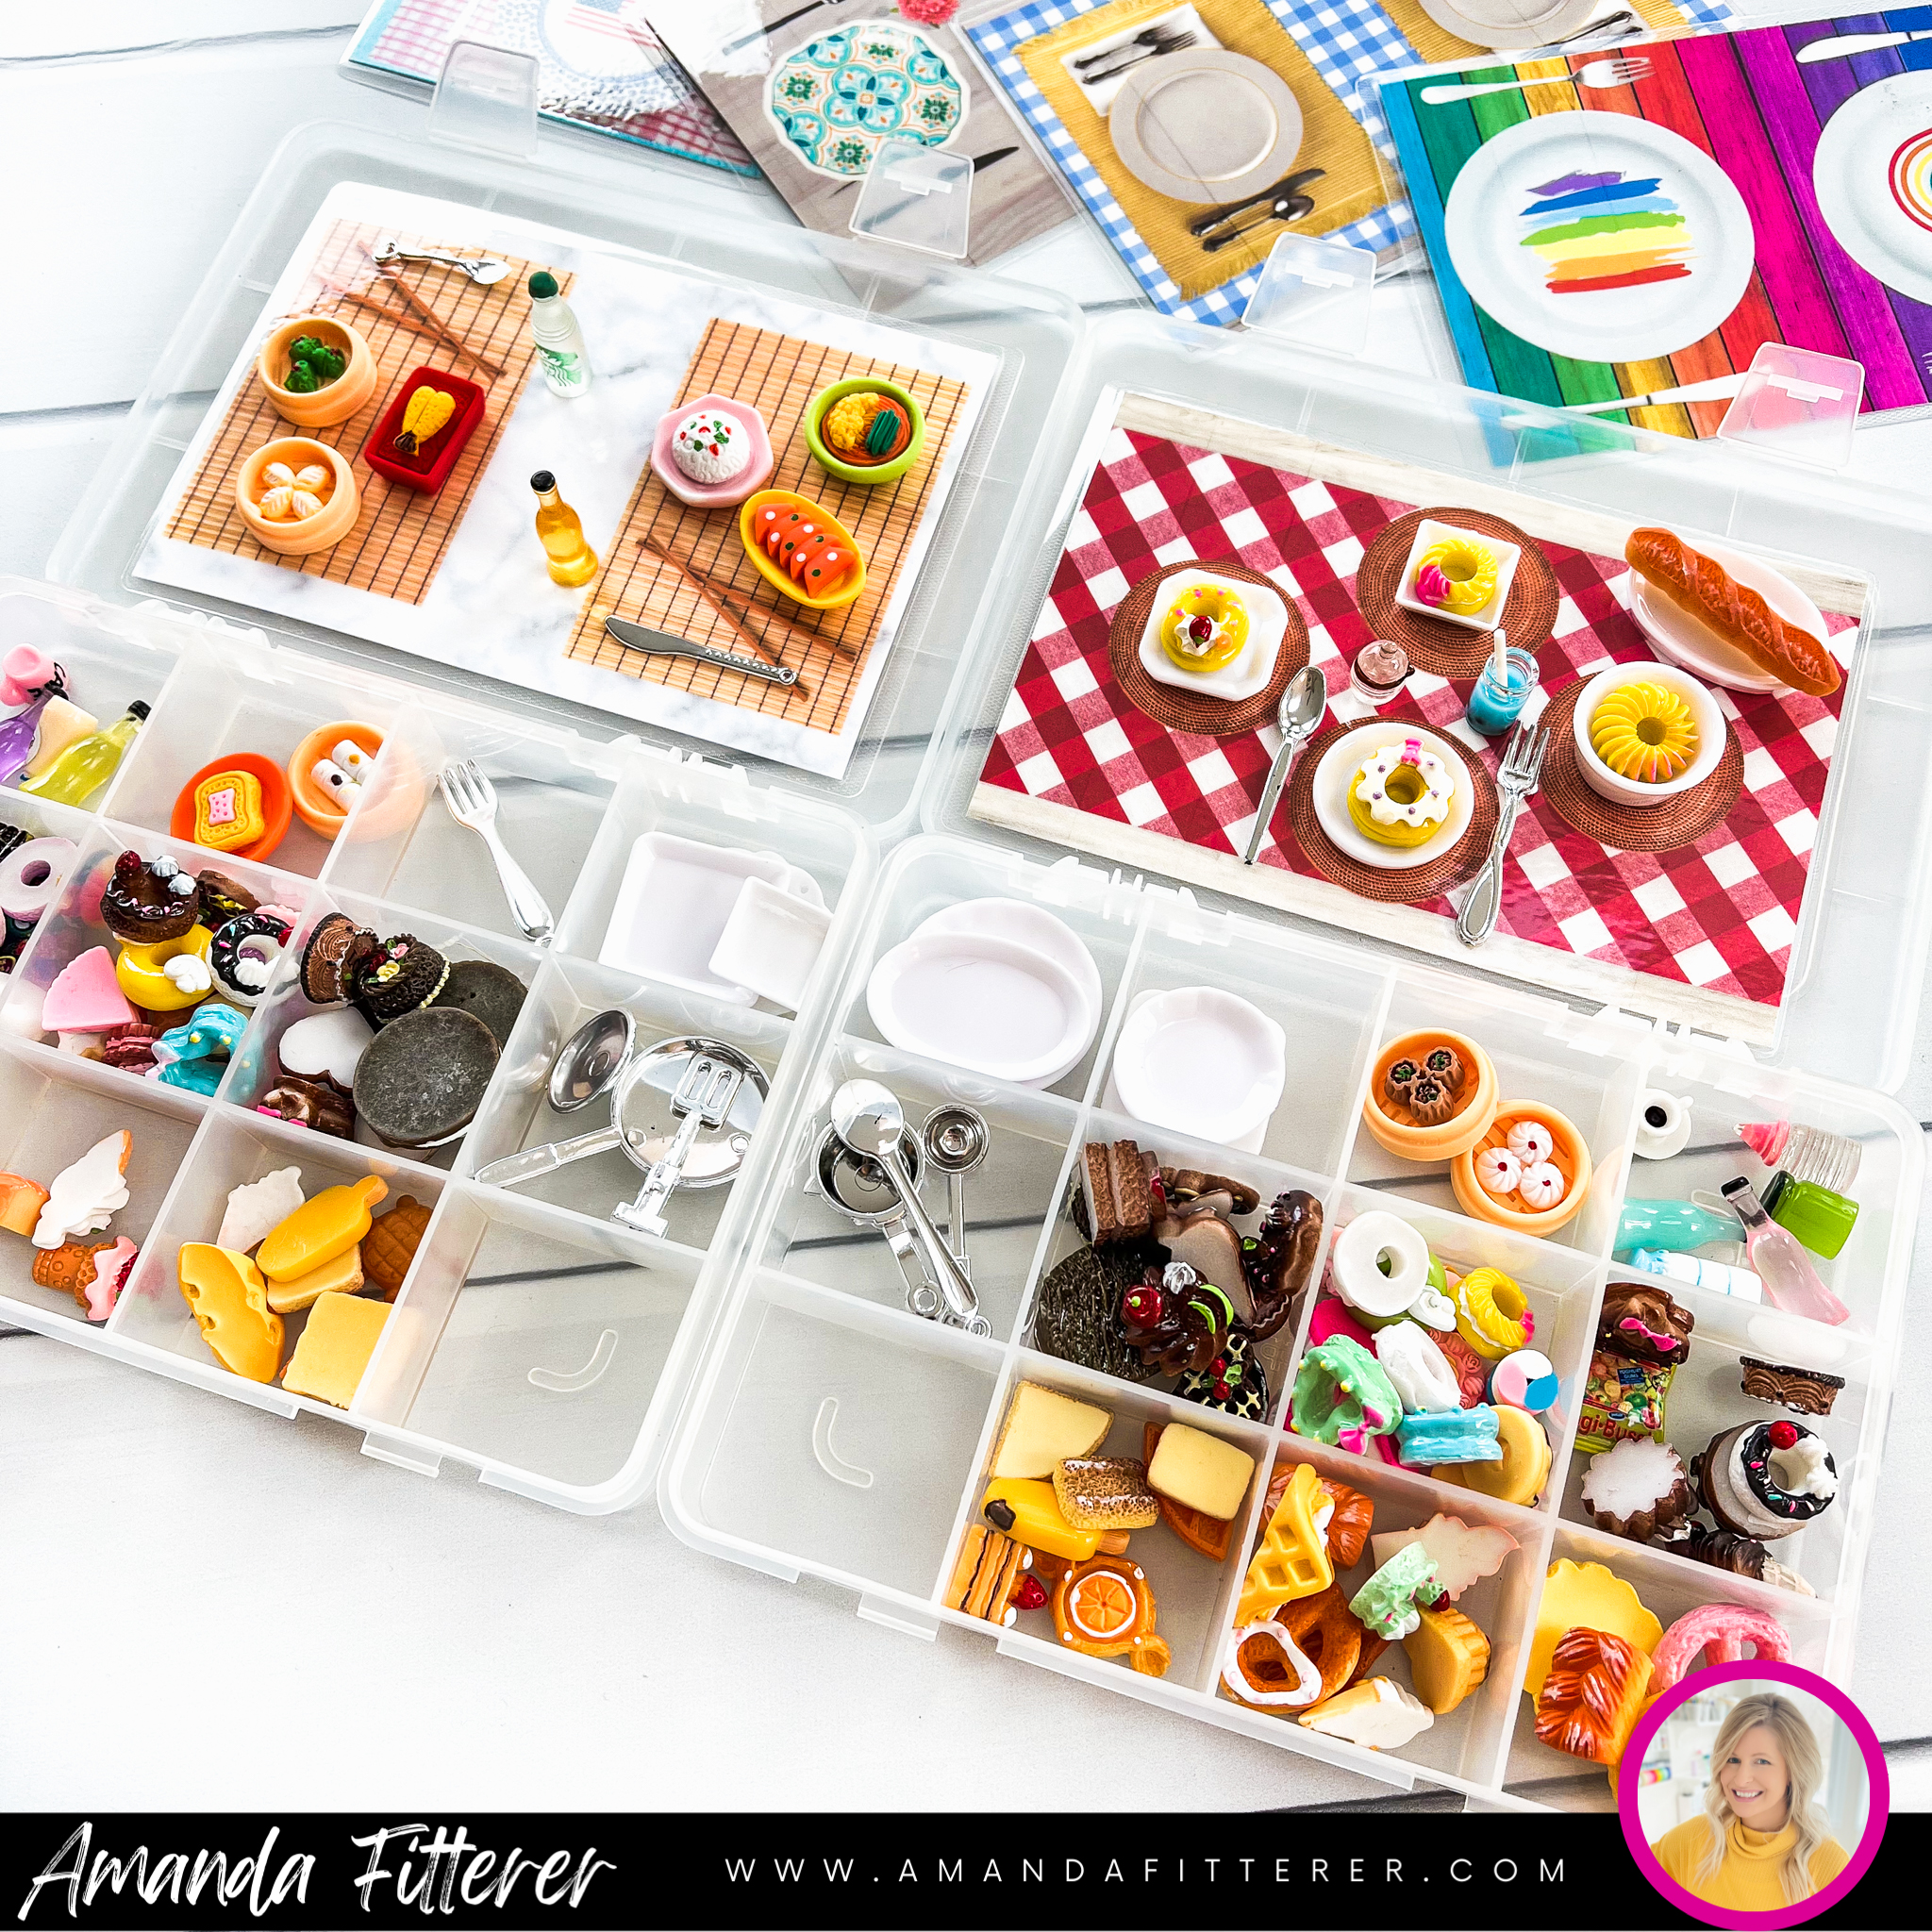
So… I’ve created this Travel Size Play Food Kit for my kiddos using some crafty creativity! Want to make your own kit? I’ve got a FREE DOWNLOAD for you!
If you want to get notified of new posts in the future, I would LOVE it if you subscribed! I’m going to be doing some more DIY crafts for this trip coming up in the next few days!
Each kit contains 3 double-sided laminated “tables”, mini cutlery and dishes, and mini foods and drinks. (Anything mini is just THE CUTEST, isn’t it!?)
Here are the items you’ll need to make your own travel kits:
A laminator – the best (and cheapest!) is this one.
Laminating pouches – I like to have a variety on hand at all time, so I have this kit.
A printer – I have used this HP 8600 printer for the last 15 years! It is my absolute fav and prints up to 100# cardstock!!!
Cardstock or paper – I prefer cardstock for this project so that you can print on both sides. But you could use 8.5″x11″ computer paper and then put them back to back in your laminating pouch.
Printable Table settings – that’s where I’ve got your FREE DOWNLOAD! Click on the download button:
Instructions: 1. Gather all your supplies. 2. Print your table settings from your FREE DOWNLOAD. The instructions for printing are in your download. 3. Laminate your table settings to make them more durable and pretty! 3. Place all your supplies in your organizer (or let the kids help!) 4. ENJOY with your kiddos!
Here’s what they look like when they’re closed up! So portable and easy to travel with! (And, obviously, SO CUTE!)
There are some affiliate links in this post! I’d be so happy if you used them to make this project – it doesn’t cost you anything, but it allows me to get a small percentage of funds to help me make more stuff to share with you! THANK YOU!
Xx, Amanda
If you want to get notified of new posts in the future, I would LOVE it if you subscribed! I’m going to be doing some more DIY crafts for this trip coming up in the next few days!