
Hey friends! Did you see we’re doing a Collaboration Hop between Heffy Doodle and Chibitronics on Instagram!? There are prizes are up for grabs!!
I created this fun light-up card using the Craft with Light Kit – White by Chibitronics. I used lots of Heffy Doodle products! Keep reading on for those links!

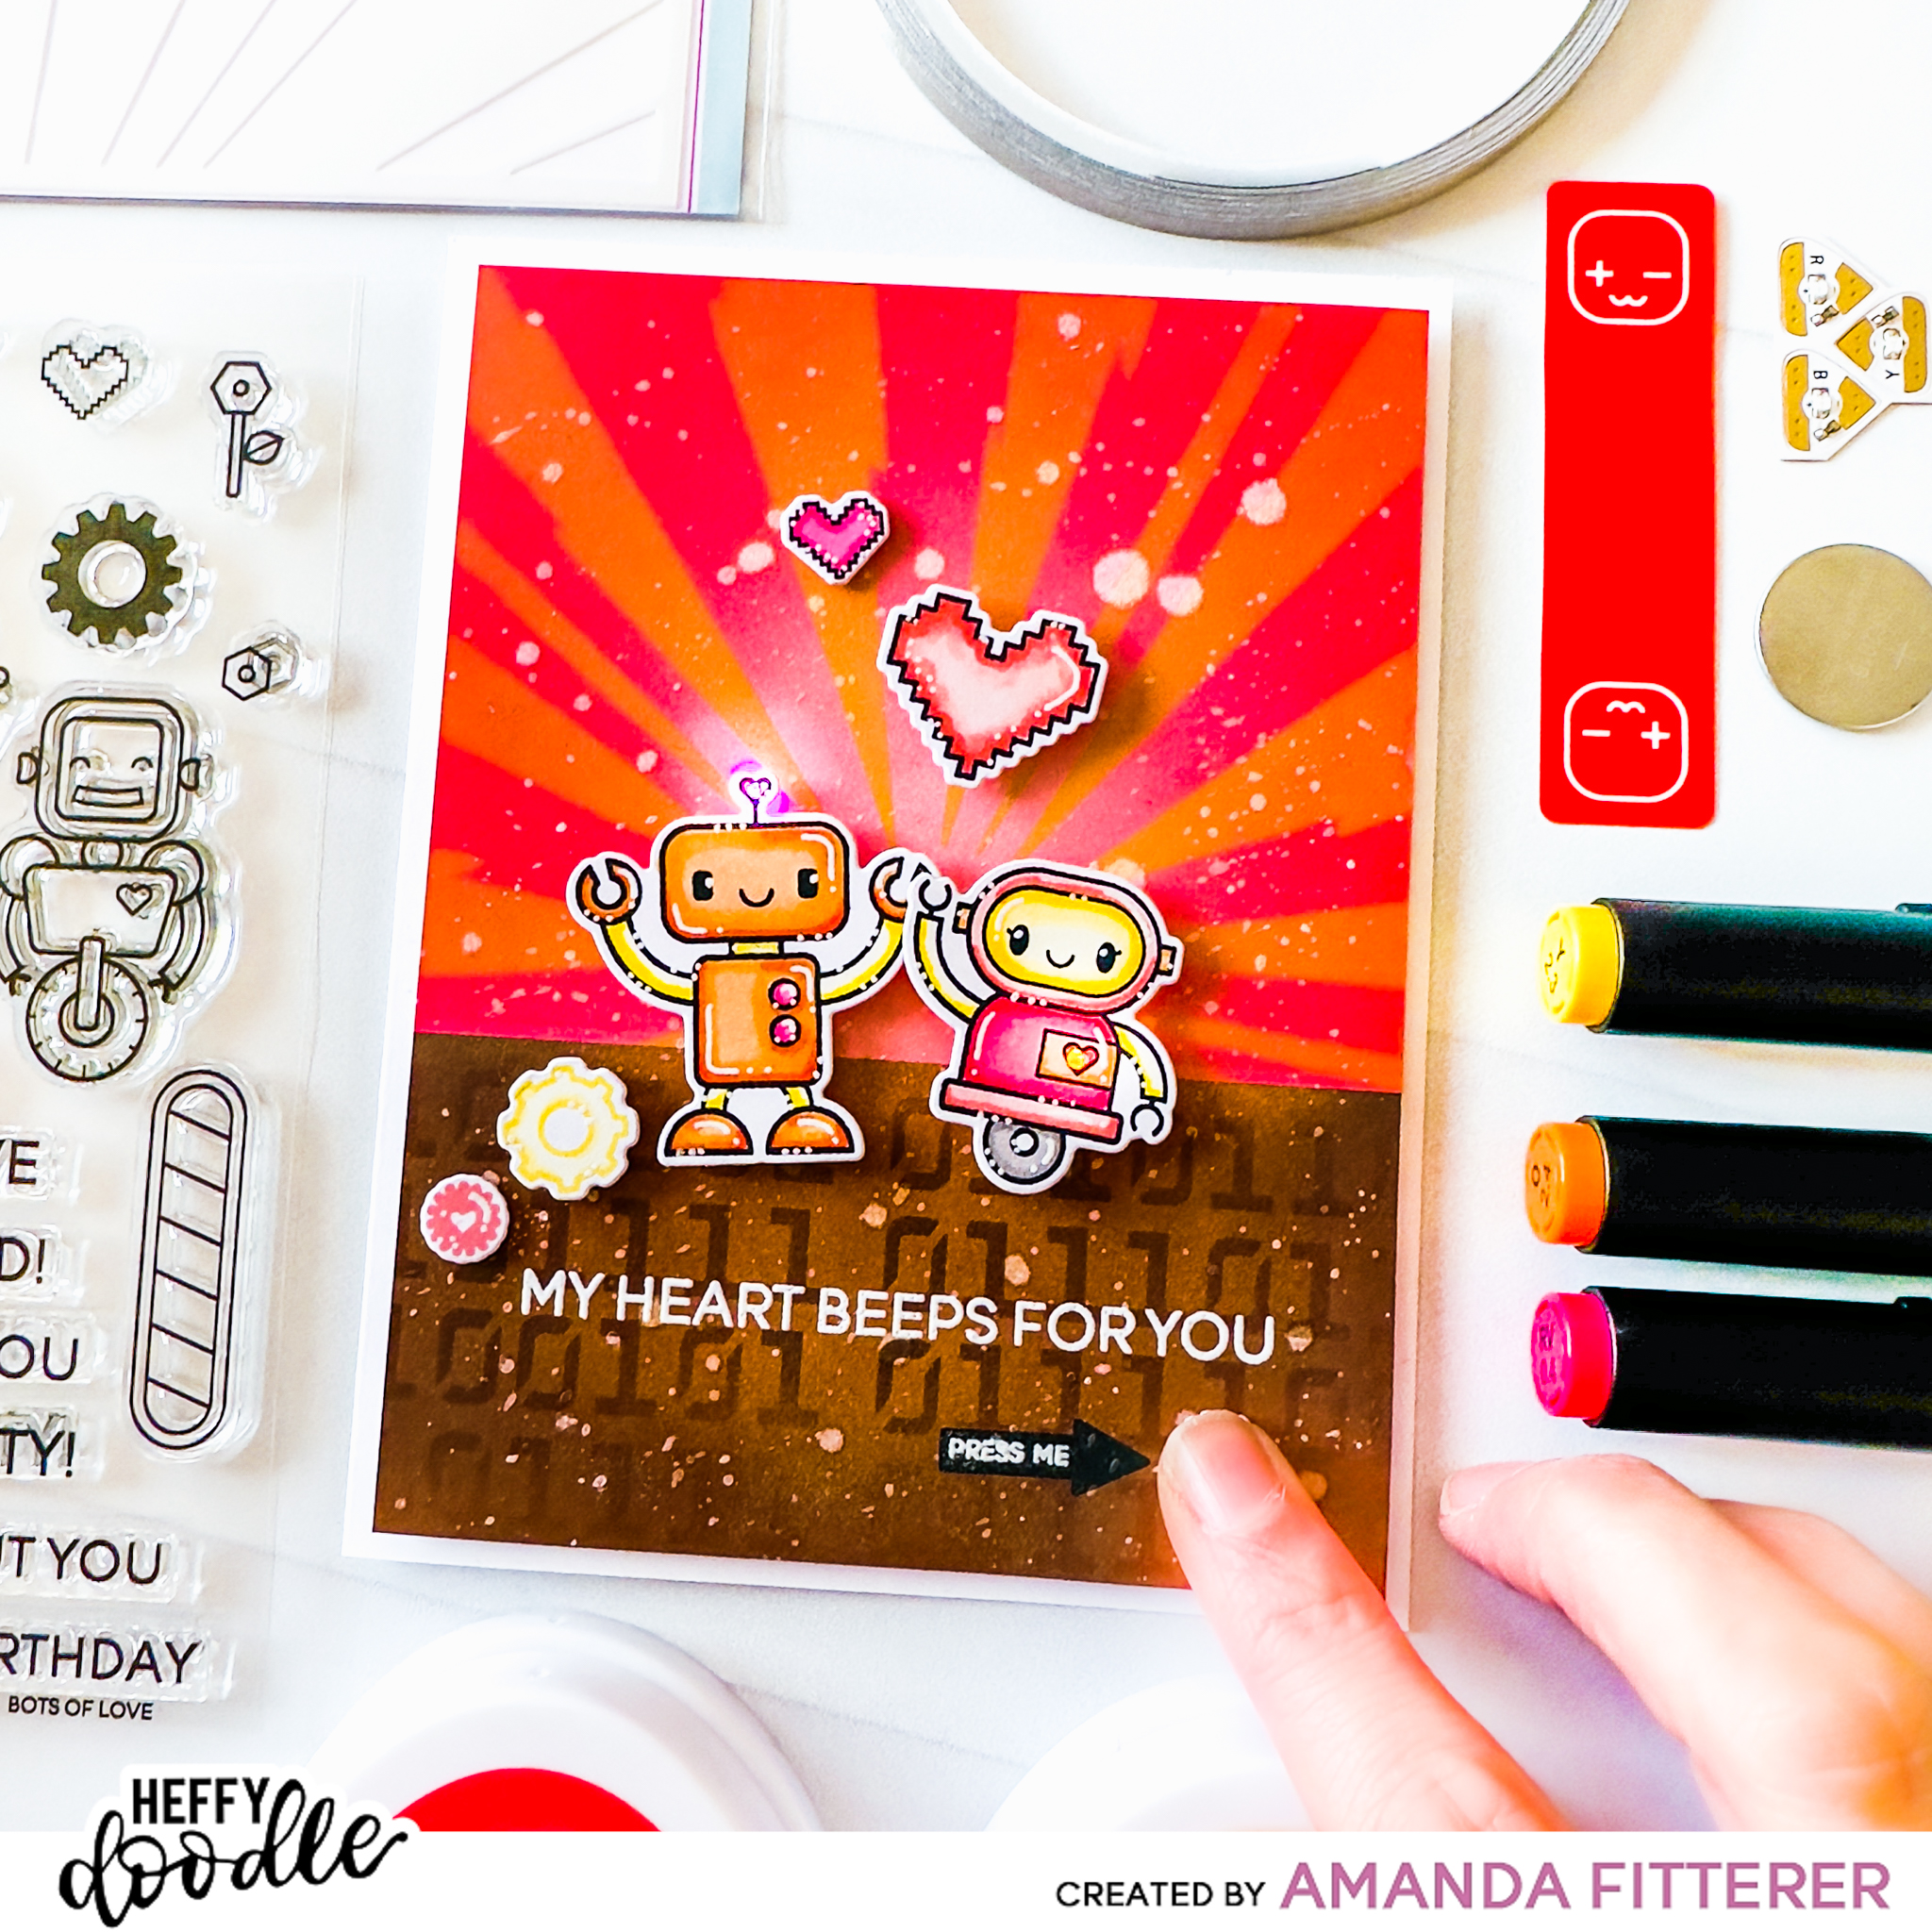
First, I created my bright background! I blended some Catherine Pooler inks through my Zapp Attack and Cogs & Code Stencil. I used Heffy Memo Tape to mask off the top and bottom of my card.

I stamped my images from the Bots of Love Stamp Set and then I colored them in with OLO markers. I cut them out using the coordinating dies.


Once I decided where I wanted my lights, I started to prepare for the wiring.
- I poked holes through the robots’ hearts where I want the bulbs to show.
- Then, I placed the robots on the background where they were going to be glued down once the card is assembled. I made a mark with a pencil through the robots’ heart holes onto the background.
- Then, I poked holes through the pencil marks on the background panel.
- Lastly, I used a pencil to make marks on my card base where the lights need to be placed.

On my card base, using the pencil marks I made in the last step as a guide, I’ve made marks where the + and – wires need to line up. I did this by taking the lights and placing them down onto my card base so the light was right over top of the pencil mark. Then, I looked at where the copper + and – are on the light unit and drew lines where I need the wires to be lined up to touch the copper part.
I’ve also created a “housing unit” for my battery with a plus and minus sign on it, so I know which way to insert the battery once it’s time. I also marked where I want the battery to be on the card base.

Next, I started by taking my tape and cutting it in half down the center to create smaller/narrower pieces. This isn’t necessary, but was helpful with navigating the tape.
I adhered my battery housing unit to my card base and started placing my + tape. This tape is the top wire which goes to the base of the battery housing unit.

Then, I placed my – tape which starts on the flap of the battery housing unit.


Next, I used 3D foam tape around the whole base of the card to “lift” my card front up so the battery doesn’t stick out farther than the rest of front panel. I attached the stamped images with 3D foam squares, making sure to line the robots up to the lights properly.


Come join in the IG HOP to enter to win the prizes from Heffy Doodle and Chibitronics!

Thank you so much for stopping by my blog today! Enjoy the Hop!
Thanks for using my affiliate links! You all are the BEST! Using an affiliate link in this post above or down below costs you nothing, but it gives me a teeny percentage of your sale to buy more crafty goodies to continue to share card tutorials with YOU! So, thank YOU! Xx, Amanda
Scrapbook.com Affiliate Link | Catherine Pooler Affiliate Link | Become a Catherine Pooler StampNation member
👇🏻👇🏻 Subscribe 👇🏻👇🏻 to be alerted of new posts by yours truly!
Xx, Amanda
