
Hey crafty friends! Are you as pumped as I am for the BRAND NEW RELEASE from Catherine Pooler?! Catherine Pooler StampNation members get access on April 18th! General ordering opens on April 19th!
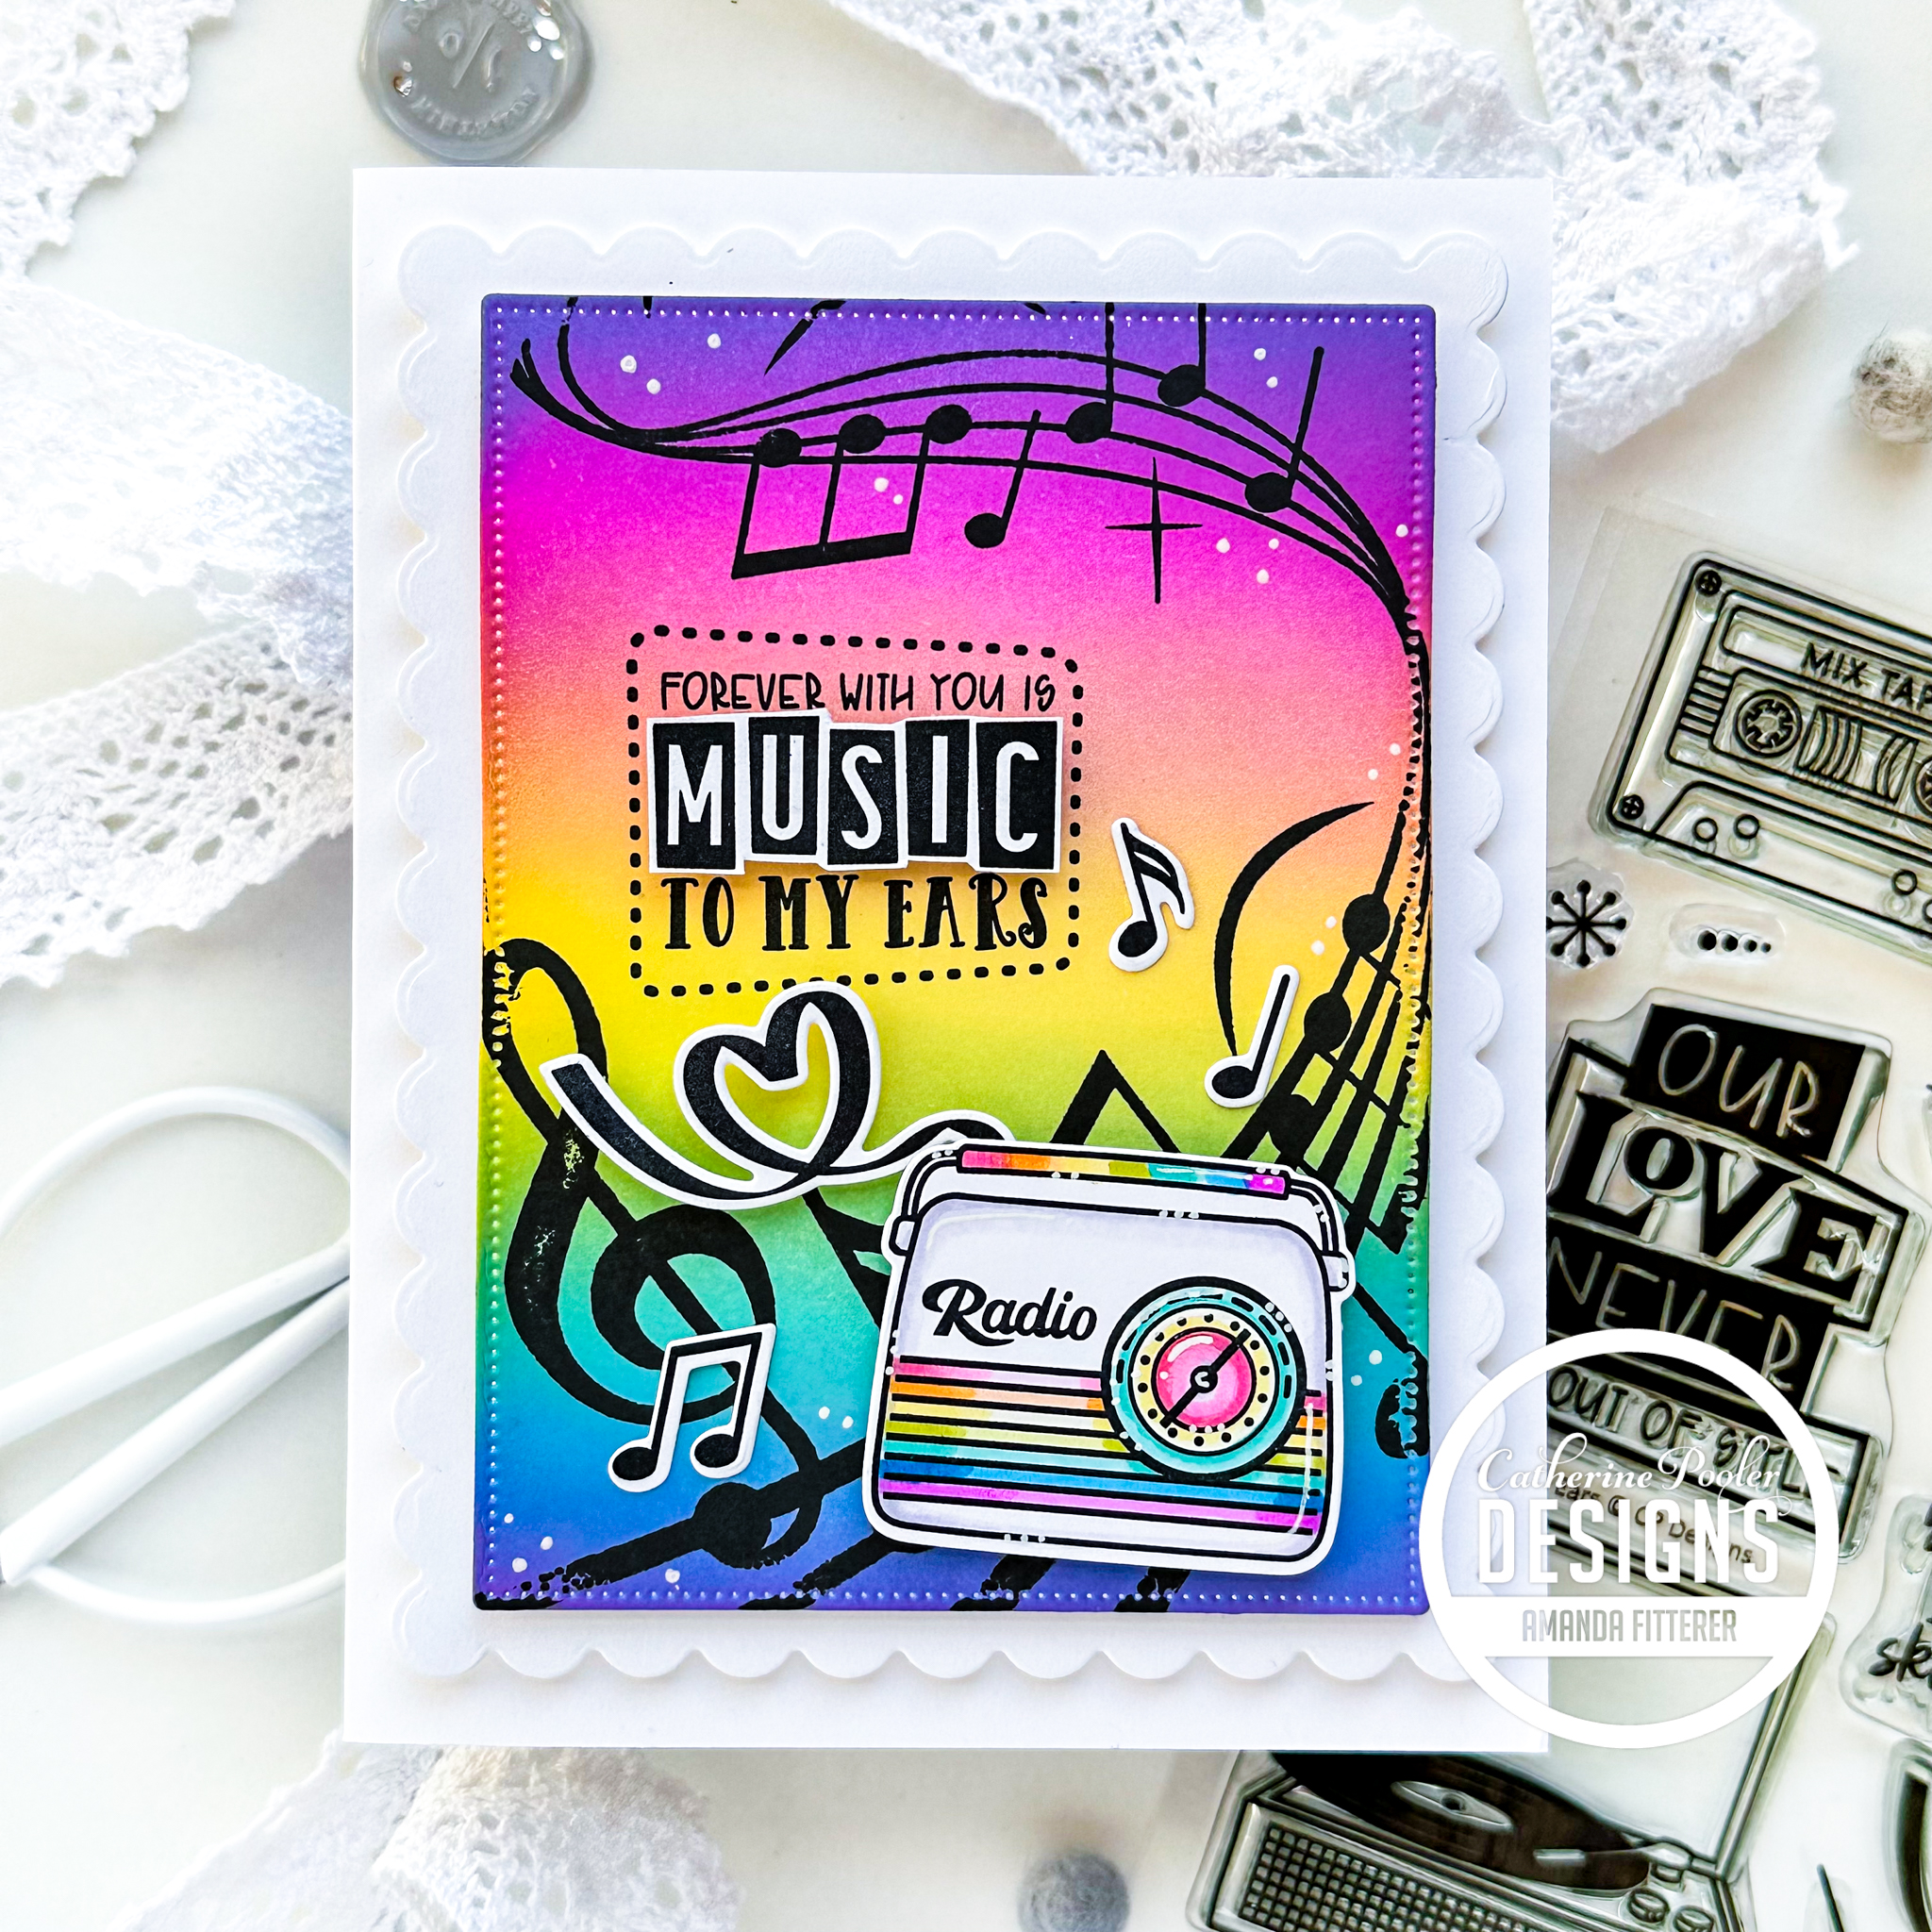
Keep scrolling to see how I made this card featuring the Music to My Ears Bundle from the NEW Soda POP Collection!
👉🏻👉🏻 GET EARLY ACCESS to this(and EVERY) New Release! Sign up to be a Catherine Pooler StampNation member and get tons of perks, including early ordering for every monthly release!

Shop now:
All the cards I share in the next few weeks will be using the following products from the Music to My Ears Bundle:
* Retro Love Word Dies <– FREE with a $75 purchase!!!!
* Music to My Ears Stamp Set
* Music to My Ears Coordinating Die Set
* On Staff Background Stamp
* Doo Wop Cover Plate
* Rad Dad One Liners Stamp Set

When creating a rainbow background, I always start with the yellow first in the center of the card (in this case, Limoncello). Next, I’ll blend Oh Boy! along the entire bottom and blend it a little with the Limoncello. Then, I’ll blend Pucker Up on the entire top of the panel. Then, I’ll blend the very bottom of the panel with Pucker Up to create a violet color. I’ll then grab Oh Boy! again and blend the top of the panel to create a fuchsia color. Next, I’ll grab Limoncello again and blend it out into the pink and blue once more.
Once I’ve got my panel ready, I can die cut with the Scallops and Dots Dies. I’m also using the dies to cut a white scalloped panel.
Next, I am stamping my On Staff Background Stamp and my sentiment from the Music to My Ears Stamp Set with Midnight ink.

Next, I stamped my images from the Music to My Ears Stamp Set with alcohol marker-friendly Memento Tuxedo Black ink. I colored them with OLO alcohol markers and cut them out with the Music to My Ears Coordinating Die Set.

I stamped my sentiment again on white and then used scissors to cut out the word “MUSIC”. I propped my die and sentiments up using my favorite 3D foam squares. I used Bearly Arts Precision Glue to adhere the panels it to my pre-scored card base,


Don’t forget: If you’re a Catherine Pooler StampNation member, you get EARLY ACCESS to every new release (plus SOOO many other benefits)! Sign up now! It’s worth it!
Thanks for using my affiliate links! You all are the BEST! Using an affiliate link in this post above or down below costs you nothing, but it gives me a teeny percentage of your sale to buy more crafty goodies to continue to share card tutorials with YOU! So, thank YOU! Xx, Amanda
Scrapbook.com Affiliate Link | Catherine Pooler Affiliate Link | Become a Catherine Pooler StampNation member
👇🏻👇🏻 Subscribe 👇🏻👇🏻 to be alerted of new posts by yours truly!
Xx, Amanda


