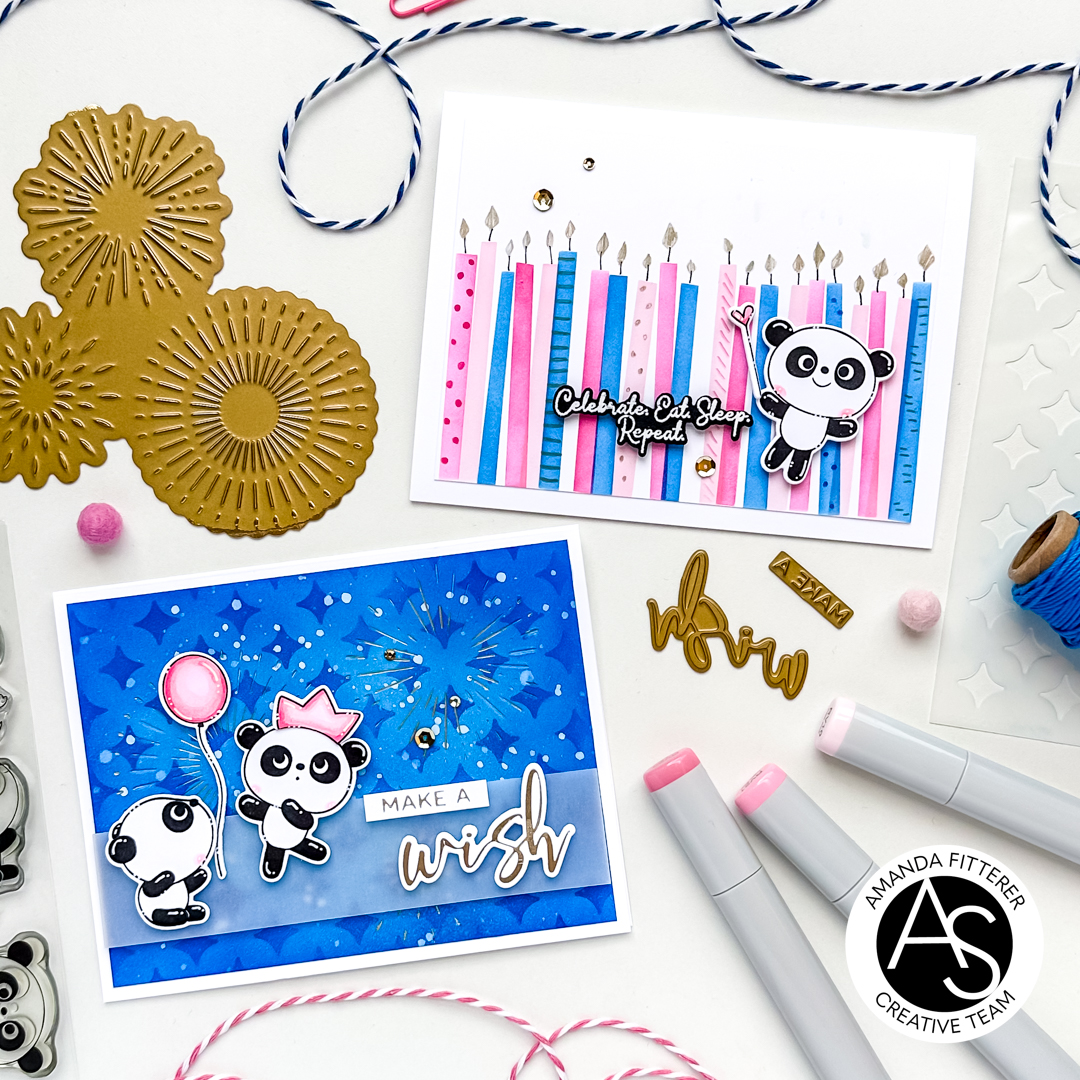
Hello friends! It’s Amanda Fitterer and today’s card that I’m sharing features the new Cheerful Panda Moments stamp set! These pandas require minimal coloring, which makes it much easier to create this panda party!
Once I got them placed and adhered with 3D foam squares, I used my favorite Cutterbee scissors to trim off the overhanging panda parts.
Such an easy but adorable card! Who wouldn’t want to join this Panda Party!?
I hope you enjoyed this sweet little card! Thanks for coming by my blog today!
Xx, Amanda
Thanks for using my affiliate links! You all are the BEST! Using an affiliate link in this post above costs you nothing, but it gives me a teeny percentage of your sale to buy more crafty goodies to continue to share card tutorials with YOU! So, thank YOU! Xx, Amanda
Welcome to the Alex Syberia Designs September Anniversary Release Blog Hop! To celebrate their birthday, Alex Syberia Designs has collaborated with a ton of wonderful sponsors to give away a grand total of £800 ($1000) in prizes! See ALL THE PRIZES down below! 👇👇
My cards feature a lot of the new products! Shop all the NEW PRODUCTS HERE.
If you ever have an issue getting a really good ink blended background, it’s possible you’re not using the right paper or cardstock. The ink should be smooth and easy to blend. Consider using Catherine Pooler’s Premium White Cardstock. It makes the process so much easier!
Be sure to leave comments by midnight BST (London, UK time) on September 17th, 2023, for a chance to win!
👉🏼👉🏼 Start your comment by telling us where you’re from (USA, Canada, Europe, or Australia) and what your favorite product is from this September Anniversary release.
All the winners will be chosen at random from the comments left on any of the posts in the blog hop, upcoming YouTube hop, and the three upcoming Instagram hops. Winners will be announced on the Alex Syberia Designs GIVEAWAY WINNERS PAGE on September 18th, 2023.
Make sure to come back and check if you are a winner! Prizes not claimed within two weeks will be forfeited.
To increase your chances of winning, be sure to comment on this blog hop, the upcoming Anniversary Video Hop that starts on the 9th of Sep on Alex Syberia Designs YT Channel, and the three consecutive Instagram Hops on Alex Syberia Designs Instagram starting on the 11th of September.
Thanks for using my affiliate links! You all are the BEST! Using an affiliate link in this post above costs you nothing, but it gives me a teeny percentage of your sale to buy more crafty goodies to continue to share card tutorials with YOU! So, thank YOU! Xx, Amanda
👇🏻👇🏻 Subscribe 👇🏻👇🏻 to be alerted of new posts by yours truly!
Hello friends! Today I’m sharing a soft and pretty “LOVE YOU” card featuring the Paradise Birds Stamp Set. Let’s make this card together! Grab your supplies!
For the White/Green Panel, we’re going to blend Catherine Pooler’s Melon Ice just around the edges. For the White/Pink panel, we’re going to blend (just lightly in the center) Cotton Candy.
Next up, we’re going to stamp our leaves from the Paradise Birds Stamp Set directly onto our card base using Melon Ice ink. To make this process a little quicker, I like to use a combination of my acrylic blocks and my MISTI. I do this because I want to use the foam from the MISTI to get a better stamped image, but the acrylic blocks make it much faster, as I don’t have to constantly move my stamps around!
We’re ready to stamp our sweet birds now! After stamping with alcohol marker-friendly Memento Tuxedo Black Ink, I’m coloring my images with Copic markers. Once finished with that, I’ll die cut them with the coordinating die set.
Well, friends! That’s it for me today!! I hope you have enjoyed this post and find some time to get crafty today!!
Thanks for using my affiliate links! You all are the BEST! Using an affiliate link in this post above costs you nothing, but it gives me a teeny percentage of your sale to buy more crafty goodies to continue to share card tutorials with YOU! So, thank YOU! Xx, Amanda