Alex Syberia Designs is giving away a £40 ($50 for the USA) gift certificate to 1 winner and a £15 ($15 for the USA) gift card to 3 lucky winners
This giveaway is open internationally, with prizes awarded in GBP (£) for non-U.S. winners and in USD ($) for U.S. winners. All 4 winners will be drawn from the entrants that have played along with this Blog hop by midnight BST April 6th, 2025. Winners will be announced on the Alex Syberia Designs blog ‘Giveaway Winners’ page on April 7th, 2025.
My affiliate link for shopping is here. This gives me a small percentage of your total purchase, but doesn’t change anything for you! I appreciate you using my links, if you decide to! Xx, Amanda
👉🏻👉🏻 GET EARLY ACCESS to this (and EVERY) New Release! Sign up to be a Catherine Pooler StampNation member and get tons of perks, including exclusive crafty Zoom sessions and early ordering for every monthly release!
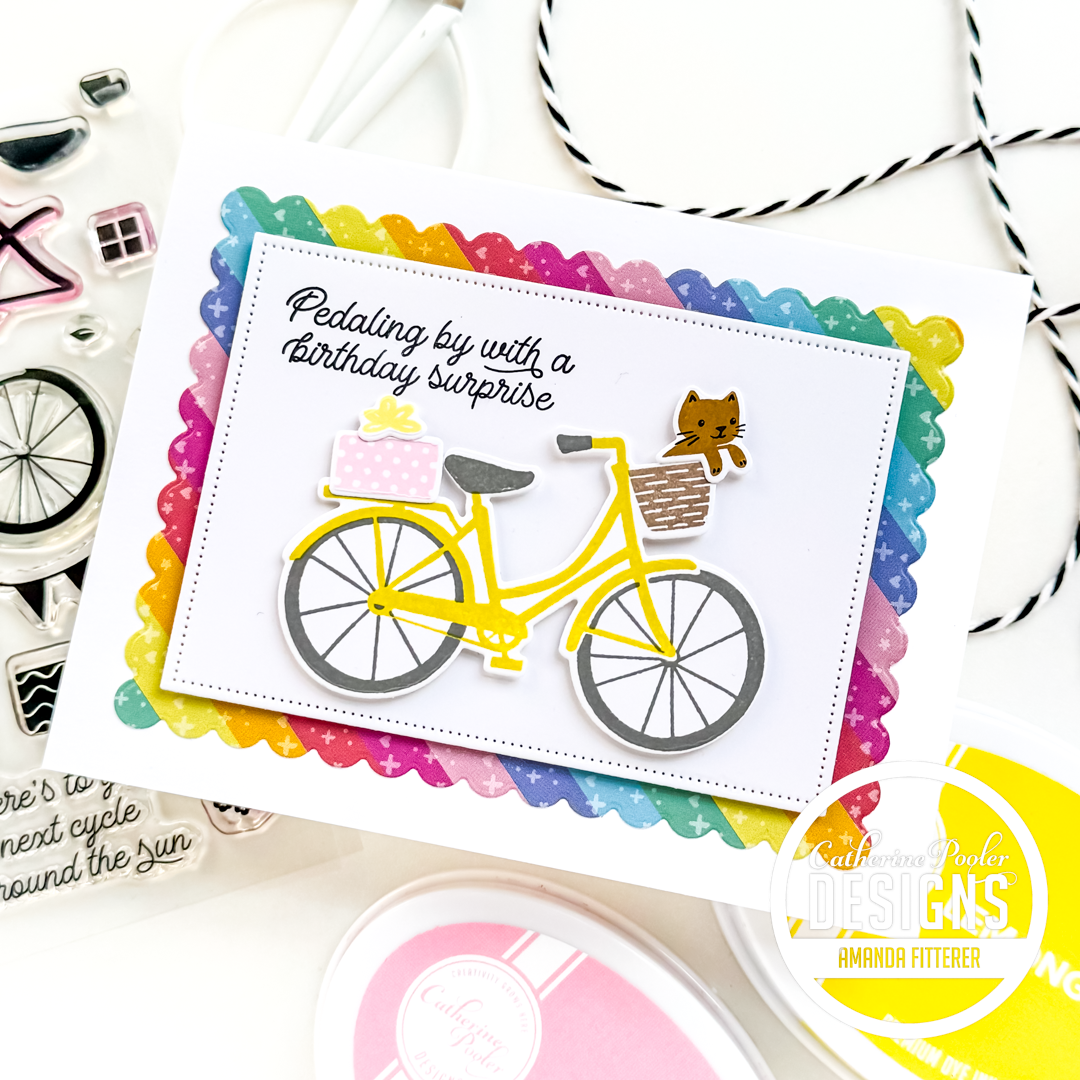
Do you have a cowboy or cowgirl in your life?! (Or maybe just a wannabe?) This collection is just bursting with the most adorable cowboy/girl accents! My stamped boots are all from the These Boots Stamp Set. This set also comes with a cowboy hat and some flowers! Plus, I LOVEEE the new Calico Charm Patterned Paper! (Keep scrolling for more ideas with this paper!)
There’s also a On the Fringe Die that is perfect for adding accents to your cards! And that Yeehaw Word Die has the most amazing font!
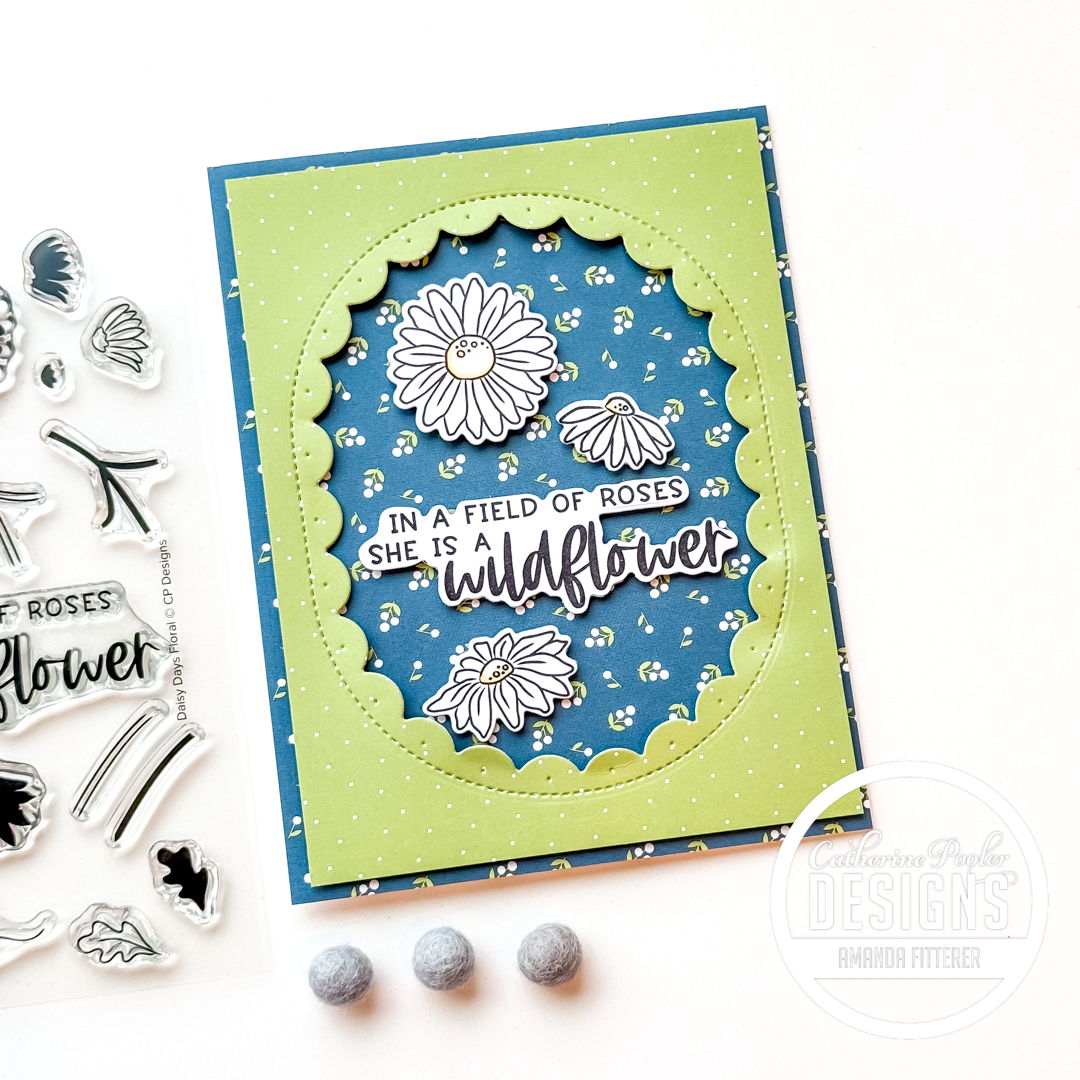
If the cowboy style isn’t really your thing – don’t worry! There’s also a Daisy Days Floral Stamp Set that is available in the New Collection!
There’s also a really cool Dusk ‘Til Dawn Cover Plate Die that can be used in so many different ways. Check it out on the Shop to see more examples!
I’m super excited to show you the other cards I made over the next few days!! Make sure to Subscribe to my blog to get notified when I post again!
Don’t forget: If you’re a Catherine Pooler StampNation member, you get EARLY ACCESS to every new release (plus SOOO many other benefits)! Sign up now! It’s worth it!
Thanks for using my affiliate links! You all are the BEST! Using an affiliate link in this post above or down below costs you nothing, but it gives me a teeny percentage of your sale to buy more crafty goodies to continue to share card tutorials with YOU! So, thank YOU! Xx, Amanda
👉🏻👉🏻 GET EARLY ACCESS to this (and EVERY) New Release! Sign up to be a Catherine Pooler StampNation member and get tons of perks, including exclusive crafty Zoom sessions and early ordering for every monthly release!
Don’t forget: If you’re a Catherine Pooler StampNation member, you get EARLY ACCESS to every new release (plus SOOO many other benefits)! Sign up now! It’s worth it!
Thanks for using my affiliate links! You all are the BEST! Using an affiliate link in this post above or down below costs you nothing, but it gives me a teeny percentage of your sale to buy more crafty goodies to continue to share card tutorials with YOU! So, thank YOU! Xx, Amanda
Hey guys! I hope your week is off to a great start! Today, I’m sharing a card I made as a Guest Designer for Sunny Studio Stamps.
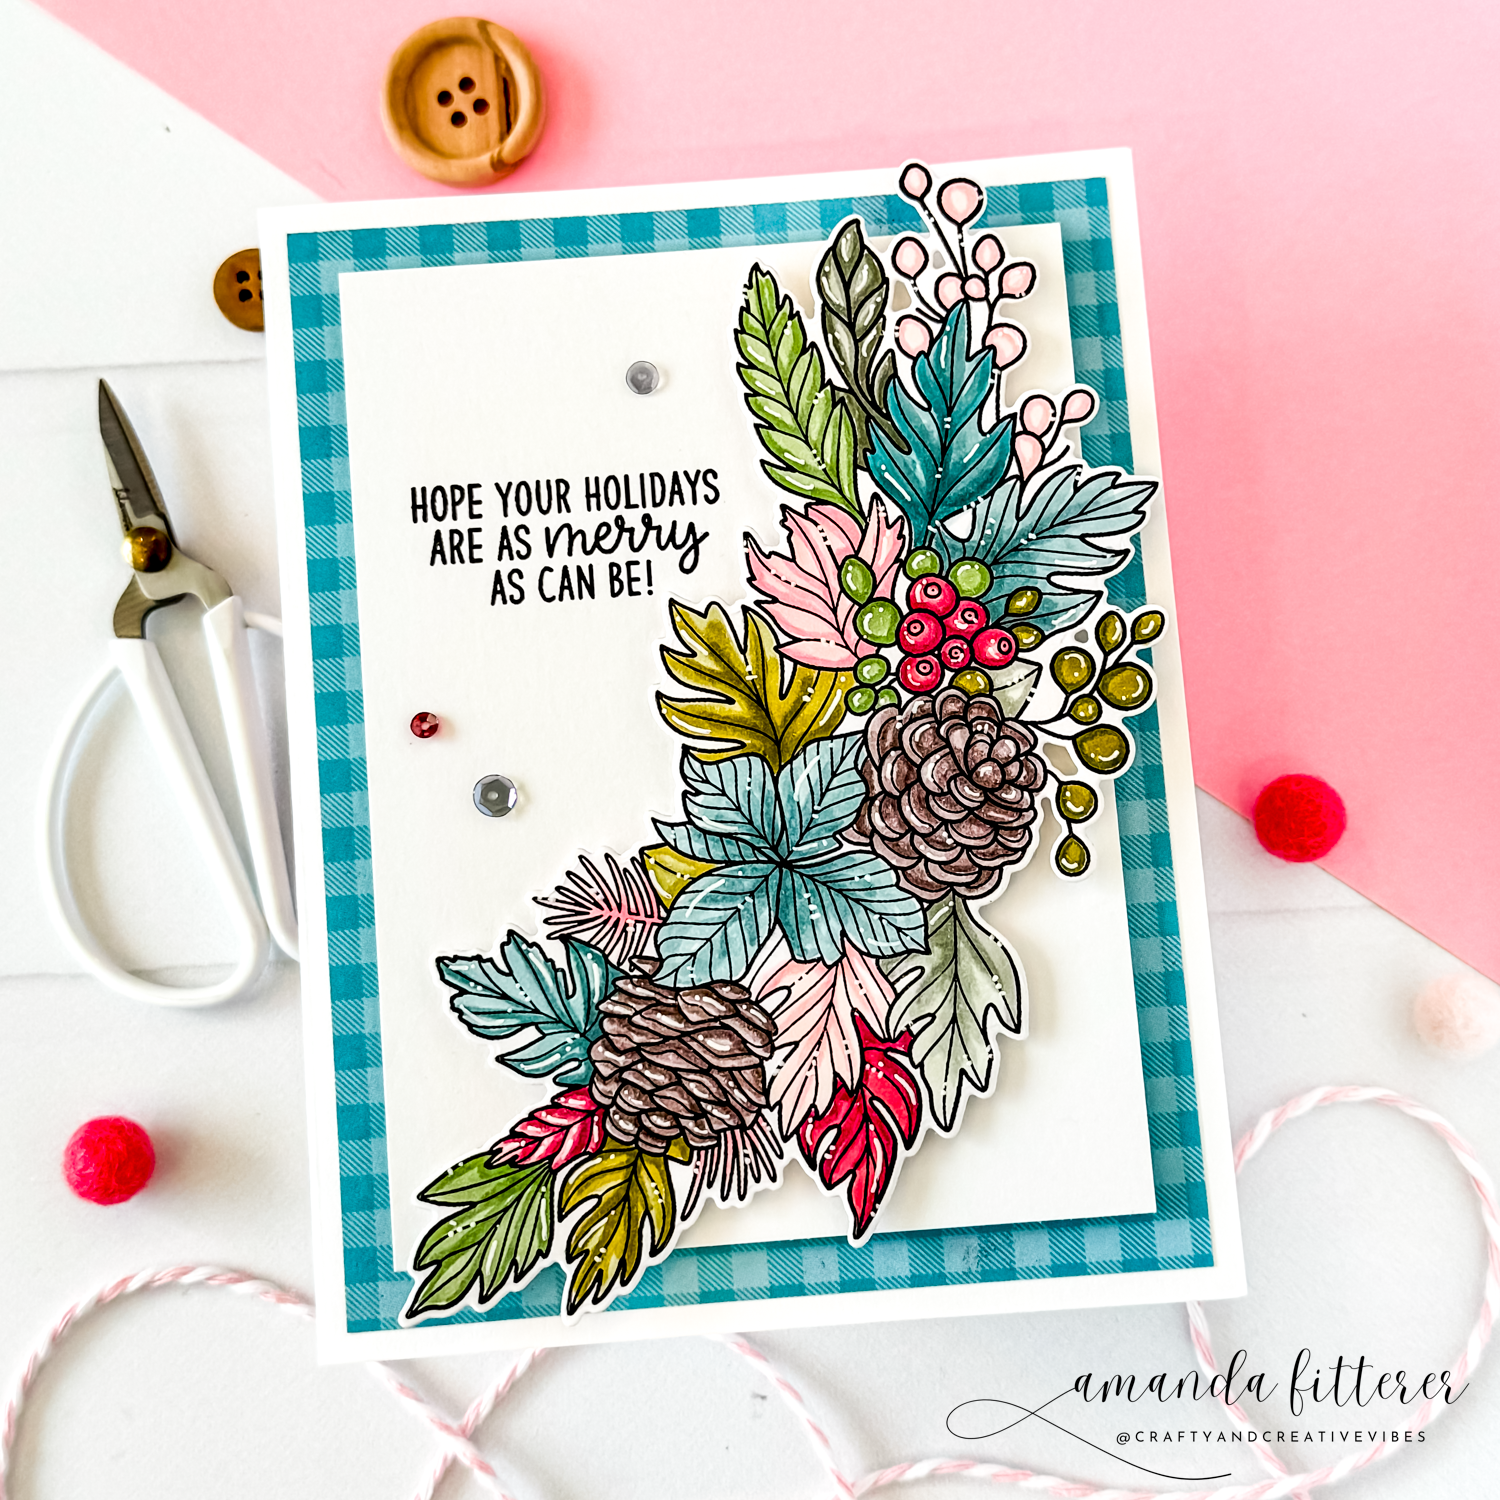
This stamp is actually from the Autumn Garland Stamps, but I wanted to show you how it could also be used for a Winter card!!
Do you ever have those days where you don’t really feel like crafting, but you want to do something in your craftroom? That’s what happened to me! I just decided to stamp out this beautiful garland, put on a show, and use my Copics to color it in! I added some highlights and dots with a white Gelly Roll pen.
I die cut the image out using the Autumn Garland Dies. Then, I trimmed a piece of white cardstock to 3.5”x4.75”. I added a sentiment from the Inside Greetings Seasons Stamps directly onto my white cardstock. The background paper is from the Joyful Holiday Paper. I trimmed this paper down to 4”x5.25” and glued it directly to my card base. I used 3D foam tape to adhere my white cardstock to my patterned paper. Then, I used 3D foam squares to adhere my garland to the white cardstock.
I added a few sequins on the left to help balance out the entire card. Here’s another photo of the finished card!
Thanks for using my affiliate links! You all are the BEST! Using an affiliate link in this post above or down below costs you nothing, but it gives me a teeny percentage of your sale to buy more crafty goodies to continue to share card tutorials with YOU! So, thank YOU! Xx, Amanda
Hey there, crafty friends! Today, I’m sharing a card I made using some fun products from the Sunny Studio Stamps New Release! I had so much playing with these products and creating some festive Holiday cards!
I used Copic markers to color all of my pieces. I love using Copic markers – as opposed to colored cardstock or ink blending – because I feel like I can give the pieces more depth this way. I place the pieces on a piece of scrap paper so that I don’t ruin my workspace!
I stamped my sentiment from the Inside Greetings Seasons Stamps with black ink on the house. (PS, I LOVE this stamp set! All of the sentiments are just perfect for the inside or the front of a holiday card!)
That’s my adorable holiday card to share with you today!! I hope you enjoyed it and I hope you find some time to get crafty today!
Thanks for stopping by my blog today! I hope the rest of your week is amazing! Xx, Amanda
Thanks for using my affiliate links! You all are the BEST! Using an affiliate link in this post above or down below costs you nothing, but it gives me a teeny percentage of your sale to buy more crafty goodies to continue to share card tutorials with YOU! So, thank YOU! Xx, Amanda
Happy 9th Birthday, Sunny Studio!! I am SO happy for you and your wonderful success! Today, I get to take part in a Blog Hop to celebrate and I’m so glad YOU are here to help celebrate as well!!
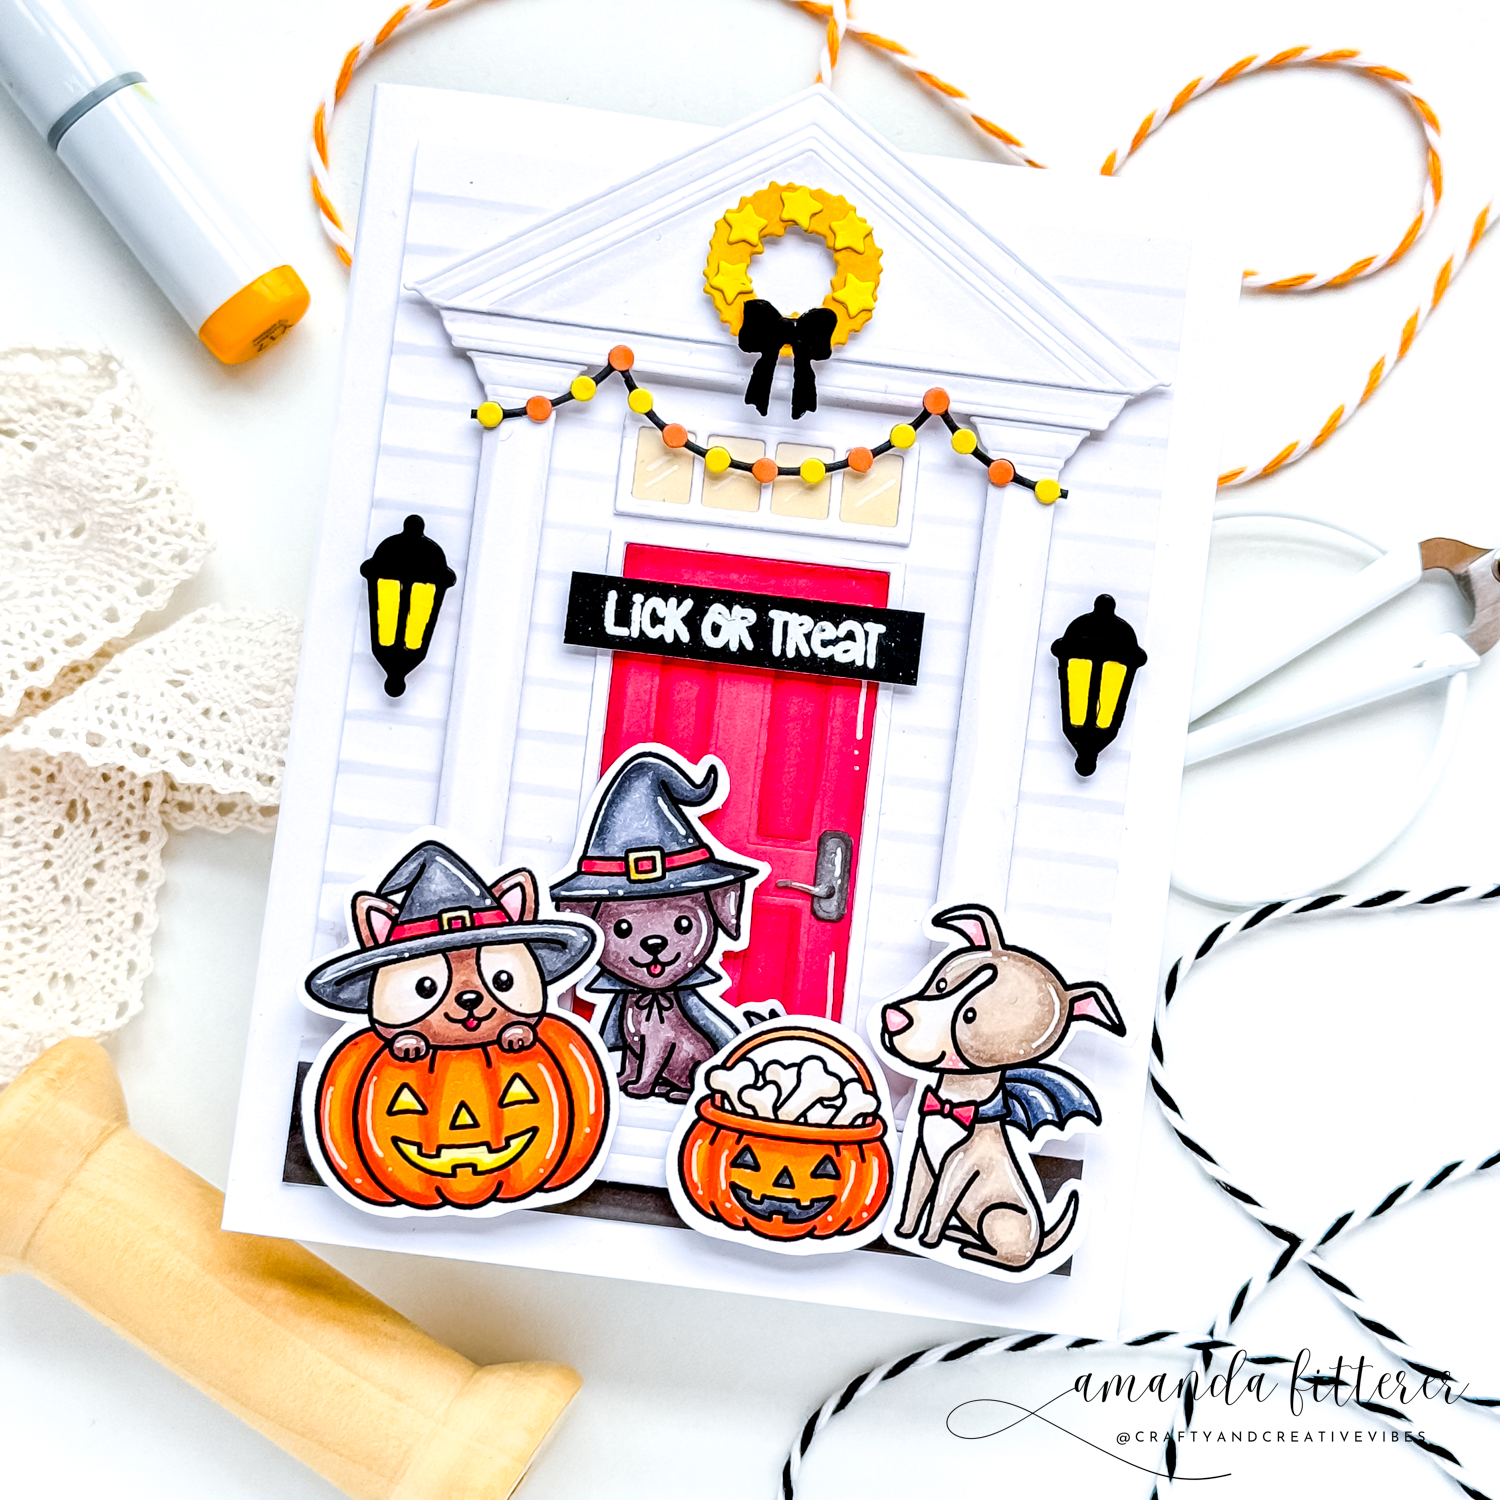
I have SO many cards I made using this New Release! Everything is just so stinking cute! Today, though, I am sharing just one card! (But don’t worry, you’ll see many of my other cards on my Instagram and on the Sunny Studio Blog over the next month or so!!)
How adorable are these puppies in their costumes?! These cuties are part of the Happy Howl-o-ween Stamps!
I colored my pups in with Copic markers and used scissors to fussy cut them out. However, there are coordinating dies available to make your life easier!
There will be $325 worth of prizes up for grabs! All you have to do is comment on all the Blog Hop posts from the Designers in the Blog Hop Lineup (below). You’ll be entered to win on each stop that you comment on! The winner from each Blog Hop Stop will win a $25 gift code to the Sunny Studio Shop!! (Imagine all the goodies you could buy!!)
PLUS, Sunny Studio is offering 20% OFF on Sunny Studio branded products (excluding clearance and new release products.). You just have to use discount code NINEYEARS at checkout through Aug 30th.
PLUS.. Sunny Studio is giving away a FREE new mini snowflake die on all orders!
Hey crafty friends! The Catherine Pooler BRAND NEW RELEASE is available now!
👉🏻👉🏻 GET EARLY ACCESS to this (and EVERY) New Release! Sign up to be a Catherine Pooler StampNation member and get tons of perks, including early ordering for every monthly release!
Don’t forget: If you’re a Catherine Pooler StampNation member, you get EARLY ACCESS to every new release (plus SOOO many other benefits)! Sign up now! It’s worth it!
Thanks for using my affiliate links! You all are the BEST! Using an affiliate link in this post above or down below costs you nothing, but it gives me a teeny percentage of your sale to buy more crafty goodies to continue to share card tutorials with YOU! So, thank YOU! Xx, Amanda
Hey crafty friends!! Did you see the New Release from Picket Fence Studios? I was able to get my hands on some of these goodies and I had such a blast making some cards! I’m excited to share them with you today!
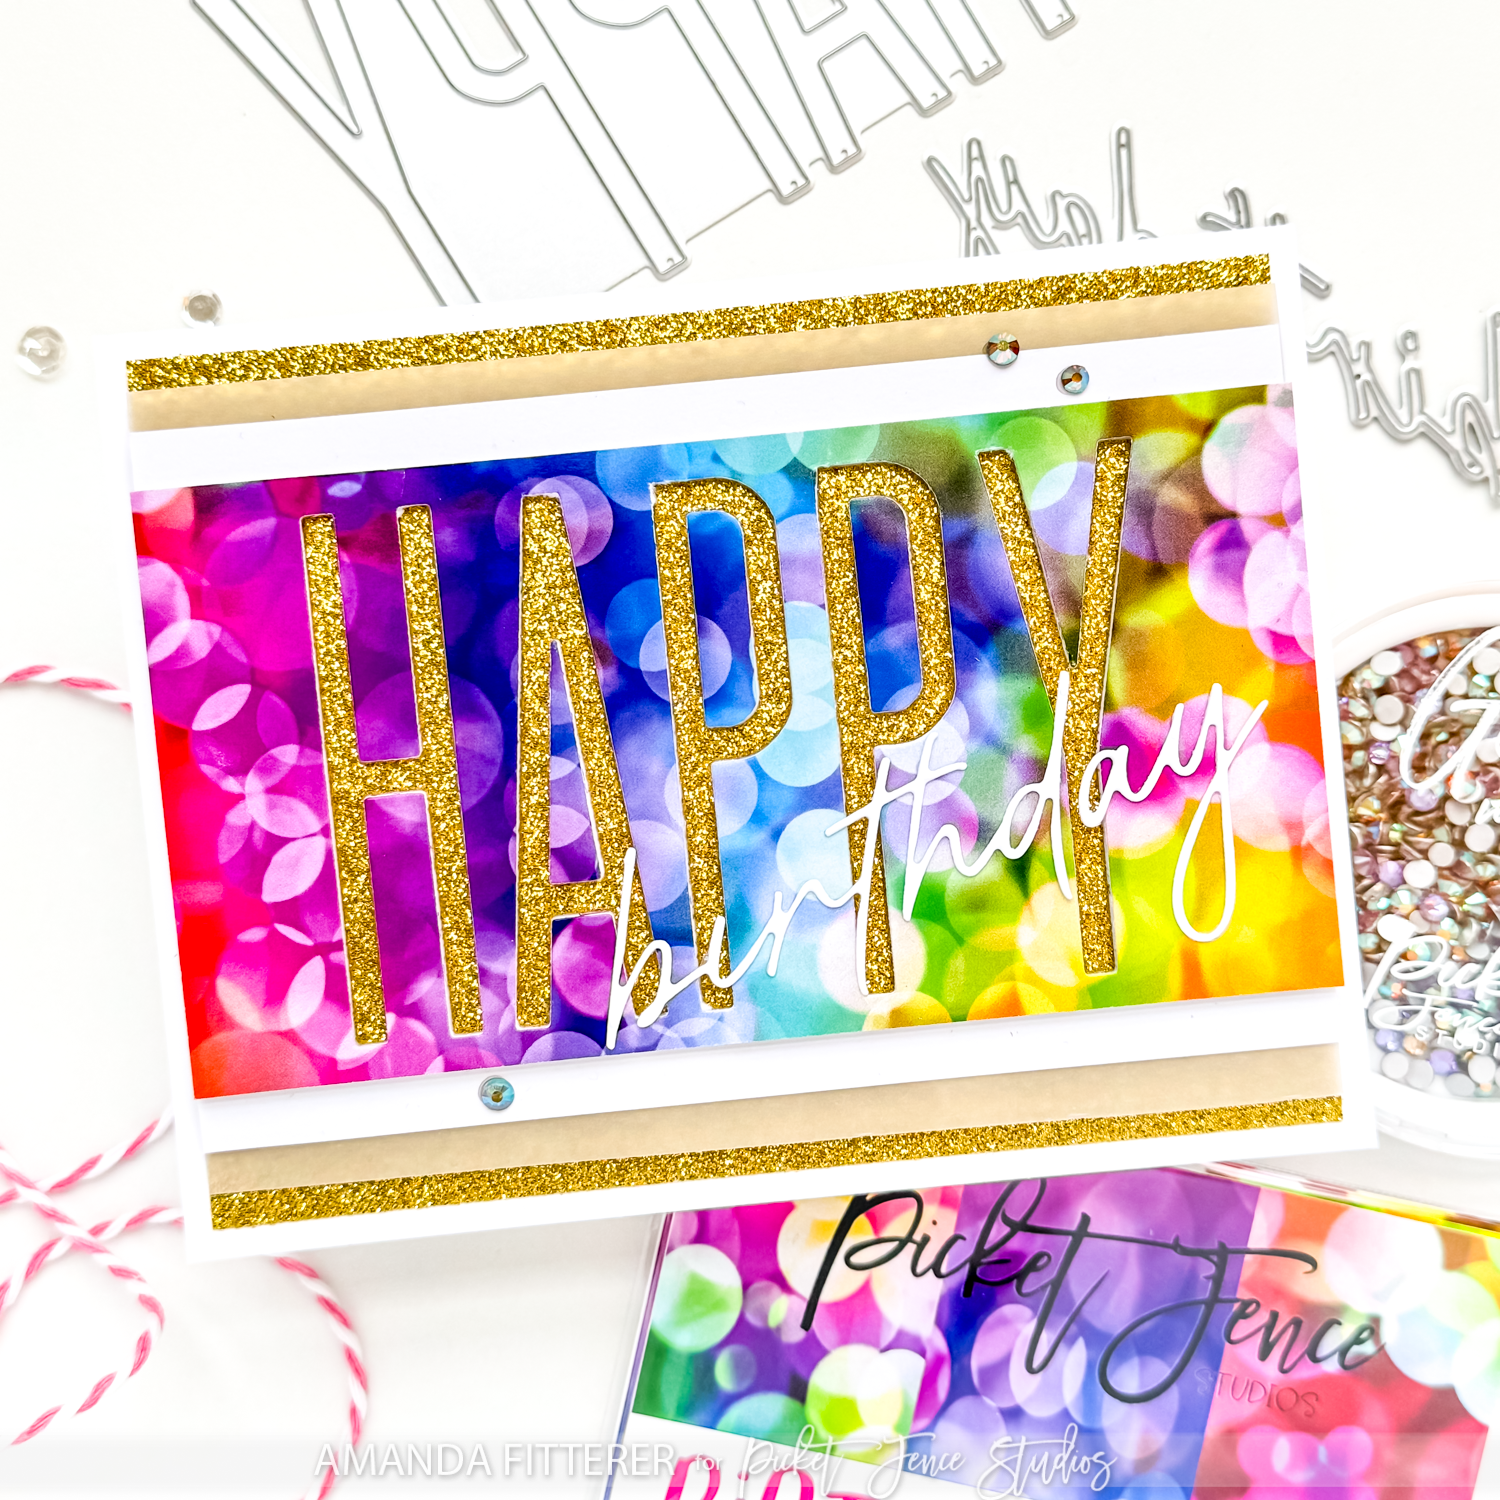
First up, we have this really bright and colorful card that I made using the Fabulous Foiling Toner A2 Card Fronts – Birthday Bash. I took one of the card fronts and cut it down to 5″x3.75″. I ran the card front with the “HAPPY” die through my diecutting machine with the Happy Birthday Word Die Set. Next, I cut the “birthday” die with white and black cardstock. I glued these 2 pieces together to create a shadow effect. I propped my “HAPPY” up with 3D foam strips, also creating a shadow effect. I glued this card front to a piece of black cardstock trimmed to 5.25″ x 4″. Then I glued that to my A2 card base. The final step was to add some Gems!
I used the same products for this card below! But instead of using black, I used gold and vellum!
This shaker card was made using the same products as the card above! The only difference is that I used the Brass Doorknob Paper Glaze as well.
Wow! What fun new products, huh! I hope you enjoyed looking at my inspiration! If you use the links in this post, they are affiliate links to Picket Fence Studios. This just means that I’ll earn a tiny commission if you buy anything using my links. I’d appreciate it, as that can help me create more content to share with you! Xx, Amanda
Hey friends! Today, we’re kicking off a CRAFTY Collaboration Blog Hop with Pear Blossom Press and Heffy Doodle ! Come hop along with us and see some awesome light-up cards! Plus, each company will be giving away £20/$25 PRIZES! All you have to do to be entered to win is to leave a comment at each stop along our Hop Lineup before May 29th at 11:59 PM EDT. Winners will be announced on the Pear Blossom Press & Heffy Doodle Blogs on 5.31.24! Scroll down for the Blog Hop Lineup!
On a plain piece of white cardstock, I used some Heffy Memo Tape to mask off the top half of the card. I ink blended Catherine Pooler’s Wintergreen ink. Then, I removed the Heffy Memo Tape and ink blended the bottom half of the card. I stamped my sentiments – one from the Koality Hugs stamp set and one from the PRESS Stamp and Die Bundle.
Next, I stamped all of my images from the Koality Hugs stamp set and colored them with Copic markers. Then, I die cut them out using the coordinating dies.
Now, I can make the card light up! I poked a hole through my koala where I wanted him to light up. Then, I placed him on the card where he’ll chill permanently. I, then, made a mark where the light should go.
Then, I used double sided tape to adhere my Pear Blossom Press One Light where my pencil mark was. Then, I used the World’s Best Foam Tape all over the card base. This tape is the same depth as the EZ-Lights battery component. (This will keep the light from sticking out.)
Then, I assembled the rest of the card using liquid glue and 3D foam squares.
Don’t forget: If you’re a Catherine Pooler StampNation member, you get EARLY ACCESS to every new release (plus SOOO many other benefits)! Sign up now! It’s worth it!
👇🏻👇🏻 Subscribe 👇🏻👇🏻 to be alerted of new posts by yours truly!
Hey guys! Want a chance to win prizes from both Pear Blossom Press and Picket Fence Studios?! In March, we’ll have THREE different Hops for you to enter to win!!
Today we’re kicking off the BLOG HOP!
Come hop along with us and see some awesome light-up cards! Plus, each company will be giving away $25 PRIZES! All you have to do to be entered to win is to leave a comment at each stop along our Hop Lineup before March 29th at 11:59 PM EDT. Winners will be announced on the Pear Blossom Press & Picket Fence Studios Blogs on 3.31.24!
I have created this fun light-up card using products from both companies! Read on to see how I created this card! You’ll be amazed at how EASY it is!!
Next, I stamped my images from the Sugar and Calorie Free Stamp Set. I colored them in with Copic markers. I stamped my sentiment onPerfect Sentiment Cardstock – Black with Embossing ink and then sprinkled white embossing powder on it. I melted the powder with my heat tool and then die cut the sentiment out with the coordinating die. I also used the coordinating dies to cut out my cakes. I used the same dies to cut out 2 plain black pieces of cardstock. I glued the cakes and their black counterparts together on a slight angle, to give the effect of a shadow!
On my card base, I made 3 little pencil dots where I wanted the candles’ flames to be. I also made a little pencil dot where I wanted the ON button to be. For this card, I’m using the Pear Blossom Press EZ-Lights. I used double sided tape to adhere my battery and button where I wanted it. Then I used masking tape to hold my wires and lights in place.
Once I had everything in place, I placed Pear Blossom Press’s World’s Best Foam Tape everywhere except over the lights and battery/button case.
On my card front, I poked 3 holes where my lights are. I placed my Pear Blossom Press Yellow Candle Flame Gems over the lights using liquid glue. Then, I placed my Clay Candles under the flames and adhered them with liquid glue.
Thanks for using my affiliate links! You all are the BEST! Using an affiliate link in this post above or down below costs you nothing, but it gives me a teeny percentage of your sale to buy more crafty goodies to continue to share card tutorials with YOU! So, thank YOU! Xx, Amanda
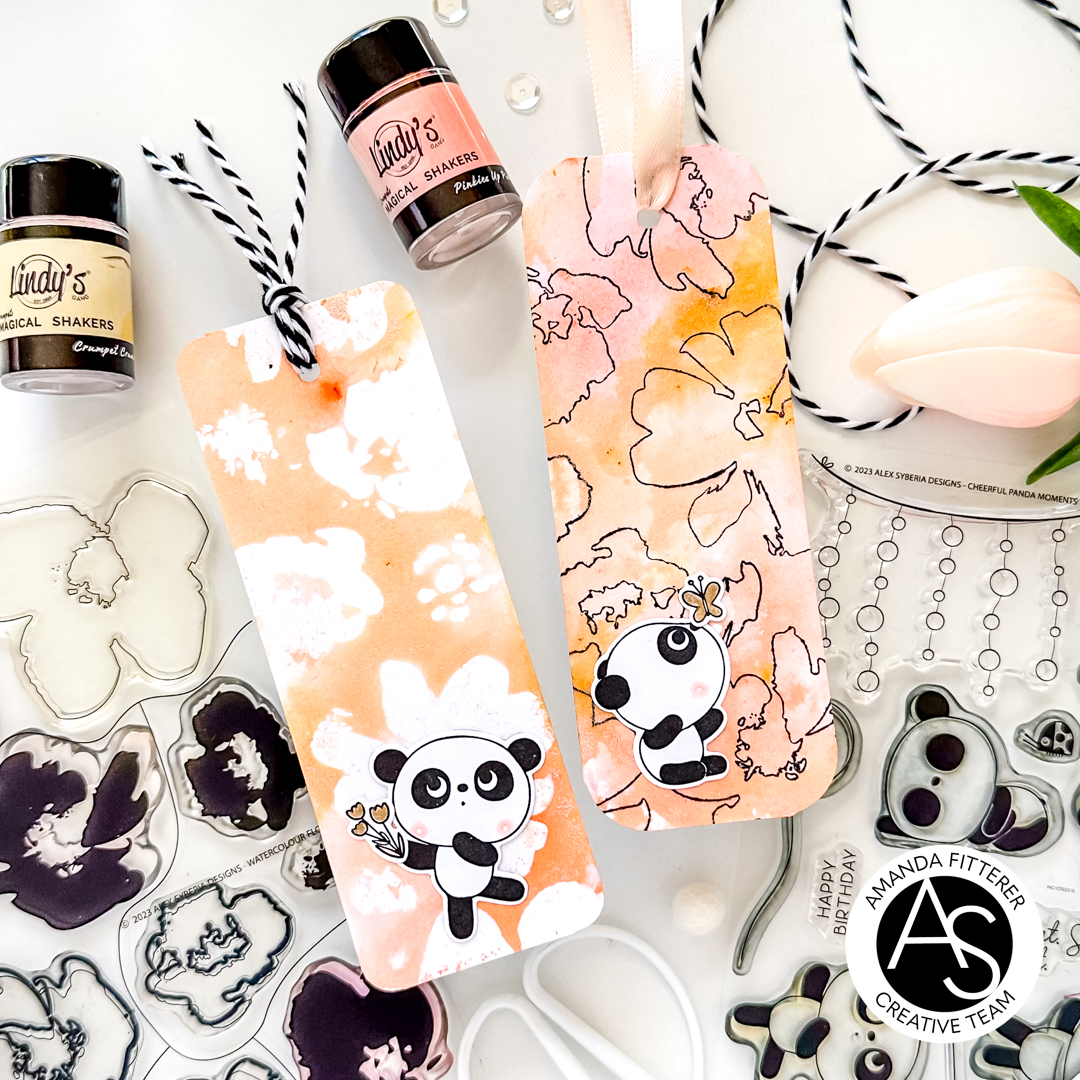
Hey guys! In case you missed it, Alex Syberia Designs and Lindy’s Gang have a Collaboration Insta-Hop going on right now! There are some prizes to be won! Plus, check out all the amazing inspiration the teams have created! You can join the Hop on Instagram! But first, scroll down to see how I made these amazing bookmarks!!
Next, I stamped my Alex Syberia Designs Watercolor Flowers Stamps (the solid flowers) with my Wow! Embossing Pad. I applied clear embossing powder to it, and then melted the powder with my favorite heat gun. Once that was cooled down, I sprayed water on my Glass Matand then sprinkled on some of Lindy’s Gang’s Pinkie’s Up and Crumpet Crumbs Magical Shakers into the water. Then, I flipped my bookmark upside down into the glittery gorgeousness until all the white was covered!
For my other bookmark, I stamped my Alex Syberia Designs Watercolor Flowers Stamps (the outline flowers) with Catherine Pooler’s Midnight Ink. I like this ink because it makes crisp images and stays wet enough for me to apply my Clear Embossing Powder onto it! After I’ve applied my powder and heated it up with my heat gun, I’m ready for the next step!
For this bookmark, I’m actually going to apply the water and powder directly onto the bookmark. I’ve also added a bit ofGrab a Guy Gold Starburst Spray to it.
Now to add my cute pandas! I’m using the Cheerful Panda Moments Stamps and Dies and just adding a little bit of color with a gold gel pen and R02 Copic.
Here’s some close-ups of these gorgeous bookmarks!
Are you wondering where I got that amazing White Glass Magnetic Craft Mat? You can get one for 20% off if you use my code AMANDA20! They are SO amazing and come in all different backgrounds! To see all my favorite things, click here!
Xx, Amanda
Thanks for using my affiliate links! You all are the BEST! Using an affiliate link in this post above costs you nothing, but it gives me a teeny percentage of your sale to buy more crafty goodies to continue to share card tutorials with YOU! So, thank YOU! Xx, Amanda
Hey friends! Did you hear Alex Syberia Designs and Lindy’s Gang have a Collaboration Insta-Hop going on right now? There are some prizes to be won! Plus, check out all the amazing inspiration the teams have created! You can join the Hop on Instagram! But first, scroll down to see how I made these amazing cards!!
First, I stamped the Timeless Blooms #3 stamp all over my background with. my Wow! Embossing Pad. Then, I applied Wow Pearl Gold Sparkle to it. I melted the powder with my favorite heat gun
Are you wondering where I got that amazing White Glass Magnetic Craft Mat? You can get one for 20% off if you use my code AMANDA20! They are SO amazing and come in all different backgrounds! To see all my favorite things, click here!
Xx, Amanda
Thanks for using my affiliate links! You all are the BEST! Using an affiliate link in this post above costs you nothing, but it gives me a teeny percentage of your sale to buy more crafty goodies to continue to share card tutorials with YOU! So, thank YOU! Xx, Amanda
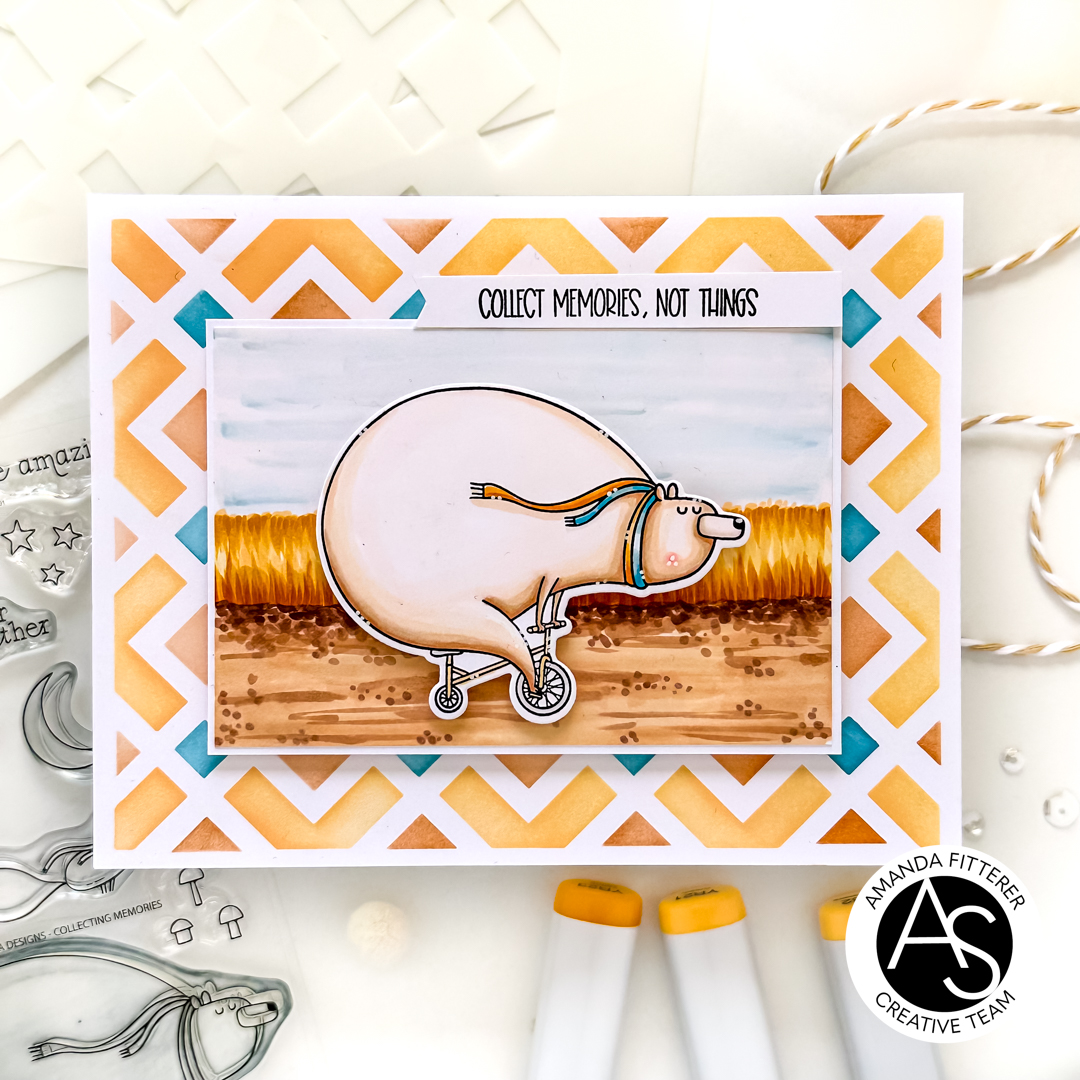
Next, on another piece of white cardstock, I created my dirt path using Copic colors E21, E53, E23, E25, and E27.
Then I created a wheat field using Y21, YR21, YR23, YR24, and YR27. I added BG70 and BG72 for the sky.
I stamped my little bear from the Collecting Memories stamp set, colored him in with Copic markers, and then die cut him with the coordinating die.
You can start at the beginning of the Blog Hop on the Alex Syberia Blog. You can shop the New Release HERE.
Alex Syberia Designs is giving away a £85 ($100) gift certificate to 1 lucky winner and a £15 ($18) gift card to 5 winners. Open internationally. All 6 winners will be drawn from the entrants that have played along with this Blog hop by midnight BST October 22nd, 2023. Winners will be announced on the Alex Syberia Designs blog ‘Giveaway Winners’ page on October 23rd, 2023.
Thanks for using my affiliate links! You all are the BEST! Using an affiliate link in this post above costs you nothing, but it gives me a teeny percentage of your sale to buy more crafty goodies to continue to share card tutorials with YOU! So, thank YOU! Xx, Amanda
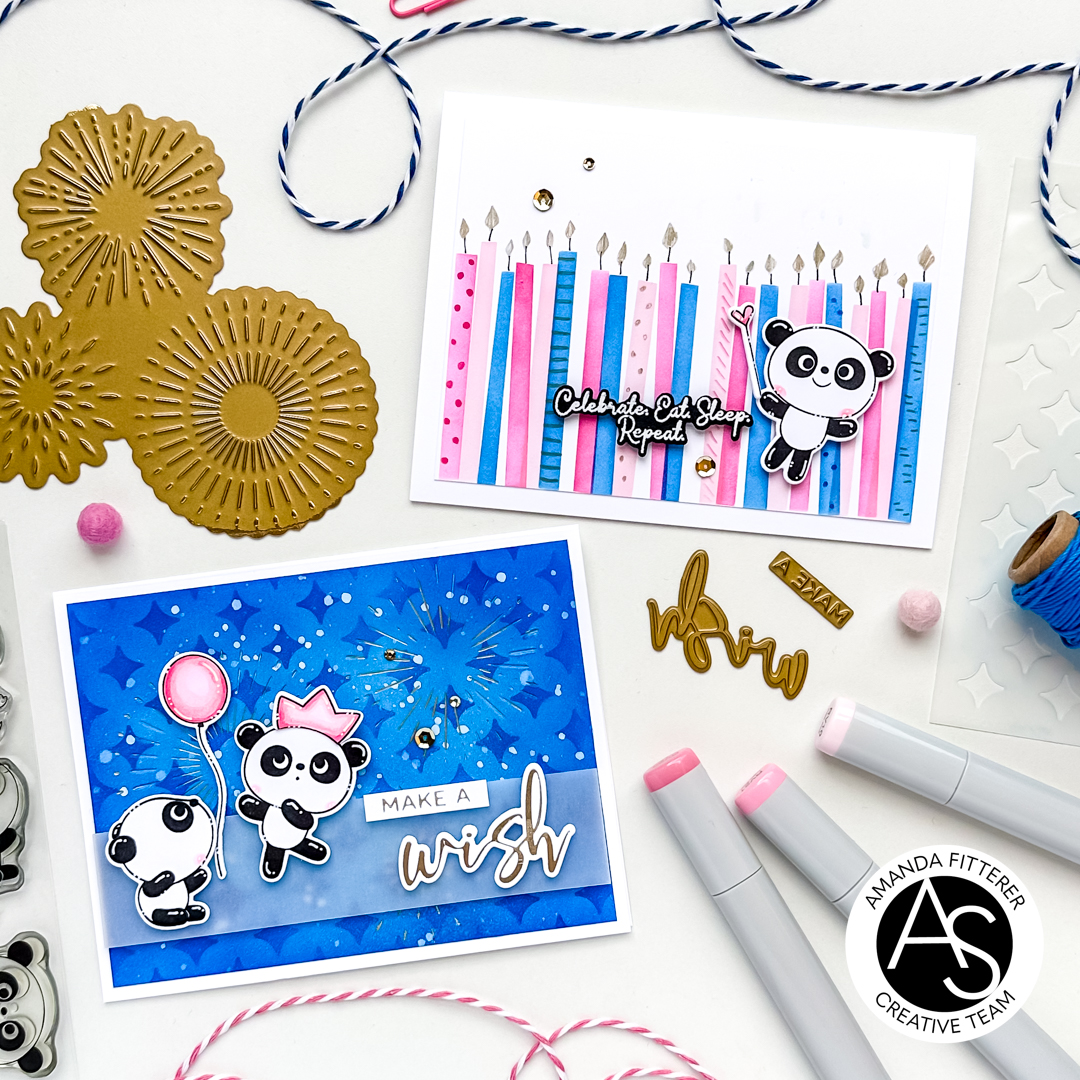
Hello friends! It’s Amanda Fitterer and today’s card that I’m sharing features the new Cheerful Panda Moments stamp set! These pandas require minimal coloring, which makes it much easier to create this panda party!
Once I got them placed and adhered with 3D foam squares, I used my favorite Cutterbee scissors to trim off the overhanging panda parts.
Such an easy but adorable card! Who wouldn’t want to join this Panda Party!?
I hope you enjoyed this sweet little card! Thanks for coming by my blog today!
Xx, Amanda
Thanks for using my affiliate links! You all are the BEST! Using an affiliate link in this post above costs you nothing, but it gives me a teeny percentage of your sale to buy more crafty goodies to continue to share card tutorials with YOU! So, thank YOU! Xx, Amanda
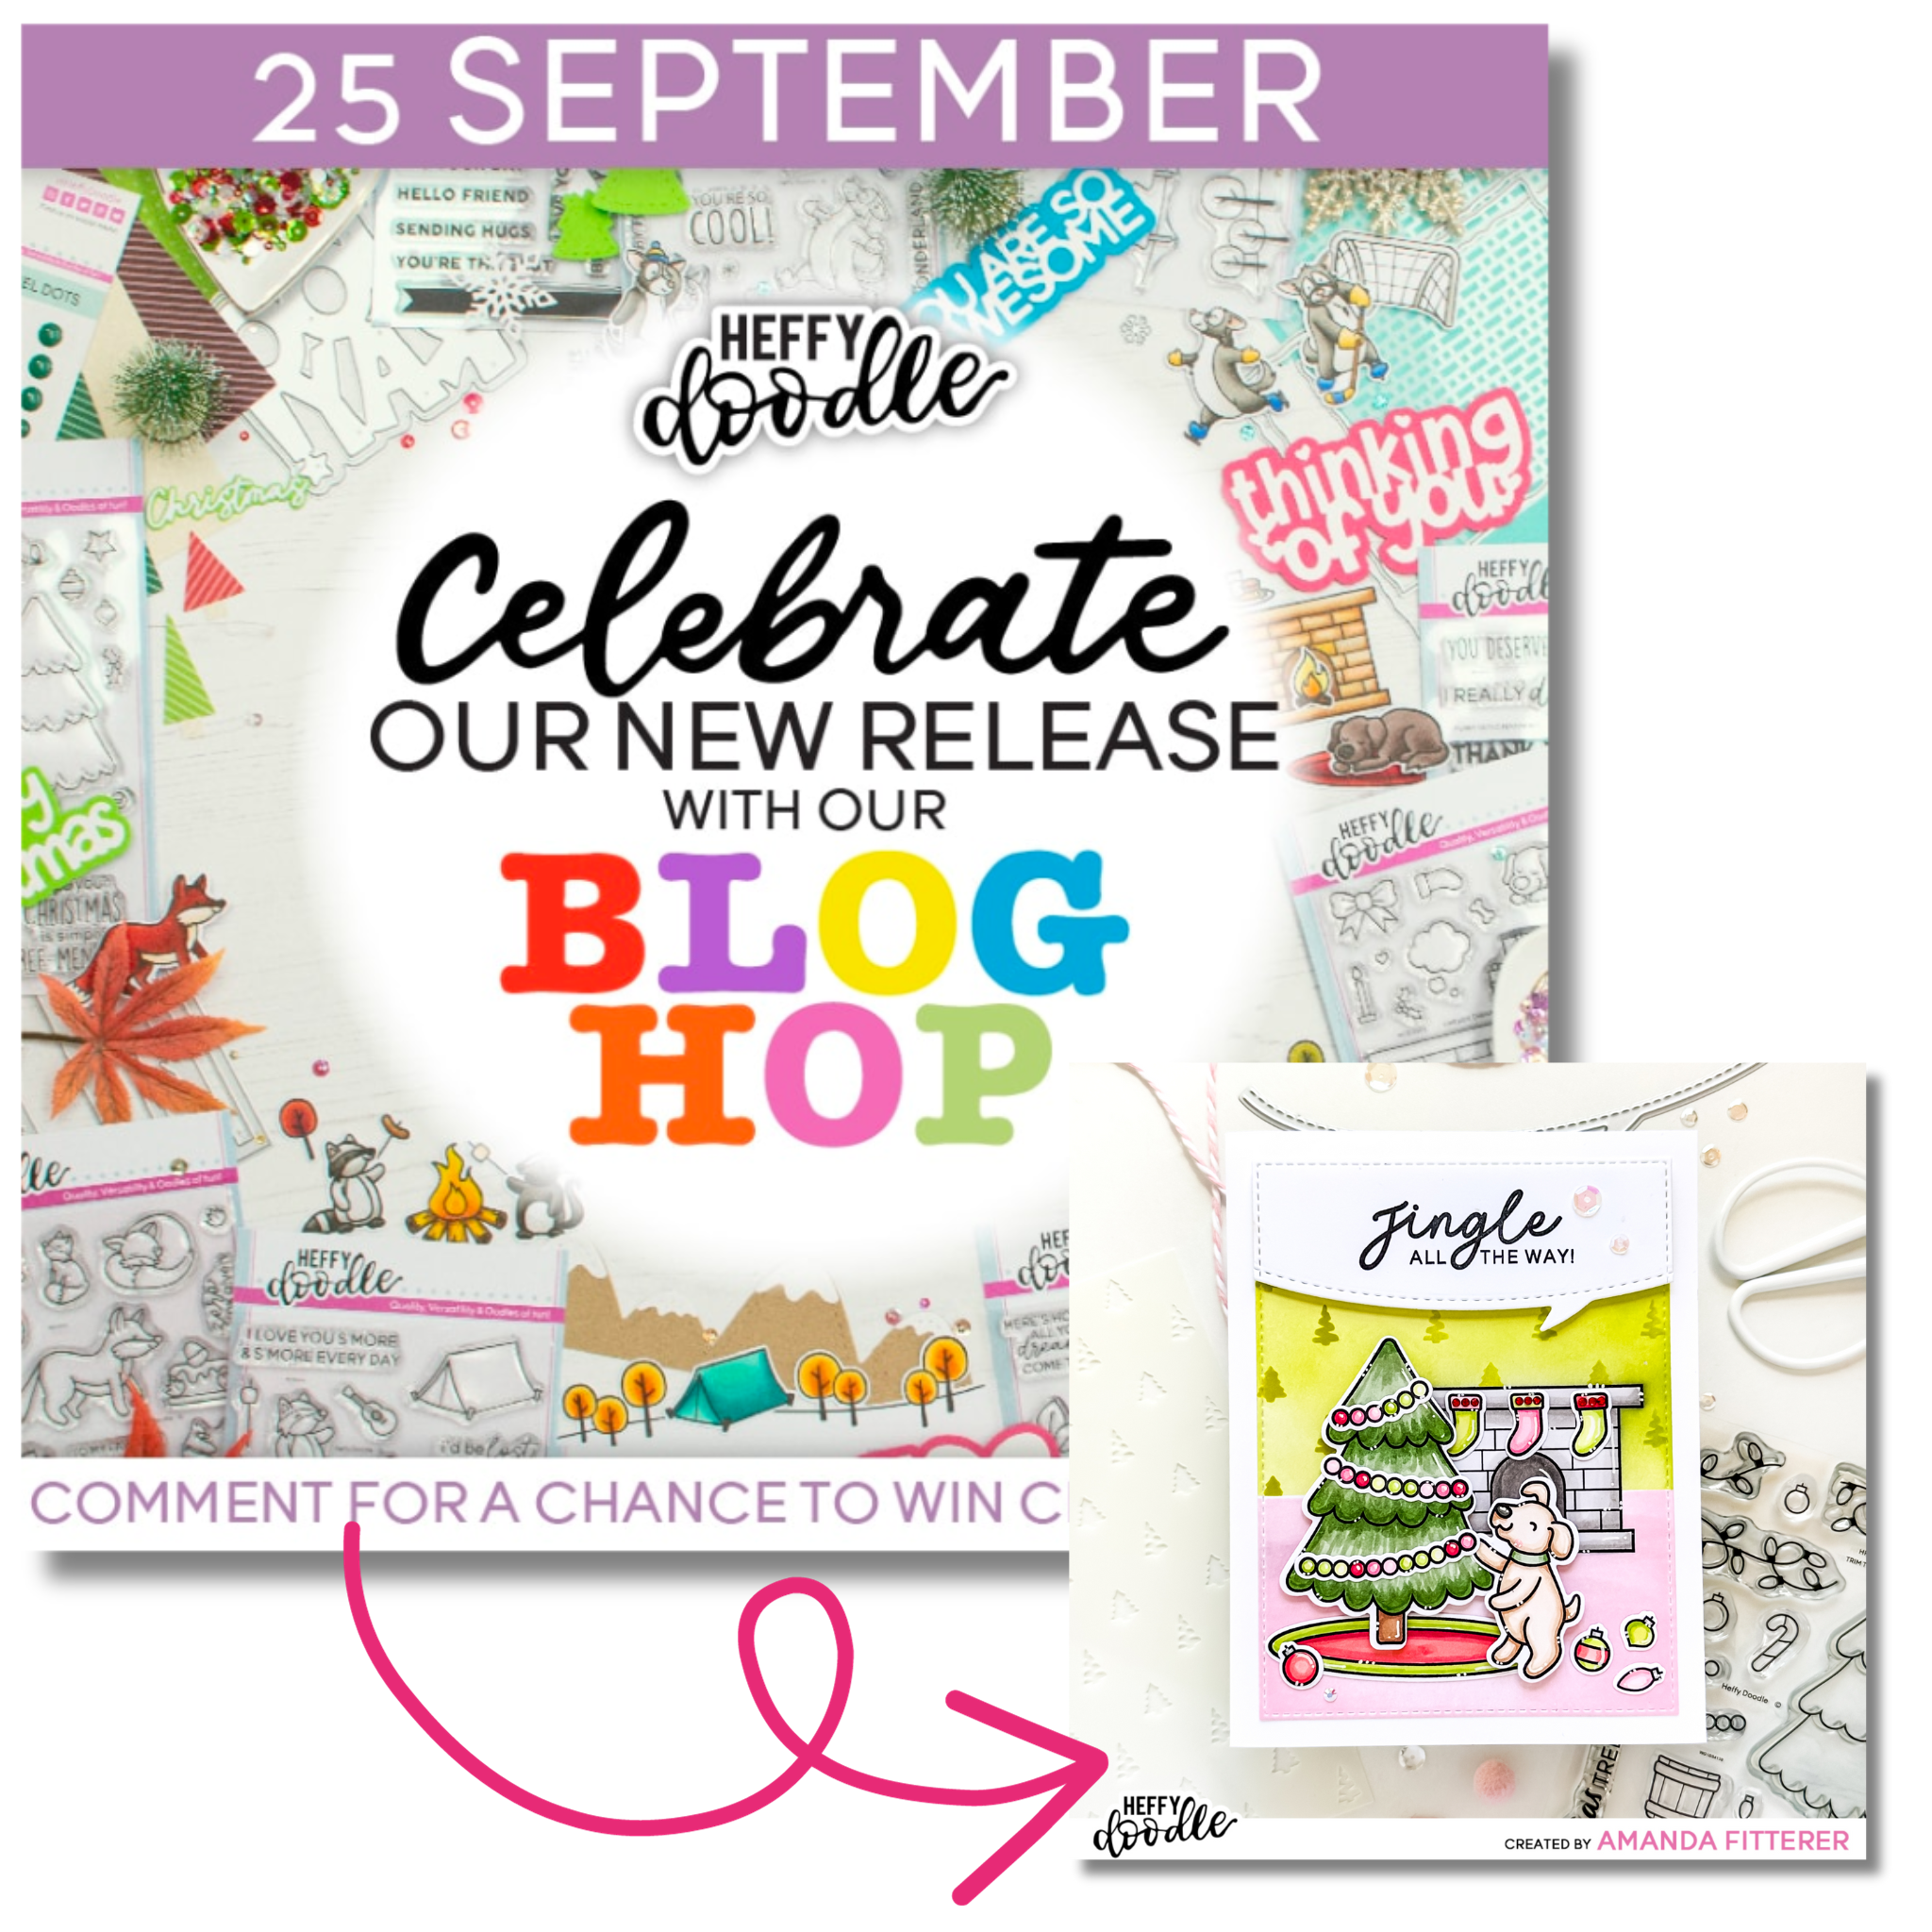
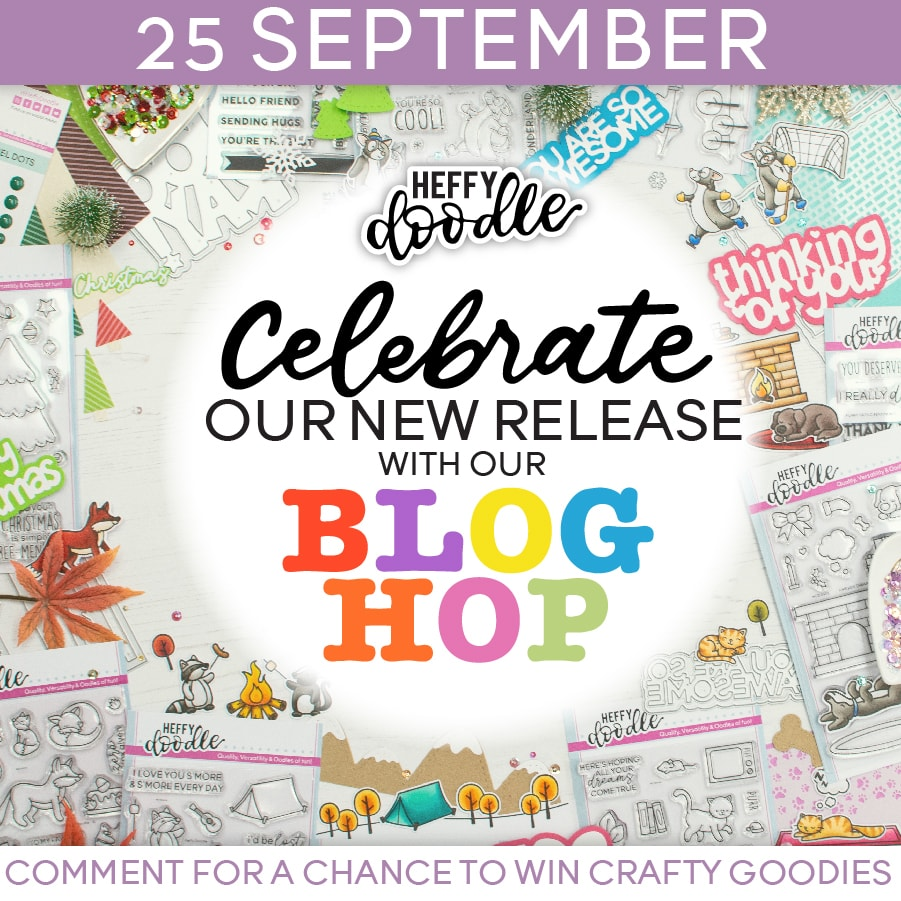
Welcome to the Heffy Doodle New Release Inspiration Blog Hop! We are so excited to share amazing cards from our Design Team members using the new release! For today’s special Blog Hop, you can win a £50 voucher to the Heffy Doodle store!
To be entered to win the giveaway, all you need to do is comment at each stop along the Blog Hop before Sep 29, 2023 at 11:59 PM EST. The winner will be announced on the Heffy Doodle Blog on Sep 30th at 10:00 AM EST!
I’m excited to share my card for this Blog Hop with you! I had such a fun time mixing and matching lots of different new products to create this card!
Step 3: Stamp the fireplace from the Fireside Dreams Stamp Set onto your panel. Stamp it again on some Heffy Memo Tape and then cut it out with scissors. Use this as a mask to keep the ink from getting on your fireplace.
Step 4: Mask off the bottom of your panel with Heffy Memo Tape.
Step 5: Lightly blend Catherine Pooler’s Lemongrass ink all over the background. Then, blend Melon Ice through the NEW Feeling Mighty Pine Stencil.
Step 6: Blend Cotton Candy ink all along the bottom.
Step 7: Color in the fireplace with Copic markers.
Step 10: Assemble the card! Glue your background panel directly onto an A2 card base. Use 3D foam tape to add dimension to your word bubble, tree, and pup. Use liquid glue to adhere the rest of the stamped images. Finally, add a few sequins from the new Strawberry Milk Sparkle Mix.
Thanks so much for hopping along with us! I hope you’ve enjoyed my card! Now, let’s get hopping to the next stop, which is Jarle Franceus!
Welcome to the Alex Syberia Designs September Anniversary Release Blog Hop! To celebrate their birthday, Alex Syberia Designs has collaborated with a ton of wonderful sponsors to give away a grand total of £800 ($1000) in prizes! See ALL THE PRIZES down below! 👇👇
My cards feature a lot of the new products! Shop all the NEW PRODUCTS HERE.
If you ever have an issue getting a really good ink blended background, it’s possible you’re not using the right paper or cardstock. The ink should be smooth and easy to blend. Consider using Catherine Pooler’s Premium White Cardstock. It makes the process so much easier!
Be sure to leave comments by midnight BST (London, UK time) on September 17th, 2023, for a chance to win!
👉🏼👉🏼 Start your comment by telling us where you’re from (USA, Canada, Europe, or Australia) and what your favorite product is from this September Anniversary release.
All the winners will be chosen at random from the comments left on any of the posts in the blog hop, upcoming YouTube hop, and the three upcoming Instagram hops. Winners will be announced on the Alex Syberia Designs GIVEAWAY WINNERS PAGE on September 18th, 2023.
Make sure to come back and check if you are a winner! Prizes not claimed within two weeks will be forfeited.
To increase your chances of winning, be sure to comment on this blog hop, the upcoming Anniversary Video Hop that starts on the 9th of Sep on Alex Syberia Designs YT Channel, and the three consecutive Instagram Hops on Alex Syberia Designs Instagram starting on the 11th of September.
Thanks for using my affiliate links! You all are the BEST! Using an affiliate link in this post above costs you nothing, but it gives me a teeny percentage of your sale to buy more crafty goodies to continue to share card tutorials with YOU! So, thank YOU! Xx, Amanda
👇🏻👇🏻 Subscribe 👇🏻👇🏻 to be alerted of new posts by yours truly!
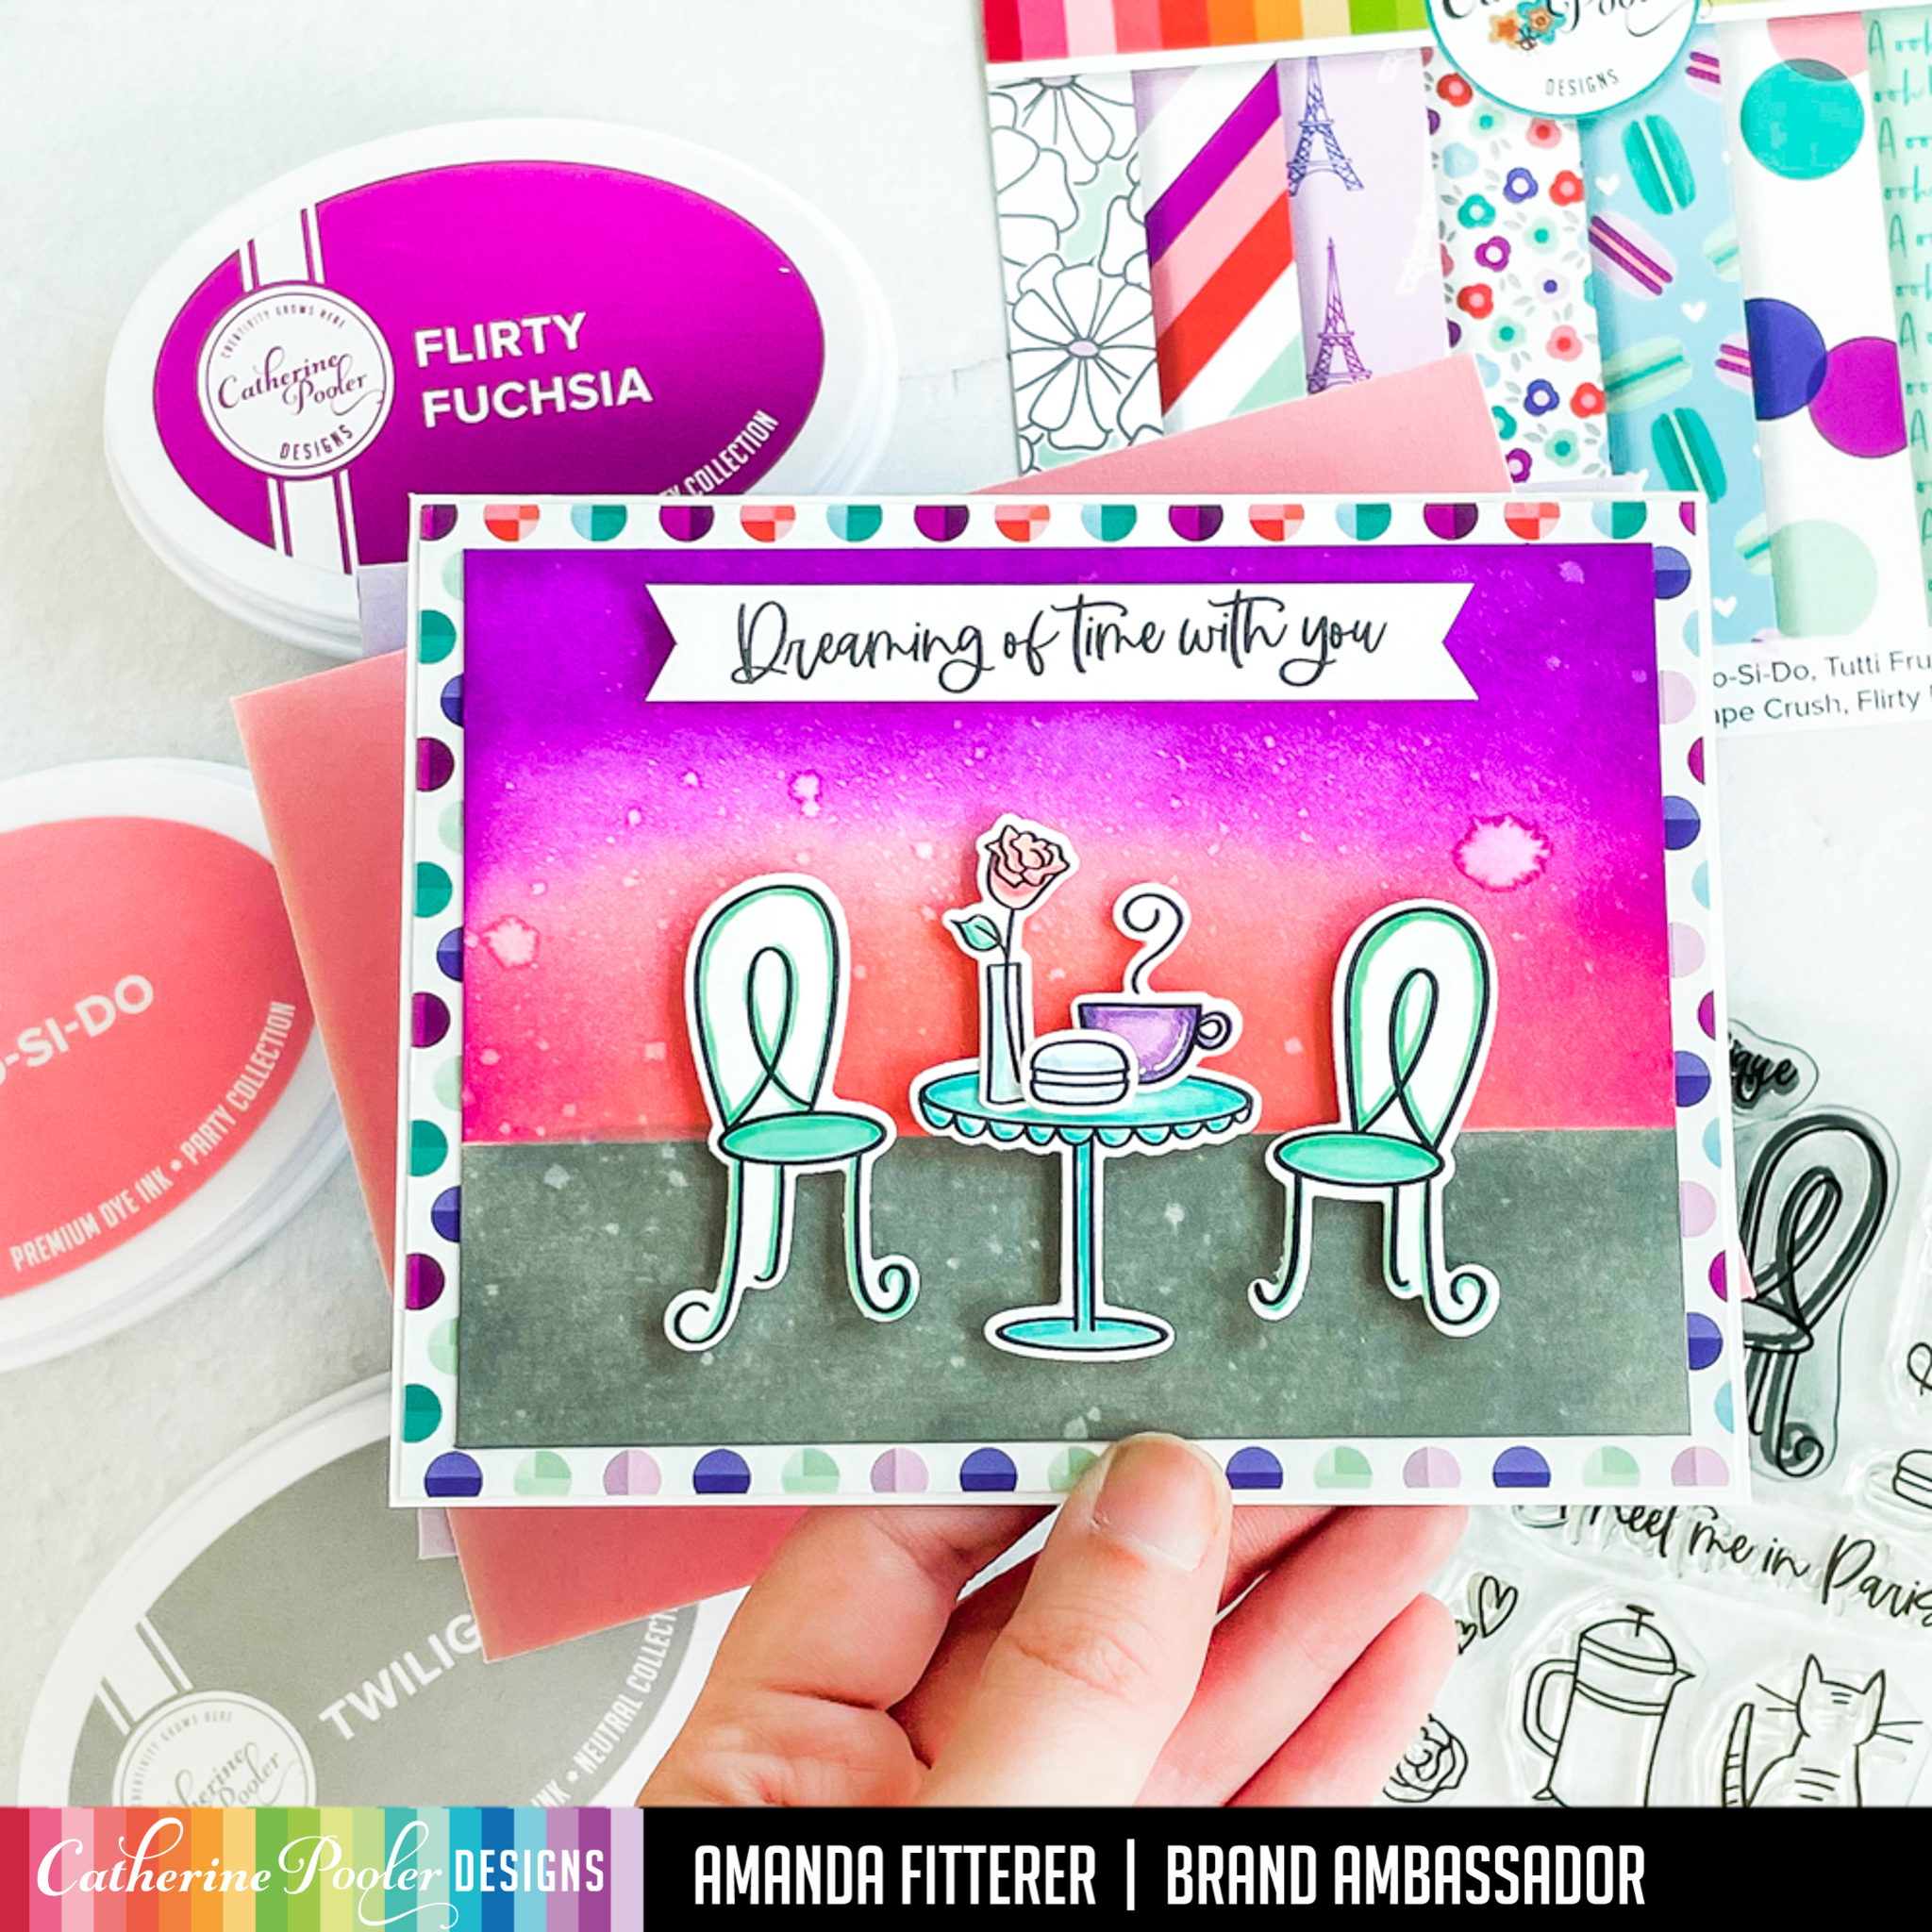
Hello friends! Today I’m sharing a soft and pretty “LOVE YOU” card featuring the Paradise Birds Stamp Set. Let’s make this card together! Grab your supplies!
For the White/Green Panel, we’re going to blend Catherine Pooler’s Melon Ice just around the edges. For the White/Pink panel, we’re going to blend (just lightly in the center) Cotton Candy.
Next up, we’re going to stamp our leaves from the Paradise Birds Stamp Set directly onto our card base using Melon Ice ink. To make this process a little quicker, I like to use a combination of my acrylic blocks and my MISTI. I do this because I want to use the foam from the MISTI to get a better stamped image, but the acrylic blocks make it much faster, as I don’t have to constantly move my stamps around!
We’re ready to stamp our sweet birds now! After stamping with alcohol marker-friendly Memento Tuxedo Black Ink, I’m coloring my images with Copic markers. Once finished with that, I’ll die cut them with the coordinating die set.
Well, friends! That’s it for me today!! I hope you have enjoyed this post and find some time to get crafty today!!
Thanks for using my affiliate links! You all are the BEST! Using an affiliate link in this post above costs you nothing, but it gives me a teeny percentage of your sale to buy more crafty goodies to continue to share card tutorials with YOU! So, thank YOU! Xx, Amanda
Welcome to the Heffy Doodle New Release Inspiration Blog Hop! We are so excited to share amazing cards from our Design Team members using the new release! For today’s special Blog Hop, you can win a £50 voucher to the Heffy Doodle store!
I love seeing how people “sketch out” their ideas for their cards, so I wanted to show you how I do it! This is how I visual the card: I knew I wanted to use the Stitched Birthday Trio Frame so I die cut that out first. Then, I lay out my stamped images and any other dies I want to use. I then take a photo so I can remember how I have things laid out!
Now, I’m going to ink blend my pond and grass and 1 panel cutout. I’m using Catherine Pooler’s Melon Ice and Martini for the grass. I’m also using All That Jazz and Uptown for the Ripple Waves Stencil pond. I LOVE this color combo! I like to do my ink blending before coloring my stamped images so that I can make sure my stamped images coordinate with the ink colors.
So, now I can color my images! I’m using OLO Alcohol Markers to color my images. I add highlights with my ABSOLUTE FAV white Gelly Roll pen.
Let’s cut these little guys out now! Like I mentioned earlier, I use 3″ wide cardstock so that I can run it through my Mini Die Cutting Machine! If you don’t have a mini die cutting machine, you HAVE to get one! They’re also available on Scrapbook.com, if you’re in the US!
Using my frame as a guide (held in place with washi tape), I’m gluing my panels down with Glubert Glue.
For my frame, I’m using Deep Foam Tape because I want it to really have a LOT of dimension!
The last step is to add my images with 3D foam squares! For some of the images, I used 2 foam squares on top of each other to get even more dimension!
Here are some close-up images!
To be entered to win the giveaway, all you need to do is comment at each stop along the Blog Hop before March 14th, 2023 at 11:59 PM EST. The winner will be announced on the Heffy Doodle Blog on March 16th at 10:00 AM EST!
Thank you so much for stopping by my part of the Blog Hop today! I really appreciate your love and support! Happy Hopping, friends!
Thanks for using my affiliate links! You all are the BEST! Using an affiliate link in this post above or down below costs you nothing, but it gives me a teeny percentage of your sale to buy more crafty goodies to continue to share card tutorials with YOU! So, thank YOU! Xx, Amanda
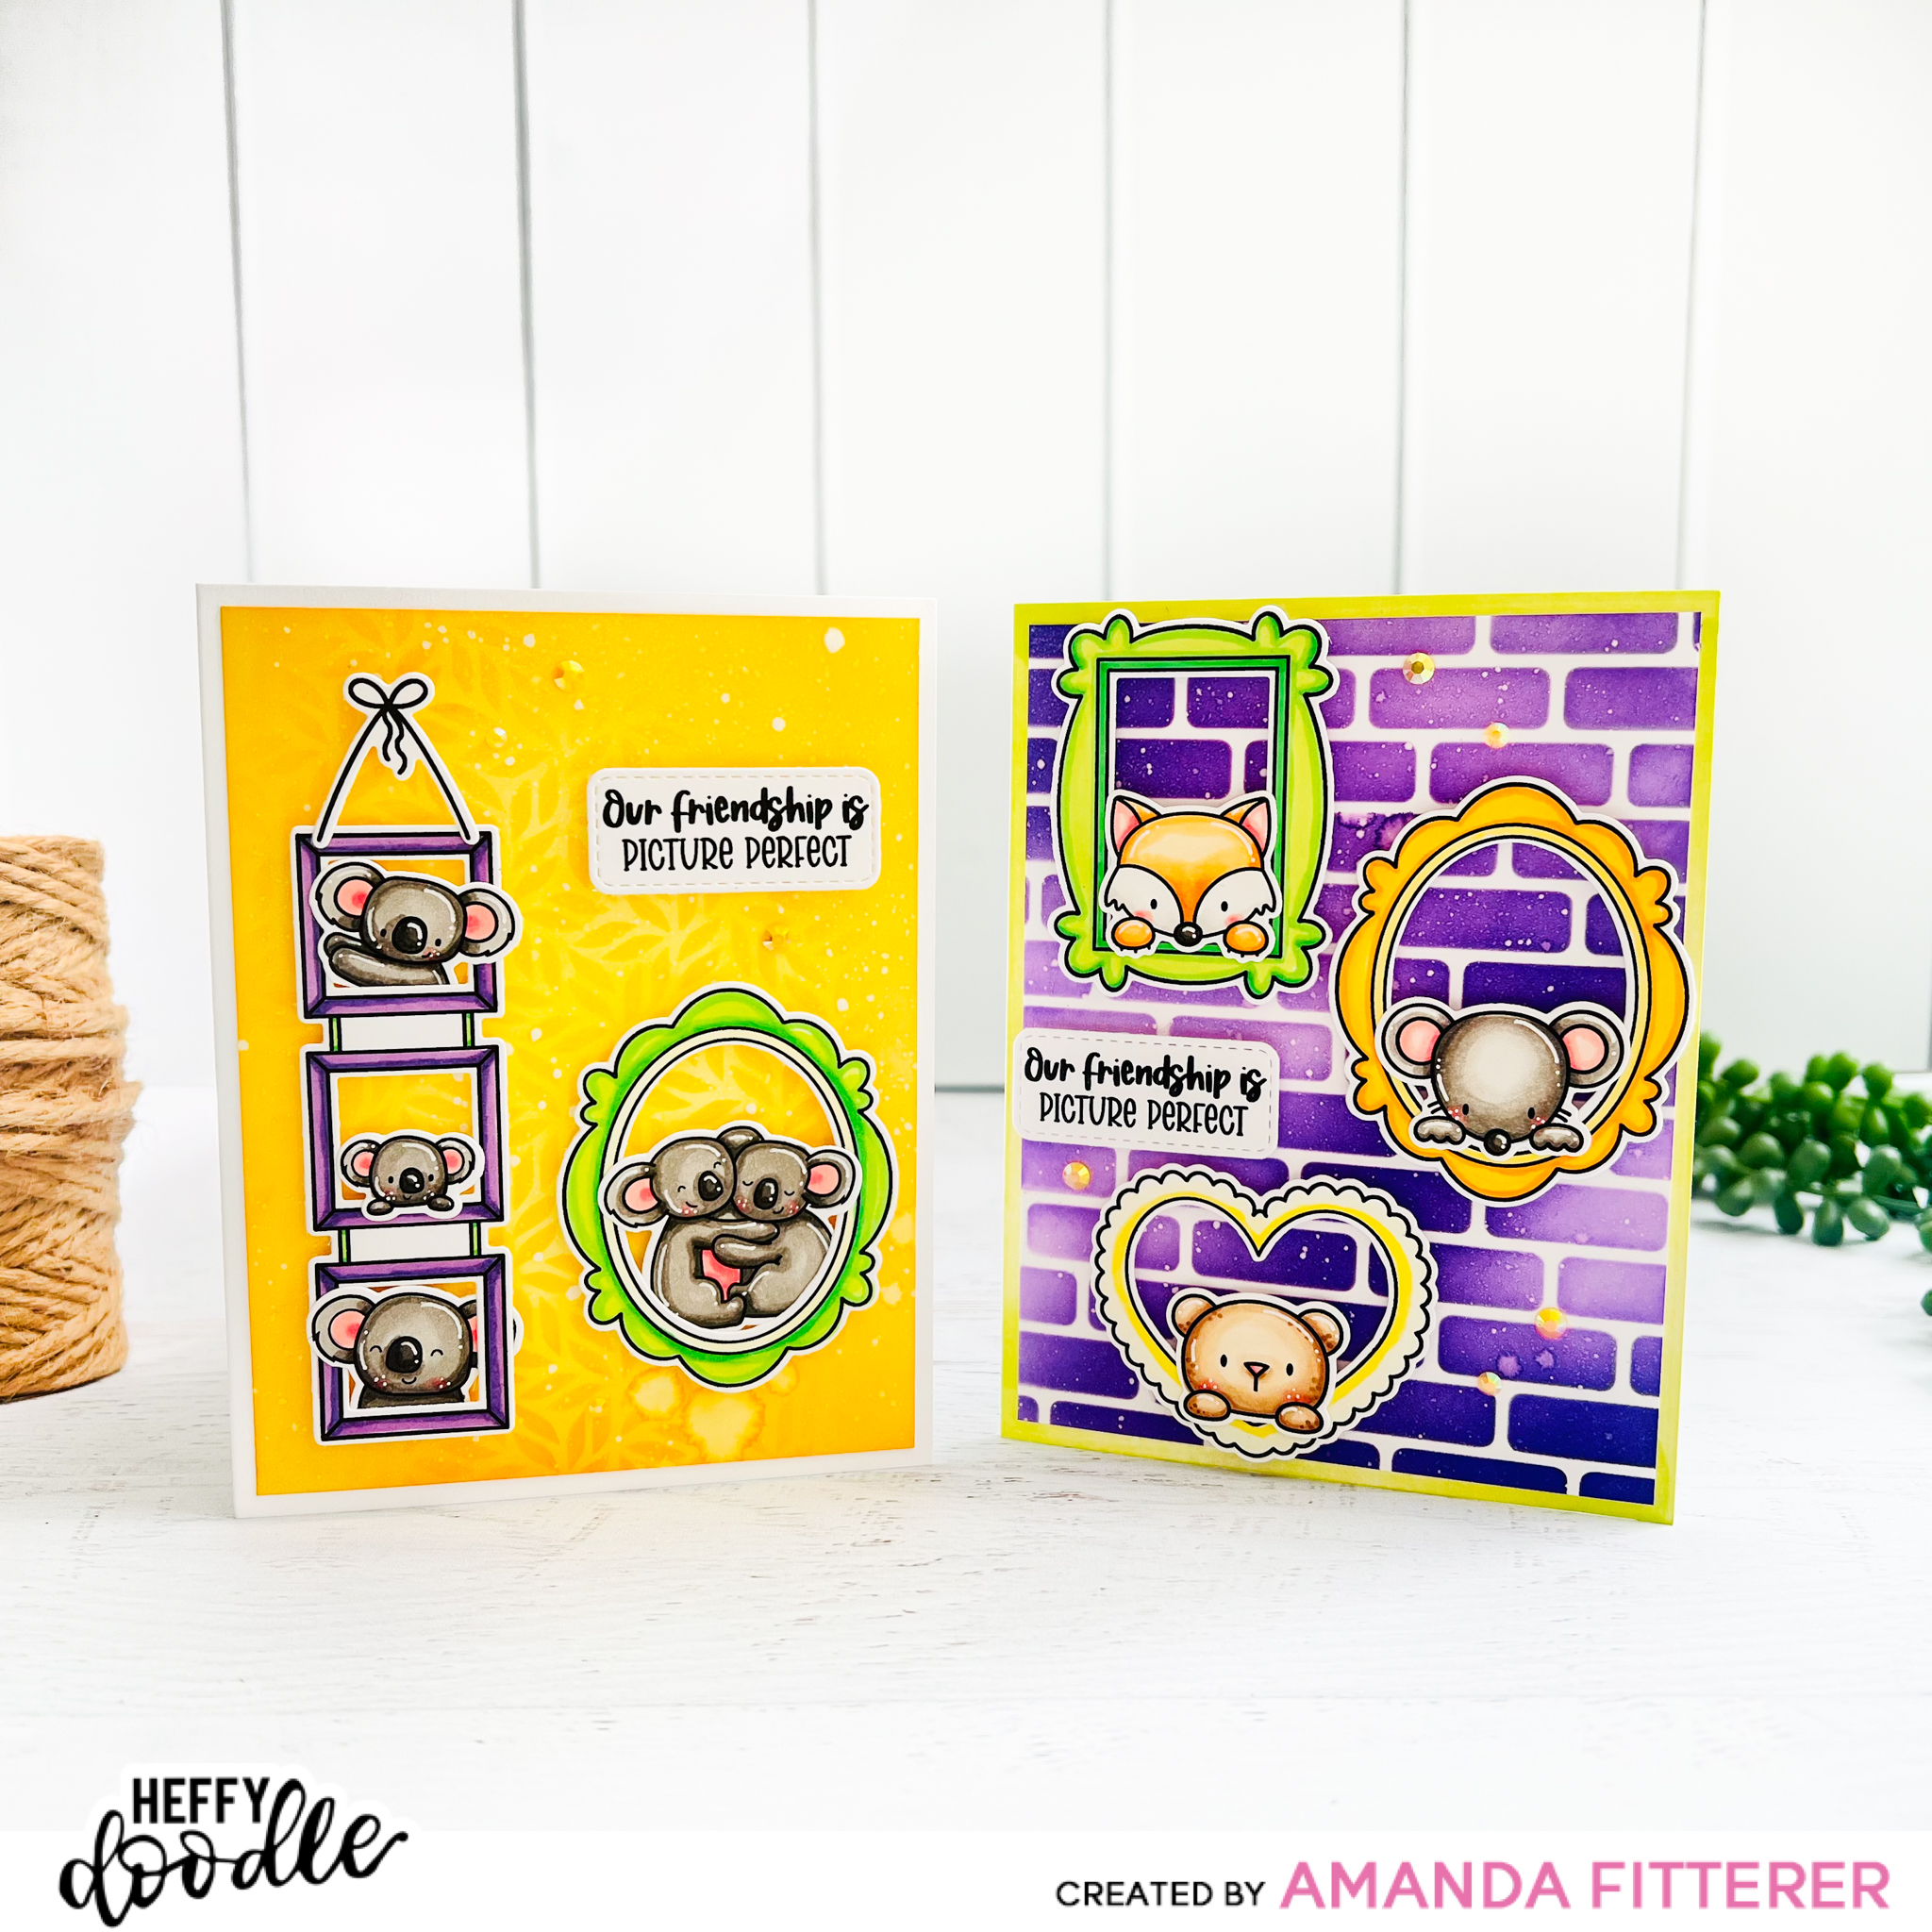
Welcome to the Heffy Doodle and Pawsome Stamps Collaboration Blog Hop! Design Team members from both companies are sharing inspiration using products from both companies! Plus, you have a chance to win prizes from both companies!
I have 2 cards to share with you today that I made using products from both companies!
For my first card, I’m going to start off with the Heffy Doodle Brick by Brick Stencil. I’m blending Catherine Pooler’s Grape Crush and Pixie Dust inks through the stencil and then spritzing with water and flicking on some white paint/water mix onto my background.
Next, I’m grabbing the Pawsome Stamps Picture Perfect Stamp Set, stamping my images and then coloring them with Copic markers.
Now I’m ready to assemble my card! I’m using 3D foam squares to adhere my stamped images onto my card front. I’m using Glubert Glue to adhere some gems as well!
For my second card, I’m grabbing my Heffy Doodle Fancy Foliage Stencil and Catherine Pooler’s Chiffon, Glitz, and Limoncello inks. I’m blending the inks, then spritzing the background with water and flicking on some white paint mixed with water.
After stamping and die cutting my images, I’m using 3D foam squares to adhere my stamped images onto my card front. I’m using Glubert Glue to adhere some gems on this card as well!
I hope you loved my 2 cards I made using products from both companies! Now, onto the GIVEAWAY INFORMATION!!
To be entered to win the giveaway, all you need to do is comment at each stop along the Blog Hop! Pawsome Stamps will be giving away $30 and Heffy Doodle will be giving away £25 to their respective stores! Be sure to comment before 11:59 PM EST on June 24th to be entered to win! Each company will post their random winner on June 25th at 10AM EST! Make sure to check the Heffy Doodle Blog and Pawsome Stamps Blog to see if you’re a winner!
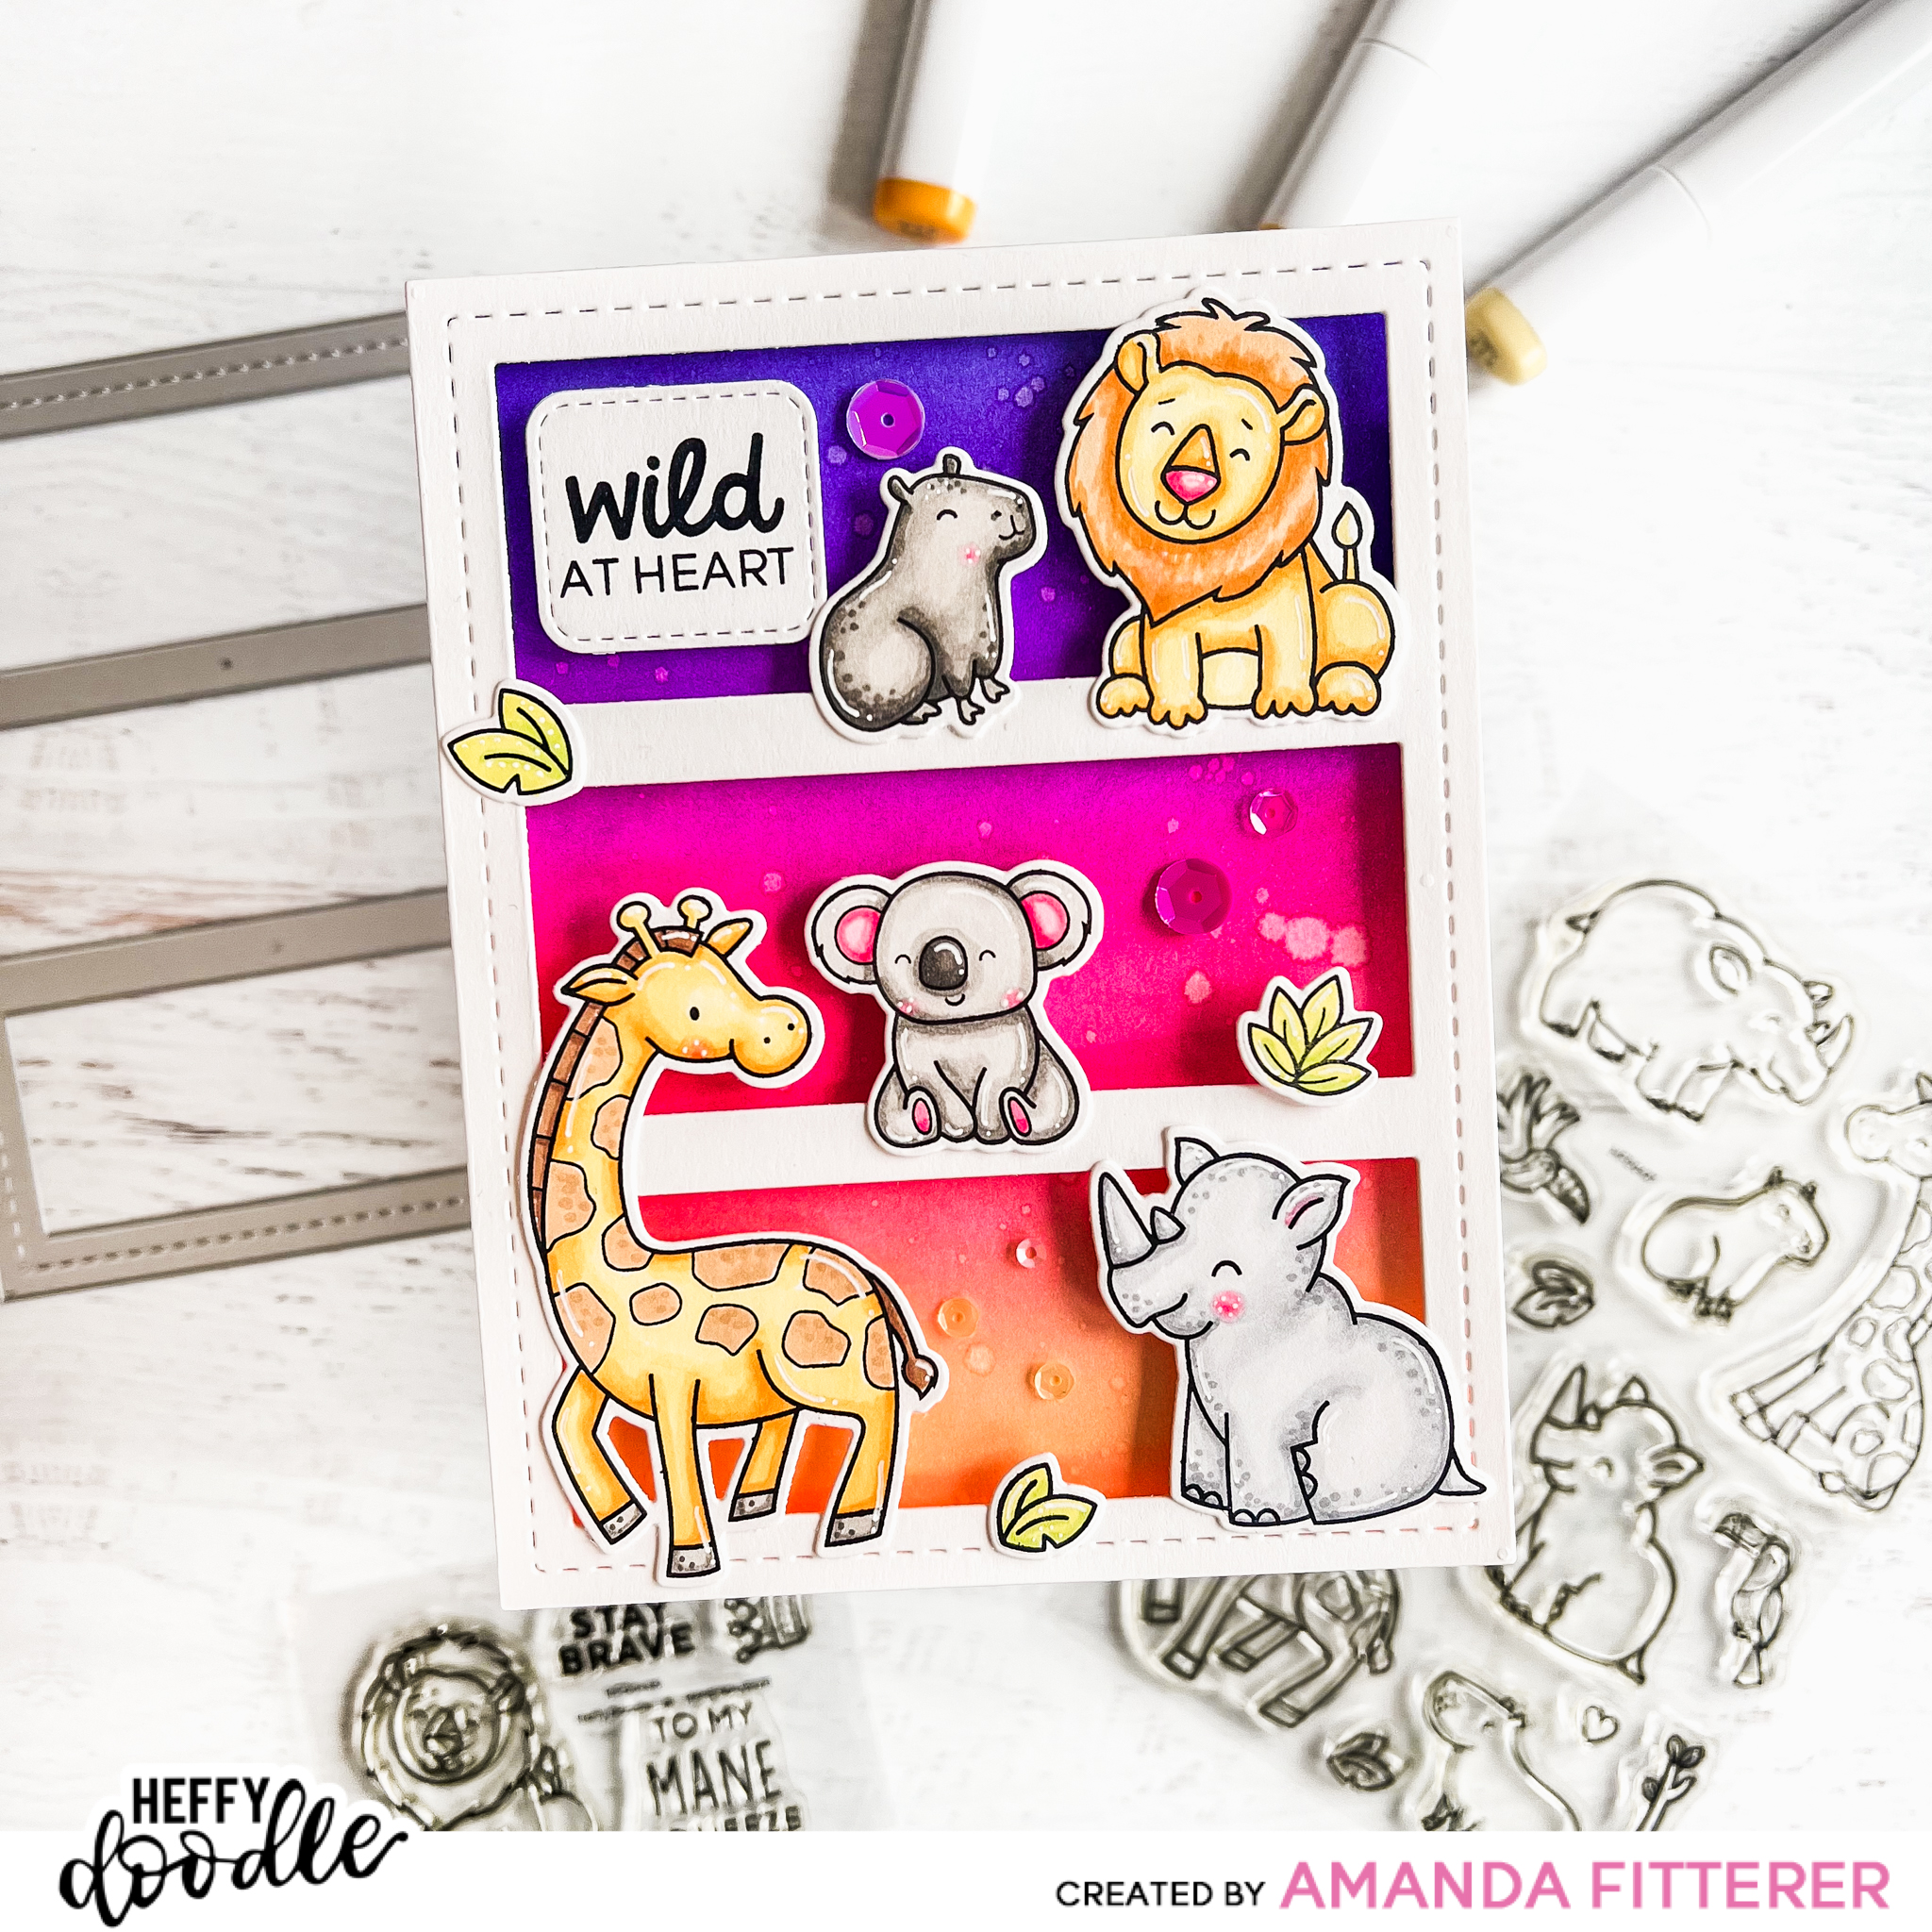
Welcome to the Heffy Doodle New Release Inspiration Blog Hop! We are so excited to share amazing cards from 8 Design Team members using the new release! For today’s special Blog Hop, you can win a £50 voucher to the Heffy Doodle store!
As part of the Blog Hop, I get to share this fun and happy card showcasing some of the brand new products!! Read on to see how I made this card!
To create this card, I am blending a piece of A2 white cardstock with Drive-In, Flirty Fuchsia, Party Dress, and Bellini inks. I am using the brand new Heffy Doodle Stitched Birthday Trio Frame Dies to create a frame for my A2 card.
Next, I’m going to place my stamps where I think I’ll want them to go. This helps me see the finished card without committing to anything just yet!
Once I have my selected stamps from the NEW Safari Animals, Koality Hugs, and Mane Squeezestamp sets, I am coloring them in with Copic markers and then cutting them out with the coordinating die sets.
My final step is to assemble the card and add some accents! I’m using the Heffy Doodle Deep Foam Tape to adhere my trio frame to the ink blended background. I’m using 3D foam squares to attach my stamped images and sentiment. For my sequins, I’m using Glubert glue to hold them down.
Here are some close-ups of the finished card!
To be entered to win the giveaway, all you need to do is comment at each stop along the Blog Hop before May 4th, 2022 at 11:59 PM EST. The winner will be announced on the Heffy Doodle Blog on May 5th at 10:00 AM EST!
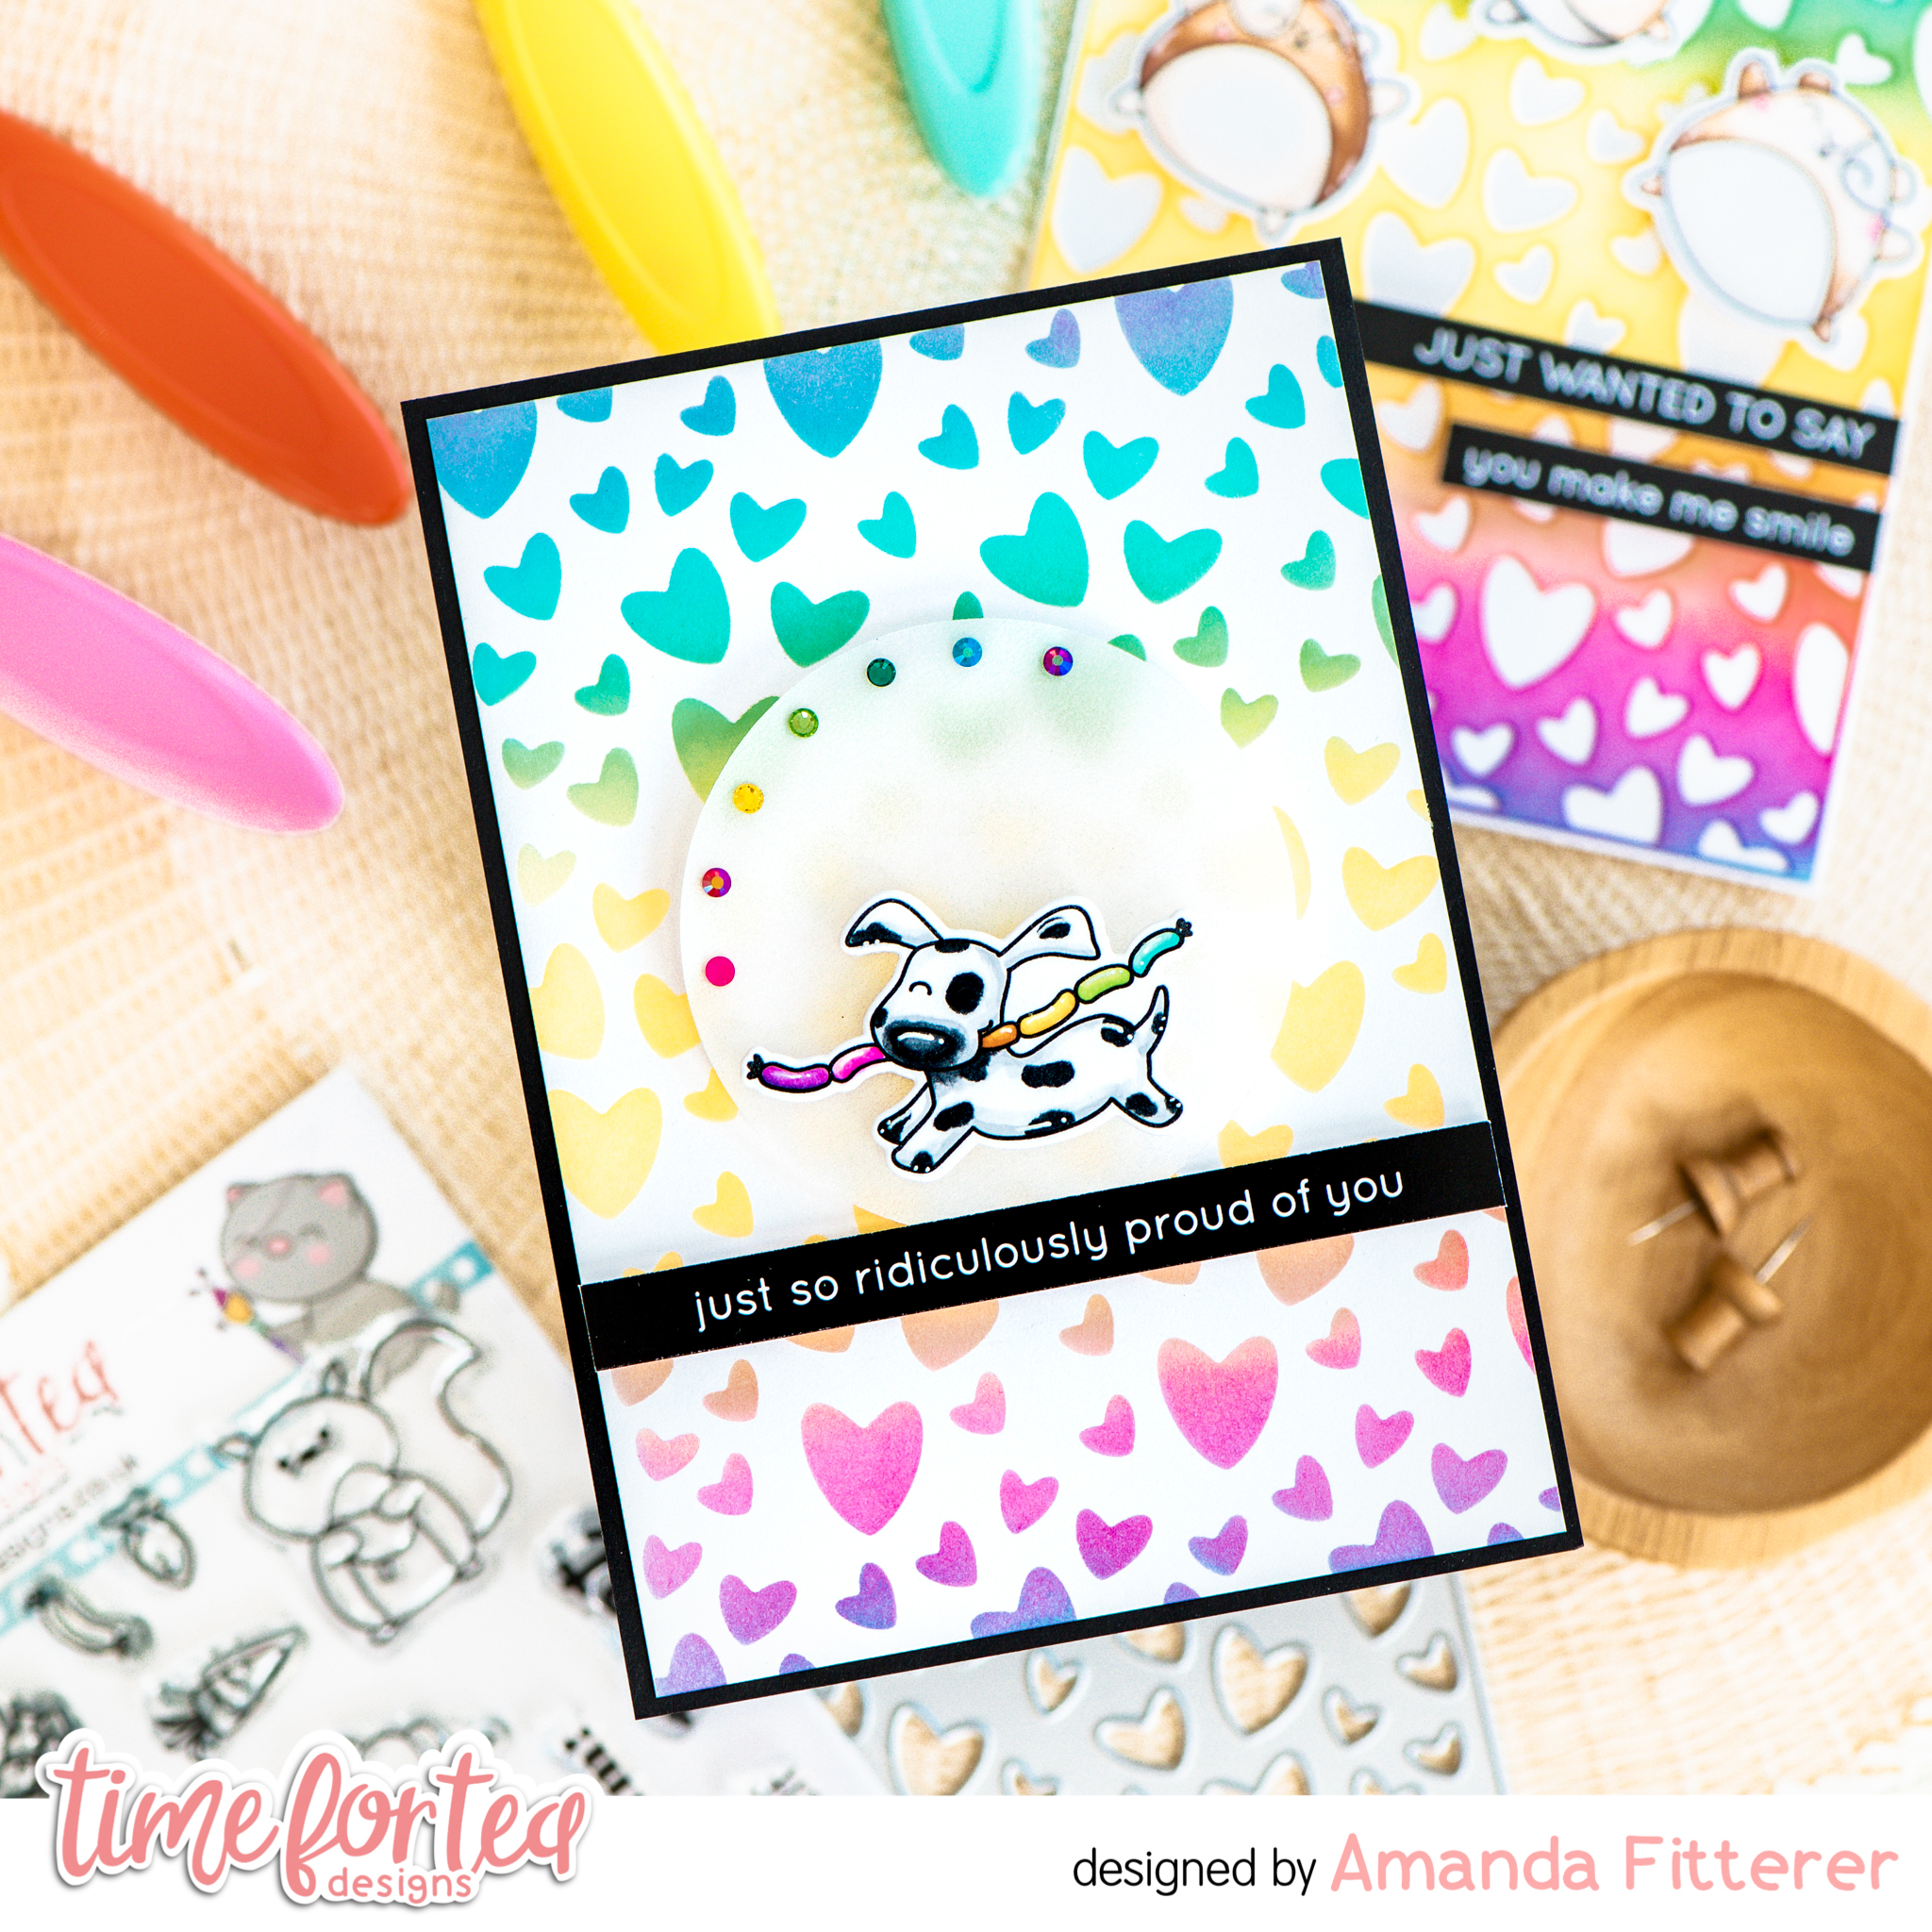
Did you see my last post where I created that beautiful rainbow background with the Scattered Hearts Cover Plate?? Today, I’m going to share the card I made using it!
To make this card, I die cut the Scattered Hearts Cover Plate on a piece of white cardstock. Once cut, I grabbed another piece of white cardstock and placed it underneath my die cut piece. Then, I blended a rainbow with Maker Forte Flamingo, Yellowstone, and Neon Lights inks. This gives me TWO backgrounds at once!
For my sweet pup, I used Enjoy the Little Things stamp set. I colored him with Copic markers and then die cut him with the coordinating dies. I propped him up with 3D foam squares and put him on a piece of round vellum.
For my sentiment, I grabbed my Brighter Days Sentiment Cards and trimmed out the “just so ridiculously proud of you” sentiment.
For the finishing touch, I added some rainbow colored gems!
The next step was to attach my heart background to a black card base with liquid glue.
Don’t forget, you can use code T4TAMANDA10 to get 10% off your purchase!
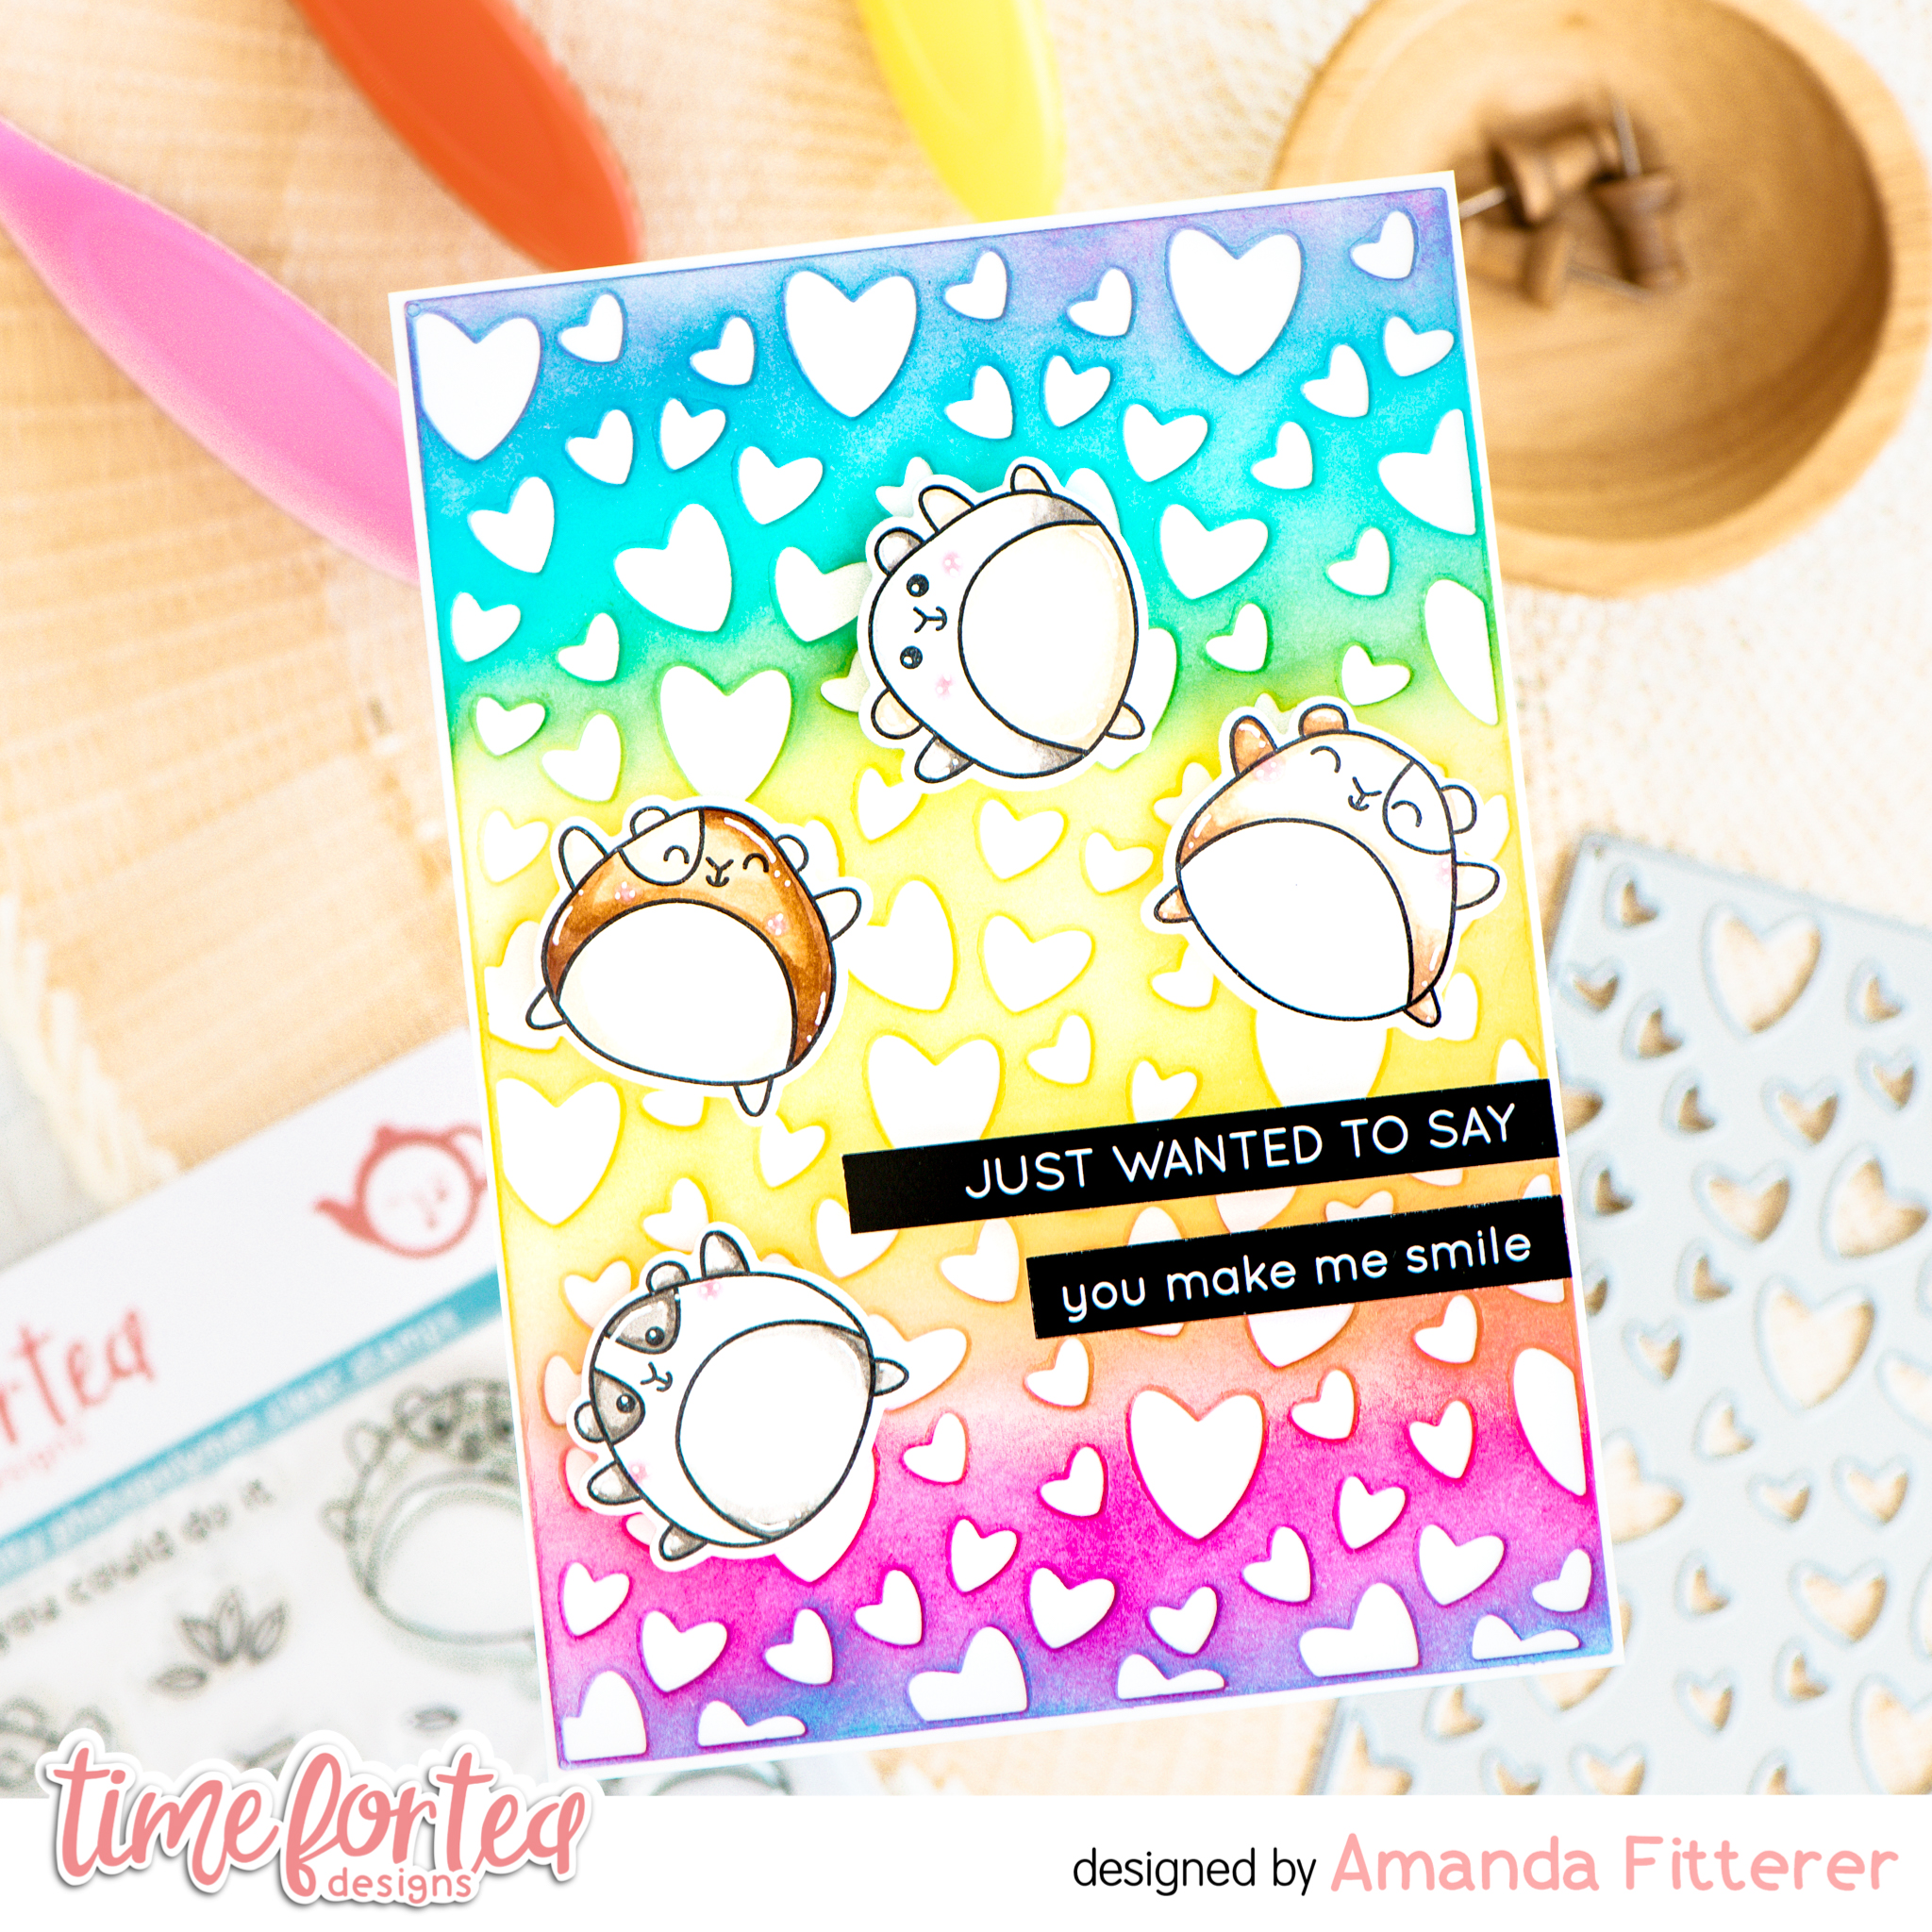
Well hey there, crafty friend! Today I’m sharing this fun rainbow card I made using the Hooray Hamster stamp set!
To make this card, I die cut the Scattered Hearts Cover Plate on a piece of white cardstock. Once cut, I grabbed another piece of white cardstock and placed it underneath my die cut piece. Then, I blended a rainbow with Maker Forte Flamingo, Yellowstone, and Neon Lights inks. This gives me TWO backgrounds at once!
Then, I was ready for my hamsters! I stamped them with black ink and then colored them in with Copic markers. I used the coordinating dies to cut them out.For my sentiments, I grabbed my Brighter Days Sentiment Cards and trimmed out 2 sentiments.
The next step was to attach my heart background to a white card base with liquid glue. For my hamsters and sentiments, I propped them up with 3D foam squares and strips.
Stay tuned for a card using the extra rainbow background NEXT WEEK! Woot woot! Use code T4TAMANDA10 to get 10% off your purchase! See you next week!
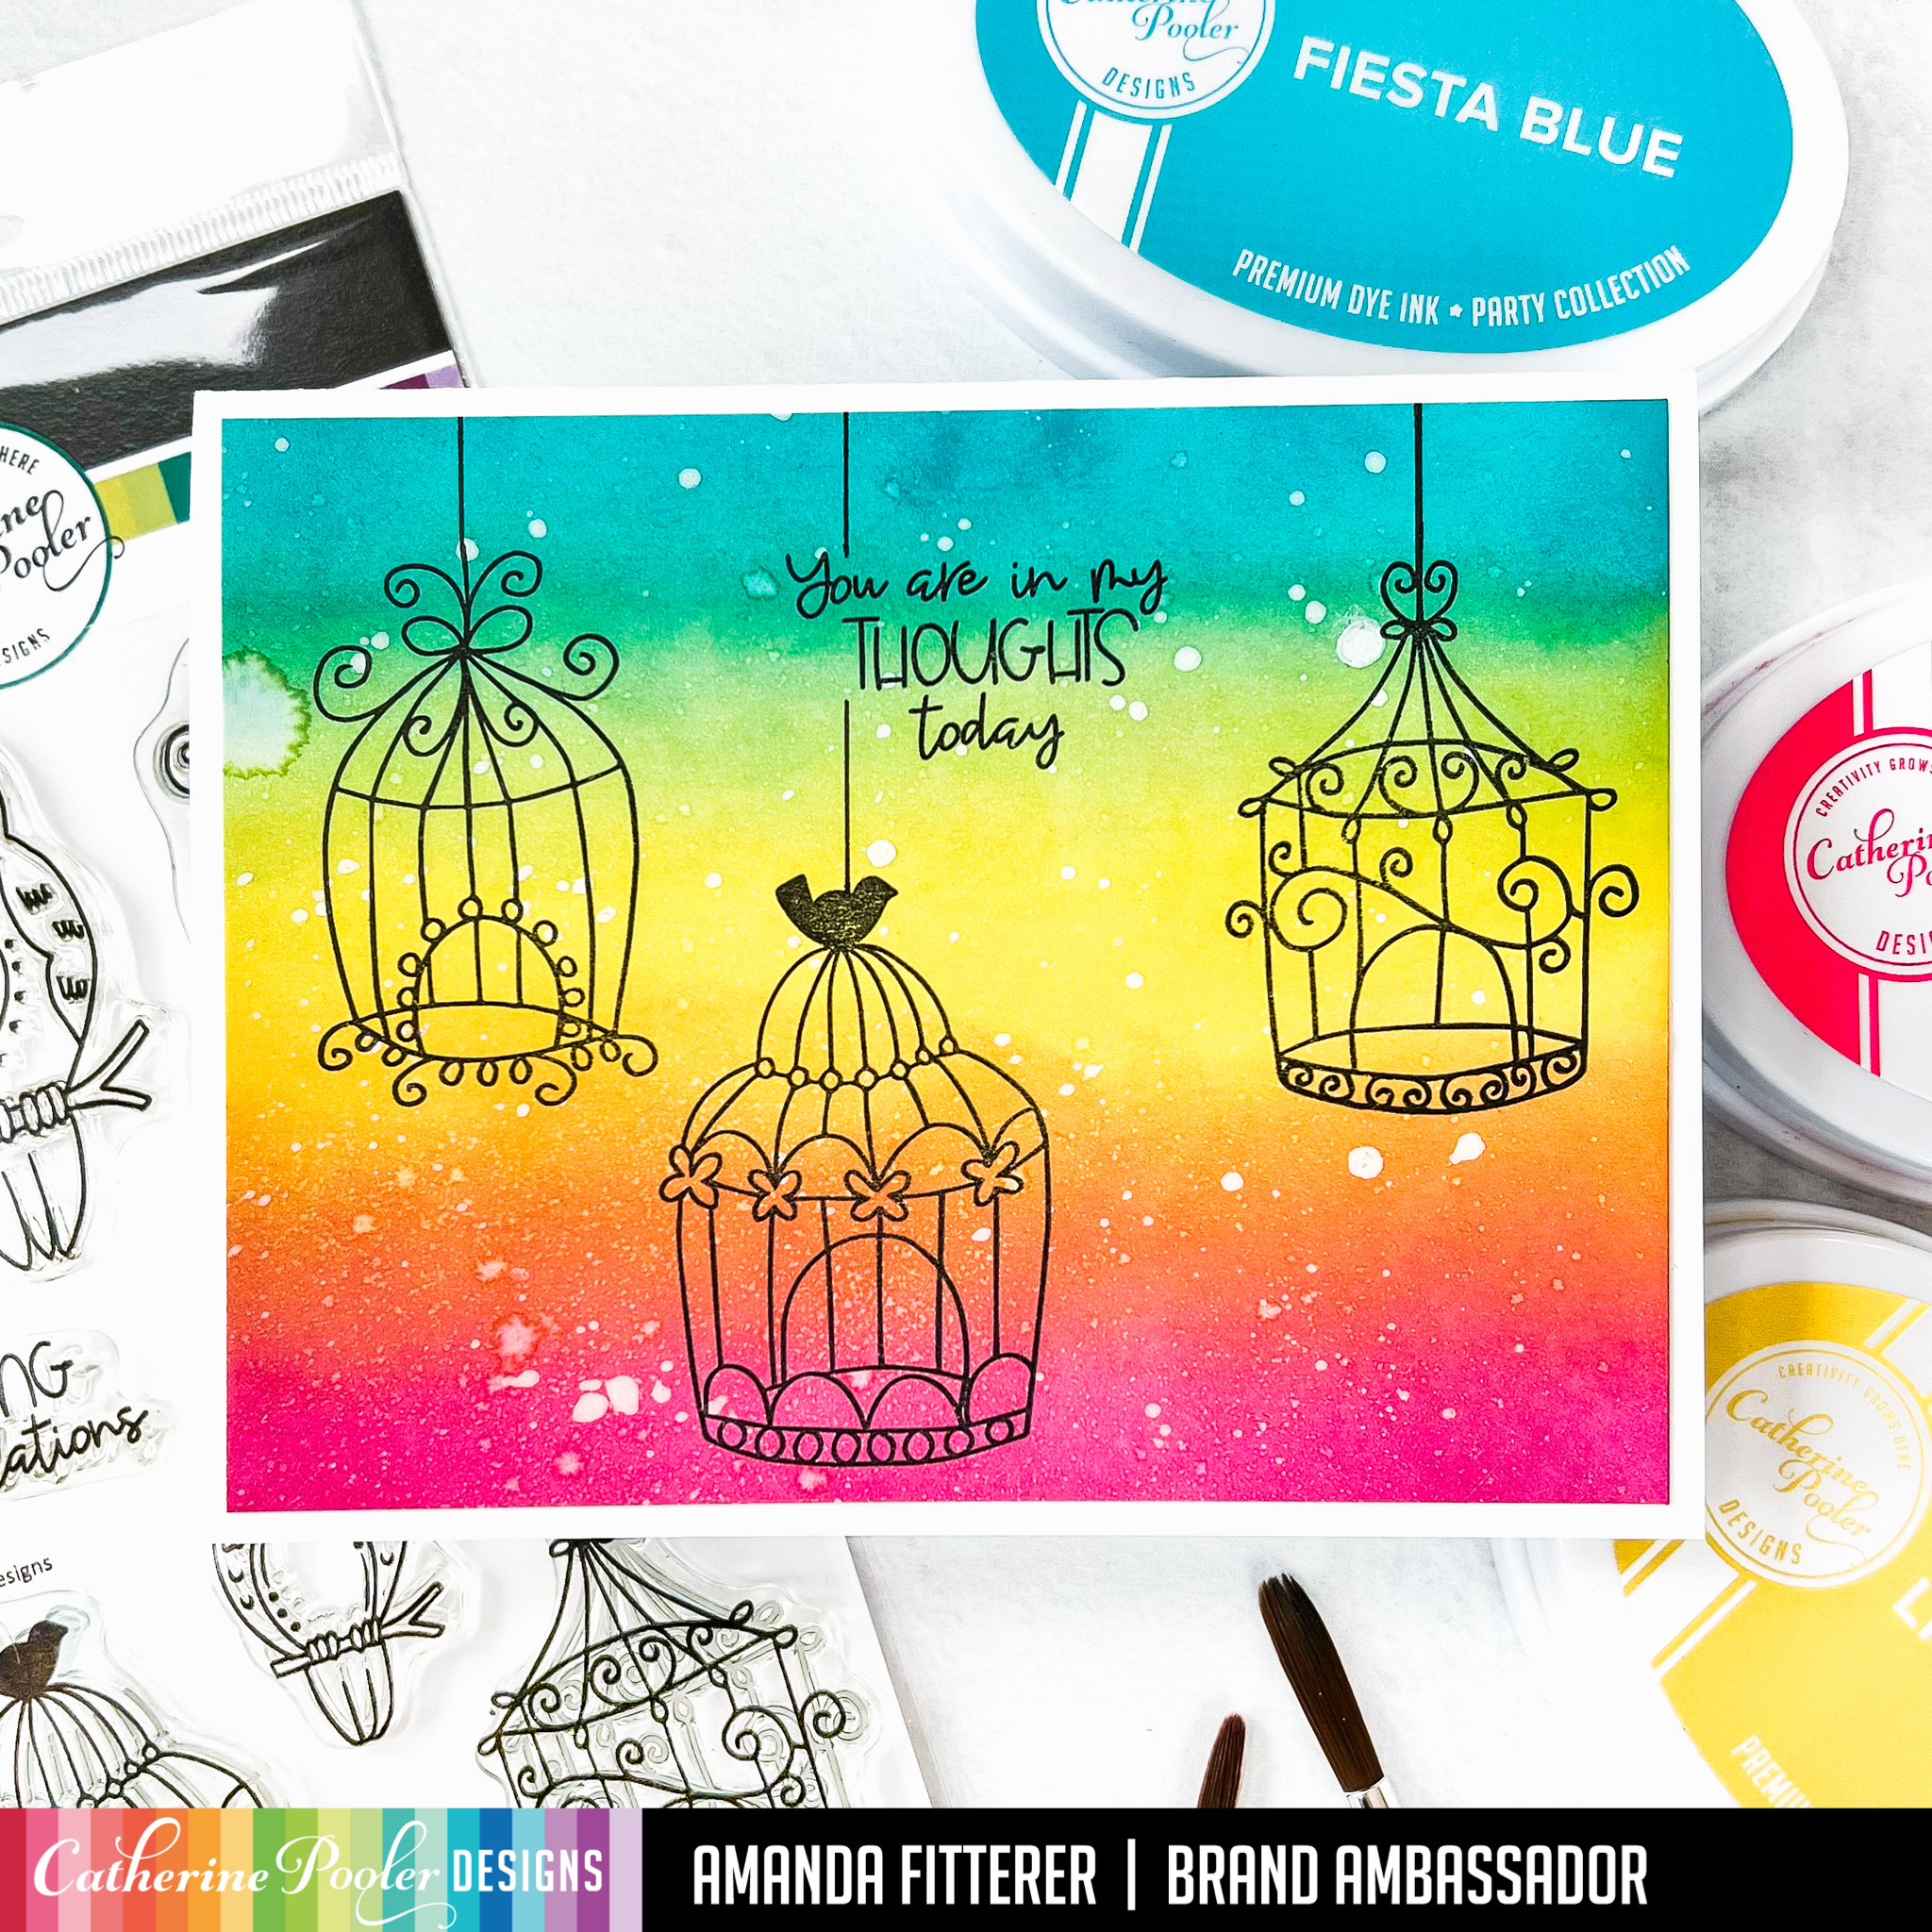
Oh my gosh! I love the new Lovebirds Stamp Set, don’t you?! The whole Ex Libris Collection is finally available for purchase now! Woot woot!
Although I ADORE the new ink colors, I am a Party Collection girl myself! So, I wanted to showcase this stamp set using a Party rainbow blended background. I blended Party Dress, Limoncello, and Fiesta Blue to create a gorgeous rainbow background. I also spritzed the background with water to create some texture!
Once I had my background blended, I stamped my birdcages and sentiment straight onto my background. Then, I used a ruler and black Copic pen to draw lines from my birdcages to the top of the card.
You can shop using my affiliate link if you want to help me get a small percentage of the sale! If you would like to, click here.
I’ll be back soon with more inspiration!! Xx, Amanda
I have step-by-step instructions on creating this mini journal.. so read on!
I’m starting out with my uber-professional looking template! 😉 1. Cut a piece of white cardstock down to 4.75″ x 7.25″. 2. Score it at 3.5″ and 3.75″. 3. Round off your corners with a corner punch, if desired.
Grab your patterned paper – I’m using the new Twilight Reading Paper Pack. 4. Cut down smaller pieces of cardstock that are approximately .25″ less for each layer. I’m using the Scallops and Dots Dies and a paper trimmer. 5. If you rounded your edges on your white cardstock base, you’ll probably want to round these off as well. I’m only rounding the right corners.
6. Use a small hole punch or poker tool to create a small hole for a brad. 7. Place a brad in the hole, giving yourself room to wrap twine around a few times.
8. On the inner flap, tape a piece of twine that’s long enough to wrap around your mini journal 2-4 times, depending on what you want it to look like.
9. Glue a piece of patterned cardstock on the front flap to cover the tape and brad. My piece of paper is 3.25″ x 4.5″. I’m also using the same size and paper for the other flap.
I’m going to add a little more interest on the front of mine by stamping some birdcages from the Lovebirds stamp set with the new Apricot ink. Im going to trim that down and glue it to the front.
Now we’re ready to work on the inside! 10. Grab a piece of patterned paper and trim it down to 3.75″ x 2.5″. 11. Score at .5″ and 3.5″. Turn 90 degrees and score at .5″.
12. Use some scissors to cut triangles out of the flaps.
13. Use red tape to secure the pocket to your mini journal.
14. Grab some computer paper. Trim strips that are 8″ x 2.75″. Fold them in half and secure them together with a stapler. Stamp an image in the corner on one or all of the pages. 15. Use red tape to secure it to the inside of your journal.
16. Create some tags out of coordinating patterned paper and stick them in your pocket!
That’s it!
I hope you enjoyed this post and try to make your own mini journal!
You can start shopping the New Release on Tues, April 5th if you’re a StampNation member! Everyone else gets to start shopping on Weds, April 6th!
You can shop using my affiliate link if you want to help me get a small percentage of the sale! If you would like to, click here.
I’ll be back soon with more inspiration!! Xx, Amanda
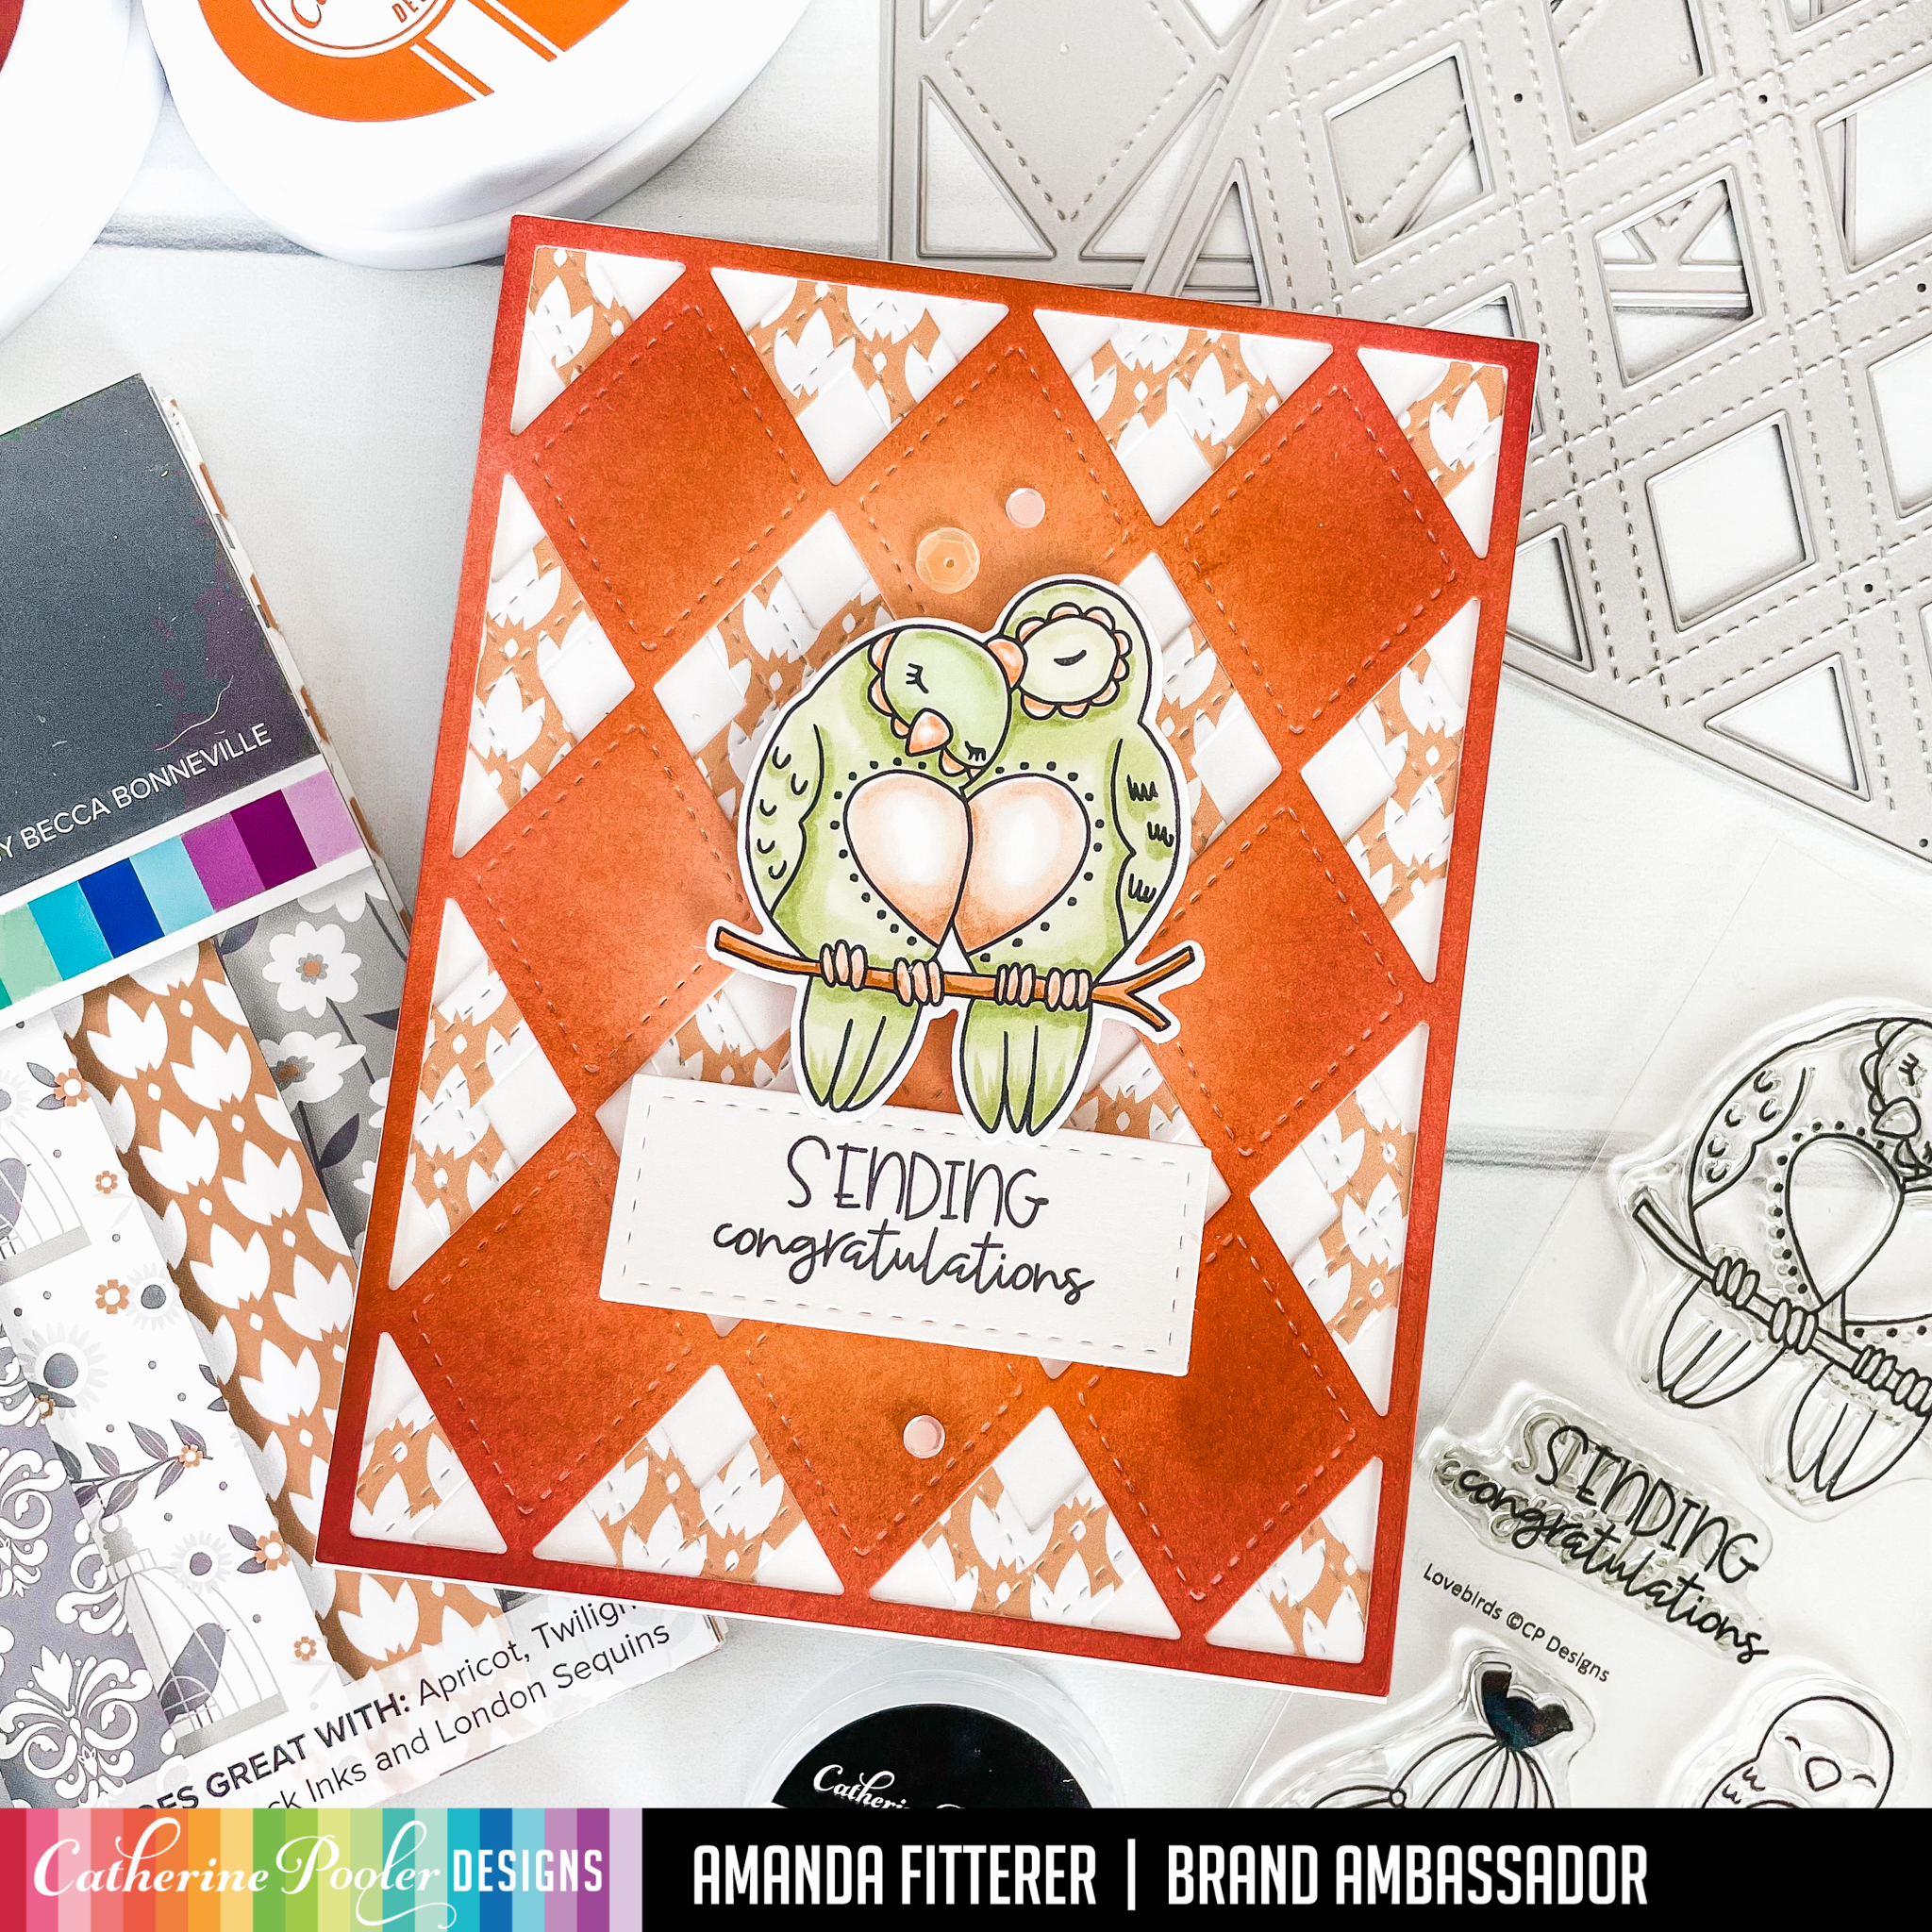
Hey friends! It’s that time again! A NEW RELEASE from Catherine Pooler is coming out!! Yippee!! And I get to share the Lovebirds Bundlewith you! Plus, the NEW INKS! I’m SOOO in love with this release!
To make this card, I used the Stitch Your Diamonds Die on white cardstock. Then, I ink blended it with Apricot, Ginger, and Terracotta inks. For my background, I used a piece of the Twilight Reading paper and die cut it with the Cross Your X’s Die. I layered them on top of each other and adhered them with liquid glue to my card base.
I stamped my Lovebirds and sentiment with black ink and then used Copic markers to color them in. I cut them out using the coordinating dies. I added some London Mix sequins to finish the card off!
Can you tell how much I love this release?! You can start shopping the New Release on Tues, April 5th if you’re a StampNation member! Everyone else gets to start shopping on Weds, April 6th!
You can shop using my affiliate link if you want to help me get a small percentage of the sale! If you would like to, click here.
I’ll be back soon with more inspiration!! Xx, Amanda
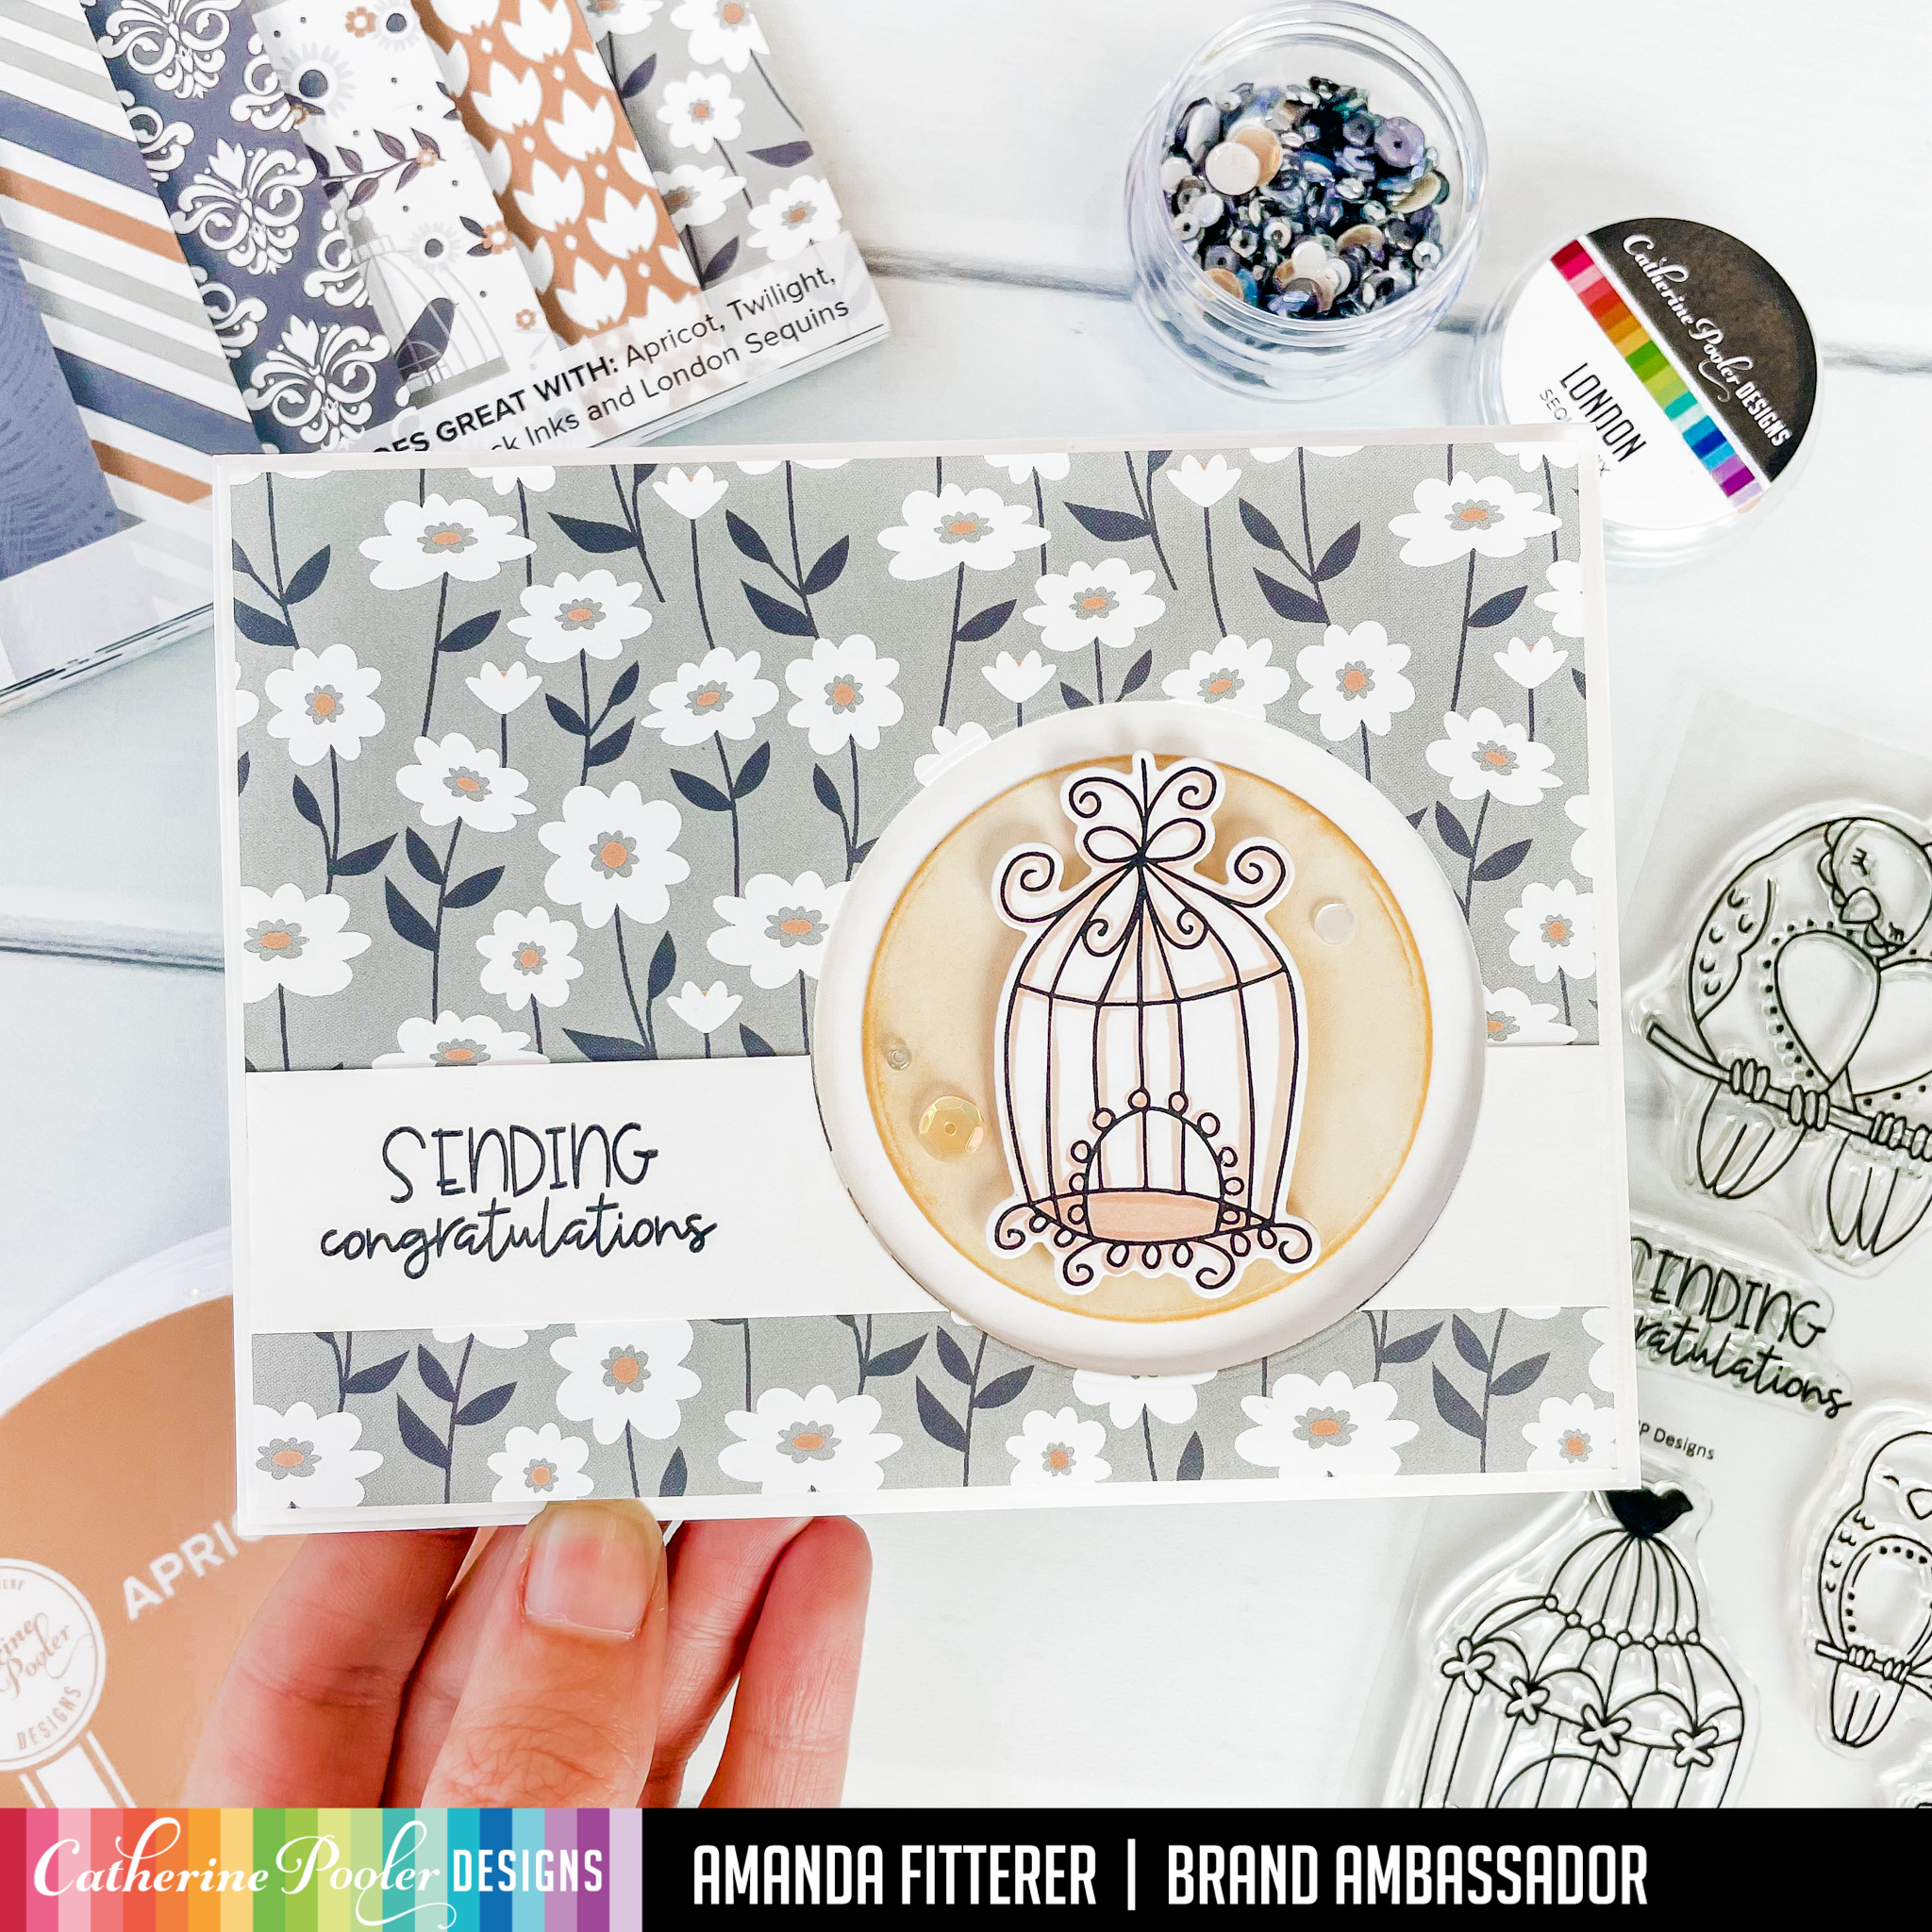
Hey friends! It’s that time again! A NEW RELEASE from Catherine Pooler is coming out!! Yippee!! And I get to share the Lovebirds Bundlewith you! Plus, the NEW INKS! I’m SOOO in love with this release!
The first card I get to share with you showcase the new Twilight ReadingPaper Pack, the new Apricot Ink, and the new Lovebirds Stamp Set!
I used the Circle Dies to cut out a circle in the bottom right portion of my patterned paper. I blended my circle cutout with the new Apricot ink. I trimmed down a piece of white cardstock and used my circle die to remove that section of my white strip. I stamped my sentiment from the Lovebirds stamp set in the open space on the left side.
I stamped my birdcage with black ink and then used a Copic marker to lightly color it in. I propped my patterned paper up with 3D foam tape to create more dimension. I added some London Mix sequins to finish the card off!
Are you as excited about this release as I am?! You can start shopping the New Release on Tues, April 5th if you’re a StampNation member! Everyone else gets to start shopping on Weds, April 6th!
You can shop using my affiliate link if you want to help me get a small percentage of the sale! If you would like to, click here.
I’ll be back soon with more inspiration!! Xx, Amanda
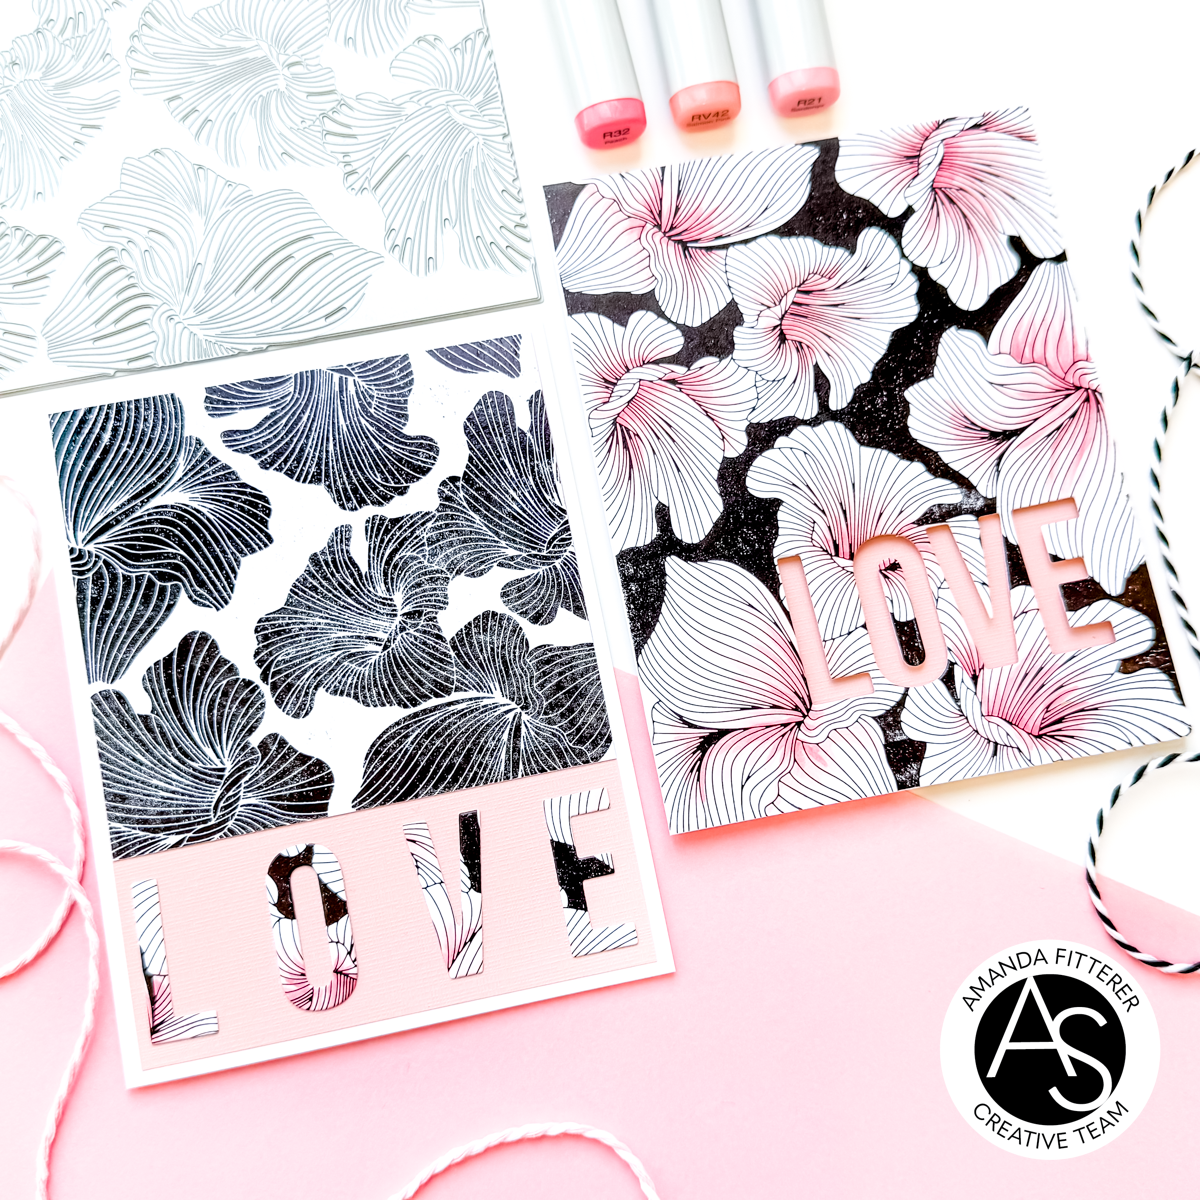
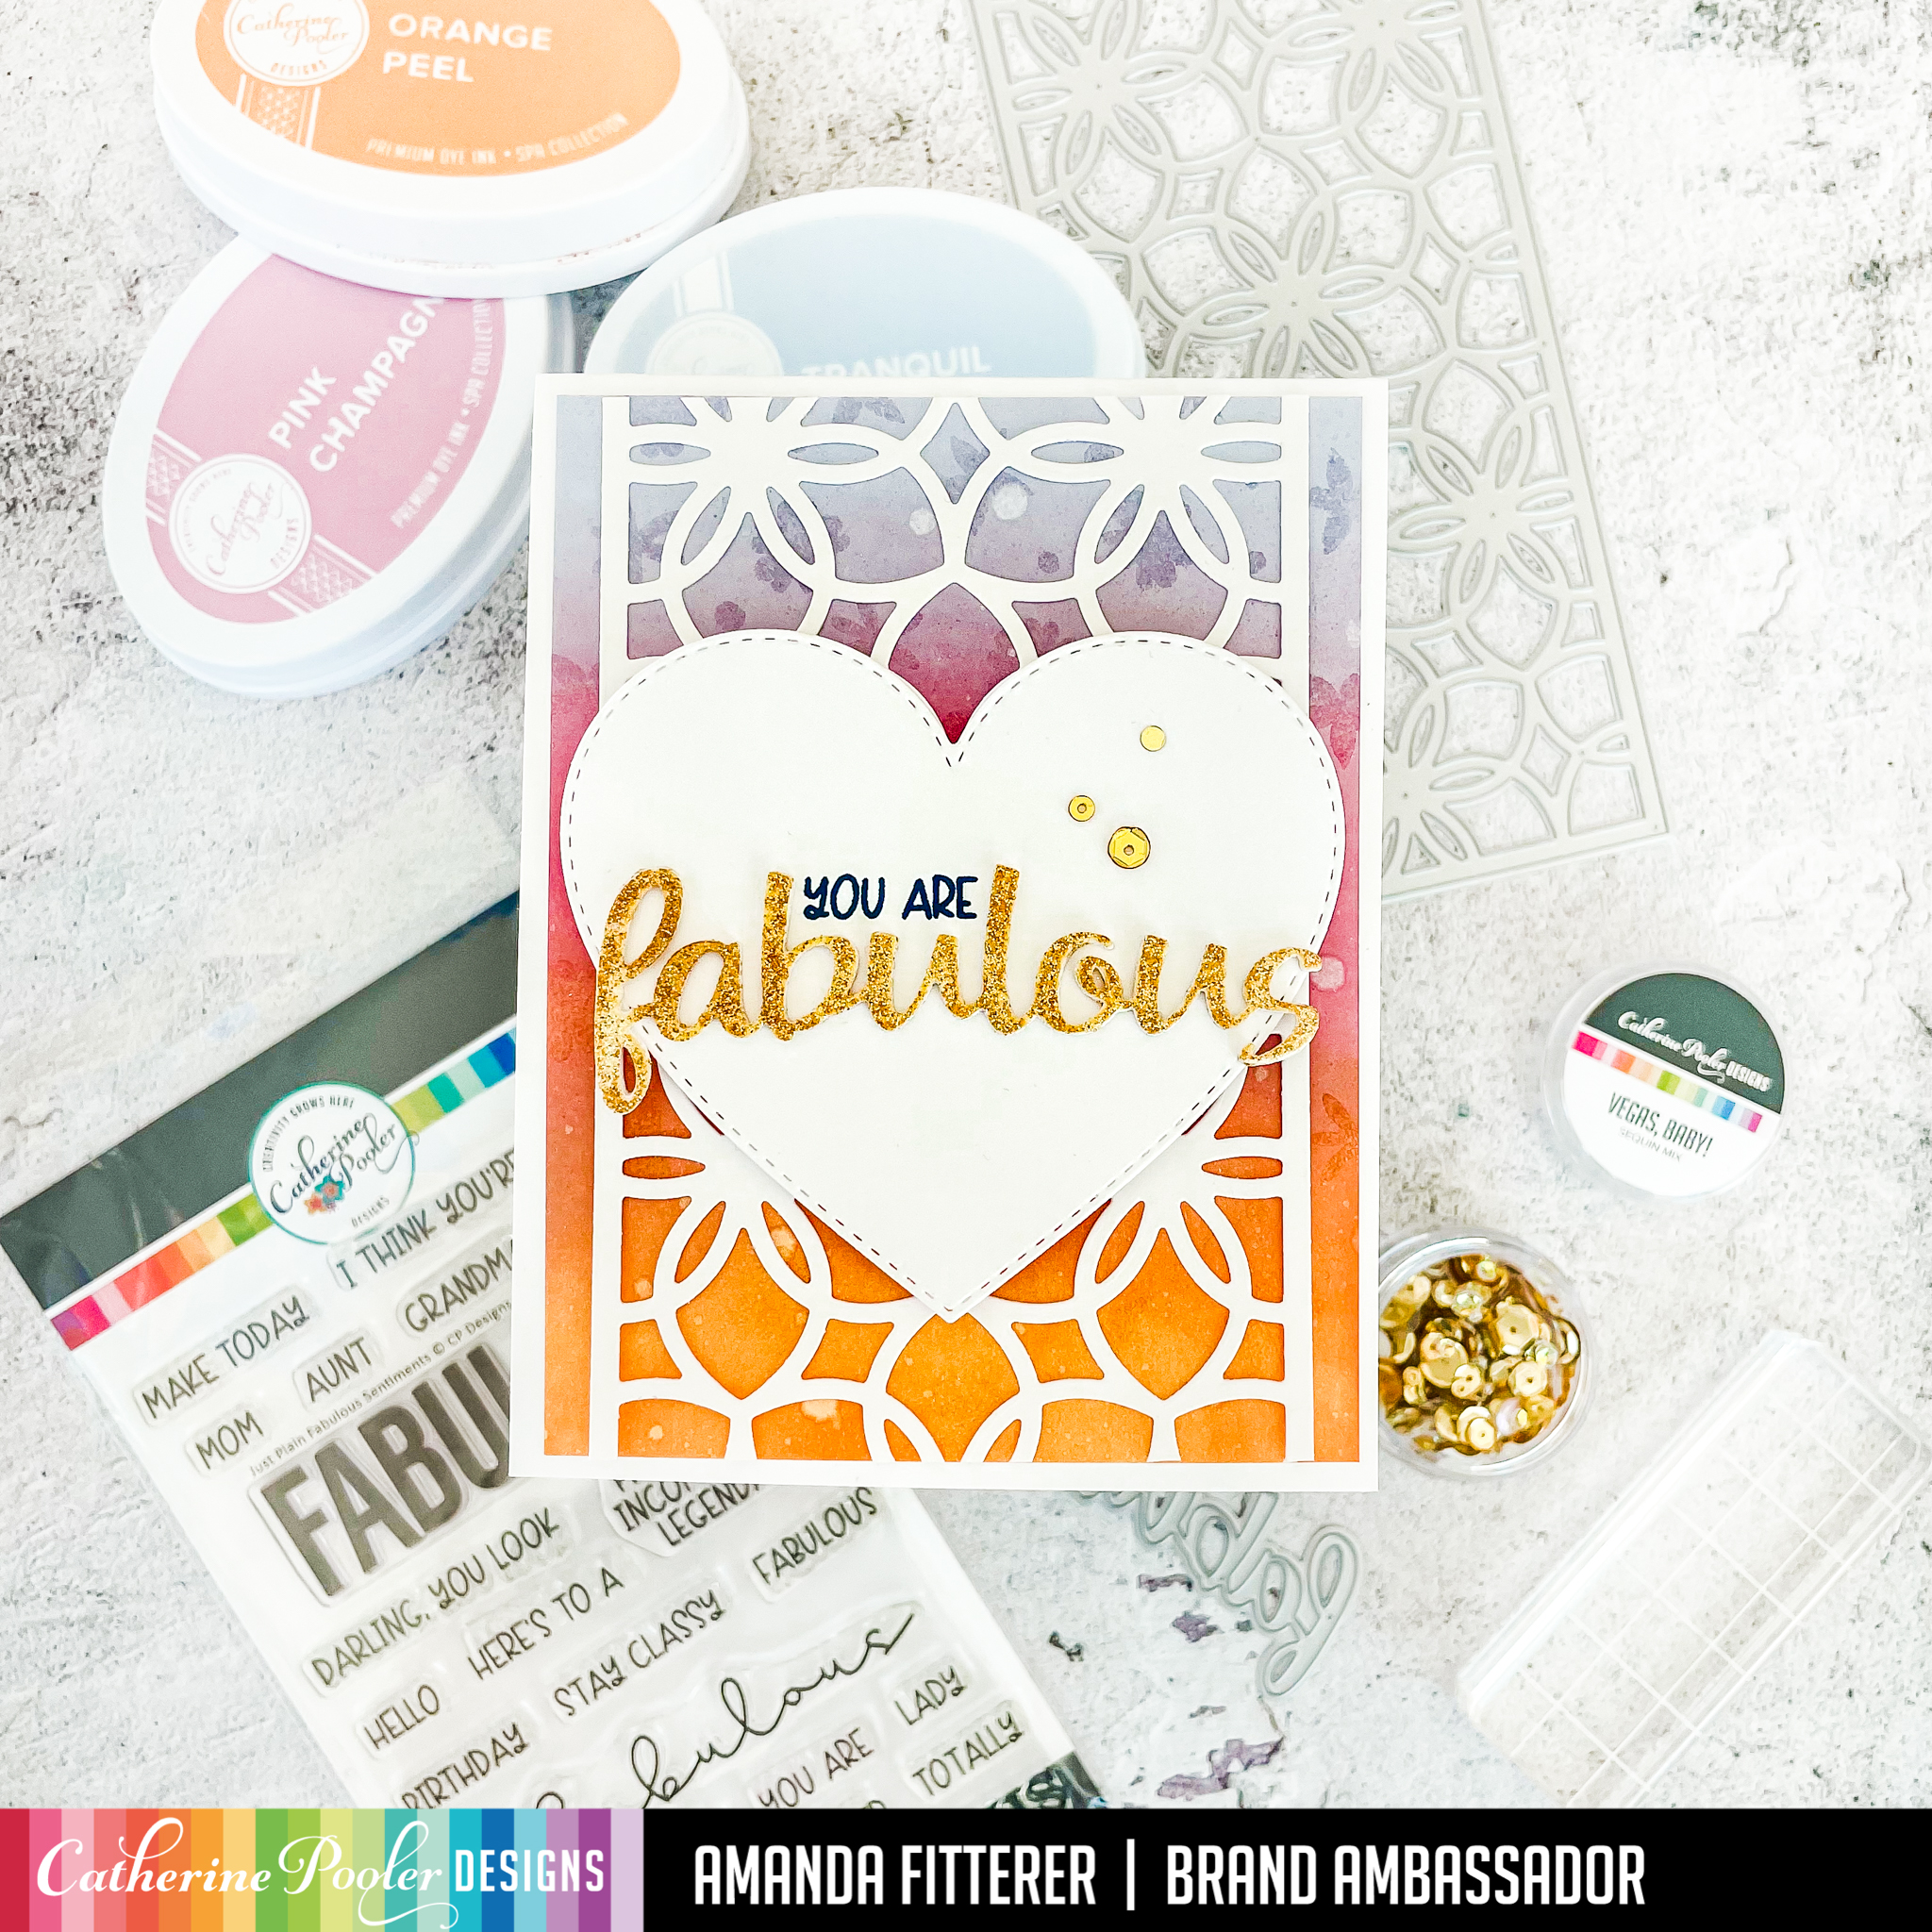
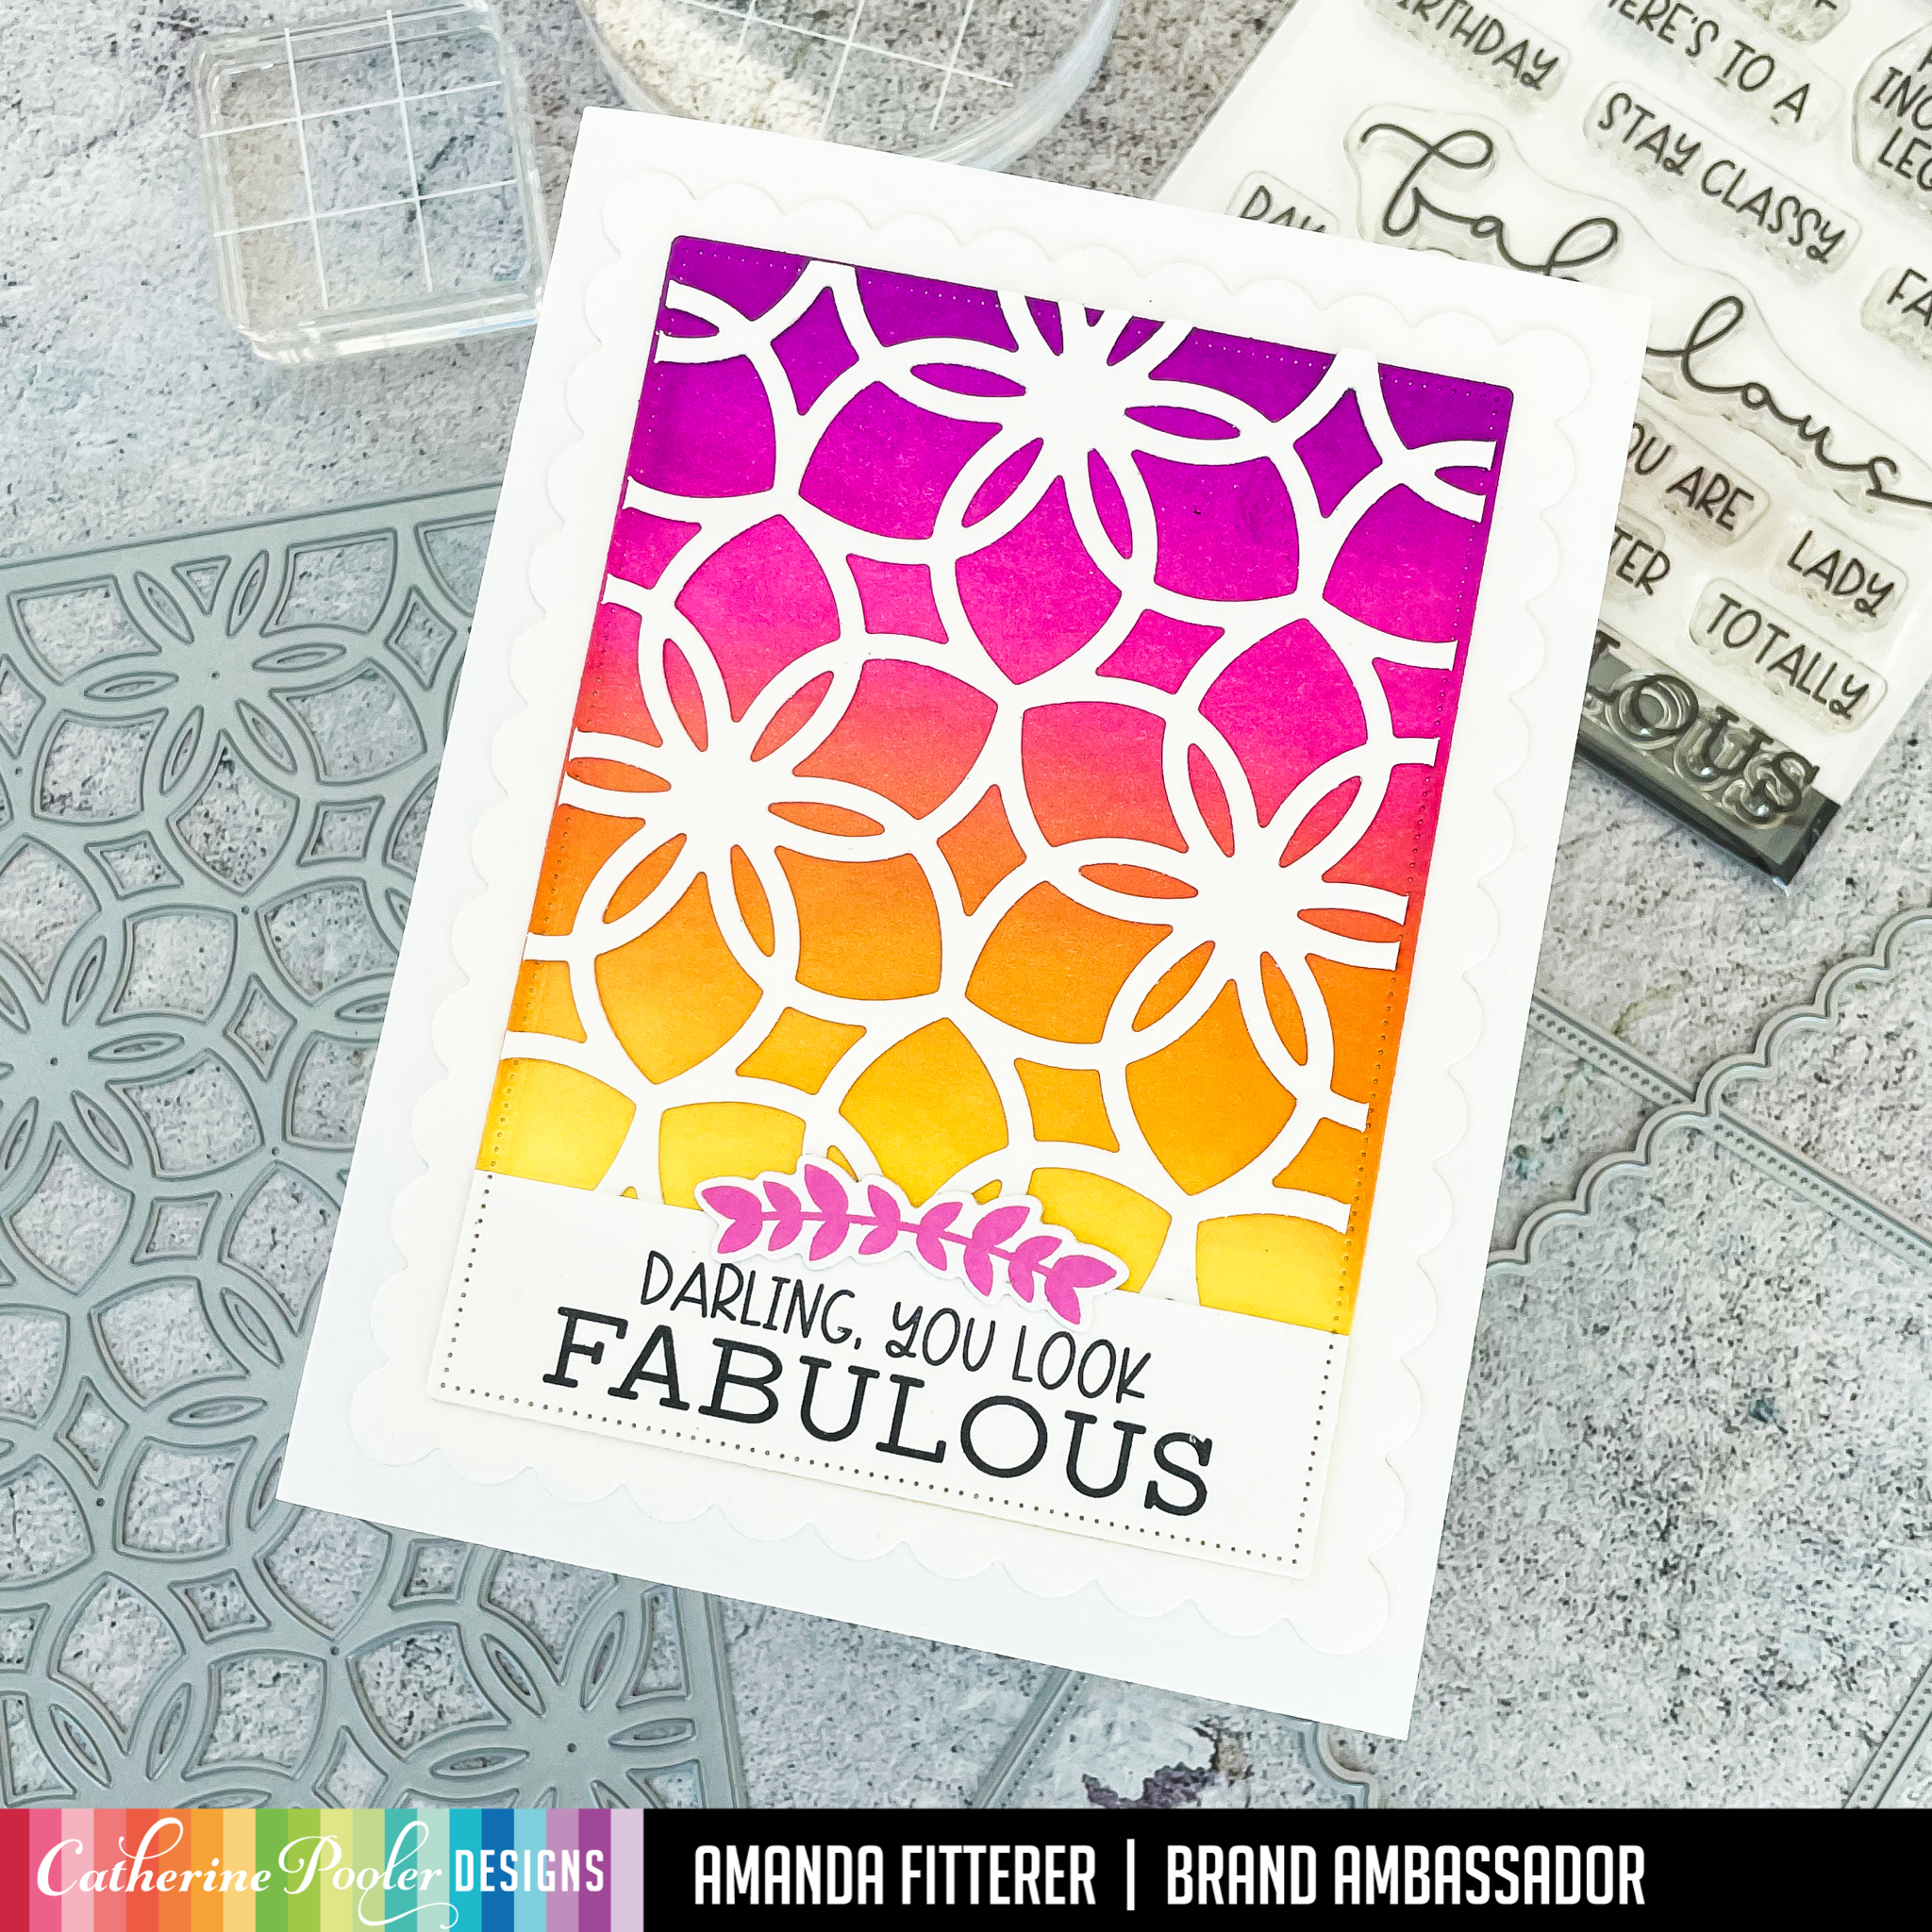
To make this card, I cut 4 of the Fabulous Word Die out of white cardstock.
I glued each of them on top of one another. Then I dabbed the die cut onto a Embossing Ink. I added Glitz Wow! Embossing Powder to it and then used a heat tool to melt the powder.
I ink blended Orange Peel, Pink Champagne, and Tranquil onto a piece of white cardstock. I die cut a panel using the Flower Power Slimline Die and then cut it down to fit onto my blended panel. I also die a Nested Stitched Heart out.
I used glue and 3D foam squares to adhere my card to my card base.
You can shop the new release using my affiliate link here or by clicking on the links in this post! It doesn’t cost you anything, but it does allow me to buy more crafty goodies to share more projects with you!
I hope you love this card as I much as I loved making it! Xx, Amanda
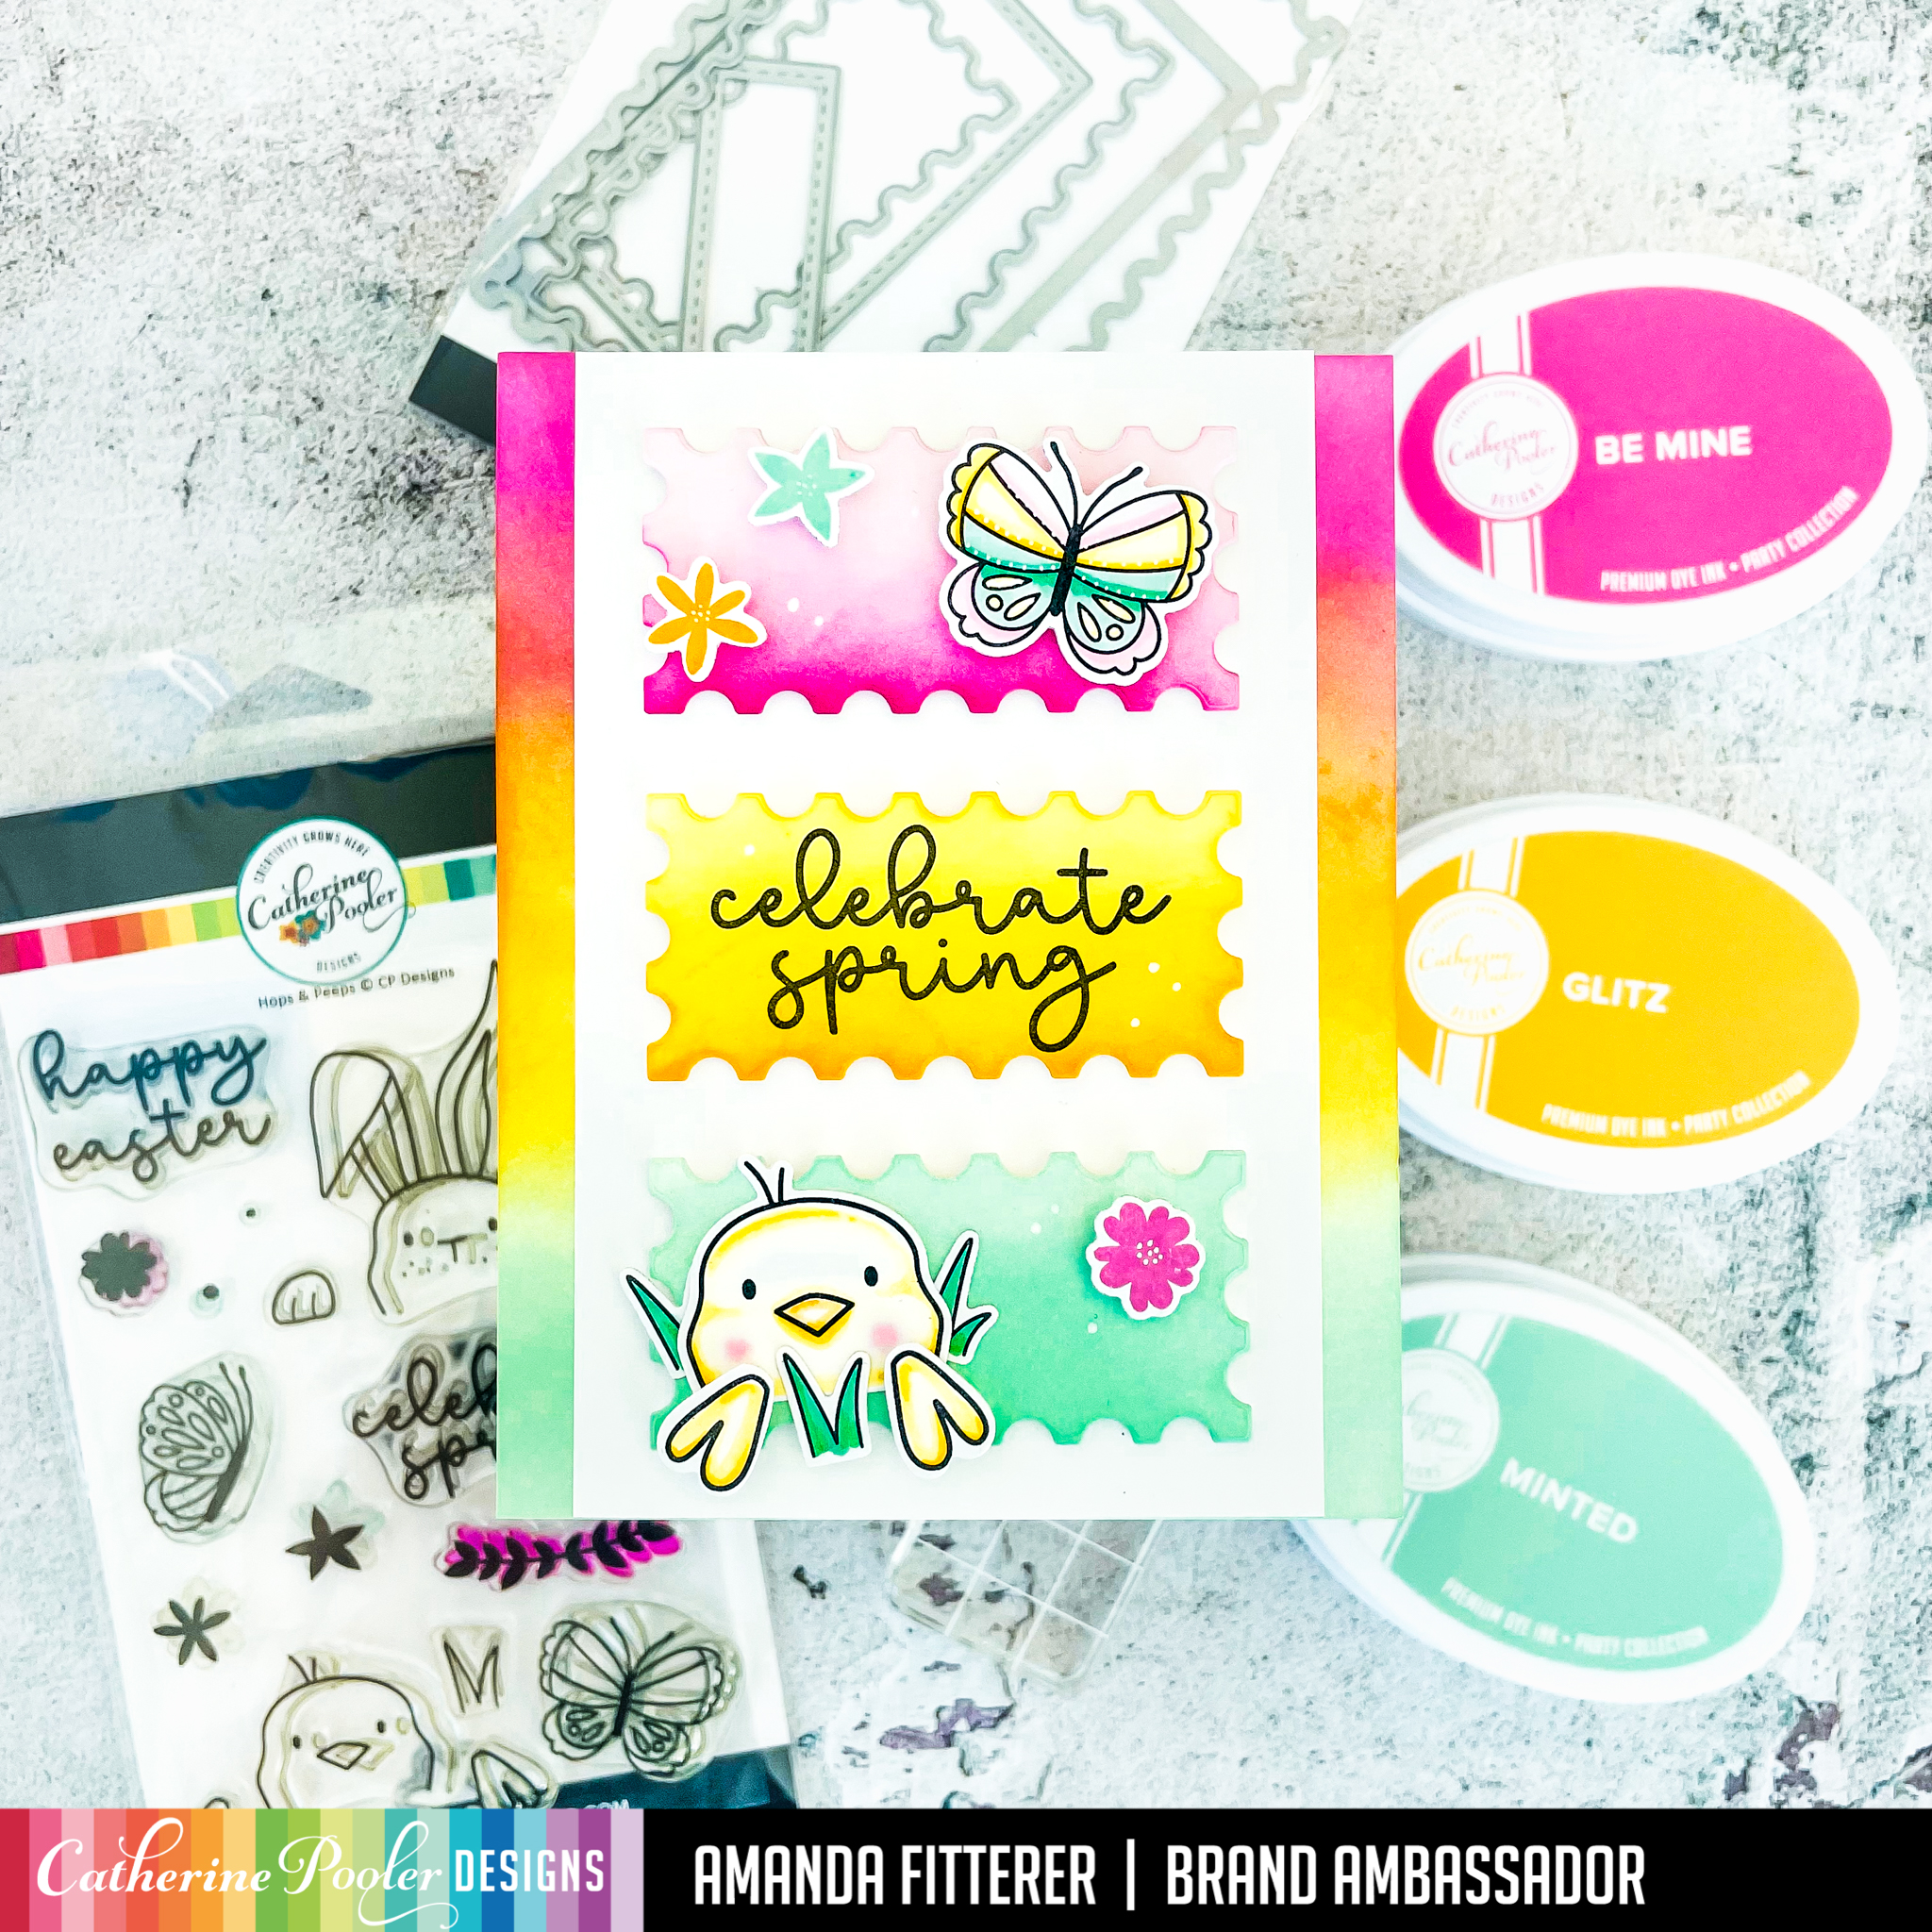
Hey crafty friends! Are you a StampNation member?! If so, you can buy this release Celebrate Spring Release NOW! If you’re not, that’s ok! You can purchase starting tomorrow!
I die cut 3 of the small Notecard Postage Dies and then ink blended them with Be Mine, Glitz, and Minted. I used the same colors to blend my background.
I stamped my Hops & Peeps Stamp Set images out, colored them with Copic markers, and then die cut them with the coordinating dies. I propped everything up with 3D foam squares!
The new Celebrate Spring Release will be available to StampNation members TODAY at Noon EST! For everyone else, you can purchase starting Weds 3/9/22 at 9 AM EST!
You can shop the new release using my affiliate link here or by clicking on the links in this post!
I cannot wait to share more cards showcasing this amazing release! See you back here soon!!! Xx, Amanda
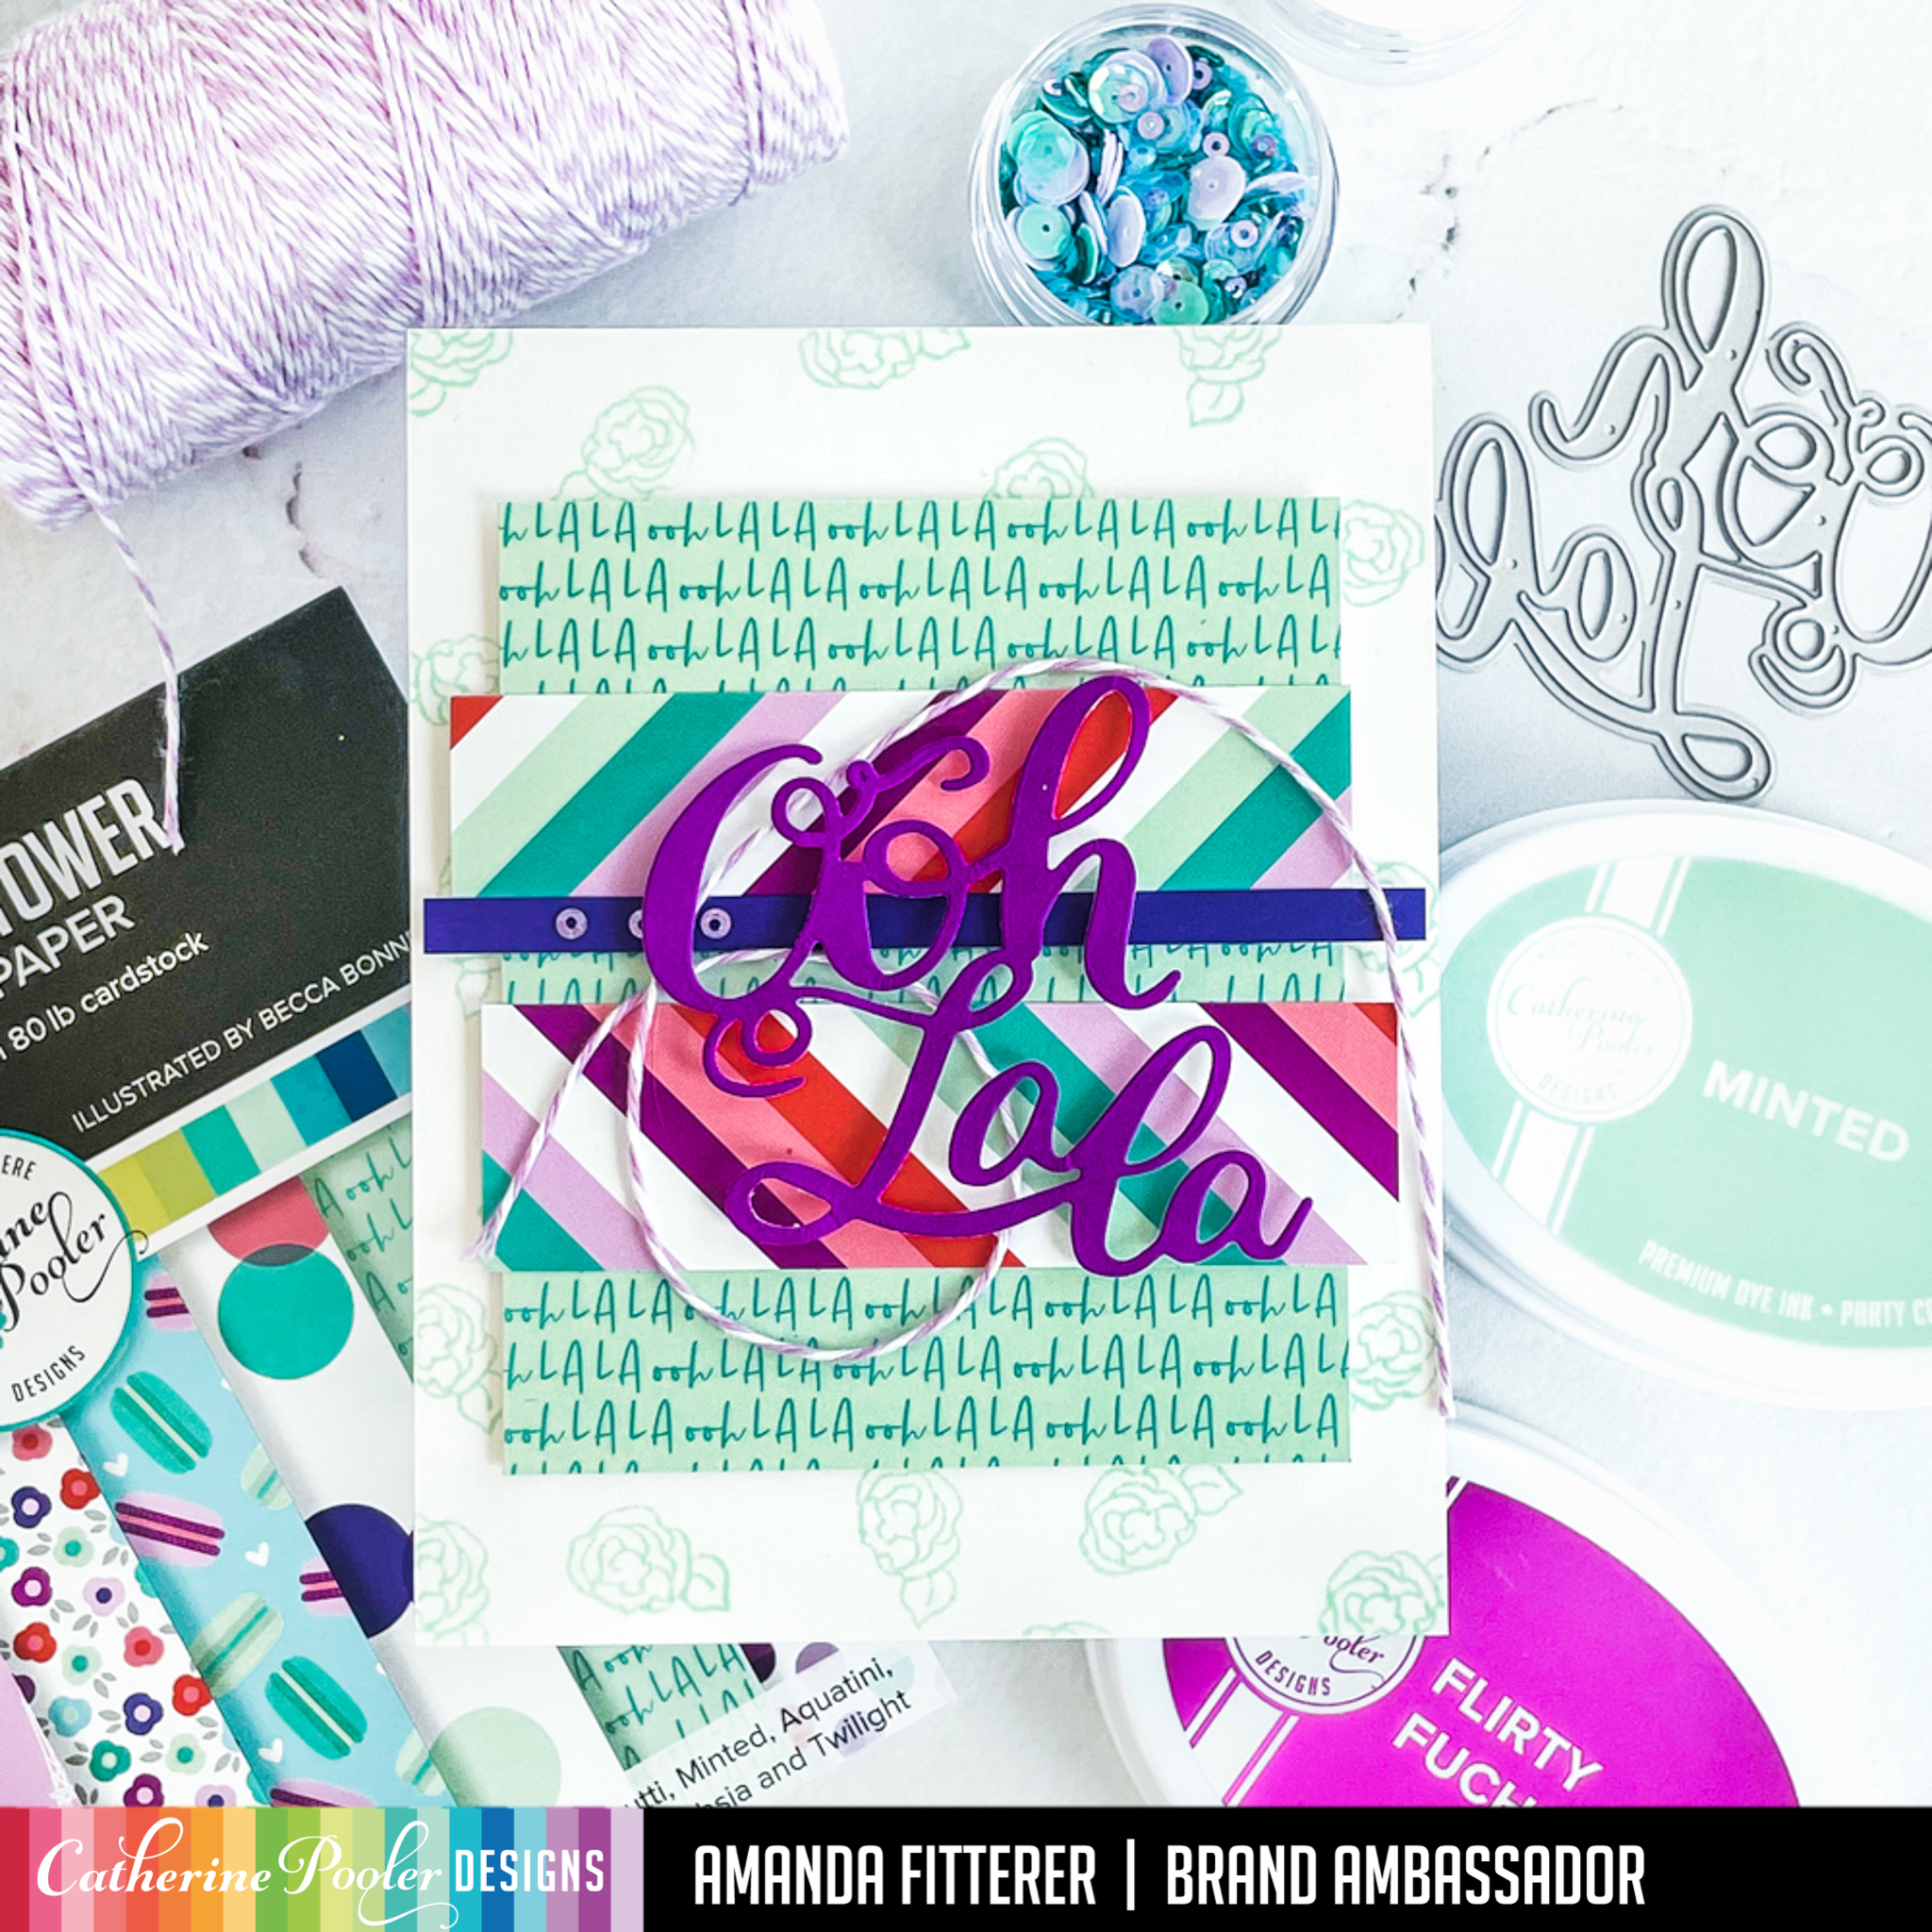
I cut out my layers using the Scallops & Dots Dies. I ink blended Flirty Fuchsia, Pucker Up, Tiki Torch, and Limoncello on my dotted layer. I cut out my Flower Power Slimline Die in white cardstock and then trimmed it to the same dimensions as my ink blended layer. I also cut a small panel of white using the dotted layer for my sentiment.
The new Celebrate Spring Release will be available to StampNation members TOMORROW 3/8/22 at Noon EST! For everyone else, you can purchase starting Weds 3/9/22 at 9 AM EST!
You can shop the new release using my affiliate link here or by clicking on the links in this post!
I cannot wait to share more cards showcasing this amazing release! See you back here soon!!! Xx, Amanda
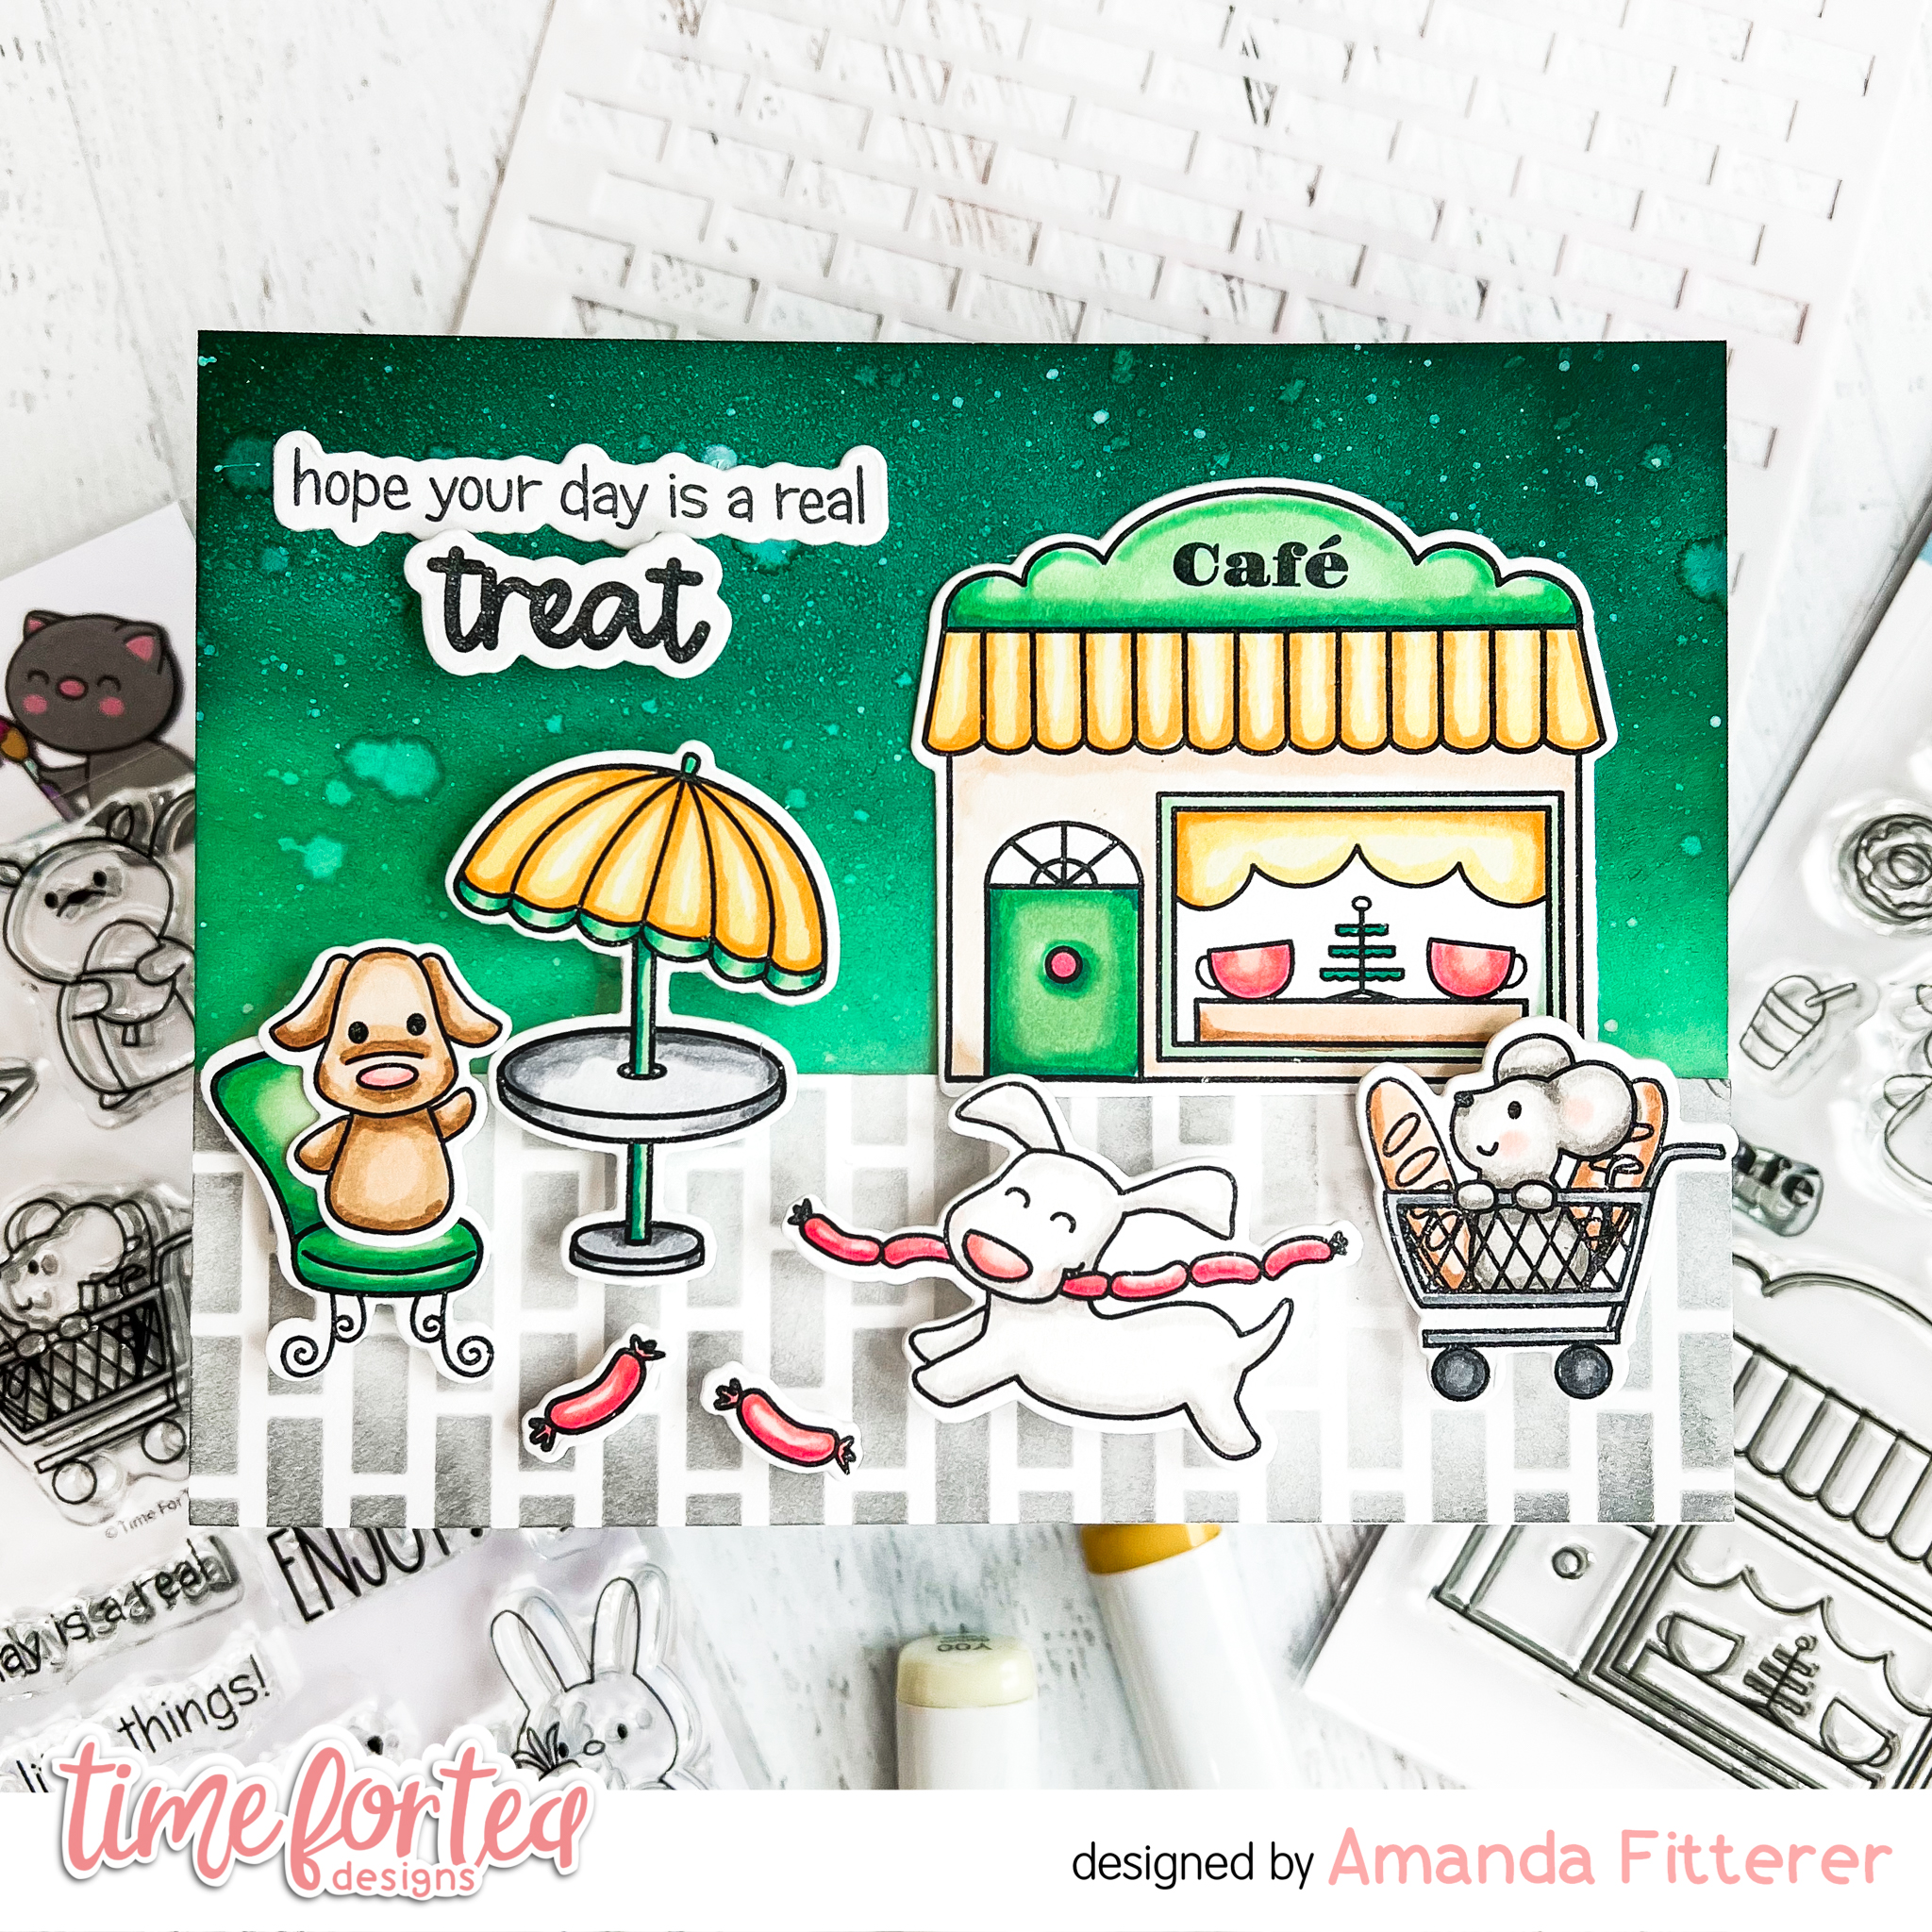
While waiting for that to dry, I cut a panel of white cardstock for the ground. I used the Tiled Wall Stencil and Twilight ink to create little pavestones.
Next, I stamped my images from the Enjoy the Little Things and Cafe Critters stamp sets, colored them with Copic markers, and then cut them out using the coordinating dies.
Finally, I assembled my card using liquid glue and 3D foam squares.
Thank you so much for stopping by my blog today! Please feel free to use any of the affiliate links below to purchase these cuties! It won’t cost you anything, but it WILL help fund my crafting addiction! :). Xx, Amanda
–> If you want to use my affiliate link to shop the New Release, click here.Thank you for all your support!!All the links in this post are affiliate links. This helps me to get some extra crafty cash to buy more goodies to share more projects with you!It is SO appreciated! <–
–> If you want to use my affiliate link to shop the New Release, click here.Thank you for all your support!!All the links in this post are affiliate links. This helps me to get some extra crafty cash to buy more goodies to share more projects with you!It is SO appreciated! <–
–> If you want to use my affiliate link to shop the New Release, click here.Thank you for all your support!!All the links in this post are affiliate links. This helps me to get some extra crafty cash to buy more goodies to share more projects with you!It is SO appreciated! <–
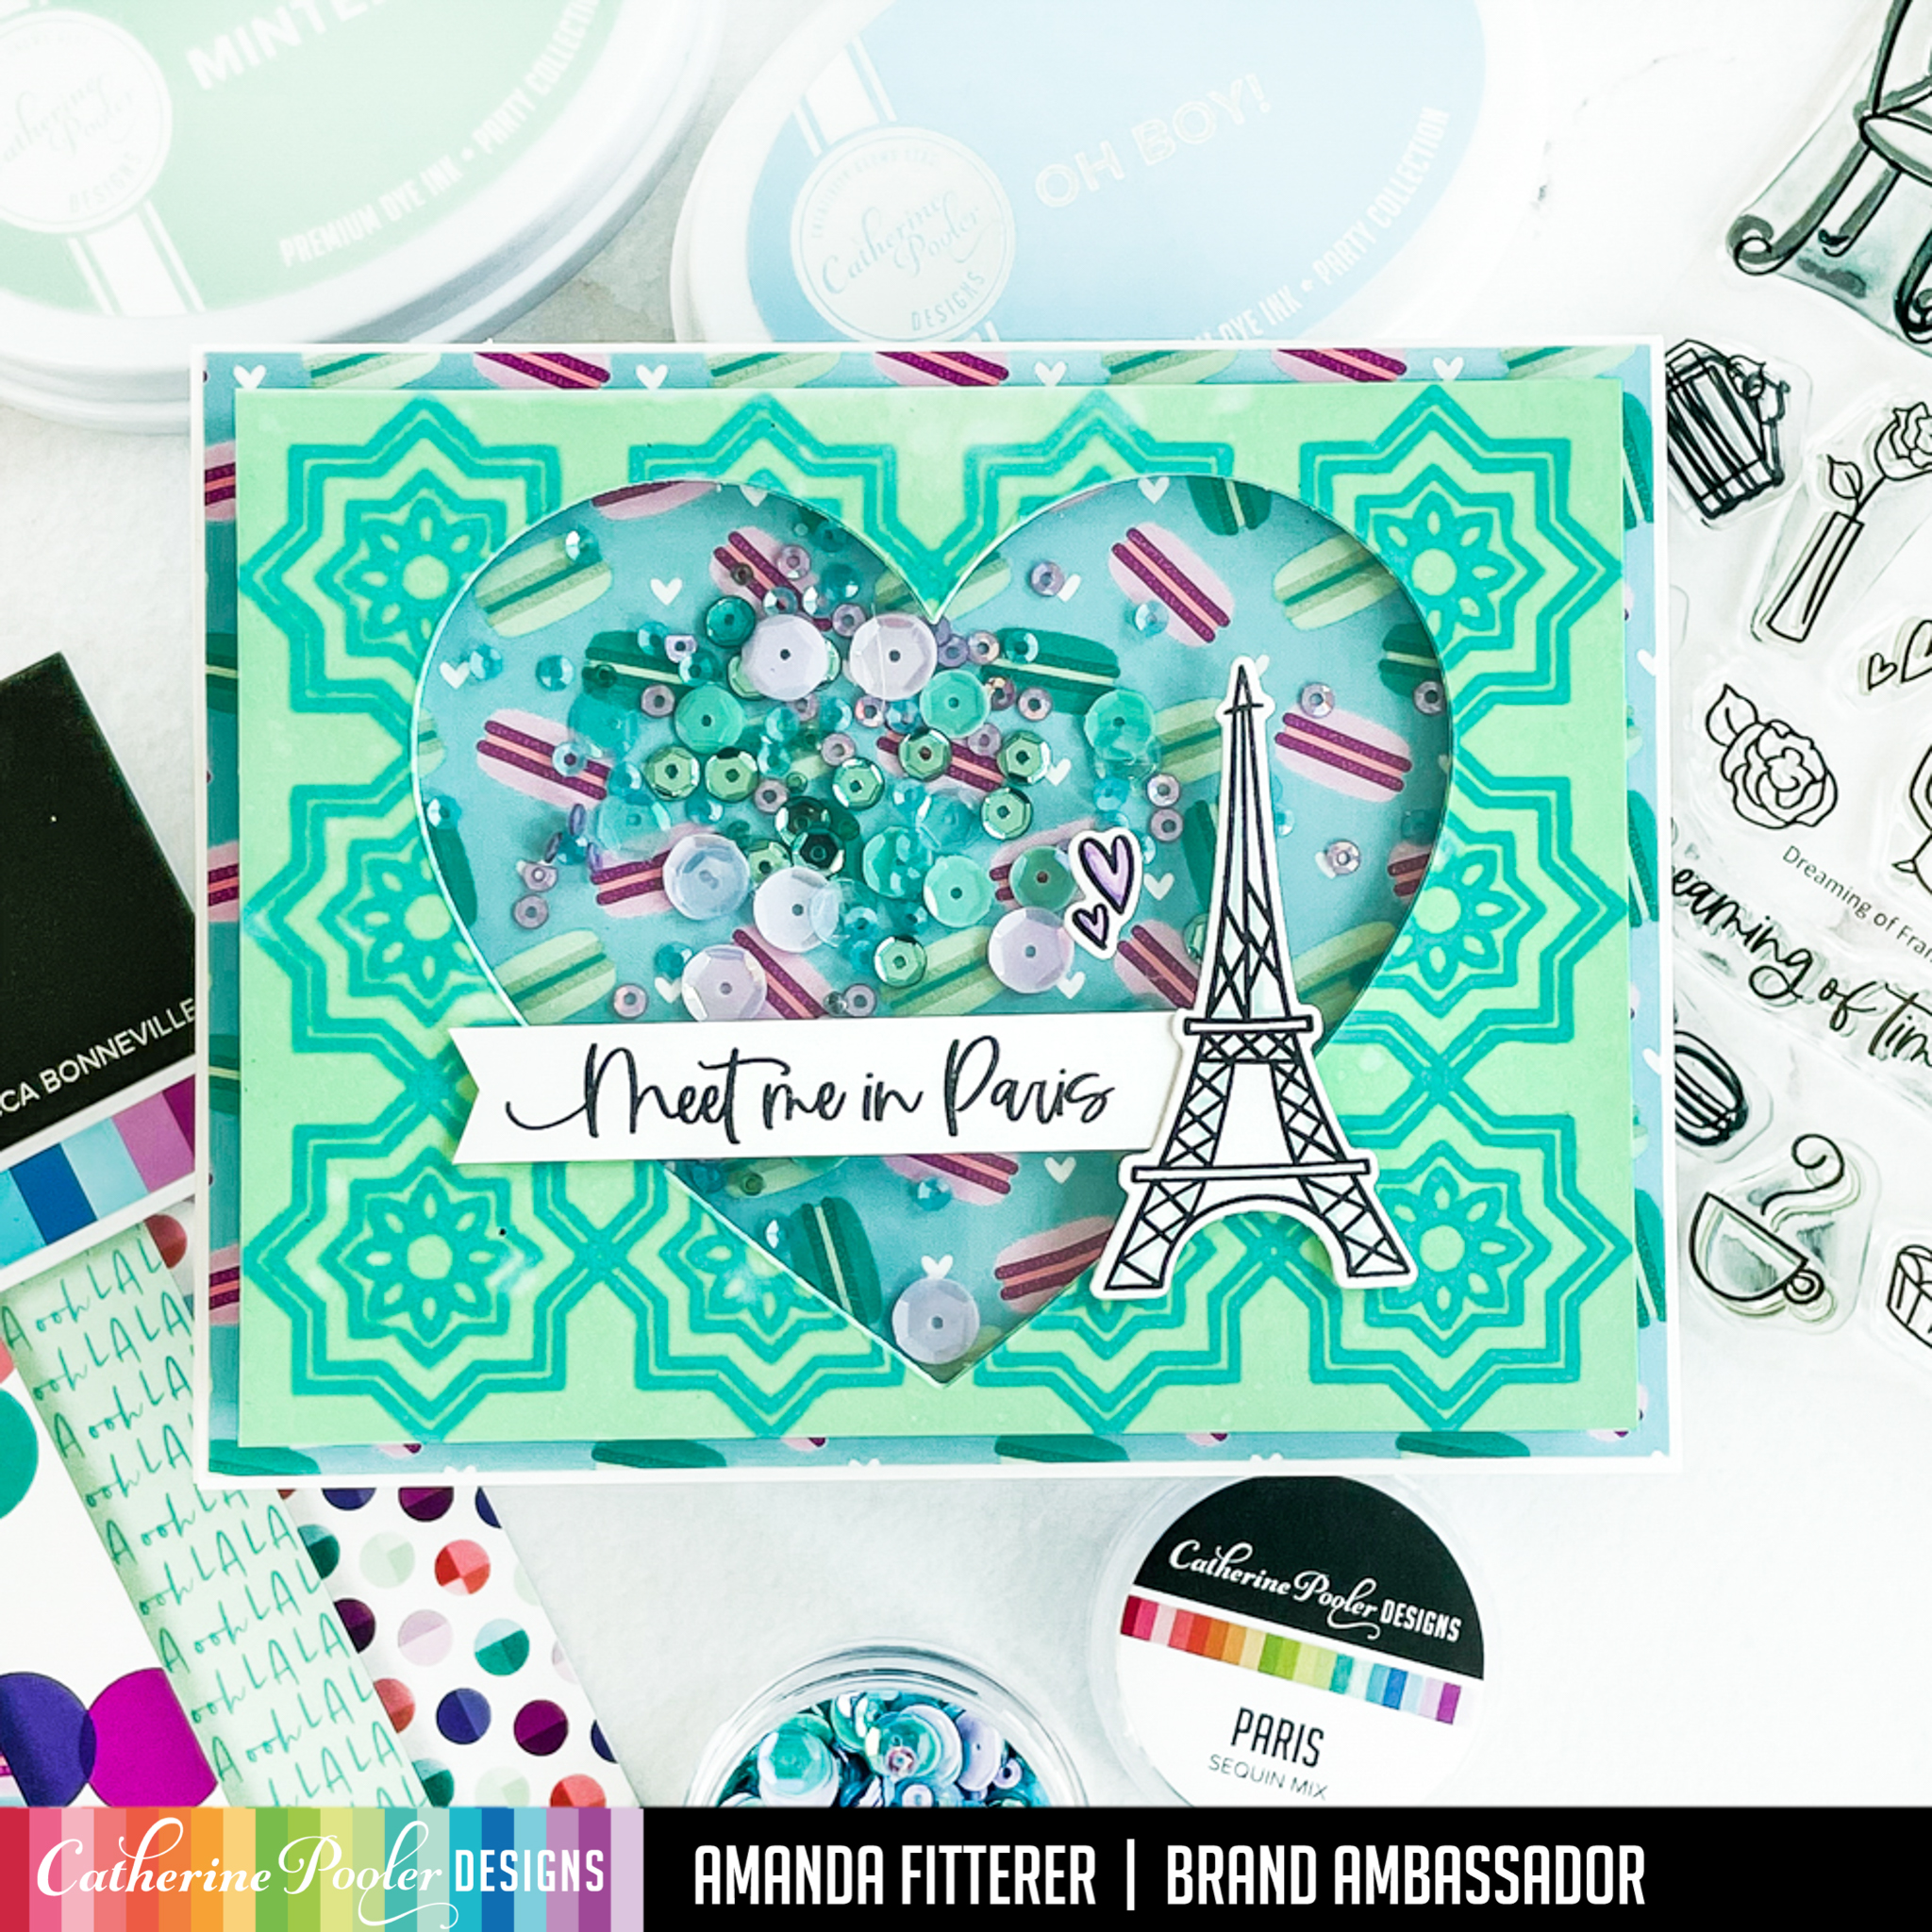
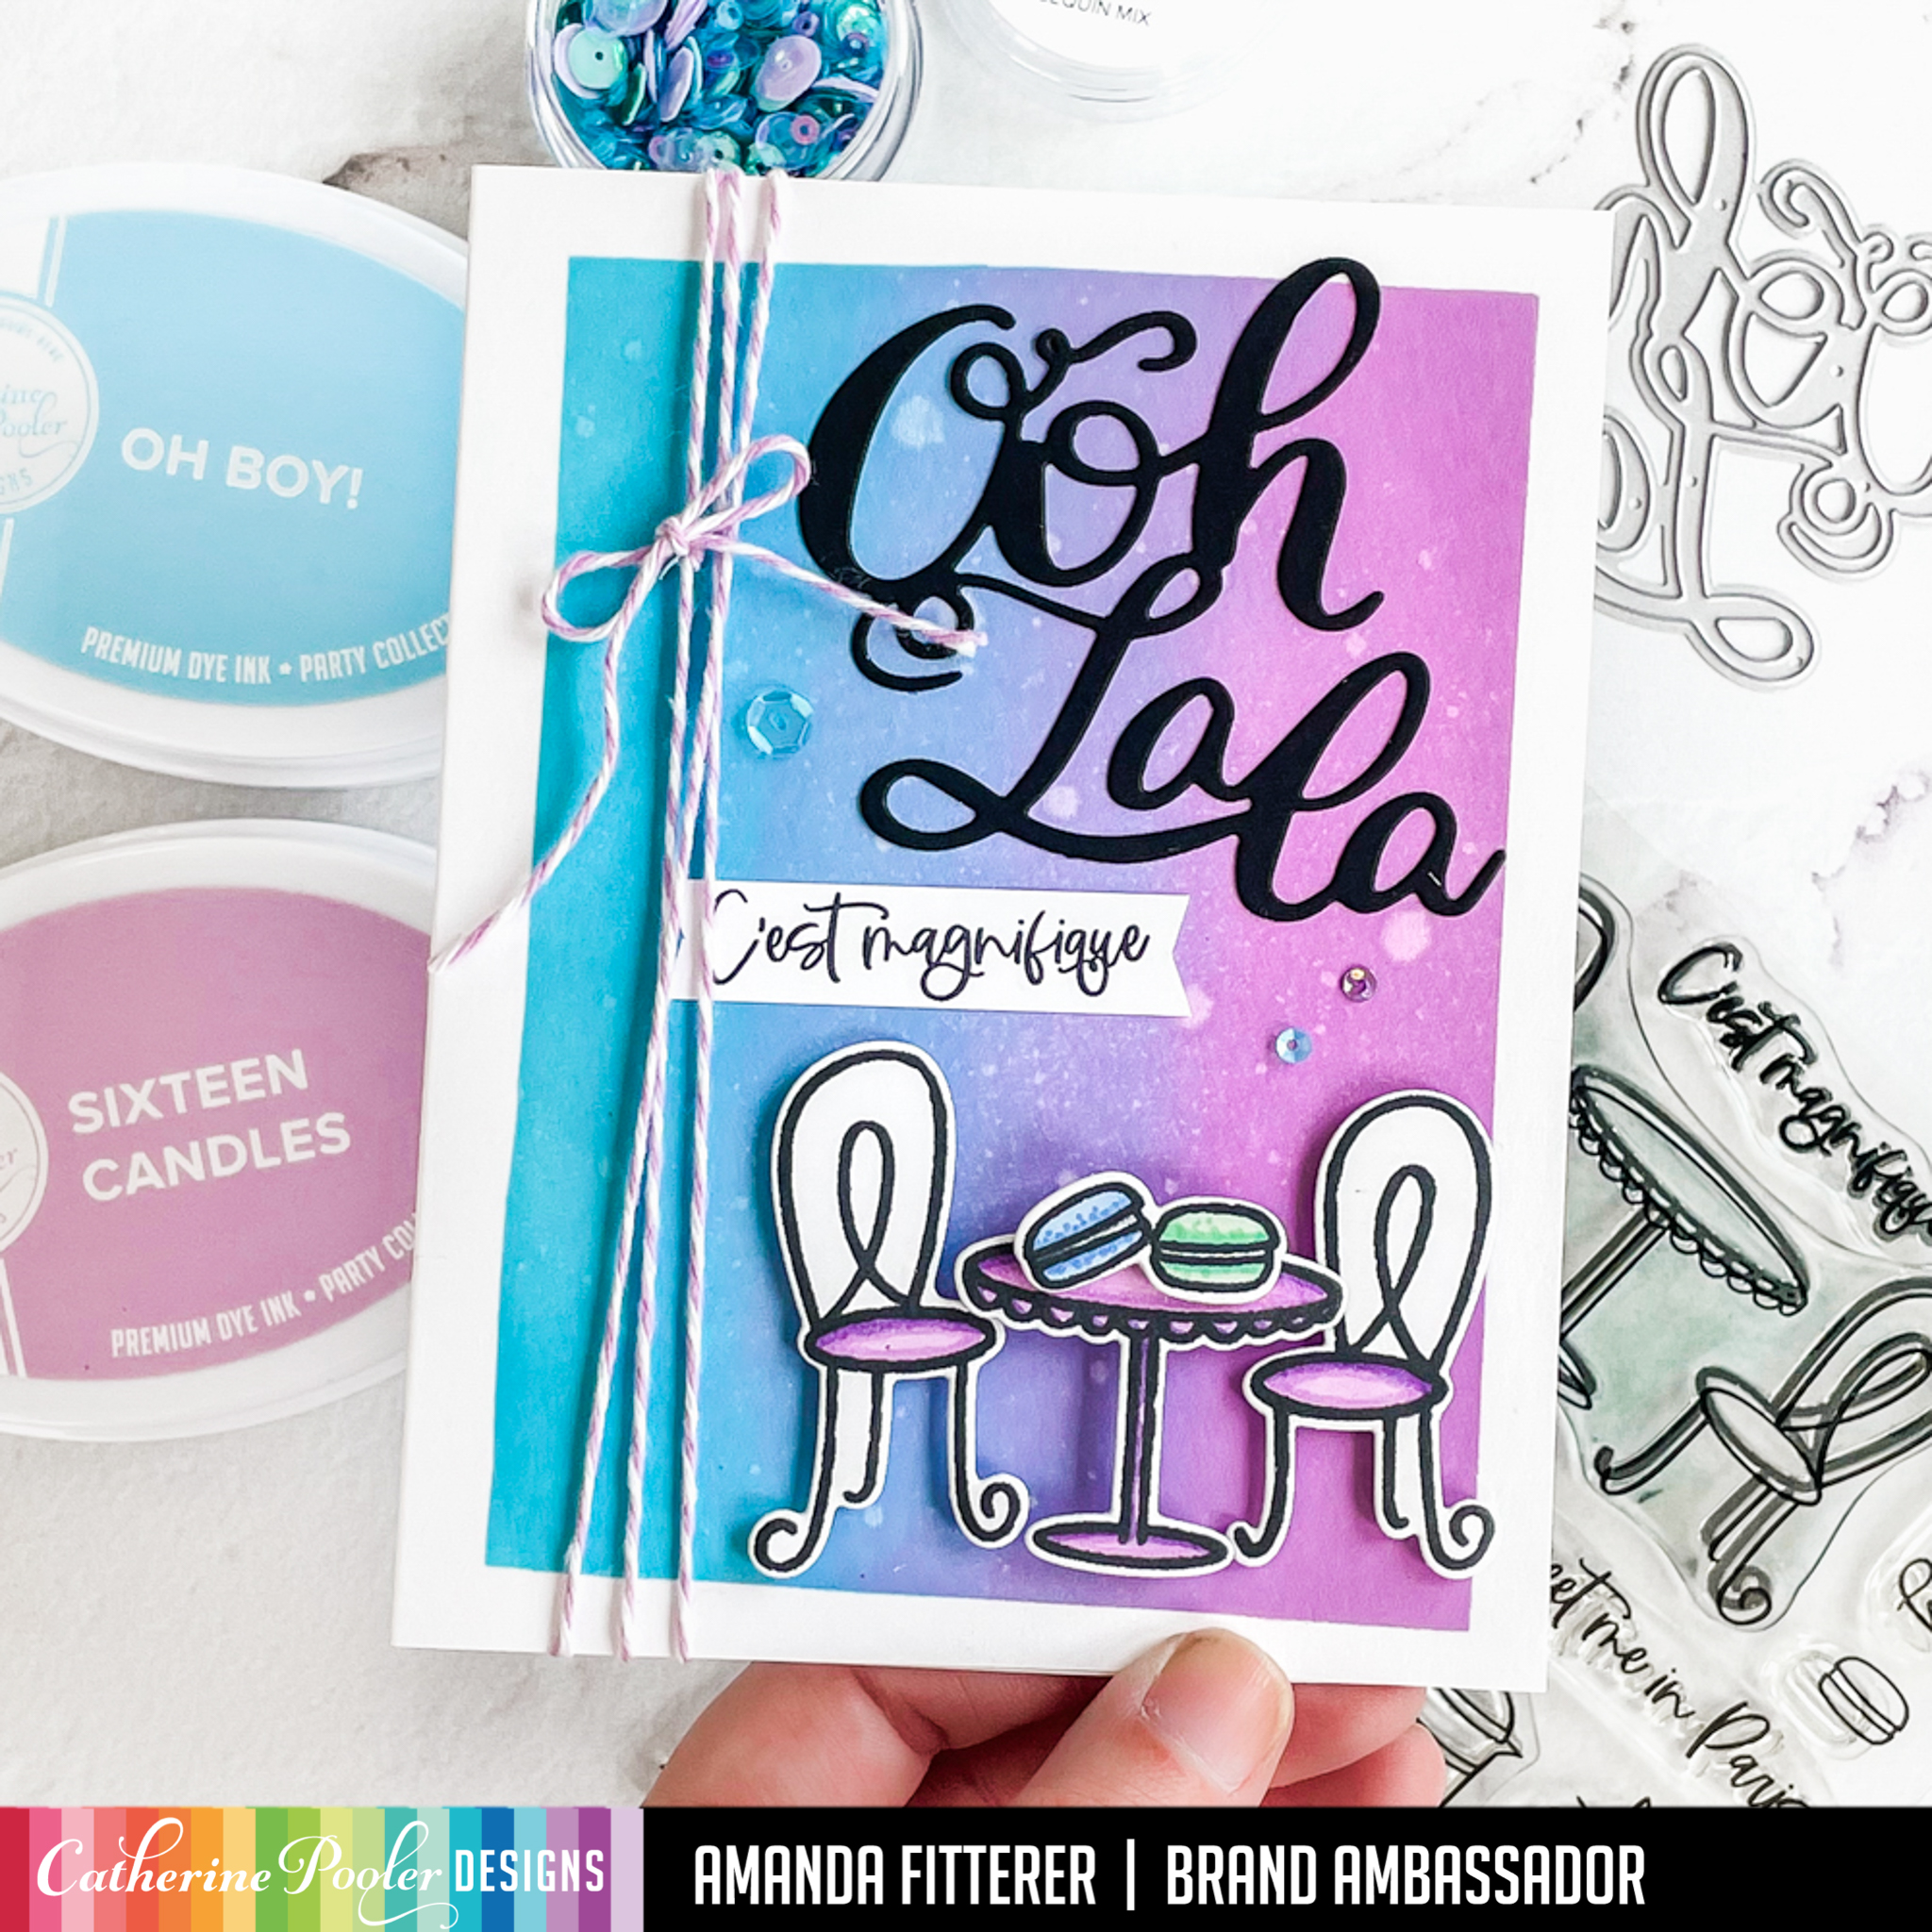
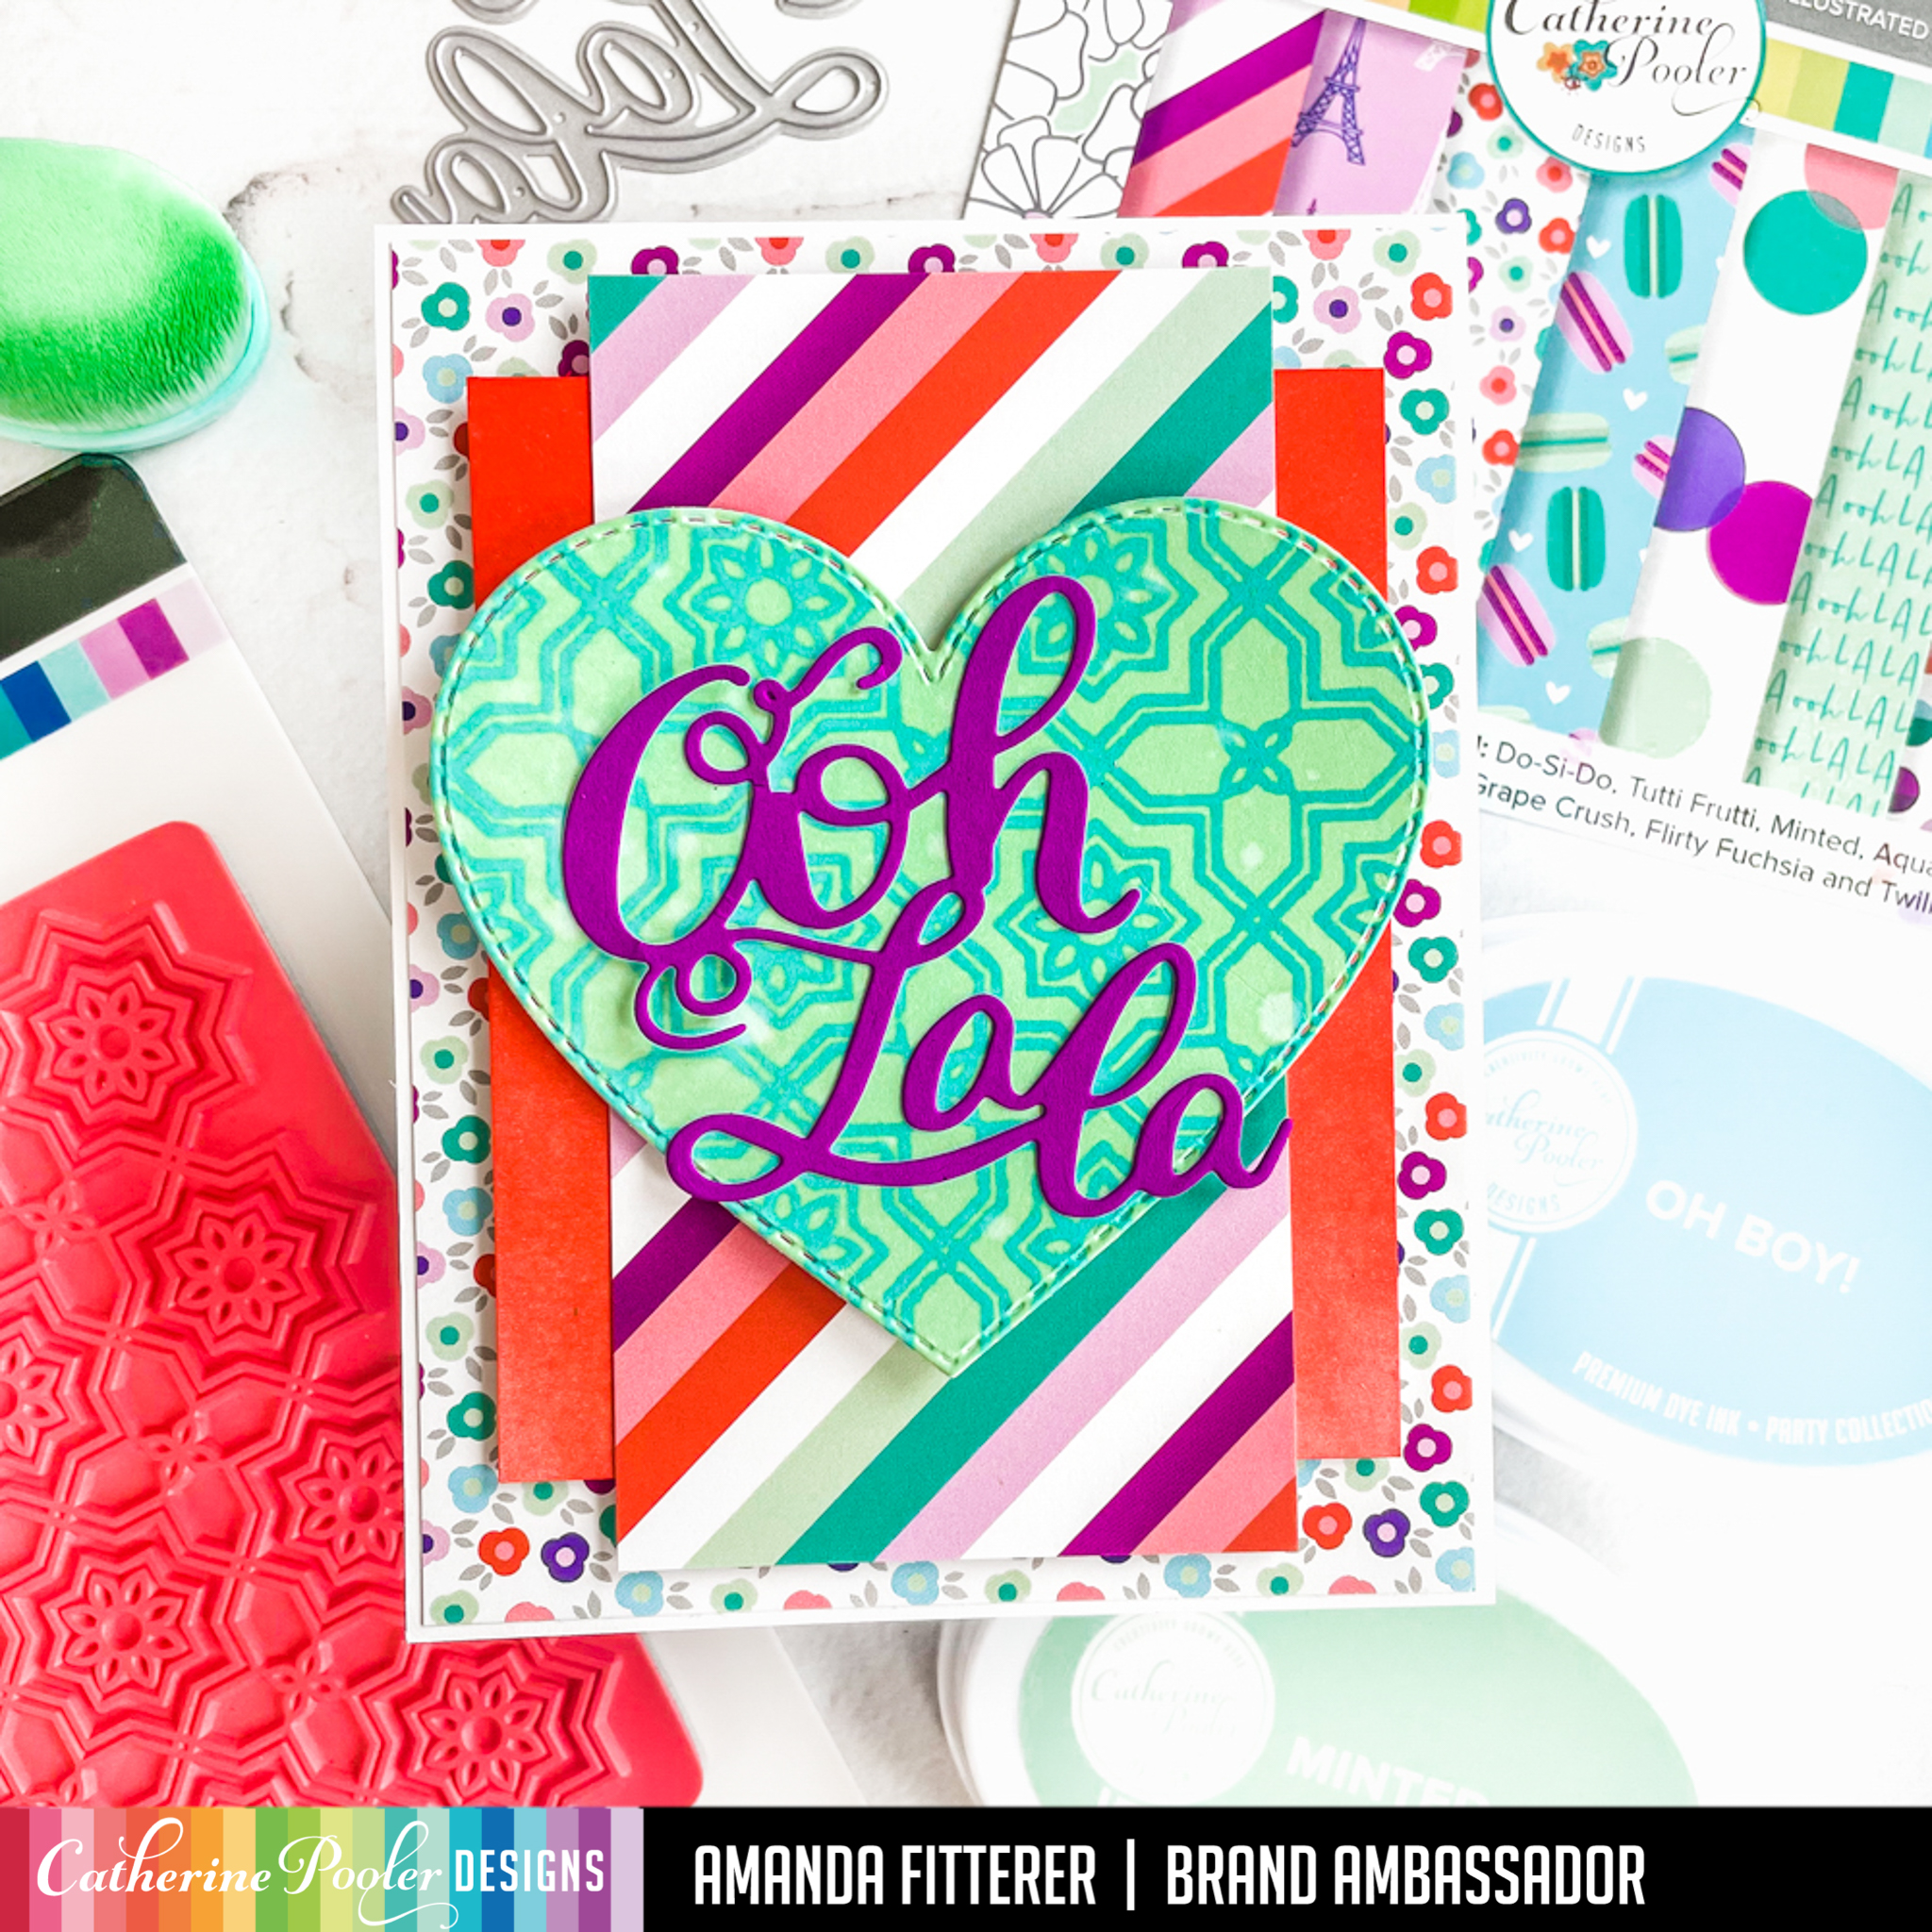
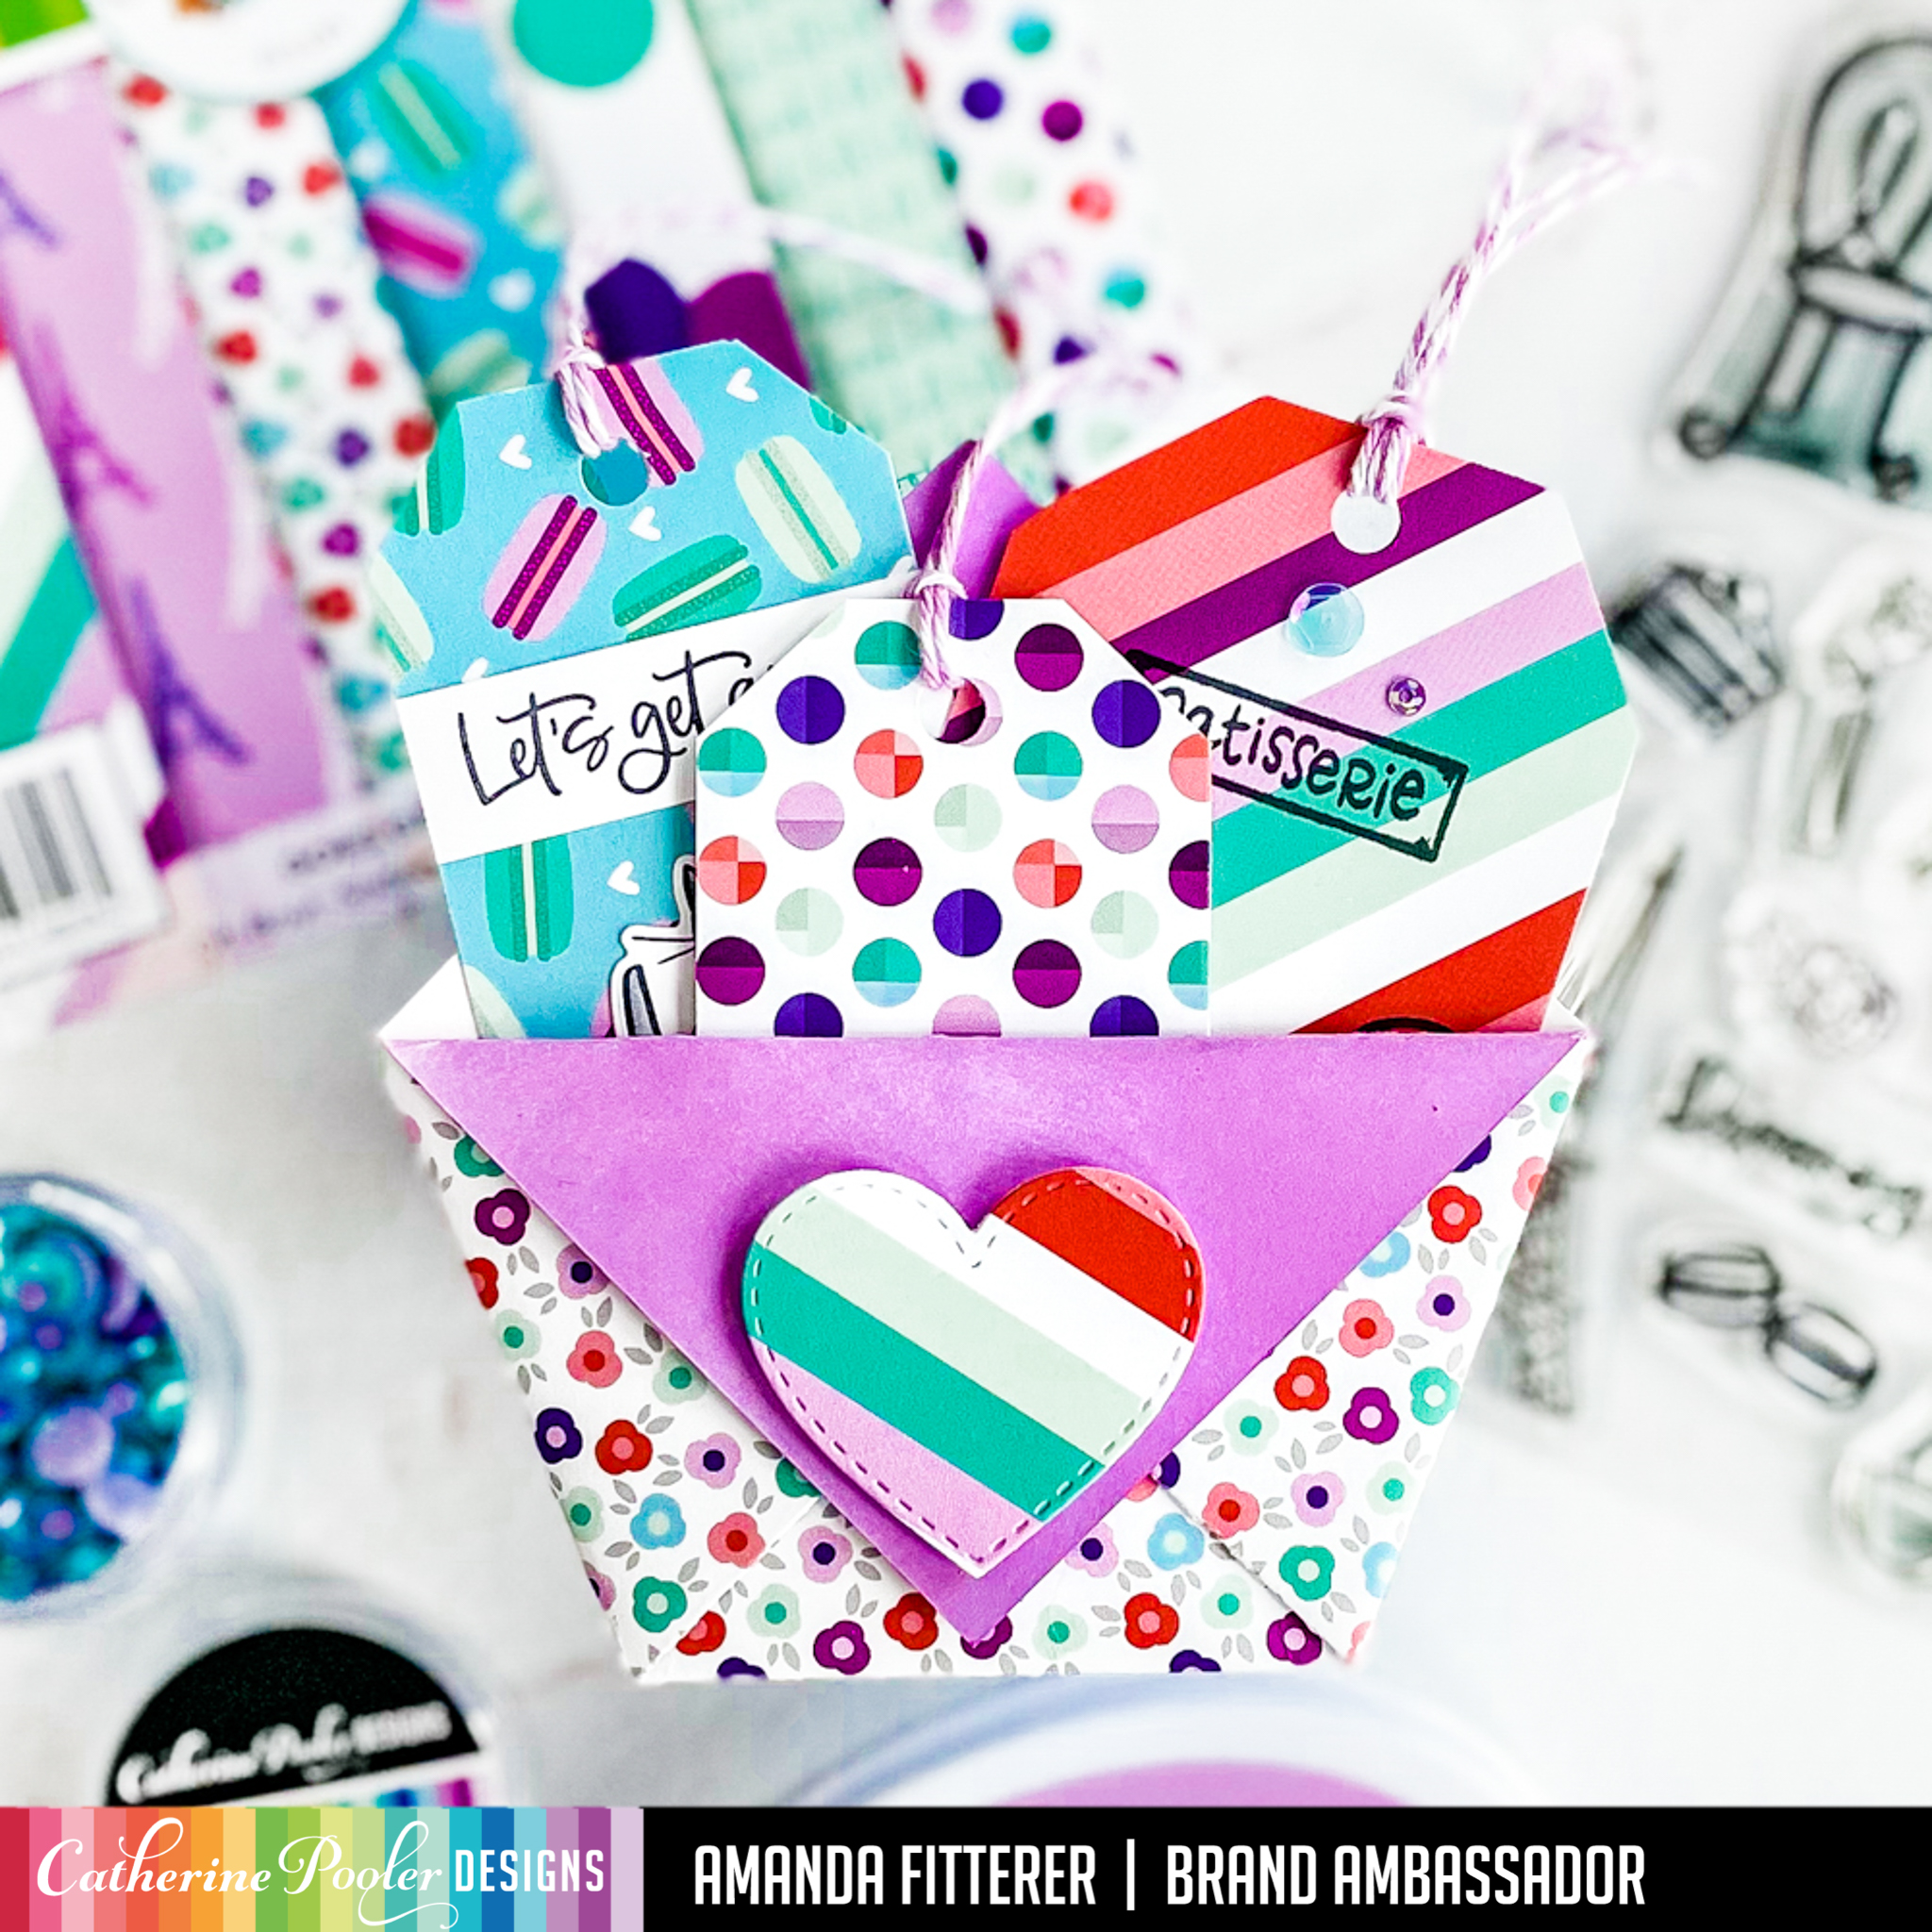
Did you catch the release of the new Global Adventure Pt. Deux Release from Catherine Pooler?! Omgoodness! The cuteness! This collection is taking you around the world! You HAVE to check it out!
Stay tuned for even MORE cards with this New Release!
–> If you want to use my affiliate link to shop the New Release, click here.Thank you for all your support!!All the links in this post are affiliate links. This helps me to get some extra crafty cash to buy more goodies to share more projects with you!It is SO appreciated! <–
I will continue to share more projects using this New Release over the next few days!!
–> If you want to use my affiliate link to shop the New Release, click here.Thank you for all your support!!All the links in this post are affiliate links. This helps me to get some extra crafty cash to buy more goodies to share more projects with you!It is SO appreciated! <–
Did you catch the release of the new Global Adventure Pt. Deux Release from Catherine Pooler?! Omgoodness! The cuteness! This collection is taking you around the world! You HAVE to check it out!
I will be back in the next few days to share some more cards using this New Release!
–> If you want to use my affiliate link to shop the New Release, click here.Thank you for all your support!!All the links in this post are affiliate links. This helps me to get some extra crafty cash to buy more goodies to share more projects with you!It is SO appreciated! <–
Well hey there, crafty friends! I sure hope you had a wonderful Christmas! Did you get any crafty goodies?! I hope so!!
Today, I’m sharing a Baby Shower card! I love interactive cards and the Slider Pop-up Dies make it so easy to make one quickly!
To create this card, I have blended some gorgeous Catherine Pooler blues on my cutouts from the Slider Pop-up Dies . Next, I’m spritzing the ink with water.
I’ve stamped my images from the Beary Big Heart and Chimply the Best stamp sets. Now, I’m ready to start coloring the images with Copic markers!
To create my leaves, I am using both the Amazonian Leaves and Forest Leaves Dies. To color the leaves, I used Limoncello and Tiara inks. I am gluing my leaves, sequins, and monkey on using Glubert Glue.
Using the Classic Sentiments stamp set and the Chimply the Best stamp set, I’ve created my sentiment on a piece of white cardstock.
Voila! So easy and fun! Plus, it will make a great Baby Shower card that is sure to be gushed over!
Thank you so much for stopping by my blog today! I hope you’ve enjoyed this post as much as I’ve enjoyed sharing it with you!! Xx, Amanda
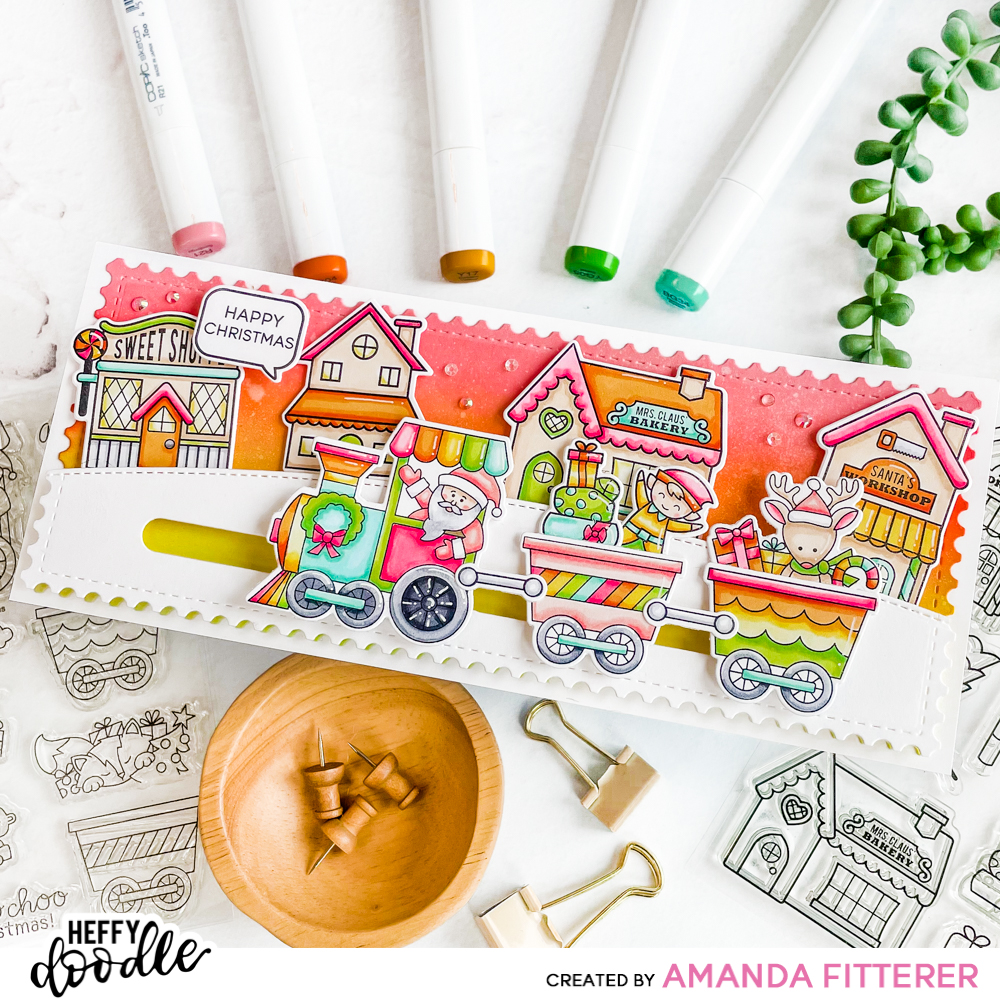
Welcome to the Heffy Doodle and Newton’s Nook Designs Collaboration Blog Hop! Design Team members from both companies are sharing inspiration using products from both companies! I am super excited to share my card with you!
To create this card, I’m starting with the Heffy Doodle Slimline Mini Mails Die and a piece of white cardstock trimmed to slimline size (3.5″x8.5″).
Next, I am stamping my images from the Newton’s Nook All About for Christmas stamp set and the Heffy Doodle Santa’s Village stamp set with the Maker Forte ReMARKable Eclipse Black ink. This is my favorite alcohol-friendly black ink!
Now, onto coloring my adorable images with Copic markers!
To create my hill and slider element, I’m using the Heffy Doodle Slimline Scenery Dies and the Straight Slider Dies. To create a longer slider, I’m die cutting 2 of the sliders right next to each other.
Using Deep Foam tape, I’m propping up my hill to give me room for a button to use as my sliding element. After attaching my trains to the buttons, I can start assembling the rest of the card using 3D foam squares and glue!
Here’s another photo of the finished card and some close-ups!
And that’s it for my card!! I hope you enjoyed my part in the Blog Hop!
To be entered to win the giveaway, all you need to do is comment at each stop along the Blog Hop! Newton’s Nook Designs will be giving away $35 and Heffy Doodle will be giving away £25 to their respective stores! Be sure to comment before 11:59 PM EST on Dec 28th to be entered to win!