
Hey crafty friends!!! It’s another Christmas in July post! Scrapbook.com just released some really fun Christmas products and they asked ME to make some projects with them! How could I refuse?! I love their products!
If you want to shop Scrapbook.com using my affiliate link, click here. That will get me a little percentage of your purchase so I can keep buying new crafty supplies and sharing inspiration with you! 🙂
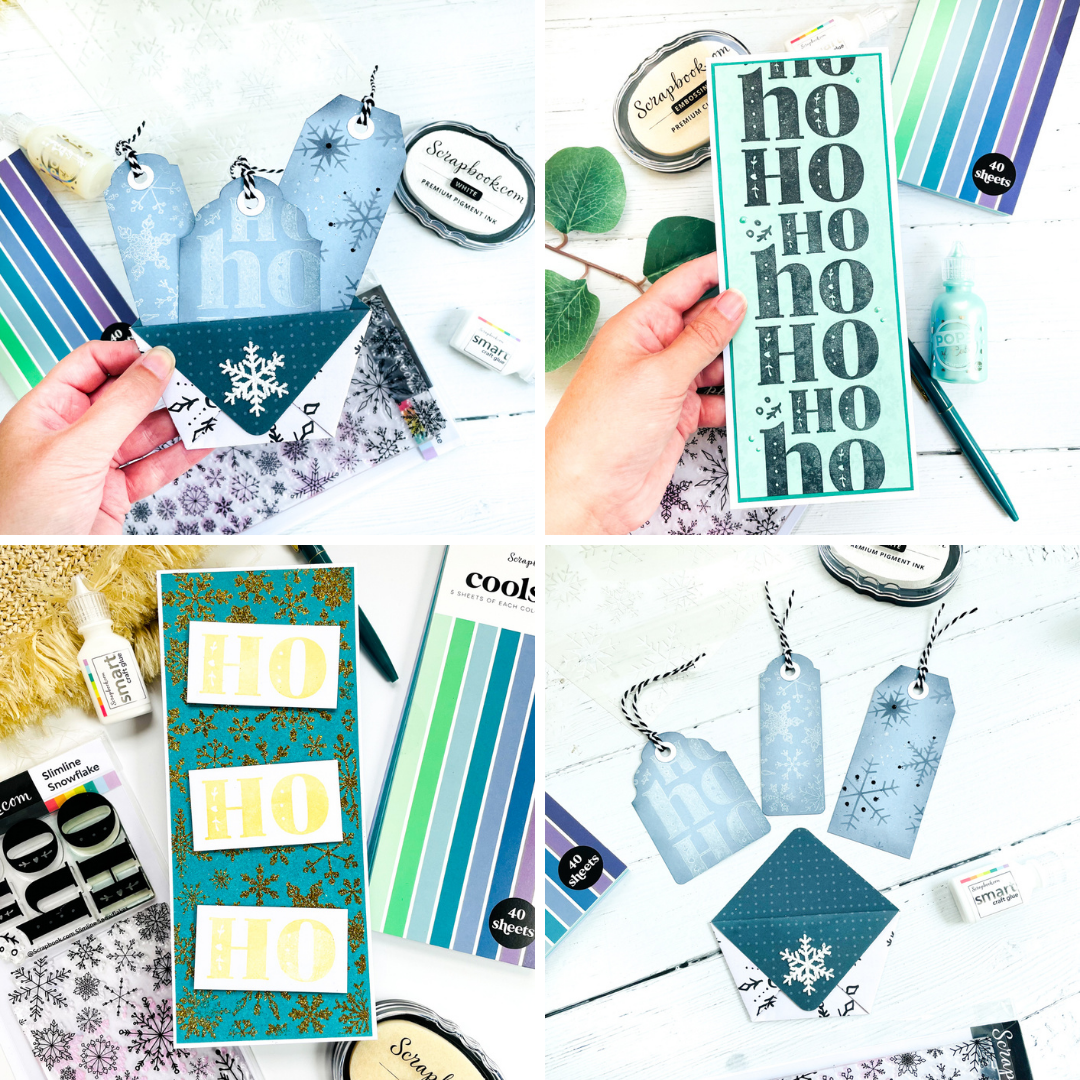
Now onto my projects! My first project is a slimline card!

I’m grabbing my Scrapbook.com Premium Clear Ink Pad and the Slimline Snowflake stamp set. Using my MISTI, I’m placing my Cools Smooth Slimline colored cardstock into the MISTI and stamping the snowflakes with the clear ink. This will create a “watermark” effect in my background that looks really cool in person.
Next, I’m stamping my “Ho Ho Ho” all the way down the front of the card with Memento Tuxedo Black Ink. I’m using the Smart Glue to adhere my layers together and then adding some Seafoam Pops of Color for a finishing touch!


For my next project, I’m going to make a folded envelope with some tags inside!

To create this cute little pocketfold envelope, I’m starting with a piece of double sided Snowflakes Crate Paper. See the gallery below to watch me fold it step-by-step:


To round off the edges of the envelope, I’m using the 3-in-1 Corner Punch. I’m using my Smart Glue again to adhere the flaps down.
Now that my pocketfold is ready, I’m ready to move onto my tags.
I’m creating my tags using the Cools Smooth Slimline Cardstock and a Rounded Tag Punch and a Rectangular Tag Punch.
I’m using the Snowflake Stencil with black ink and the Slimline Snowflake Stamps with Pure White Ink to decorate my tags.
To add glitter to one of my tags, I’m using the Clear Pops of Color with some Black Glitter on top.
For my snowflake, I used the Snowflake Stencil and some Fluff It Paste to create a 3D snowflake.


The last step is to add some twine to each tag and place them in the pocketfold envelope!


My final project is another slimline card!

To make this card, I’m stamping the Slimline Snowflake in Scrapbook.com Premium Clear Ink Pad and applying some gold glitter on top.
For my sentiment, I’m stamping with Metallic Gold Ink. I’m masking off the part of the stamp I don’t want to ink up with Memo Tape.


Thank you SO much for stopping by my blog today! I appreciate YOU so much!
Just a reminder, clicking on the products above will go to my affiliate links for those products! I appreciate all the extra spending money I can get! I enjoy sharing my inspiration with you!
Xoxo, Amanda