Shipping Update: Orders placed after July23rd will begin processing on July 31st.
(Normally, ships SAME or NEXT Day!) Free US shipping on orders of $100 or more! Dismiss
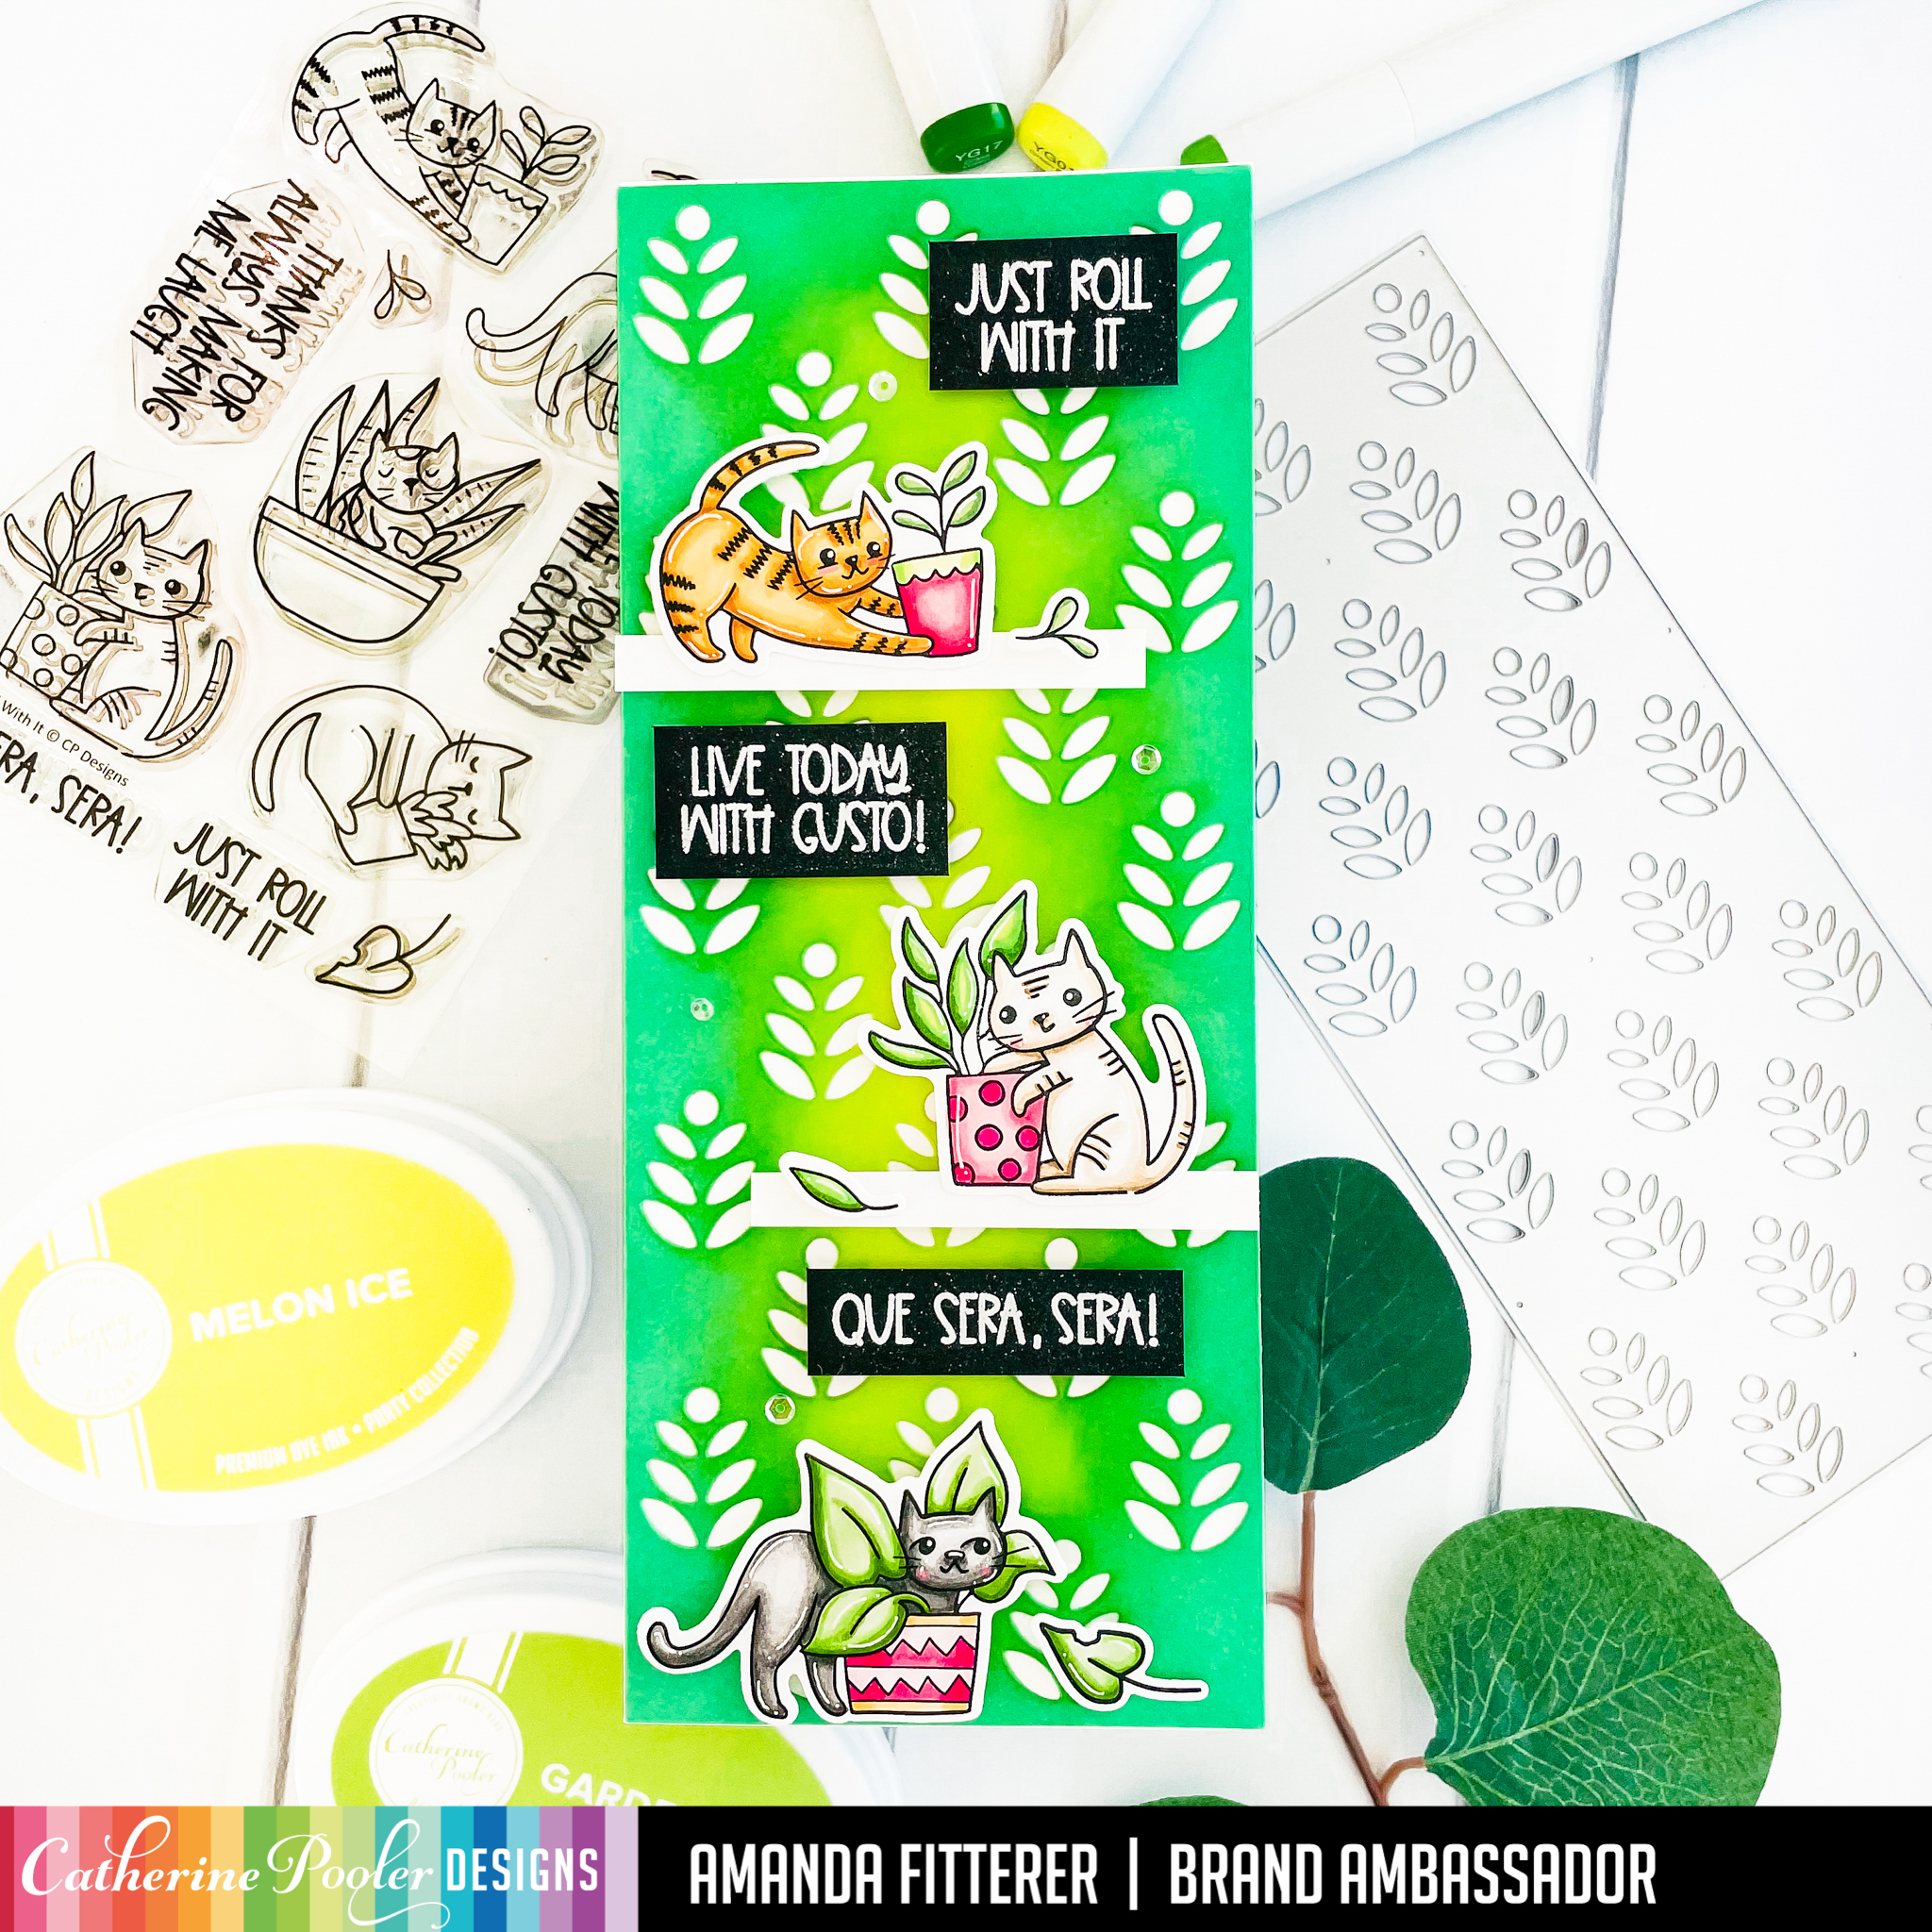
The Catherine Pooler New At Home Collection Release is available for purchase!! I am in love with the Just Roll With It stamp set! Those little kitties are quite the mischievous little ones!! Plus, I just love potted plants! They’re so much fun to color!
You can shop the entire Just Roll With It Collectionhere. I used the Plant Stand Slimline Die for my background and blended Melon Ice and Garden Party. I created some cute little shelves for my kitties using white cardstock. I stamped my images from Just Roll With It Stamp Set and colored those cuties with Copic markers. I used the coordinating dies to cut them out. Finally, I used 3D foam squares to attach everything to the front of my card!
If you shop with my affiliate link, I can earn a little extra money at no extra cost to you. All you have to do is click here and start shopping or use the links in this post!
Thank you so much for stopping by my blog today!! Hope you have a wonderful weekend!
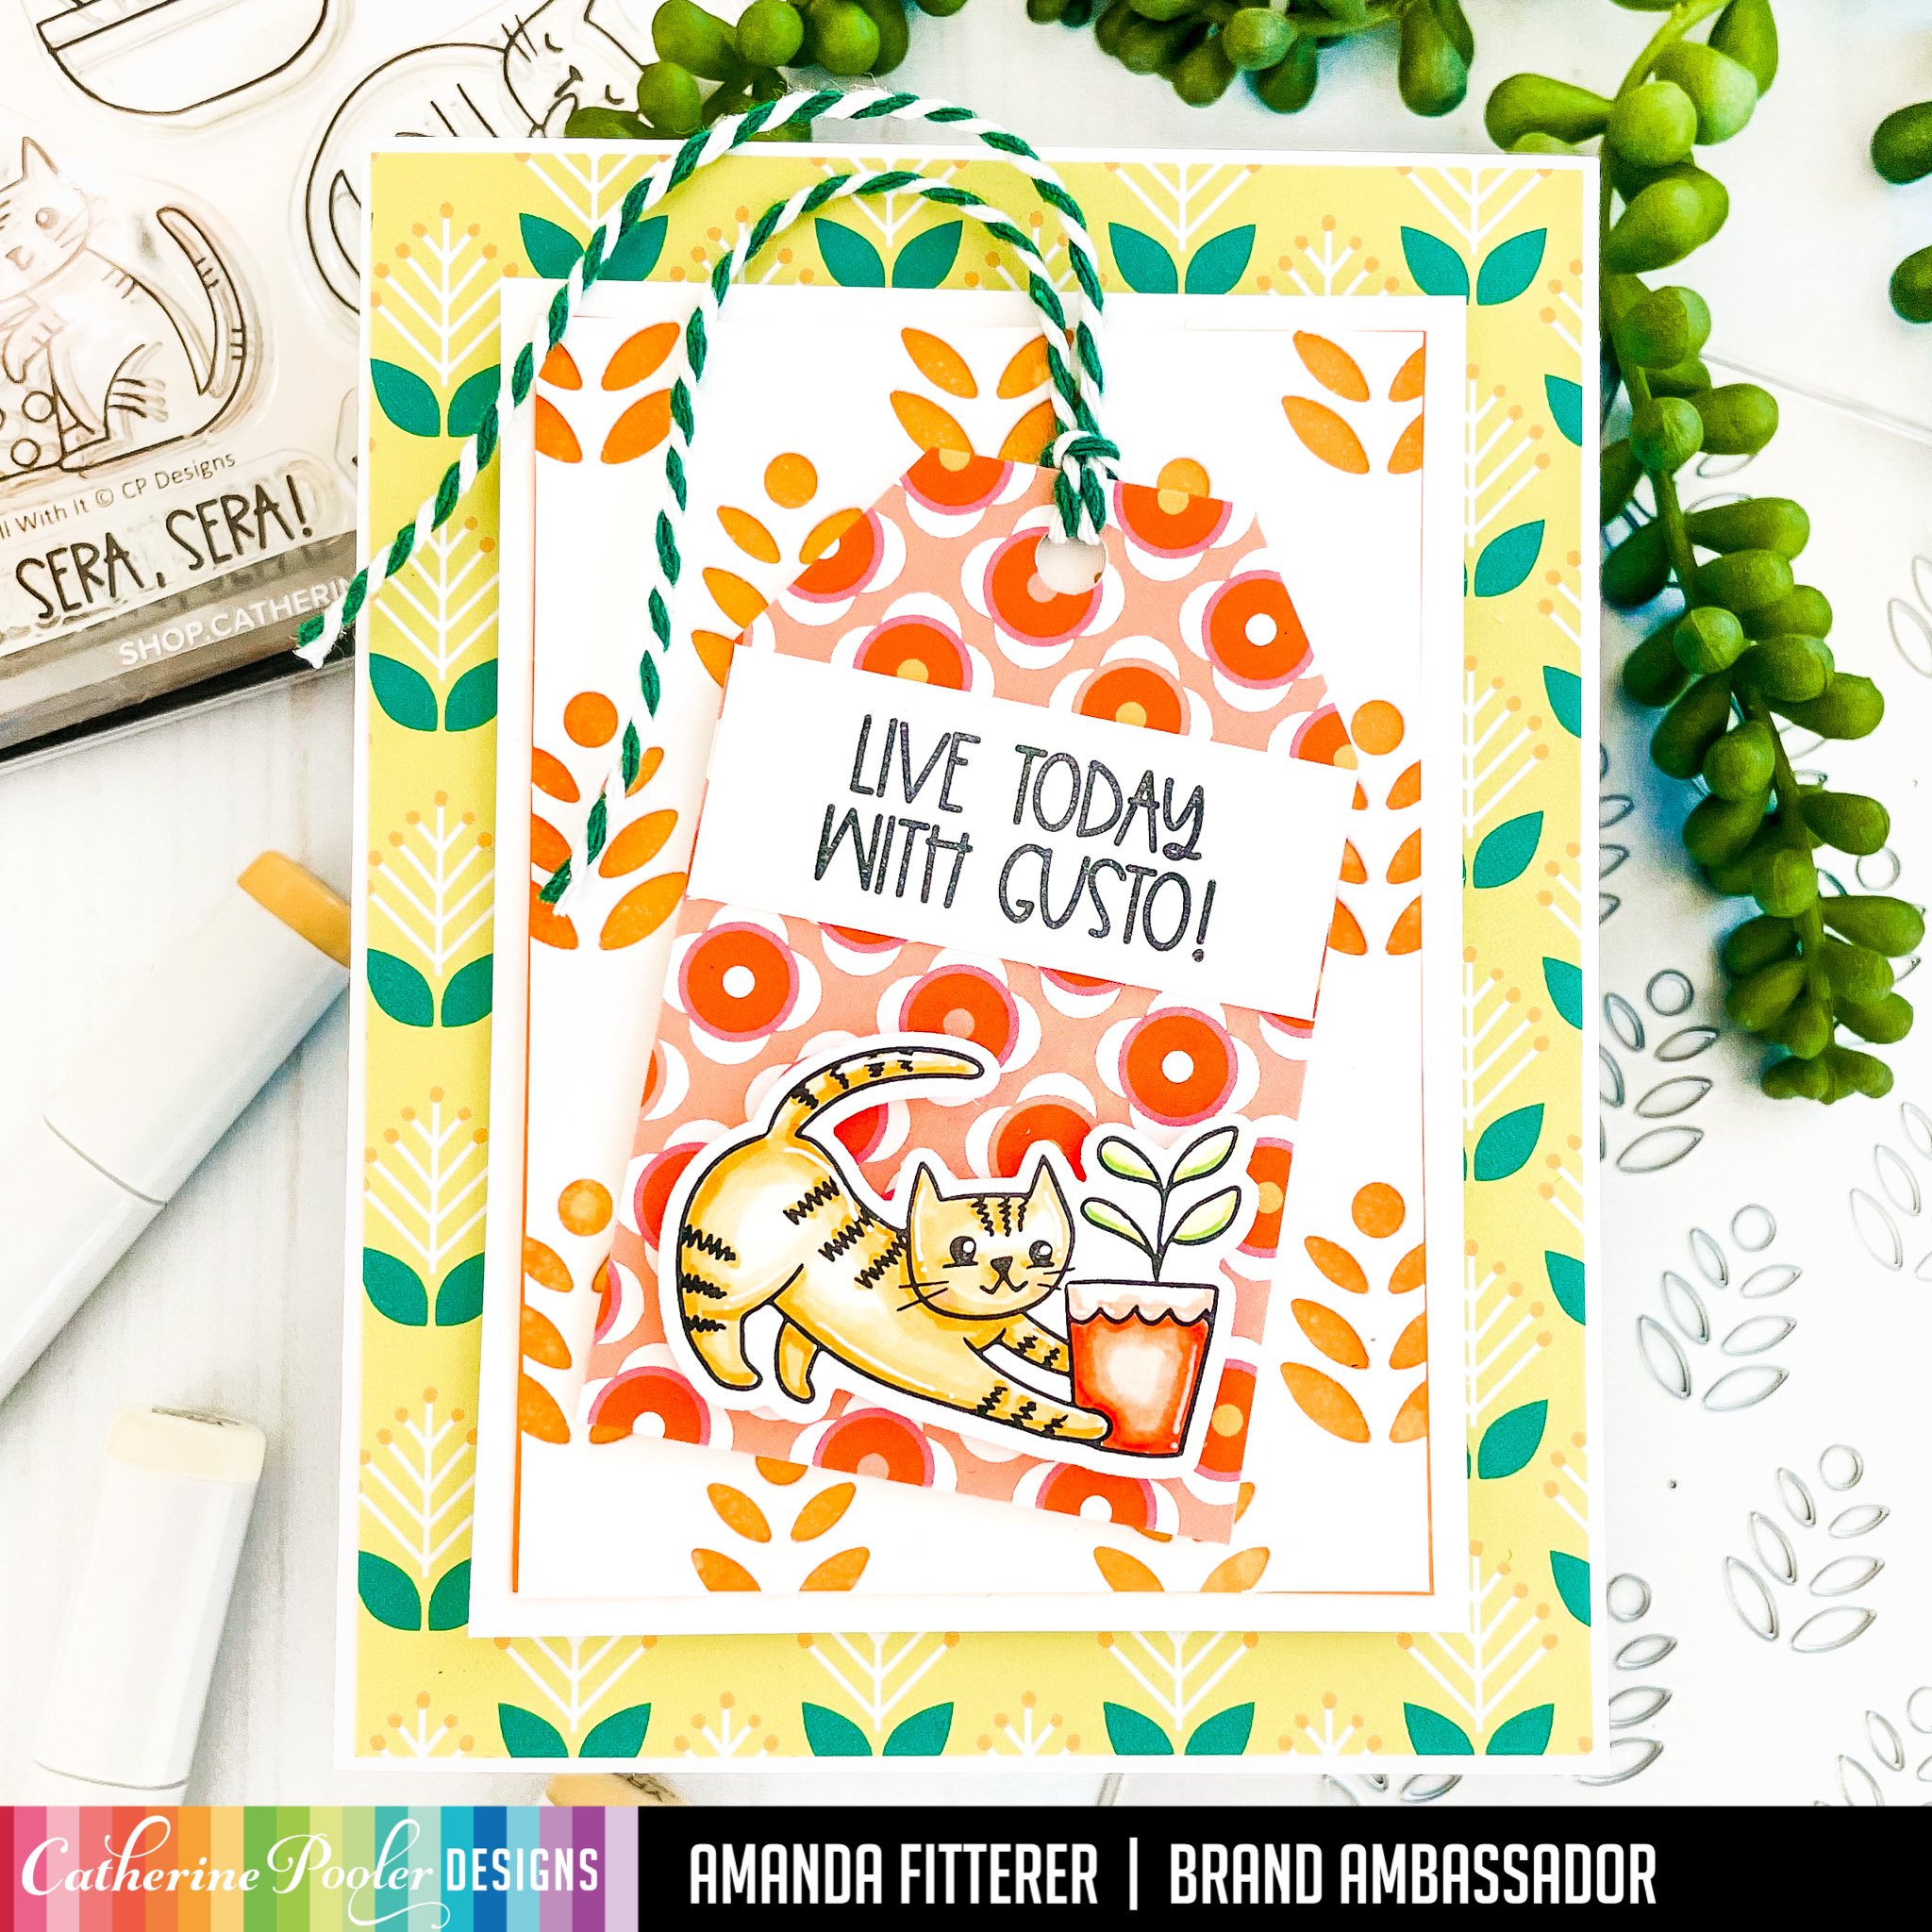
I have another fun card to share using the Just Roll With It Collection. I used the Potted Patterned Paper, the Plant Stand Slimline Die, and the Just Roll With It stamp set to create this card!
If you shop with my affiliate link, I can earn a little extra money at no extra cost to you. All you have to do is click here and start shopping or use the links in this post!
If you shop with my affiliate link, I can earn a little extra money at no extra cost to you. All you have to do is click here and get shopping or use the links in this post!
To create this card, I started with the Slider Pop-up Dies from Heffy Doodle. I love using this die to create an easy interactive card! I cut the card front with the Potted Patterned Paper.
For the inner panel, I blended Bellini, Orange Twist, and Flame.
Next, I stamped my images from the Just Roll With It stamp set and colored them with Copic markers. Then, I die cut them with the coordinating dies. I stamped a sentiment on a piece of white cardstock and then rounded the corners.
I assembled the card using 3D foam tape. I attached my kitties and leaves with foam squares and liquid glue.
And that’s it for me today! Thanks so much for stopping by!
To shop with my affiliate link and help me earn a little extra cash (at no cost to you) to buy more crafty goodies to share more projects with you, click here or use the links in this post!
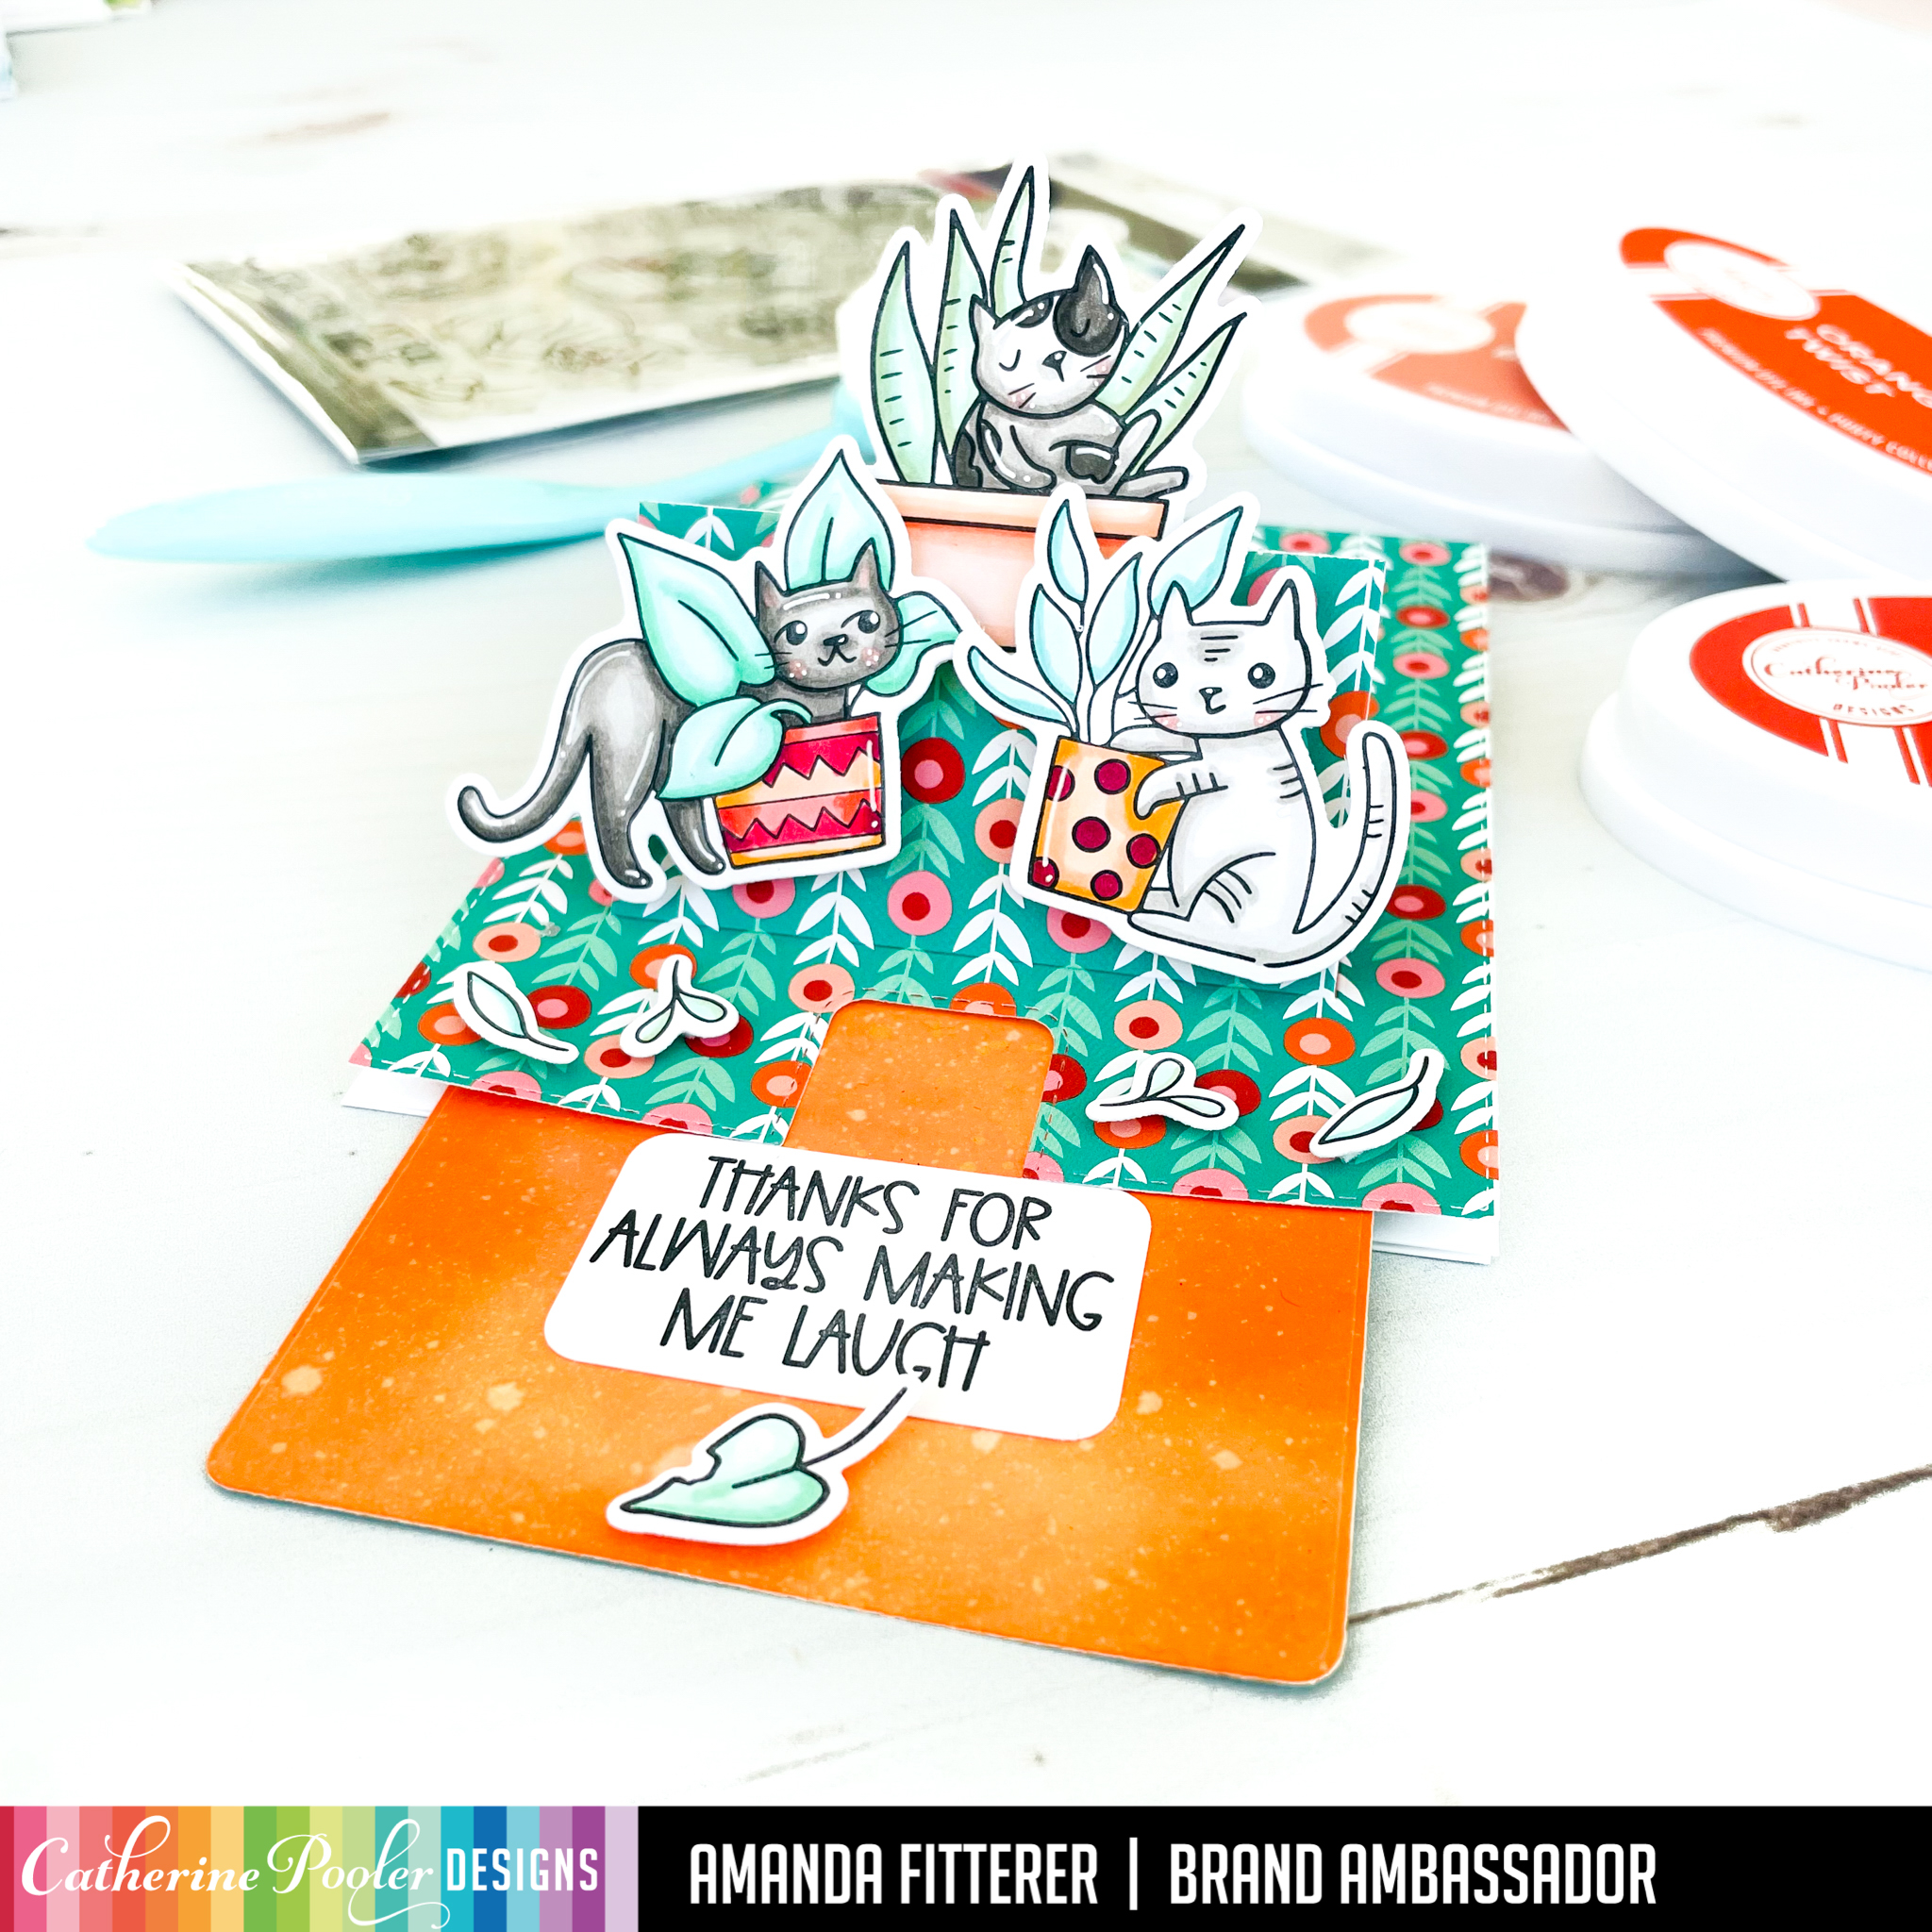
Today, I’m making a card with my leftover piece from yesterday’s card. If you missed my post yesterday, you can see it here. I’m using the Just Roll With It Collection for this release!
I ran a slimline card front through my die cutting machine with the Plant Stand Slimline Die. I placed the die cut card front on top of another slimline card front. Then, I blended Limoncello, Glitz, Party Dress, Pucker Up and Flirty Fuschia inks onto both card fronts. This gives me 2 different card fronts to use!
Next, I stamped my kitty from the Just Roll With It stamp set and then colored her with Copic markers. I also stamped my sentiments on black cardstock nd then used white embossing powder on them. I used the Nested Stitched Heart Dies and then trimmed off one edge of the heart and propped it up with foam squares.
Thank you so much for hanging out with me today! I can’t wait to share more cards with you from this collection!
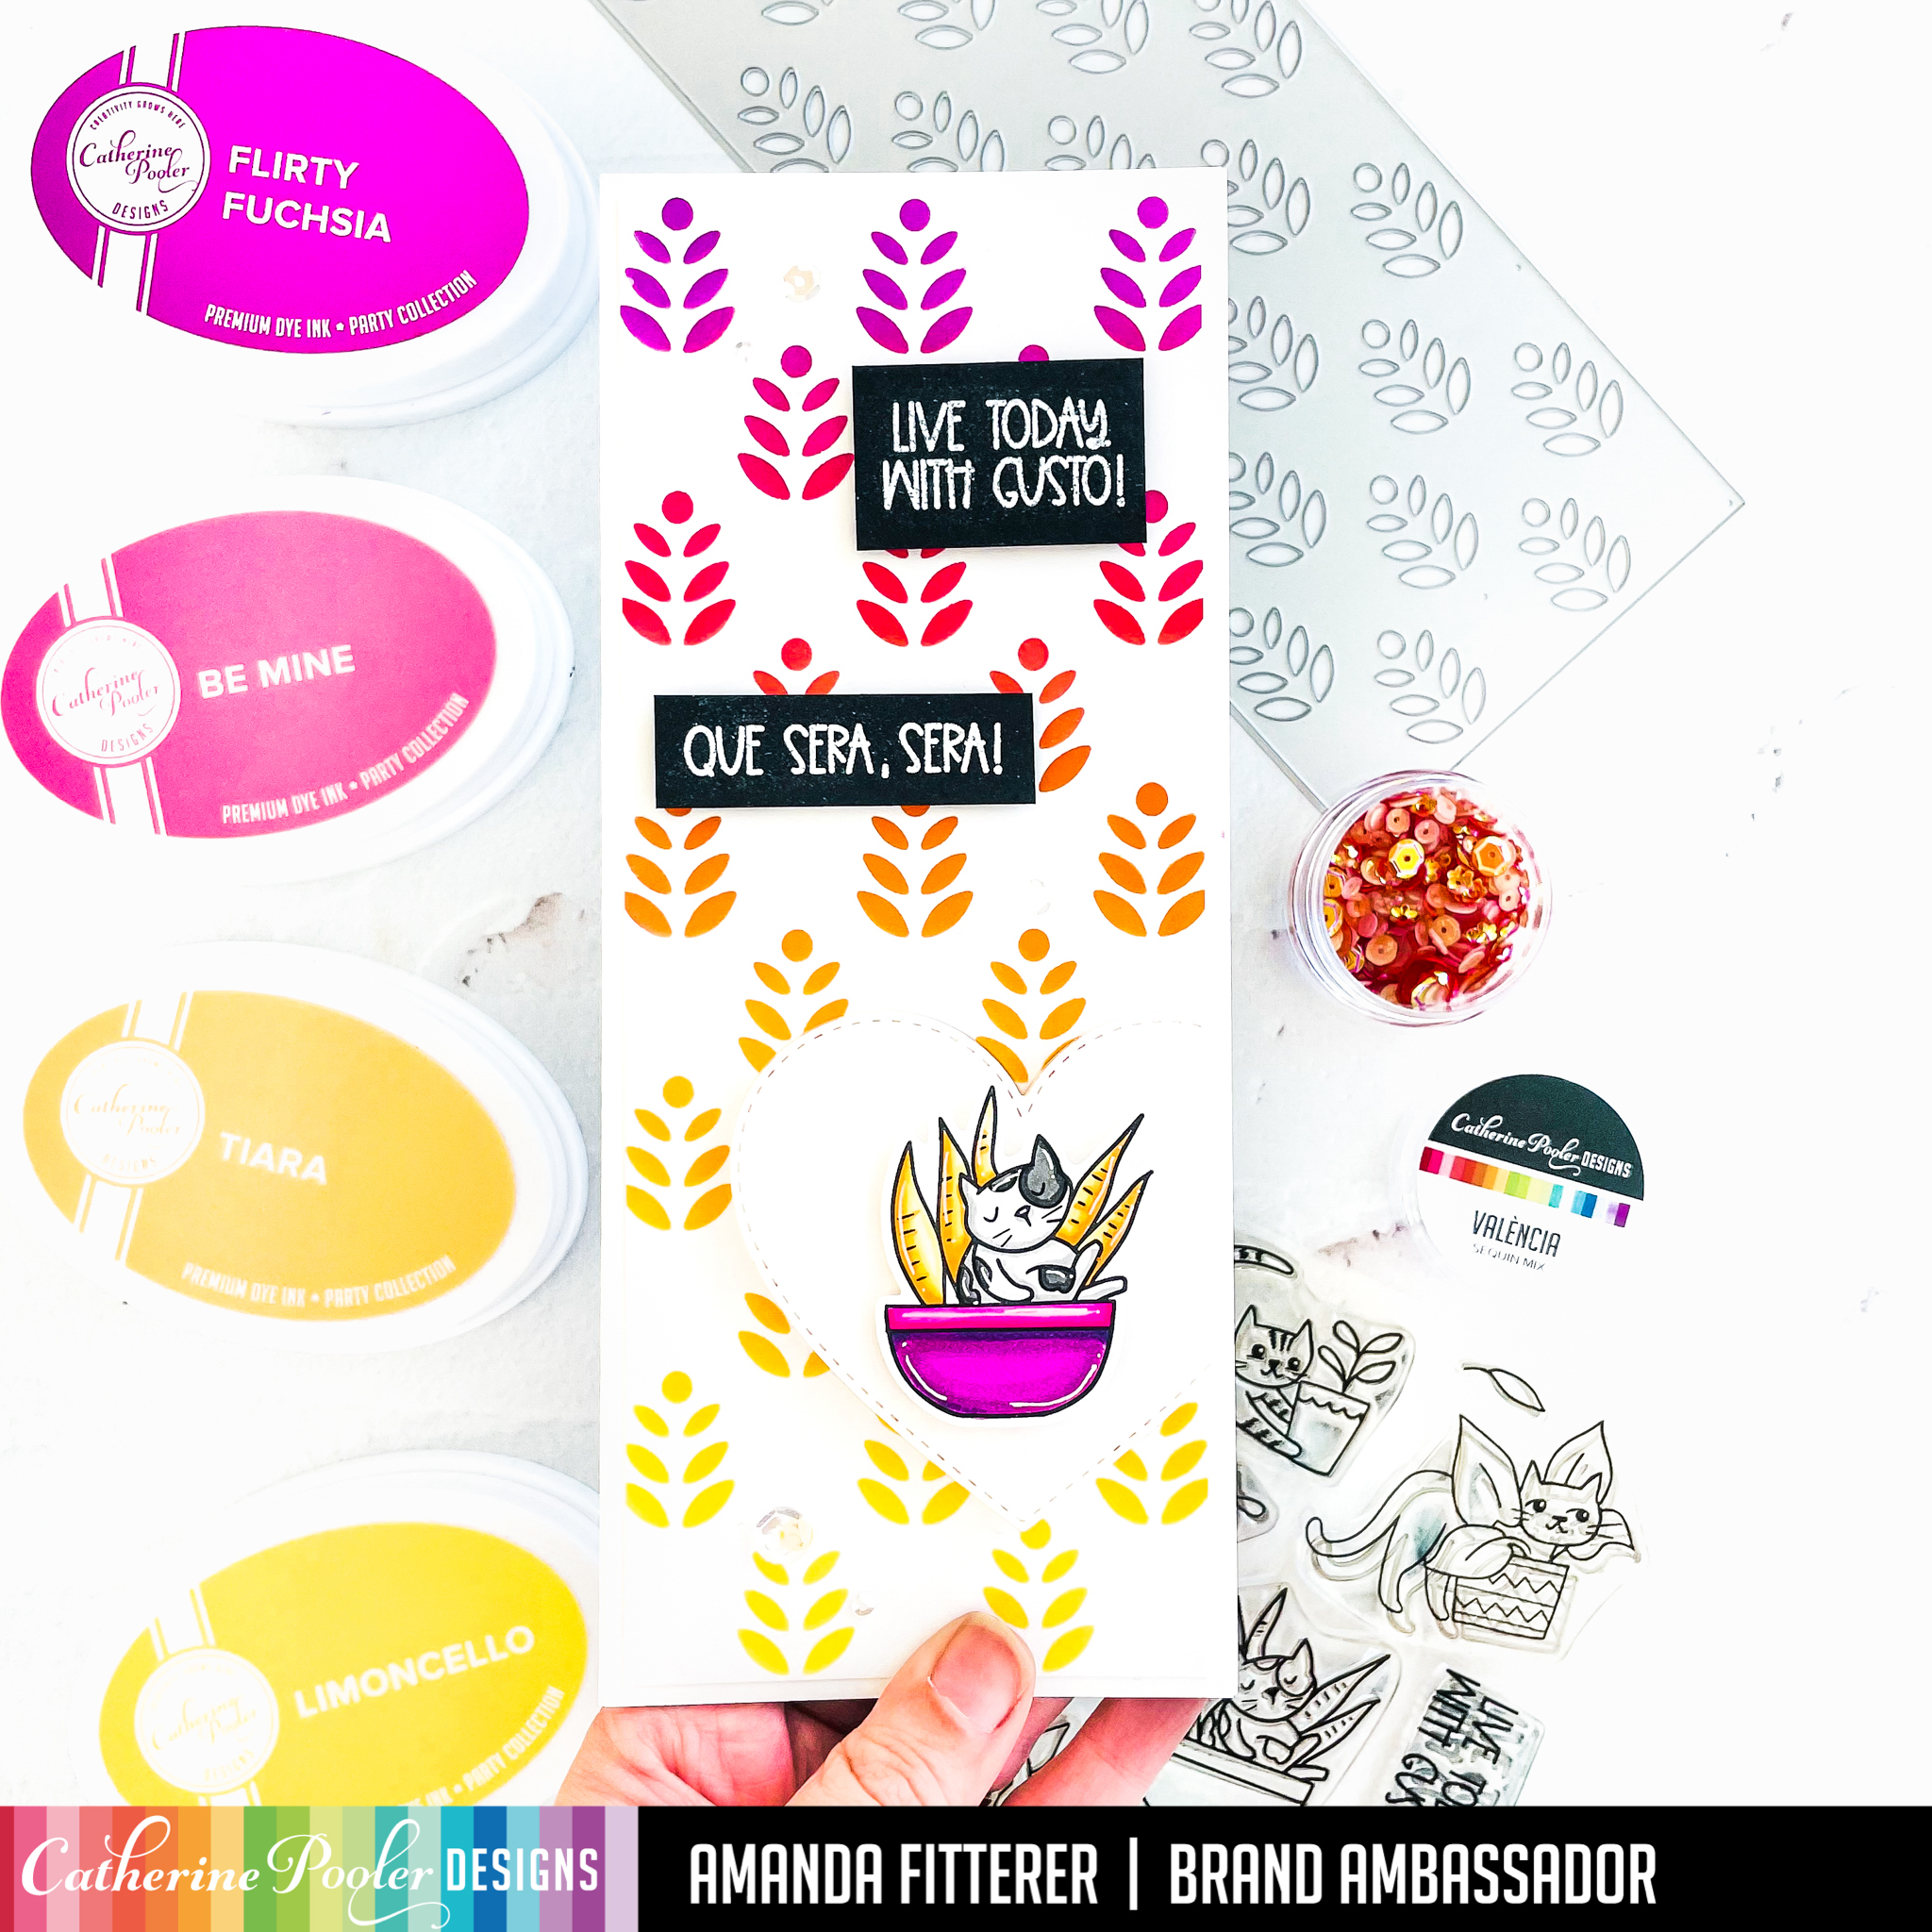
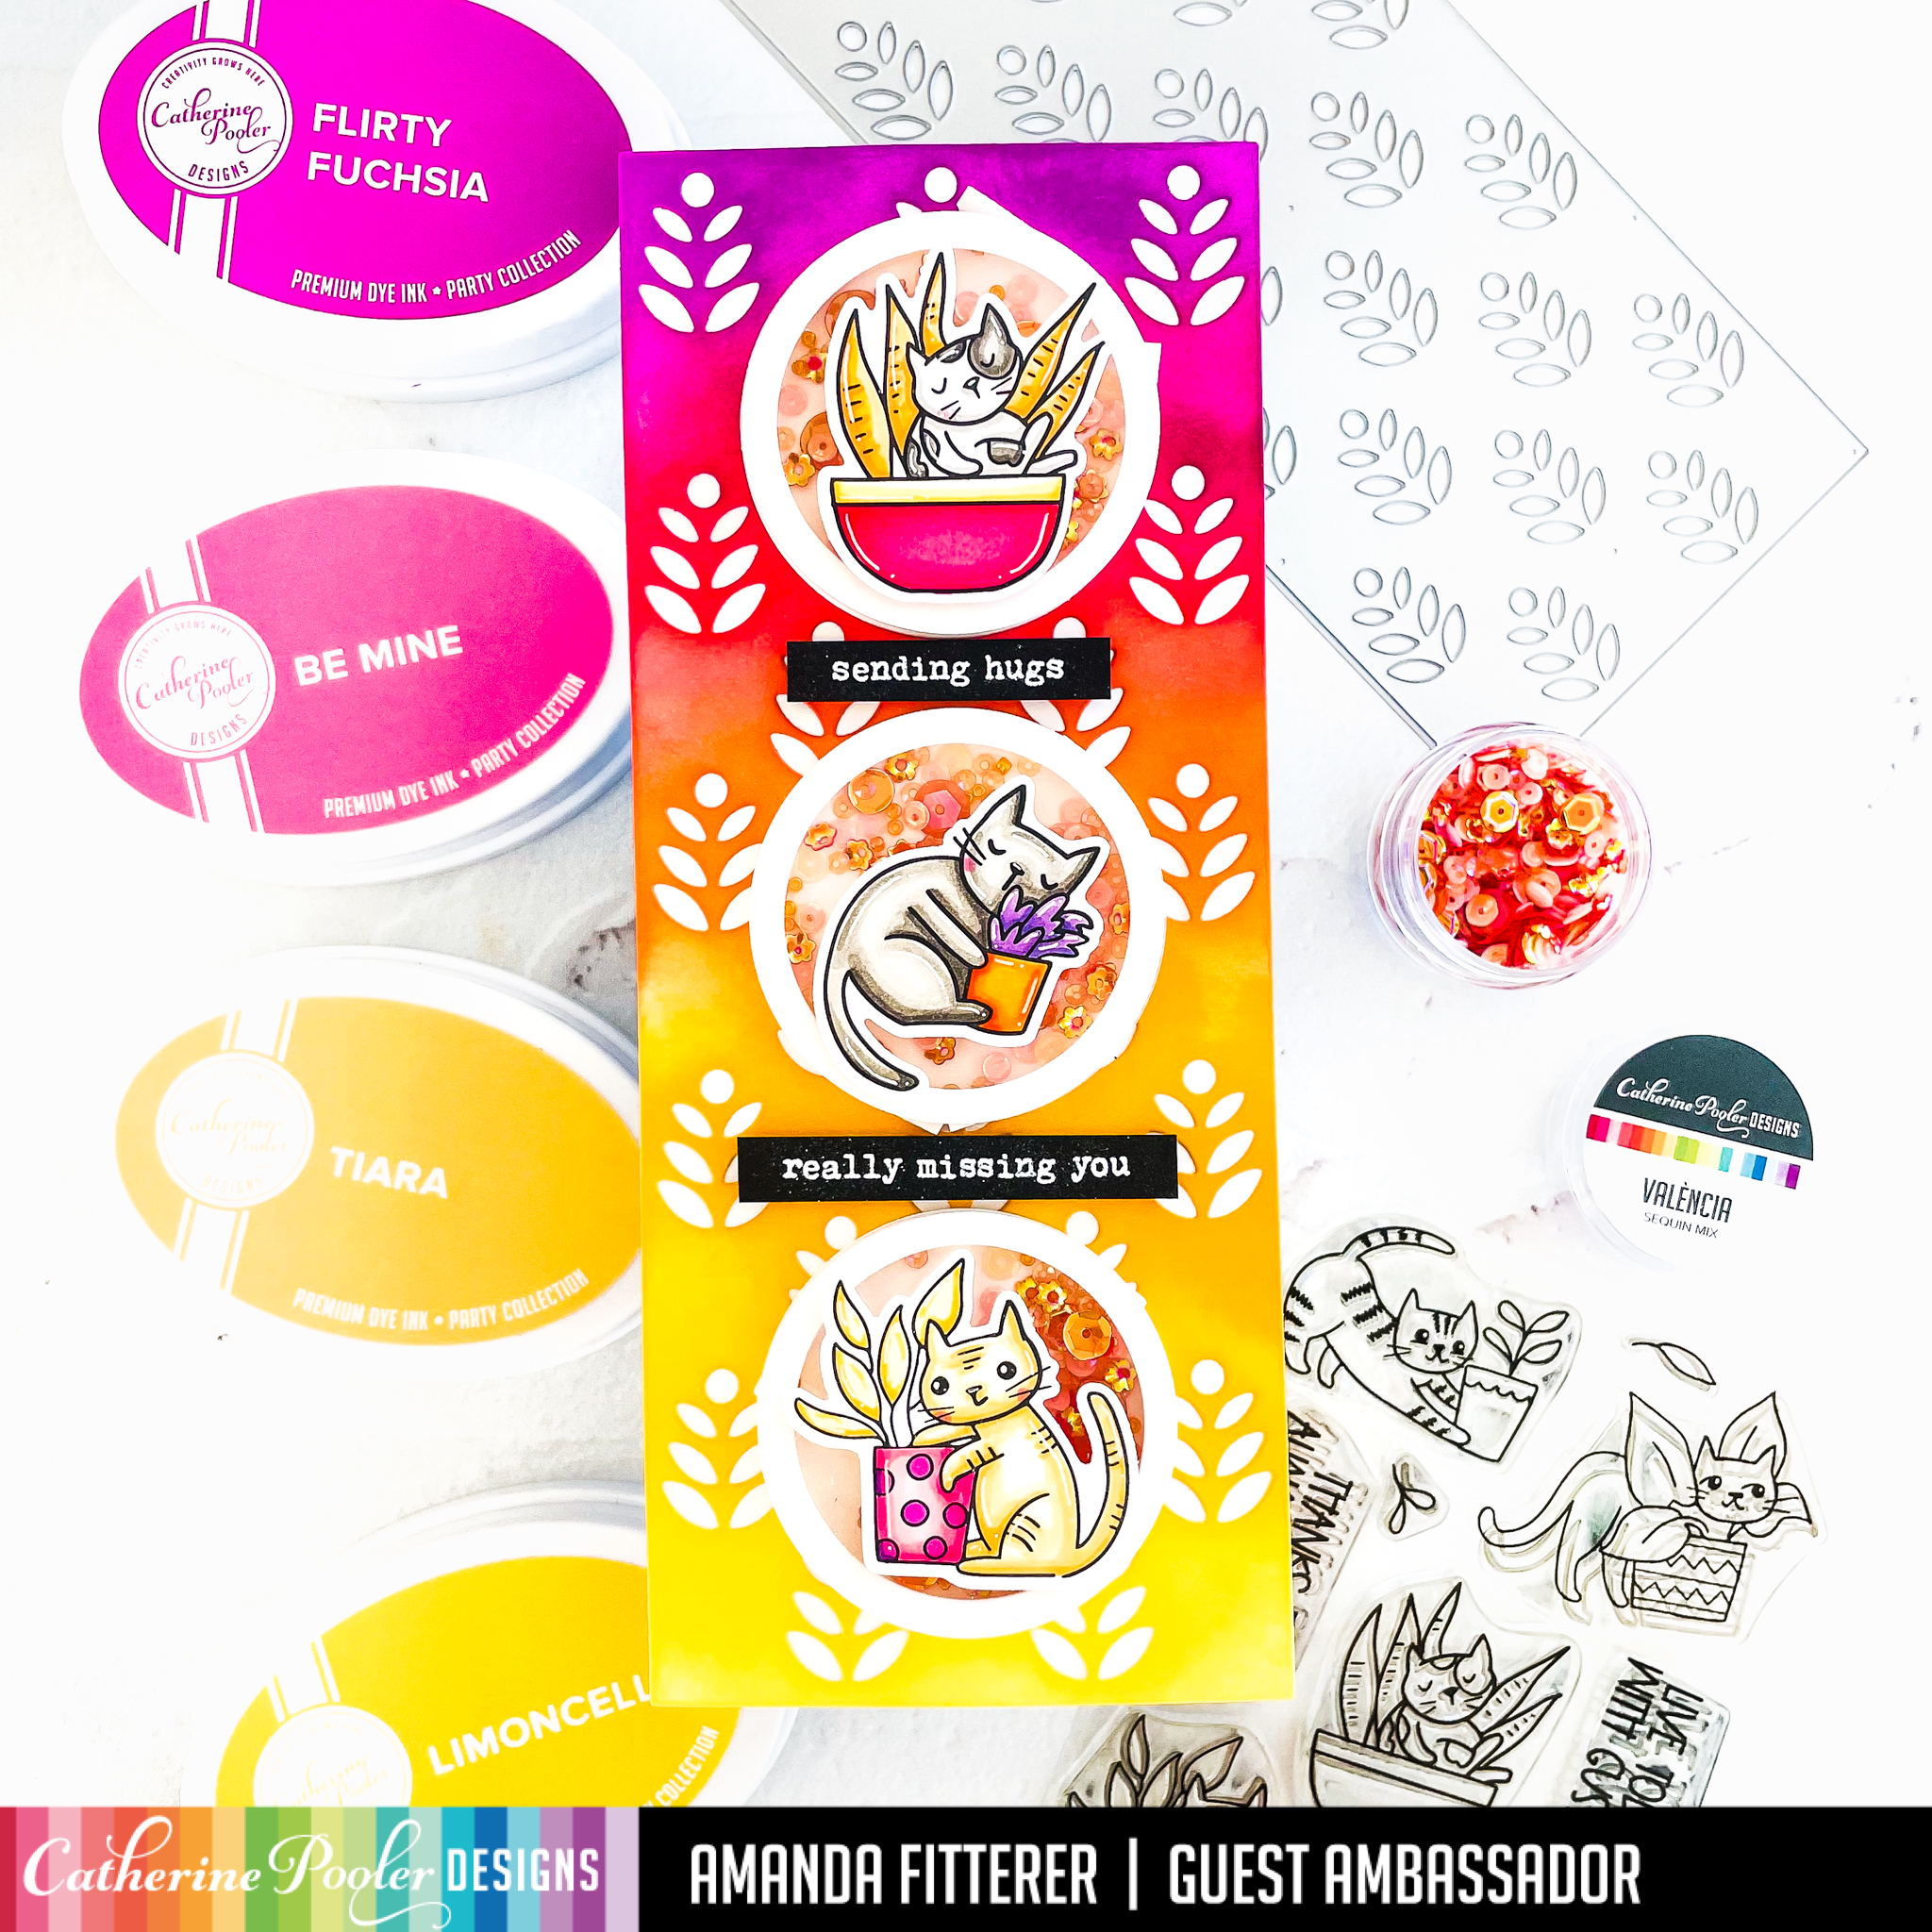
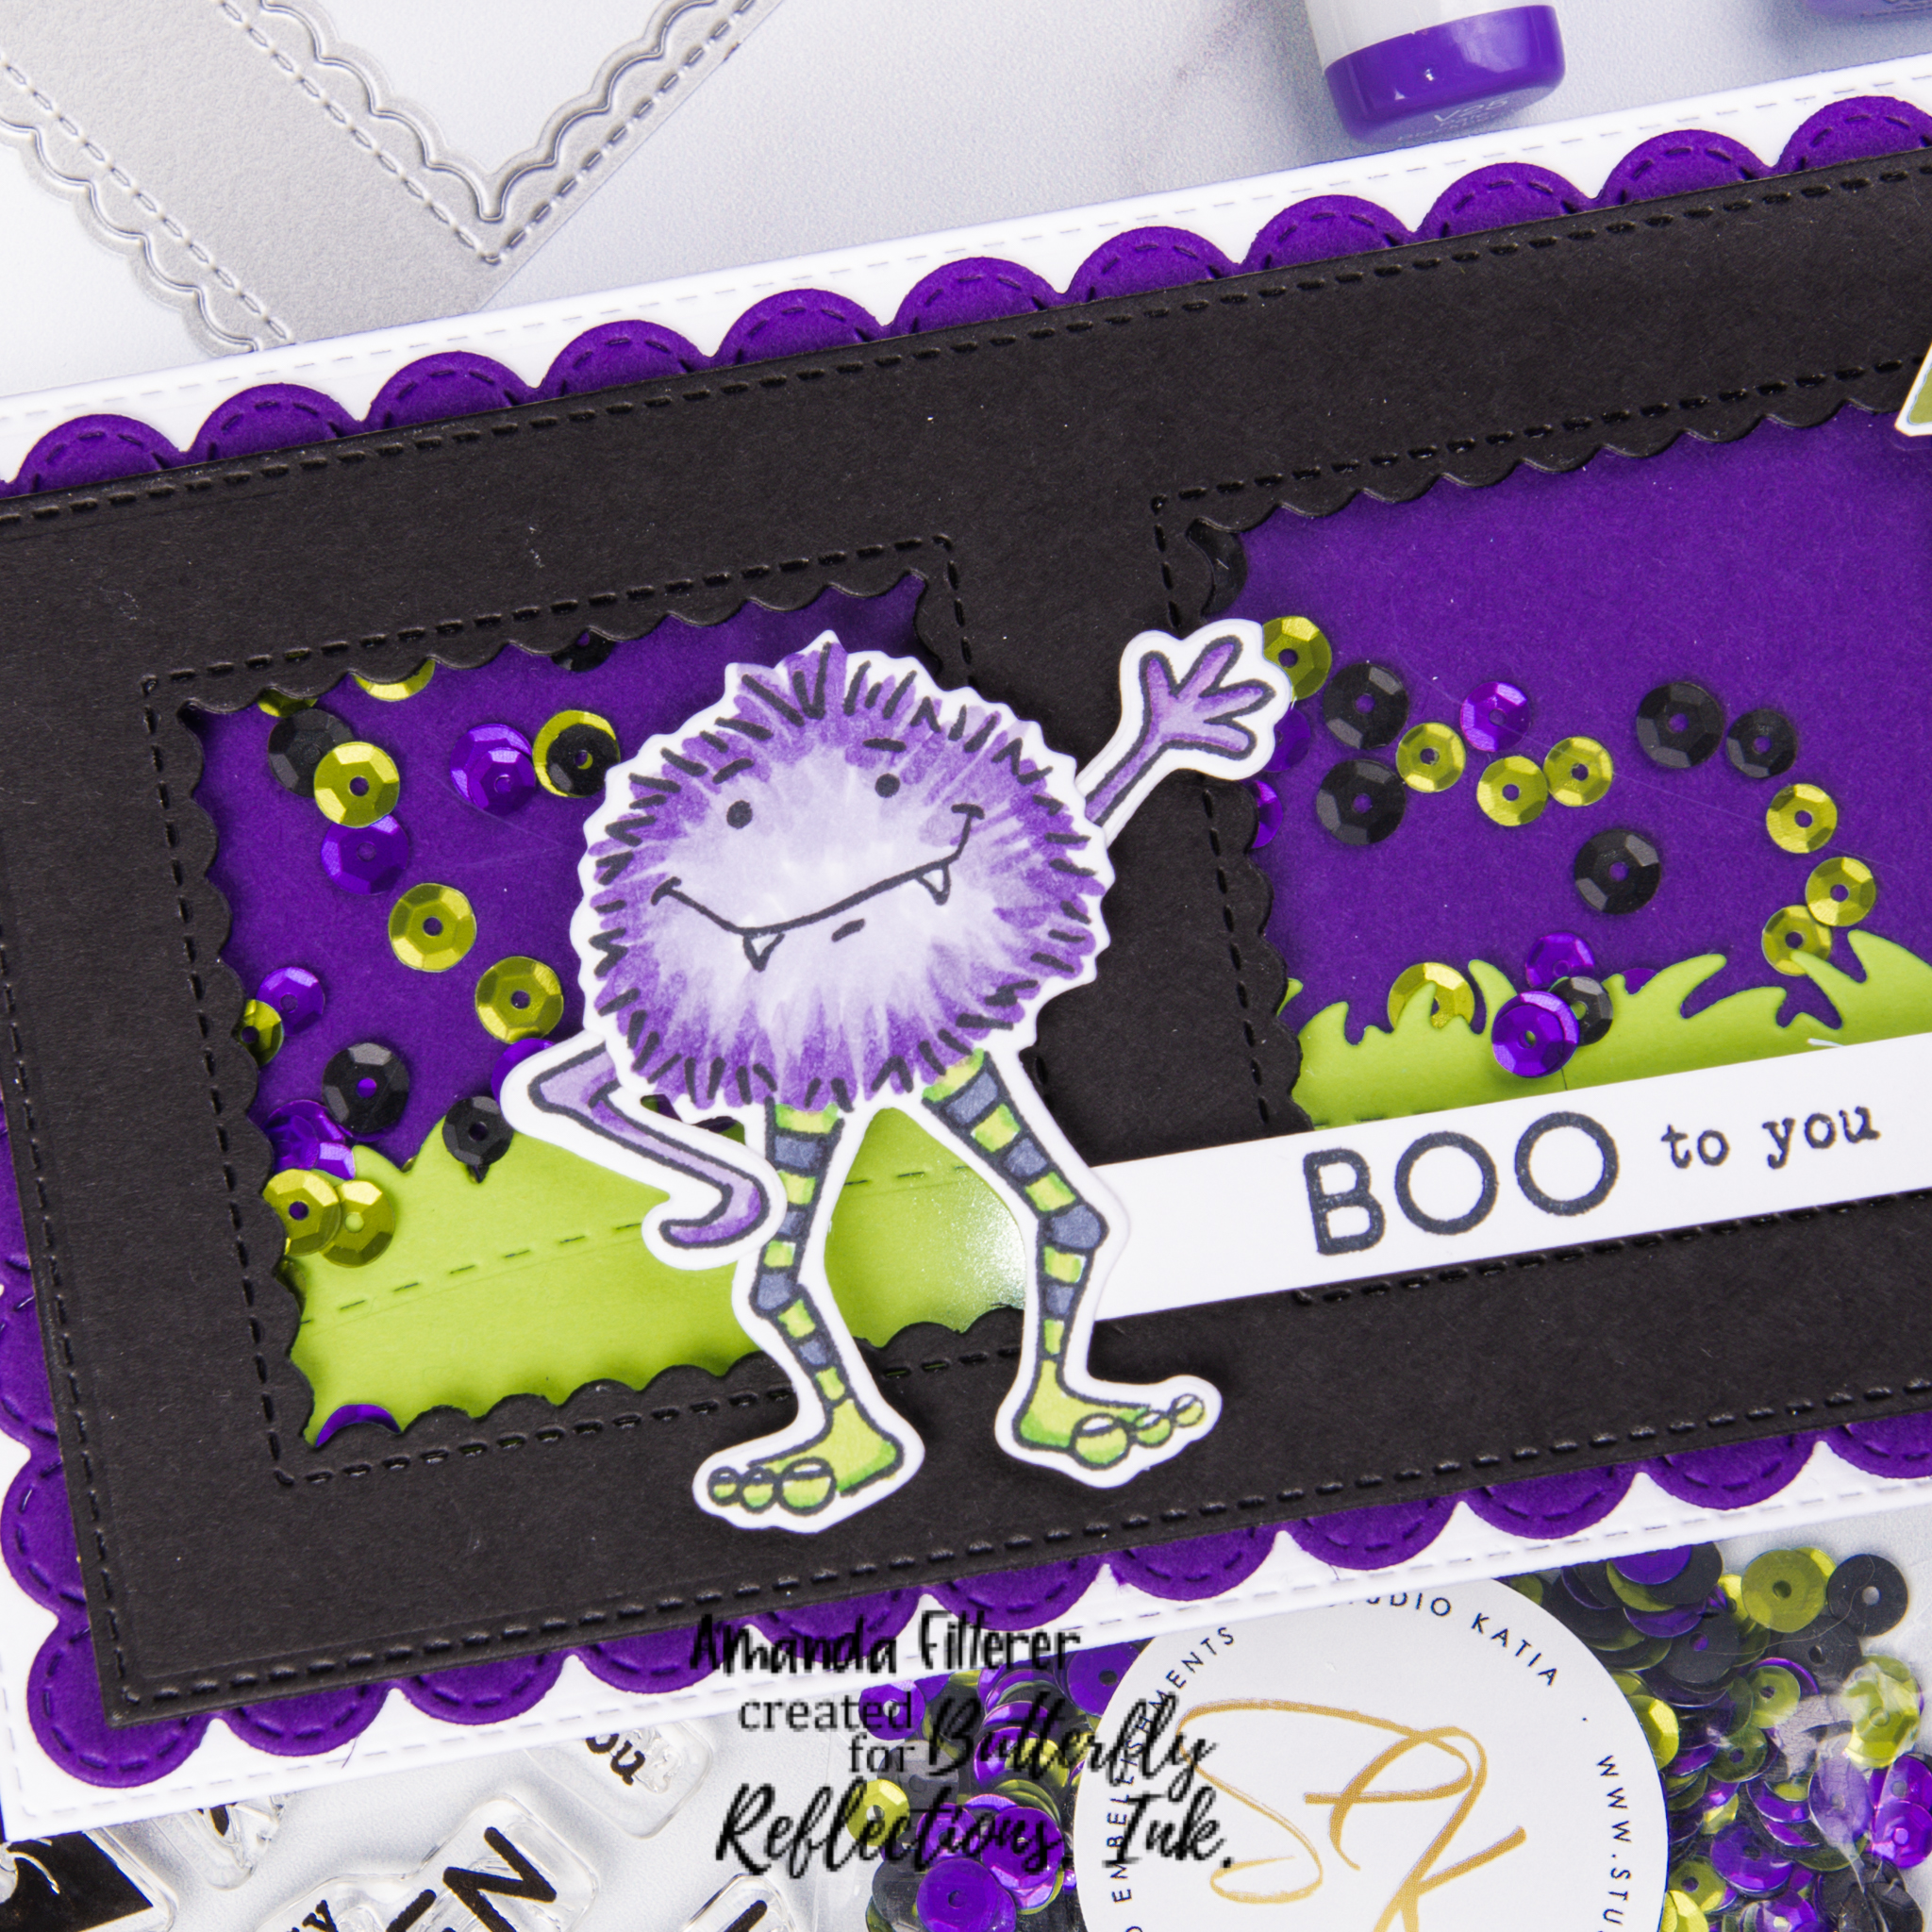
I ran a slimline card front through my die cutting machine with the Plant Stand Slimline Die. I placed the die cut card front on top of another slimline card front. Then, I blended Limoncello, Glitz, Party Dress, Pucker Up and Flirty Fuschia inks onto both card fronts. This gives me 2 different card fronts to use!
Next, I stamped my images from the Just Roll With It stamp set and colored them with Copic markers. Then, I die cut them with the coordinating dies.
I created shaker elements by cutting some Circle Dies, adding some 3D foam tape, acetate, and Valencia sequins.
Thank you so much for hanging out with me today! I can’t wait to share more cards with you from this collection!
Welcome to the Heffy Doodle and Newton’s Nook Designs Collaboration Blog Hop! Design Team members from both companies are sharing inspiration using products from both companies! I am super excited to share my card with you!
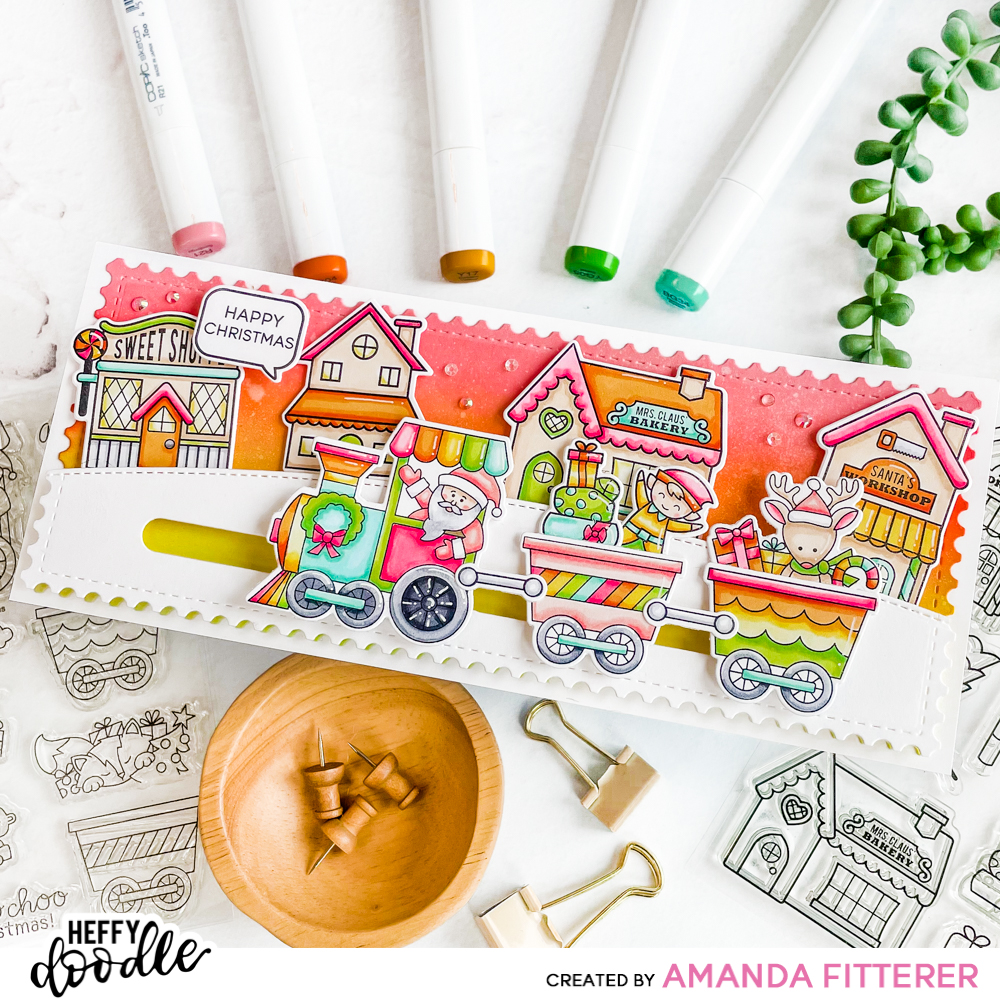
To create this card, I’m starting with the Heffy Doodle Slimline Mini Mails Die and a piece of white cardstock trimmed to slimline size (3.5″x8.5″).
Next, I am stamping my images from the Newton’s Nook All About for Christmas stamp set and the Heffy Doodle Santa’s Village stamp set with the Maker Forte ReMARKable Eclipse Black ink. This is my favorite alcohol-friendly black ink!
Now, onto coloring my adorable images with Copic markers!
To create my hill and slider element, I’m using the Heffy Doodle Slimline Scenery Dies and the Straight Slider Dies. To create a longer slider, I’m die cutting 2 of the sliders right next to each other.
Using Deep Foam tape, I’m propping up my hill to give me room for a button to use as my sliding element. After attaching my trains to the buttons, I can start assembling the rest of the card using 3D foam squares and glue!
Here’s another photo of the finished card and some close-ups!
And that’s it for my card!! I hope you enjoyed my part in the Blog Hop!
To be entered to win the giveaway, all you need to do is comment at each stop along the Blog Hop! Newton’s Nook Designs will be giving away $35 and Heffy Doodle will be giving away £25 to their respective stores! Be sure to comment before 11:59 PM EST on Dec 28th to be entered to win!
Hey crafty friends!!! It’s another Christmas in July post! Scrapbook.com just released some really fun Christmas products and they asked ME to make some projects with them! How could I refuse?! I love their products!
If you want to shop Scrapbook.com using my affiliate link, click here. That will get me a little percentage of your purchase so I can keep buying new crafty supplies and sharing inspiration with you! 🙂
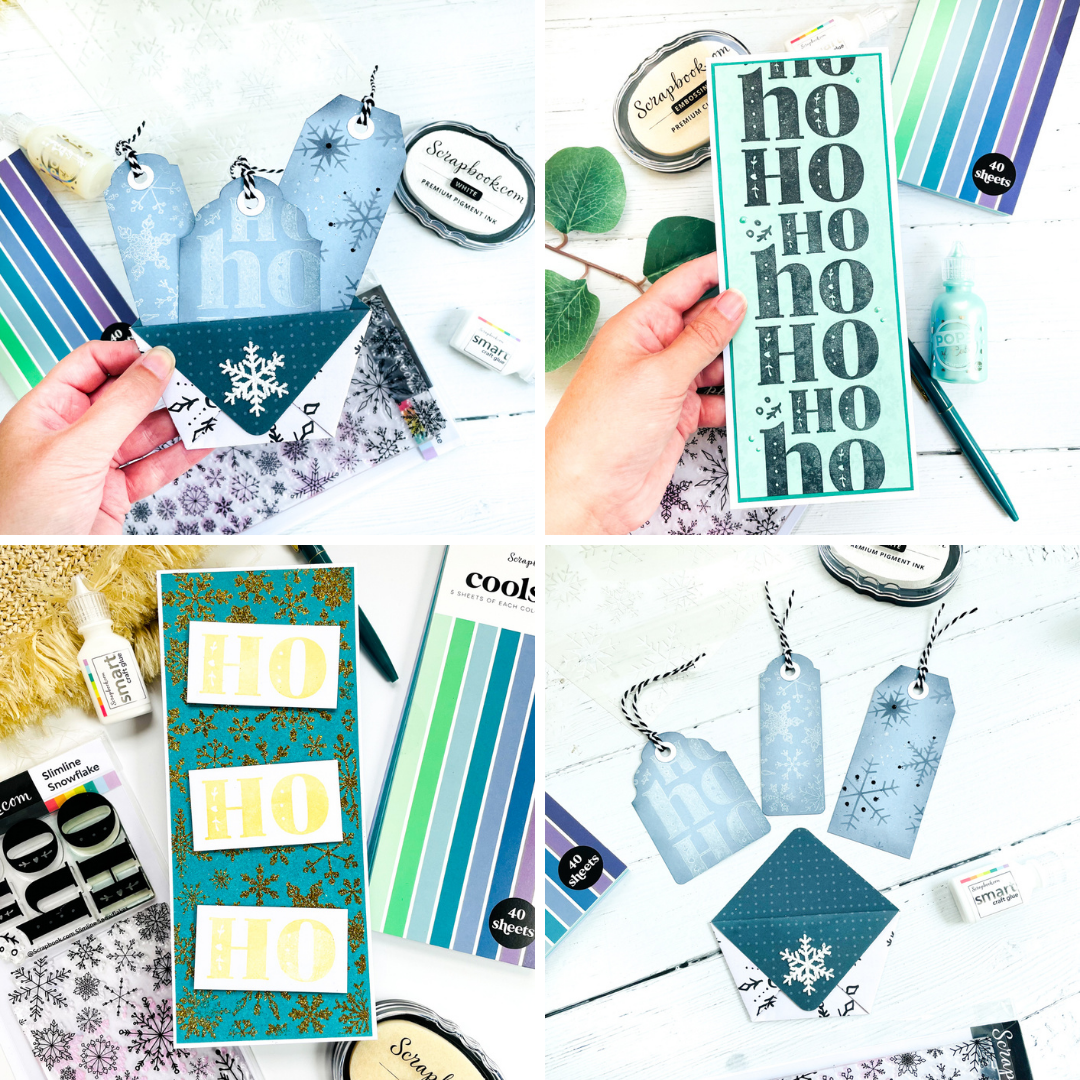
Now onto my projects! My first project is a slimline card!
I’m grabbing my Scrapbook.com Premium Clear Ink Pad and the Slimline Snowflake stamp set. Using my MISTI, I’m placing my Cools Smooth Slimline colored cardstock into the MISTI and stamping the snowflakes with the clear ink. This will create a “watermark” effect in my background that looks really cool in person. Next, I’m stamping my “Ho Ho Ho” all the way down the front of the card with Memento Tuxedo Black Ink. I’m using the Smart Glue to adhere my layers together and then adding some Seafoam Pops of Color for a finishing touch!
For my next project, I’m going to make a folded envelope with some tags inside!
To create this cute little pocketfold envelope, I’m starting with a piece of double sided Snowflakes Crate Paper. See the gallery below to watch me fold it step-by-step:
To round off the edges of the envelope, I’m using the 3-in-1 Corner Punch. I’m using my Smart Glue again to adhere the flaps down.
Now that my pocketfold is ready, I’m ready to move onto my tags.
For my sentiment, I’m stamping with Metallic Gold Ink. I’m masking off the part of the stamp I don’t want to ink up with Memo Tape.
Thank you SO much for stopping by my blog today! I appreciate YOU so much!
Just a reminder, clicking on the products above will go to my affiliate links for those products! I appreciate all the extra spending money I can get! I enjoy sharing my inspiration with you!
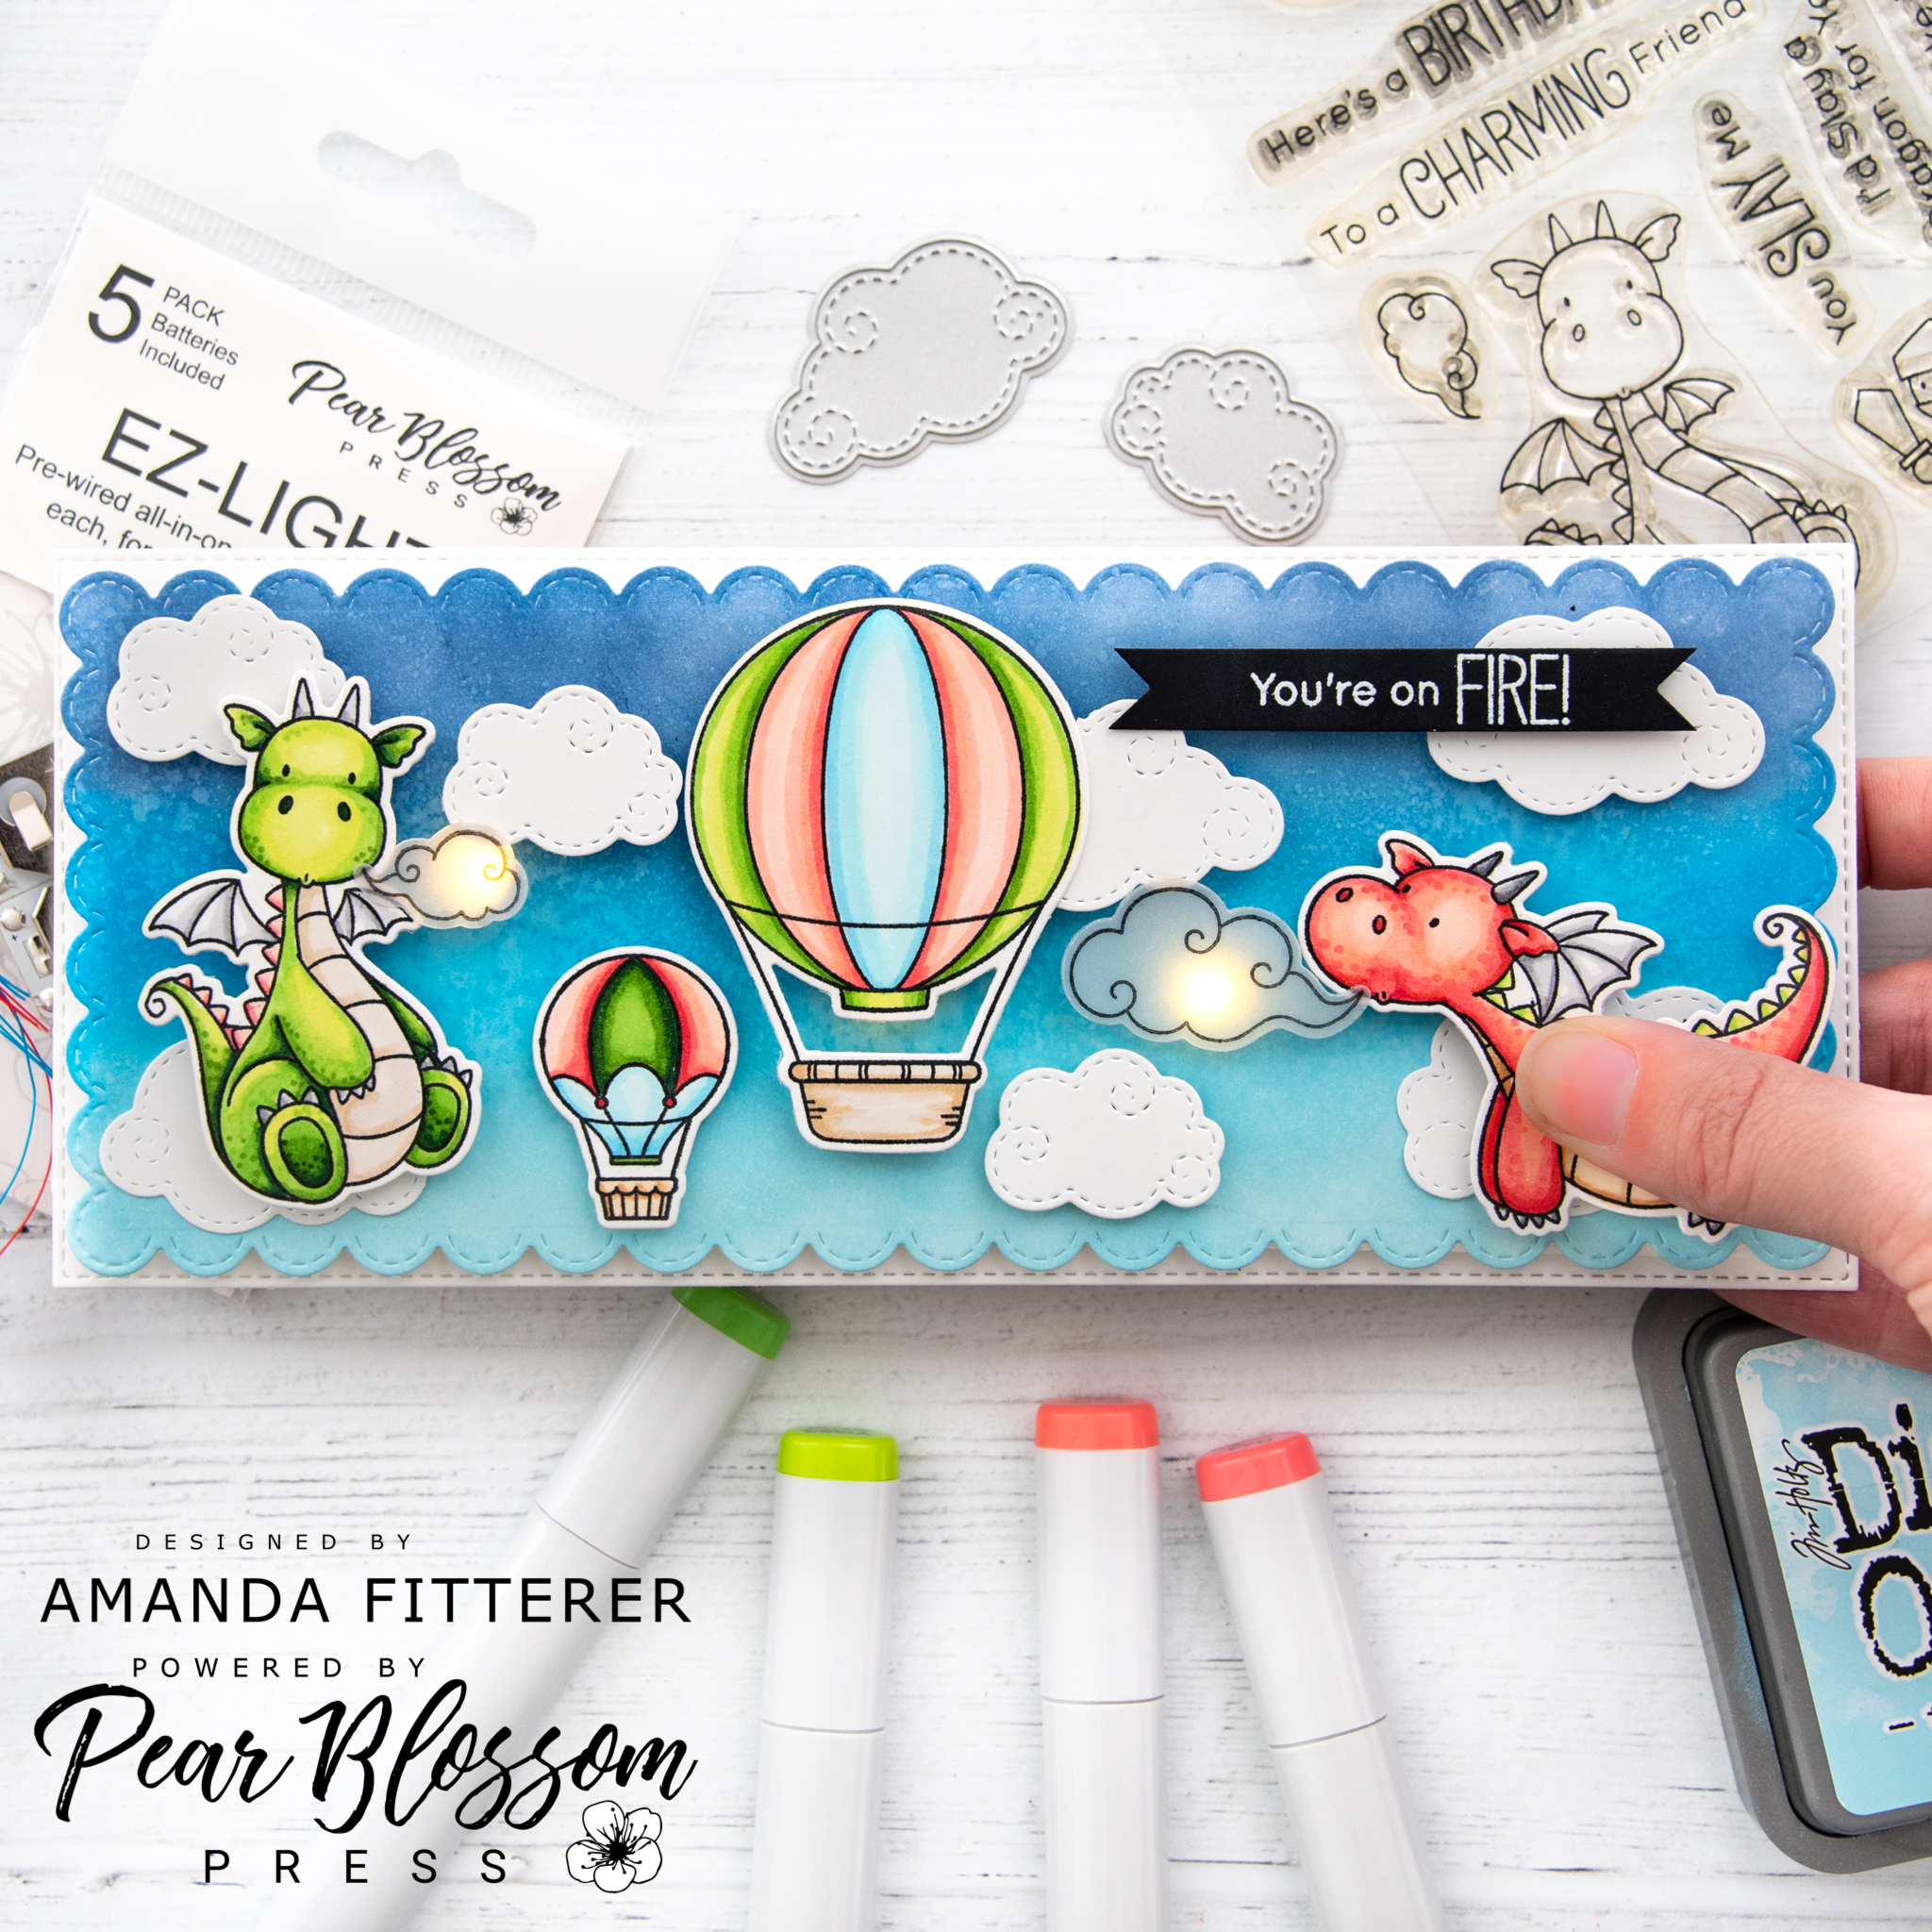
Hello my friends!! I’m here today to share a light-up card I made using the incredibly easy-to-use EZ- Lights! I also have a video to share with you on how I added the EZ-Lights to my card!
On my card base, I made marks where I wanted my lights to shine through and where I wanted the button to be. Then, I adhered my button using double sided tape. I held my lights down using tape as well, with the bulbs facing upwards. I used Heffy Doodle Deep Foam Tape to prop my card front up so that there wasn’t a bulge where the button was.
I adhered my card front to my card base and tested to make sure the lights worked. Then, I adhered all of the stamped images onto my card front. Here’s another photo of the finished card!
Thank you so much for stopping by my blog today! I hope you enjoyed my card and video! Xoxo, Amanda
This blog uses affiliate links to help me fund my crafting! If you click through and make a purchase using one of the links above, I am able to receive a small commission from the sale! It won’t cost you any extra, but you will help be helping me out and I really appreciate that!
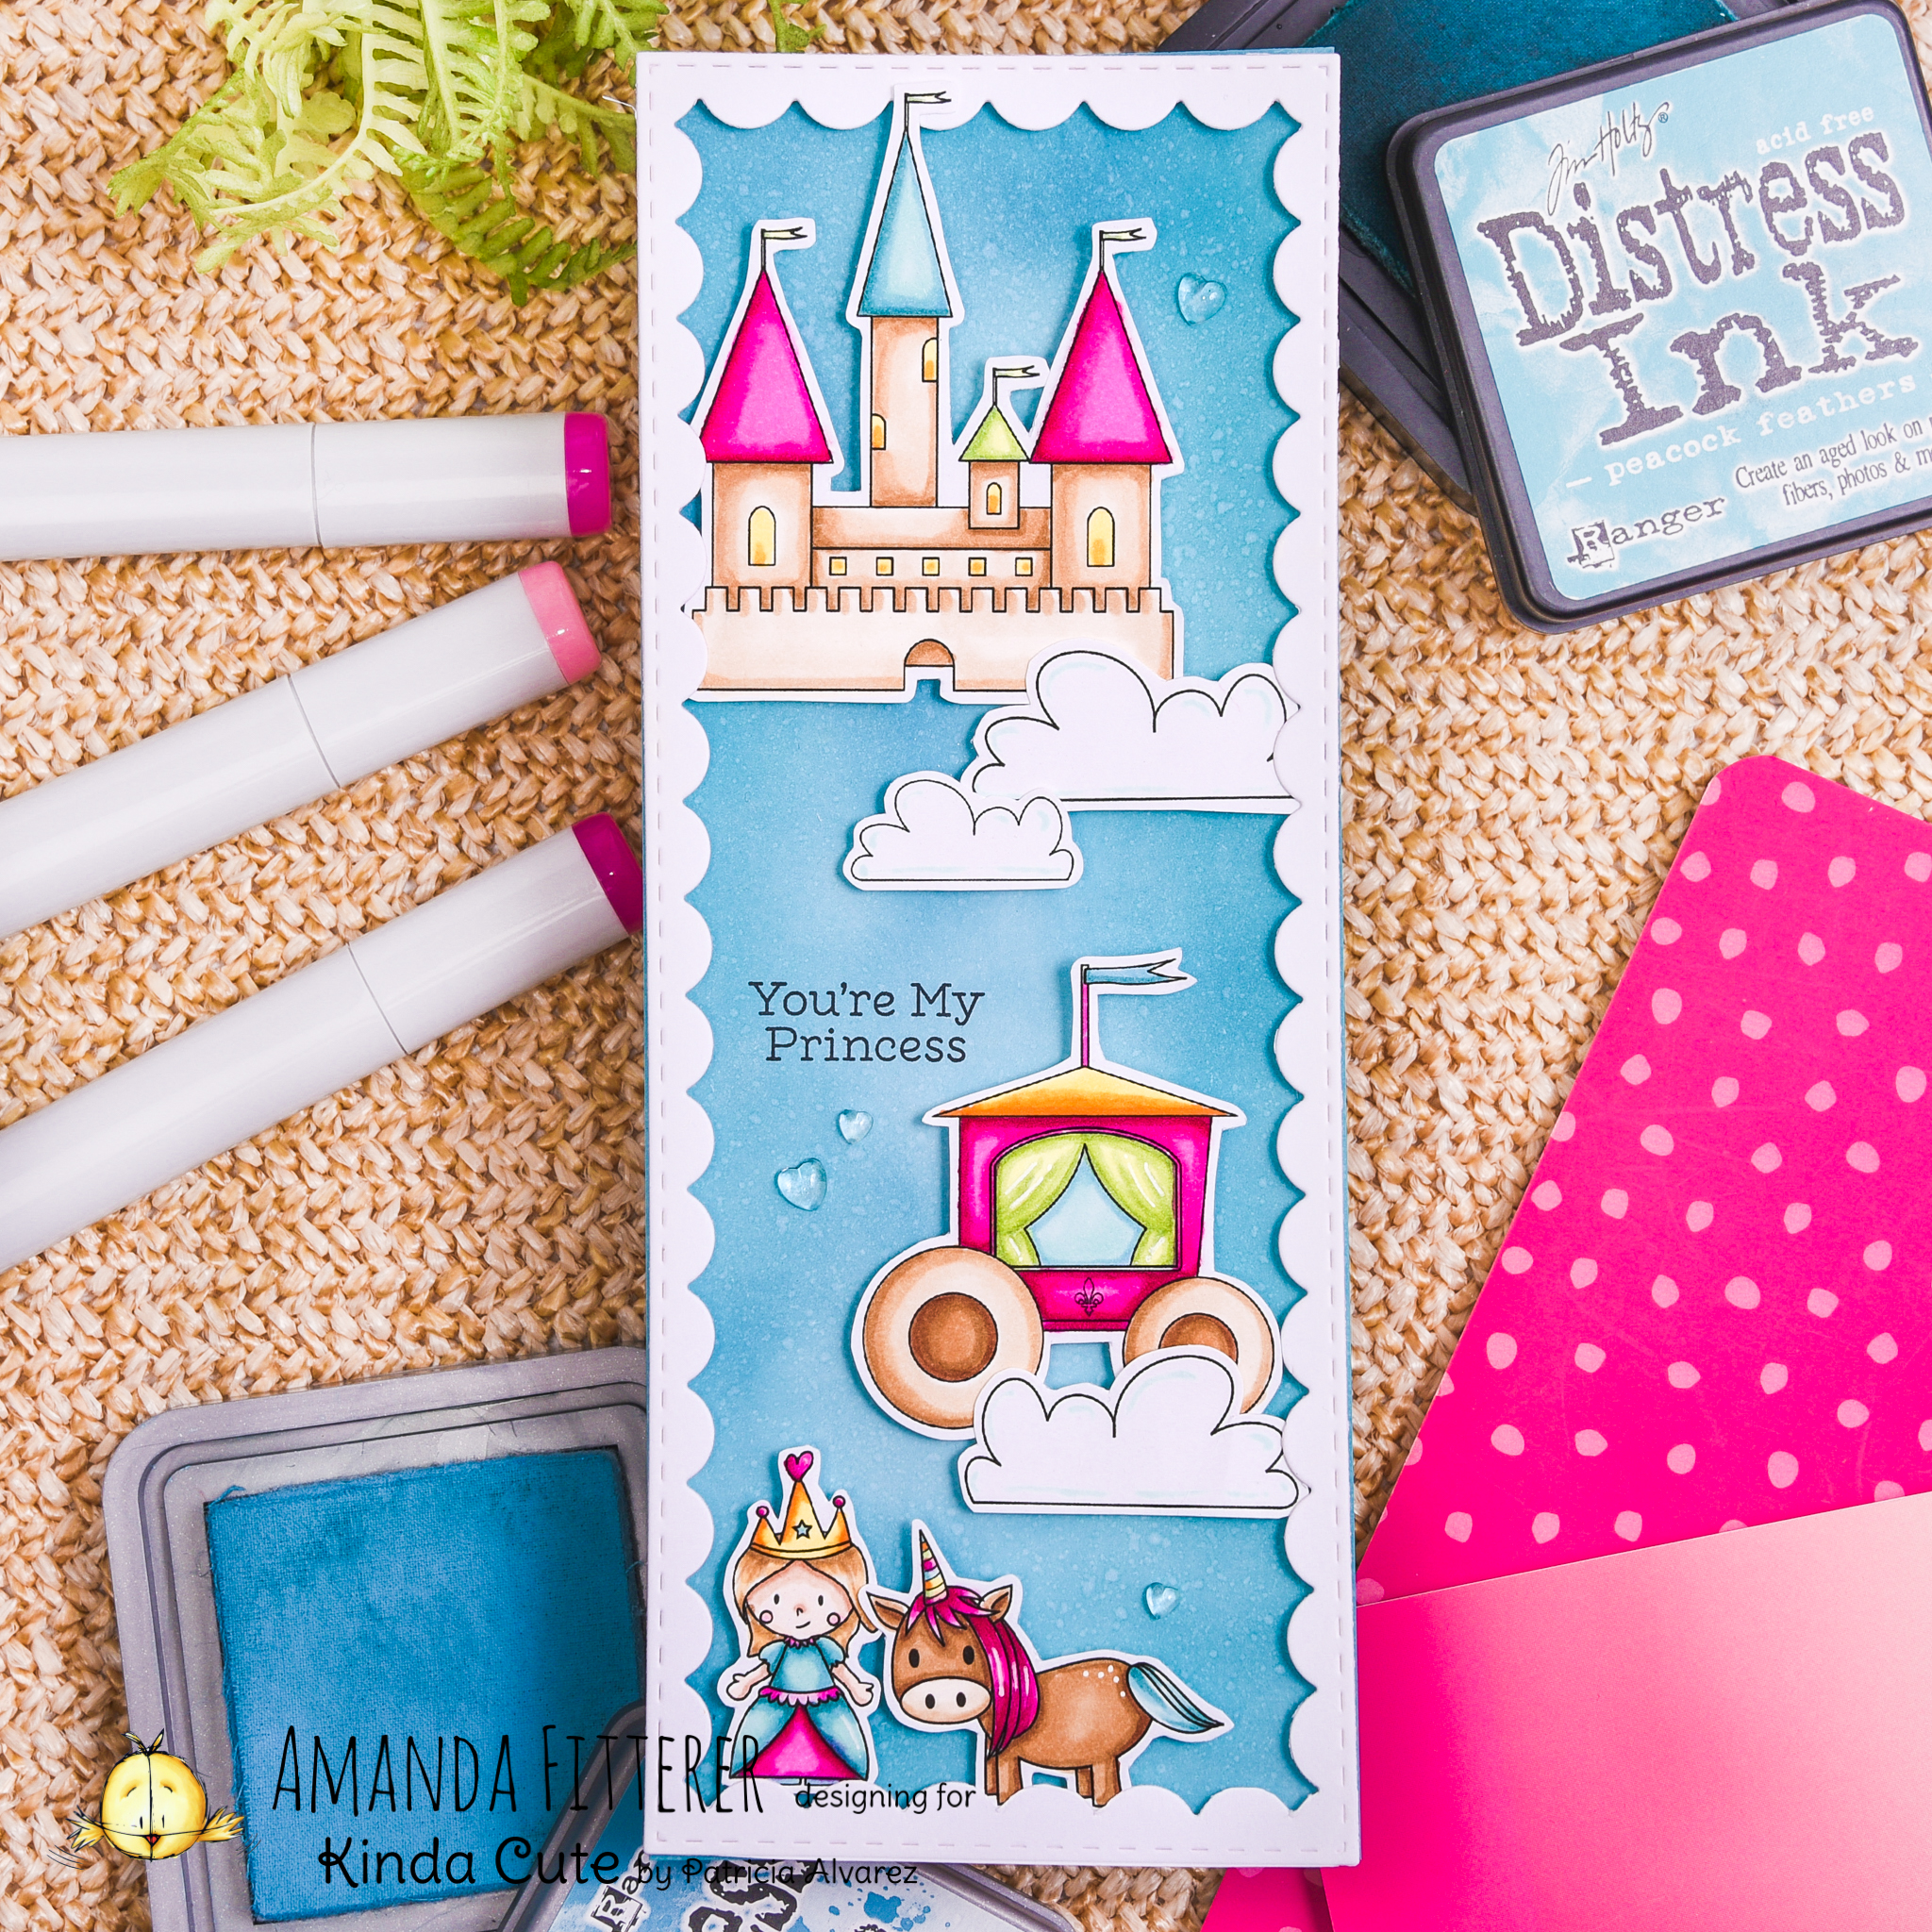
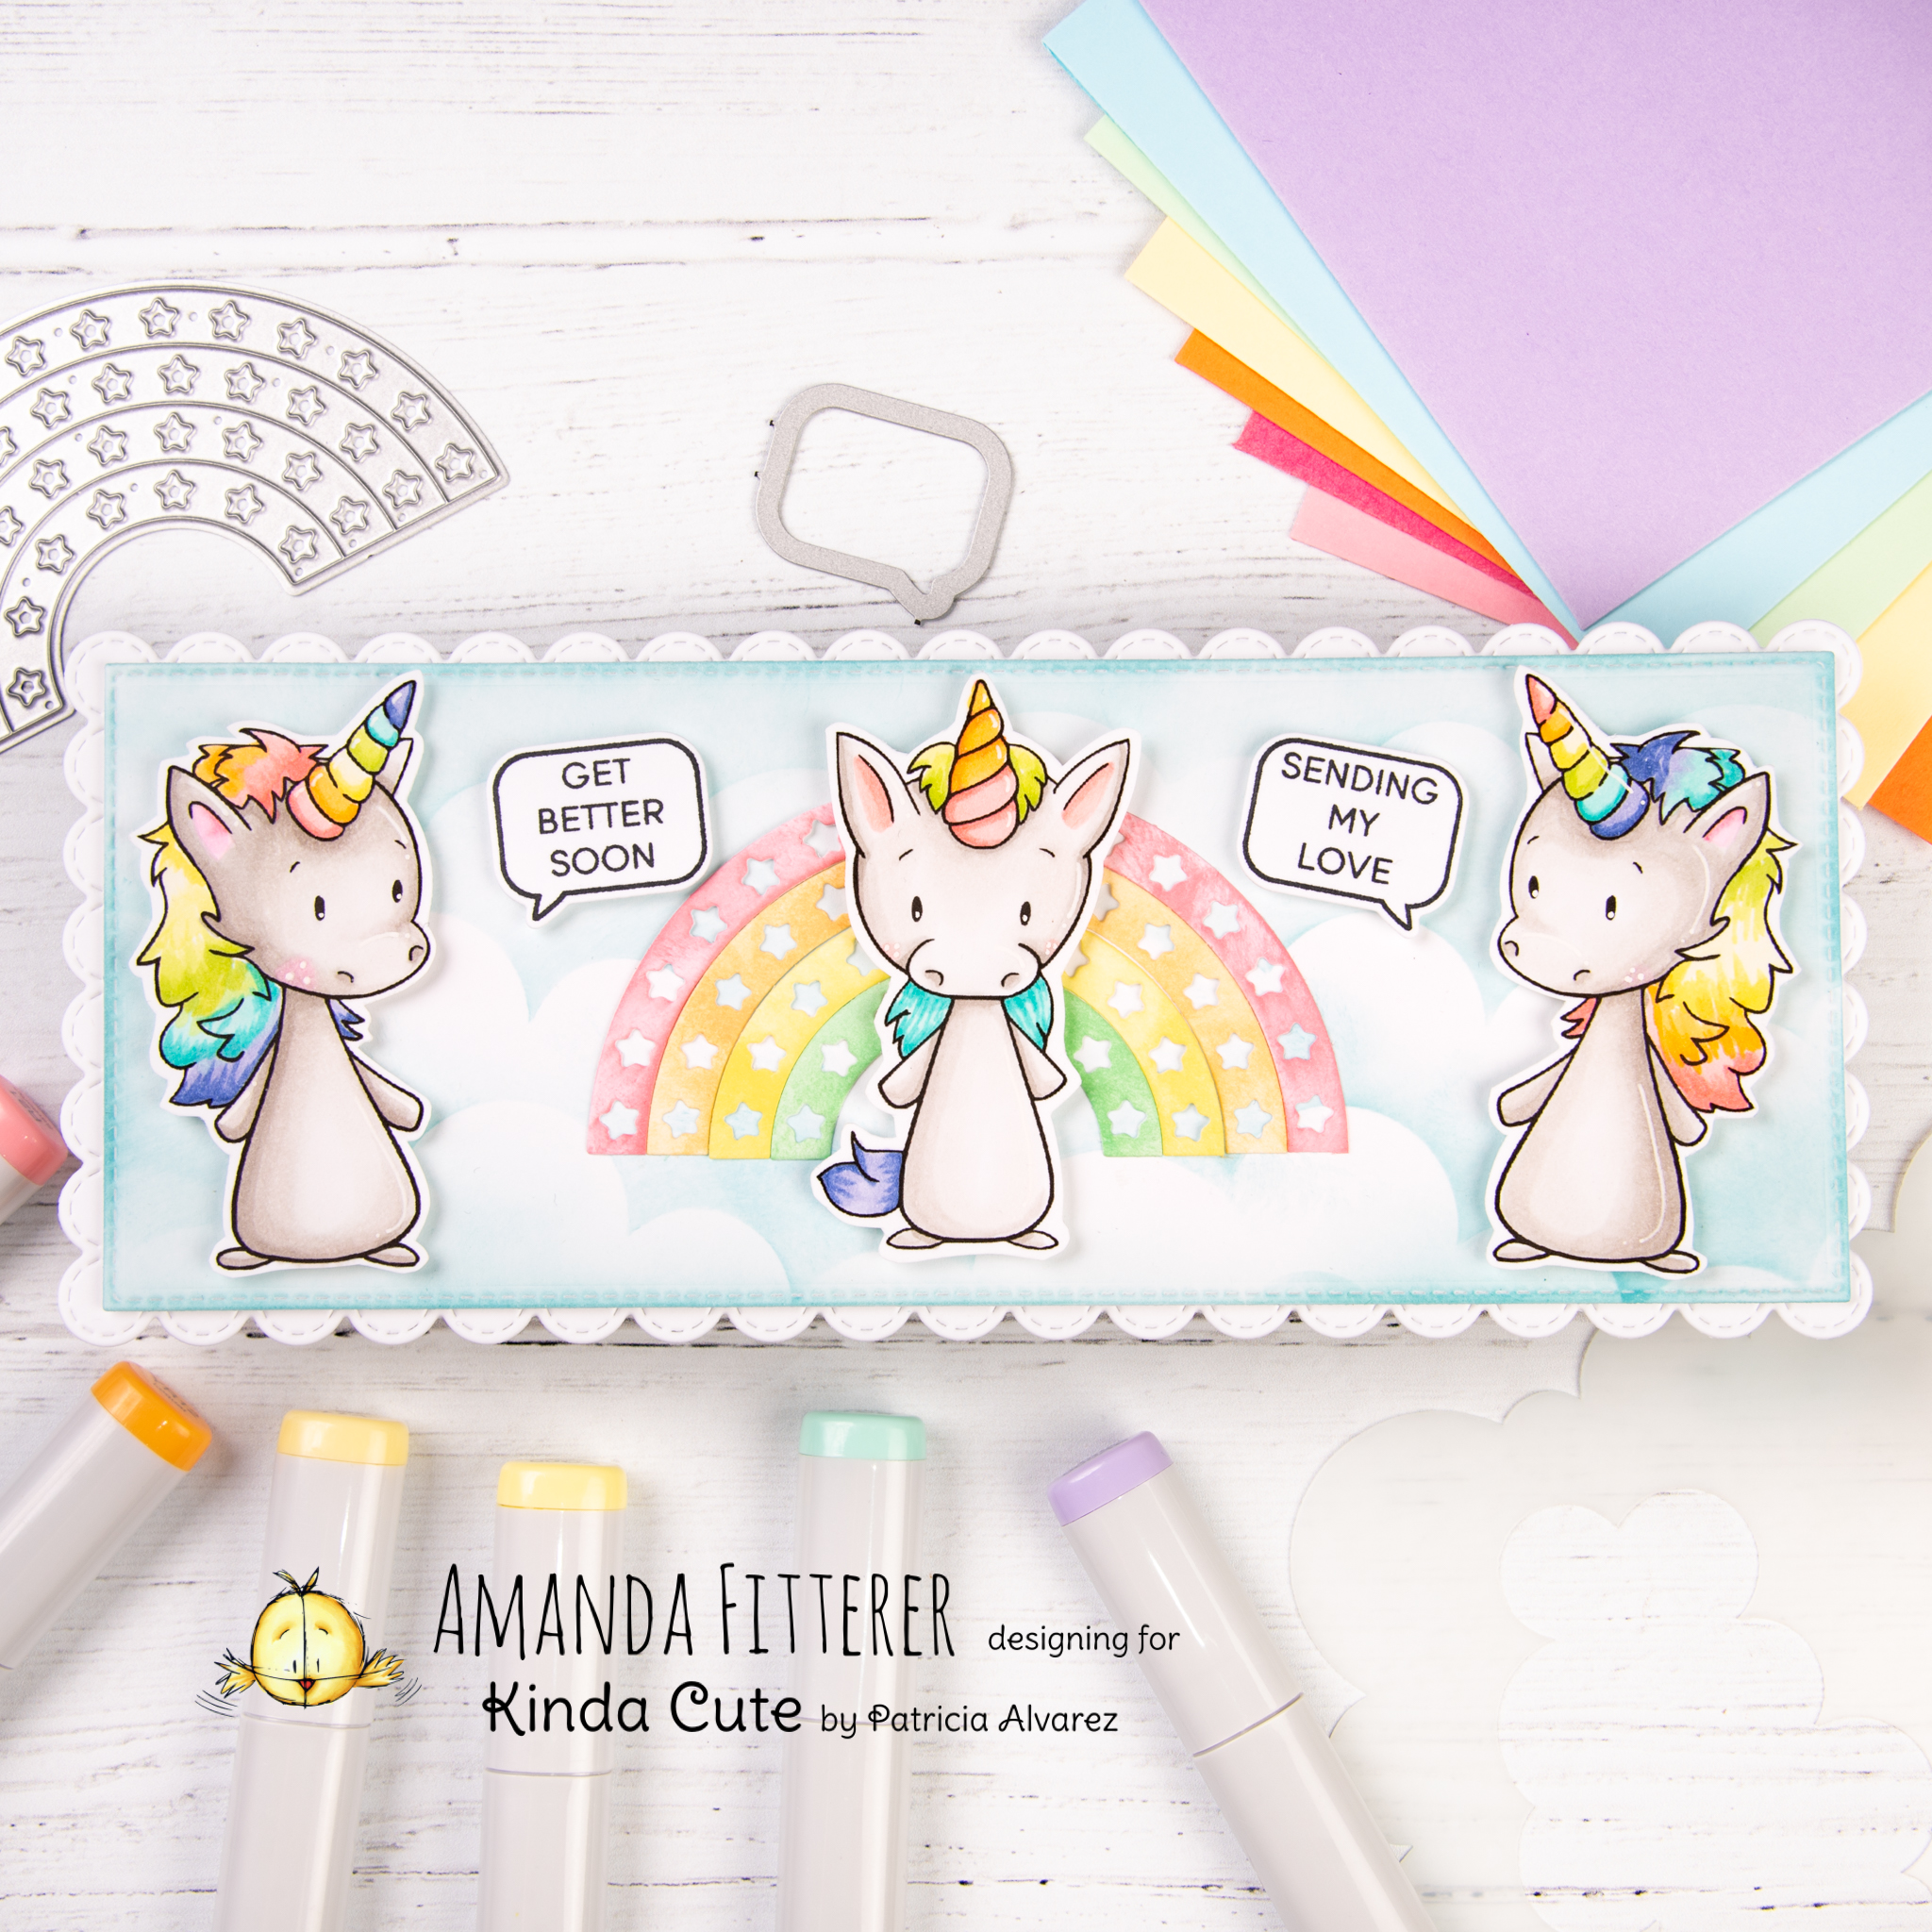
Today, I am sharing a magical slimline card using the Princess Bundle Set from Kinda Cute by Patricia Alavrez.
To create this card, I printed the images on 80lb. Neenah Solar White cardstock. I, then, colored the images with Copic markers. I cut the images out using precision scissors.
To create my slimline base, I used the Pink and Main Blessings Slimline Die. I blended Broken China and Peacock Feathers Distress Ink and Oxide to create my background. I adhered my card together using 3D foam strips and squares.
Thank you so much for stopping by my blog today! Xoxo, Amanda
Hello all you crafty people! I hope you had a fantastic Thanksgiving! I guess it’s time to start thinking about Christmas cards now! I can’t believe how quickly Christmas will be here!
Today, I’m excited to share some slimline cards I made using some products from the November Subscription Box!
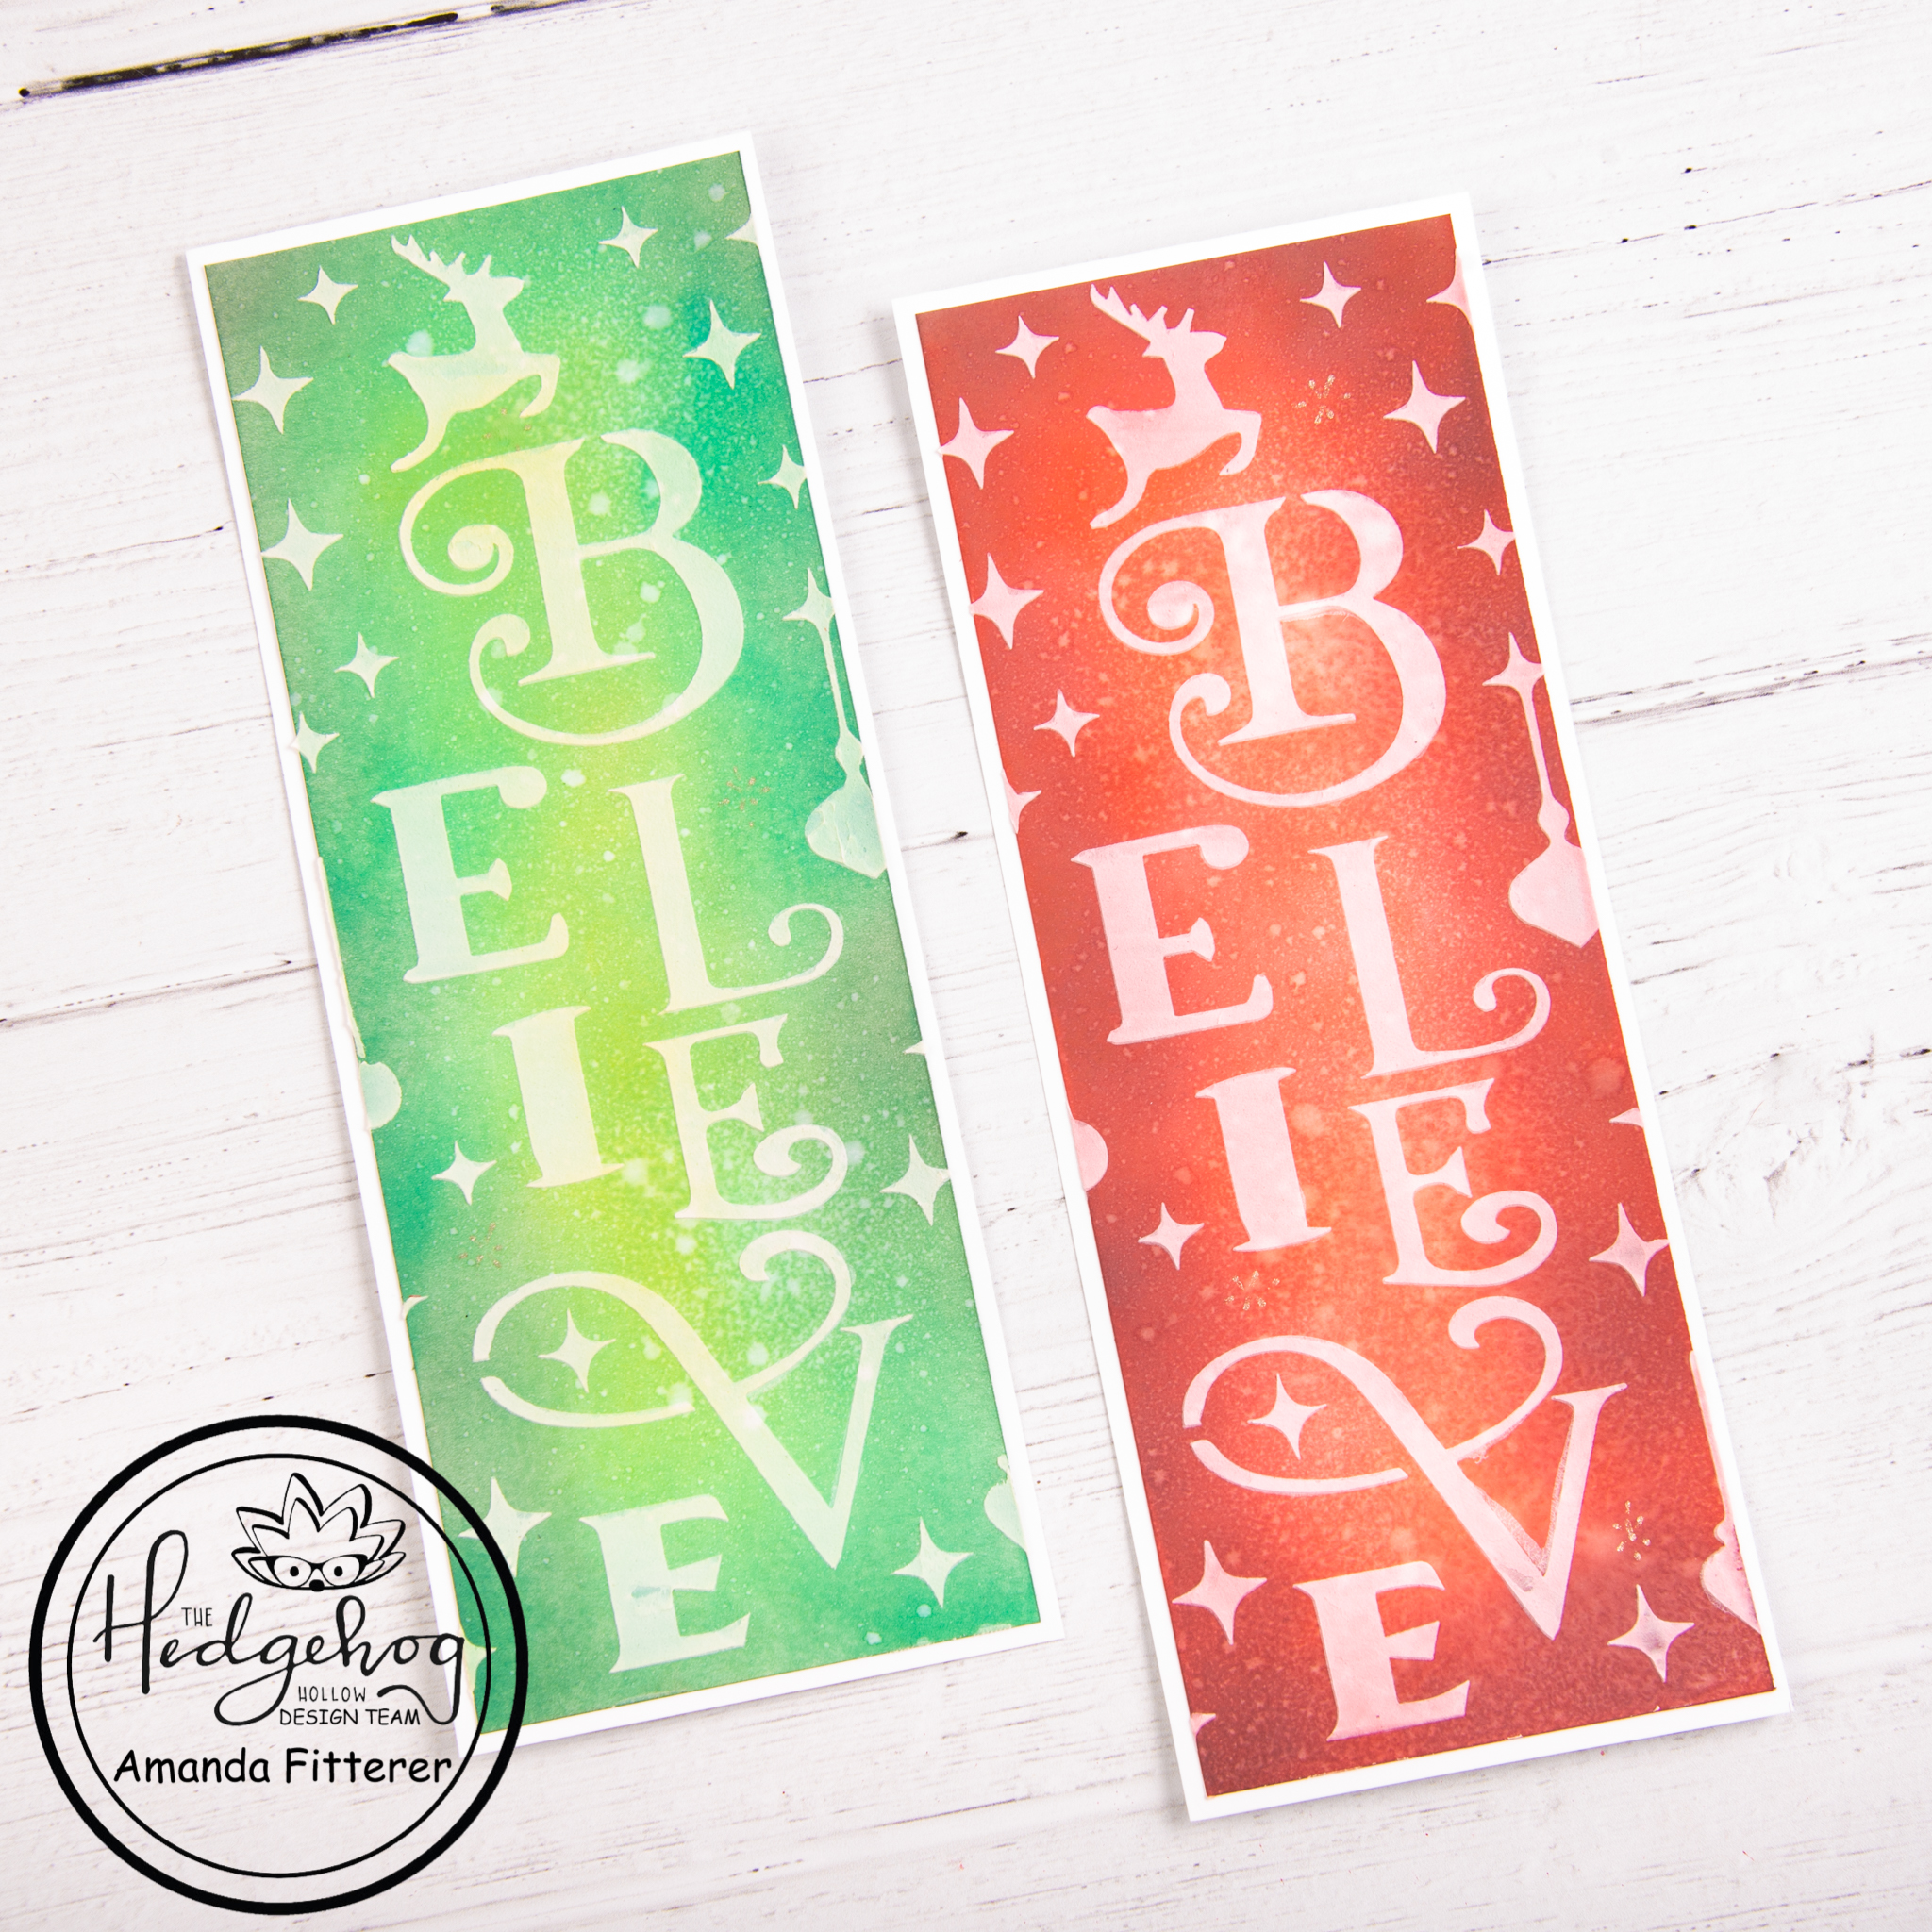
The Subscription Box came with some Maker Forte Perfect Blend Slimine Mini Strips. These are made specifically for Distress Ink and Oxide blending, so the colors go on super smooth!
For the green background, I blended Lucky Clover, Twisted Citron, and Black Soot. Once I was finished blending, I spritzed the card front with water.
For the red background, I used Candied Apple, Abandoned Coral, and Black Soot. Again, I misted some water on it to create a fun effect.
The November Subscription Box also had a “Believe” stencil included! This stencil is the perfect size for a slimline card! I used some embossing paste with the stencil to create a textured, 3 dimensional look. I used a white slimline card base to frame the card fronts.
These cards were so easy to make, but are so beautiful and elegant! They’d be perfect holiday cards to make in bulk, don’t you think?
The November box isn’t available now, but if you want to see the Subscription Box Options, you can click here to sign up for the December box! You can also check in December to see if the November box is available as a One-Off Box!
I can’t wait to see what the December box has in store for us! It’s always so exciting to see that package waiting for me in my mailbox! I love a good surprise!
Thanks again for stopping by my blog today! I hope you enjoy the rest of your weekend! Xoxo, Amanda
Hello, hello! Can you believe it is November already!? I am sad at how fast the holidays are approaching, but I am EXCITED about the new Hedgehog Hollow Box for November! It’s filled with lots of goodies!! If you didn’t catch the Reveal Video yet, you can find it here! You can also see a list of the products here. If you sign up before November 14th, you can still get this November box! What are you waiting for?!
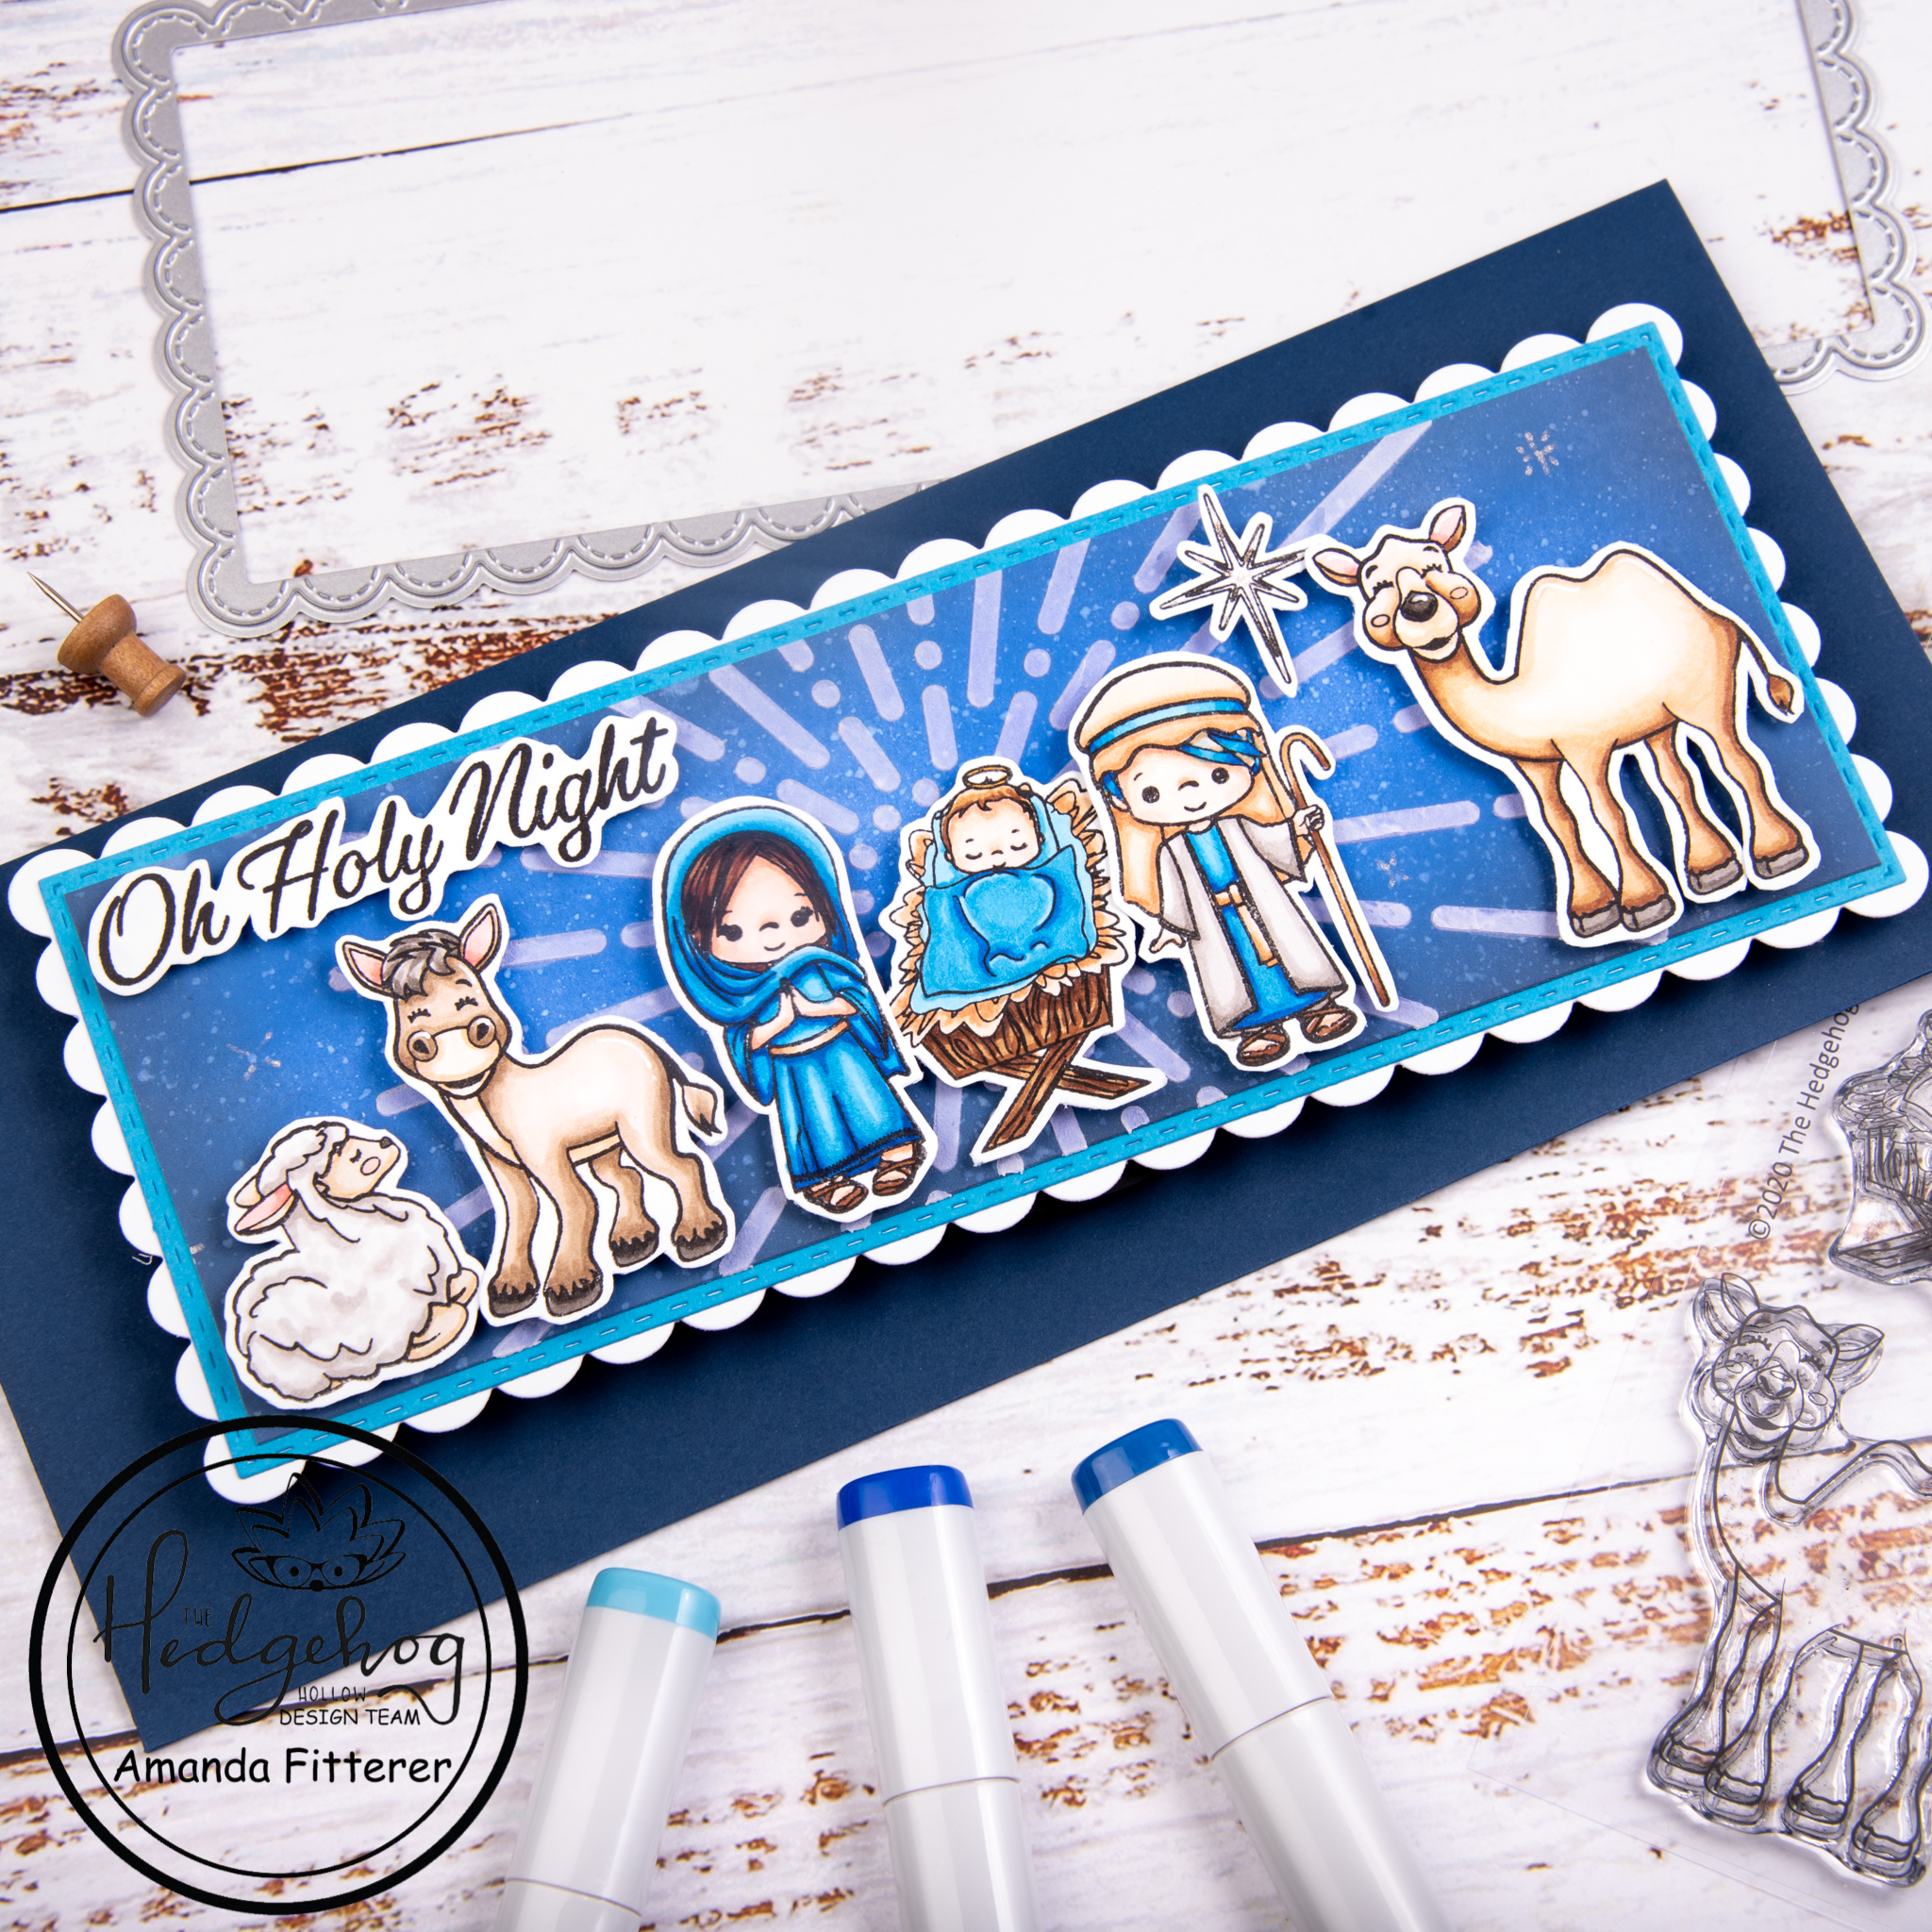
Today, I am sharing this Nativity Scene card with you! I think these images are just so sweet!
To create this card, I started with this AHHHHMAZING cardstock called “Perfect Blend Slimline Mini Strips” by Maker Forte. Blending Distress Inks and Oxides on this cardstock is just a breeze! I blended Faded Jeans, Blueprint Sketch, and Black Soot to create a dark background. I flecked water onto the background to create a “starry” effect.
I used the Simply Radiant Stencil from Heffy Doodle to create a starburst in my background. Using a spatula, I lightly applied some embossing paste.
While that dried, I stamped my images from the “Nativity” stamp set that was included in the November Subscription Box. I colored my images with Copic markers and then fussy cut each image out with detail scissors.
I love the way all of these images from the Nativity stamp set go together! They make the perfect little Christmas scene!
I hope you enjoyed my post! If you’re not already following me on Instagram, you can find me here. Later this week, I will be back with another project using the November Subscription Box! I can’t wait to keep sharing some more inspiration!
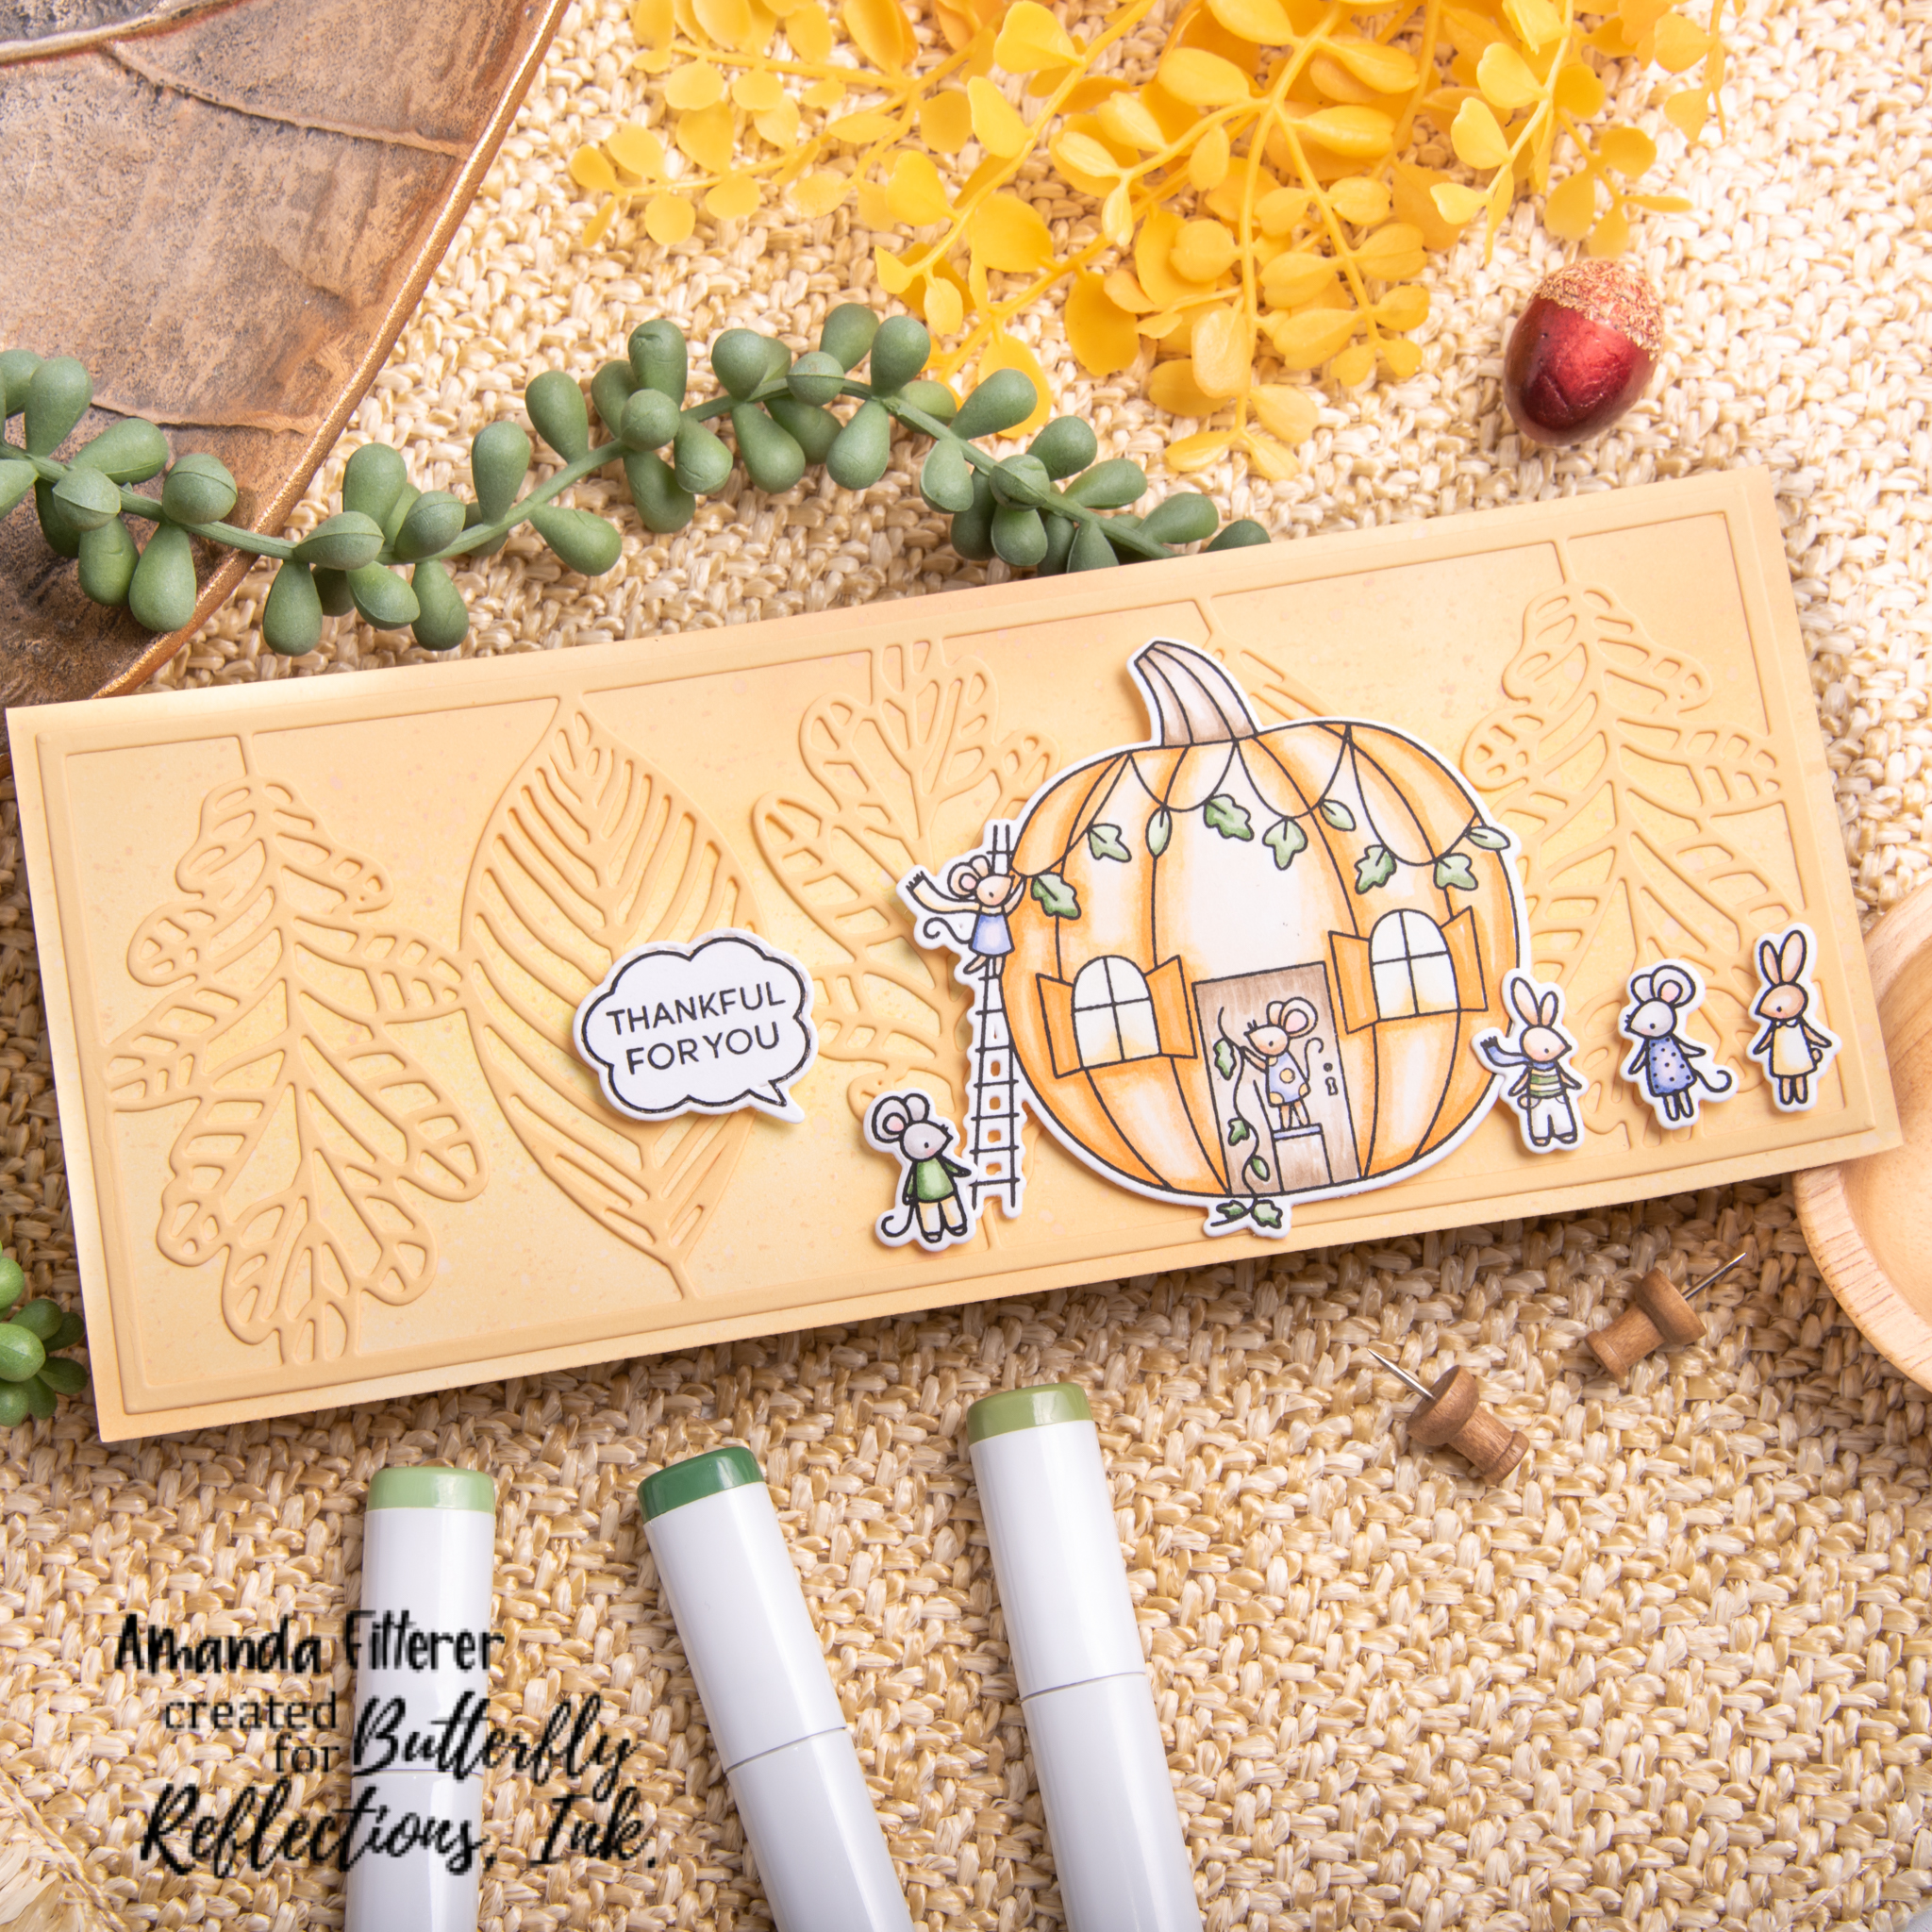
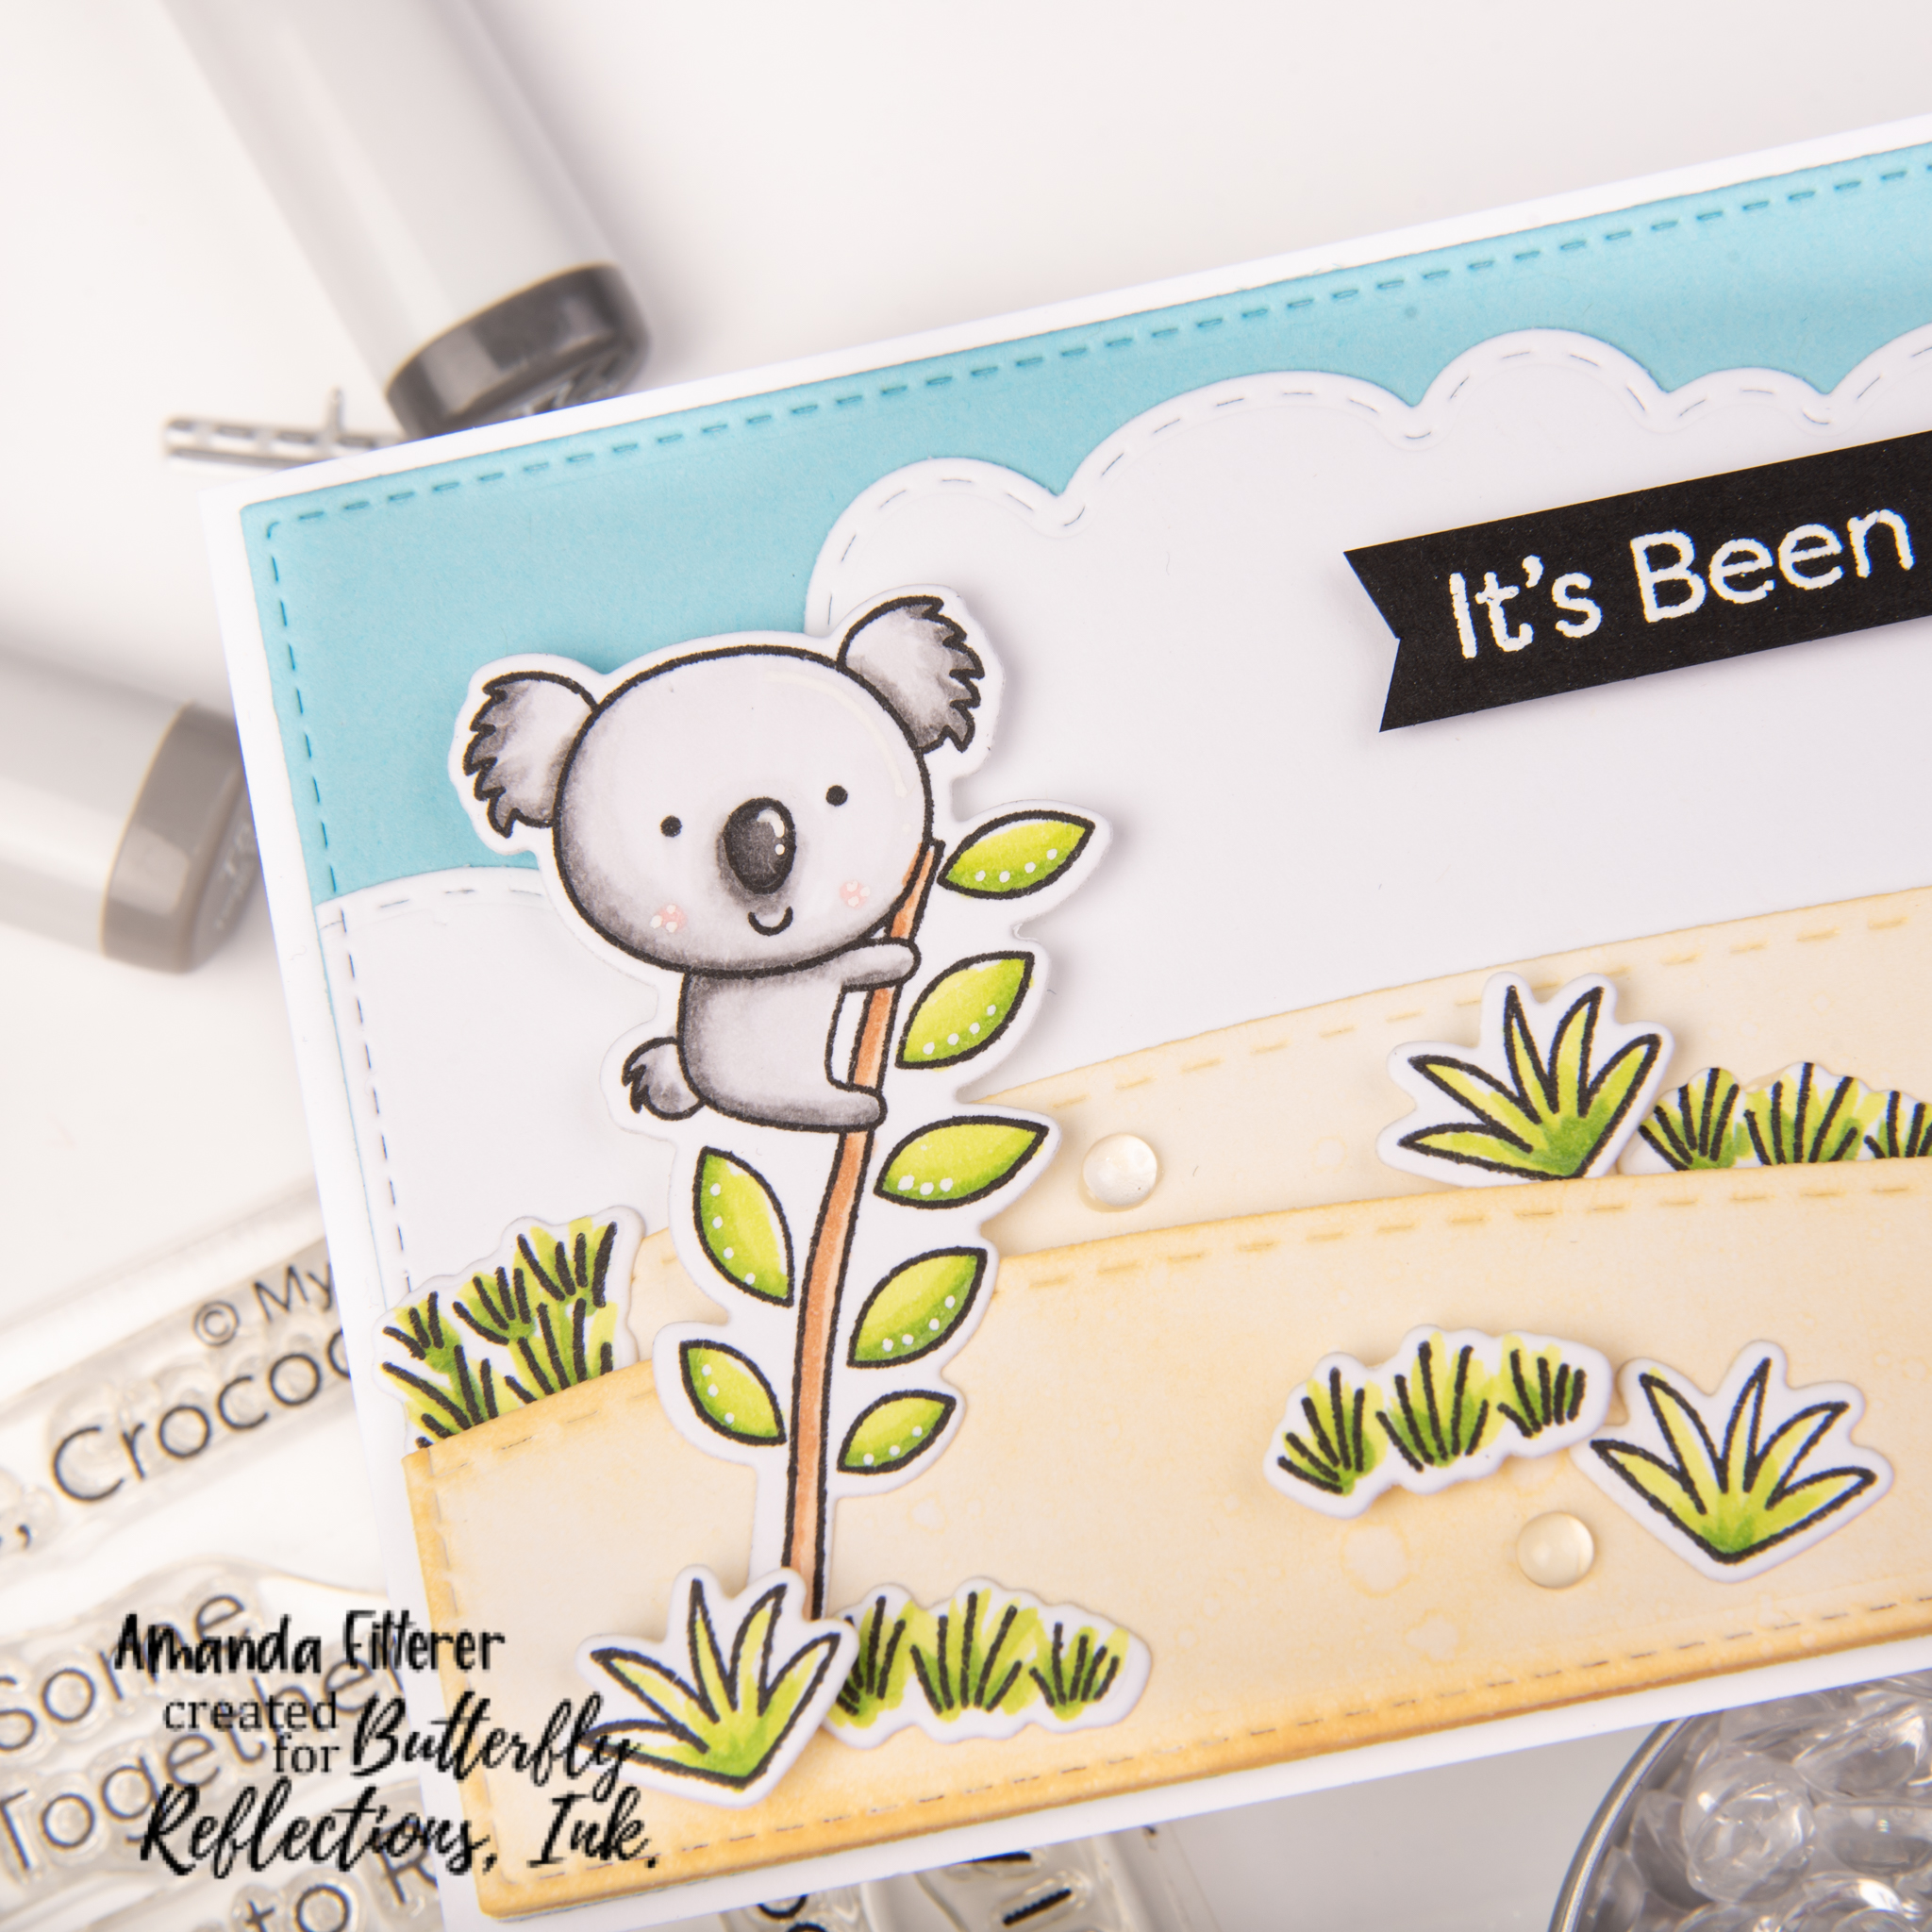
Hello hello!! I’m up on the Butterfly Reflections Ink blog again today with a fun slimline card! Here is the blog post! Head there to see ALL the details!
Hi everyone and welcome to the Heffy Doodle and Time for Tea Designs Collaboration Blog Hop! Our design teams have come together to share some amazing inspiration featuring Heffy Doodle and Time for Tea Designs products, and there is a prize up for grabs, too!
To make this fun slider slimline card, I’m going to start with the Slimline Pull Tab Dies and the Stitched Slimline Trio Dies. I am using the Colored Cardstock from Heffy Doodle as well as 80 lb. Neenah Solar White cardstock. Using the Grassy Lass Border Dies, I’m going to create 2 little hills for the hamsters to roll down. I am using G00, G40, and G12 Copic markers to color my hills. I’m positioning the Wavy Water Slides Dies so that they’re hidden behind the grass.
I am stamping my little Hooray Hamster Stamps and then coloring the images with my Copic markers. I am using: 0, BG32, BG11, BG10, BG0000 E00, E50, E30, E31, E34, E11, E13, E40, E42, E43
For the slider portion, I’m going to cut 2 extra wheels, plus 2 small circles (these are from Lawn Fawn’s Reveal Wheel dies), and grab 2 brads. First, I’m attaching my colored hamster to the colored wheel. Next, I’m attaching my extra wheel to my small circle with a brad. Now, I’m going to put foam squares on the wheel and attach both wheels to each other. This will allow the hamster wheel to turn in circles. I’m cutting down a small circle to be my slide and then attaching a strip of acetate to it. Once I adhere my grass to the front of the card, I will adhere my hamster wheel to the acetate strip.
I stamped my sentiments, adhered my grass using 3D foam strips, and then attached my hamsters. Now my hamsters can turn in circles and slide down the hill at the same time!
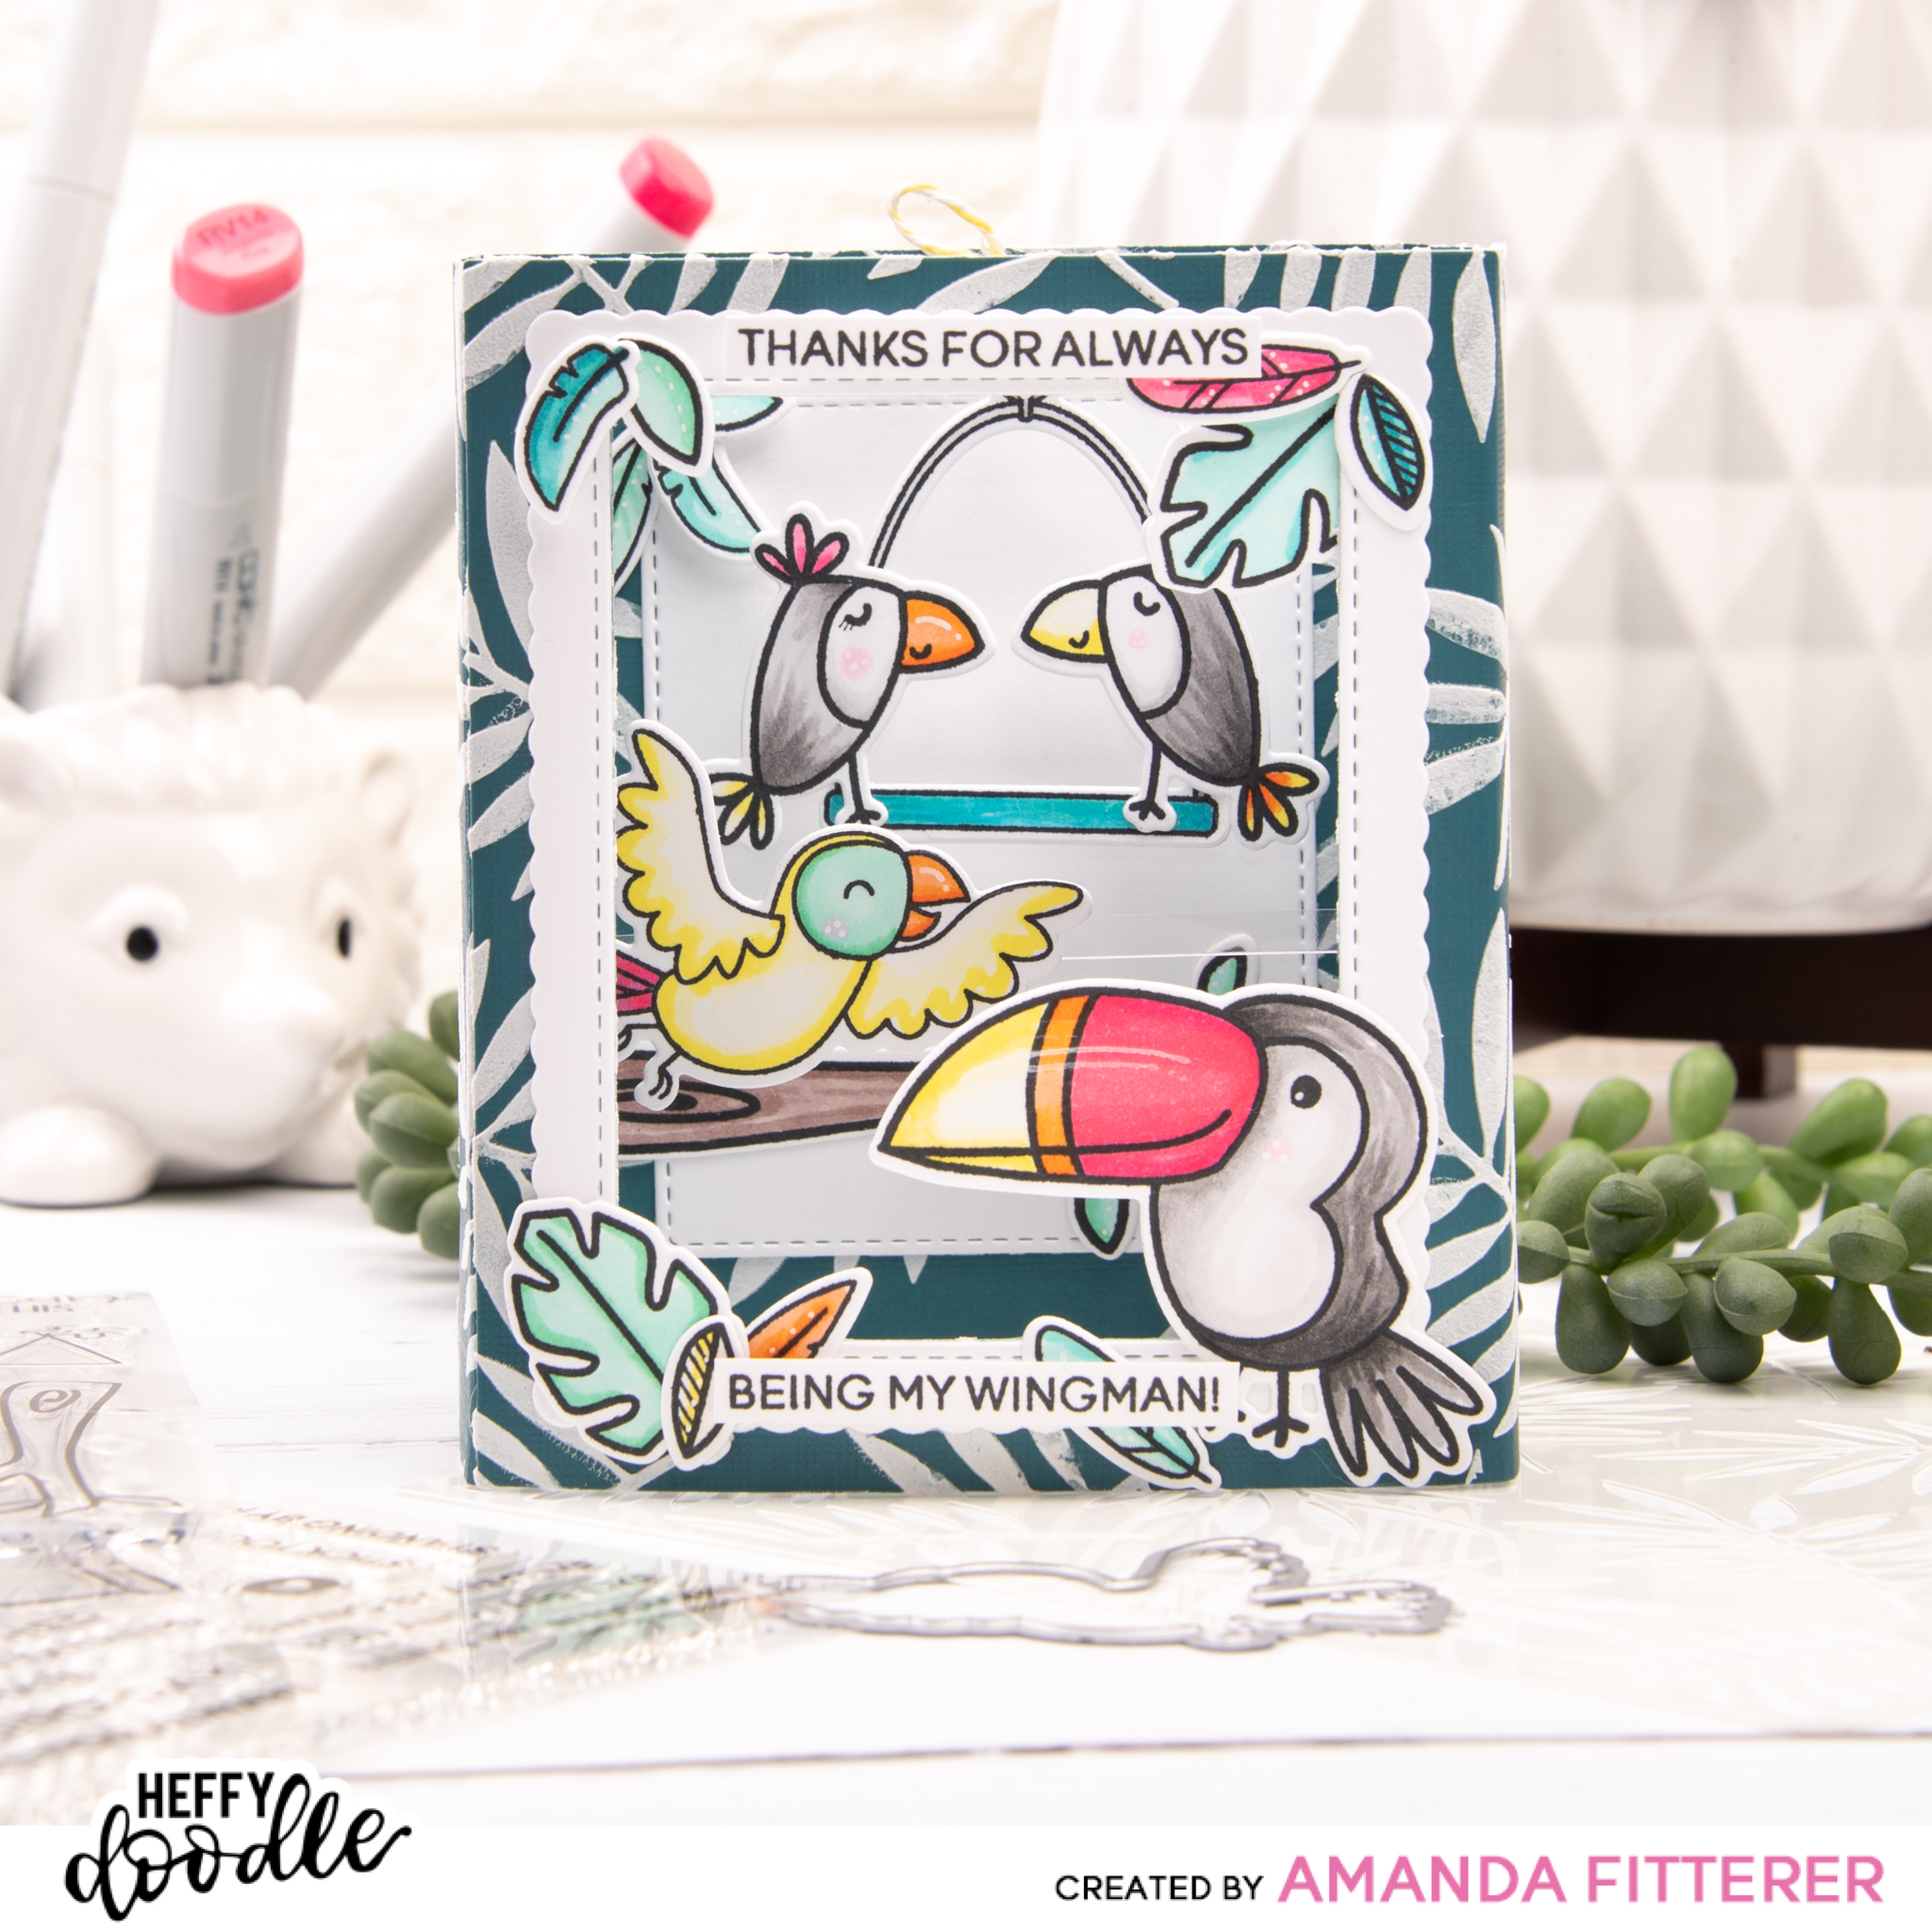
For this tropical card, I’m starting with the Big Shadow Box Die and some dark cardstock. Using the UnbeLEAFable Stencil and embossing paste, I’m creating the pattern on both sides (letting it dry before flipping over to the other side.)
While that dries, I’m going to stamp my images with Memento Tuxedo Black ink and color my images with Copic markers. Click on any photo to view it larger.
After die cutting my images, I’m ready to start assembling the card! I am using liquid glue and 3D foam squares to adhere all the images. I am using double sided tape to construct the shadow box. For my bird swing, I am using a small hole punch to put a hole on top of the swing and then using yellow and white baker’s twine to make a bow. I’m attaching it to an acetate strip. I am also attaching my yellow bird to an acetate strip so that he can fly back and forth.
PRIZES: Heffy Doodle and Time for Tea Designs will each be giving away a 25£ to their respective stores. Winners will be chosen randomly and announced on July 28th on the Heffy Doodle and Time for Tea Designs blogs.
Thank you so much for hopping along with us! If you’re not following me on Instagram yet and you want to see more of my cards, please follow me here: @craftyandcreativevibes
I printed the images on 80lb. Neenah Solar White cardstock. I used my Copic markers to color the koalas. I used: N0, N1, N2, N3, N4, N6, R20. I used precision scissors to cut out the koalas.
The slimline dies are newly released from Heffy Doodle. The heart stencil I used for the background is also from Heffy Doodle! I used “Worn Lipstick” distress oxide to blend the background.
Thank you so much for stopping by my blog to see this post! ‘Til next time!! Xoxo, Amanda