Posted on 4 Comments

VIDEO: DIY NECKLACE, KEYCHAIN, AND GIFT PACKAGING

Hello there, Hollowers! I hope you are all having a fantastic Tuesday! I told you I’d be back with another fun project using the December 2020 Box and here I am! If you didn’t see my blog post from last week, you can find it here. I made a cute card using all the Forest Friends! Don’t forget to follow me on Instagram to see my other posts as well!

This week, I am sharing a video tutorial! I made a Shrinky Dink necklace and keychain. Plus, I made the gift packaging to put it in! This month’s subscription box is most definitely my fav so far! Did you get yours yet?!

You can watch the video tutorial here.

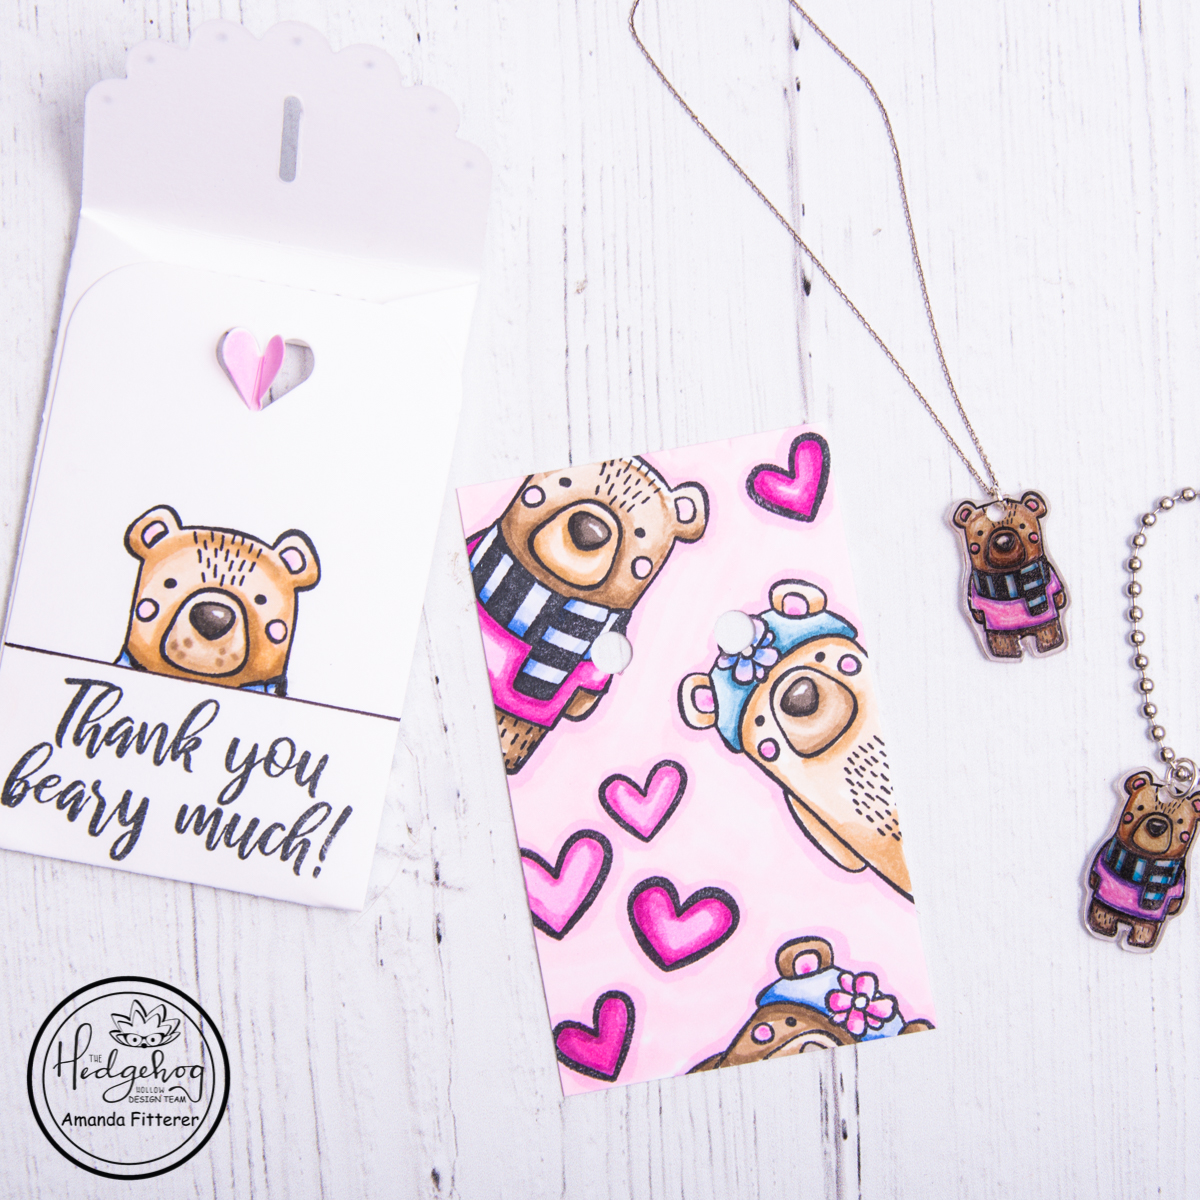
To create the gift packaging, I used the Heffy Doodle Gift Card Pocket Die. I created my own dot borders with a Sharpie pen.

For the bears and sentiment, I used the Forest Friends and Animal Greetings Stamp Sets that were included in the December Subscription Box. I colored the images with Copic markers.

To create my necklace and keychain, I used Dress My Craft’s Shrink Prink. I stamped the bear from the Forest Friends Stamp Set on the glossy side of the Shrink Prink with Staz-On ink. I, then, colored him on the frosted side of the Shrink Prink using colored pencils. I used a hole punch to create a hole BEFORE shrinking him down with my heat tool.

I just love the sentiment “Thank you beary much” with these sweet Forest Friends bears! My daughter has already stolen the keychain and hung it in her room!

I hope you enjoyed this tutorial and video! Looking forward to my post for next week! What could it be… what could it be… ?

Don’t forget, you only have until December 14th to order this box! What are you waiting for!?

Xoxo, Amanda 🙂

Posted on Leave a comment

Happy Hanukkah – 2 Quick and Easy Cards

Hello friends and welcome back to The Hedgehog Hollow Blog! It’s Amanda Fitterer back today with some more holiday cards!

The November Subscription Box is available now, but you only have until November 14th to get yours! If you want to see the reveal video, you can find it here. The box is full of lots of goodies, including the double-sided patterned paper that I used for these cards! There’s also a really cool product called WoodUBend that is super fun to play with. If you haven’t seen my video using the product, you can find the post here.

Now onto these beautiful Hanukkah cards!

To create my first card, I used the double-sided patterned paper with Dress My Craft’s Rounded Tag Punch. I tied baker’s twine to each of my tags and popped them up with 3D foam squares. I used Danube Blue and Bahama Blue Memento ink to stamp my image from the “Happy Hanukkah” stamp set. This stamp set is included in the November box and has loads of great images and sentiments. I cut a circle of vellum to frame my Star of David. I used 3D foam squares to adhere the Star and vellum to the front of the card. To finish the card off, I placed a few embellishments from Dress My Craft’s Penguins and Snowflakes Mix.

To create my shaker card, I used Stitched Dies and the double-sided patterned paper to create my frames and base. I filled my shaker with Penguin Slices and Penguins and Snowflakes Mix. I tied some baker’s twine to the bottom of the card. I stamped and fussy cut the Dove out from the “Happy Hanukkah” stamp set. I colored the image with B95, B93, and B91. I used 3D foam squares to adhere the image to my card.

And voila! You have 2 quick and easy Hanukkah cards!

Thank you so much for coming by The Hedgehog Hollow blog! It’s almost the weekend! Hang in there! I’ll have one more post on the November box on November 28th, so keep an eye out!

Xoxo, Amanda

Posted on Leave a comment

DIY Christmas Ornaments with Hedgehog Hollow

Hello friends and welcome back to my blog! I hope you’re all doing well today and excited to see some DIY ornaments!

The November Subscription Box is available now! If you order before November 14th, you’ll get the November box which is full of so many goodies! If you want to see the reveal video, you can find it here.

This new box includes a product called WoodUBend which is a heatable, bendable wood product. I created the ornament bases using the samples that were in the box! This product is SO neat and there are so many ways you can use it!

To create the ornaments, I painted the WoodUBend mouldings with White Gesso first. After the Gesso dried, I used an a knife to cut the moulding into 2 pieces.

To bend the pieces into a circle, I used a heat tool to heat the mouldings, and then bent them once they became flexible enough.

Using the patterned paper that was including in the November Subscription Box, I cut out backgrounds for each of my ornaments.

I added the twine and ribbon using a hot glue gun.

I added Frosted Sugar Powder and Crystal Ice Cubes to each of the ornaments using liquid glue. I also added some cute little Penguin Slices to the smaller ornament.

I am pretty excited to be put these on my Christmas tree this year! I hope you enjoyed the video tutorial and this blog post! If you like this project, I’d love to hear from you! Feel free to comment on this blog post or the YouTube tutorial! I love reading your comments!

Thank you so much for stopping by my blog! Don’t forget you only have until November 14th to order the November Subscription Box!