Posted on 8 Comments

Alex Syberia Designs Spring Meadow Release Blog Hop & Giveaway

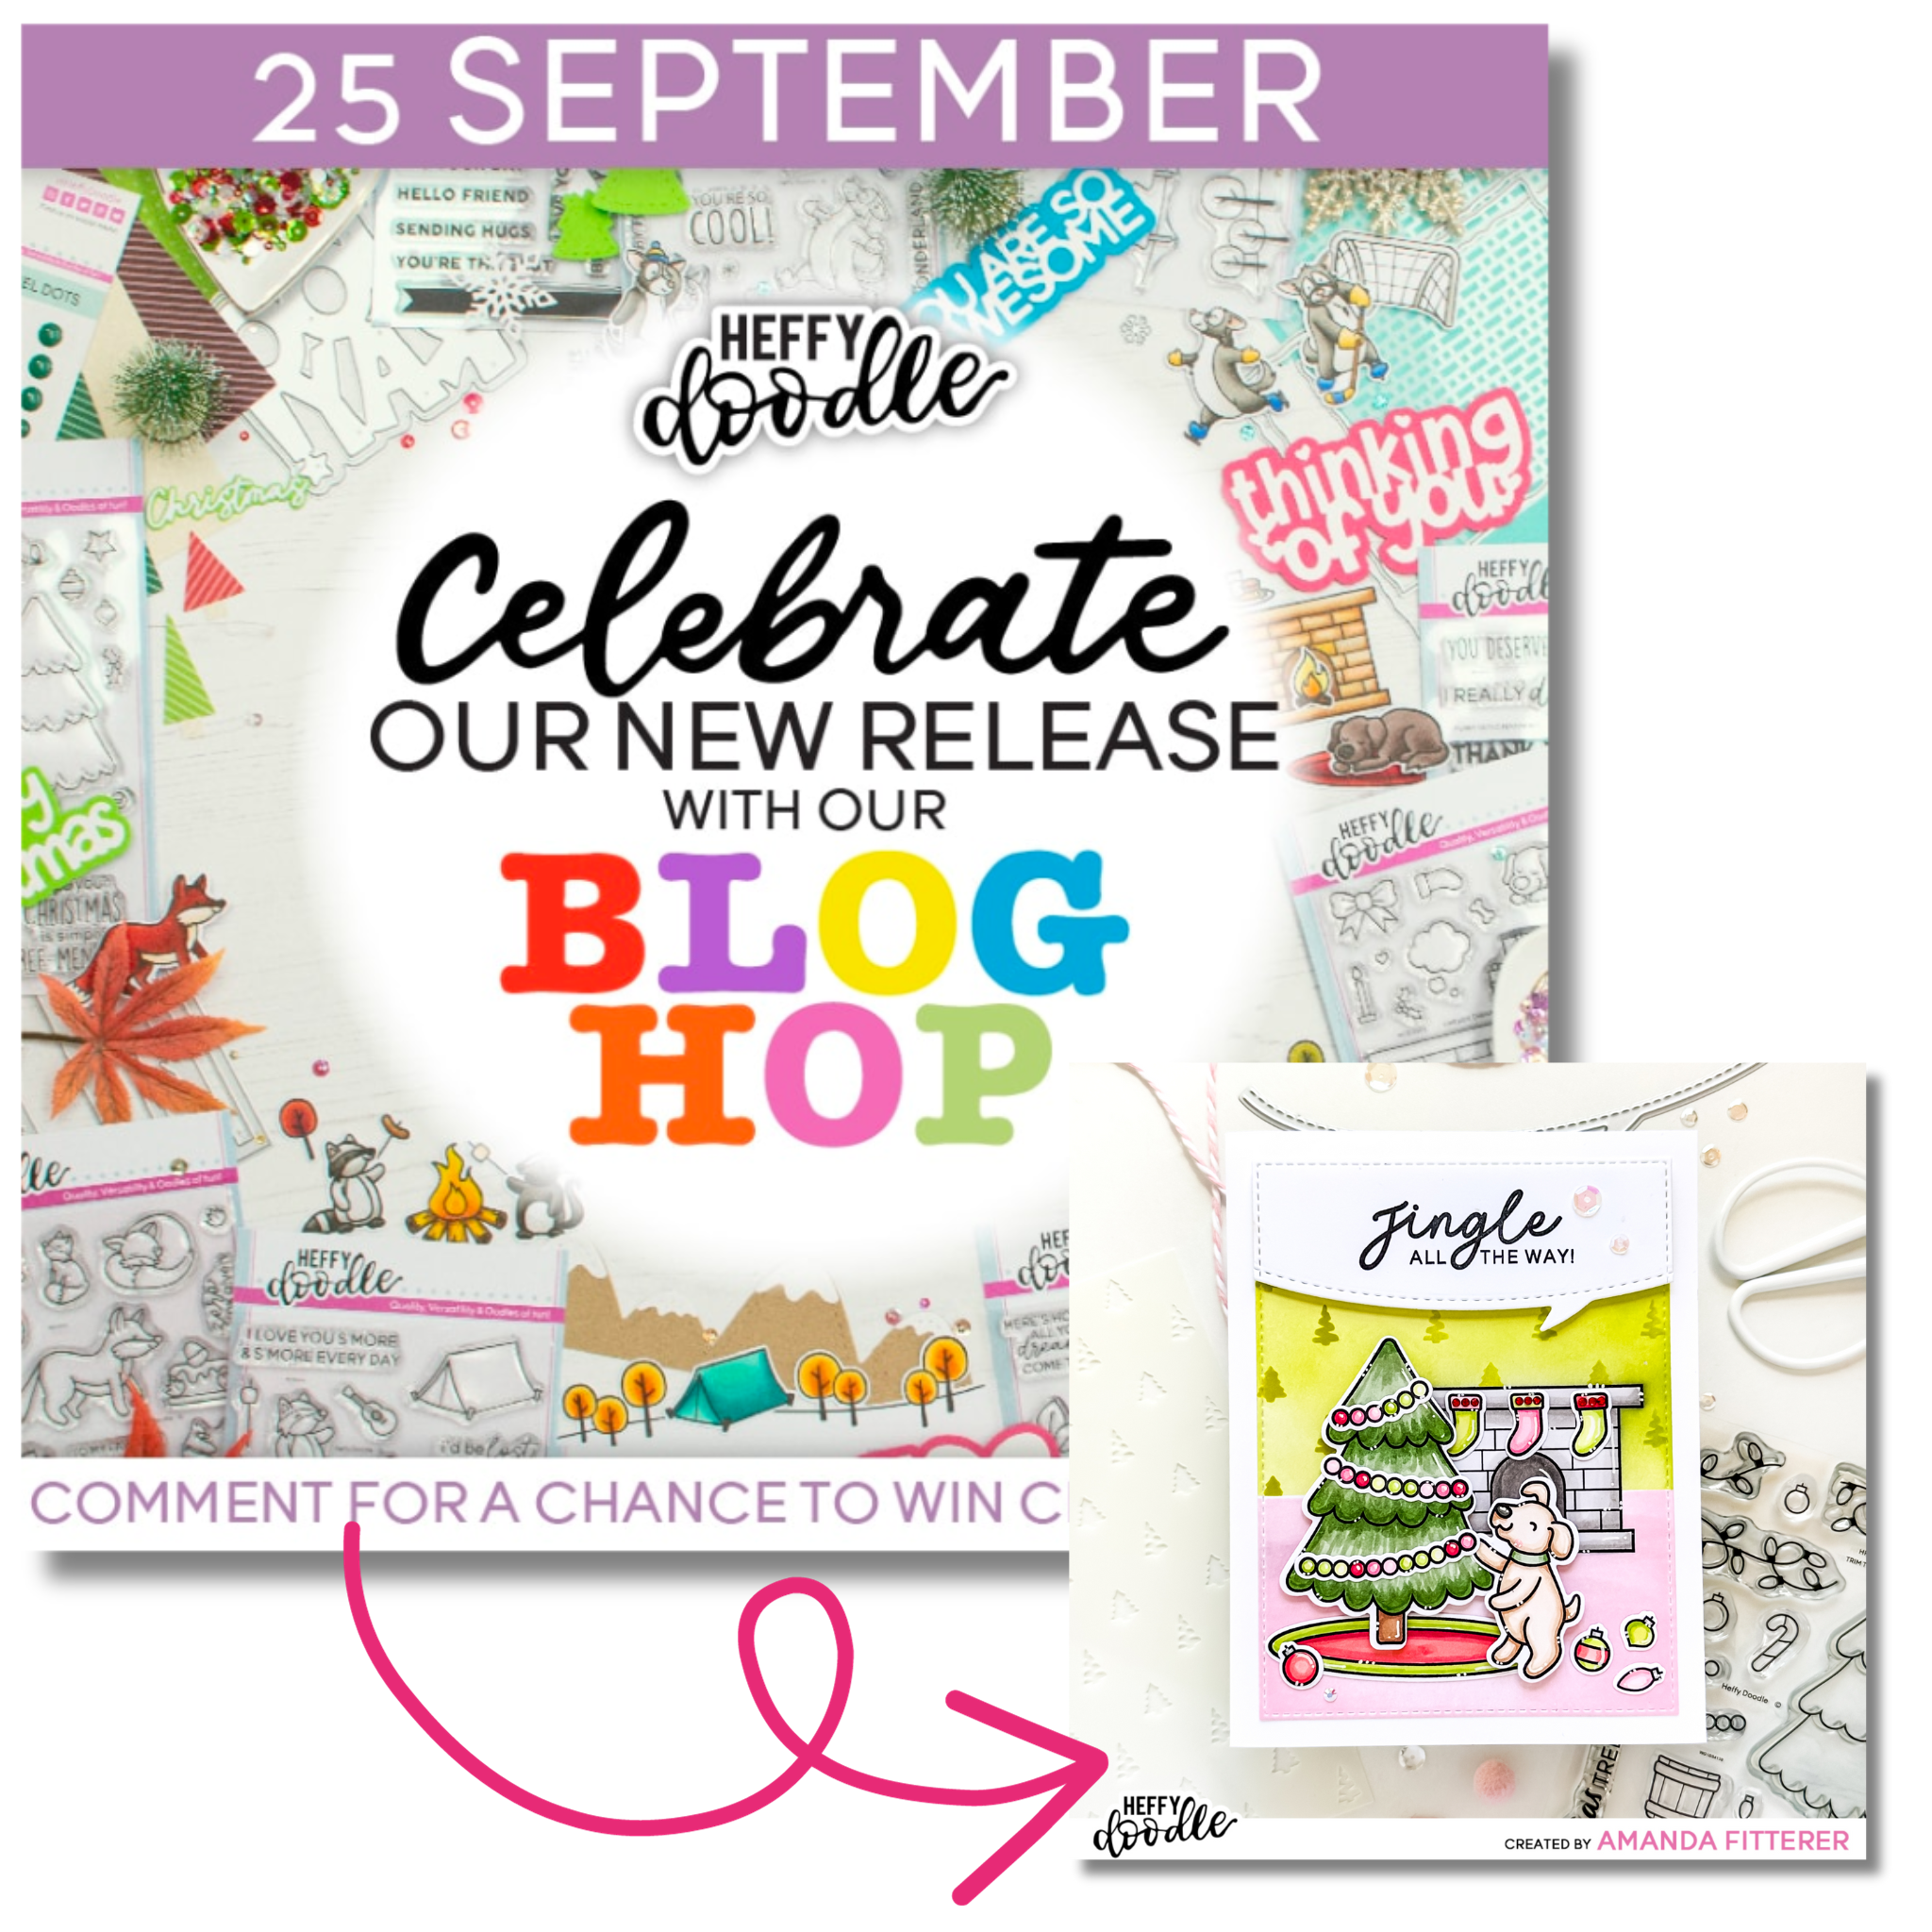
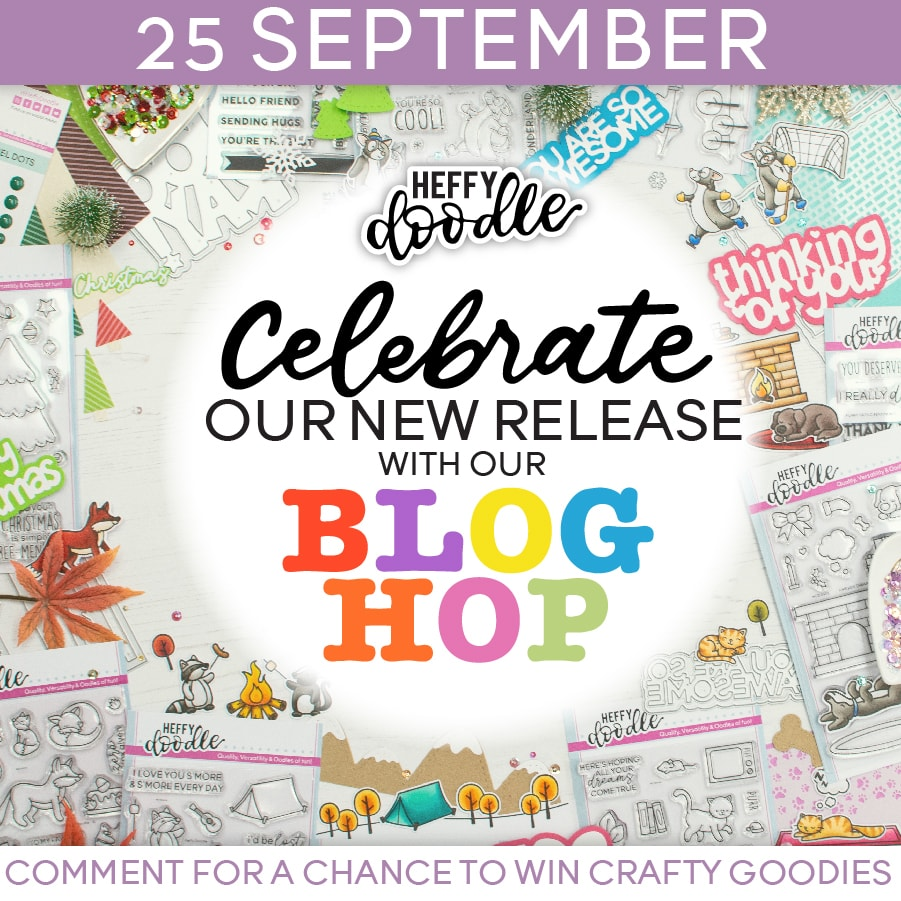
Hey there, crafty friends! Today is an exciting day! Alex Syberia Designs has a NEW RELEASE!! Woohoo! We have a Blog Hop AND an Instagram Hop happening to kick off the excitement!

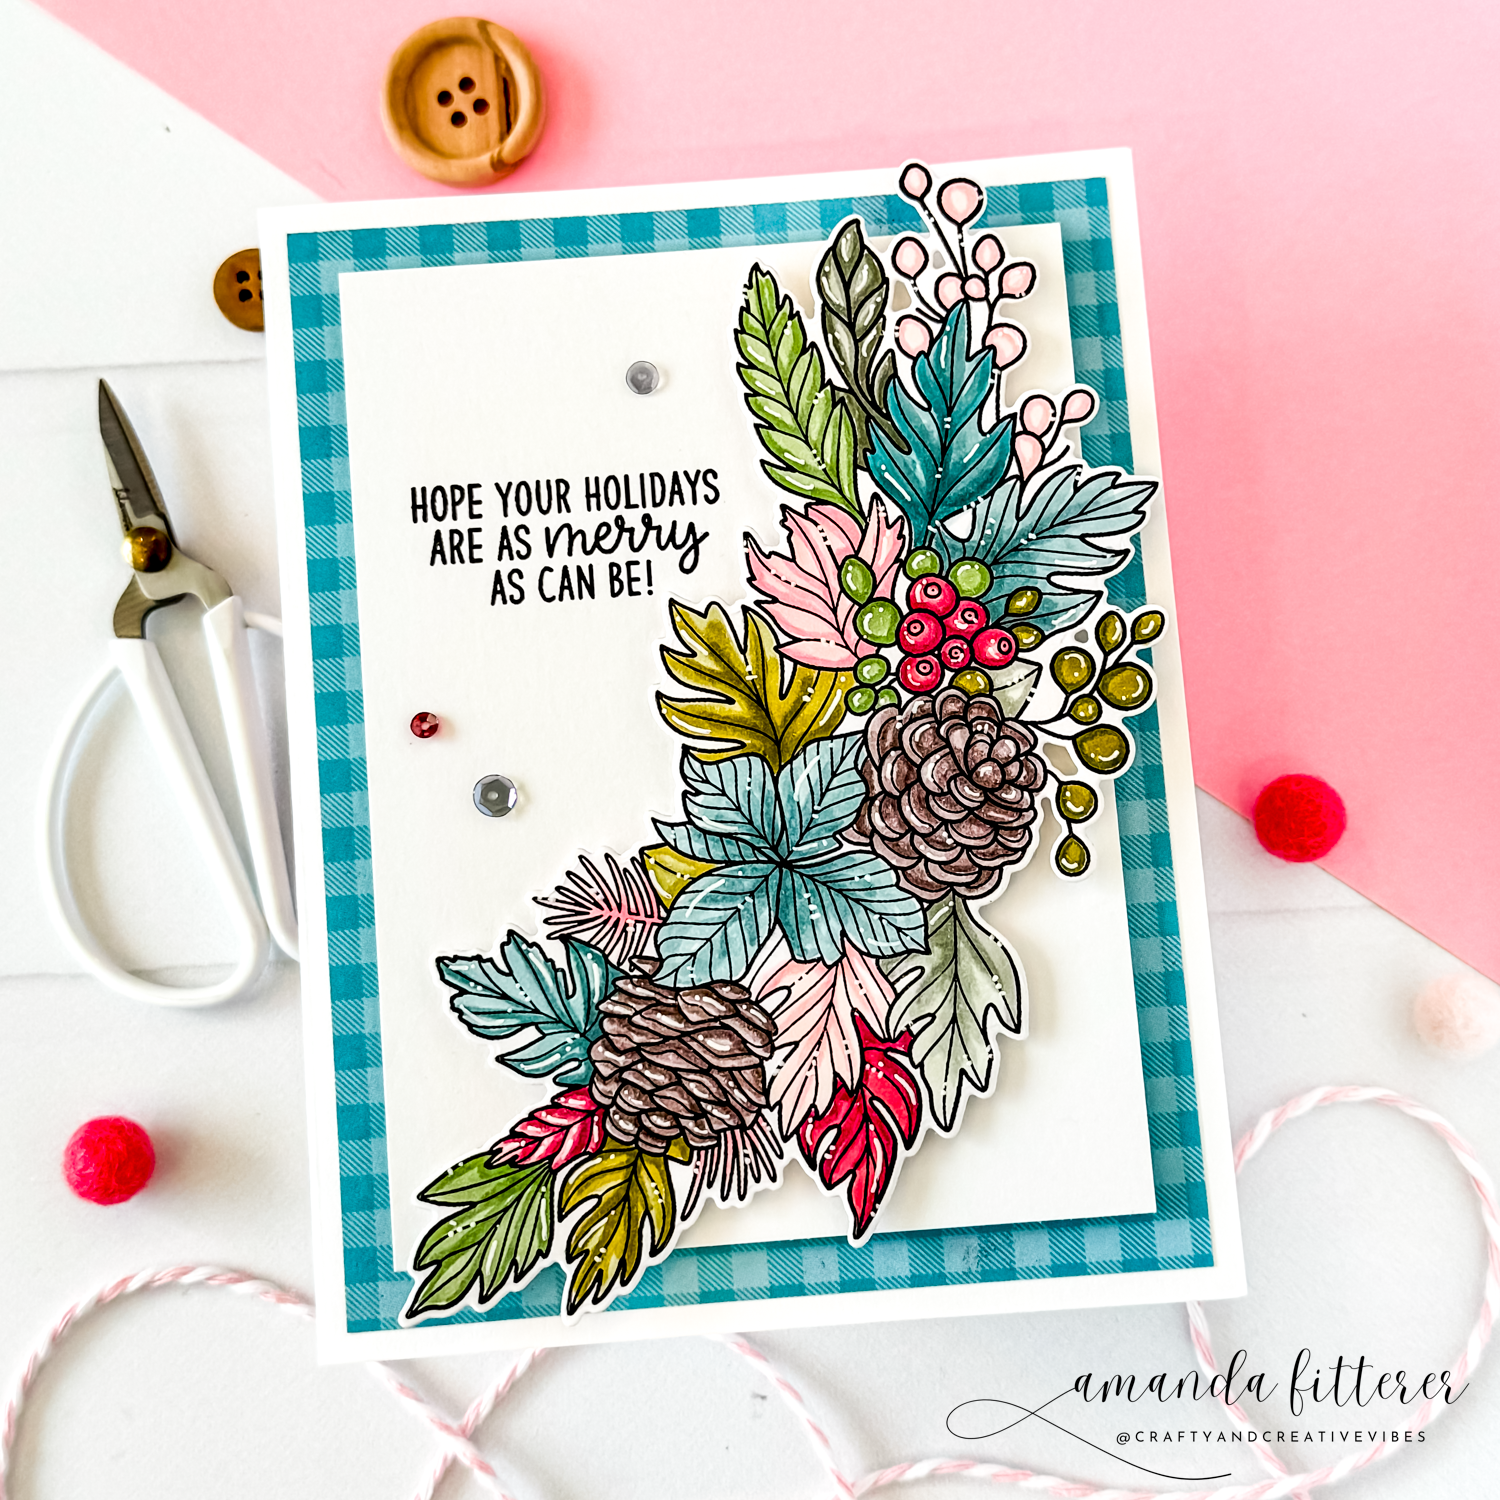
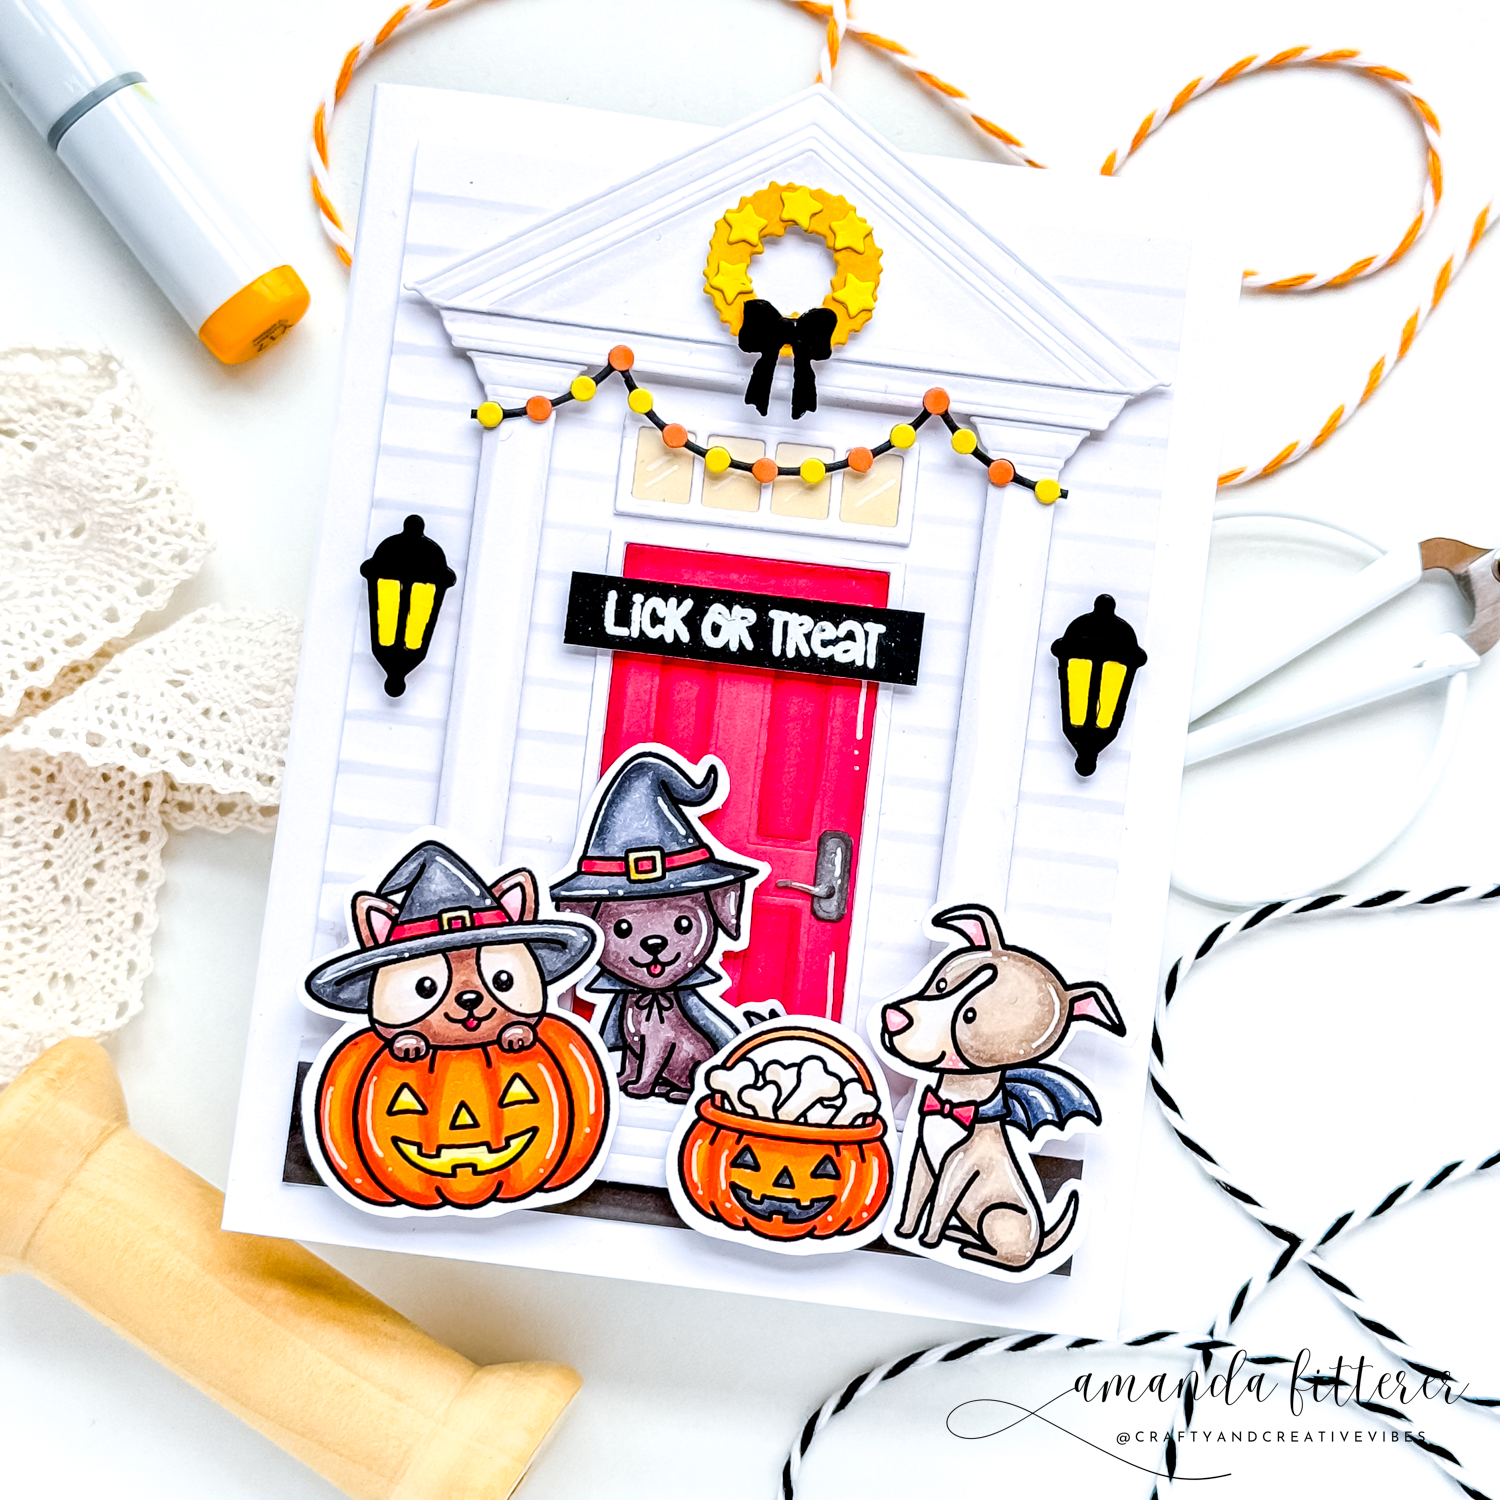
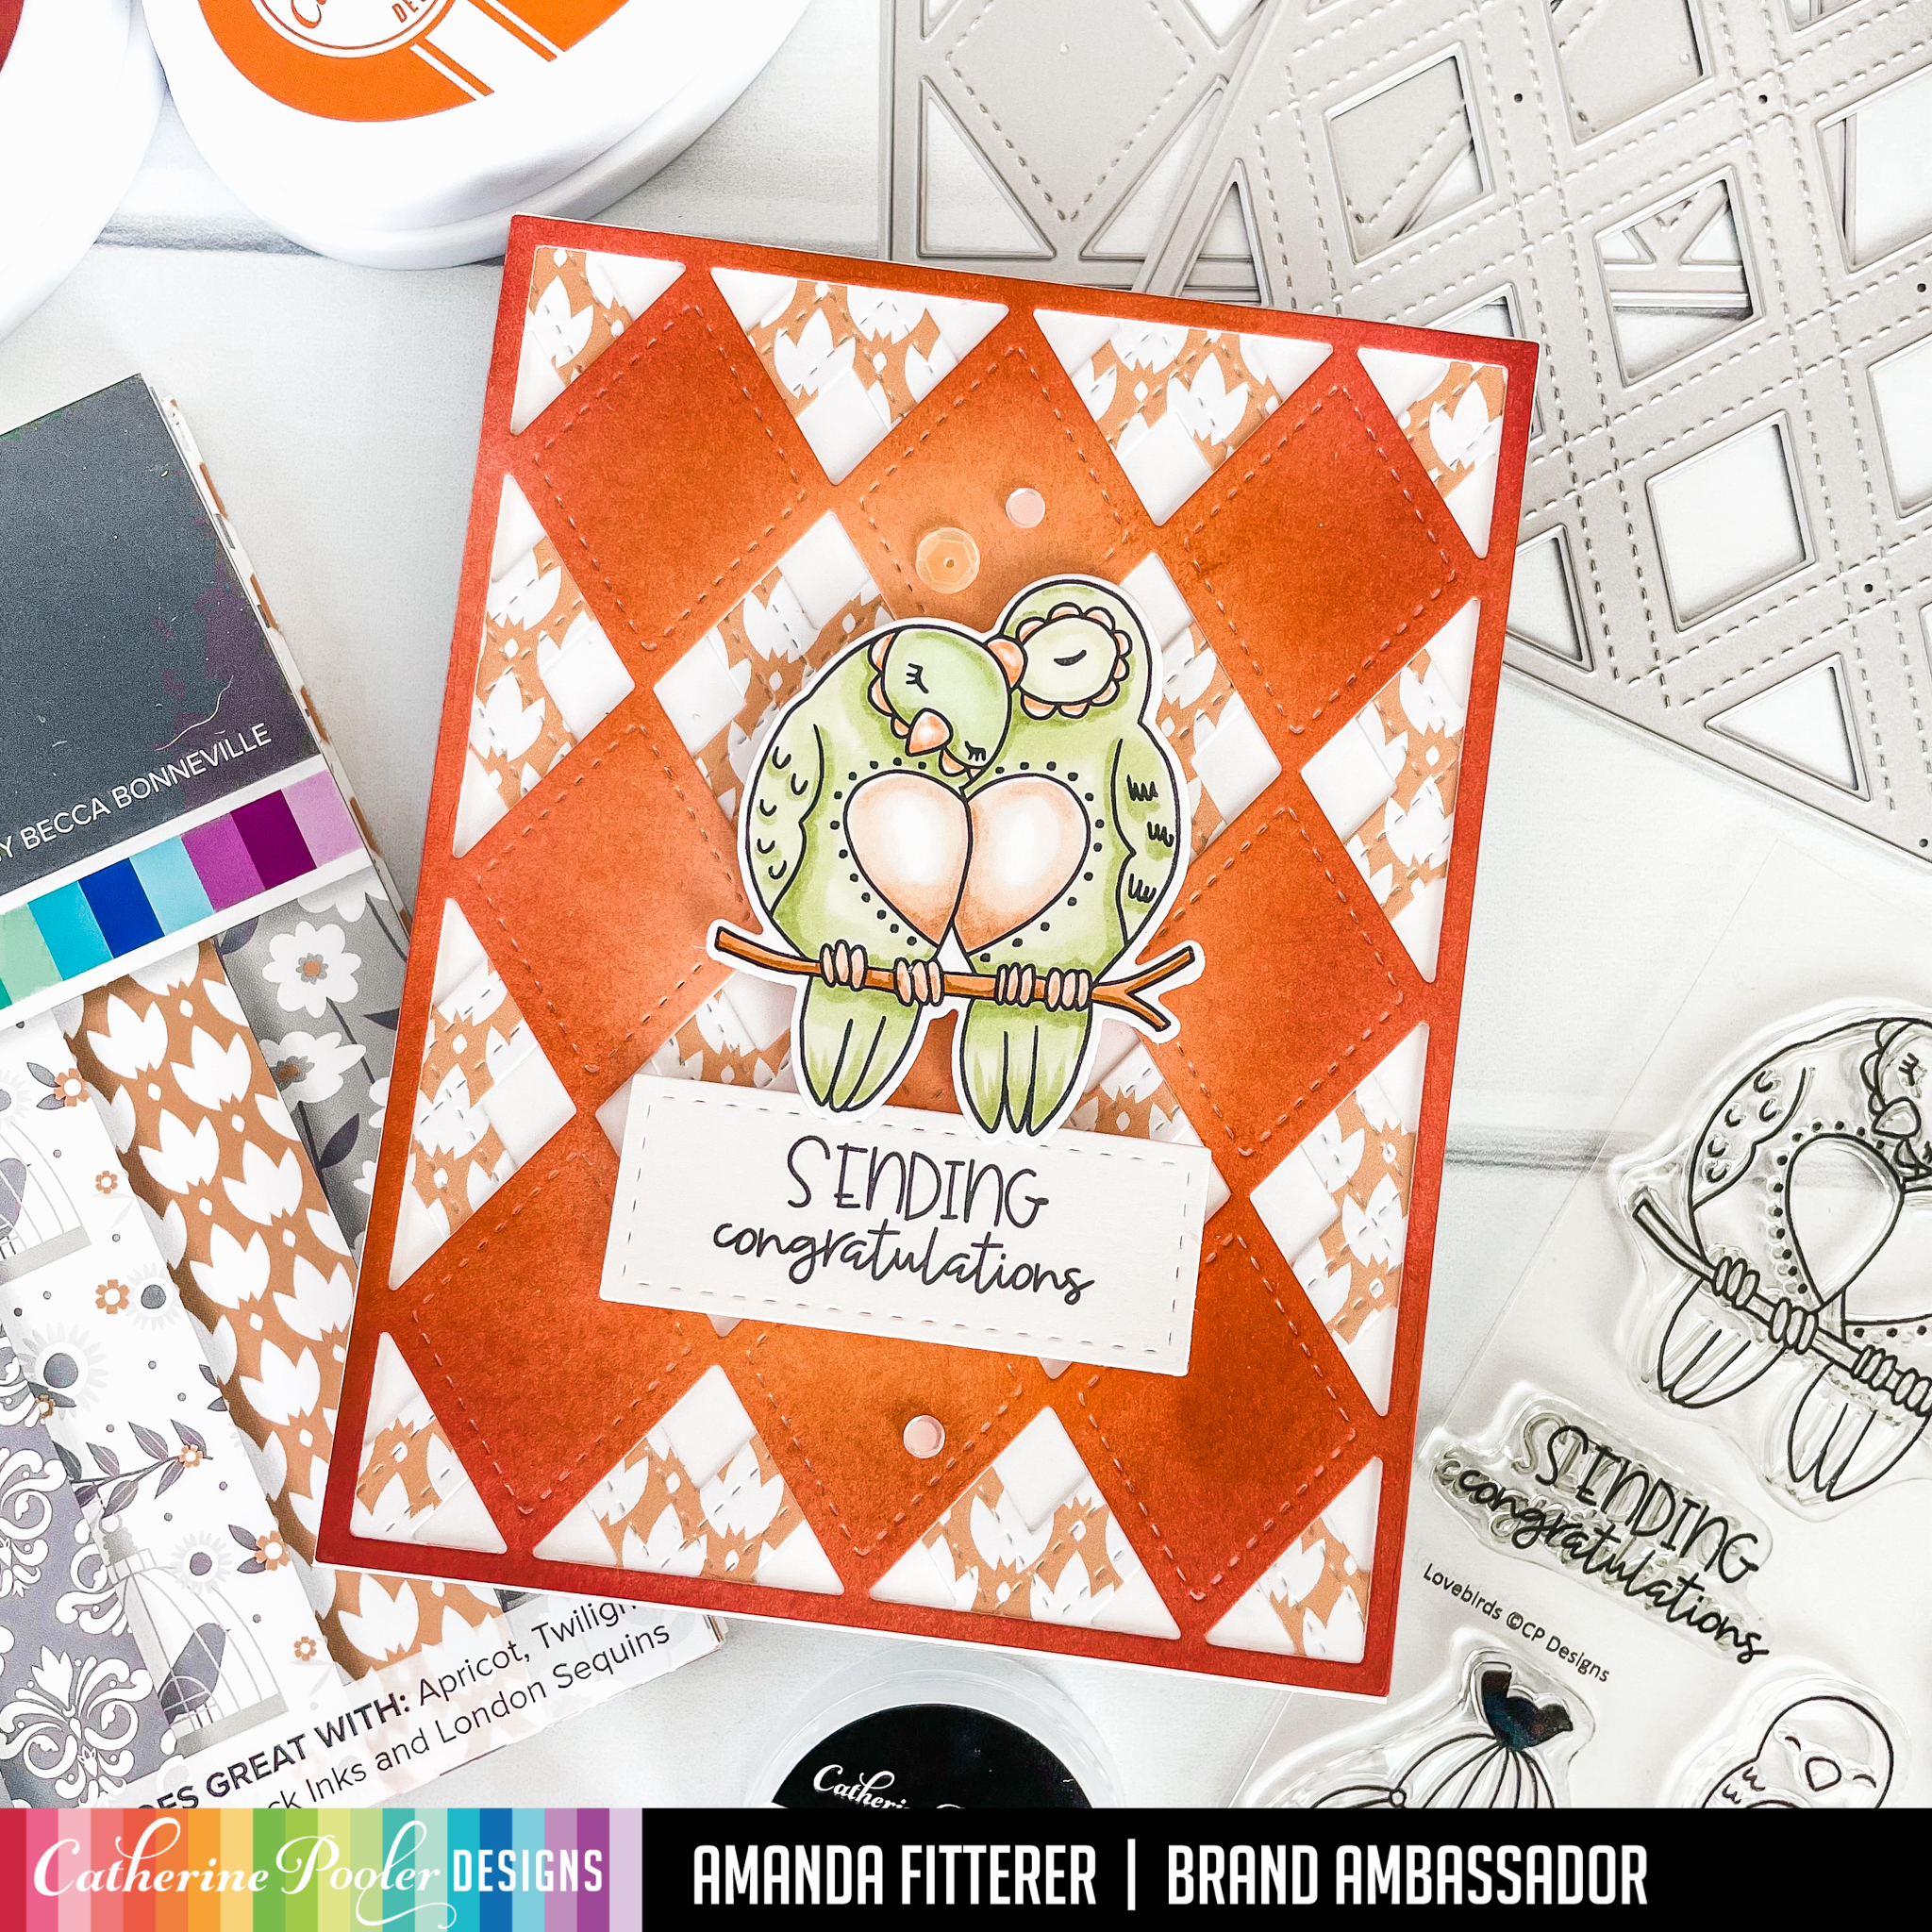
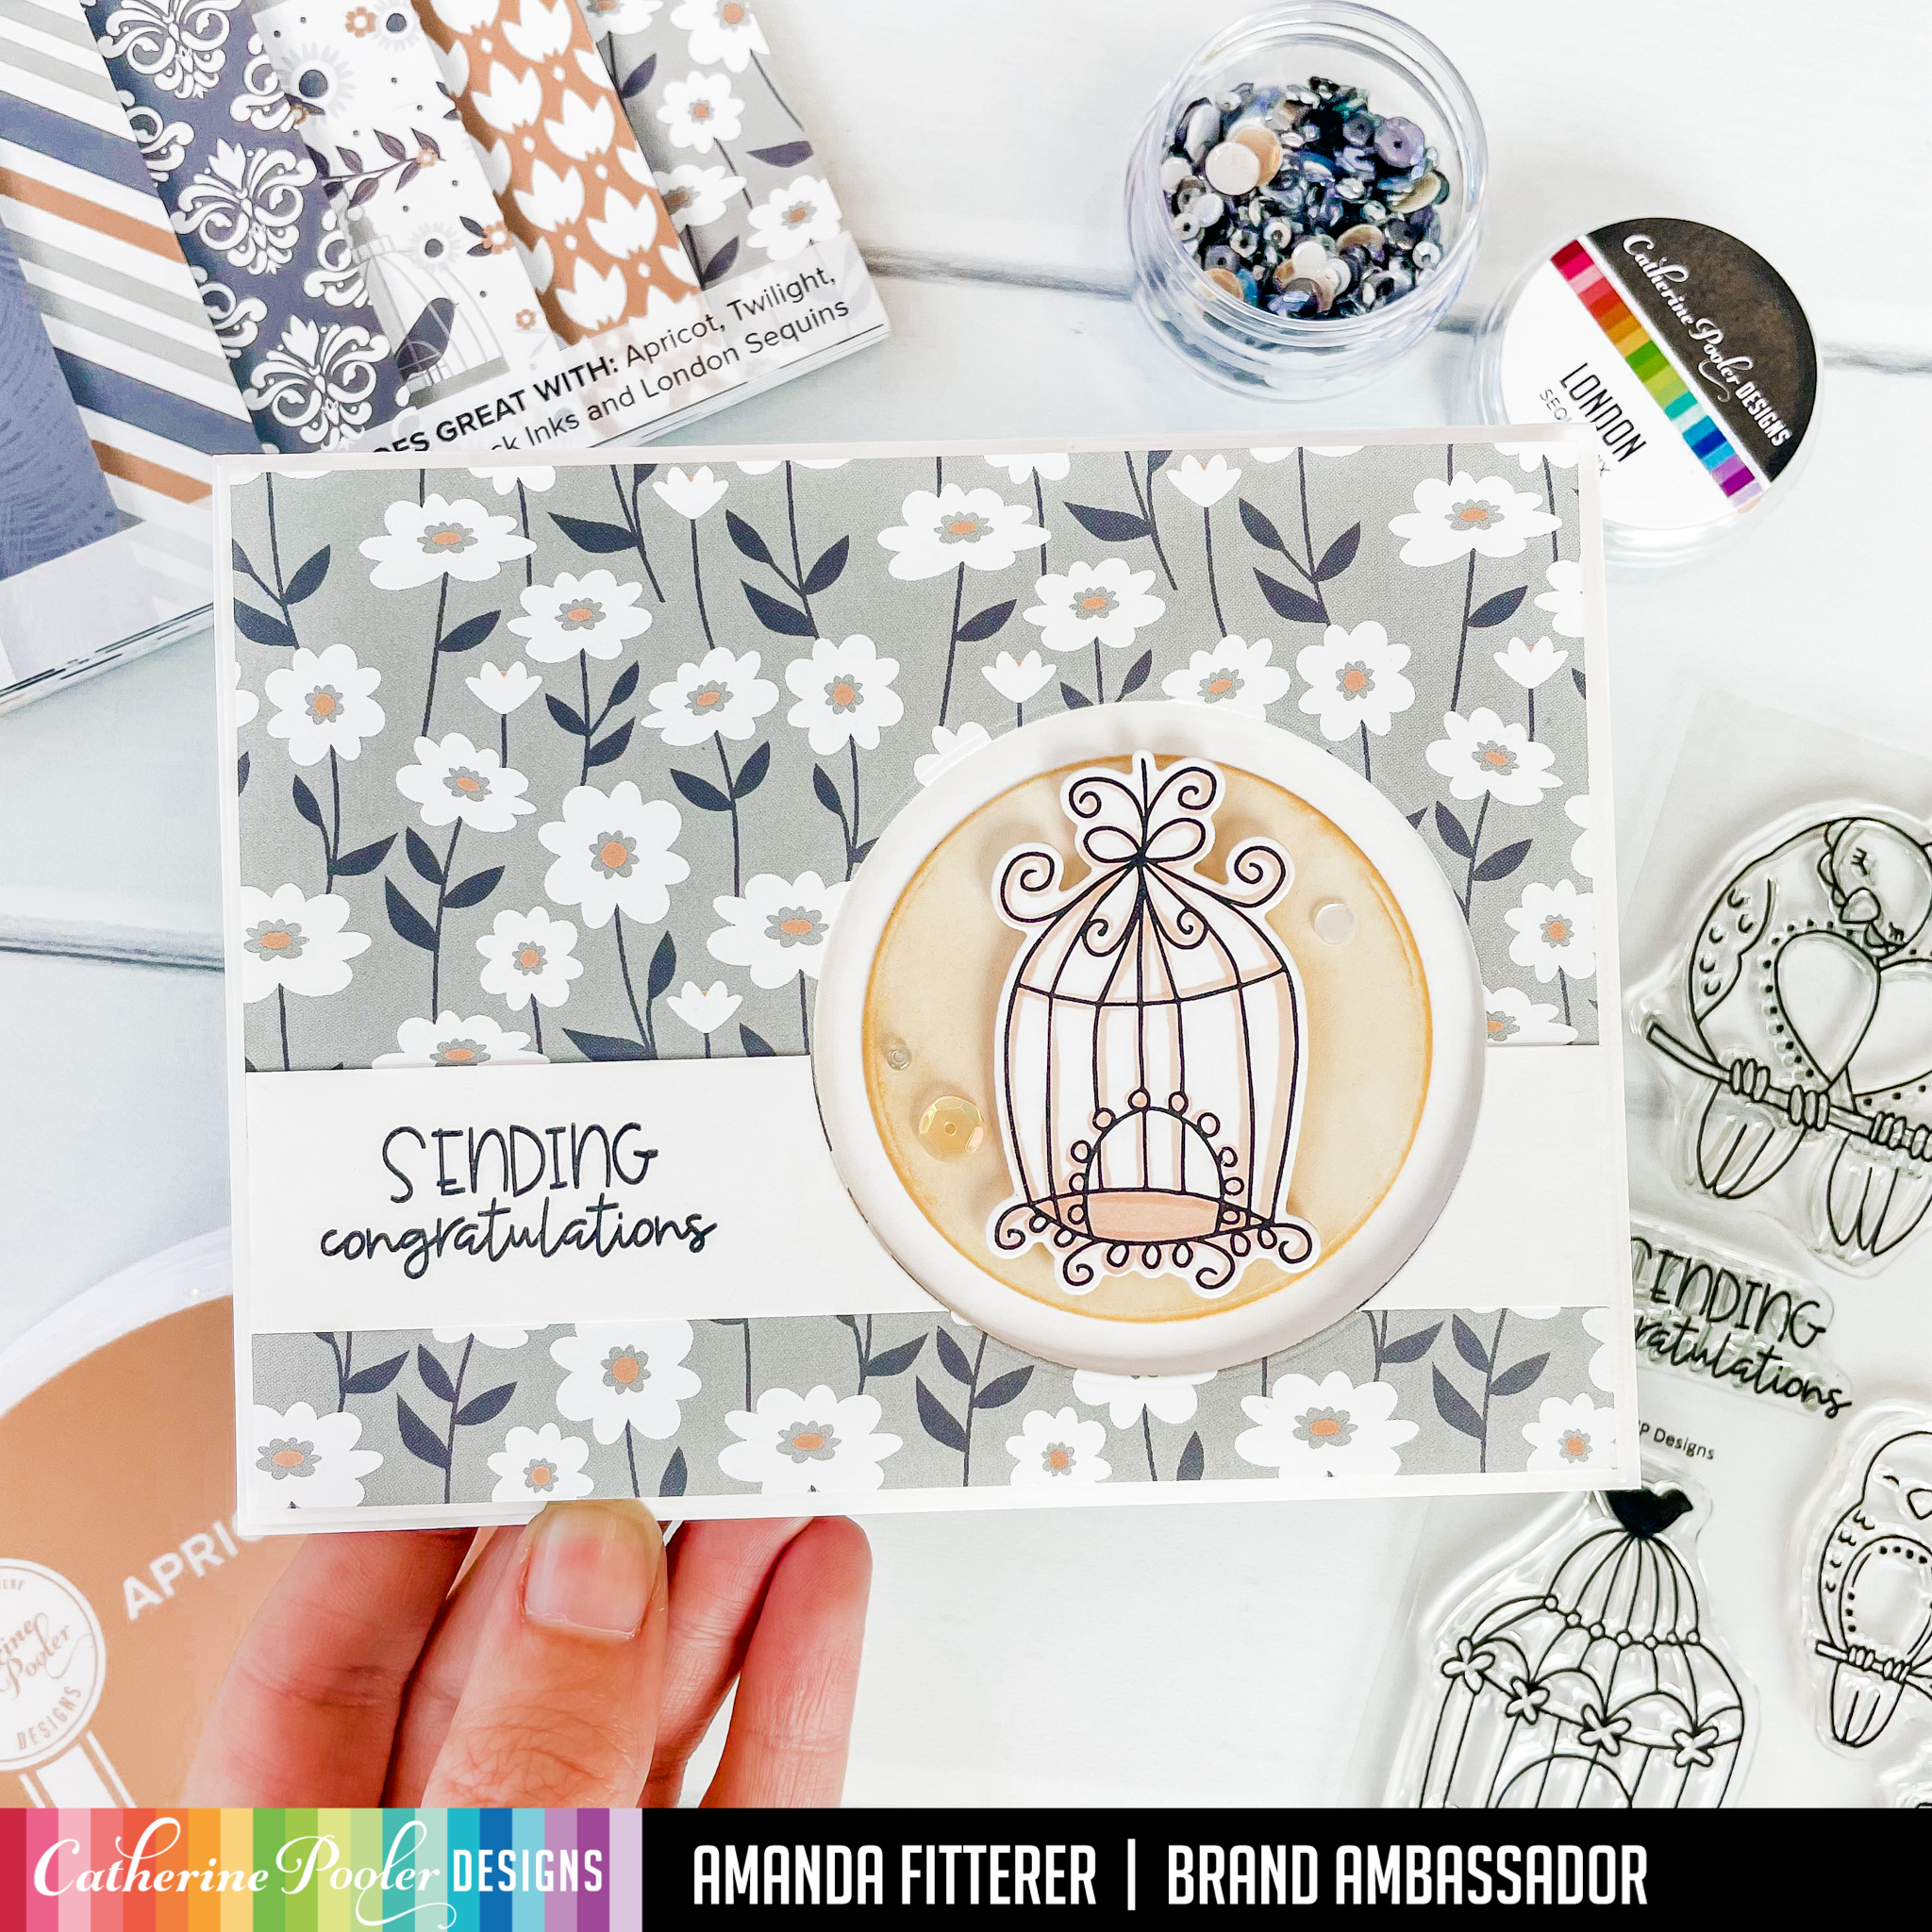
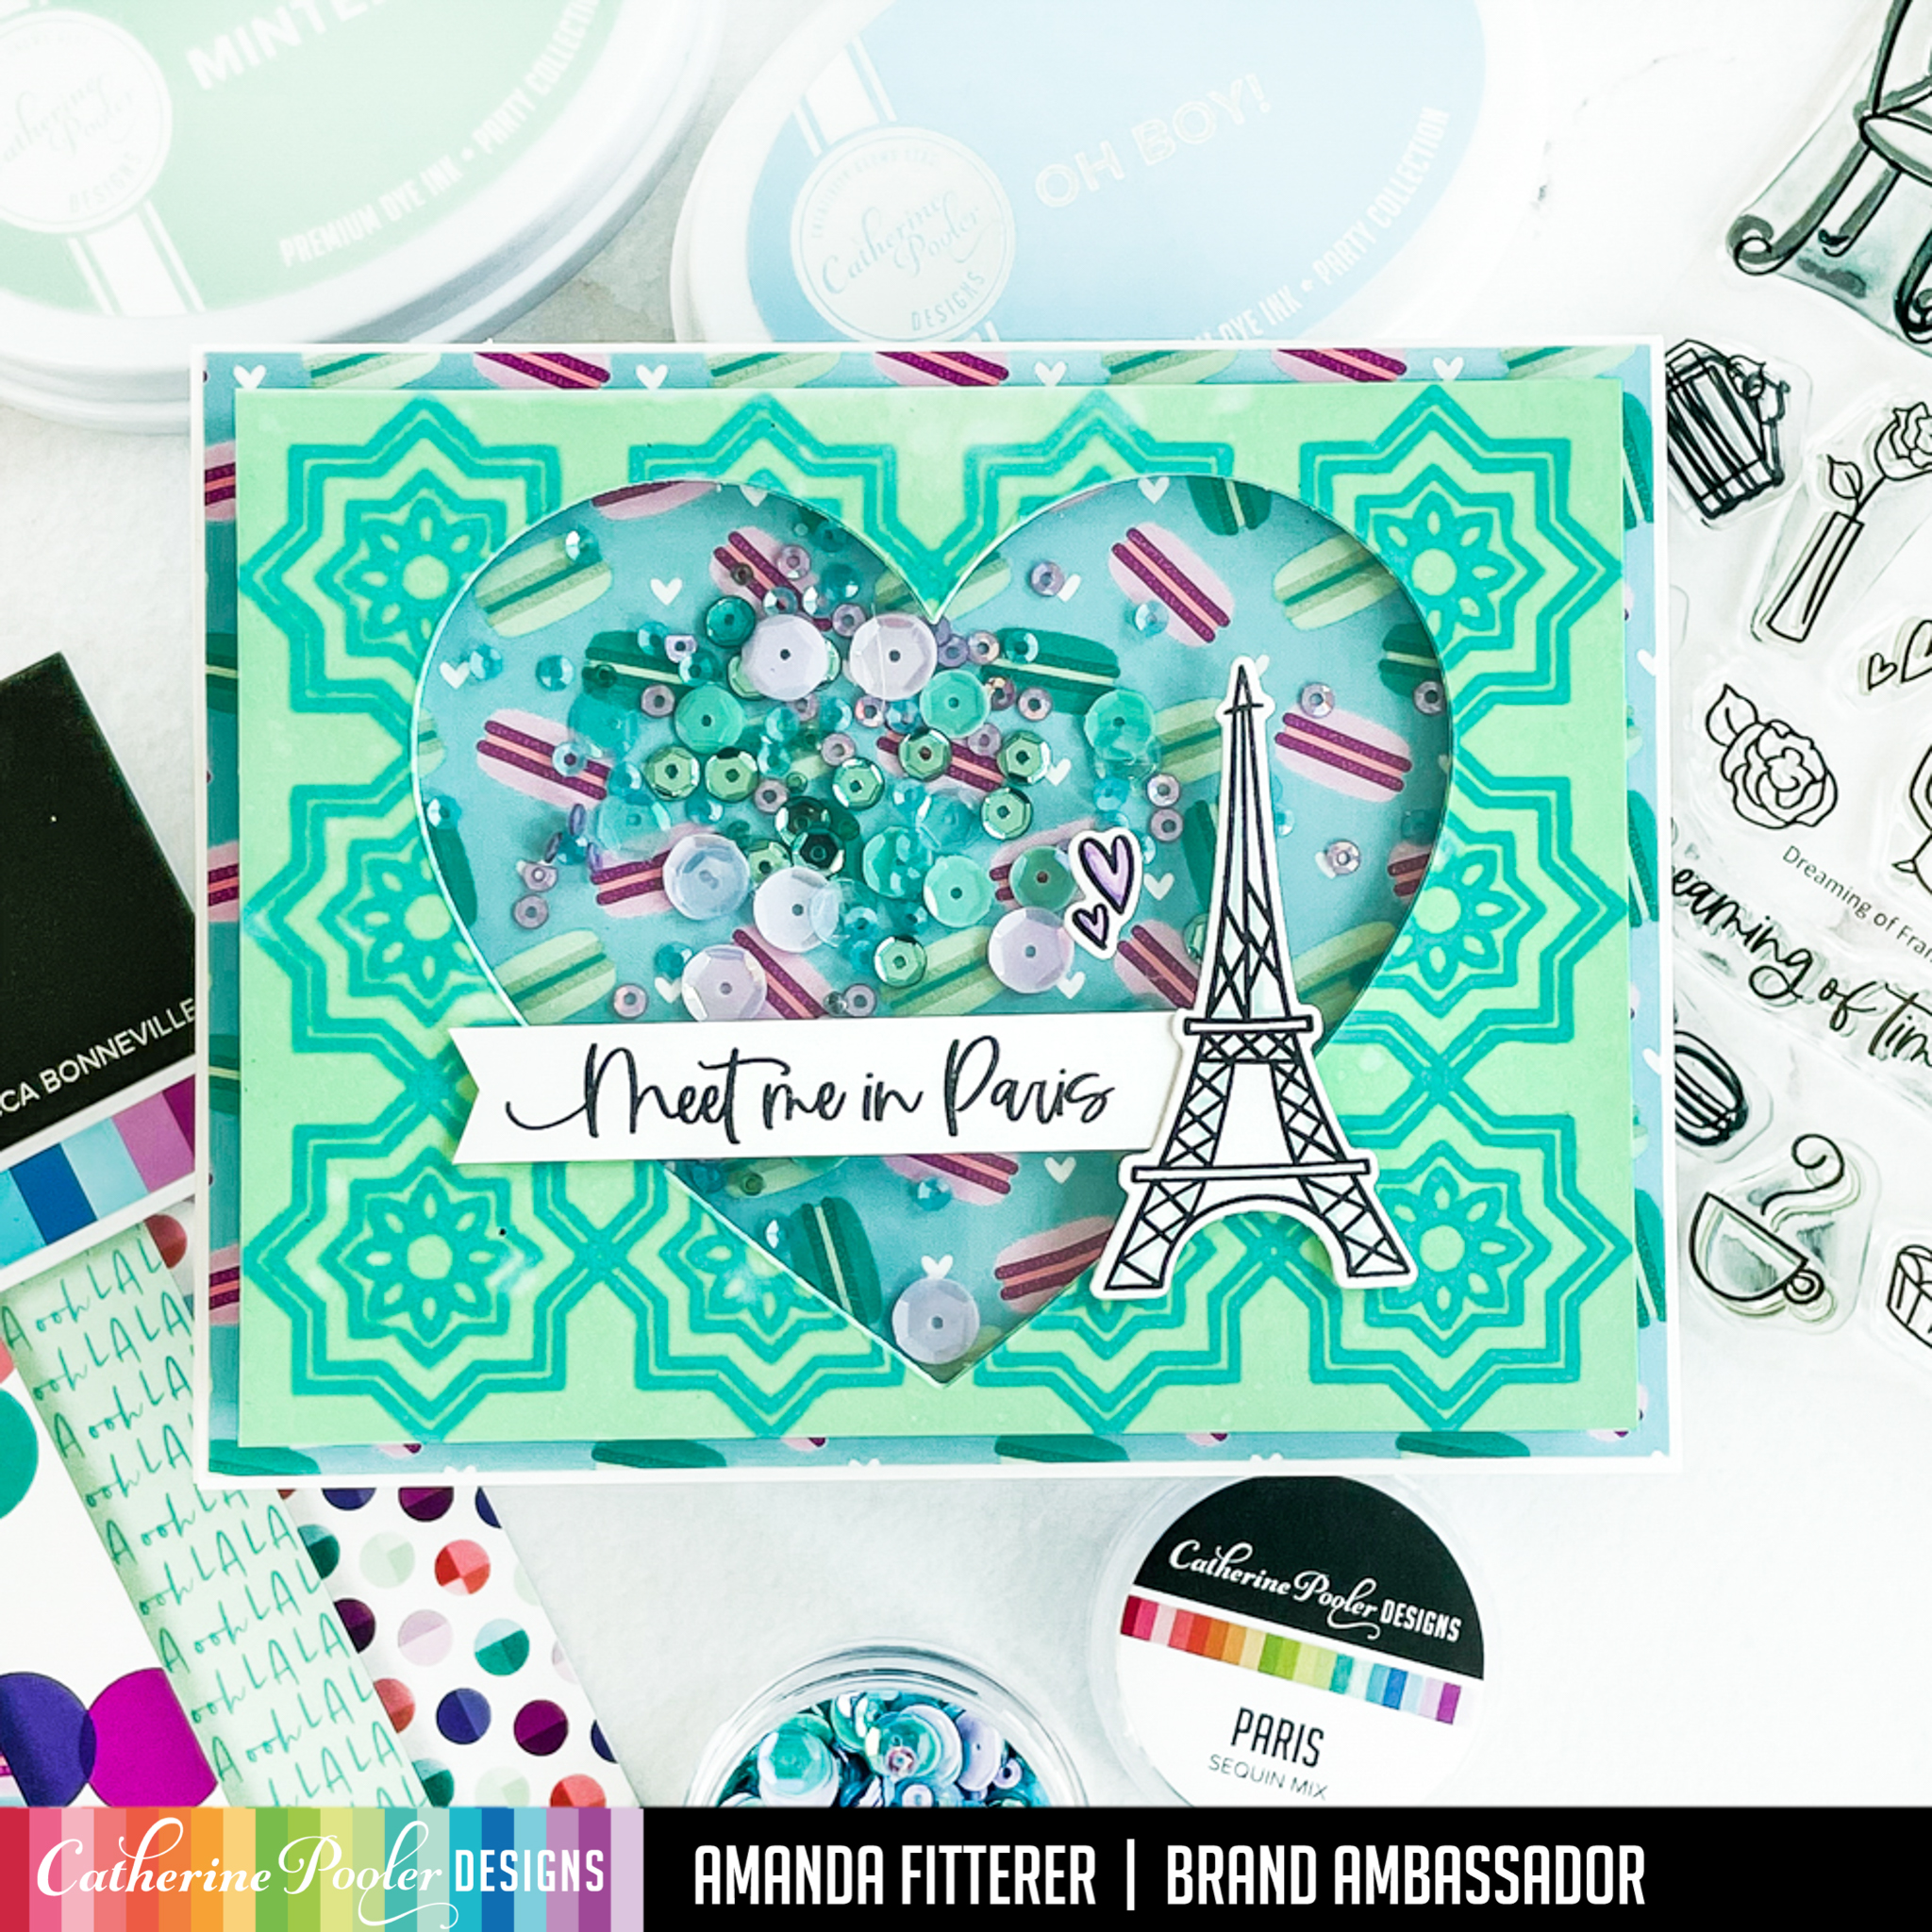
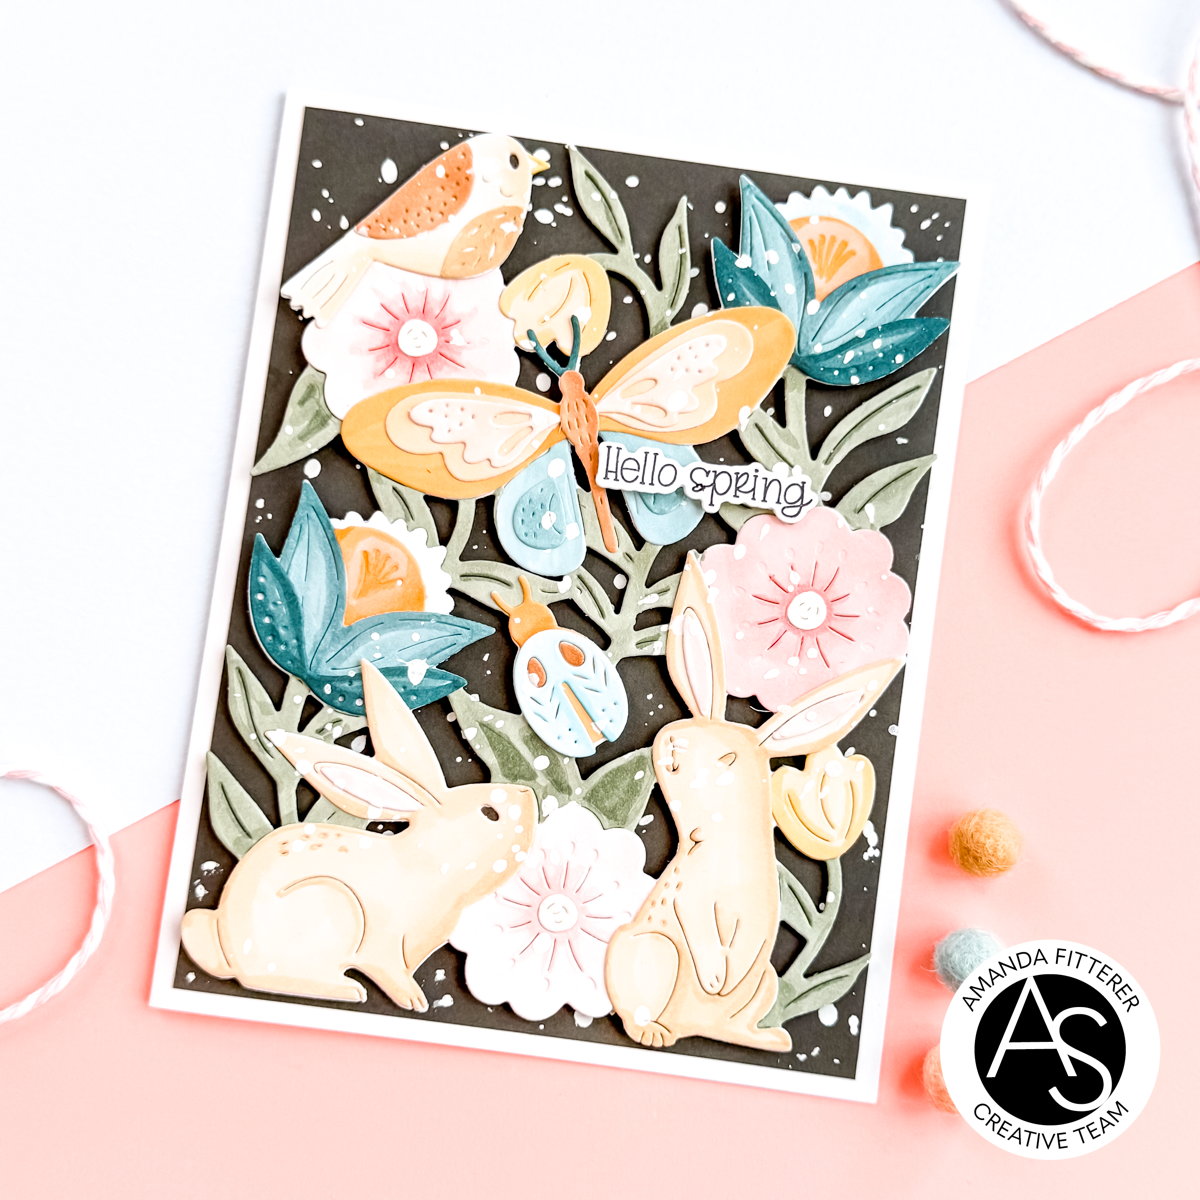
I have created this stunning card using the new Spring Meadow Dies, Cheerful Meadow Dies, and the sentiment is from the Hoppy Easter Stamps! You can shop the New Release HERE!

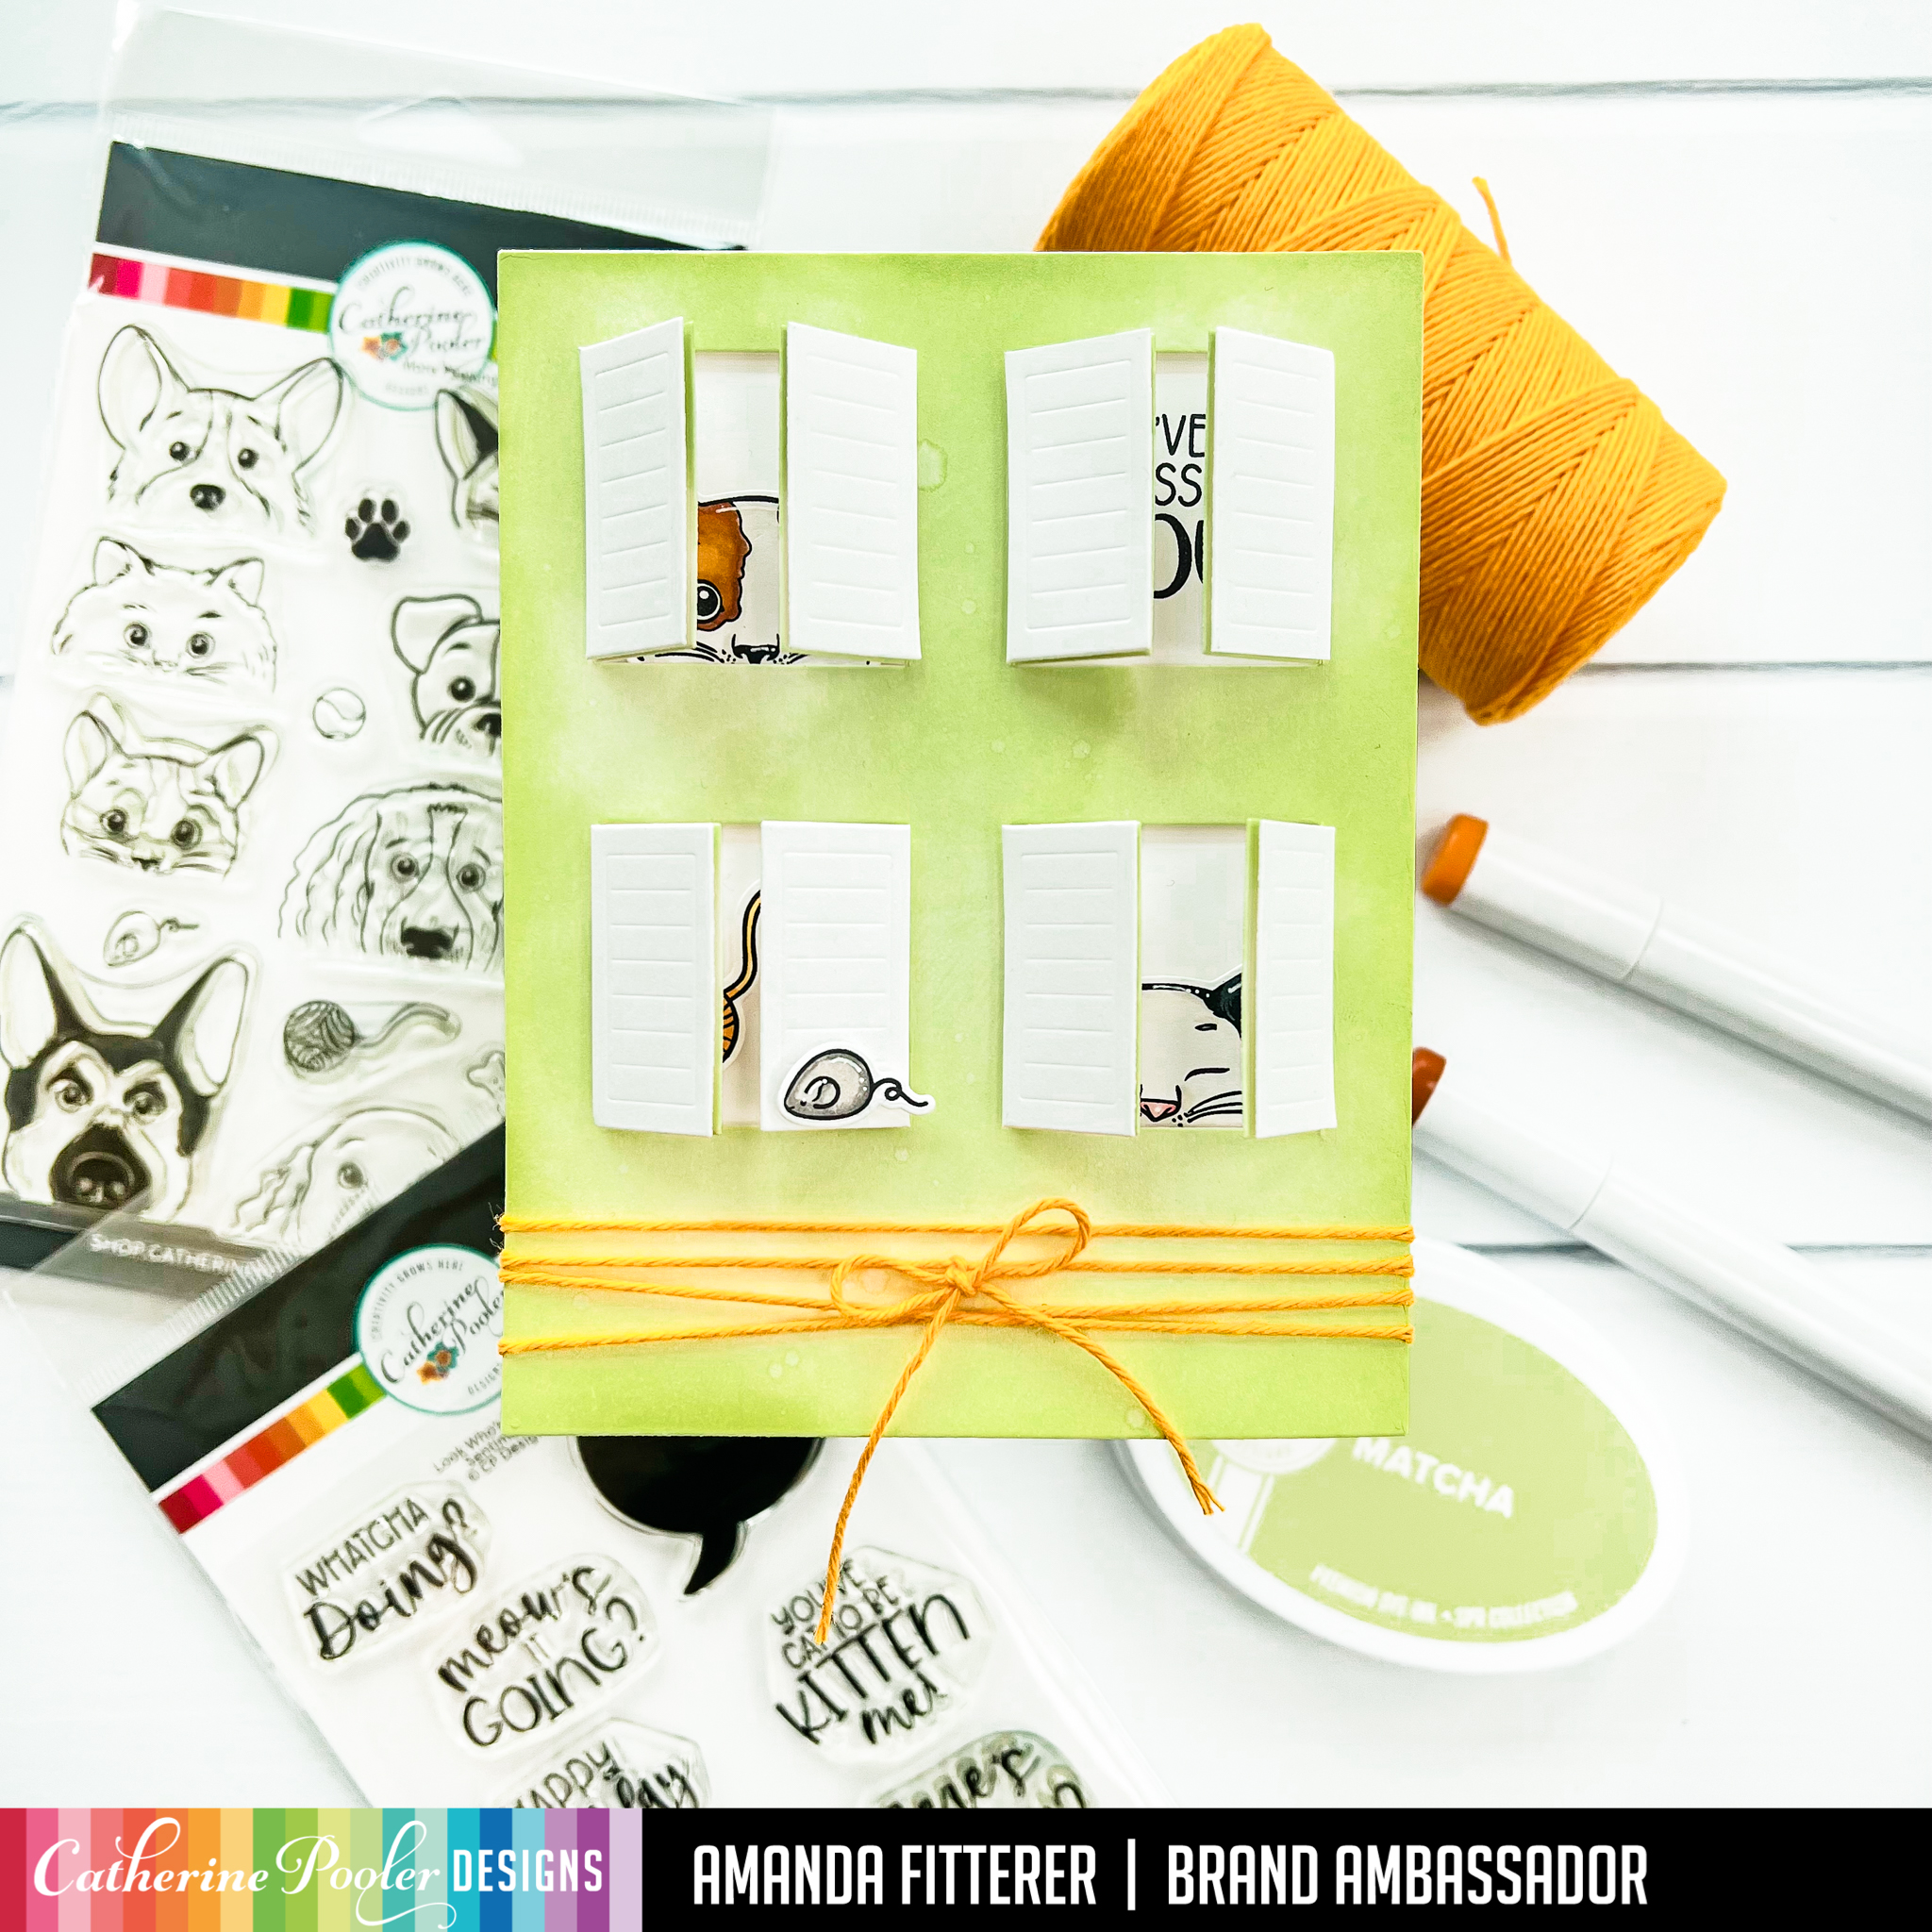
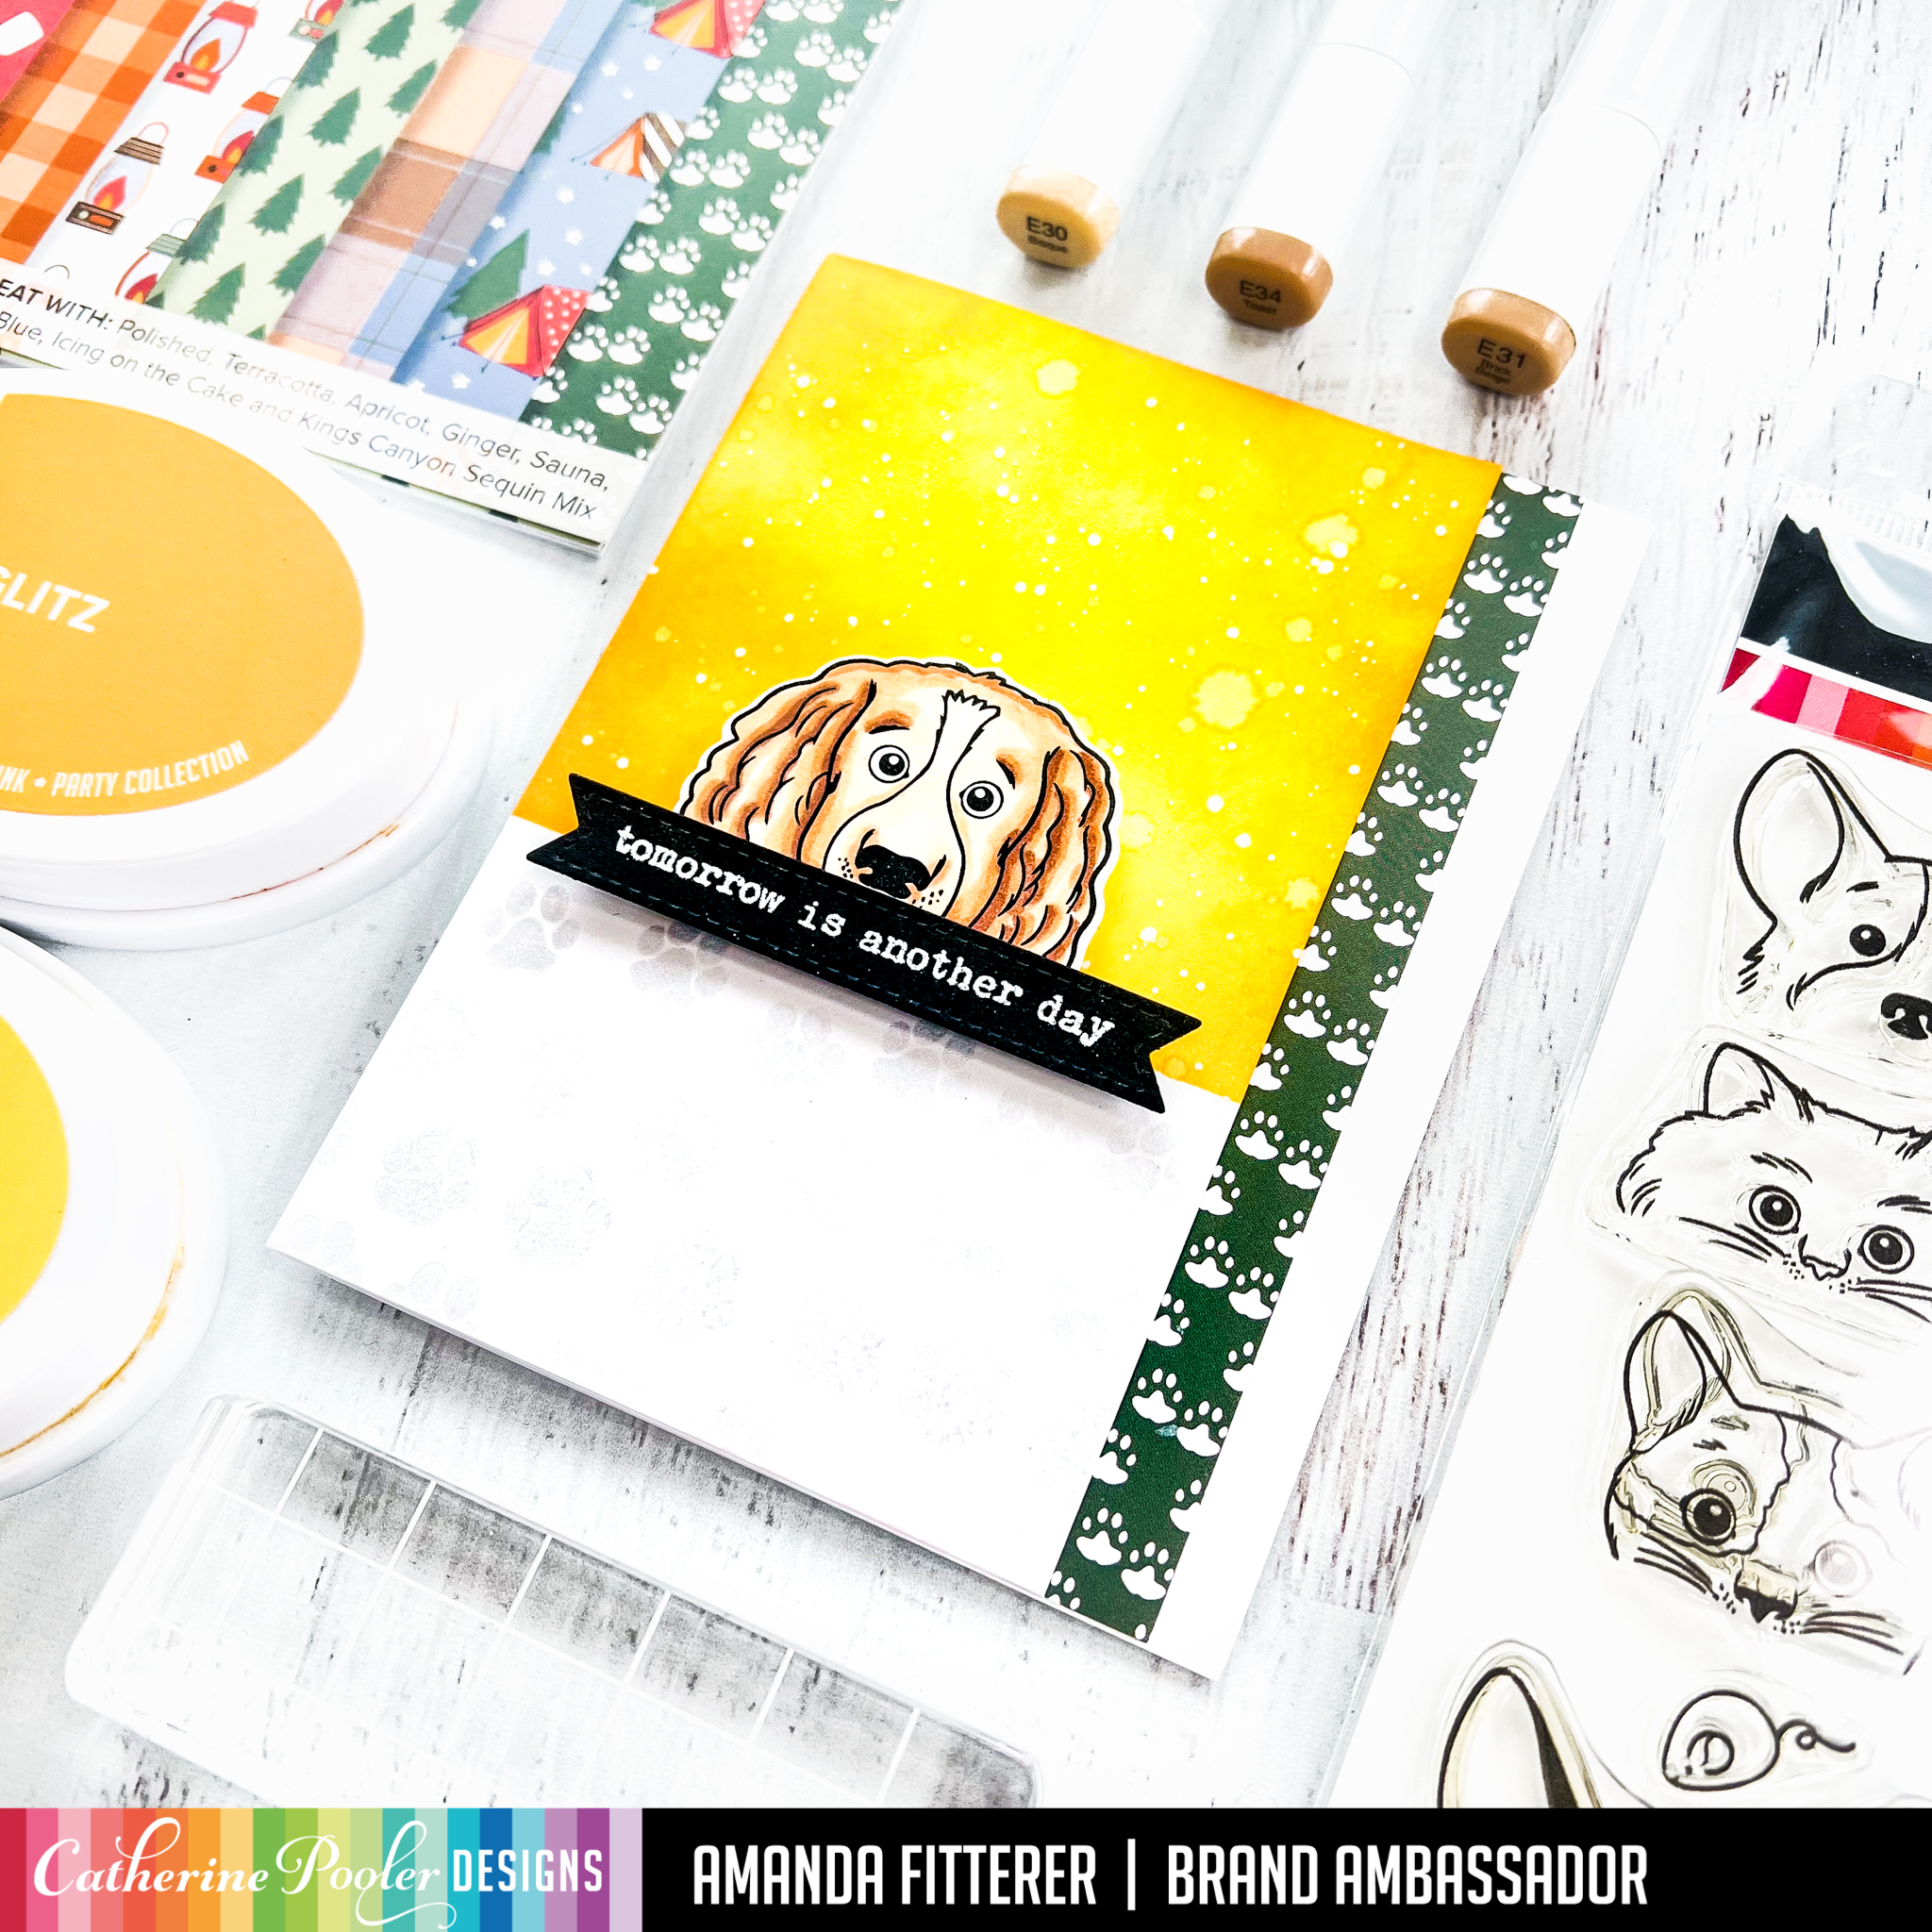
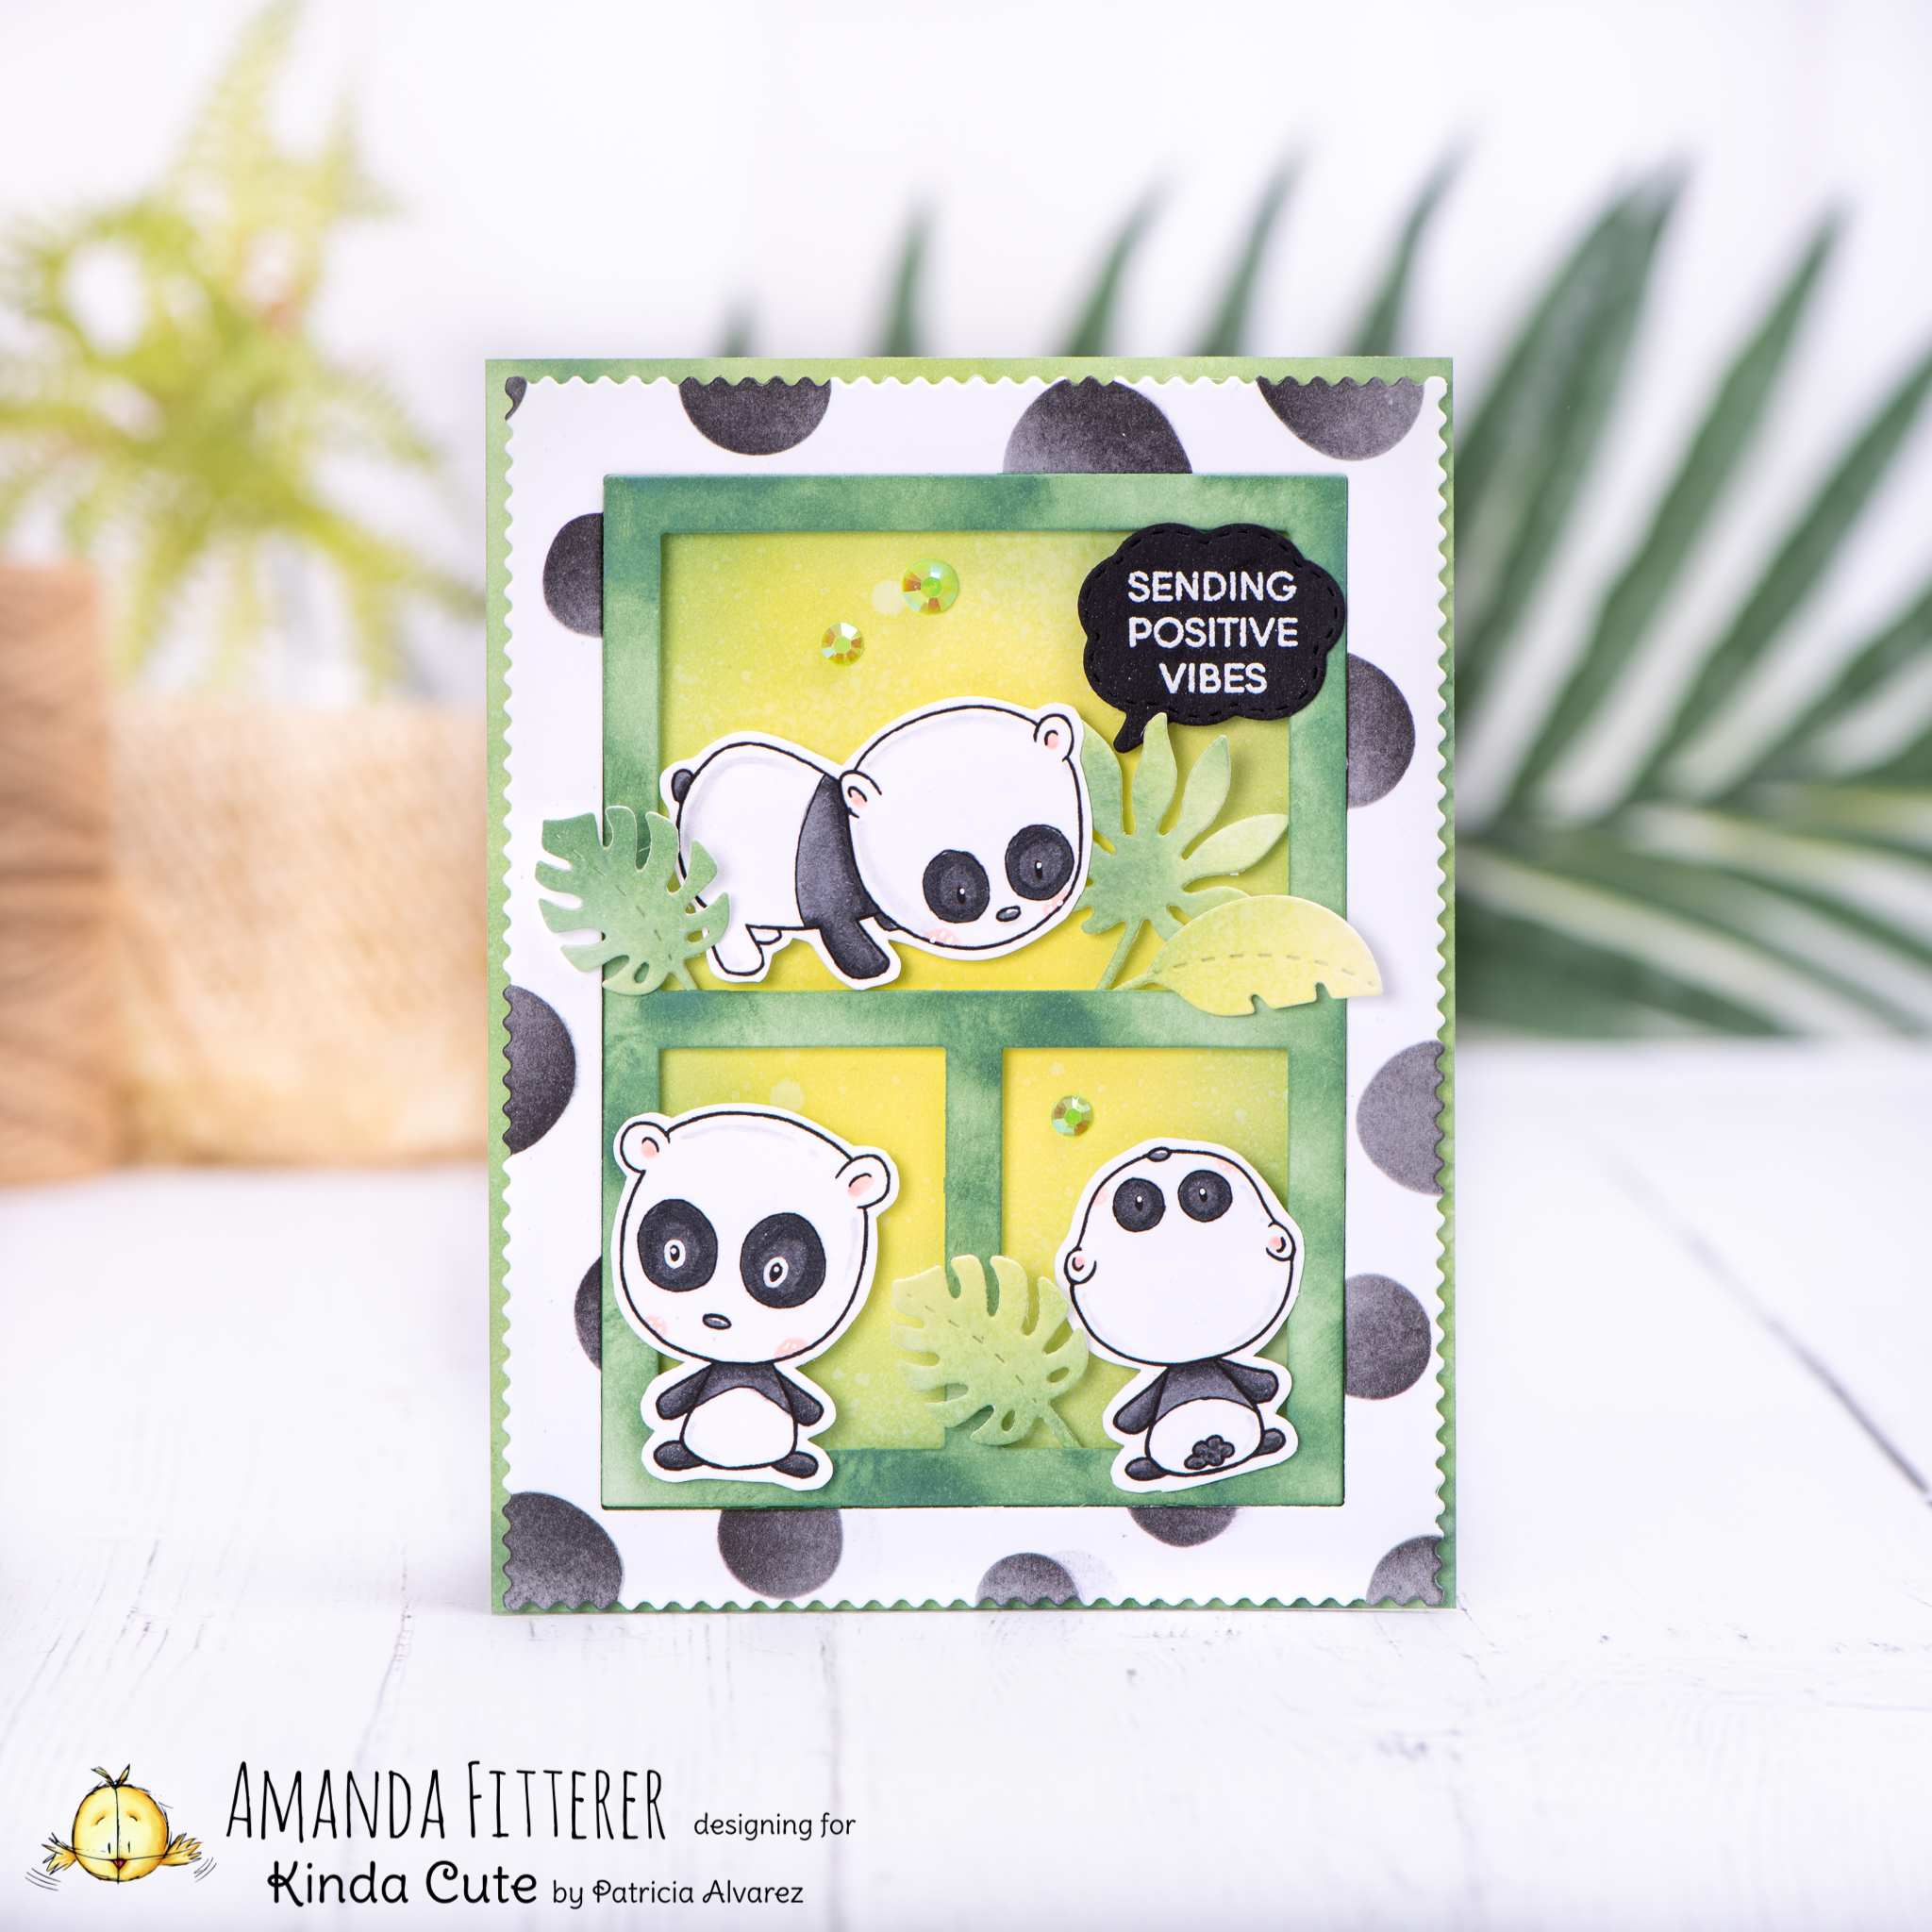
To create this beautiful card, I cut all the pieces from the Spring Meadow Dies and Cheerful Meadow Dies. I colored each piece with Copic markers.

I glued the pieces together with liquid glue and then put 3D foam strips behind the entire thing. I adhered it to a piece of dark gray cardstock. I flicked white acrylic paint all over the card with a paintbrush.

Giveaway Info!
Alex Syberia Designs is giving away a £30 (or $30 for U.S. winners) gift certificate to one winner, and a £15 (or $15 for U.S. winners) gift certificate to three lucky winners.
This giveaway is open internationally. Prizes will be awarded in GBP (£) for non-U.S. winners and USD ($) for U.S. winners.

All four winners will be drawn from participants who enter this Blog Hop by midnight BST  April 27th, 2025.
Winners will be announced on the Alex Syberia Designs blog ‘Giveaway Winners’ page  on April 28th, 2025.

Blog Hop Order:

Happy hopping, friends!

My affiliate link for shopping is here. This gives me a small percentage of your total purchase, but doesn’t change anything for you! I appreciate you using my links, if you decide to! Xx, Amanda

Posted on Leave a comment

Making an Autumn Stamp Work for Christmas

Hey guys! I hope your week is off to a great start! Today, I’m sharing a card I made as a Guest Designer for Sunny Studio Stamps.

This stamp is actually from the Autumn Garland Stamps, but I wanted to show you how it could also be used for a Winter card!!  

Do you ever have those days where you don’t really feel like crafting, but you want to do something in your craftroom?  That’s what happened to me!  I just decided to stamp out this beautiful garland, put on a show, and use my Copics to color it in!  I added some highlights and dots with a white Gelly Roll pen.

I die cut the image out using the Autumn Garland Dies.  Then, I trimmed a piece of white cardstock to 3.5”x4.75”.  I added a sentiment from the Inside Greetings Seasons Stamps directly onto my white cardstock.   The background paper is from the Joyful Holiday Paper.  I trimmed this paper down to 4”x5.25” and glued it directly to my card base.  I used 3D foam tape to adhere my white cardstock to my patterned paper.  Then, I used 3D foam squares to adhere my garland to the white cardstock.  


I added a few sequins on the left to help balance out the entire card.  Here’s another photo of the finished card!

Thanks for using my affiliate links! You all are the BEST! Using an affiliate link in this post above or down below costs you nothing, but it gives me a teeny percentage of your sale to buy more crafty goodies to continue to share card tutorials with YOU! So, thank YOU! Xx, Amanda

Scrapbook.com Affiliate Link | Catherine Pooler Affiliate Link | Become a Catherine Pooler StampNation member

👇🏻👇🏻 Subscribe 👇🏻👇🏻 to be alerted of new posts by yours truly!

Xx, Amanda

Shop Scrapbook.com dickblick.com
Posted on 42 Comments

Sunny Studio’s 9th Birthday Celebration

Happy 9th Birthday, Sunny Studio!! I am SO happy for you and your wonderful success! Today, I get to take part in a Blog Hop to celebrate and I’m so glad YOU are here to help celebrate as well!!

I have SO many cards I made using this New Release! Everything is just so stinking cute! Today, though, I am sharing just one card! (But don’t worry, you’ll see many of my other cards on my Instagram and on the Sunny Studio Blog over the next month or so!!)

How adorable are these puppies in their costumes?! These cuties are part of the Happy Howl-o-ween Stamps!

I colored my pups in with Copic markers and used scissors to fussy cut them out. However, there are coordinating dies available to make your life easier!

And, what about this amazing Distinctive Door Dies?! I also used the Distinctive Door Holiday Add-on Dies to make this house! I love how versatile this set is! You have to go check them out and see all the possibilities!

I had so much fun making this card! I hope you love it as much as I do! Keep scrolling for Blog Hop details!

I’m not sure if you saw all the Sneak Peek Days on the Sunny Studio Blog, but you should definitely check them out and see all kinds of inspiration!!

Sneak Peek Day 1: Autumn Garland, Buffalo Plaid Dies, & Striped Stencils
Sneak Peek Day 2: Happy Howl-o-ween and Brilliant Banner 3 & 4 Dies
Sneak Peek Day 3: Crisp Apple, Wood Barrel, & Punny Apple Greetings
Sneak Peek Day 4: Distinctive Door, Holiday Add-on, & Inside Greetings Seasons
Sneak Peek Day 5: Roly Poly Penguins & Snowmen in Sweaters Stamps

Blog Hop Details!

There will be $325 worth of prizes up for grabs! All you have to do is comment on all the Blog Hop posts from the Designers in the Blog Hop Lineup (below). You’ll be entered to win on each stop that you comment on! The winner from each Blog Hop Stop will win a $25 gift code to the Sunny Studio Shop!! (Imagine all the goodies you could buy!!)

PLUS, Sunny Studio is offering 20% OFF on Sunny Studio branded products (excluding clearance and new release products.). You just have to use discount code NINEYEARS at checkout through Aug 30th.

PLUS.. Sunny Studio is giving away a FREE new mini snowflake die on all orders!

BLOG HOP LINEUP:
Sunny Studio Blog
Leanne West
Marine Simon
Nicky Meek
Hanh Nguyen
Amanda Fitterer < – You are here!
Teri Anderson < – Go here next!
Tina Henkens

I hope you have a great time Hopping and Shopping!! Xx, Amanda

Posted on 13 Comments

Pear Blossom Press & Picket Fence Studios Collab Blog Hop!

Hey guys! Want a chance to win prizes from both Pear Blossom Press and Picket Fence Studios?! In March, we’ll have THREE different Hops for you to enter to win!!

Today we’re kicking off the BLOG HOP!

Come hop along with us and see some awesome light-up cards!  Plus, each company will be giving away $25 PRIZES!  All you have to do to be entered to win is to leave a comment at each stop along our Hop Lineup before March 29th at 11:59 PM EDT.  Winners will be announced on the Pear Blossom Press & Picket Fence Studios Blogs on 3.31.24!

I have created this fun light-up card using products from both companies! Read on to see how I created this card! You’ll be amazed at how EASY it is!!

First, I created my background using the Picket Fence Studios What’s Your Sign Stencil and Pint Sized Paper Pouncers. I blended Catherine Pooler’s All That Jazz and Cummerbund inks.

Next, I stamped my images from the Sugar and Calorie Free Stamp Set. I colored them in with Copic markers. I stamped my sentiment on Perfect Sentiment Cardstock – Black with Embossing ink and then sprinkled white embossing powder on it. I melted the powder with my heat tool and then die cut the sentiment out with the coordinating die. I also used the coordinating dies to cut out my cakes. I used the same dies to cut out 2 plain black pieces of cardstock. I glued the cakes and their black counterparts together on a slight angle, to give the effect of a shadow!

On my card base, I made 3 little pencil dots where I wanted the candles’ flames to be. I also made a little pencil dot where I wanted the ON button to be. For this card, I’m using the Pear Blossom Press EZ-Lights. I used double sided tape to adhere my battery and button where I wanted it. Then I used masking tape to hold my wires and lights in place.

Once I had everything in place, I placed Pear Blossom Press’s World’s Best Foam Tape everywhere except over the lights and battery/button case.

On my card front, I poked 3 holes where my lights are. I placed my Pear Blossom Press Yellow Candle Flame Gems over the lights using liquid glue. Then, I placed my Clay Candles under the flames and adhered them with liquid glue.

I used 3D Foam Squares to prop up my cakes and sentiment. I added a few Catherine Pooler Crater Lake Sequins to finish it off.

That’s how easy it is to create a fun light-up card! I hope you enjoyed my stop on the Blog Hop!

Blog Hop Lineup:

Pear Blossom Press 

Natasha Davies

Andrea Shell

April Leithner

Brenda Noelke

Jenn Paar Gross

Colleen Balija

Amanda Fitterer

Justin Adkins <<- Go here next!

Picket Fence Studios

Happy Hopping!!

My favorite craft essentials:
Heffy Doodle Mini Die Cutting Machine
* MISTI
Smart Craft Glue
*  Petal Pink Gemini Jr. Die Cutting Machine
* 3D Foam Squares
* 3D Foam Tape
*Pre-scored Card Base
* Catherine Pooler Inks
* Catherine Pooler Blending Brushes

* White Glass Magnetic Craft Mat (Use code AMANDA20 for 20% off your order!)

Thanks for using my affiliate links! You all are the BEST! Using an affiliate link in this post above or down below costs you nothing, but it gives me a teeny percentage of your sale to buy more crafty goodies to continue to share card tutorials with YOU! So, thank YOU! Xx, Amanda

Scrapbook.com Affiliate Link | Catherine Pooler Affiliate Link | Become a Catherine Pooler StampNation member

👇🏻👇🏻 Subscribe 👇🏻👇🏻 to be alerted of new posts by yours truly!

Posted on 23 Comments

Heffy Doodle New Release Inspiration Blog Hop

Welcome to the Heffy Doodle New Release Inspiration Blog Hop!  We are so excited to share amazing cards from our Design Team members using the new release!  For today’s special Blog Hop, you can win a £50 voucher to the Heffy Doodle store!

To be entered to win the giveaway, all you need to do is comment at each stop along the Blog Hop before Sep 29, 2023 at 11:59 PM EST.  The winner will be announced on the Heffy Doodle Blog on Sep 30th at 10:00 AM EST!

I’m excited to share my card for this Blog Hop with you! I had such a fun time mixing and matching lots of different new products to create this card!

Step 1: Cut 2 panels from the Stitched Rectangle Dies (US Size).

Step 2: Cut the large bubble from the new Look Who’s Talking Die Set.

Step 3: Stamp the fireplace from the Fireside Dreams Stamp Set onto your panel. Stamp it again on some Heffy Memo Tape and then cut it out with scissors. Use this as a mask to keep the ink from getting on your fireplace.

Step 4: Mask off the bottom of your panel with Heffy Memo Tape.

Step 5: Lightly blend Catherine Pooler’s Lemongrass ink all over the background. Then, blend Melon Ice through the NEW Feeling Mighty Pine Stencil.

Step 6: Blend Cotton Candy ink all along the bottom.

Step 7: Color in the fireplace with Copic markers.

Step 8: Stamp out the rest of your images from the Fireside Dreams Stamp Set and Costume Critters Stamp Set. Color them with Copic markers and then die cut them out with their coordinating die sets.

Step 9: Stamp your sentiment from the Happy Holidays Sentiments Stamps on the word bubble.

Step 10: Assemble the card! Glue your background panel directly onto an A2 card base. Use 3D foam tape to add dimension to your word bubble, tree, and pup. Use liquid glue to adhere the rest of the stamped images. Finally, add a few sequins from the new Strawberry Milk Sparkle Mix.

Thanks so much for hopping along with us! I hope you’ve enjoyed my card! Now, let’s get hopping to the next stop, which is Jarle Franceus!

Here’s the whole lineup, in case you need it!
Heffy Doodle Blog  

Blog Hop Lineup:

Heffy Doodle Blog

Amanda Fitterer < You’re here!

Jarle Franceus << GO HERE NEXT!

Natasha Davies 

Jasmin Oliver

Kari VanNoy

Annette Allen

Peggy Emmerink

Ashlee McGregor

Francesca Vignoli

Have fun hopping!!

Posted on Leave a comment

Have You Been NAUGHTY or NICE?

Hey, friends! The new Holly Jolly Christmas Collection from Catherine Pooler is available for purchase now!

If you want to buy the whole Christmas Critters Bundle of goodies, you can use this link here.

To create this card, I’ve used the Better Not Pout Patterned Paper Pack, the Naughty List Stamp Set, and the Merriest Sentiments Stamp Set.

I stamped my images from the Naughty List Stamp Set, colored them with Copic markers, and then die cut them with the coordinating die set. I cut my Better Not Pout Patterned Paper Pack at an angle and then adhered it straight to my card front. I propped up my stamped image with 3D foam squares.

Thank you SO much for stopping by my blog today! I appreciate you so much!!

Don’t forget to use my affiliate link while shopping the Catherine Pooler site! It costs you nothing, but it gives me a teeny percentage back to help fund my crafty tutorials to share with YOU! Thank you SO much for your support!! Xx, Amanda

Shop Scrapbook.com
Posted on Leave a comment

Making a Pocketfold Tri-fold Card with a Bookmark

Hello, my fav crafty peeps! How are you doing? I’m doing AMAZING because I get to share this fun card with you! The new Holly Jolly Christmas Collection from Catherine Pooler is available for purchase now! So make sure you get your goodies before they sell out!!

If you want to buy the whole Christmas Critters Bundle of goodies, you can use this link here.

To create this card, I’ve used the Better Not Pout Patterned Paper Pack, the Naughty List Stamp Set, the Merriest Sentiments Stamp Set, and the Tree Trimmings Die.

I stamped my images from the Naughty List Stamp Set, colored them with Copic markers, and then die cut them with the coordinating die set.

For my center panel, I stamped my sentiment from the Naughty List Stamp Set and then cut it out with the Circles Dies. I also added my dotted circles using the Circle Party Stamp Set and Melon Ice. On a piece of Better Not Pout Patterned Paper, I die cut the Tree Trimmings Die in the center. Then, I adhered my circle cutout in the center with my favorite Bearly Art Glue.

For my bookmark, I trimmed down a piece of Better Not Pout Patterned Paper to 2″x 5″. I rounded off the edges with my most favorite 3-in-1 Corner Punch. I added my hole reinforcer from the Notecard Frame & Tag Dies. I just love the “Fa La La La La’ sentiment from the Merriest Sentiments Stamp Set, so I stamped that in the corner using Midnight Ink. Finally, I added a few pieces of Tuxedo Turquoise Twine.

To get my scalloped edge, I used the Decorate Edge Dies.

To tie the whole thing together, I used a brad and the Party Twist Twine.

Such a fun card filled with cheeriness! Thank you SO much for stopping by my blog today! I appreciate you so much!!

Don’t forget to use my affiliate link while shopping the Catherine Pooler site! It costs you nothing, but it gives me a teeny percentage back to help fund my crafty tutorials to share with YOU! Thank you SO much for your support!! Xx, Amanda

Shop Scrapbook.com
Posted on Leave a comment

Belly Laughs!

It’s time! It’s time!! The Holly Jolly Christmas is available for purchase NOW!

PLUS, you’ll get this FREE STAMP SET on orders over $50!! Get yours NOW!

To create this card, I’ve used the Belly Laughs Cover Plate, which is absolutely AMAZING! How cute is that background?

For my ink blended background, I used Sea Glass and Bay Breeze and the world’s best blending brushes!

For the sentiment, I’ve used the Old Saint Nick Stamp Set. I’ve also used the Better Not Pout Patterned Paper for my banner flag.

What are you buying from this release?! Leave a comment and let me know!

Don’t forget to use my affiliate link while shopping the Catherine Pooler site! It costs you nothing, but it gives me a teeny percentage back to help fund my crafty tutorials to share with YOU! Thank you SO much for your support!! Xx, Amanda

Shop Scrapbook.com
Posted on Leave a comment

Feelin’ Holly Jolly!

DID YOU SEE?! Catherine Pooler has a NEW COLLECTION coming out!! It’s called Holly Jolly Christmas and it’s full of the CUTEST holiday products!! This release isn’t available quite yet, but it will be available on Sept 14th! If you’re a StampNation member, you get EARLY ACCESS on Sept 13th (along with tons of other perks!!!

Plus, get this FREE DASHER STAMP SET on orders of $50 or more!

To create this card, I’ve used the New Naughty List Stamp Set. I’ve paired it with a sentiment from the Merriest Sentiments Stamp Set.

I love using non-traditional colors for holiday cards, don’t you!? I am not a big fan of red and green 😛! So, for this card, I made my entire background Chiffon and Limoncello.

What are you excited about getting from this release??! Leave me a comment!! I can’t wait to hear!

Don’t forget to use my affiliate link while shopping the Catherine Pooler site! It costs you nothing, but it gives me a teeny percentage back to help fund my crafty tutorials to share with YOU! Thank you SO much for your support!! Xx, Amanda

Shop Scrapbook.com
Posted on Leave a comment

I Found Santa’s Jammies!

DID YOU SEE?! Catherine Pooler has a NEW COLLECTION coming out!! It’s called Holly Jolly Christmas and it’s full of the CUTEST holiday products!! This release isn’t available quite yet, but it will be available on Sept 14th! If you’re a StampNation member, you get EARLY ACCESS on Sept 13th (along with tons of other perks!!!

To create this card, I’ve used the Old Saint Nick Stamp Set. I’ve paired it with a sentiment from the Merriest Sentiments Stamp Set. I’ve also used the Better Not Pout Patterned Paper for my background!

What are you excited about getting from this release??! Leave me a comment!! I can’t wait to hear!

Don’t forget to use my affiliate link while shopping the Catherine Pooler site! It costs you nothing, but it gives me a teeny percentage back to help fund my crafty tutorials to share with YOU! Thank you SO much for your support!! Xx, Amanda

Shop Scrapbook.com
Posted on Leave a comment

Sweet-n-Spooky Mini Pocketfold Notebook

Have you seen the New Sweet-n-Spooky Bundle from Catherine Pooler?! The release is available now for purchase! Make sure to get your spooky bundle before they sell out!

To make this really fun pocketfold notebook, I trimmed down a piece of Letter size white cardstock to 11″ x 4″ and then folded it into a trifold. Then, I added the too cute Sweet-n-Spooky Patterned Paper to each flap on the inside and the outside.

Then, I created a pocket by trimming down a rectangle piece of patterned paper. I scored at .5″ on 3 sides and then folded at the score lines. Using scissors, I trimmed off the corners of the side and bottom flaps. Next, I can add double sided tape to each flap and then adhere it to my pocketfold.

I created 2 tags using my favorite tag punch.

I cut a piece of black cardstock using the new Eek Boo Cover Plate.

For the mini notebook, I simply trimmed down a piece of the patterned paper to form a book cover. I folded some regular computer paper to form the pages and then stapled them together. I used red SuperTape to adhere my pages to the cover because this tape is super strong.

Next, I stamped my images from the Toil and Trouble Stamp Set and colored them in with Copic markers.

I trimmed down some twine to wrap around my pocketfold, leaving enough to tie into a bow.

Here are more photos of the finished mini pocketfold notebook!

What are you excited about getting from this release??!

Don’t forget to use my affiliate link while shopping the Catherine Pooler site! It costs you nothing, but it gives me a teeny percentage back to help fund my crafty lifestyle! Thank you SO much for your support!! Xx, Amanda

Posted on Leave a comment

Catherine Pooler’s Halloween Release

I’m SO pumped about this New Sweet-n-Spooky Bundle from Catherine Pooler! The release is available now for purchase! Make sure to get your spooky bundle before they sell out!

To create this card, I used the Scallops & Dots Dies with the Sweet-n-Spooky Patterned Paper and white cardstock. I stamped my images and sentiment from the Toil and Trouble Stamp Set. I colored my cauldron with Copic markers.

What are you excited about getting from this release??!

Don’t forget to use my affiliate link while shopping the Catherine Pooler site! It costs you nothing, but it gives me a teeny percentage back to help fund my crafty lifestyle! Thank you SO much for your support!! Xx, Amanda

Posted on 1 Comment

Catherine Pooler and Ellen Hutson IG Hop

Hey friends! Did you see that Catherine Pooler and Ellen Hutson kicked off an Instagram Hop together today!? You DO NOT want to miss out! They’re BOTH giving prizes away to 3 lucky winners! Woot!! Head to the IG Hop here.

I’m sharing TWO cards I made using this amazing Float Your Boat stamp set that Catherine Pooler’s team made exclusively for Ellen Hutson. Read on to see how I created these cards!

For my first card, I trimmed down my Parqs and Rec Cover Plate Die to change the sizes of the rectangles. (I love when dies can be used in different ways, don’t you?!).

On a piece of A2 White Premium Cardstock, I blended Something Borrowed, Oh Boy!, All that Jazz, Aquatini, and Minted inks. Then I spritzed my background with water and some paint droplets using a paint brush.

Next, I glued my frame down to my background and then stamped my sentiments using Midnight Ink. I used the White Premium Cardstock to stamp my images from the new Float Your Boat stamp set. I colored my images with Copic markers and then die cut them using the coordinating dies. I used 3D foam squares to attach my stamped and cut images to the card front. I added some St. Cloud sequins at the end for a finishing touch!

For my second card, I used Heffy Memo Tape to mask off the bottom of the card front. I used Drive-In and Serenade for my background. Then, I used Black Jack on the bottom of the card for my “road”. I cut the background down using the Notecard Postage Dies. For this card, I stamped images from the Float Your Boat stamp set as well as the Special Delivery stamp set. I added some Sofia sequins to this card!

Those are my cards to share with you today for this really fun IG Hop. I hope you enjoy the Hop and GOOD LUCK!!! Remember, there will be 3 winners! Make sure to check the IG Hop for all the details.

You can shop the Catherine Pooler store using my affiliate link by clicking any of the links in this blog post or by clicking here. Using my affiliate link doesn’t cost you anything, but I do get a small percentage of your purchase. This helps me provide you with more tutorials! So please feel free to come back and use it anytime! THANK YOU!! Xx, Amanda

Posted on Leave a comment

Peeking In Bundle

AVAILABLE NOW: Come shop the new Catherine Pooler Quint-Essentials Collection!

Check out these little More Peeking Pets from the Peeking In Bundle! I’ve paired these cuties with the Four Window Cover Plate Die!

Also, don’t forget that you can use my affiliate link to shop the entire Catherine Pooler store. All you have to do is click this link, shop, and then I’ll get a tiny percentage of your sale to help buy new goodies to share in tutorials with you! It doesn’t cost you anything at all!

See you back here soon!! Xx, Amanda

Shop Scrapbook.com

*affiliate link

Posted on Leave a comment

Peeking In Bundle

AVAILABLE NOW: Come shop the new Catherine Pooler Quint-Essentials Collection!

Check out these little More Peeking Pets from the Peeking In Bundle! Oh, and that SUPER FUN Parqs and Rec Cover Die! Eek!

Also, don’t forget that you can use my affiliate link to shop the entire Catherine Pooler store. All you have to do is click this link, shop, and then I’ll get a tiny percentage of your sale to help buy new goodies to share in tutorials with you! It doesn’t cost you anything at all!

See you back here soon!! Xx, Amanda

Shop Scrapbook.com

*affiliate link

Posted on Leave a comment

Release Day! New Ink Colors!

It’s RELEASE DAY for the Catherine Pooler Quint-Essentials Collection!

Check out these little More Peeking Pets from the Peeking In Bundle and these BRAND NEW INK COLORS! Woot woot! Introducing Lilac, Crushed Violet, Matcha and Whipped Honey Spa Collection Inks!

Also, don’t forget that you can use my affiliate link to shop the entire Catherine Pooler store. All you have to do is click this link, shop, and then I’ll get a tiny percentage of your sale to help buy new goodies to share in tutorials with you! It doesn’t cost you anything at all!

See you back here soon!! Xx, Amanda

Shop Scrapbook.com

*affiliate link

Posted on Leave a comment

Peek-a-Boo Notecard and Envelope Duo

I have another SNEAK PEEK to show you from the new Quint-Essentials Peeking In Bundle!

Check out these little More Peeking Pets and the Look Who’s Talking sentiments that go with them! I’ve paired this cutie with the Parqs and Rec Cover Plate Die! I’ve also used the new Woot Word Die!

To create my envelope, I used the Notecard Envelope Dies and the Nesting Circles Dies with a piece of paper from the Potted Patterned Paper Pack.

For my background, I blended the new Whipped Honey all around my card base. Then, I used the Parisian Portico Background Stamp and stamped with the Whipped Honey as well!

Also, don’t forget that you can use my affiliate link to shop the entire Catherine Pooler store. All you have to do is click this link, shop, and then I’ll get a tiny percentage of your sale to help buy new goodies to share in tutorials with you! It doesn’t cost you anything at all!

See you back here soon!! Xx, Amanda

Shop Scrapbook.com

*affiliate link

Posted on Leave a comment

New Peeking In Bundle!

I have another SNEAK PEEK to show you from the new Quint-Essentials Peeking In Bundle!

Check out these little More Peeking Pets and the Look Who’s Talking sentiments that go with them! I’ve paired this cutie with the Parqs and Rec Cover Plate Die!

For my background, I blended Melon Ice and Grass Skirt inks and then splattered with water and white paint.

Are you looking forward to more sneak peeks?! ME TOO!! Make sure you’re subscribed to my blog so you’re emailed when I put out the next sneaky peek!

Also, don’t forget that you can use my affiliate link to shop the entire Catherine Pooler store. All you have to do is click this link, shop, and then I’ll get a tiny percentage of your sale to help buy new goodies to share in tutorials with you! It doesn’t cost you anything at all!

See you back here soon!! Xx, Amanda

Shop Scrapbook.com

*affiliate link

Posted on Leave a comment

Sneaky Peeky! New Catherine Pooler Quint-Essentials Collection!

Don’t you just LOVE New Releases?! It’s always so fun and exciting to see the new products in the crafting industry! Today, I get to give you a sneak peek of the new Quint-Essentials Peeking In Bundle!

Check out these little More Peeking Pets! I’ve paired my Peeking Pets with the S’mores Please Patterned Paper from last month’s release!

I blended Limoncello and Glitz for my background and then spritzed some water and white paint onto it to create some texture.

To create my paw print pattern on the bottom, I’ve used the little paw included in the More Peeking Pets Stamp Set and some clear glue ink. I’ve added a little sparkle to each paw print for a subtle shimmery pattern.

Are you looking forward to more sneak peeks?! ME TOO!! Make sure you’re subscribed to my blog so you’re emailed when I put out the next sneaky peek!

Also, don’t forget that you can use my affiliate link to shop the entire Catherine Pooler store. All you have to do is click this link, shop, and then I’ll get a tiny percentage of your sale to help buy new goodies to share in tutorials with you! It doesn’t cost you anything at all!

See you back here soon!! Xx, Amanda

Shop Scrapbook.com

*affiliate link

Posted on 1 Comment

Ridiculously Proud of You

Did you see my last post where I created that beautiful rainbow background with the Scattered Hearts Cover Plate?? Today, I’m going to share the card I made using it!

To make this card, I die cut the Scattered Hearts Cover Plate on a piece of white cardstock.  Once cut, I grabbed another piece of white cardstock and placed it underneath my die cut piece.  Then, I blended a rainbow with Maker Forte Flamingo, Yellowstone, and Neon Lights inks.  This gives me TWO backgrounds at once!

For my sweet pup, I used Enjoy the Little Things stamp set. I colored him with Copic markers and then die cut him with the coordinating dies. I propped him up with 3D foam squares and put him on a piece of round vellum.

For my sentiment, I grabbed my Brighter Days Sentiment Cards and trimmed out the “just so ridiculously proud of you” sentiment.

For the finishing touch, I added some rainbow colored gems!

The next step was to attach my heart background to a black card base with liquid glue. 


Don’t forget, you can use code T4TAMANDA10 to get 10% off your purchase! 

Xx, Amanda

Posted on 1 Comment

Hopping Hamsters

Well hey there, crafty friend! Today I’m sharing this fun rainbow card I made using the Hooray Hamster stamp set!

To make this card, I die cut the Scattered Hearts Cover Plate on a piece of white cardstock.  Once cut, I grabbed another piece of white cardstock and placed it underneath my die cut piece.  Then, I blended a rainbow with Maker Forte Flamingo, Yellowstone, and Neon Lights inks.  This gives me TWO backgrounds at once!

Then, I was ready for my hamsters!  I stamped them with black ink and then colored them in with Copic markers.  I used the coordinating dies to cut them out.For my sentiments, I grabbed my Brighter Days Sentiment Cards and trimmed out 2 sentiments.

The next step was to attach my heart background to a white card base with liquid glue.  For my hamsters and sentiments, I propped them up with 3D foam squares and strips.

Stay tuned for a card using the extra rainbow background NEXT WEEK!  Woot woot!
Use code T4TAMANDA10 to get 10% off your purchase! See you next week!

Xx, Amanda

Posted on Leave a comment

Ex Libris Birdcages

Oh my gosh! I love the new Lovebirds Stamp Set, don’t you?! The whole Ex Libris Collection is finally available for purchase now! Woot woot!

Although I ADORE the new ink colors, I am a Party Collection girl myself! So, I wanted to showcase this stamp set using a Party rainbow blended background. I blended Party Dress, Limoncello, and Fiesta Blue to create a gorgeous rainbow background. I also spritzed the background with water to create some texture!

Once I had my background blended, I stamped my birdcages and sentiment straight onto my background. Then, I used a ruler and black Copic pen to draw lines from my birdcages to the top of the card.

You can shop using my affiliate link if you want to help me get a small percentage of the sale! If you would like to, click here.

I’ll be back soon with more inspiration!! Xx, Amanda

Posted on 1 Comment

DIY Mini Journal with 6×6 Patterned Ppaer

Heya, friends! Are you getting excited that it’s ALMOST time to get your new Catherine Pooler goodies?!

I’m sharing tons of inspiration from the Lovebirds Bundle!

I have step-by-step instructions on creating this mini journal.. so read on!

I’m starting out with my uber-professional looking template! 😉
1. Cut a piece of white cardstock down to 4.75″ x 7.25″.
2. Score it at 3.5″ and 3.75″.
3. Round off your corners with a corner punch, if desired.

Grab your patterned paper – I’m using the new Twilight Reading Paper Pack.
4. Cut down smaller pieces of cardstock that are approximately .25″ less for each layer. I’m using the Scallops and Dots Dies and a paper trimmer.
5. If you rounded your edges on your white cardstock base, you’ll probably want to round these off as well. I’m only rounding the right corners.

6. Use a small hole punch or poker tool to create a small hole for a brad.
7. Place a brad in the hole, giving yourself room to wrap twine around a few times.

8. On the inner flap, tape a piece of twine that’s long enough to wrap around your mini journal 2-4 times, depending on what you want it to look like.

9. Glue a piece of patterned cardstock on the front flap to cover the tape and brad. My piece of paper is 3.25″ x 4.5″. I’m also using the same size and paper for the other flap.

I’m going to add a little more interest on the front of mine by stamping some birdcages from the Lovebirds stamp set with the new Apricot ink. Im going to trim that down and glue it to the front.

Now we’re ready to work on the inside!
10. Grab a piece of patterned paper and trim it down to 3.75″ x 2.5″.
11. Score at .5″ and 3.5″. Turn 90 degrees and score at .5″.

12. Use some scissors to cut triangles out of the flaps.

13. Use red tape to secure the pocket to your mini journal.

14. Grab some computer paper. Trim strips that are 8″ x 2.75″. Fold them in half and secure them together with a stapler. Stamp an image in the corner on one or all of the pages.
15. Use red tape to secure it to the inside of your journal.

16. Create some tags out of coordinating patterned paper and stick them in your pocket!

That’s it!

I hope you enjoyed this post and try to make your own mini journal!

You can start shopping the New Release on Tues, April 5th if you’re a StampNation member! Everyone else gets to start shopping on Weds, April 6th!

You can shop using my affiliate link if you want to help me get a small percentage of the sale! If you would like to, click here.

I’ll be back soon with more inspiration!! Xx, Amanda

Posted on Leave a comment

Sweet Lovebirds

Hey friends! It’s that time again! A NEW RELEASE from Catherine Pooler is coming out!! Yippee!! And I get to share the Lovebirds Bundle with you! Plus, the NEW INKS! I’m SOOO in love with this release!

Today I’m sharing a card I made using the new Stitch Your Diamonds and Cross Your X’s Dies, the new Ginger, Apricot, and Terracotta Inks, the new Twilight Reading Paper Pack and the new Lovebirds Stamp Set!

To make this card, I used the Stitch Your Diamonds Die on white cardstock. Then, I ink blended it with Apricot, Ginger, and Terracotta inks. For my background, I used a piece of the Twilight Reading paper and die cut it with the Cross Your X’s Die. I layered them on top of each other and adhered them with liquid glue to my card base.

I stamped my Lovebirds and sentiment with black ink and then used Copic markers to color them in. I cut them out using the coordinating dies. I added some London Mix sequins to finish the card off!

Can you tell how much I love this release?! You can start shopping the New Release on Tues, April 5th if you’re a StampNation member! Everyone else gets to start shopping on Weds, April 6th!

You can shop using my affiliate link if you want to help me get a small percentage of the sale! If you would like to, click here.

I’ll be back soon with more inspiration!! Xx, Amanda

Posted on Leave a comment

Ex Libris Beautiful Birdcage

Hey friends! It’s that time again! A NEW RELEASE from Catherine Pooler is coming out!! Yippee!! And I get to share the Lovebirds Bundle with you! Plus, the NEW INKS! I’m SOOO in love with this release!

The first card I get to share with you showcase the new Twilight Reading Paper Pack, the new Apricot Ink, and the new Lovebirds Stamp Set!

I used the Circle Dies to cut out a circle in the bottom right portion of my patterned paper. I blended my circle cutout with the new Apricot ink. I trimmed down a piece of white cardstock and used my circle die to remove that section of my white strip. I stamped my sentiment from the Lovebirds stamp set in the open space on the left side.

I stamped my birdcage with black ink and then used a Copic marker to lightly color it in. I propped my patterned paper up with 3D foam tape to create more dimension. I added some London Mix sequins to finish the card off!

Are you as excited about this release as I am?! You can start shopping the New Release on Tues, April 5th if you’re a StampNation member! Everyone else gets to start shopping on Weds, April 6th!

You can shop using my affiliate link if you want to help me get a small percentage of the sale! If you would like to, click here.

I’ll be back soon with more inspiration!! Xx, Amanda

Posted on Leave a comment

Hope Your Day is a Real Treat!

I am SOOOO freakin’ excited to be part of the Time for Tea Designs design team!!

Are these Enjoy the Little Things and Cafe Critters stamp sets just the CUTEST!?  Eek!  They look so good mix and matched, too!

For this card, I blended a background using Catherine Pooler’s Minted, In the Park, and Deck the Halls inks.  I spritzed it with water and also flicked a bit of white paint on it.

While waiting for that to dry, I cut a panel of white cardstock for the ground.  I used the Tiled Wall Stencil and Twilight ink to create little pavestones.

Next, I stamped my images from the Enjoy the Little Things and Cafe Critters stamp sets, colored them with Copic markers, and then cut them out using the coordinating dies.

Finally, I assembled my card using liquid glue and 3D foam squares.

Thank you so much for stopping by my blog today! Please feel free to use any of the affiliate links below to purchase these cuties! It won’t cost you anything, but it WILL help fund my crafting addiction! :). Xx, Amanda

Time For Tea Designs ENJOY THE LITTLE THINGS Clear Stamps

Time For Tea Designs ENJOY THE LITTLE THINGS Clear Stamps


Time For Tea Designs ENJOY THE LITTLE THINGS Dies

Time For Tea Designs ENJOY THE LITTLE THINGS Dies


Time For Tea Designs TILED WALL Stencil

Time For Tea Designs TILED WALL Stencil
Posted on Leave a comment

Layered Ooh La La

I am just loving this Global Adventure Pt. Deux Release! This shaker card features the Springtime in Paris Collection!

This card really showcases the Under the Eiffel Tower Patterned Paper and the Ooh La La Die! I used Flirty Fuchsia to color my die.

For my accents, I used the coordinating Paris Sequins and the Sweet Twist Twine.

–> If you want to use my affiliate link to shop the New Release, click here. Thank you for all your support!! All the links in this post are affiliate links. This helps me to get some extra crafty cash to buy more goodies to share more projects with you! It is SO appreciated! <–

Xx, Amanda

Posted on Leave a comment

Meet in Paris Shaker Card

I am just loving this Global Adventure Pt. Deux Release! This shaker card features the Springtime in Paris Collection!

This card is besties with the card I made in this post where I cut out the heart using the Nested Stitched Heart Dies. I ink blended the NEW REFRESHED Minted ink and then spritzed with water. I, then, stamped the gorgeous Parisian Portico Background Stamp with the other newly refreshed ink – OH BOY!

I also stamped the Eiffel Tower from the new Dreaming of France Stamp Set and then cut it out with the coordinating dies. For my shaker, I used the coordinating Paris Sequins.

For my beautiful patterned background, I used the Under the Eiffel Tower Patterned Paper.

–> If you want to use my affiliate link to shop the New Release, click here. Thank you for all your support!! All the links in this post are affiliate links. This helps me to get some extra crafty cash to buy more goodies to share more projects with you! It is SO appreciated! <–

Xx, Amanda

Posted on Leave a comment

Ooh La La – C’est Magnifique!

My card features the Springtime in Paris Collection!

To create my gorgeously ink blended background, I masked off the edges of my card with Heffy Doodle Memo Tape and then I used the NEW REFRESHED Sixteen Candles and Oh Boy! inks. I, then, spritzed the background with water.

I die cut the new Ooh Lala Die out of black cardstock.

I also stamped and colored images from the new Dreaming of France Stamp Set and the coordinating dies. For my finishing touch, I added some Paris Sequins and some Sweet Twist Twine.

–> If you want to use my affiliate link to shop the New Release, click here. Thank you for all your support!! All the links in this post are affiliate links. This helps me to get some extra crafty cash to buy more goodies to share more projects with you! It is SO appreciated! <–

Xx, Amanda

Posted on Leave a comment

Springtime in Paris Pocketfold Envelope and Tags

Who’s ready for some more Global Adventure New Release Inspo?!

Me too! 🙂 Today, I’m sharing some tags inside a pocketfold envelope! This project features the Springtime in Paris Collection! I’ve used the new Dreaming of France Stamp Set and the coordinating dies. All of my tags and the envelope are made using the Under the Eiffel Tower Patterned Paper.

I will continue to share more projects using this New Release over the next few days!!

–> If you want to use my affiliate link to shop the New Release, click here. Thank you for all your support!! All the links in this post are affiliate links. This helps me to get some extra crafty cash to buy more goodies to share more projects with you! It is SO appreciated! <–

Xx, Amanda

Posted on Leave a comment

Interactive Slider Baby Shower Card

Well hey there, crafty friends!  I sure hope you had a wonderful Christmas!  Did you get any crafty goodies?!  I hope so!!

Today, I’m sharing a Baby Shower card!  I love interactive cards and the Slider Pop-up Dies make it so easy to make one quickly!

To create this card, I have blended some gorgeous Catherine Pooler blues on my cutouts from the Slider Pop-up Dies . Next, I’m spritzing the ink with water.

I’ve stamped my images from the Beary Big Heart and Chimply the Best stamp sets.  Now, I’m ready to start coloring the images with Copic markers!

To create my leaves, I am using both the Amazonian Leaves and Forest Leaves Dies.  To color the leaves, I used Limoncello and Tiara inks.  I am gluing my leaves, sequins, and monkey on using Glubert Glue.

Using the Classic Sentiments stamp set and the Chimply the Best stamp set, I’ve created my sentiment on a piece of white cardstock. 

Voila!  So easy and fun!  Plus, it will make a great Baby Shower card that is sure to be gushed over!

Thank you so much for stopping by my blog today!  I hope you’ve enjoyed this post as much as I’ve enjoyed sharing it with you!!  Xx, Amanda

Posted on 29 Comments

Heffy Doodle and Newton’s Nook Designs Collaboration Blog Hop

Welcome to the Heffy Doodle and Newton’s Nook Designs Collaboration Blog Hop!
Design Team members from both companies are sharing inspiration using products from both companies! I am super excited to share my card with you!

To create this card, I’m starting with the Heffy Doodle Slimline Mini Mails Die and a piece of white cardstock trimmed to slimline size (3.5″x8.5″).

Next, I am stamping my images from the Newton’s Nook All About for Christmas stamp set and the Heffy Doodle Santa’s Village stamp set with the Maker Forte ReMARKable Eclipse Black ink. This is my favorite alcohol-friendly black ink!

Now, onto coloring my adorable images with Copic markers!

For my background, I’m blending Catherine Pooler’s Chiffon, Maker Forte’s Yellowstone, Bubblegum, and Coral Keys inks.

To create my hill and slider element, I’m using the Heffy Doodle Slimline Scenery Dies and the Straight Slider Dies. To create a longer slider, I’m die cutting 2 of the sliders right next to each other.

Using Deep Foam tape, I’m propping up my hill to give me room for a button to use as my sliding element. After attaching my trains to the buttons, I can start assembling the rest of the card using 3D foam squares and glue!

Here’s another photo of the finished card and some close-ups!

And that’s it for my card!! I hope you enjoyed my part in the Blog Hop!

To be entered to win the giveaway, all you need to do is comment at each stop along the Blog Hop!
Newton’s Nook Designs will be giving away $35 and Heffy Doodle will be giving away £25 to their respective stores!  Be sure to comment before 11:59 PM EST on Dec 28th to be entered to win!

Each company will post their random winner on Dec 29th at 10AM EST!  Make sure to check the Heffy Doodle Blog and Newton’s Nook Designs Blog to see if you’re a winner!


Blog Hop Lineup:

Heffy Doodle Blog

Tatiana Trafimovich

Tina Herbeck

Amanda Fitterer (you are here!)

Maria Russell (GO HERE NEXT!)

Cassie Trask

Samantha Mann

Amanda Stevens

Zsofia Molnar

Newton’s Nook Designs Blog

Please note, some of the links above may be affiliate links. Feel free to use them and help a fellow crafter out! Thank you!!

Posted on 33 Comments

Heffy Doodle and Catherine Pooler Collaboration Blog Hop

Welcome to the Heffy Doodle and Catherine Pooler Collaboration Blog Hop!
Design Team members from both companies are sharing inspiration using products from both companies!

I’m so excited to share TWO cards with you today!

For my first card, I used a plethora of stamp sets! I stamped images from the Heffy Doodle Who Let the Dogs Out Stamp Set and the Flying High Stamp Set. From Catherine Pooler, I stamped my images from the Special Delivery Stamp Set. I colored my images with Copic markers.

For my background, I use the Heffy Doodle Imperial Stitched Rectangle Dies, and the Grassy Lass Dies. I blended my Simply Radiant Stencil using Chiffon, Tiara, and Coral Cabana Catherine Pooler inks. For my grass, I used Garden Party.

I assembled my card using 3D foam squares and liquid glue.

Now, onto my 2nd card!

To make this card, I stamped my images from the Who Let the Dogs Out, Hot Diggity Dog and Special Delivery Stamp Sets. I colored my images with Copic makers again. For my background, I blended the background using Chiffon and Tiara and the Marvellous Mountains Stencil. I used my mini Midnight Ink and a white gel pen to create a road using the Loads of Roads Stencil.

I assembled my card using liquid glue and 3D foam squares.

Now, onto the Blog Hop Giveaway Details:

To be entered to win the giveaway, all you need to do is comment at each stop along the Blog Hop!
Catherine Pooler will be giving away $35 and Heffy Doodle will be giving away £25 to their respective stores!  Be sure to comment before 11:59 PM EST on Nov 24th to be entered to win!Each company will post their random winner on Nov 25th at 10AM EST!  Make sure to check the Heffy Doodle Blog and Catherine Pooler Blog to see if you’re a winner!

Blog Hop Lineup:

Heffy Doodle Blog

Ali Farmer

Ilina Crouse

Amanda Fitterer (you are here!)

Allison Cope (go here next!)

Ashley Young

Karen Baker

Claudia Mauri

Daniel West

Catherine Pooler Blog

Posted on Leave a comment

It’s Christmas in July!

Hey crafty friends! Today, I’m sharing some inspiration from the new Maker Forte Christmas in July Release!

You can shop the entire New Release here.

Have you purchased anything from the New Release! Leave a comment and let me know or tag me in your Instagram posts @craftyandcreativevibes !

Posted on 39 Comments

Heffy Doodle and Sunny Studio Stamps Collaboration Blog Hop

Welcome to the Heffy Doodle and Sunny Studio Stamps Collaboration Blog Hop!
Design Team members from both companies are sharing inspiration using products from both companies!

I couldn’t choose just 1 card, so I decided to make 2!

Whenever I’m starting a card, I like to lay my stamps out on my card base to get an idea of what the card will look like. After doing that, I got blended my background using Fossilized Amber, Worn Lipstick, and Dusty Concord Distress Oxides.

The next step is stamping and coloring! I stamped images from the Heffy Doodle Chimply the Best, Wingman, Hootiful, and Beary Big Heart stamp sets. From Sunny Studio Stamps, I stamped images from the Silly Sloths stamp set.

For my sentiments, I used the word bubbles from the Whatcha Sayin’ stamp set. I also used a sentiment from the Silly Sloth stamp set.

Once I had all of my elements ready, I used 3D foam squares and strips to adhere everything to my background.

For my other card, I used Chimply the Best and Silly Sloths again. I stamped the images and colored them with Copic markers.

For my background and border, I used the UnbeLEAFable Stencil and the Stitched Rectangle Dies. I wanted my border to stick out farther than regular 3D foam adhesive, so I used the Deep Foam Tape.

I created leaves with the Amazonian Leaves Dies and Lucky Clover Distress Oxide. Finally, I started adhering everything to my card front with glue and 3D foam squares and strips.

To be entered to win the giveaway, all you need to do is comment at each stop along the Blog Hop!
Sunny Studio Stamps will be giving away $35 and Heffy Doodle will be giving away £25 to their respective stores!  Be sure to comment before 11:59 PM on March 3rd to be entered to win!

Each company will post their random winner on March 4th at 10AM EST!  Make sure to check the Heffy Doodle Blog and Sunny Studio Stamps Blog to see if you’re a winner!

Blog Hop Lineup:

Heffy Doodle Blog
Tallie Clewley
Mayra Duran-Hernandez
Mona Toth
Candice Fisher
Davina Cantrell
Julia Englich
Amanda Fitterer
Handmade by Kavya
Sunny Studio Blog

Posted on Leave a comment

Pandas Sending Good Vibes

Hey there crafty friends! I hope you are all having wonderful celebrations with your families for the holidays!

Today, I am sharing this bright and happy card using Kinda Cute by Patricia Alvarez Panda Bear Digital Stamp.

I printed the images on 80# Neenah Solar White cardstock and then colored the images with Copic markers. I cut the images out using precision scissors.

To create my card base and background, I used the Hello Bluebird Gallery Frames #4 Die. I created spots using the Heffy Doodle Dotty Lottie Stencil. I blended Twisted Citron, Rustic Wilderness, and Black Soot Distress Inks and Oxides for the background and only used Rustic Wilderness for my frame. I also cut some leaves using the Heffy Doodle Amazonian Leaves Dies.

I adhered everything to the card base using liquid glue, 3D foam squares and strips.

I love how cheery this card! I think it would brighten up anybody’s day, don’t you?!

Thank you so much for stopping by my blog today! I hope you have a wonderful New Years!

Xoxo, Amanda

Posted on 18 Comments

Heffy Doodle and Miss Ink Stamps Collaboration Blog Hop

Welcome to the Heffy Doodle and Miss Ink Stamps Collaboration Blog Hop!  Design team members from both teams are sharing some crafty inspiration using products from both companies!  Plus, both stores will be giving away prizes!

Now, let’s get crafty! I couldn’t handle all the cuteness of all the stamps, so I ended up making 3 cards!

  1. For my first card, I created my card front using Heffy Doodle’s Stitched Rectangle Dies.
  2. I stamped images from the Heffy Doodle Hootiful Stamp Set and the Miss Ink Stamps Say Cheese Stamp Set. I colored them with Copic markers.
  3. For my background, I used the Miss Ink Stamps Scene Builder: Meadow Stamp Set.
  4. I cut everything out and then adhered it to my card base using 3D foam squares!

For my next card, I wanted to create a cute slimline card!

  1. I stamped images from the Heffy Doodle Quill You Be Mine and Gnome Matter What sets and then colored and cut them.
  2. I used the Heffy Doodle Stitched Slimline Trio Dies to create my slimline base and frames.
  3. On my background, I stamped images from the Miss Ink Stamps Scene Builder: Meadow Stamp Set and the Rise and Shine Stamp Set. I used Heffy Doodle Memo Tape to make sure I didn’t stamp outside the frames.
  4. I used the Bold Banner Sentiments from Heffy Doodle and die cut them with the coordinating die to make perfect banners.
  5. I adhered everything to my base using 3D foam squares and strips.

For my final card, I knew I had to use these cute little Punny Farm Pigs from Miss Ink Stamps.

  1. I started with Rise and Shine Stamp Set for my background.
  2. I used the Grassy Lass Border Dies to create some grass for my foreground and colored it with Bundled Sage Distress Ink.
  3. Then, I stamped my Punny Farm Pigs, Quill You Be Mine, and A Little Shellfish stamp sets and colored and cut them.
  4. I colored in my background using Copic markers and used Tumbled Glass Distress Oxide for my sky.
  5. I used the Whatcha Sayin’ and Whatcha Saying Now for my sentiments.
  6. I adhered everything to my card base with 3D foam squares, strips, and liquid glue!

Thank you so much for stopping by my blog post! I hope you enjoyed my cards!

Make sure to comment along the way for your chance to win! Miss Ink Stamps will be giving away $25 and Heffy Doodle will be giving away £25 to their respective stores!

Blog Hop Lineup:

Heffy Doodle Blog
Silvia Galloni 
Cassie Trask
Davina Cantrell
Amanda Fitterer (you are here!)
Yuliya Yavorskaya 
Ali Farmer
Emelie Hessler
Miss Ink Blog