blog hop · cards · catherine pooler · heffy doodle

Heffy Doodle and Alex Syberia Designs Insta-Hop and Giveaway!

Welcome to the Heffy Doodle and Alex Syberia Designs Collaboration Instagram Hop!
Design Team members from both companies are sharing inspiration using products from both companies on Instagram!

To make this card, I’ve used the following products from both companies:
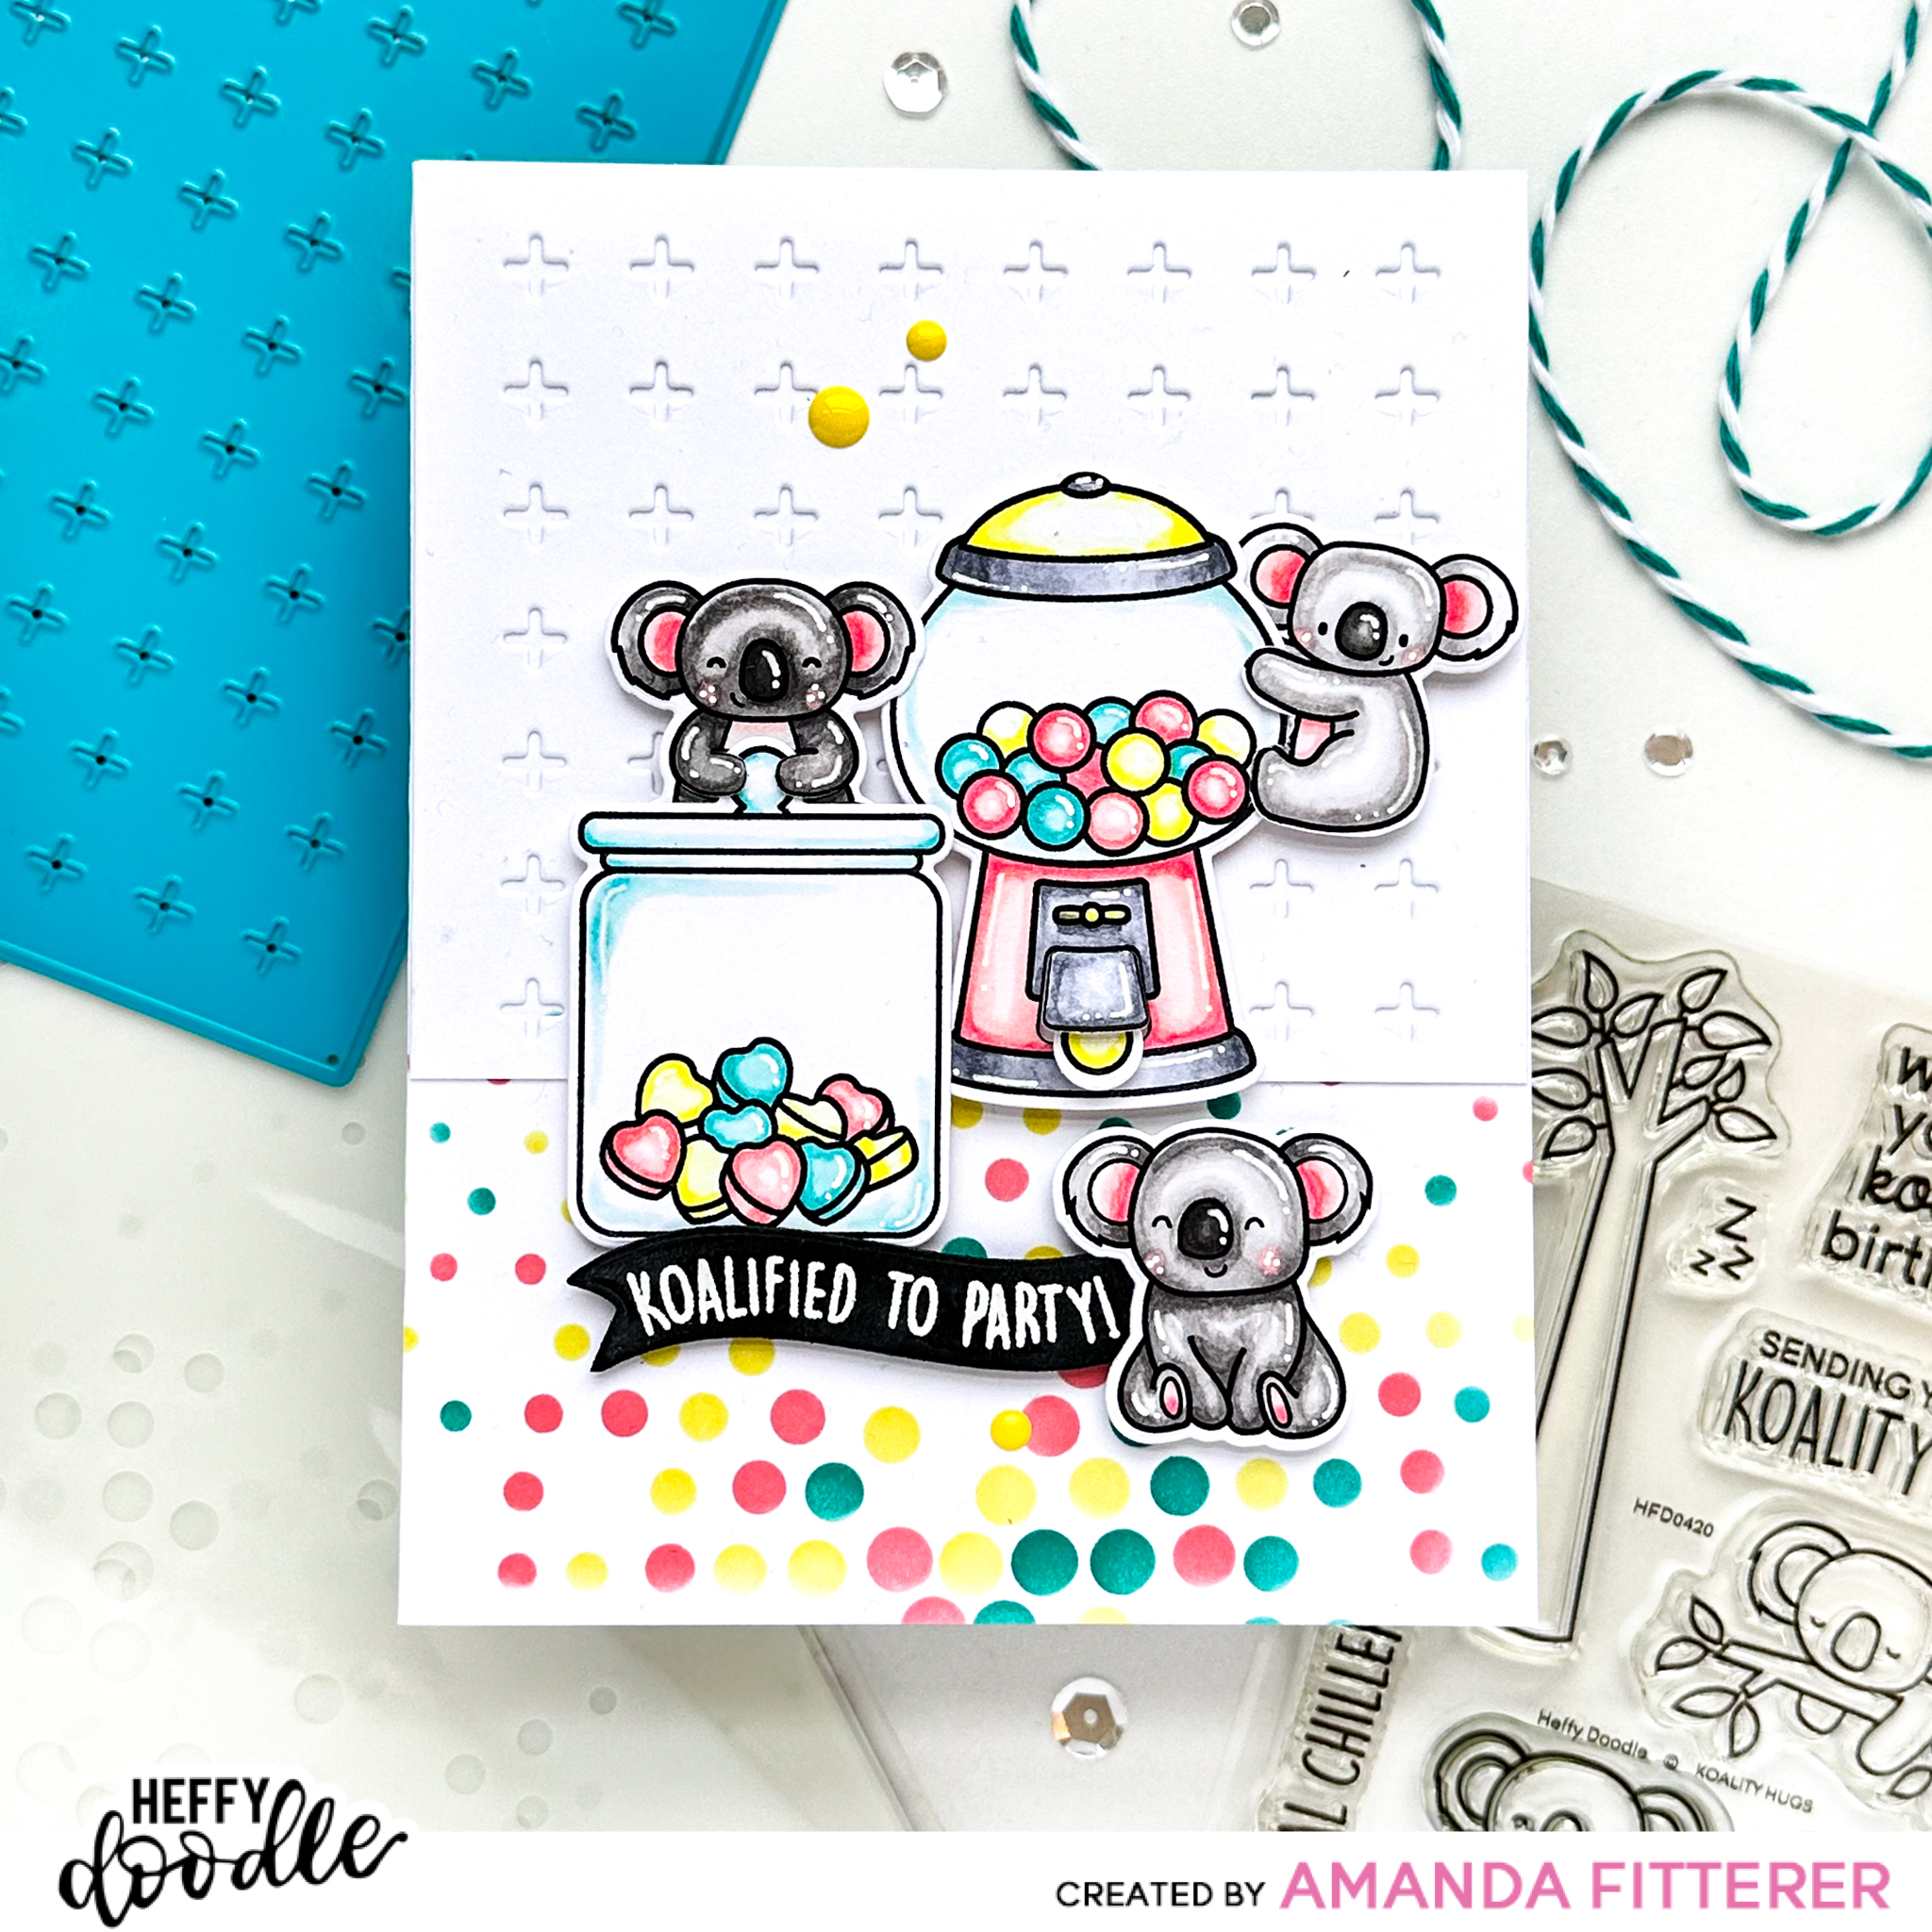
* Heffy Doodle Wrapped with Love Stamp Set
* Heffy Doodle Wrapped with Love Die Set
* Heffy Doodle Let’s Party Jumbo Sentiment Dies
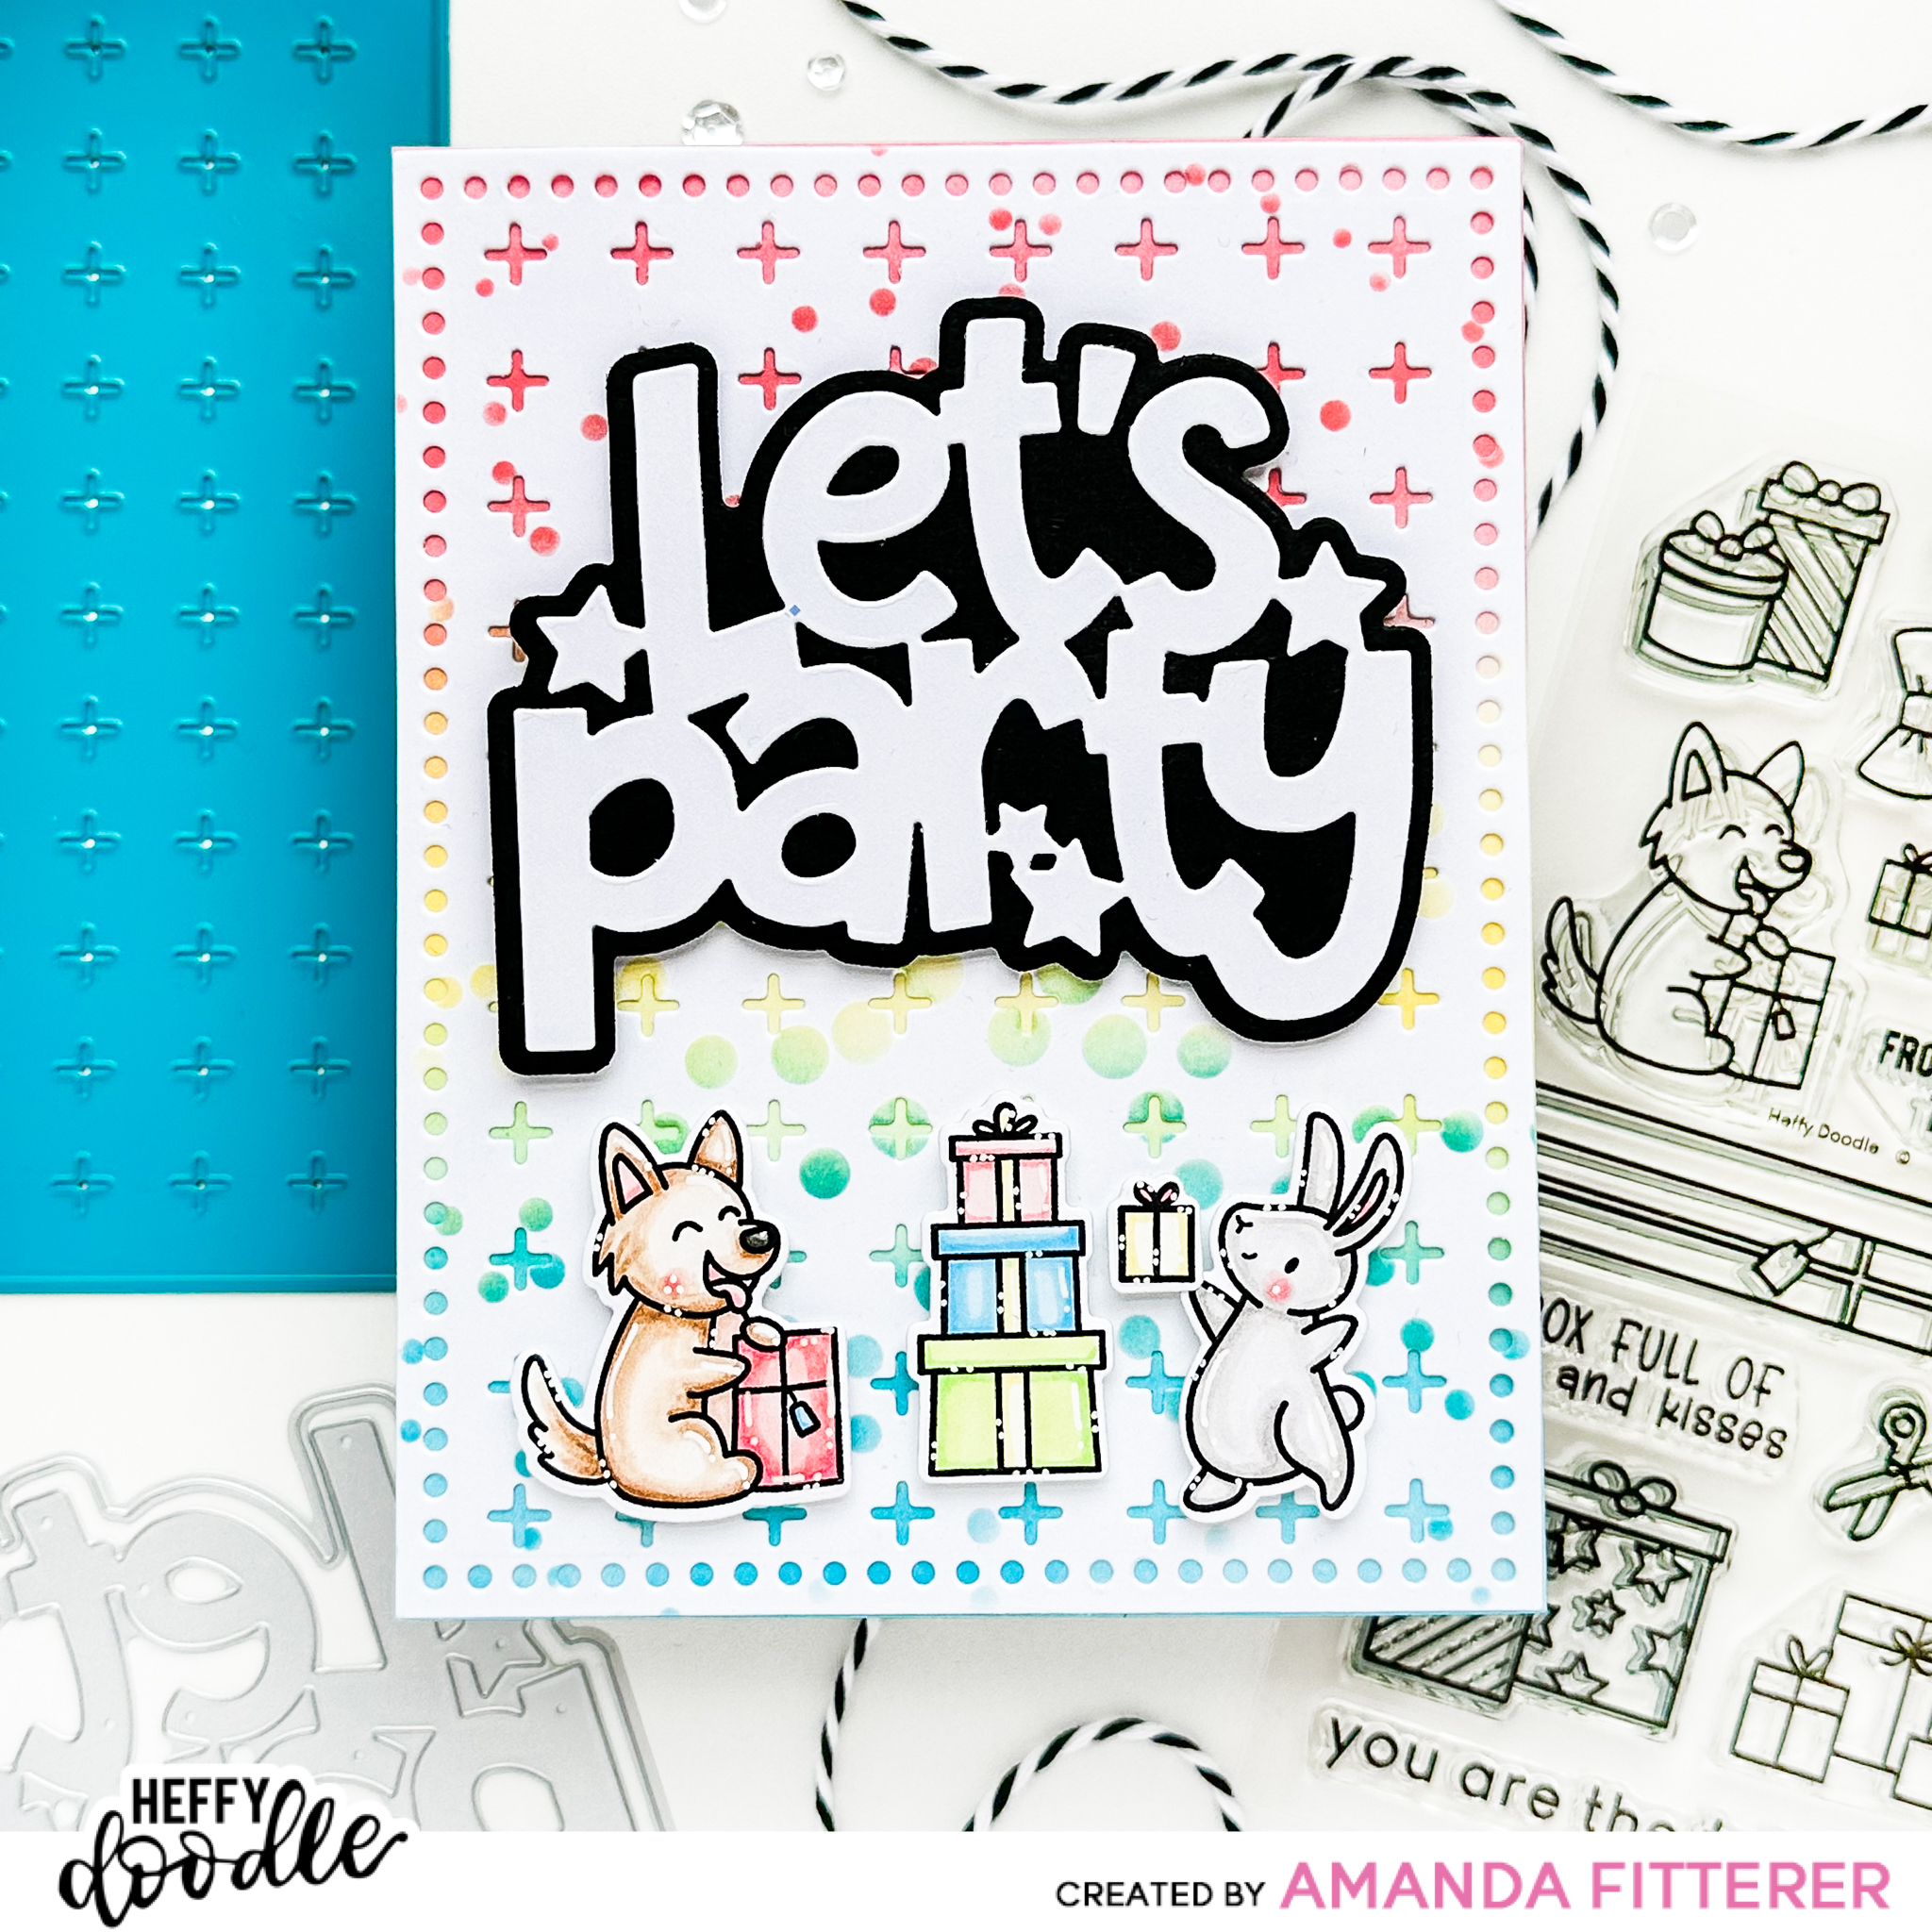
* Alex Syberia Confetti Stencil Set
* Alex Syberia Tiny Crosses Cover Die
My favorite craft essentials:
Heffy Doodle Mini Die Cutting Machine
* MISTI
Smart Craft Glue
*  Petal Pink Gemini Jr. Die Cutting Machine
* 3D Foam Squares
* 3D Foam Tape
*Pre-scored Card Base
* Catherine Pooler Inks

To be entered to win the giveaway, all you need to do is start on Instagram and comment on the designers’ posts!

Thanks for using my affiliate links! You all are the BEST! Using an affiliate link in this post above or down below costs you nothing, but it gives me a teeny percentage of your sale to buy more crafty goodies to continue to share card tutorials with YOU! So, thank YOU! Xx, Amanda

Scrapbook.com Affiliate Link | Catherine Pooler Affiliate Link | Become a Catherine Pooler StampNation member

👇🏻👇🏻 Subscribe 👇🏻👇🏻 to be alerted of new posts by yours truly!

Xx, Amanda

Shop Scrapbook.com dickblick.com
cards · catherine pooler

Creating a Vibrant Rainbow Background

Hey friends! If you’re not signed up for the Club Sursee subscription through Catherine Pooler, YOU SHOULD BE! I love these kits!! So many fun things to be surprised by every month!! This cards’ products came from the January 2023 Club Sursee box!

When creating a rainbow background, I always start with the yellow first in the center of the card (in this case, Limoncello). Next, I’ll blend Oh Boy! along the entire bottom and blend it a little with the Limoncello. Then, I’ll blend Pucker Up on the entire top of the panel. Then, I’ll blend the very bottom of the panel with Pucker Up to create a violet color. I’ll then grab Oh Boy! again and blend the top of the panel to create a fuchsia color. Next, I’ll grab Limoncello again and blend it out into the pink and blue once more.

To create a “shadow” on the Lucky Word Die, I cut the word twice; once with white cardstock and one with black cardstock. Then, I just offset the black and glued them together! It’s an easy way to help your word dies POP!

Thanks for using my affiliate links! You all are the BEST! Using an affiliate link in this post above or down below costs you nothing, but it gives me a teeny percentage of your sale to buy more crafty goodies to continue to share card tutorials with YOU! So, thank YOU! Xx, Amanda

Scrapbook.com Affiliate Link | Catherine Pooler Affiliate Link | Become a Catherine Pooler StampNation member

👇🏻👇🏻 Subscribe 👇🏻👇🏻 to be alerted of new posts by yours truly!

Xx, Amanda

Shop Scrapbook.com
cards · catherine pooler

How to Use Solid Stamp Florals

Hey crafty friends! Today, I’m sharing a card I made using the Clovers and Blooms Stamp Set from the January 2023 Club Sursee! This stamp set is available for purchase outside of the subscription now, so you can get yours today!!

Using floral stamps that are completely solid is personally outside of my comfort zone! If you know me, I love to color in outlined images much more than using solid stamps! So, this set was a fun challenge for me! I wanted to share how I created this card with you!

First, I picked my color palette. This is (in my opinion) the make or break moment when it comes to using solid stamps. I used the Free Download Color Wheel from Catherine Pooler to help me make this decision! If you haven’t downloaded it yet, you need to! It’s a life saver!!

So, I’ve chosen Limoncello, Tiara, Pucker Up, Melon Ice, and Minted. Then, I just go crazy with stamping them! I make sure for each color, I have a large and a small option. Having too many flowers and leaves is NOT a problem. It’s better to have a full bouquet than one that looks bare!

Next, I die cut the images with the coordinating dies and then start laying them out on my card panel. This is super time consuming for me, but it’s probably not for everyone! I just move them around until I feel like it’s looking good! With this card, I’m also planning around my sentiment. When that is the case, I lay my stamp down where I think I’m going to want it so that I can visual it.

Once I get my flowers arranged how I like them, I TAKE A PHOTO with my phone! That way, I can use that as a guide for positioning them once I’ve got glue and 3D foam squares on them!

Once I take my photo, I leave my sentiment stamp where it is and place my card panel in my MISTI. I stamp my sentiment with Midnight Ink. Then, I start assembling my bouquet again, with glue and 3D foam squares! Phew! Good thing I have that photo to look back to! The last step is to add some black dots with any black marker!

Well, that wasn’t too hard! I hope you enjoyed this little tutorial!! Xx, Amanda

Thanks for using my affiliate links! You all are the BEST! Using an affiliate link in this post above or down below costs you nothing, but it gives me a teeny percentage of your sale to buy more crafty goodies to continue to share card tutorials with YOU! So, thank YOU! Xx, Amanda

Scrapbook.com Affiliate Link | Catherine Pooler Affiliate Link | Become a Catherine Pooler StampNation member

👇🏻👇🏻 Subscribe 👇🏻👇🏻 to be alerted of new posts by yours truly!

Xx, Amanda

Shop Scrapbook.com