Oh my gosh! I love the new Lovebirds Stamp Set, don’t you?! The whole Ex Libris Collection is finally available for purchase now! Woot woot!
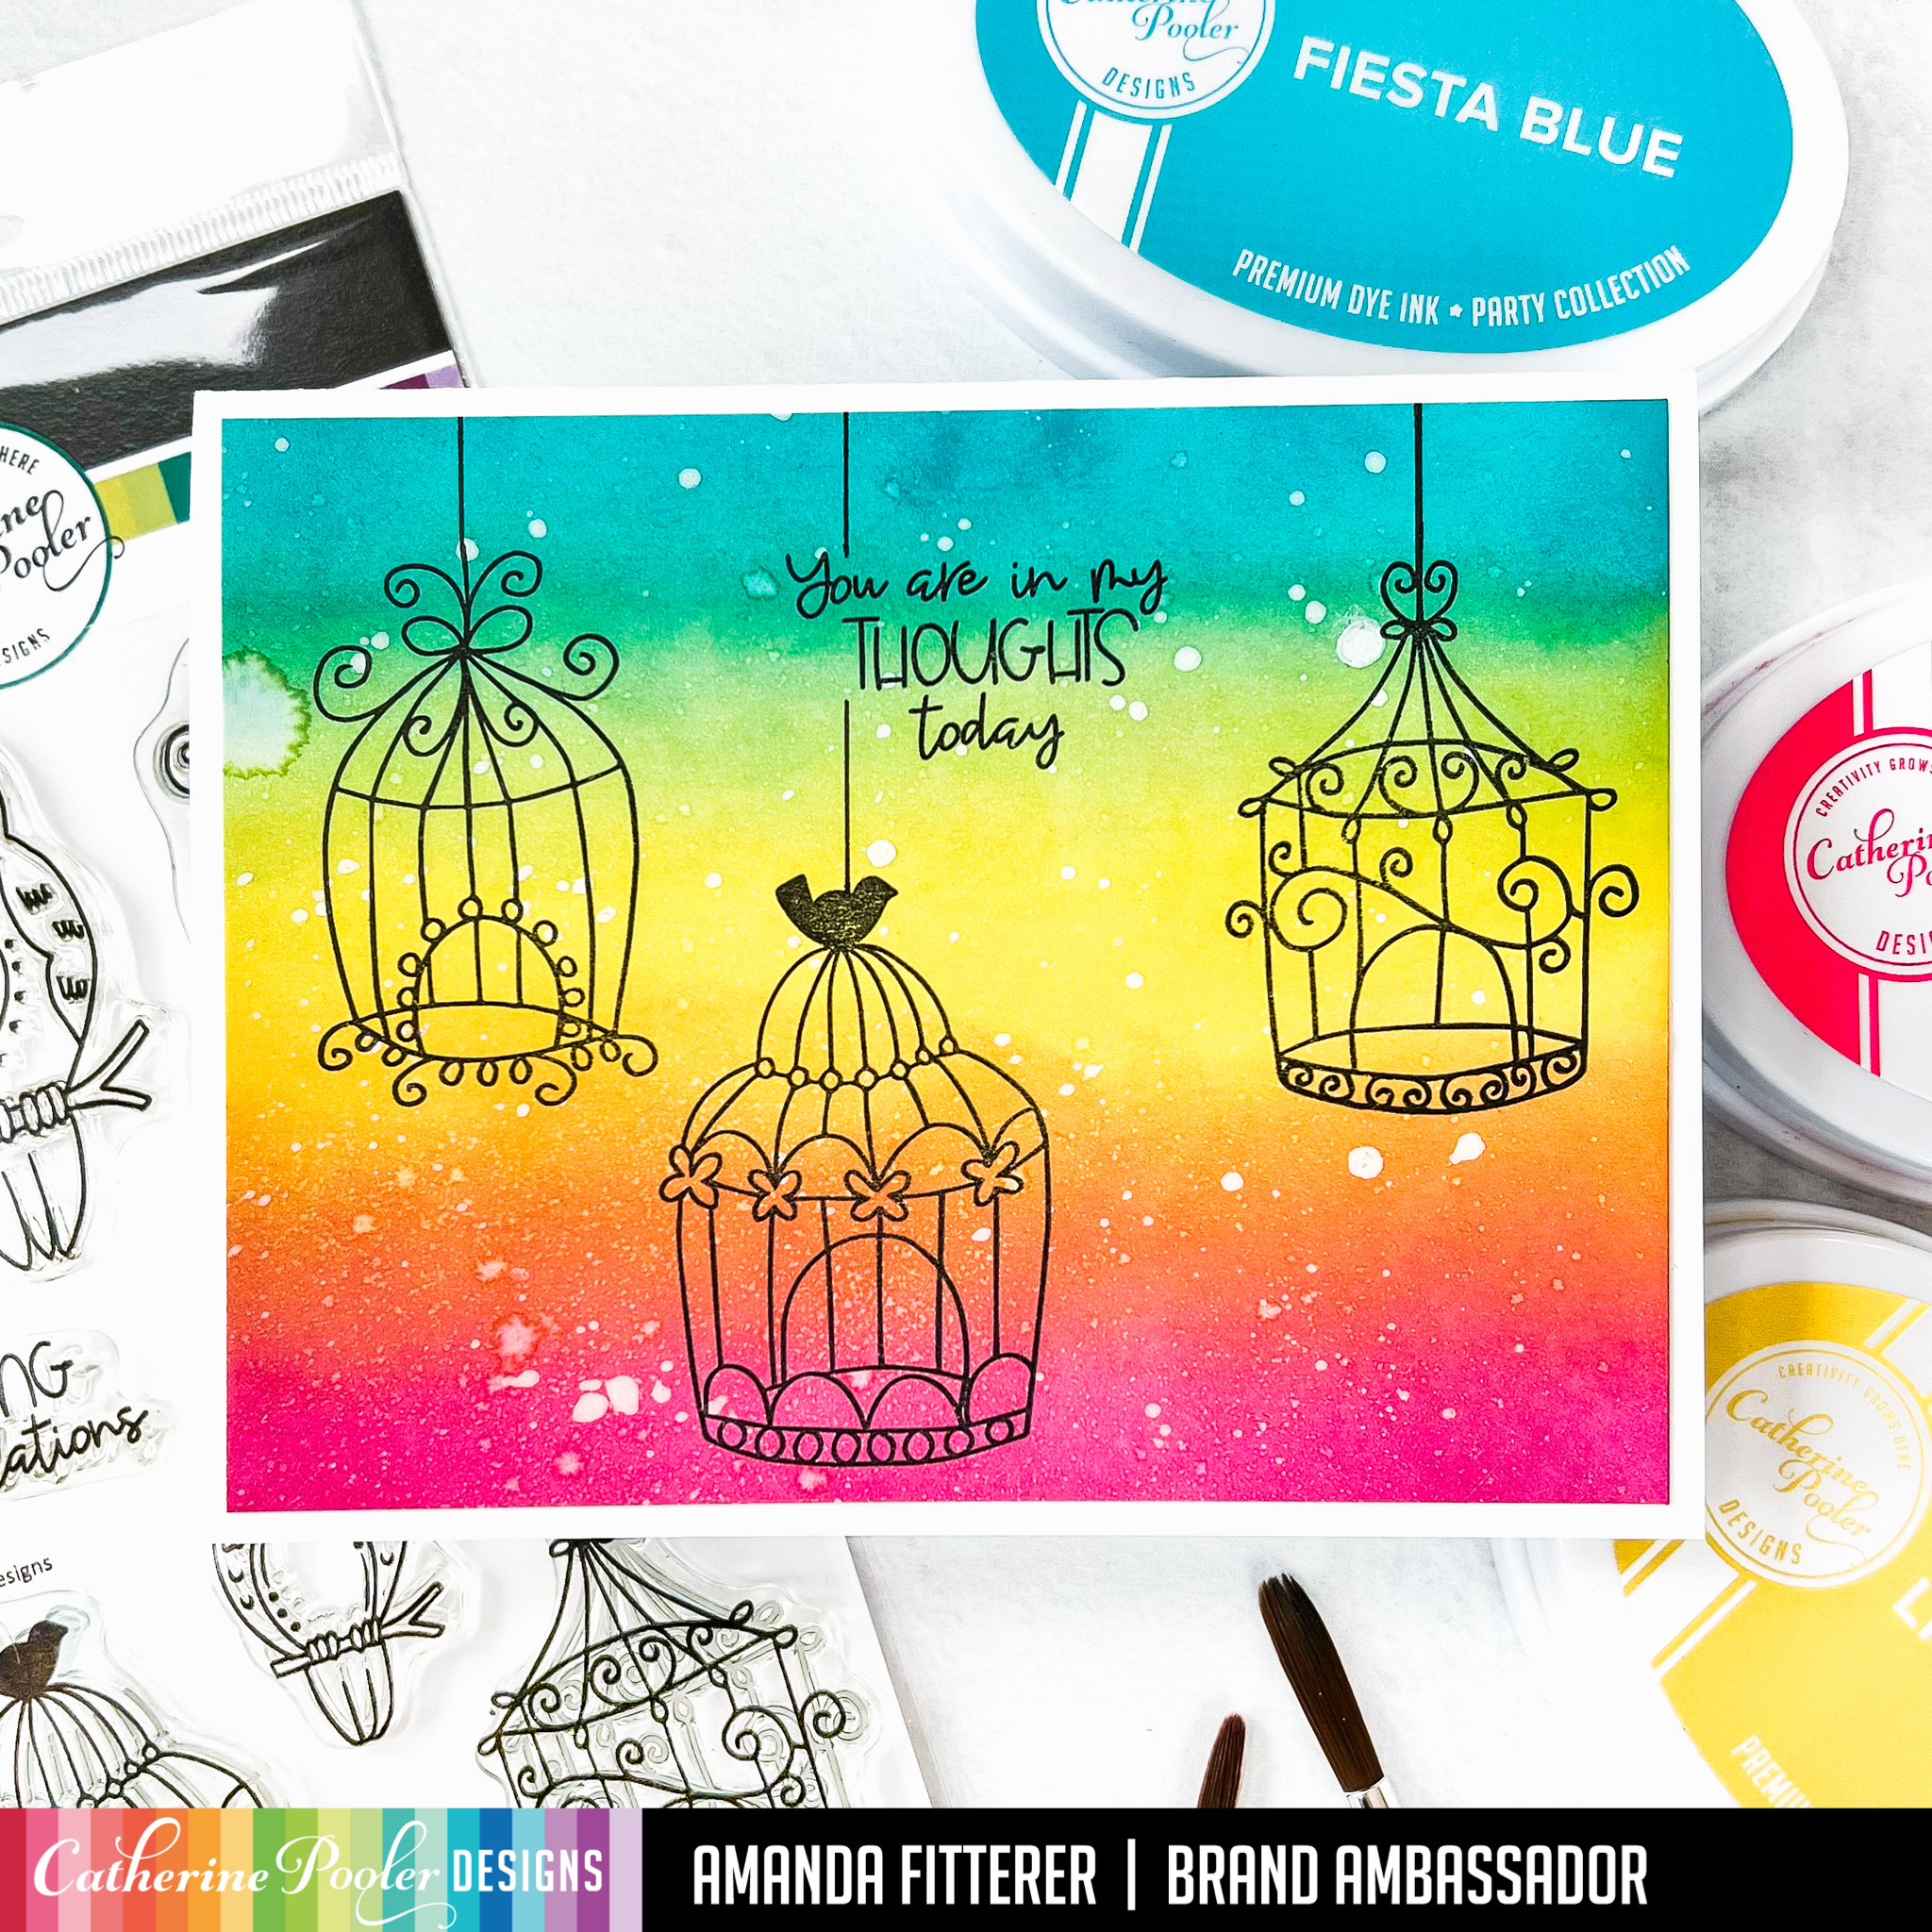
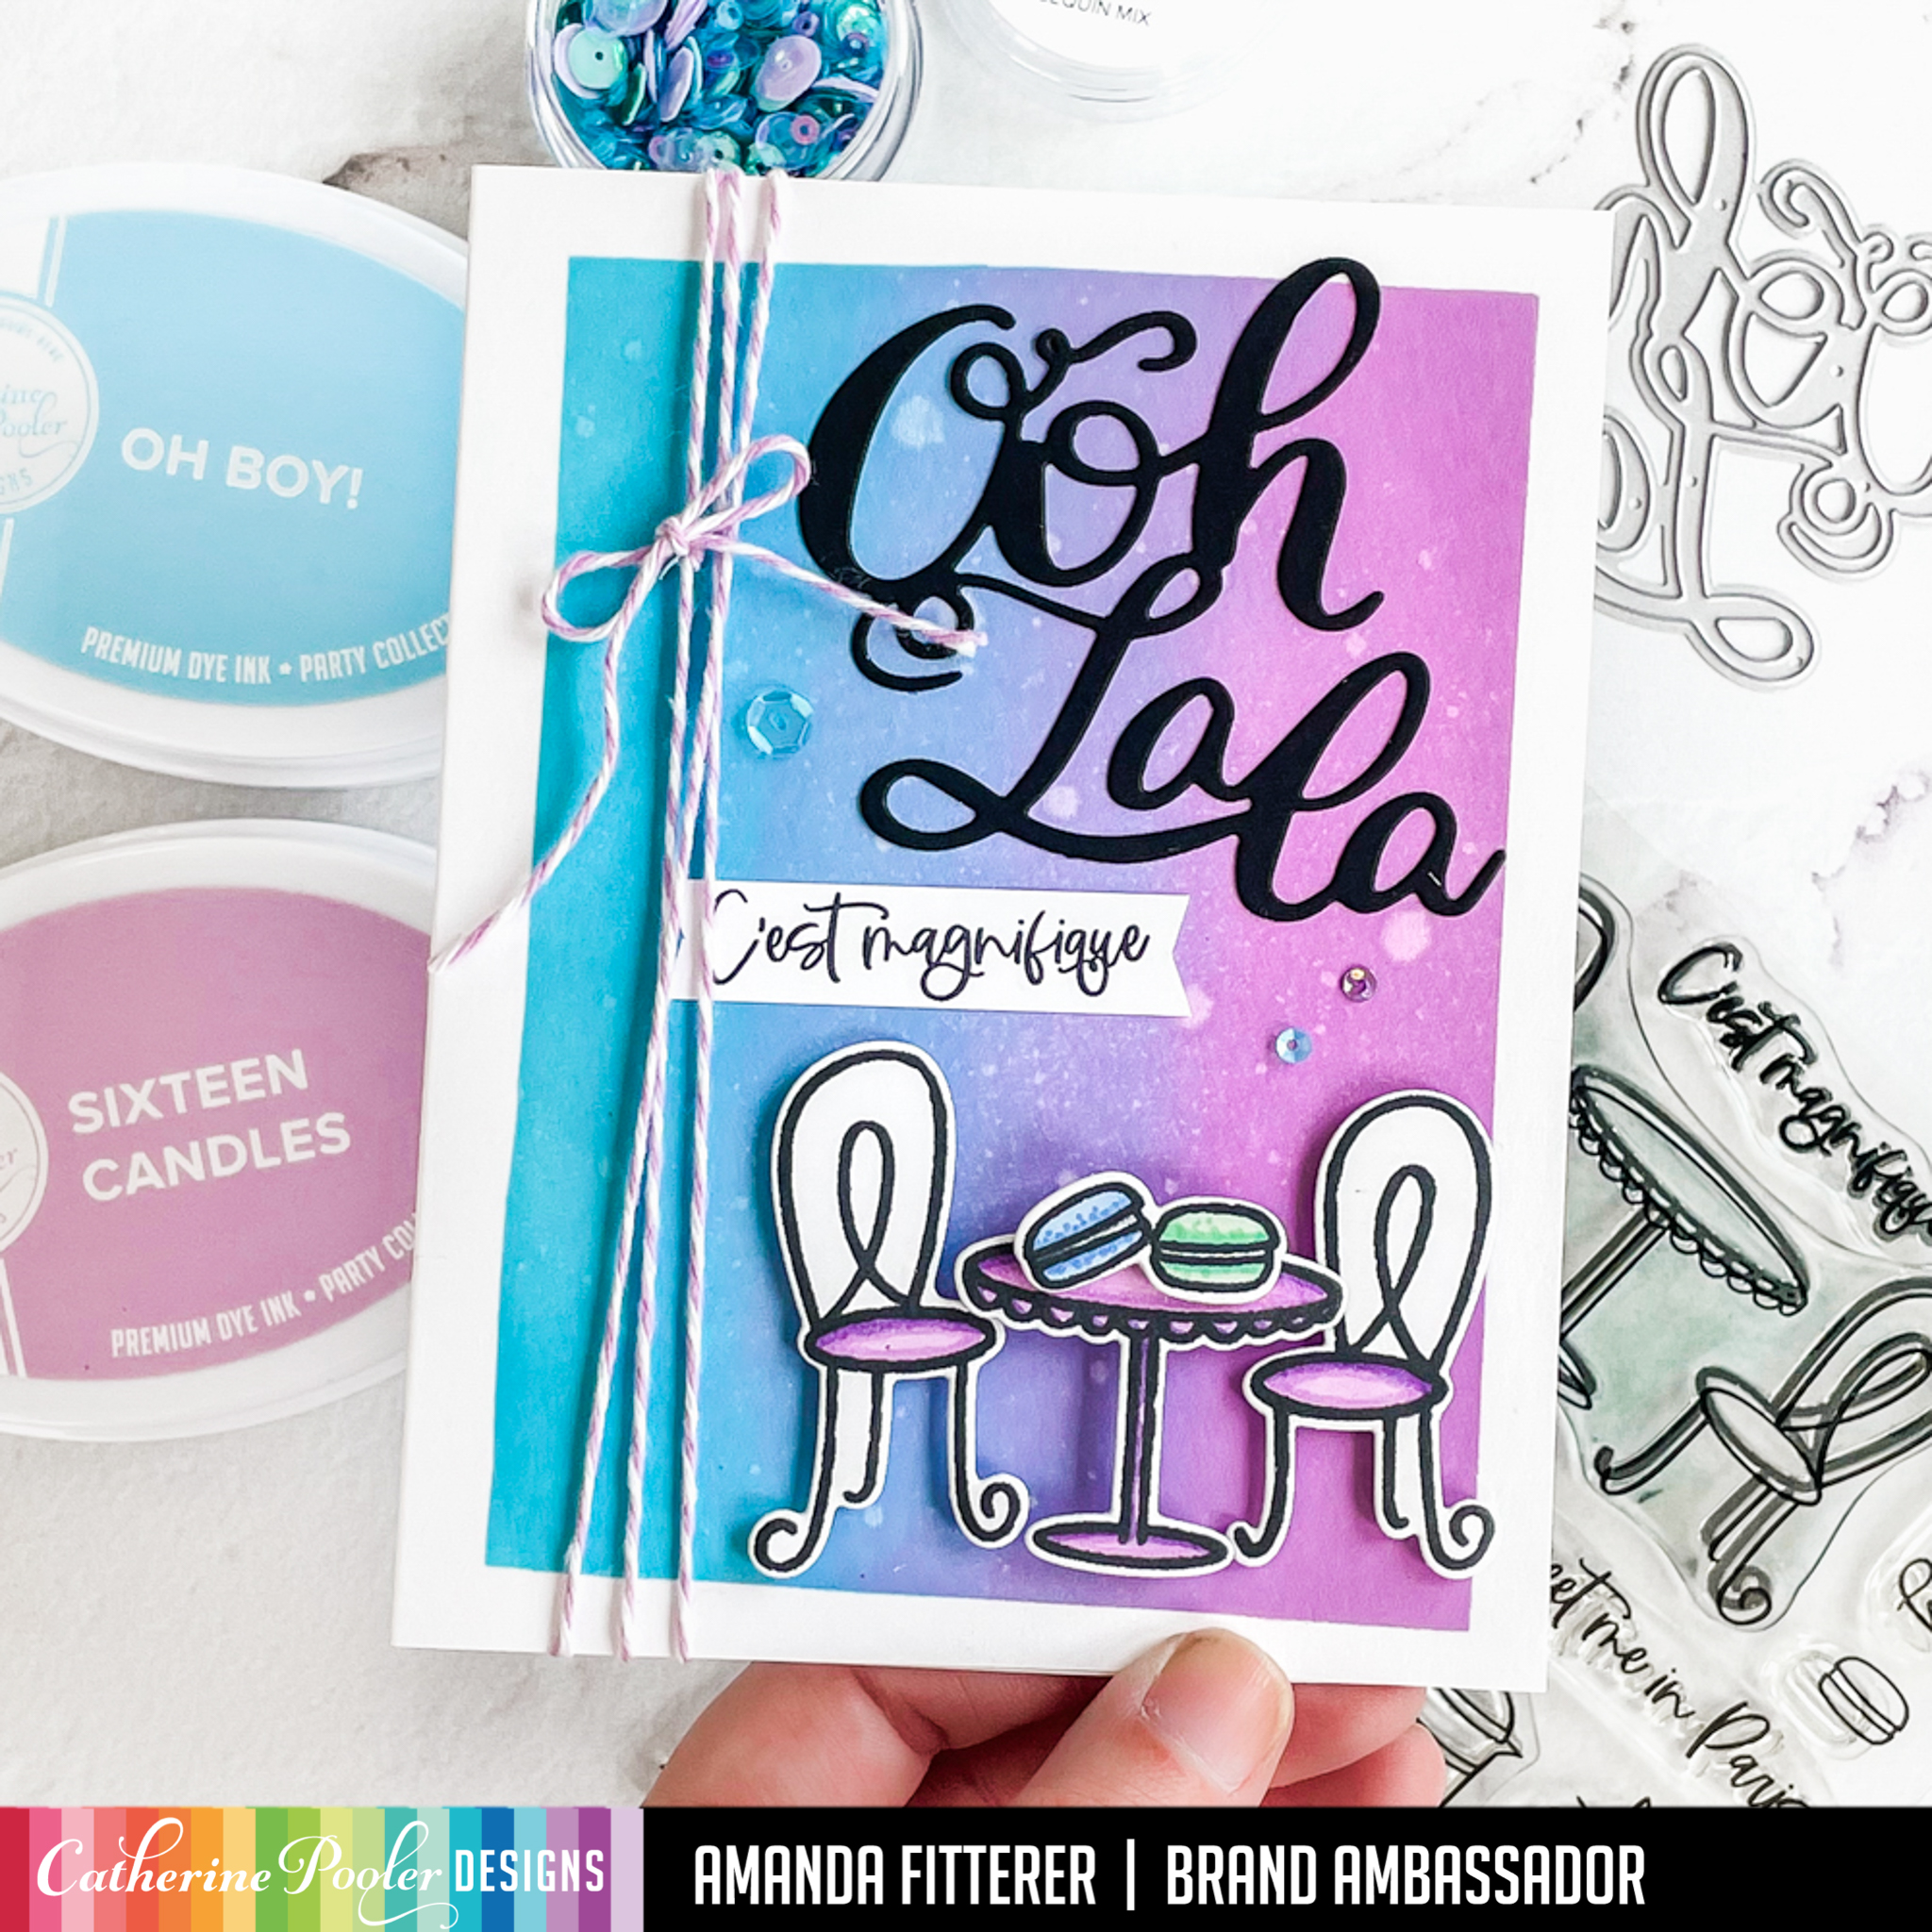
Although I ADORE the new ink colors, I am a Party Collection girl myself! So, I wanted to showcase this stamp set using a Party rainbow blended background. I blended Party Dress, Limoncello, and Fiesta Blue to create a gorgeous rainbow background. I also spritzed the background with water to create some texture!
Once I had my background blended, I stamped my birdcages and sentiment straight onto my background. Then, I used a ruler and black Copic pen to draw lines from my birdcages to the top of the card.
You can shop using my affiliate link if you want to help me get a small percentage of the sale! If you would like to, click here.
I’ll be back soon with more inspiration!! Xx, Amanda
I have step-by-step instructions on creating this mini journal.. so read on!
I’m starting out with my uber-professional looking template! 😉 1. Cut a piece of white cardstock down to 4.75″ x 7.25″. 2. Score it at 3.5″ and 3.75″. 3. Round off your corners with a corner punch, if desired.
Grab your patterned paper – I’m using the new Twilight Reading Paper Pack. 4. Cut down smaller pieces of cardstock that are approximately .25″ less for each layer. I’m using the Scallops and Dots Dies and a paper trimmer. 5. If you rounded your edges on your white cardstock base, you’ll probably want to round these off as well. I’m only rounding the right corners.
6. Use a small hole punch or poker tool to create a small hole for a brad. 7. Place a brad in the hole, giving yourself room to wrap twine around a few times.
8. On the inner flap, tape a piece of twine that’s long enough to wrap around your mini journal 2-4 times, depending on what you want it to look like.
9. Glue a piece of patterned cardstock on the front flap to cover the tape and brad. My piece of paper is 3.25″ x 4.5″. I’m also using the same size and paper for the other flap.
I’m going to add a little more interest on the front of mine by stamping some birdcages from the Lovebirds stamp set with the new Apricot ink. Im going to trim that down and glue it to the front.
Now we’re ready to work on the inside! 10. Grab a piece of patterned paper and trim it down to 3.75″ x 2.5″. 11. Score at .5″ and 3.5″. Turn 90 degrees and score at .5″.
12. Use some scissors to cut triangles out of the flaps.
13. Use red tape to secure the pocket to your mini journal.
14. Grab some computer paper. Trim strips that are 8″ x 2.75″. Fold them in half and secure them together with a stapler. Stamp an image in the corner on one or all of the pages. 15. Use red tape to secure it to the inside of your journal.
16. Create some tags out of coordinating patterned paper and stick them in your pocket!
That’s it!
I hope you enjoyed this post and try to make your own mini journal!
You can start shopping the New Release on Tues, April 5th if you’re a StampNation member! Everyone else gets to start shopping on Weds, April 6th!
You can shop using my affiliate link if you want to help me get a small percentage of the sale! If you would like to, click here.
I’ll be back soon with more inspiration!! Xx, Amanda
Hey friends! It’s that time again! A NEW RELEASE from Catherine Pooler is coming out!! Yippee!! And I get to share the Lovebirds Bundlewith you! Plus, the NEW INKS! I’m SOOO in love with this release!
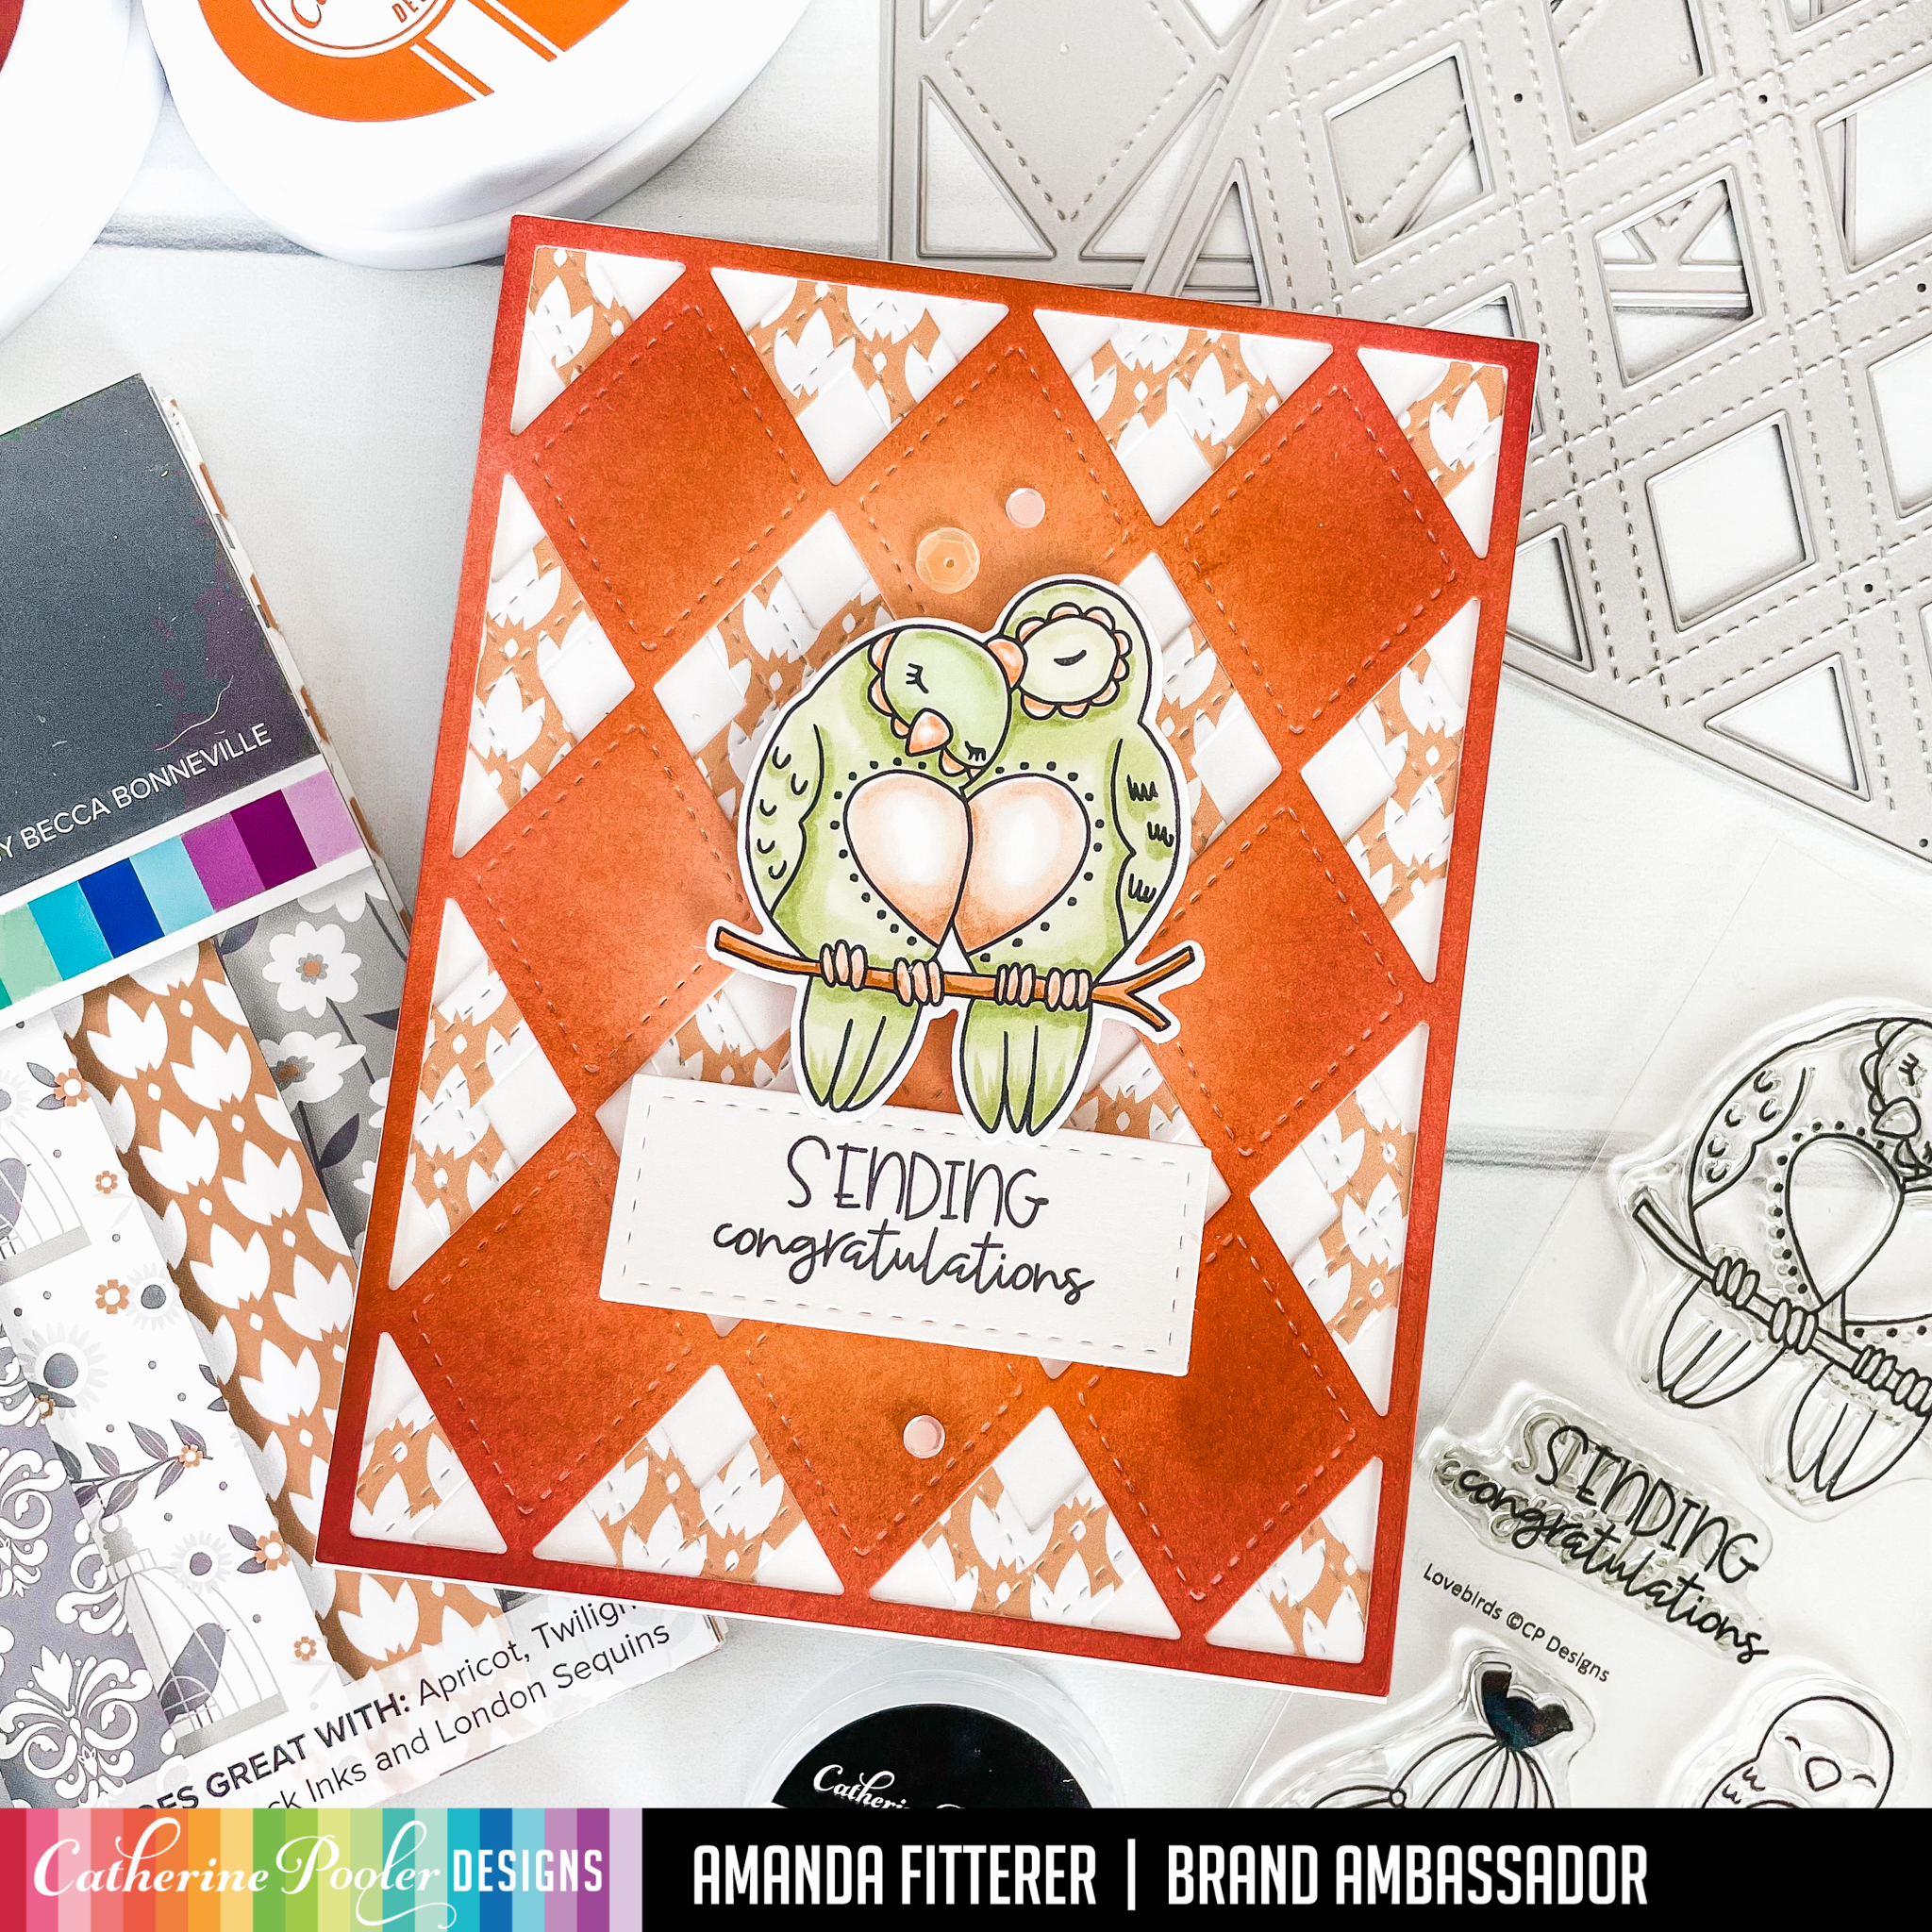
To make this card, I used the Stitch Your Diamonds Die on white cardstock. Then, I ink blended it with Apricot, Ginger, and Terracotta inks. For my background, I used a piece of the Twilight Reading paper and die cut it with the Cross Your X’s Die. I layered them on top of each other and adhered them with liquid glue to my card base.
I stamped my Lovebirds and sentiment with black ink and then used Copic markers to color them in. I cut them out using the coordinating dies. I added some London Mix sequins to finish the card off!
Can you tell how much I love this release?! You can start shopping the New Release on Tues, April 5th if you’re a StampNation member! Everyone else gets to start shopping on Weds, April 6th!
You can shop using my affiliate link if you want to help me get a small percentage of the sale! If you would like to, click here.
I’ll be back soon with more inspiration!! Xx, Amanda
Hey friends! It’s that time again! A NEW RELEASE from Catherine Pooler is coming out!! Yippee!! And I get to share the Lovebirds Bundlewith you! Plus, the NEW INKS! I’m SOOO in love with this release!
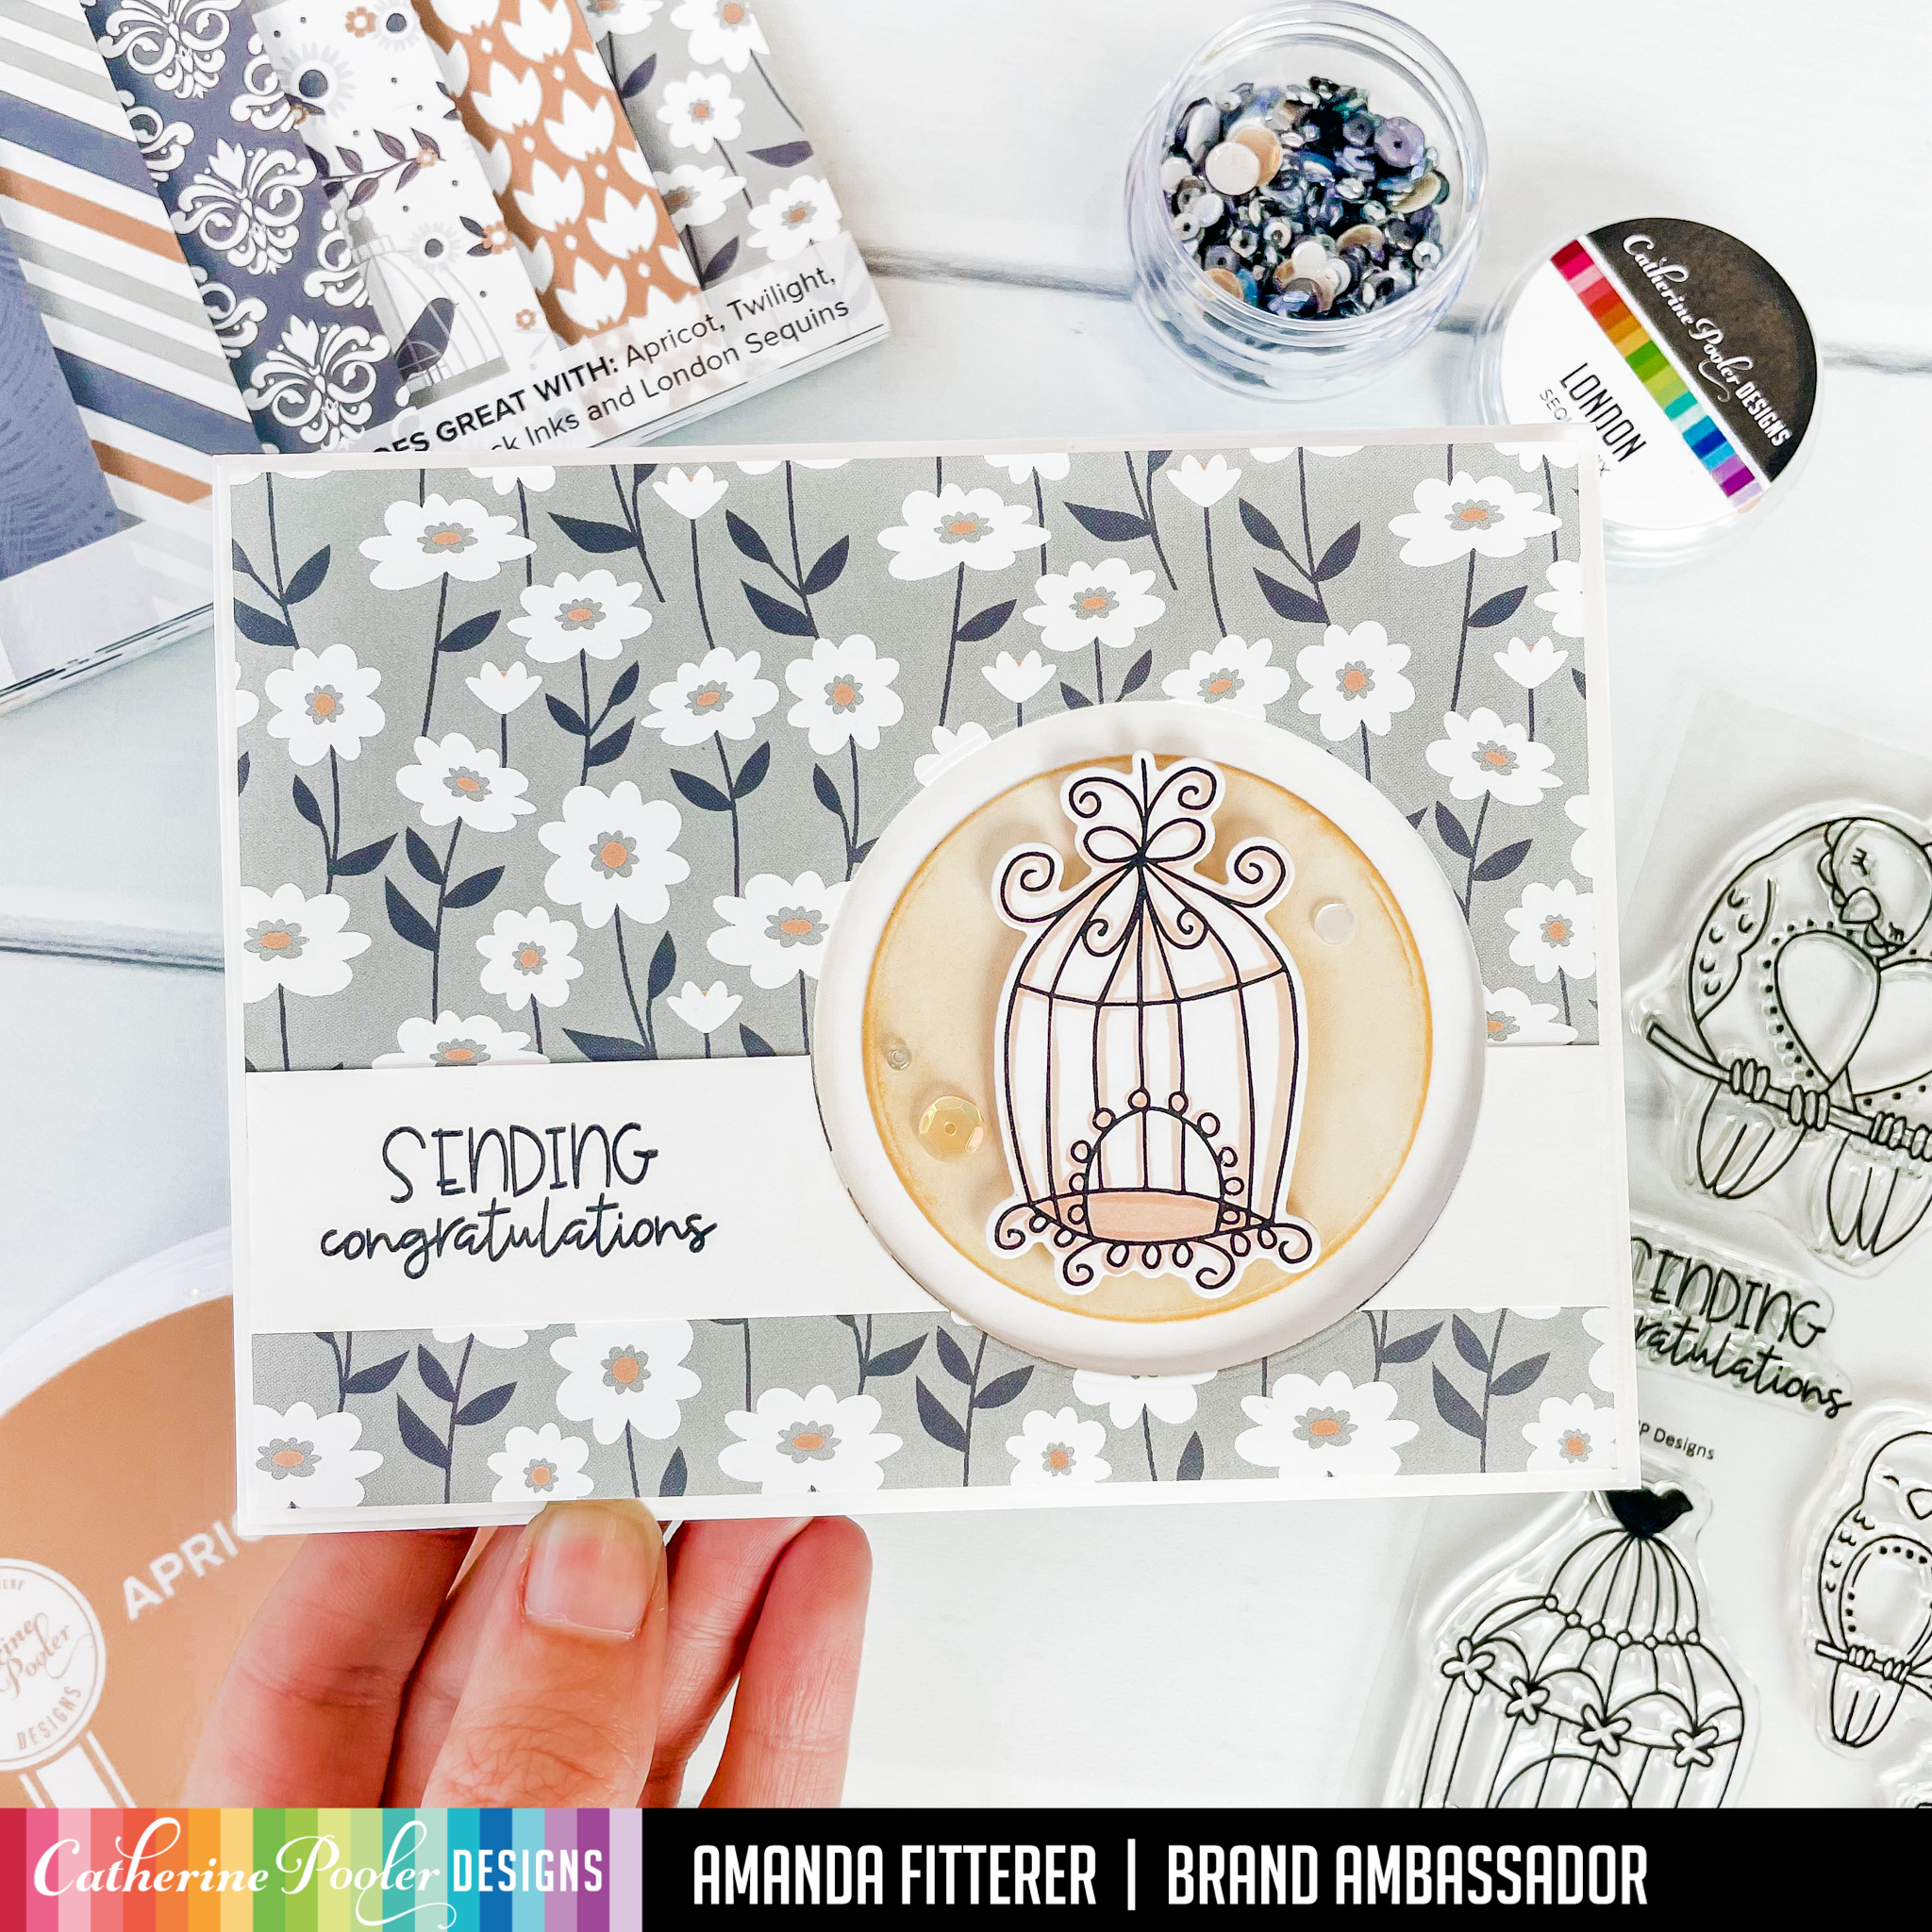
The first card I get to share with you showcase the new Twilight ReadingPaper Pack, the new Apricot Ink, and the new Lovebirds Stamp Set!
I used the Circle Dies to cut out a circle in the bottom right portion of my patterned paper. I blended my circle cutout with the new Apricot ink. I trimmed down a piece of white cardstock and used my circle die to remove that section of my white strip. I stamped my sentiment from the Lovebirds stamp set in the open space on the left side.
I stamped my birdcage with black ink and then used a Copic marker to lightly color it in. I propped my patterned paper up with 3D foam tape to create more dimension. I added some London Mix sequins to finish the card off!
Are you as excited about this release as I am?! You can start shopping the New Release on Tues, April 5th if you’re a StampNation member! Everyone else gets to start shopping on Weds, April 6th!
You can shop using my affiliate link if you want to help me get a small percentage of the sale! If you would like to, click here.
I’ll be back soon with more inspiration!! Xx, Amanda
If you shop with my affiliate link, I can earn a little extra money at no extra cost to you. All you have to do is click here and get shopping or use the links in this post!
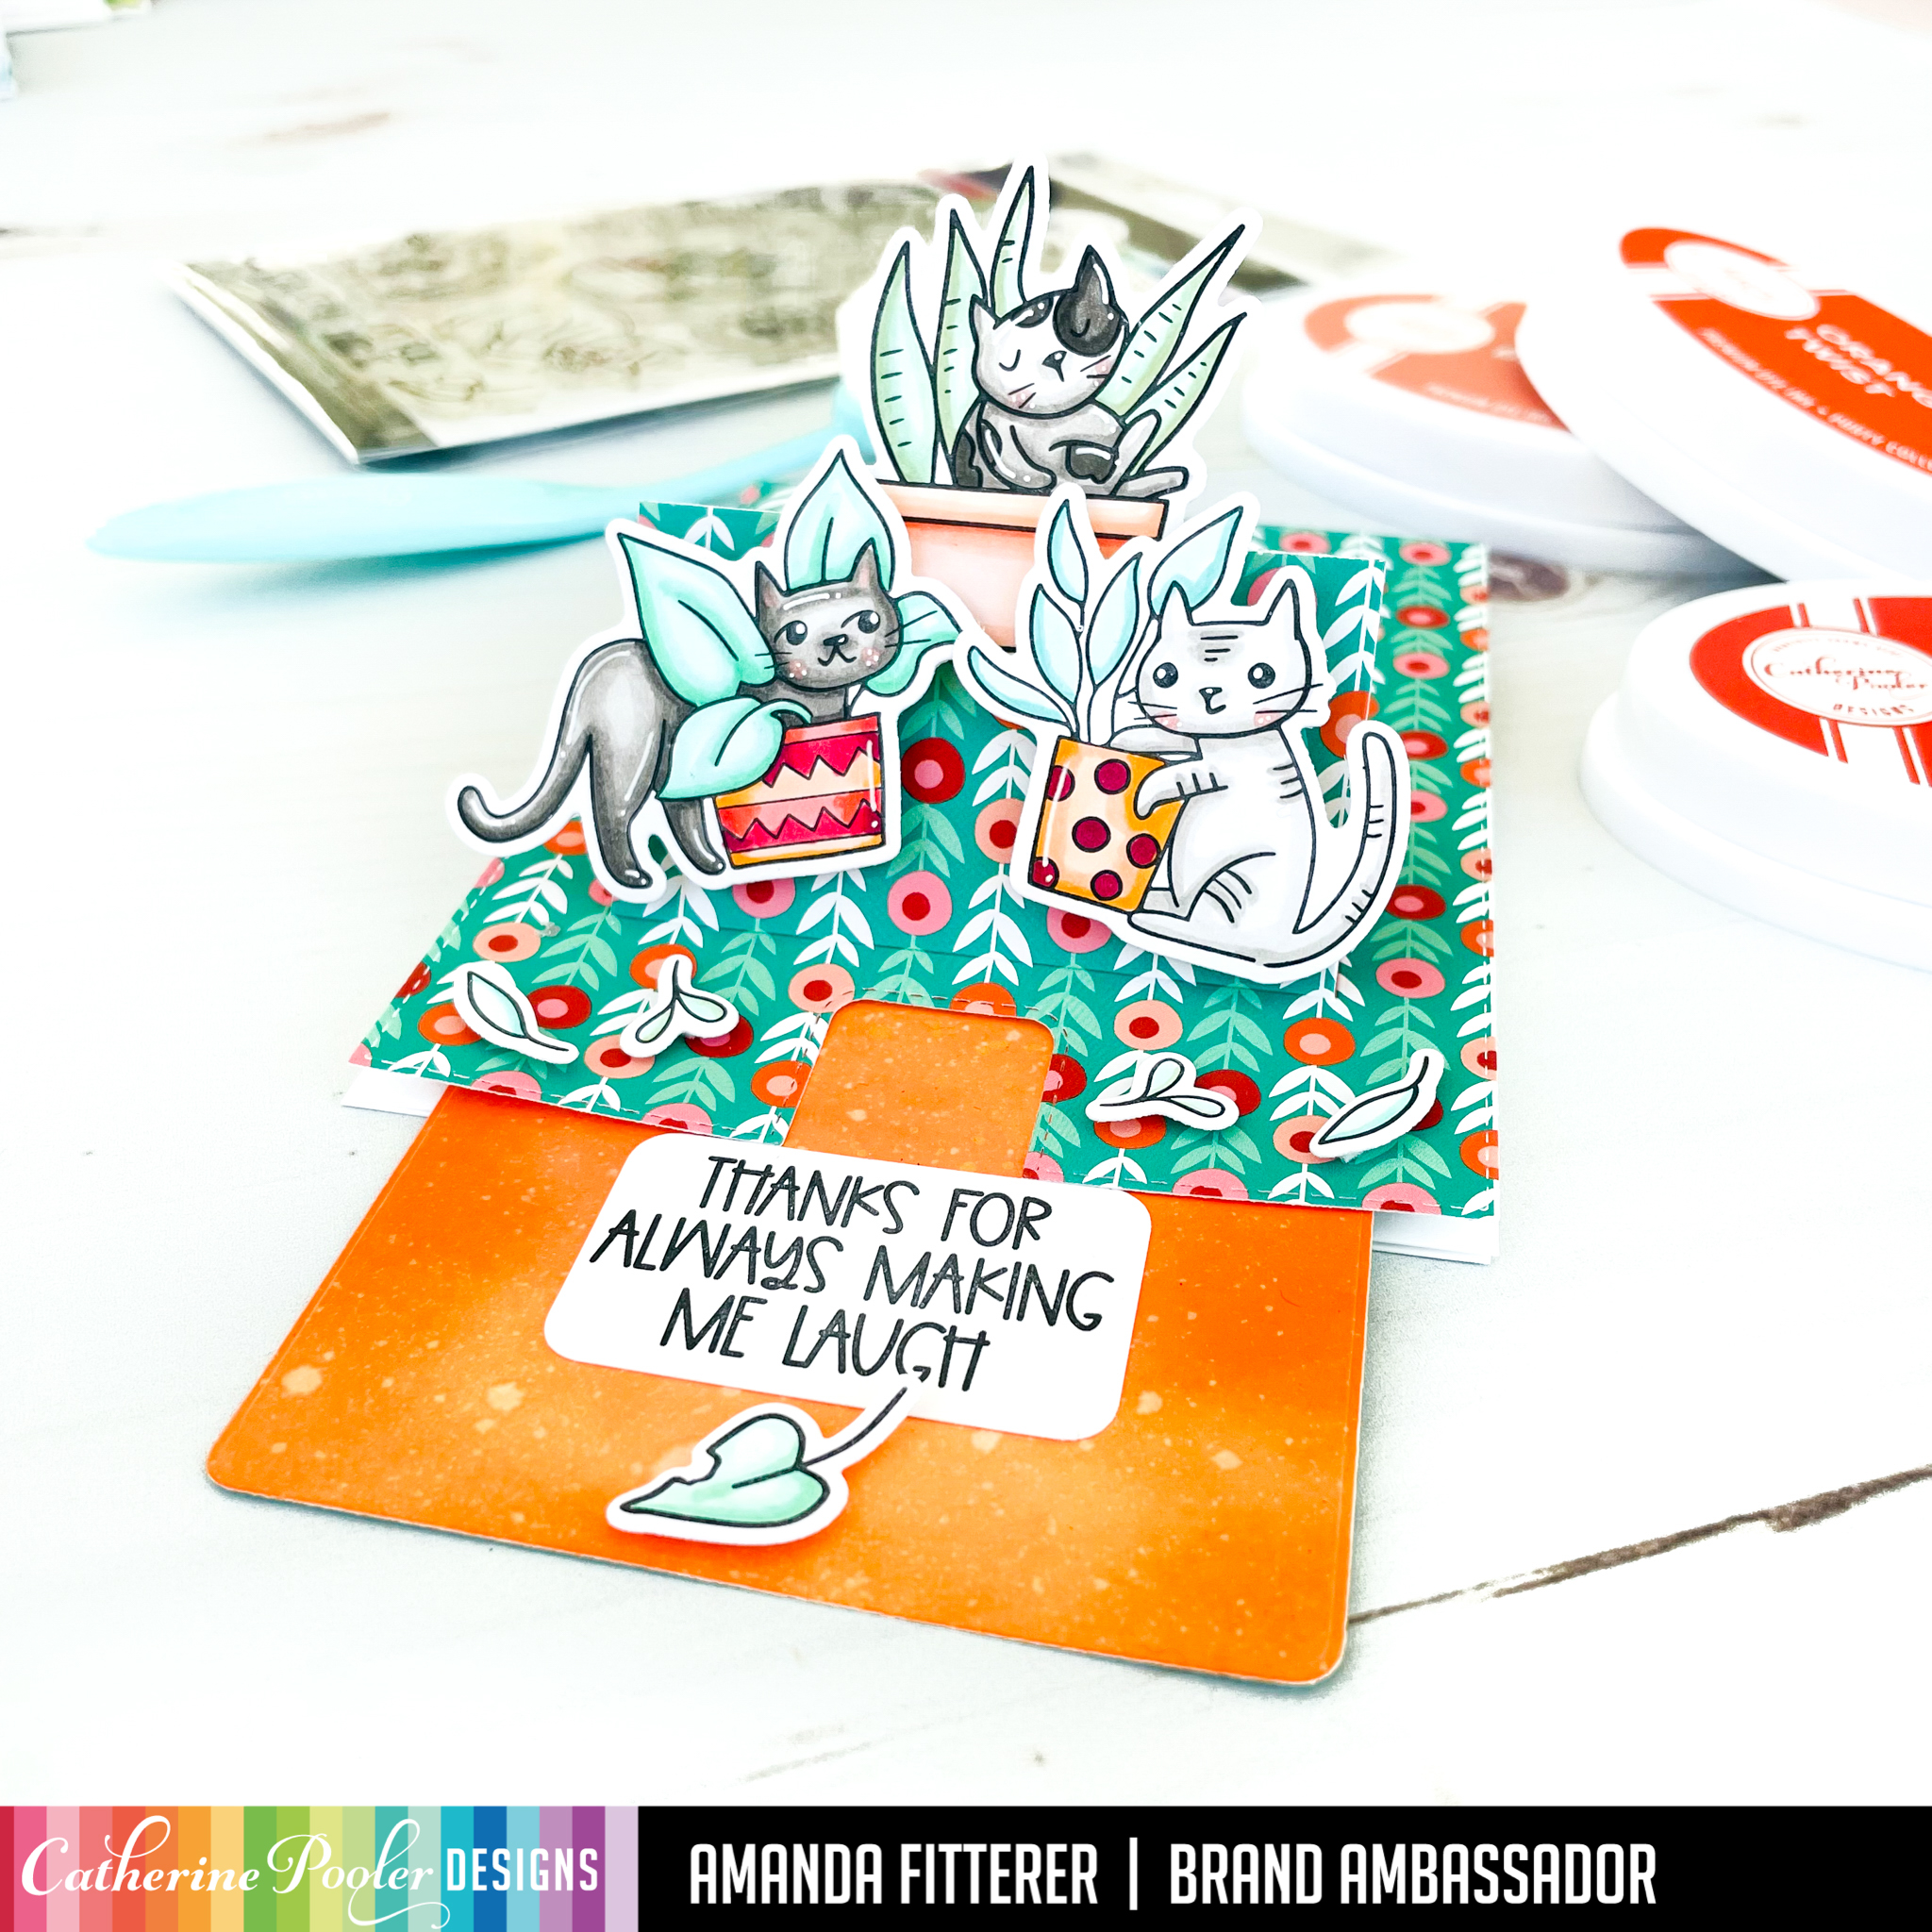
To create this card, I started with the Slider Pop-up Dies from Heffy Doodle. I love using this die to create an easy interactive card! I cut the card front with the Potted Patterned Paper.
For the inner panel, I blended Bellini, Orange Twist, and Flame.
Next, I stamped my images from the Just Roll With It stamp set and colored them with Copic markers. Then, I die cut them with the coordinating dies. I stamped a sentiment on a piece of white cardstock and then rounded the corners.
I assembled the card using 3D foam tape. I attached my kitties and leaves with foam squares and liquid glue.
And that’s it for me today! Thanks so much for stopping by!
To shop with my affiliate link and help me earn a little extra cash (at no cost to you) to buy more crafty goodies to share more projects with you, click here or use the links in this post!
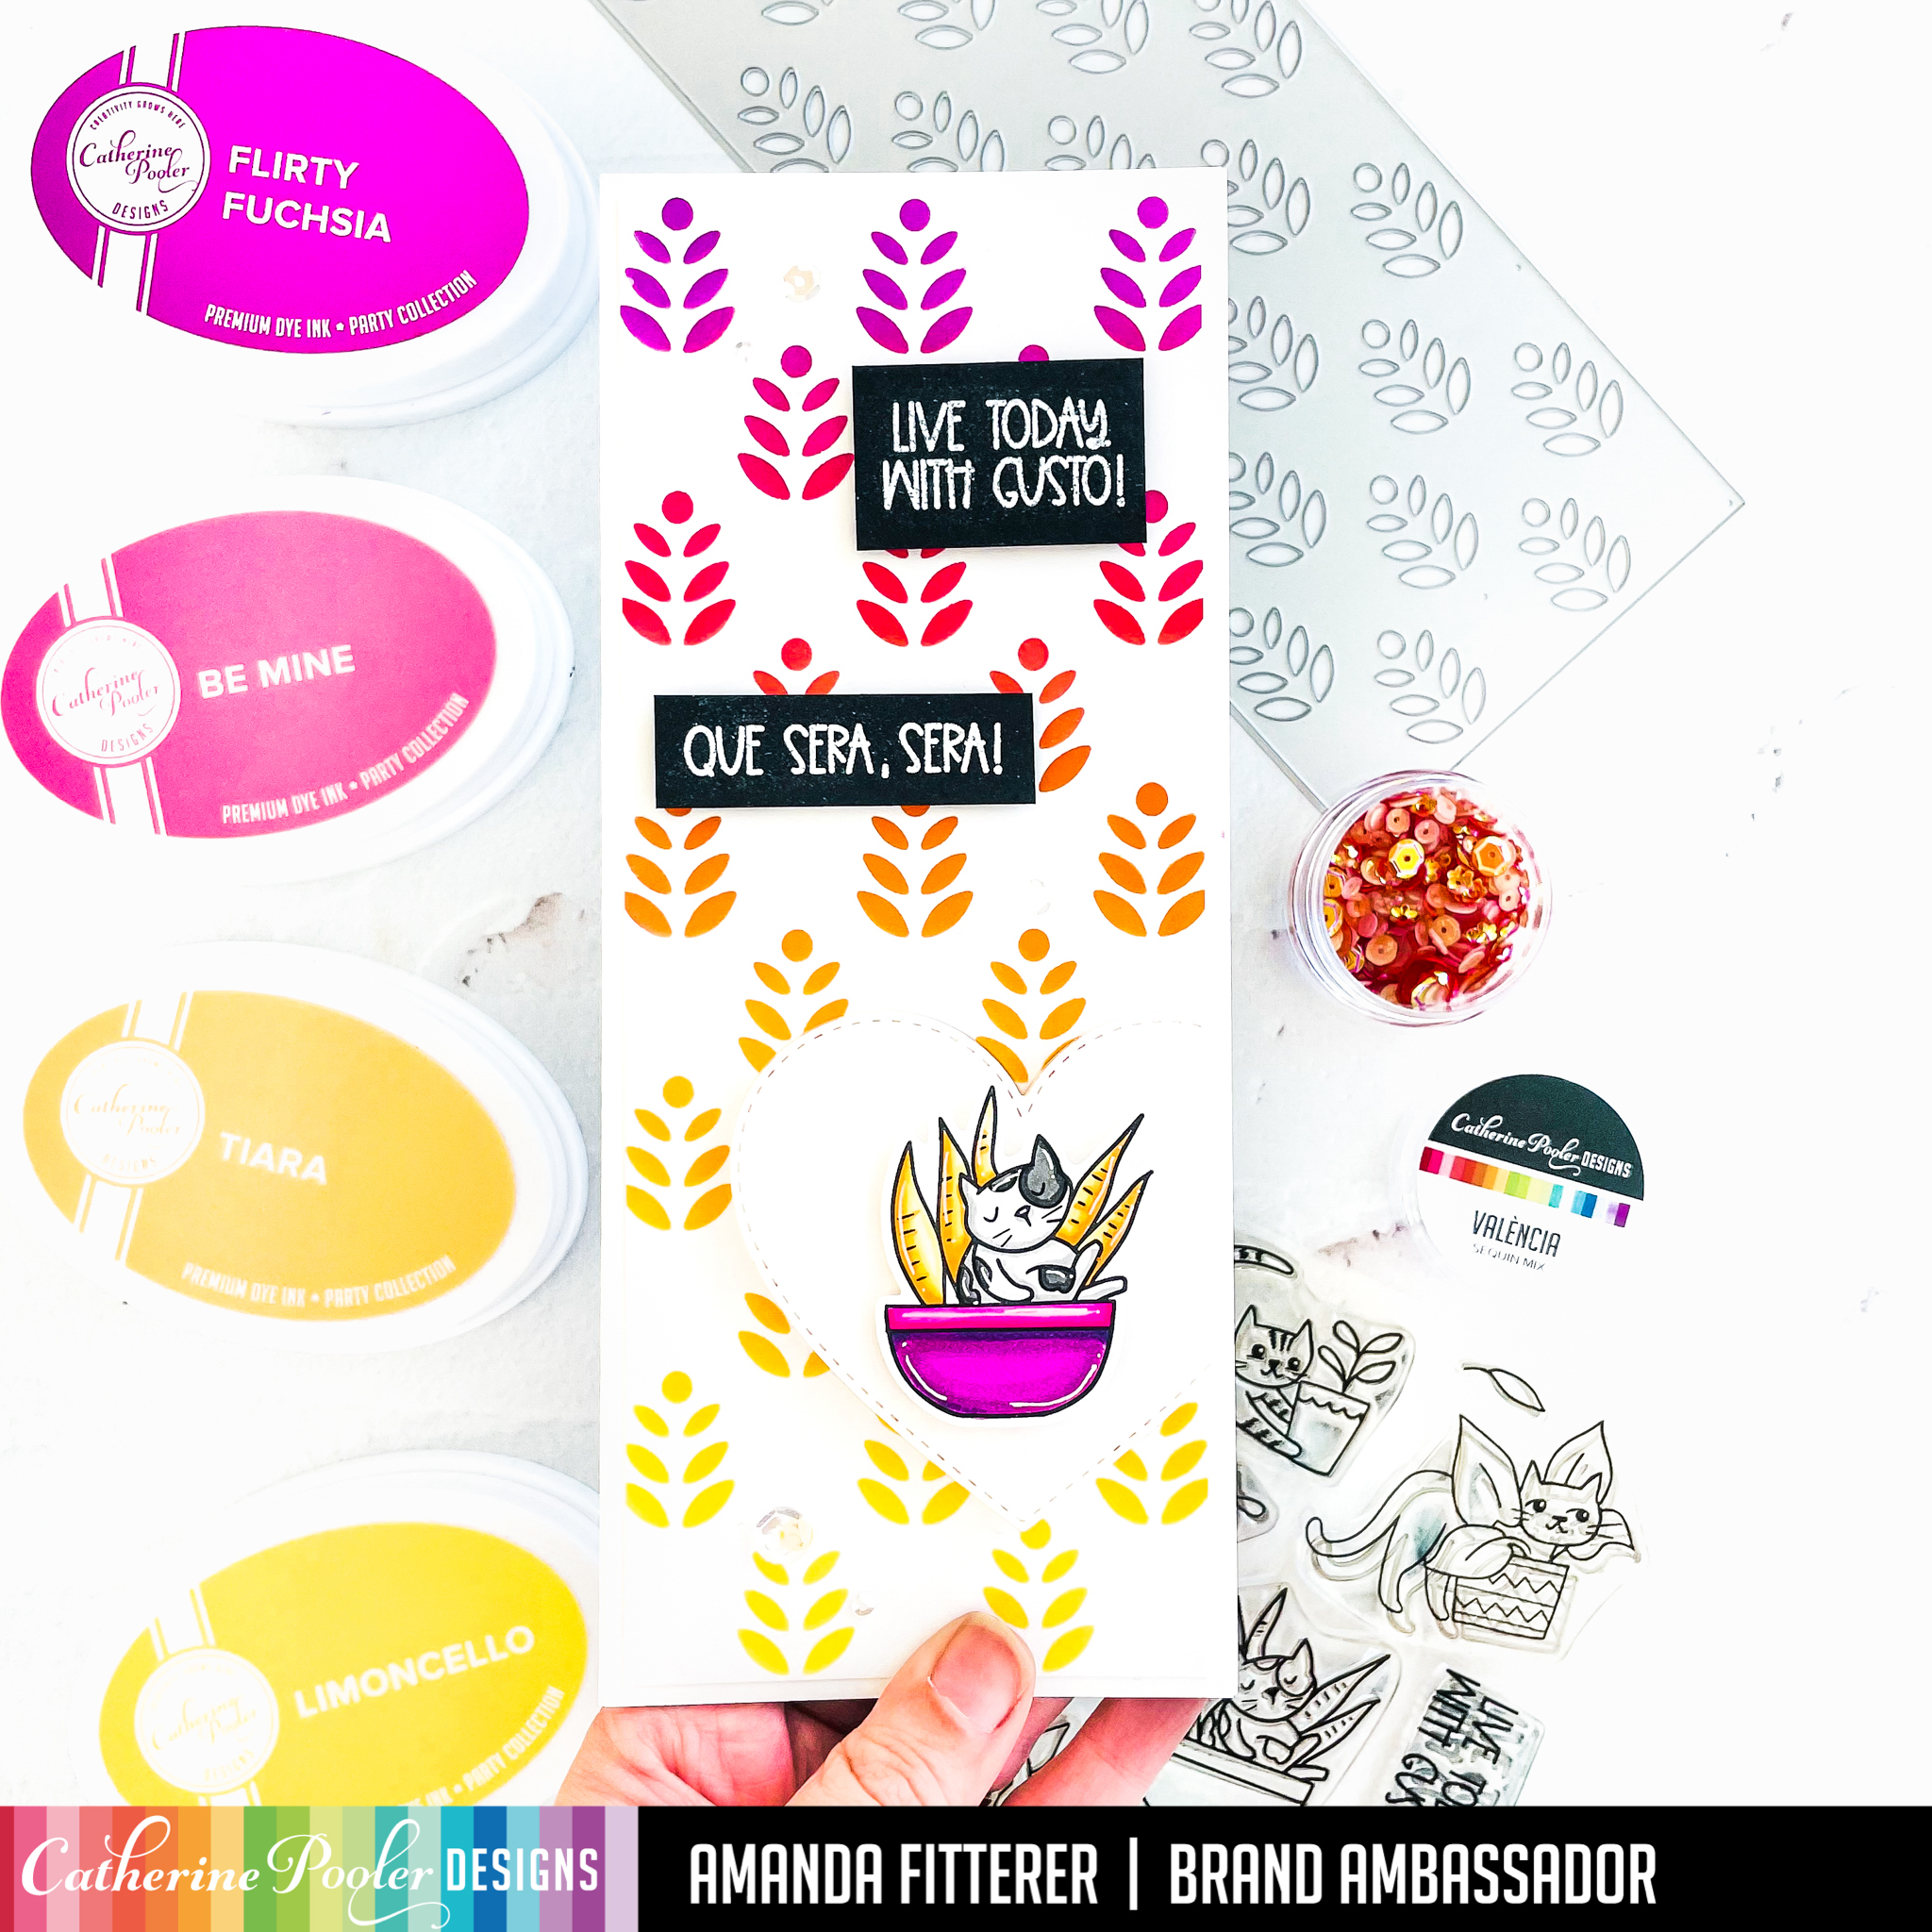
Today, I’m making a card with my leftover piece from yesterday’s card. If you missed my post yesterday, you can see it here. I’m using the Just Roll With It Collection for this release!
I ran a slimline card front through my die cutting machine with the Plant Stand Slimline Die. I placed the die cut card front on top of another slimline card front. Then, I blended Limoncello, Glitz, Party Dress, Pucker Up and Flirty Fuschia inks onto both card fronts. This gives me 2 different card fronts to use!
Next, I stamped my kitty from the Just Roll With It stamp set and then colored her with Copic markers. I also stamped my sentiments on black cardstock nd then used white embossing powder on them. I used the Nested Stitched Heart Dies and then trimmed off one edge of the heart and propped it up with foam squares.
Thank you so much for hanging out with me today! I can’t wait to share more cards with you from this collection!
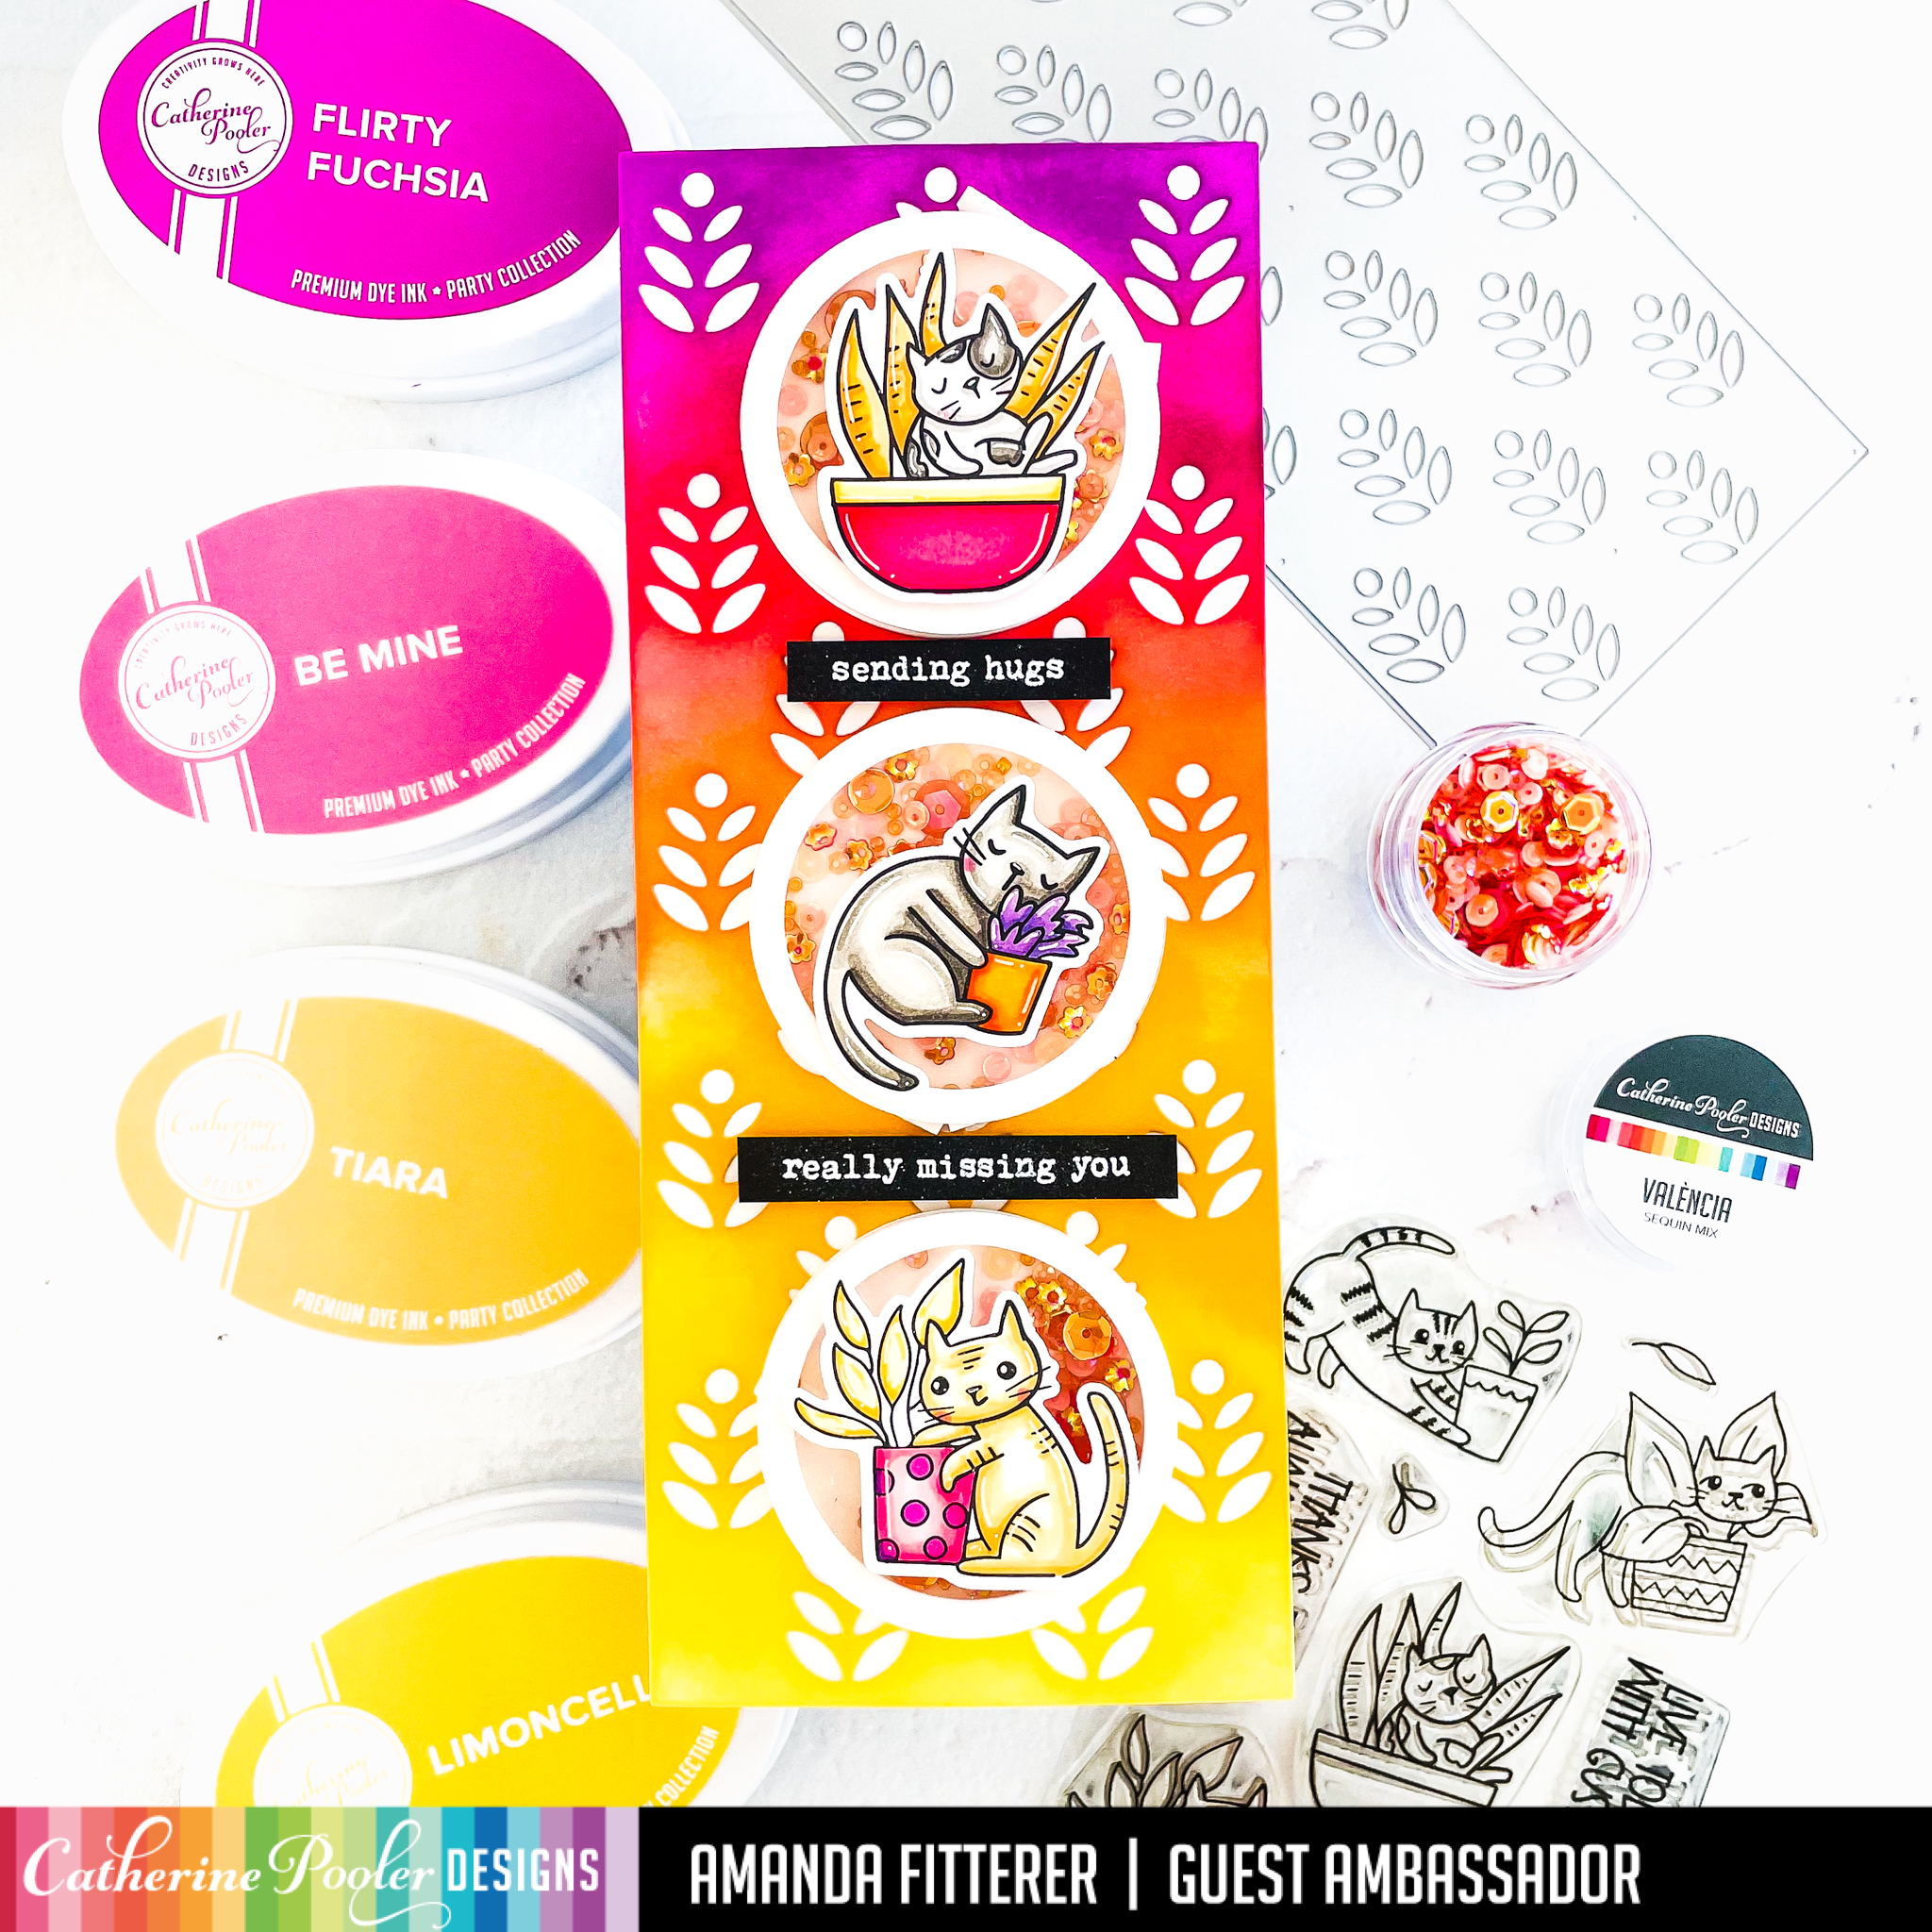
I ran a slimline card front through my die cutting machine with the Plant Stand Slimline Die. I placed the die cut card front on top of another slimline card front. Then, I blended Limoncello, Glitz, Party Dress, Pucker Up and Flirty Fuschia inks onto both card fronts. This gives me 2 different card fronts to use!
Next, I stamped my images from the Just Roll With It stamp set and colored them with Copic markers. Then, I die cut them with the coordinating dies.
I created shaker elements by cutting some Circle Dies, adding some 3D foam tape, acetate, and Valencia sequins.
Thank you so much for hanging out with me today! I can’t wait to share more cards with you from this collection!
–> If you want to use my affiliate link to shop the New Release, click here.Thank you for all your support!!All the links in this post are affiliate links. This helps me to get some extra crafty cash to buy more goodies to share more projects with you!It is SO appreciated! <–
–> If you want to use my affiliate link to shop the New Release, click here.Thank you for all your support!!All the links in this post are affiliate links. This helps me to get some extra crafty cash to buy more goodies to share more projects with you!It is SO appreciated! <–
–> If you want to use my affiliate link to shop the New Release, click here.Thank you for all your support!!All the links in this post are affiliate links. This helps me to get some extra crafty cash to buy more goodies to share more projects with you!It is SO appreciated! <–