Hey there, crafty friends! Today is an exciting day! Alex Syberia Designs has a NEW RELEASE!! Woohoo! We have a Blog Hop AND an Instagram Hop happening to kick off the excitement!
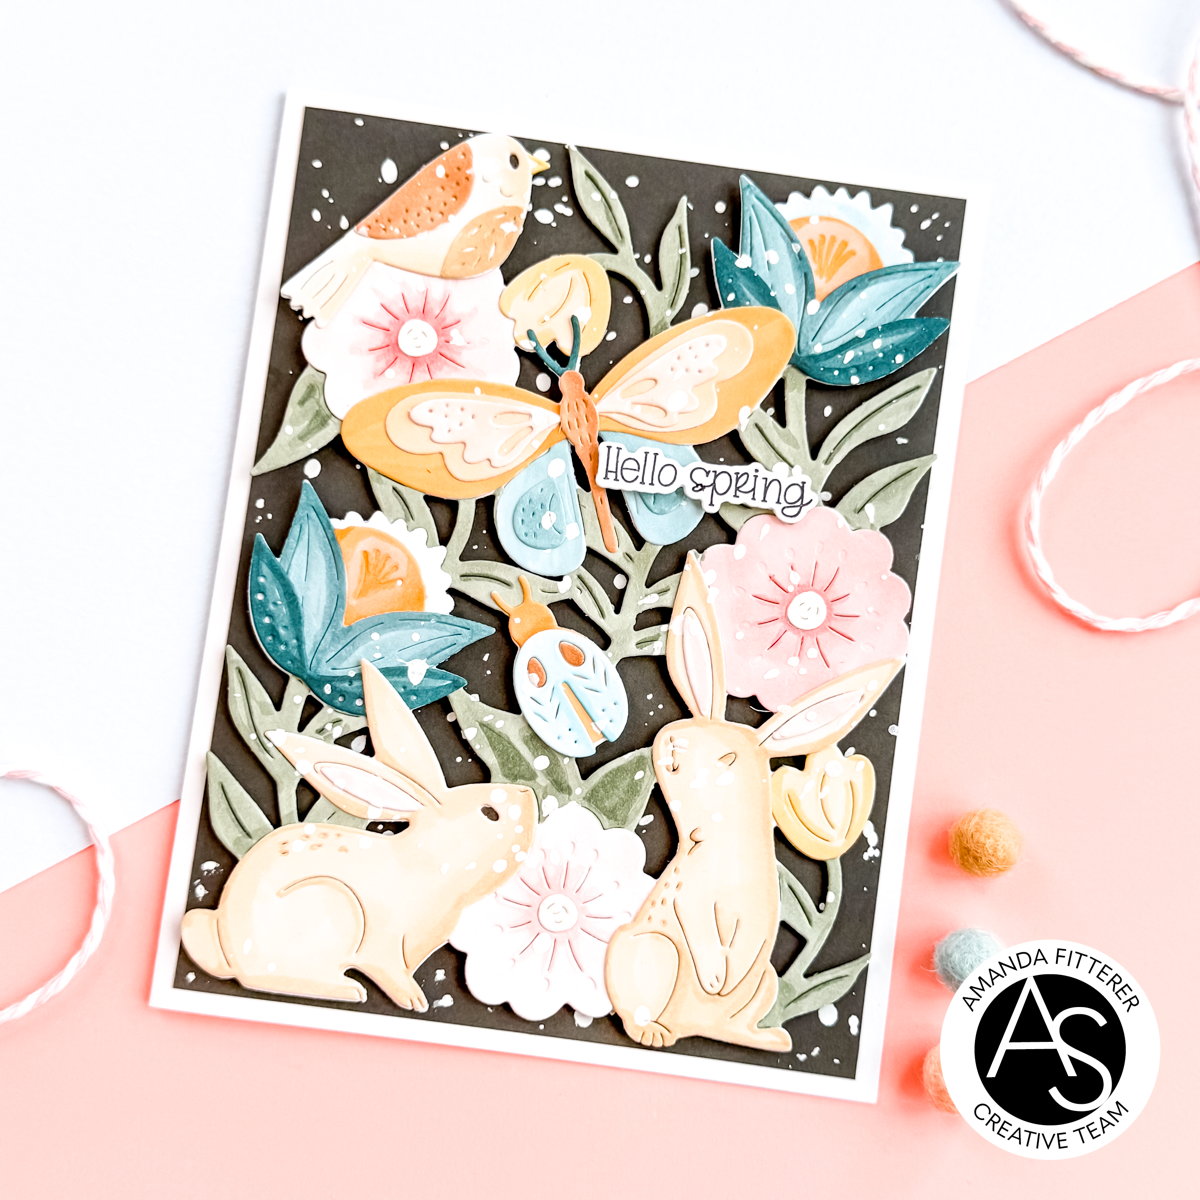
I have created this stunning card using the new Spring Meadow Dies, Cheerful Meadow Dies, and the sentiment is from the Hoppy Easter Stamps! You can shop the New Release HERE!
To create this beautiful card, I cut all the pieces from the Spring Meadow Dies and Cheerful Meadow Dies. I colored each piece with Copic markers.
I glued the pieces together with liquid glue and then put 3D foam strips behind the entire thing. I adhered it to a piece of dark gray cardstock. I flicked white acrylic paint all over the card with a paintbrush.
Giveaway Info! Alex Syberia Designs is giving away a £30 (or $30 for U.S. winners) gift certificate to one winner, and a £15 (or $15 for U.S. winners) gift certificate to three lucky winners. This giveaway is open internationally. Prizes will be awarded in GBP (£) for non-U.S. winners and USD ($) for U.S. winners.
All four winners will be drawn from participants who enter this Blog Hop by midnight BST April 27th, 2025. Winners will be announced on the Alex Syberia Designs blog ‘Giveaway Winners’ page on April 28th, 2025.
My affiliate link for shopping is here. This gives me a small percentage of your total purchase, but doesn’t change anything for you! I appreciate you using my links, if you decide to! Xx, Amanda
Hey friends! I have another card using the new BetterPress plates that Alex Syberia Designs just launched! I just can’t stop playing with them! And this one is even MORE fun because it has a coordinating stencil!
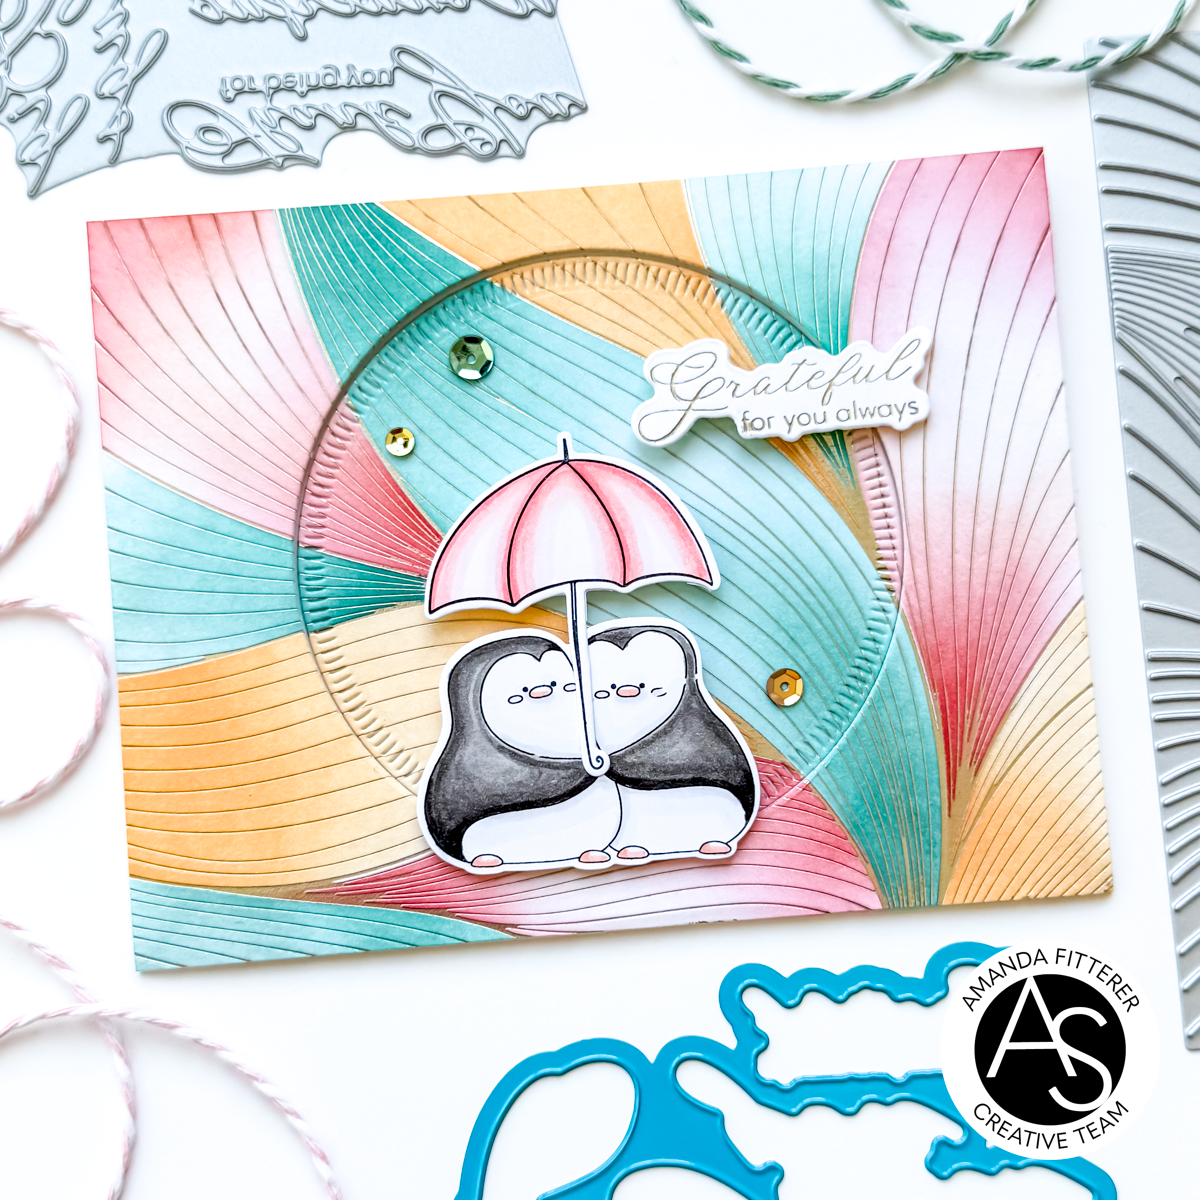
I started by heating up my Glimmer Hot Foil System and trimming a piece of gold foil to A2 size (4.25″x5.5″). Then, I hot foiled the Abstract Background Plate onto a piece of 110lb cardstock. I also hot foiled the Classic Sentiments Plate and used the coordinating dies to cut them out.
Then, I used the coordinating stencil to ink blend Catherine Pooler’s Apricot, Clay Mask, Terracotta, Hot Tub, and Skylight inks.
Once I was finished ink blending, I used the smaller of the Nested Stitched Circle Dies to cut out the center of the panel.
I stamped the cute little couple from the Penguin Love Stamps. The umbrella is from the Sweet Friend Stamps. I colored the images with Copic Markers and then die cut them out with the coordinating dies.
Next, I glued the inner circle directly to an A2 card base. Then, I put 3D foam strips behind the outer panel and adhered it to the card base. I put foam squares on the back of the images and sentiment and then adhered them to the card. I added a few sequins using my favorite glue.
I love that background so much! Stay tuned because I have another amazing card using the Charming Flora Background Plate next Thursday!
This blog post does contain some affiliate links! If you use them, I’ll get a small percentage of your entire order (but it won’t cost you anything!) Thanks for using my links, if you decide to!
Hey crafty friends! Did you get your hands on the new BetterPress plates from the latest Alex Syberia Designs release?! Are they so beautiful or what?! Wow!
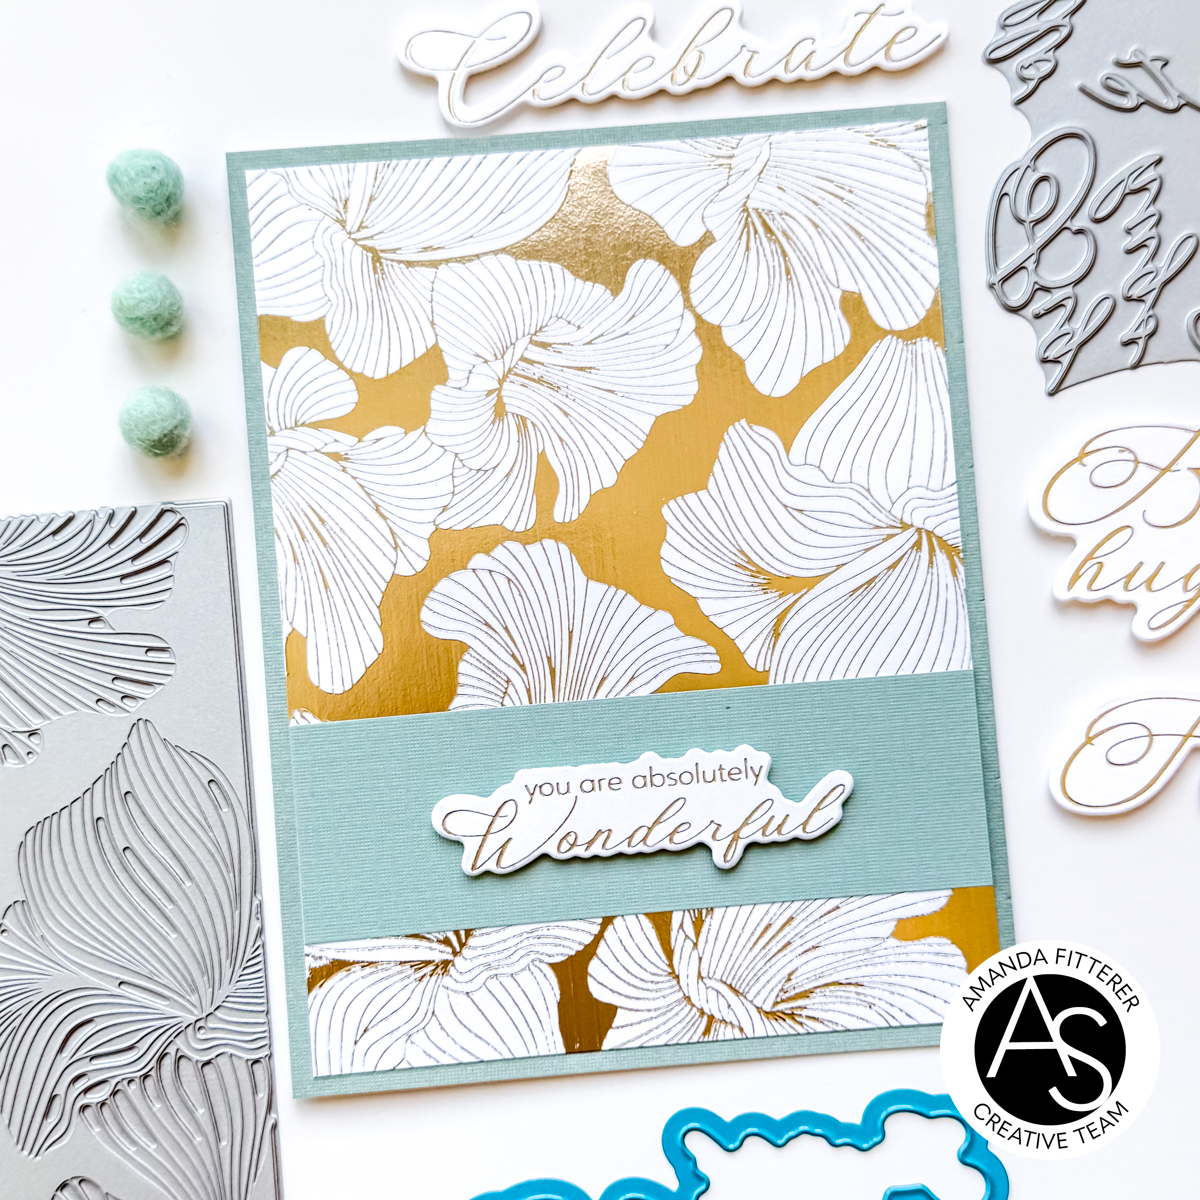
I made this card using the Abstract Floral Background Plate and some gold foil! It’s STUNNING, isn’t it?!
I started by trimming a piece of textured aqua paper down to 4.25″x5.5″. Then, I used my Glimmer Hot Foil System with a piece of gold foiland the Abstract Floral Background Plate. I hot foiled onto a piece of 110lb cardstock. I trimmed this down to 4″x5.25″
Next, I trimmed another piece of the aqua paper to 4″x 2″. Then, I hot foiled the Classic Sentiments Plate with the same gold foil and 110lb. cardstock. I used the coordinating dies to cut the sentiment out.
Thanks so much for coming by my blog today! I hope you find some time to get crafty today!
This blog post does contain some affiliate links! If you use them, I’ll get a small percentage of your entire order (but it won’t cost you anything!) Thanks for using my links, if you decide to!
Alex Syberia Designs is giving away a £40 ($50 for the USA) gift certificate to 1 winner and a £15 ($15 for the USA) gift card to 3 lucky winners
This giveaway is open internationally, with prizes awarded in GBP (£) for non-U.S. winners and in USD ($) for U.S. winners. All 4 winners will be drawn from the entrants that have played along with this Blog hop by midnight BST April 6th, 2025. Winners will be announced on the Alex Syberia Designs blog ‘Giveaway Winners’ page on April 7th, 2025.
My affiliate link for shopping is here. This gives me a small percentage of your total purchase, but doesn’t change anything for you! I appreciate you using my links, if you decide to! Xx, Amanda
Hey crafty friends! Today is a really run kick-off Blog Hop for the Alex Syberia Designs New February Release! I’m so grateful to be a part of it! There are so many cute and fun products!
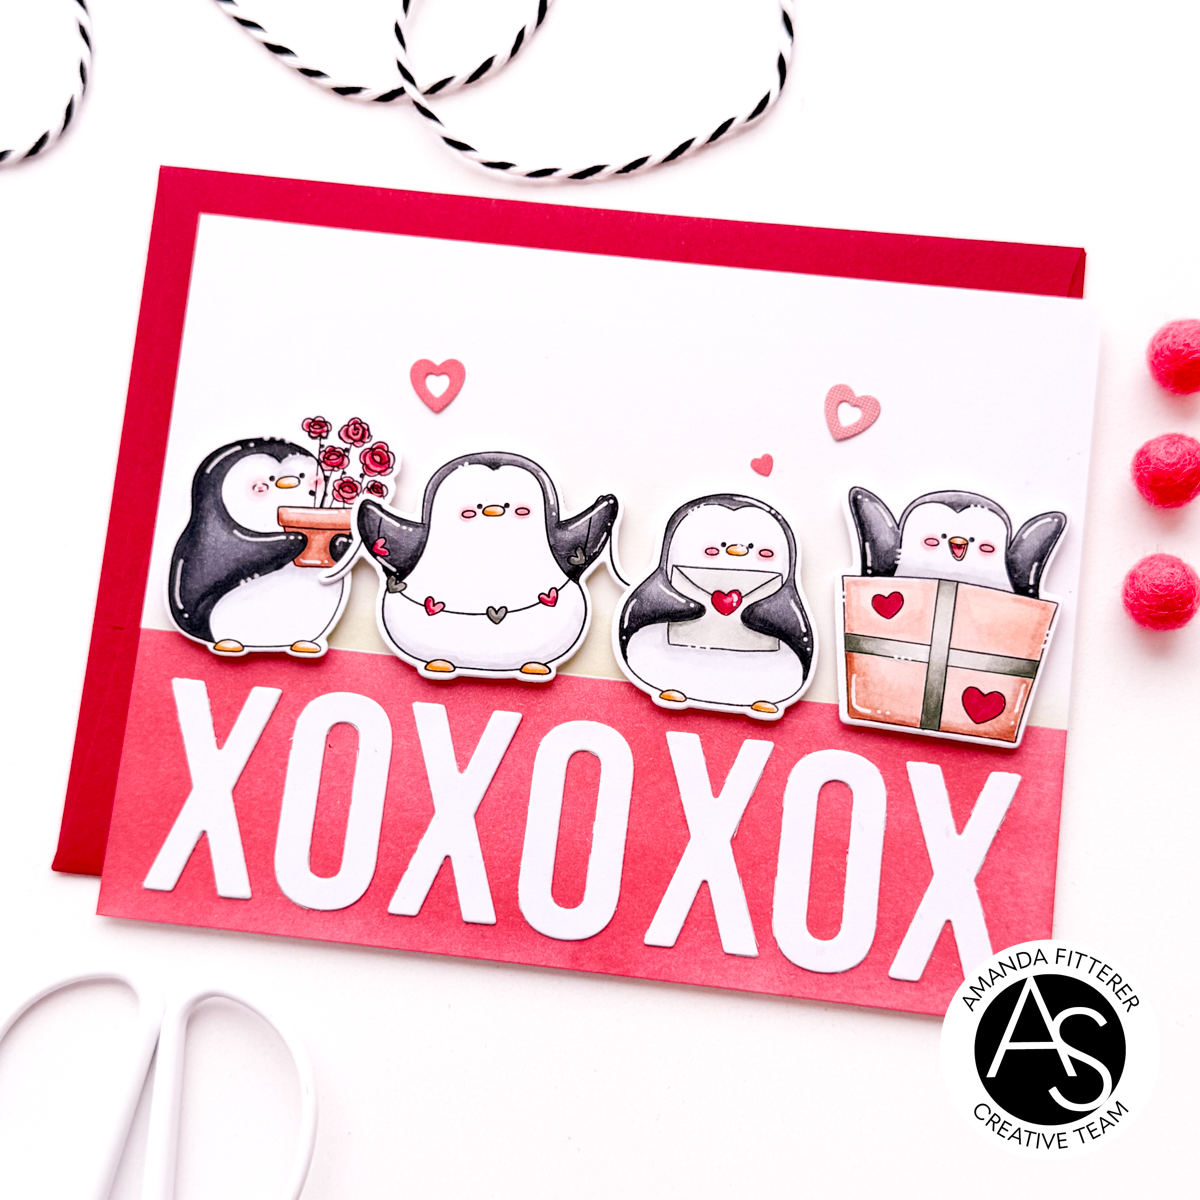
For the Blog Hop today, I’m sharing this sweet card that could be for any love event – wedding, bridal shower, Valentine’s, anniversary, and more! I have used the new Penguin Love Stamps, theEndless Hearts Dies, and the Love and XOXO Dies.
Using some Heffy Memo Tape, I masked off the bottom of my card and very lightly blended Catherine Pooler Matcha ink. Then, I used the tape to mask off the top of the card and blended Catherine Pooler Polished ink.
I cut the XOXO’s out using the Love and XOXO Dies. I glued them to the bottom of the card, spacing them as evenly as possibly.
Then, I stamped my penguins from the Penguin Love Stamps. I colored them with Copic markers and added some highlights with a white gel pen. I put 3d foam squares behind them and added them to the card.
The little hearts are from the Endless Hearts Dies and I glued those directly to the card panel.
Giveaway info:
Alex Syberia Designs is giving away a $50 gift certificate to 1 winner and a $15 gift card to 3 lucky winners.
Open internationally. All 4 winners will be drawn from the entrants that have played along with this Blog hop by midnight GMT March 8th, 2025. Winners will be announced on the Alex Syberia Designs blog ‘Giveaway Winners’ page on March 9th, 2025.
Good luck!! I hope you win!! Please subscribe to my Blog to get alerts when I post!
The links in this blog post may be affiliate links. That just means that when you make your purchase, I’ll get a small percentage of it. Thanks for using my links! I appreciate your support!!
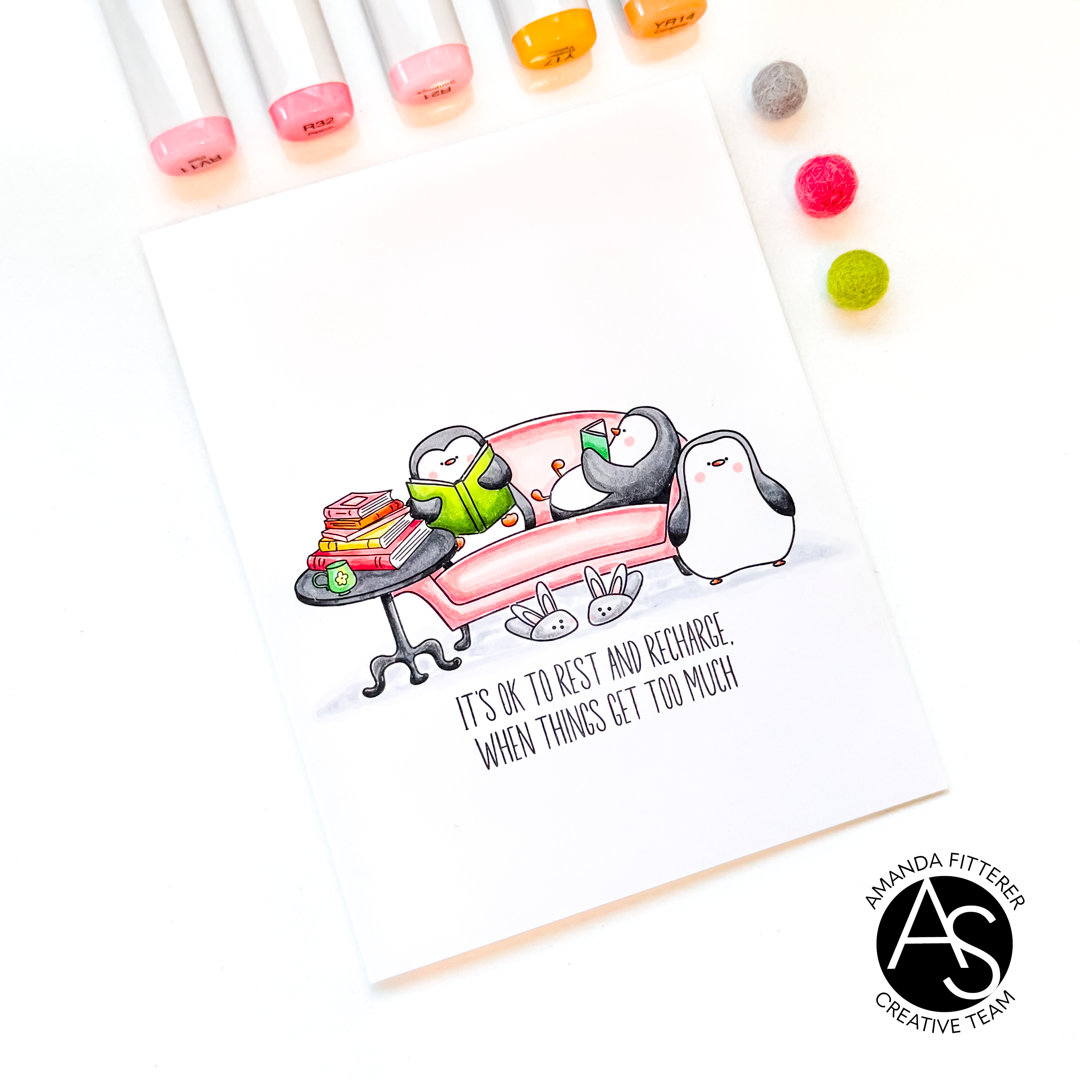
What do you think about these adorable penguins!? They are included in the “Smile More” stamp set! This stamp set also has some super cute fox critters!
I created this card using a masking technique. First, I stamped the end table, slippers, and the standing penguin. Then, I used some Heffy Doodle Memo Tape to mask off those images. To do this, I stamped the images on the Memo Tape and then cut on the lines. I placed the masks on the stamped images and then stamped my couch & penguins image. Then, I removed the masks and was left with this sweet little scene!
I colored the images with Copic markers and then stamped my sentiment underneath!
Alex Syberia Designs is giving away a $50 gift certificate to 1 winner and a $15 gift card to 3 lucky winners.
Open internationally. All 4 winners will be drawn from the entrants that have played along with this Blog hop by midnight BST October 31st, 2024. Winners will be announced on the Alex Syberia Designs blog ‘Giveaway Winners’ page on November 1st, 2024.
If you kindly use the affiliate links in this blog post to shop the New Release, I’ll get a tiny percentage of your entire order! When you do this, I get to buy more crafty goodies to keep making posts for YOU! I love what I do and I hope you do, too! Xx, Amanda
Are you excited for this Blog Hop or what?! Alex Syberia Designs is giving away a $50 gift certificate to 1 winner and a $15 gift card to 3 lucky winners. To play along, simply leave a comment on each stop of the hop. Keep scrolling to see my card and all the Hop details!
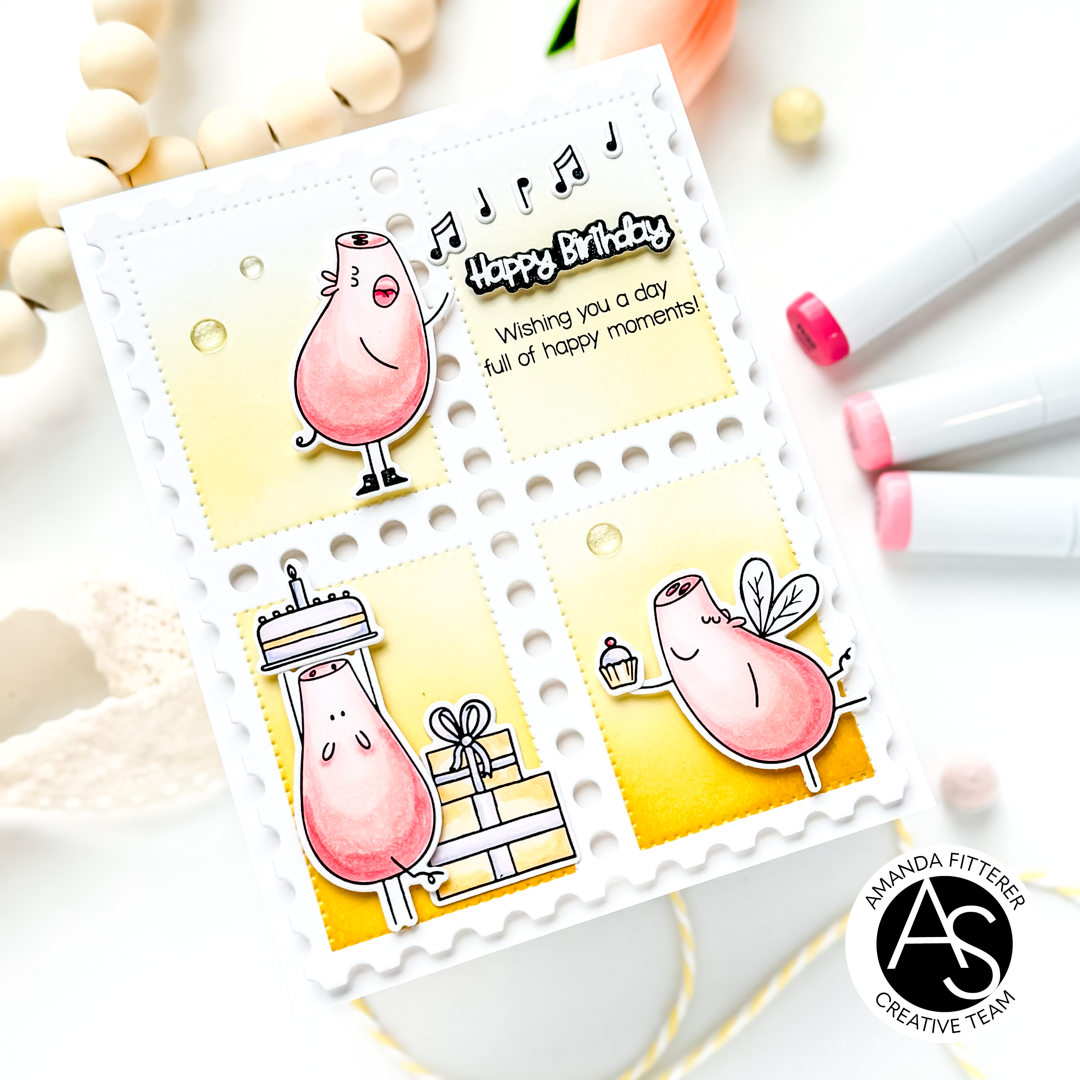
To create this card, I started by stamping my cute images from the Hog Happy Day Stamp Set. I colored them in with Copic markers and then die cut them out using the coordinating dies.
I adhered all my images to the panel using 3d foam squares and glue. I added a few sparkly embellishments from The Rabbit Hole Designs to finish it off!
Here are some more images of the finished card!
Now let’s get to the Blog Hop Details!
Open internationally. All 4 winners will be drawn from the entrants that have played along with this Blog hop by midnight BST August 10th, 2024. Winners will be announced on the Alex Syberia Designs blog ‘Giveaway Winners’ page on August 11th, 2024.
If you like what you see, please subscribe to my blog below!
This post has some affiliate links to the Alex Syberia Designs store. If you use those links, it will give me a small portion of your sale! you can use my affiliate links anytime you want! Xx, Amanda
I’m excited to be joining WOW Embossing Powder to celebrate their July 2024 release! It’s a BUMPER release, filled with Embossing Sparkles, Fab Foils and even a completely NEW product line; Mixed Media Additives!
The Design Team and special Guests are each sharing inspiration using this gorgeous new release and you’re invited to join the party! 🥳
WOW are generously offering THREE lucky winners the ENTIRE July 2024 release, and you can get all of the details on how to enter further down this post. First, let’s get straight to the inspiration!
We are so excited about this amazing new mixed media release, that we are hopping along over 3 different platforms to give YOU the best chance to win!
WOW are generously offering THREE goodie bags that will contain the entire July 2024 release, worth over $70!
This post is part of the Blog Hop, so you just need to leave a comment on this post before 6pm BST on the 1st August. You’ll find the link to the next awesome designer further down this post, or you can go straight to the WOW Embossing Powder Blog post to start from the beginning.
One lucky winner will be selected from the comments left across this hop, so the more posts you leave a comment on, the more chances you have to win!
Don’t forget to find us on Instagram and Youtube for even more chances to be a lucky winner! (Further details are included on the WOW Embossing blog post.)
Thank you for checking out my post today, if you like what you see then don’t forget to follow/subscribe/join my mailing list so you don’t miss any of my content!
I hope you enjoy hopping around with all the wonderful designers!!
Hello my friends!! Alex Syberia Designs is BACK OPEN FOR BUSINESS!! How exciting is that?! Today, kicks off the Blog Hop & Giveaway! You can scroll down to see the card I made for the Blog Hop and see some of the new products!
Alex Syberia Designs is giving away a whole May release for one lucky winner, as well as $15 gift cards for 3 additional winners.
Open internationally. All winners will be drawn from the entrants who have participated in this Blog Hop by midnight EDT on May 23rd, 2024. Winners will be announced on the Alex Syberia Designs blog ‘Giveaway Winners’ page on May 24th, 2024. You can click HERE to go to the Alex Syberia Designs Blog Post.
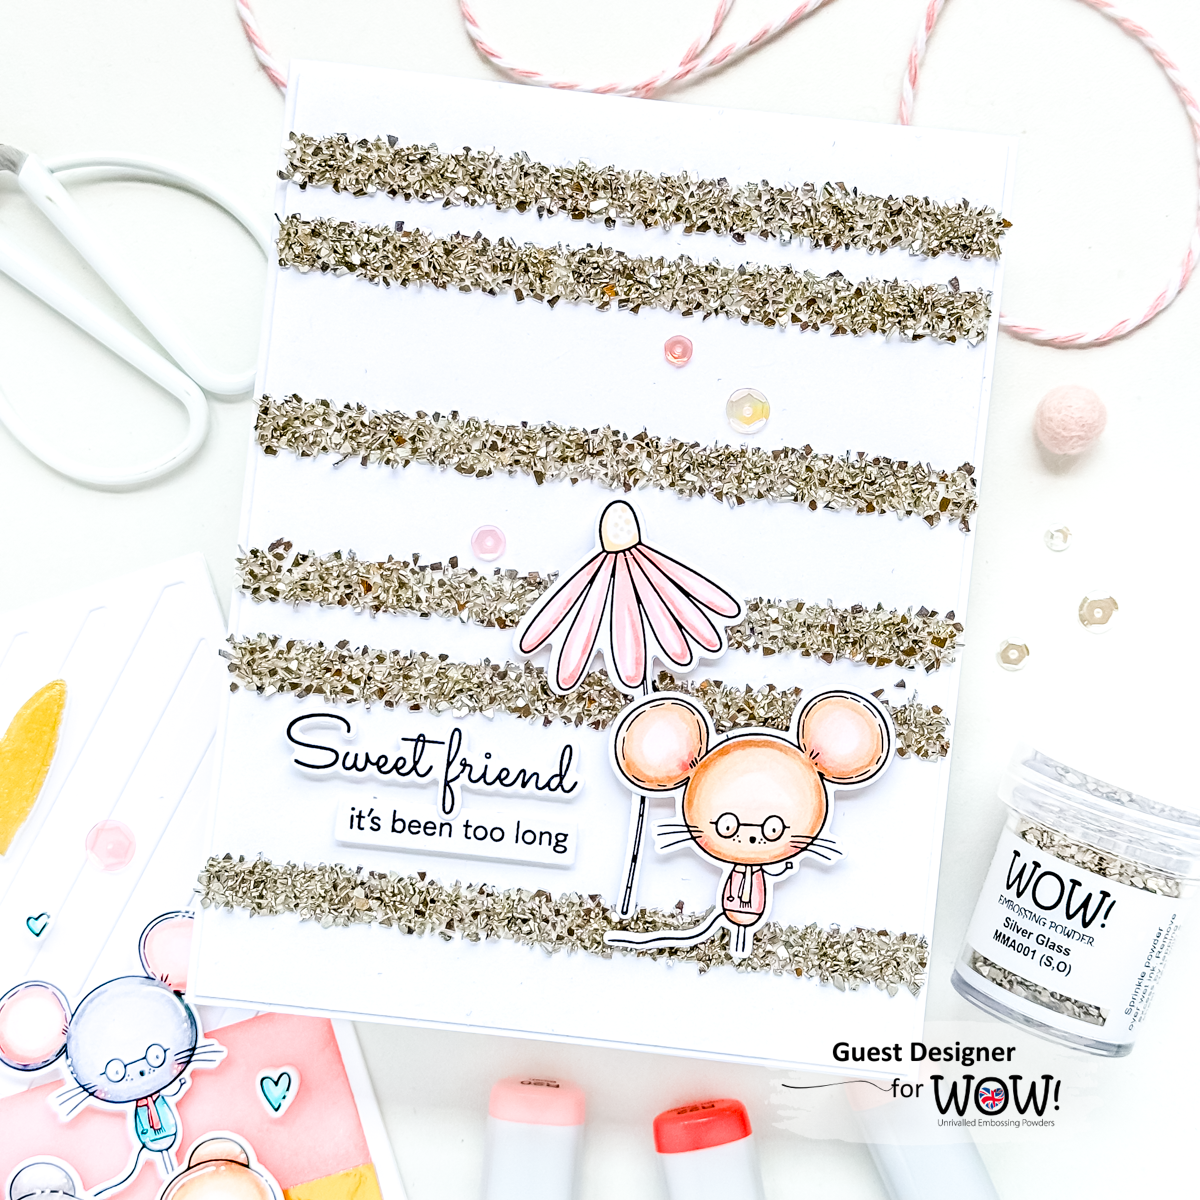
For the little mouse and flower, I stamped my image and then colored them in with Copic markers. I die cut them out using the coordinating dies. I added some white highlights using a white Gelly Roll pen.
Thanks for using my affiliate links! You all are the BEST! Using an affiliate link in this post above or down below costs you nothing, but it gives me a teeny percentage of your sale to buy more crafty goodies to continue to share card tutorials with YOU! So, thank YOU! Xx, Amanda
Hello and welcome to the Alex Syberia Designs November Release Blog Hop! I hope you’re getting lots of inspiration from all the Designers! The New Release is available now!!
To make this card, I made this super cool background using the NEW Snowflake Petals Cover Die. I simply cut the die out of white cardstock and glued it to an A2 card base.
To create my sentiment, I stamped it on black cardstock using my Wow! Embossing Glue Pad. Then, I applied White Opaque Embossing Powder on it. I melted the powder using my favorite heat gun. I cut it out using the coordinating die!
Here’s more info about the Blog Hop:
Alex Syberia Designs is giving away a £85 ($100) gift certificate to 1 lucky winner and a £15 ($18) gift card to 5 winners.
Open internationally. All 6 winners will be drawn from the entrants that have played along with this Blog hop by midnight BST November 26th, 2023. Winners will be announced on the Alex Syberia Designs blog ‘Giveaway Winners’ page on November 27th, 2023.
👇🏻👇🏻 Subscribe 👇🏻👇🏻 to be alerted of new posts by yours truly!
Thanks for using my affiliate links! You all are the BEST! Using an affiliate link in this post above or down below costs you nothing, but it gives me a teeny percentage of your sale to buy more crafty goodies to continue to share card tutorials with YOU! So, thank YOU! Xx, Amanda
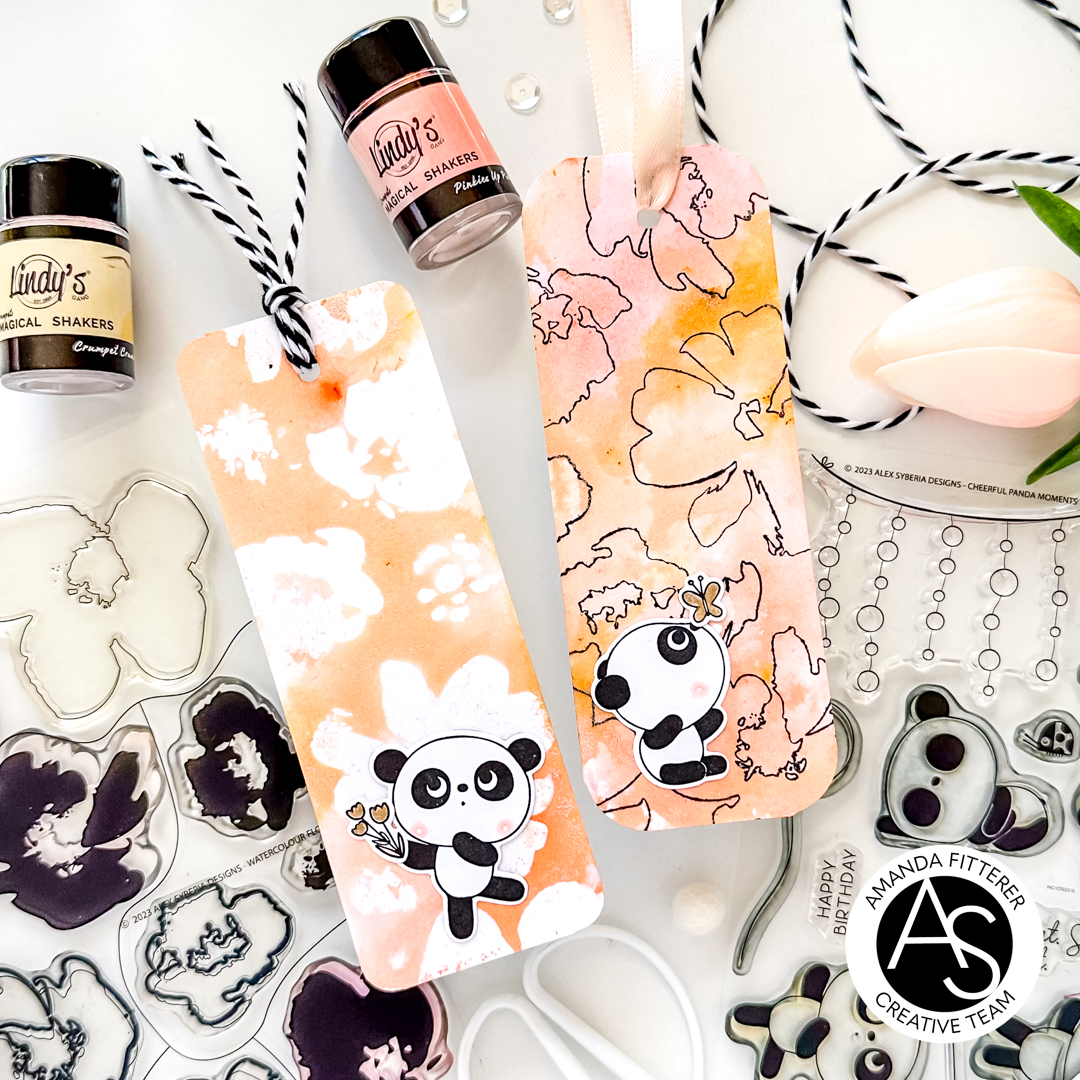
Hey guys! In case you missed it, Alex Syberia Designs and Lindy’s Gang have a Collaboration Insta-Hop going on right now! There are some prizes to be won! Plus, check out all the amazing inspiration the teams have created! You can join the Hop on Instagram! But first, scroll down to see how I made these amazing bookmarks!!
Next, I stamped my Alex Syberia Designs Watercolor Flowers Stamps (the solid flowers) with my Wow! Embossing Pad. I applied clear embossing powder to it, and then melted the powder with my favorite heat gun. Once that was cooled down, I sprayed water on my Glass Matand then sprinkled on some of Lindy’s Gang’s Pinkie’s Up and Crumpet Crumbs Magical Shakers into the water. Then, I flipped my bookmark upside down into the glittery gorgeousness until all the white was covered!
For my other bookmark, I stamped my Alex Syberia Designs Watercolor Flowers Stamps (the outline flowers) with Catherine Pooler’s Midnight Ink. I like this ink because it makes crisp images and stays wet enough for me to apply my Clear Embossing Powder onto it! After I’ve applied my powder and heated it up with my heat gun, I’m ready for the next step!
For this bookmark, I’m actually going to apply the water and powder directly onto the bookmark. I’ve also added a bit ofGrab a Guy Gold Starburst Spray to it.
Now to add my cute pandas! I’m using the Cheerful Panda Moments Stamps and Dies and just adding a little bit of color with a gold gel pen and R02 Copic.
Here’s some close-ups of these gorgeous bookmarks!
Are you wondering where I got that amazing White Glass Magnetic Craft Mat? You can get one for 20% off if you use my code AMANDA20! They are SO amazing and come in all different backgrounds! To see all my favorite things, click here!
Xx, Amanda
Thanks for using my affiliate links! You all are the BEST! Using an affiliate link in this post above costs you nothing, but it gives me a teeny percentage of your sale to buy more crafty goodies to continue to share card tutorials with YOU! So, thank YOU! Xx, Amanda
Hey friends! Did you hear Alex Syberia Designs and Lindy’s Gang have a Collaboration Insta-Hop going on right now? There are some prizes to be won! Plus, check out all the amazing inspiration the teams have created! You can join the Hop on Instagram! But first, scroll down to see how I made these amazing cards!!
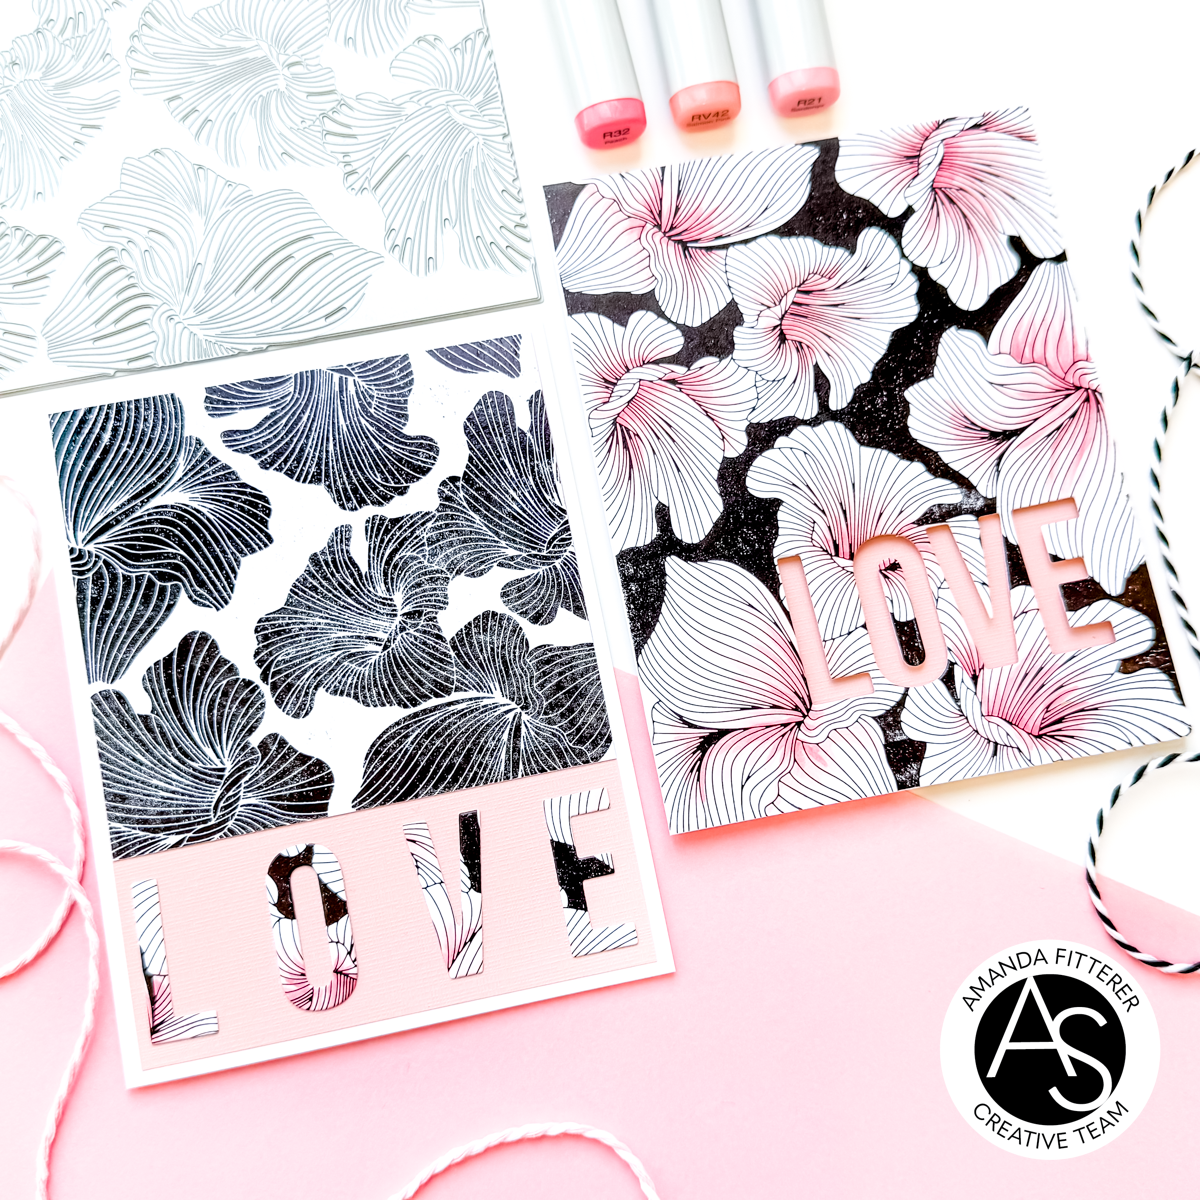
First, I stamped the Timeless Blooms #3 stamp all over my background with. my Wow! Embossing Pad. Then, I applied Wow Pearl Gold Sparkle to it. I melted the powder with my favorite heat gun
Are you wondering where I got that amazing White Glass Magnetic Craft Mat? You can get one for 20% off if you use my code AMANDA20! They are SO amazing and come in all different backgrounds! To see all my favorite things, click here!
Xx, Amanda
Thanks for using my affiliate links! You all are the BEST! Using an affiliate link in this post above costs you nothing, but it gives me a teeny percentage of your sale to buy more crafty goodies to continue to share card tutorials with YOU! So, thank YOU! Xx, Amanda
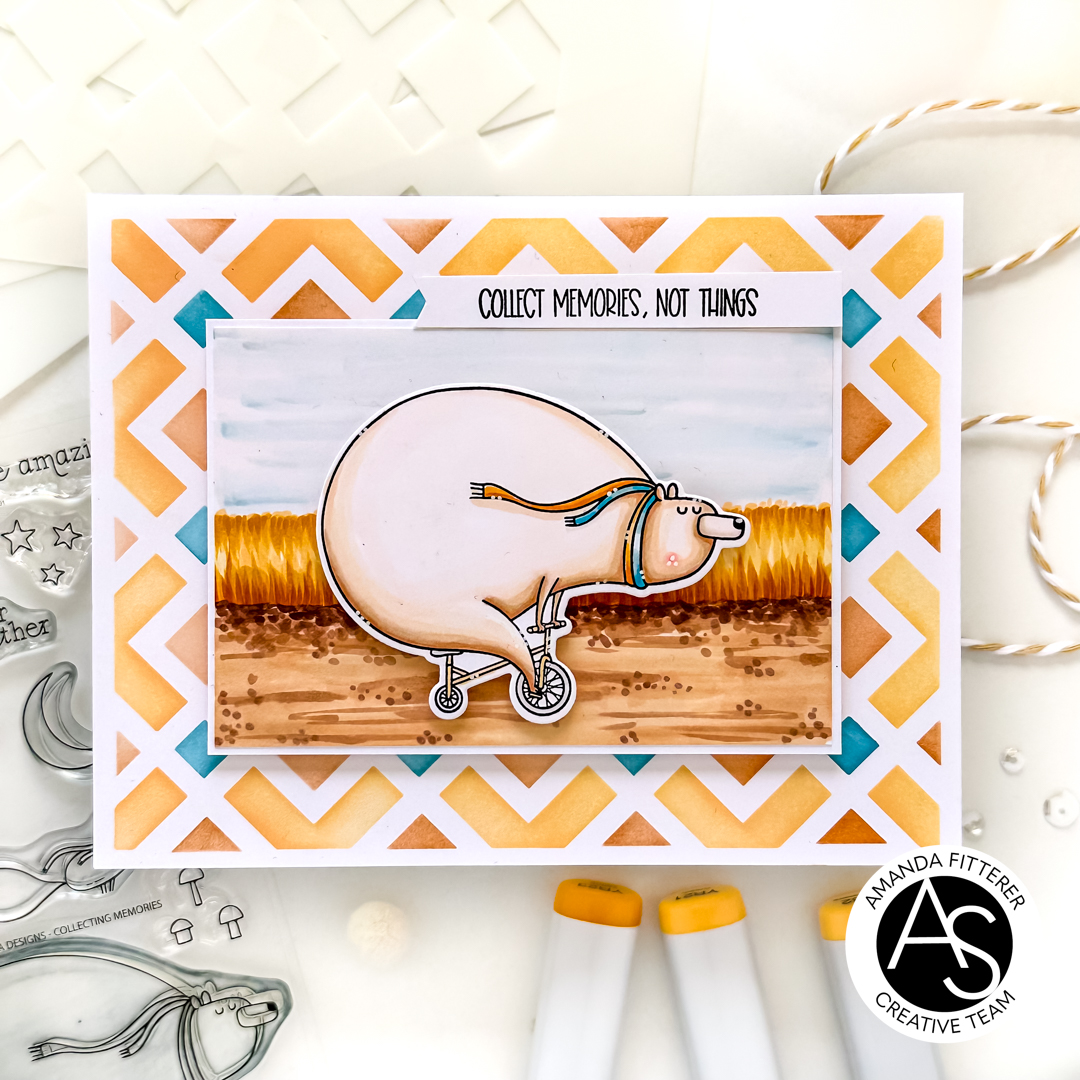
Next, on another piece of white cardstock, I created my dirt path using Copic colors E21, E53, E23, E25, and E27.
Then I created a wheat field using Y21, YR21, YR23, YR24, and YR27. I added BG70 and BG72 for the sky.
I stamped my little bear from the Collecting Memories stamp set, colored him in with Copic markers, and then die cut him with the coordinating die.
You can start at the beginning of the Blog Hop on the Alex Syberia Blog. You can shop the New Release HERE.
Alex Syberia Designs is giving away a £85 ($100) gift certificate to 1 lucky winner and a £15 ($18) gift card to 5 winners. Open internationally. All 6 winners will be drawn from the entrants that have played along with this Blog hop by midnight BST October 22nd, 2023. Winners will be announced on the Alex Syberia Designs blog ‘Giveaway Winners’ page on October 23rd, 2023.
Thanks for using my affiliate links! You all are the BEST! Using an affiliate link in this post above costs you nothing, but it gives me a teeny percentage of your sale to buy more crafty goodies to continue to share card tutorials with YOU! So, thank YOU! Xx, Amanda
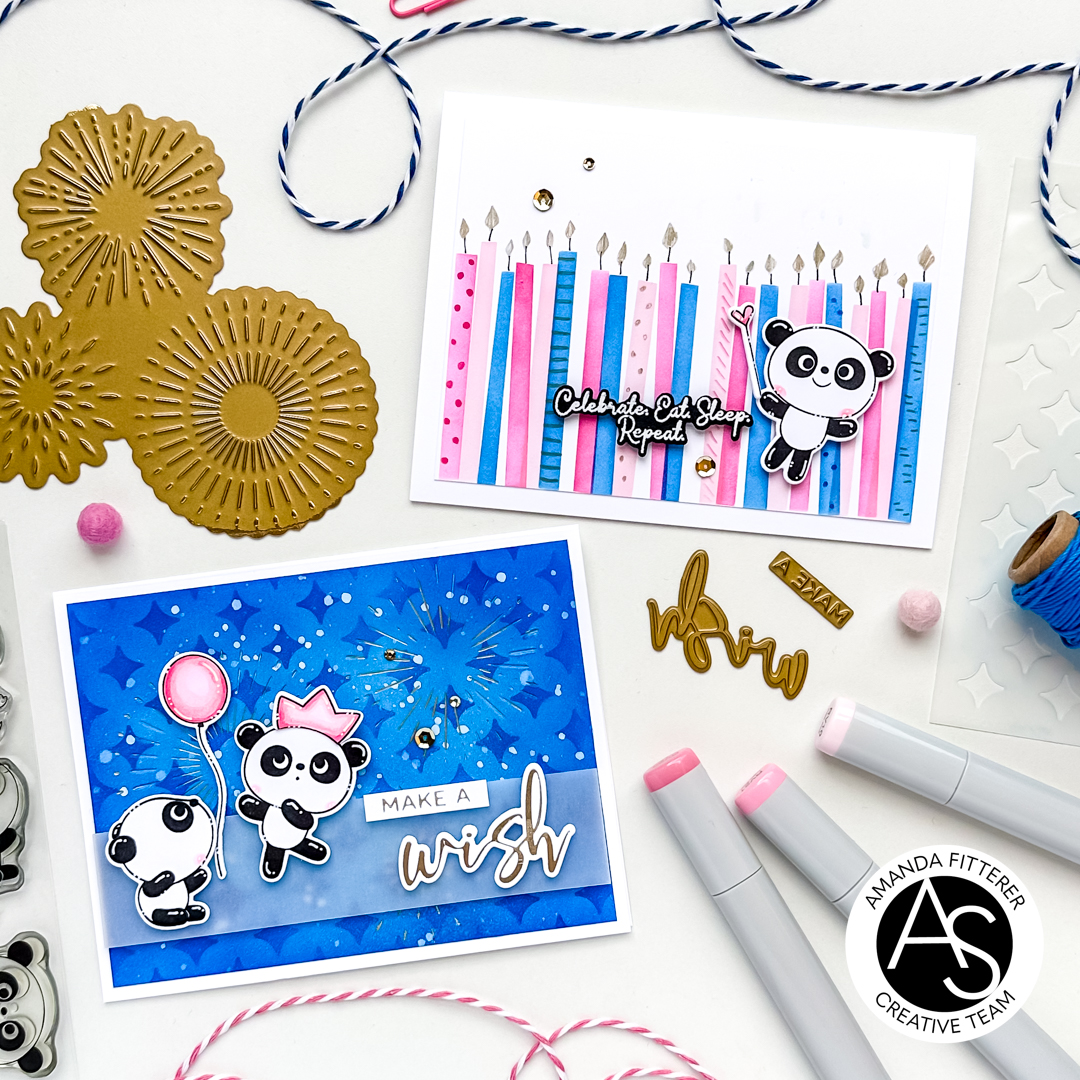
Hello friends! It’s Amanda Fitterer and today’s card that I’m sharing features the new Cheerful Panda Moments stamp set! These pandas require minimal coloring, which makes it much easier to create this panda party!
Once I got them placed and adhered with 3D foam squares, I used my favorite Cutterbee scissors to trim off the overhanging panda parts.
Such an easy but adorable card! Who wouldn’t want to join this Panda Party!?
I hope you enjoyed this sweet little card! Thanks for coming by my blog today!
Xx, Amanda
Thanks for using my affiliate links! You all are the BEST! Using an affiliate link in this post above costs you nothing, but it gives me a teeny percentage of your sale to buy more crafty goodies to continue to share card tutorials with YOU! So, thank YOU! Xx, Amanda
Welcome to the Alex Syberia Designs September Anniversary Release Blog Hop! To celebrate their birthday, Alex Syberia Designs has collaborated with a ton of wonderful sponsors to give away a grand total of £800 ($1000) in prizes! See ALL THE PRIZES down below! 👇👇
My cards feature a lot of the new products! Shop all the NEW PRODUCTS HERE.
If you ever have an issue getting a really good ink blended background, it’s possible you’re not using the right paper or cardstock. The ink should be smooth and easy to blend. Consider using Catherine Pooler’s Premium White Cardstock. It makes the process so much easier!
Be sure to leave comments by midnight BST (London, UK time) on September 17th, 2023, for a chance to win!
👉🏼👉🏼 Start your comment by telling us where you’re from (USA, Canada, Europe, or Australia) and what your favorite product is from this September Anniversary release.
All the winners will be chosen at random from the comments left on any of the posts in the blog hop, upcoming YouTube hop, and the three upcoming Instagram hops. Winners will be announced on the Alex Syberia Designs GIVEAWAY WINNERS PAGE on September 18th, 2023.
Make sure to come back and check if you are a winner! Prizes not claimed within two weeks will be forfeited.
To increase your chances of winning, be sure to comment on this blog hop, the upcoming Anniversary Video Hop that starts on the 9th of Sep on Alex Syberia Designs YT Channel, and the three consecutive Instagram Hops on Alex Syberia Designs Instagram starting on the 11th of September.
Thanks for using my affiliate links! You all are the BEST! Using an affiliate link in this post above costs you nothing, but it gives me a teeny percentage of your sale to buy more crafty goodies to continue to share card tutorials with YOU! So, thank YOU! Xx, Amanda
👇🏻👇🏻 Subscribe 👇🏻👇🏻 to be alerted of new posts by yours truly!
Hello friends! Today I’m sharing a soft and pretty “LOVE YOU” card featuring the Paradise Birds Stamp Set. Let’s make this card together! Grab your supplies!
For the White/Green Panel, we’re going to blend Catherine Pooler’s Melon Ice just around the edges. For the White/Pink panel, we’re going to blend (just lightly in the center) Cotton Candy.
Next up, we’re going to stamp our leaves from the Paradise Birds Stamp Set directly onto our card base using Melon Ice ink. To make this process a little quicker, I like to use a combination of my acrylic blocks and my MISTI. I do this because I want to use the foam from the MISTI to get a better stamped image, but the acrylic blocks make it much faster, as I don’t have to constantly move my stamps around!
We’re ready to stamp our sweet birds now! After stamping with alcohol marker-friendly Memento Tuxedo Black Ink, I’m coloring my images with Copic markers. Once finished with that, I’ll die cut them with the coordinating die set.
Well, friends! That’s it for me today!! I hope you have enjoyed this post and find some time to get crafty today!!
Thanks for using my affiliate links! You all are the BEST! Using an affiliate link in this post above costs you nothing, but it gives me a teeny percentage of your sale to buy more crafty goodies to continue to share card tutorials with YOU! So, thank YOU! Xx, Amanda