Posted on Leave a comment

There’s Always One Duck!

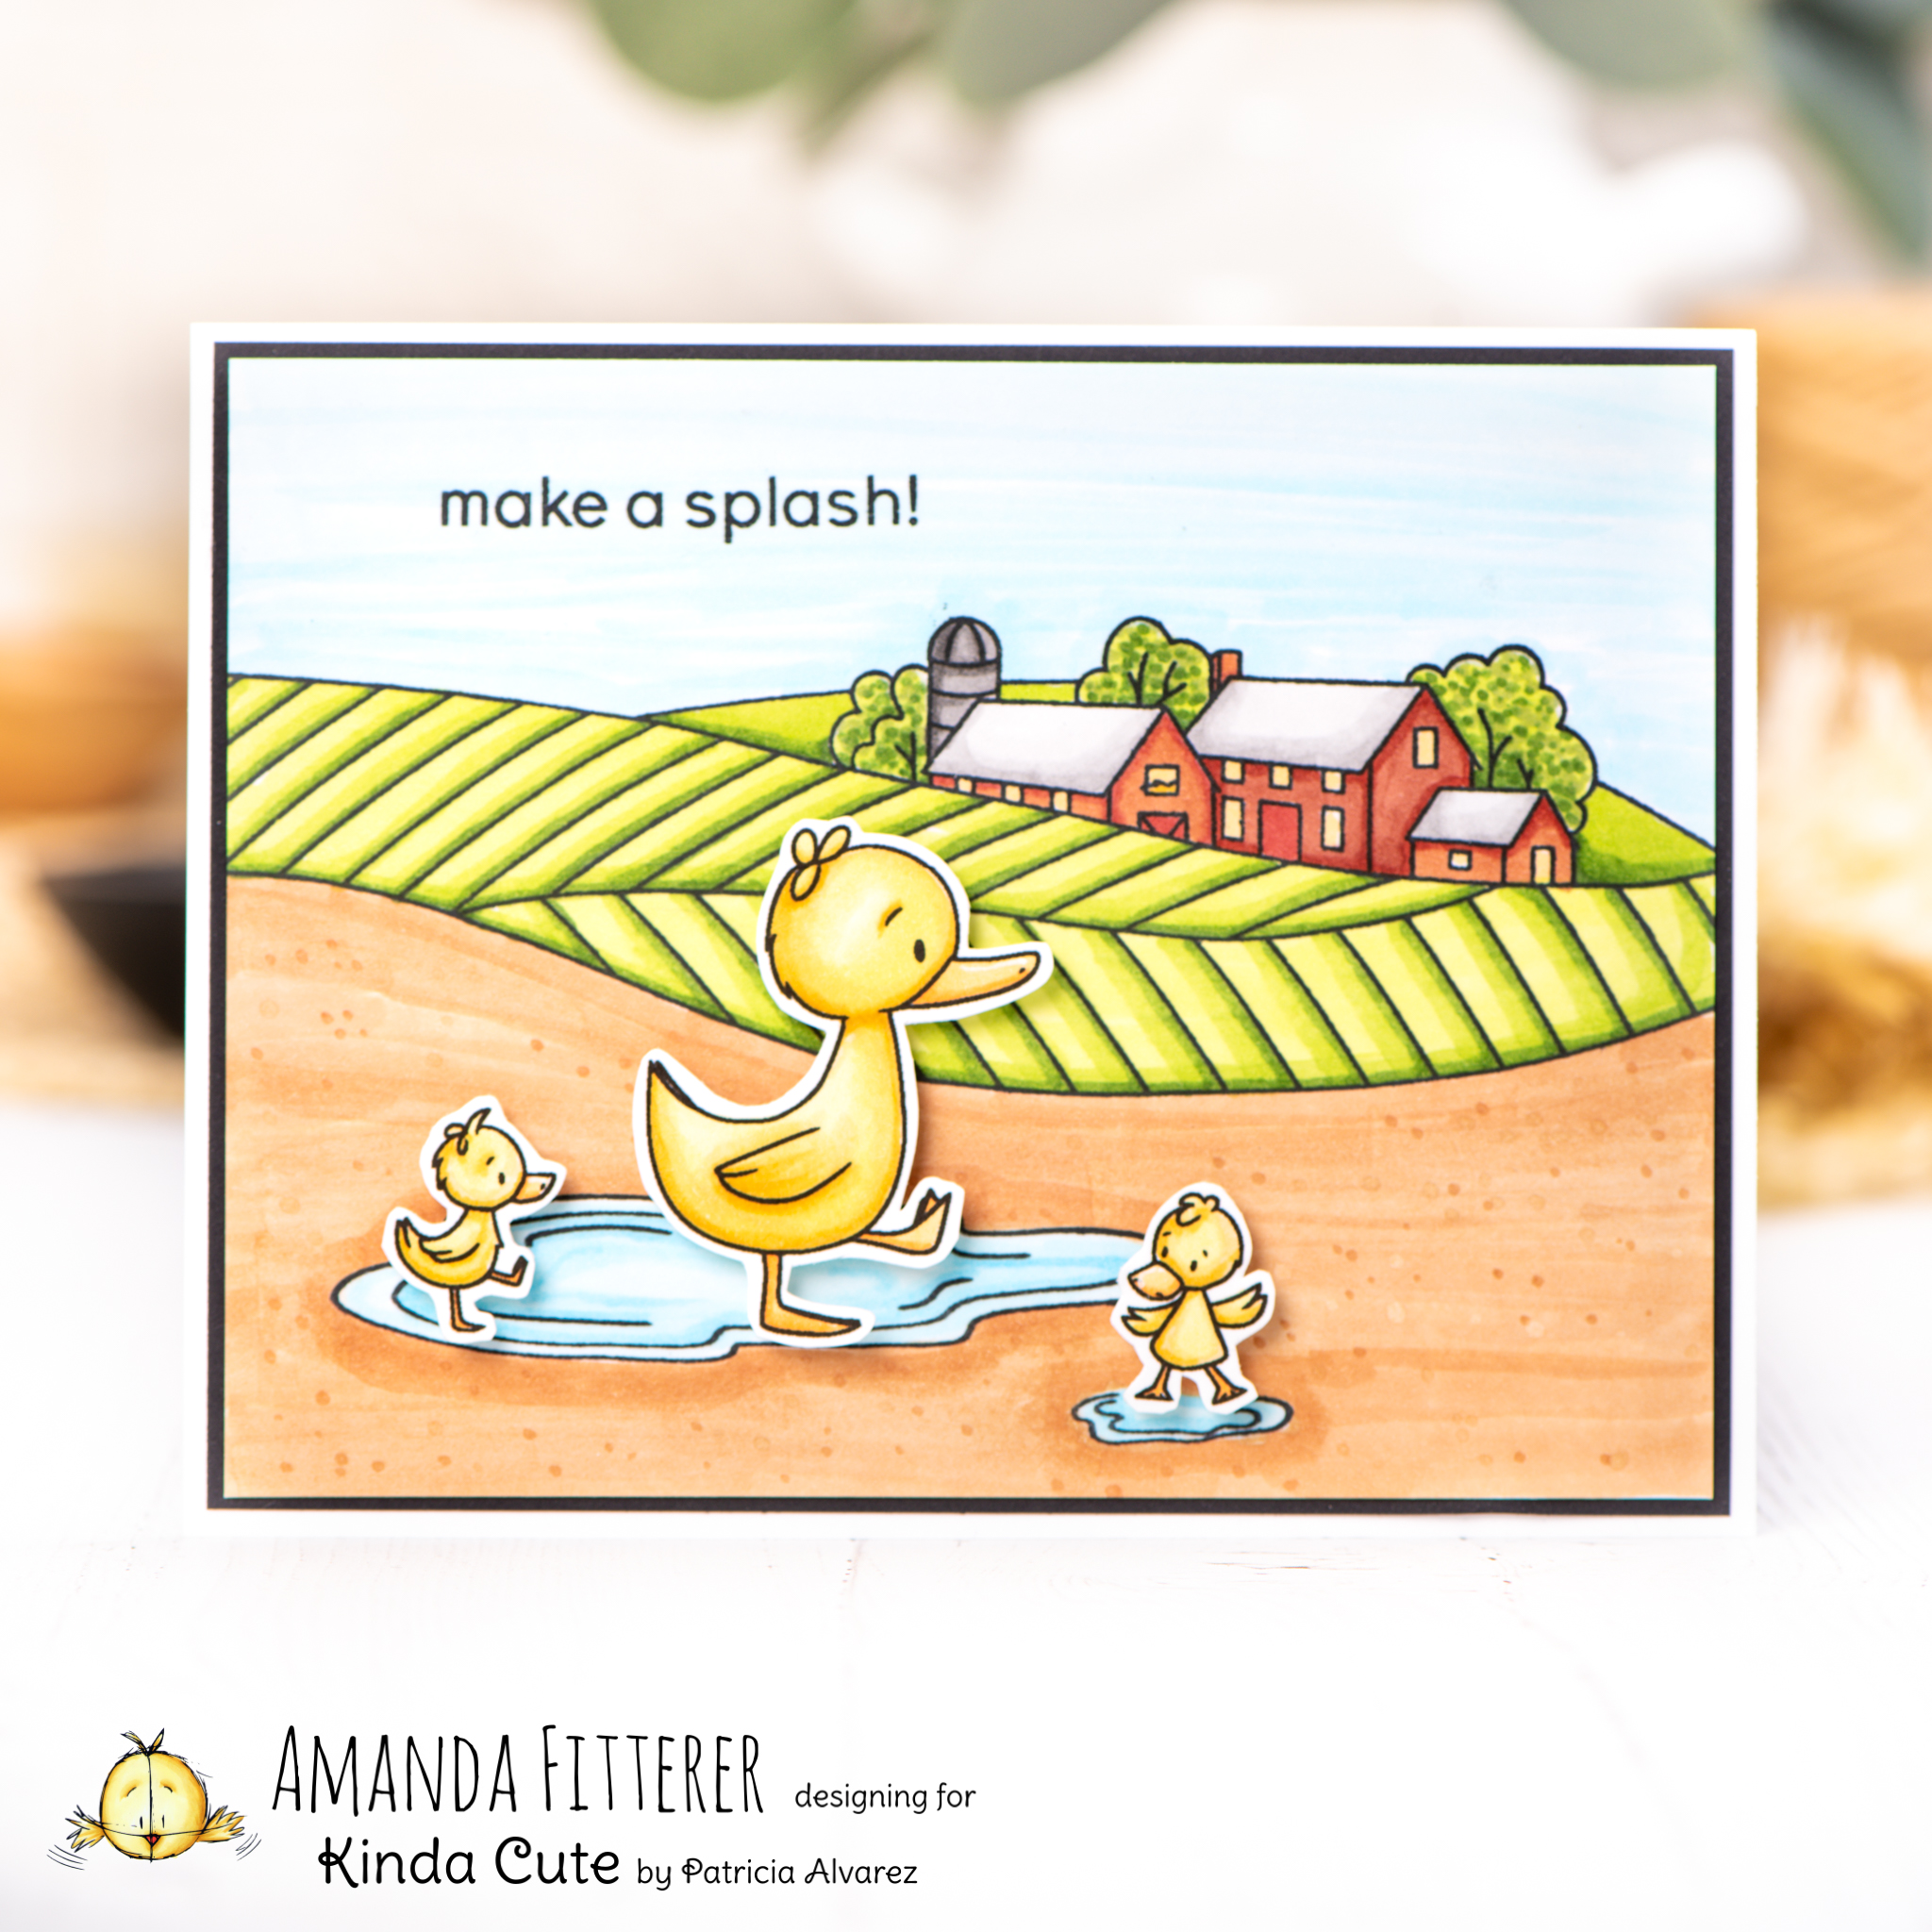
Hey there crafty friends! Today, I’m sharing a card using the Kinda Cute by Patricia “There’s Always One Duck” digital stamp!

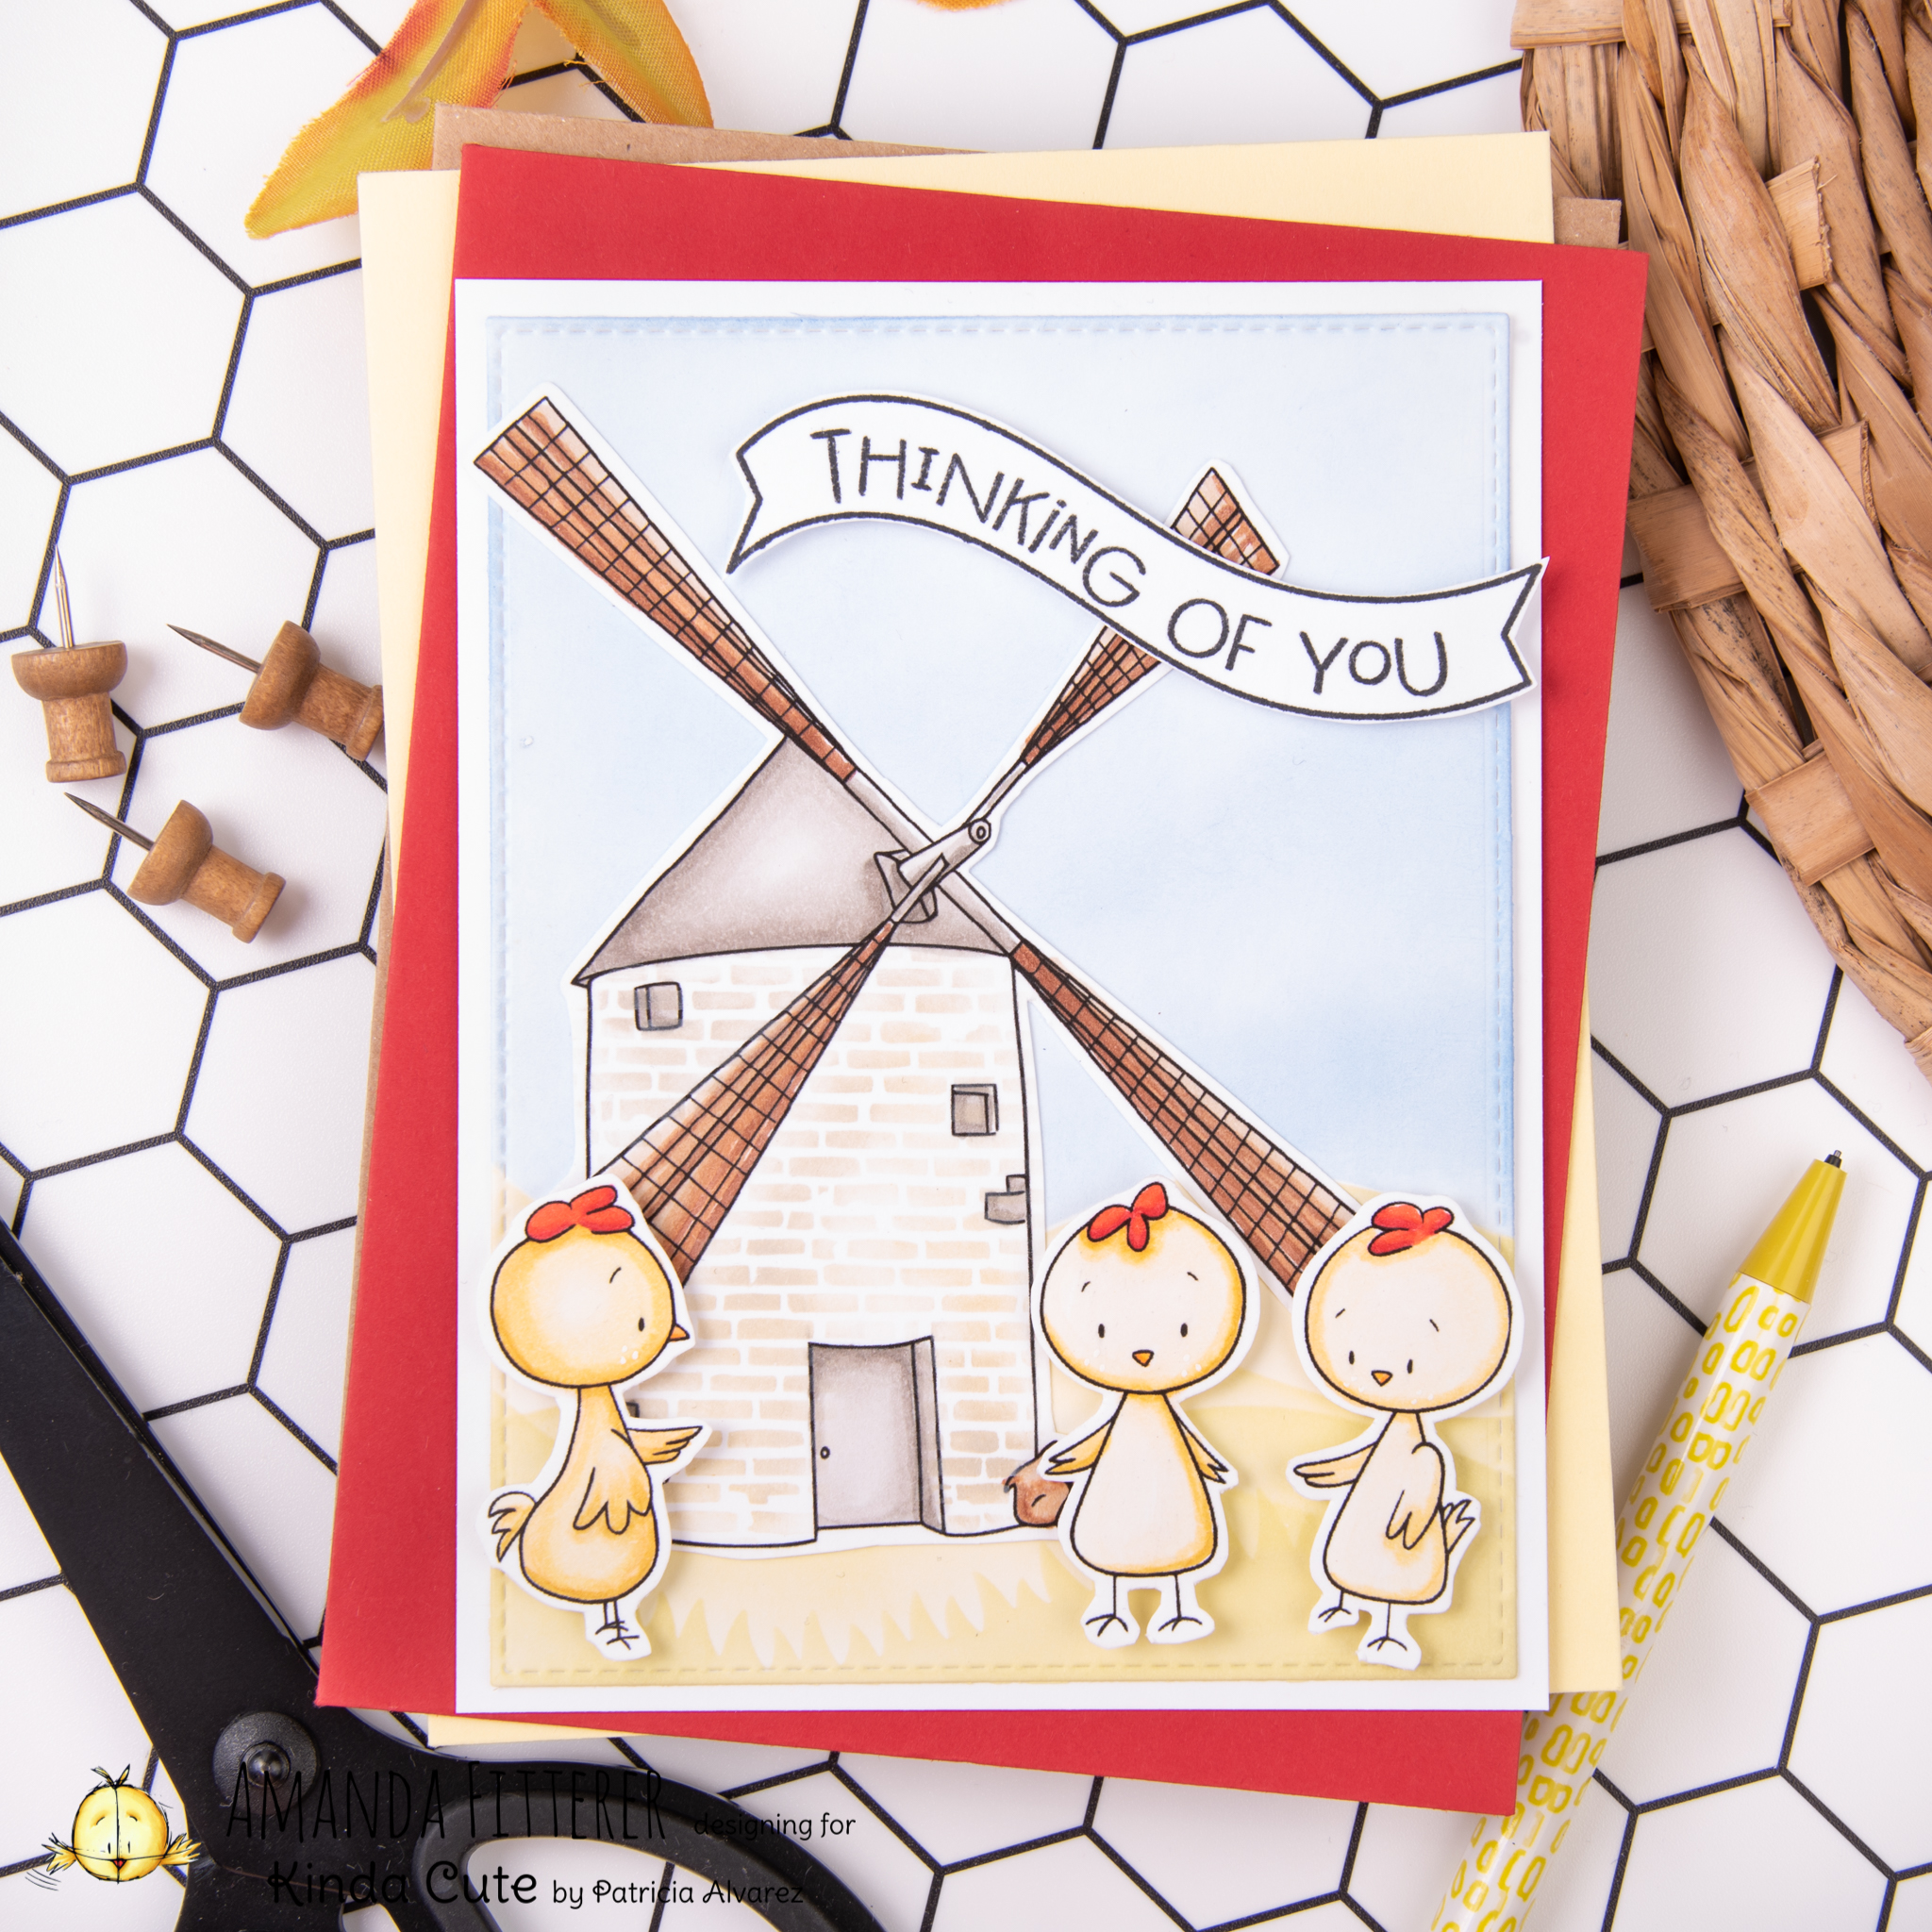
Aren’t these little ducks so sweet?! And the little mischievous one just has my heart!

To make this card, I stamped some images from the Miss Ink Stamps “Rise and Shine” stamp set and the “Punny Farm Pigs” stamp set. Then, I used Copic markers to color the images in.

After my images were colored in completely, I grabbed a sentiment from the Heffy Doodle “Hot Diggity Dog” stamp set and stamped it directly onto my background.

I adhered my ducks using 3D foam adhesives, and voila! Finished!

Thank you so much for stopping by my blog today! I hope you enjoyed my blog post and enjoy the rest of your week!

Posted on Leave a comment

Kinda Cute Alien Birthday

Hey there! I’m so glad you stopped by my blog today! Today, I am sharing a birthday card using Kinda Cute by Patricia’s Alien Digital Stamp Set.

To make this card, I am starting with the galaxy background. I used Heffy Doodle’s Stargazer Backdrop on a piece of white cardstock. Then, I created the galaxy effect by blending Dusty Concord, Faded Jeans, Blueprint Sketch, Twisted Citron, and Black Soot Distress Oxide Inks.

Next, I colored my images using Copic markers and then cut them out using scissors.

For my sentiment, I used the MFT Space Explorer stamp set. I also grabbed a few stars from this stamp set and used 3D foam squares to adhere them to my card front.

Here’s a few closeups of the finished card!

Posted on Leave a comment

Athena Reading

Hello friends! Welcome back to my blog! Today, I’m sharing a card that I made using the Kinda Cute by Patricia Athena Girl Reading digital stamp and the Window and Curtains Room Background digital stamp.

First, I set up my images in Adobe Illustrator. Then, I printed them on 80 lb. Neenah Solar White cardstock. Then, I colored the images using Copic markers.

After I had it all colored, I used a stitched rectangle die and a trimmer to create my layers. I stamped my sentiment underneath the image and assembled the card!

Thank you so much for stopping by my blog today! Xoxo, Amanda

Posted on Leave a comment

You’re My Princess

Hello crafty friends!

Today, I am sharing a magical slimline card using the Princess Bundle Set from Kinda Cute by Patricia Alavrez.

To create this card, I printed the images on 80lb. Neenah Solar White cardstock. I, then, colored the images with Copic markers. I cut the images out using precision scissors.

To create my slimline base, I used the Pink and Main Blessings Slimline Die. I blended Broken China and Peacock Feathers Distress Ink and Oxide to create my background. I adhered my card together using 3D foam strips and squares.

Thank you so much for stopping by my blog today! Xoxo, Amanda

Posted on Leave a comment

Happy Holidays Gnome

Hi friends! Thank you so much for stopping by my blog today! I really appreciate your love and support!

Today, I’m sharing this adorable holiday scene that I created using a few Kinda Cute by Patricia Alvarez digital stamps. I used the Lights are Tangled Gnome and Christmas Filler Digital Stamps.

Have a great day!
Xoxo, Amanda

Posted on Leave a comment

More Halloween Kids!

More kids in Halloween costumes?! Of course! I love seeing kids dress up for Halloween!! These kids by Kinda Cute by Patricia Alvarez are just so sweet!

The images I used for this card can be found here:
Super Hero Girl
Mummy Boy
Halloween Fillers

Here are the Copic markers I used to color the images:

Thank you so much for stopping by today!
Xoxo, Amanda

Posted on Leave a comment

Let’s Get a Pumpkin!

Have you picked out pumpkins for carving yet?? We have the cutest little local farm here that has a huge pumpkin patch that we love to go to every year! They have hay rides, corn mazes, and lots of treats! The kids just love going there!

This sweet girl on this card reminds me of my 6 year old daughter! I just HAD to make a card with her. She’s a digital stamp from Kinda Cute called “Girl with Wheelbarrow“.

I printed the image on 80# Neenah cardstock and then colored her in with Copic markers.

I finished the card off by adding some black cardstock and then patterned paper behind it!
I hope you were inspired by my post and I hope you’re having a great week so far! Thank you so much for stopping by my blog! It really means a lot to me!
Xoxo, Amanda

Posted on Leave a comment

Get Out Your Rakes!

It’s that time of year! Are you excited for Autumn or dreading it? Summer is definitely my favorite season, but I do love getting out the fall boots and sweaters!
My doggies are definitely happy it’s cooling down! It definitely looks like this cute little dog is having a blast in the leaves!

To make this card, I’m using the Kinda Cute Boy Raking Leaves digital stamp and my Copic markers!

I think this little duo turned out pretty stinkin’ cute!
Thanks so much for stopping by and I hope you’re having a great week so far!
Xoxo, Amanda

Posted on 1 Comment

Back to School Kiddos

It’s back to school time! My daughter starts school TODAY! The 1st grade! It’s so exciting! I wanted to make a back to school card for all those kiddos out there!

These cute school kids are perfect for the “Back to School” theme, don’t you think?!

Here are the products I’m using:
School Girl Digital Stamp
School Boy Digital Stamp
Honey Bee Stamps Perfect Bricks Stencil
Ink Blot Shop Get Grounded Stamp Set

To start, I printed my images on 80# Neenah cardstock. I’m going to use my Copic markers to color the cutie.

Next, I’m creating my background using the Perfect Bricks stencil and the Get Grounded stamps.

Thank you so much for stopping by my blog! I hope you’ve been inspired!
XOXO, Amanda

Posted on Leave a comment

3 Chickens and a Windmill

Hey there! I hope you’re all having a fantastic week so far! It’s almost the weekend! Yay!
I have a new card to share with you today using some Kinda Cute digital stamps!

For this card, I used the following digital stamps:
Chickens
Old Windmill

As well as:
Green Fields Stencil
Salvaged Brick Stencil

I started by creating my grassy background with the Green Fields Stencil and Shabby Shutters distress oxide.

Next, I used Scattered Straw and Pumice Stone and a tiny brush with the Salvaged Brick stencil for my windmill.

I used Copic markers to color in the rest of the windmill.
I used: W1, W2, W3, W4, W5, E42, E23, and E25.

For my chickies, I used R05, R24, R27, YR16, YR30, Y000, Y00, Y11, Y21, Y23, and Y26.

I cut each of my chicks and the windmill out and used 3D foam adhesive to attach it to my card base.


Thank you so much for stopping by! Xoxo, Amanda

Posted on Leave a comment

Seagulls at the Beach

Hello there friends! I am excited to share this super cute card with you all today!

To make this card, I used these Kinda Cute digital stamps:
Seagulls at the Beach
Birthday Filler
Birthday Sentiments

I put the balloon in the little bird’s hand on my computer. I printed the digis on 80lb. Neenah Solar White cardstock.

I used a cloud stencil with Tumbled Glass distress oxide for my background.

Next, I colored my images with Copic markers. (Click on any image to view it larger.)

Thank you so much for stopping by my blog! I hope this post inspired you! Xoxo, Amanda

Posted on Leave a comment

Sweet Koalas

Hello all of my crafty friends! Today, I am sharing these super sweet koalas with you!

These koalas are a digital stamp by Kinda Cute. The Thank You Sentiments are also digital and printable.

I printed the images on 80lb. Neenah Solar White cardstock. I used my Copic markers to color the koalas. I used: N0, N1, N2, N3, N4, N6, R20. I used precision scissors to cut out the koalas.

The slimline dies are newly released from Heffy Doodle. The heart stencil I used for the background is also from Heffy Doodle! I used “Worn Lipstick” distress oxide to blend the background.

Thank you so much for stopping by my blog to see this post!
‘Til next time!! Xoxo, Amanda

Posted on Leave a comment

Monster Lemonade Stand

Hello lovely friends! Thanks for stopping by my blog to to see this adorable monster selling lemonade! This cute digital stamp can be printed as one scene or as separate pieces and arranged in your own scene! You can find this stamp on Kinda Cute’s website!

I’m going to start by printing the digital stamp on 80lb. Neenah Solar White cardstock. I’m printing the images separately so that I can arrange my own scene. I’m also going to print a few extra lemonade pitchers!

I’m ready to color my images now! For the lemonade, I’m using Y00, Y04, and Y08. For the lemonade stand, I’m using E30, E31, E33, E35, and E37.

Now, I’m going to use YG00, YG01, and YG03 for the awning. I’m also using BG000, BG10 and BG11.

For my cute little monster, I’m using YG17, YG03, YG01, YG00. For his outfit and eye, I’m using BG0000, BG000, BG01, BG02, and 100 (to make stripes). I’m using T5, T6, T8, and T10 for his hairs.

Now, I’m going to cut all of my images out with some precision scissors. After I’m finished with that, I’m ready to arrange my scene. I am using some stencils and dies and distress oxides to create my background. The stencils are from Simon Says Stamp and the die is from Heffy Doodle.


I am going to heat emboss some sentiments with white embossing powder on black cardstock and then adhere everything to my card using 3D foam squares and strips.

Thank you so much for stopping by my site! Xoxo, Amanda

Posted on Leave a comment

Stay Salty

Hello all of my crafty friends! I hope you are all doing well! I have been enjoying the warmer weather my kiddos and husband! We’ve been spending lots of time at the pool! I hope you are having nice weather as well!

Today, I have my very first card I’ve made for the Kinda Cute by Patricia Alvarez design team! It’s this adorable Mermaid in Shell digi stamp!

I printed the digital stamp on 80 lb. Neenah Solar White Card Stock. Then, using Copic markers, I colored in my mermaid. (Click on a photo below to view it larger.)

Next, I used the Ocean Scene Builder Stencil from Honey Bee to create my background. I used Tumbled Glass Distress Oxide and Copic markers (BG0000, BG000, BG11, and BG70). I also used Frayed Burlap for my plants.

I added just a few water droplets and a “Stay Salty” sentiment to complete the scene!

Thanks so much for stopping by my blog! I hope you enjoyed this post! Til next time! Xoxo, Amanda