Hi everyone and welcome to the Heffy Doodle and Time for Tea Designs Collaboration Blog Hop! Our design teams have come together to share some amazing inspiration featuring Heffy Doodle and Time for Tea Designs products, and there is a prize up for grabs, too!
To make this fun slider slimline card, I’m going to start with the Slimline Pull Tab Dies and the Stitched Slimline Trio Dies. I am using the Colored Cardstock from Heffy Doodle as well as 80 lb. Neenah Solar White cardstock. Using the Grassy Lass Border Dies, I’m going to create 2 little hills for the hamsters to roll down. I am using G00, G40, and G12 Copic markers to color my hills. I’m positioning the Wavy Water Slides Dies so that they’re hidden behind the grass.
I am stamping my little Hooray Hamster Stamps and then coloring the images with my Copic markers. I am using: 0, BG32, BG11, BG10, BG0000 E00, E50, E30, E31, E34, E11, E13, E40, E42, E43
For the slider portion, I’m going to cut 2 extra wheels, plus 2 small circles (these are from Lawn Fawn’s Reveal Wheel dies), and grab 2 brads. First, I’m attaching my colored hamster to the colored wheel. Next, I’m attaching my extra wheel to my small circle with a brad. Now, I’m going to put foam squares on the wheel and attach both wheels to each other. This will allow the hamster wheel to turn in circles. I’m cutting down a small circle to be my slide and then attaching a strip of acetate to it. Once I adhere my grass to the front of the card, I will adhere my hamster wheel to the acetate strip.
I stamped my sentiments, adhered my grass using 3D foam strips, and then attached my hamsters. Now my hamsters can turn in circles and slide down the hill at the same time!
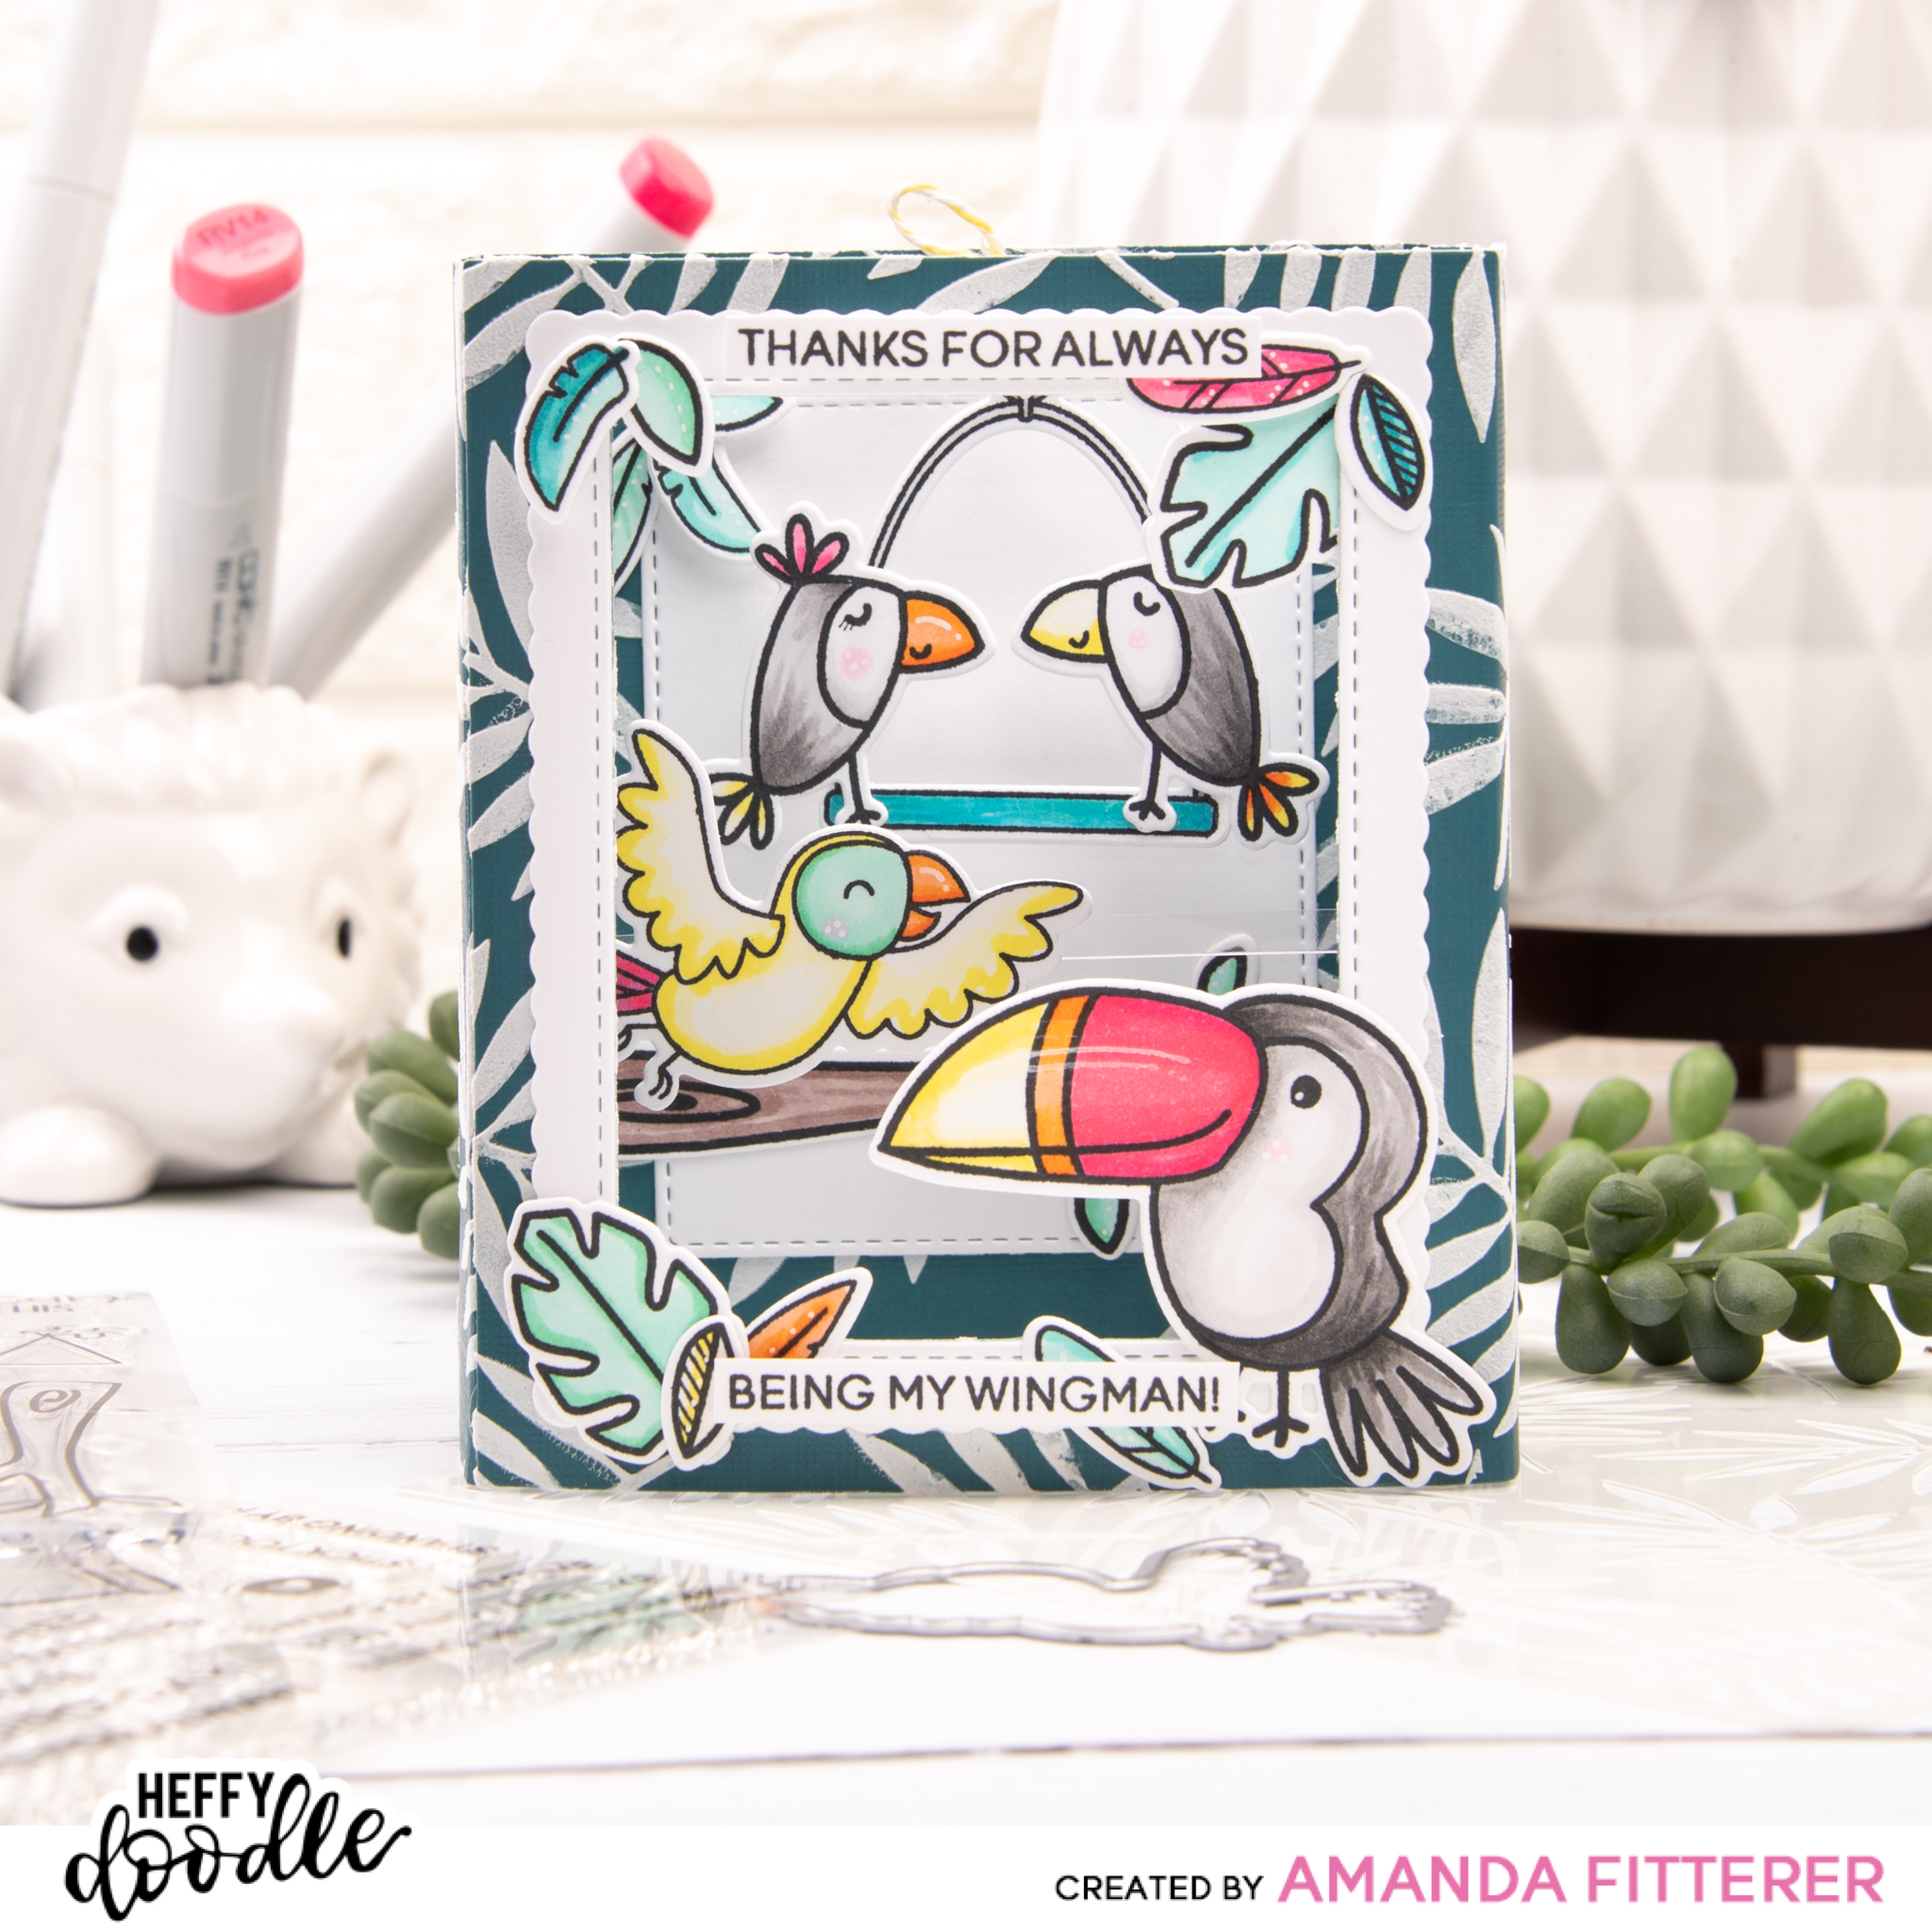
For this tropical card, I’m starting with the Big Shadow Box Die and some dark cardstock. Using the UnbeLEAFable Stencil and embossing paste, I’m creating the pattern on both sides (letting it dry before flipping over to the other side.)
While that dries, I’m going to stamp my images with Memento Tuxedo Black ink and color my images with Copic markers. Click on any photo to view it larger.
After die cutting my images, I’m ready to start assembling the card! I am using liquid glue and 3D foam squares to adhere all the images. I am using double sided tape to construct the shadow box. For my bird swing, I am using a small hole punch to put a hole on top of the swing and then using yellow and white baker’s twine to make a bow. I’m attaching it to an acetate strip. I am also attaching my yellow bird to an acetate strip so that he can fly back and forth.
PRIZES: Heffy Doodle and Time for Tea Designs will each be giving away a 25£ to their respective stores. Winners will be chosen randomly and announced on July 28th on the Heffy Doodle and Time for Tea Designs blogs.
Thank you so much for hopping along with us! If you’re not following me on Instagram yet and you want to see more of my cards, please follow me here: @craftyandcreativevibes
Welcome to the Honey Bee Stamps Summer Release Blog Hop – Day 2! To celebrate this huge release, Honey Bee Stamps is giving away a $25 gift certificate to the store for each day of the Hop! Be sure to comment on every stop along the way for Day 1 and Day 2 to win!
I’m going to make a different roof for each house! I’m die cutting the roof from the Beach House Add-On Honey Cuts. For my first house, I’m using Scattered Straw and Frayed Burlap distress ink and oxide. I’m also adding E34 to the embossed parts. For the 2nd house, I’m using Copic markers and a flicking motion to color in the entire roof. I am using E41, E42, E43, and E44. For the last house, I’m using the Scattered Straw and Frayed Burlap again, but doing a lighter coat.
I’m using the doors and windows that come with the House Builder Base for the 2nd and 3rd houses and coloring them with Copic markers.
Now I’m going to start stamping my images from the Beach House Add-On Stamps and coloring them with Copic markers. Click on any image to view it larger! For my “Welcome” sign, I’m using a paddle as my stick!
For my palm trees, I’m going to blend Mowed Lawn and Twisted Citron distress inks on a piece of white card stock and then die cut my leaves. For the trunk, I’m using E50, E31, E23, and E55.
Now I’m ready to start adhering my cards together! The process is the same for each card, so I’m only showing one house below. I am using 3D foam squares and strips for items I want to stick out (such as the palm tree, bike, and tiki torches). I am using a glue pen for tiny things, such as the leaves on the wreath and the palm leaves. I am using double sided tape for the fence.
Here’s another look at the finished cards!
For my 2nd project, I created these shaker tags!
To make these tags, I am using the Tag Along dies from Heffy Doodle. I am using the same tag die to cut the acetate for my shaker portion so that it fits perfectly. Next, I’m blending some backgrounds with distress oxides and stencils.
I’m stamping my images using Memento Tuxedo Black ink and then using my Copic markers to color my images.
I am adding “margarita salt” to the rim of my margarita using liquid glue and Frosted Sugar Powder from Dress My Craft. For my shakers, I’m using the Frosted Sugar Powder and Crystal Ice Cubes from Dress My Craft.
Thank you so much for stopping by my post! If you’re not already following me on Instagram, please follow me if you want to see more cards from me! @craftyandcreativevibes Xoxo, Amanda