
Hey friends! You can see all the details for this card on the Butterfly Reflections, Ink blog!

Hello, hello! Can you believe it is November already!? I am sad at how fast the holidays are approaching, but I am EXCITED about the new Hedgehog Hollow Box for November! It’s filled with lots of goodies!! If you didn’t catch the Reveal Video yet, you can find it here! You can also see a list of the products here. If you sign up before November 14th, you can still get this November box! What are you waiting for?!
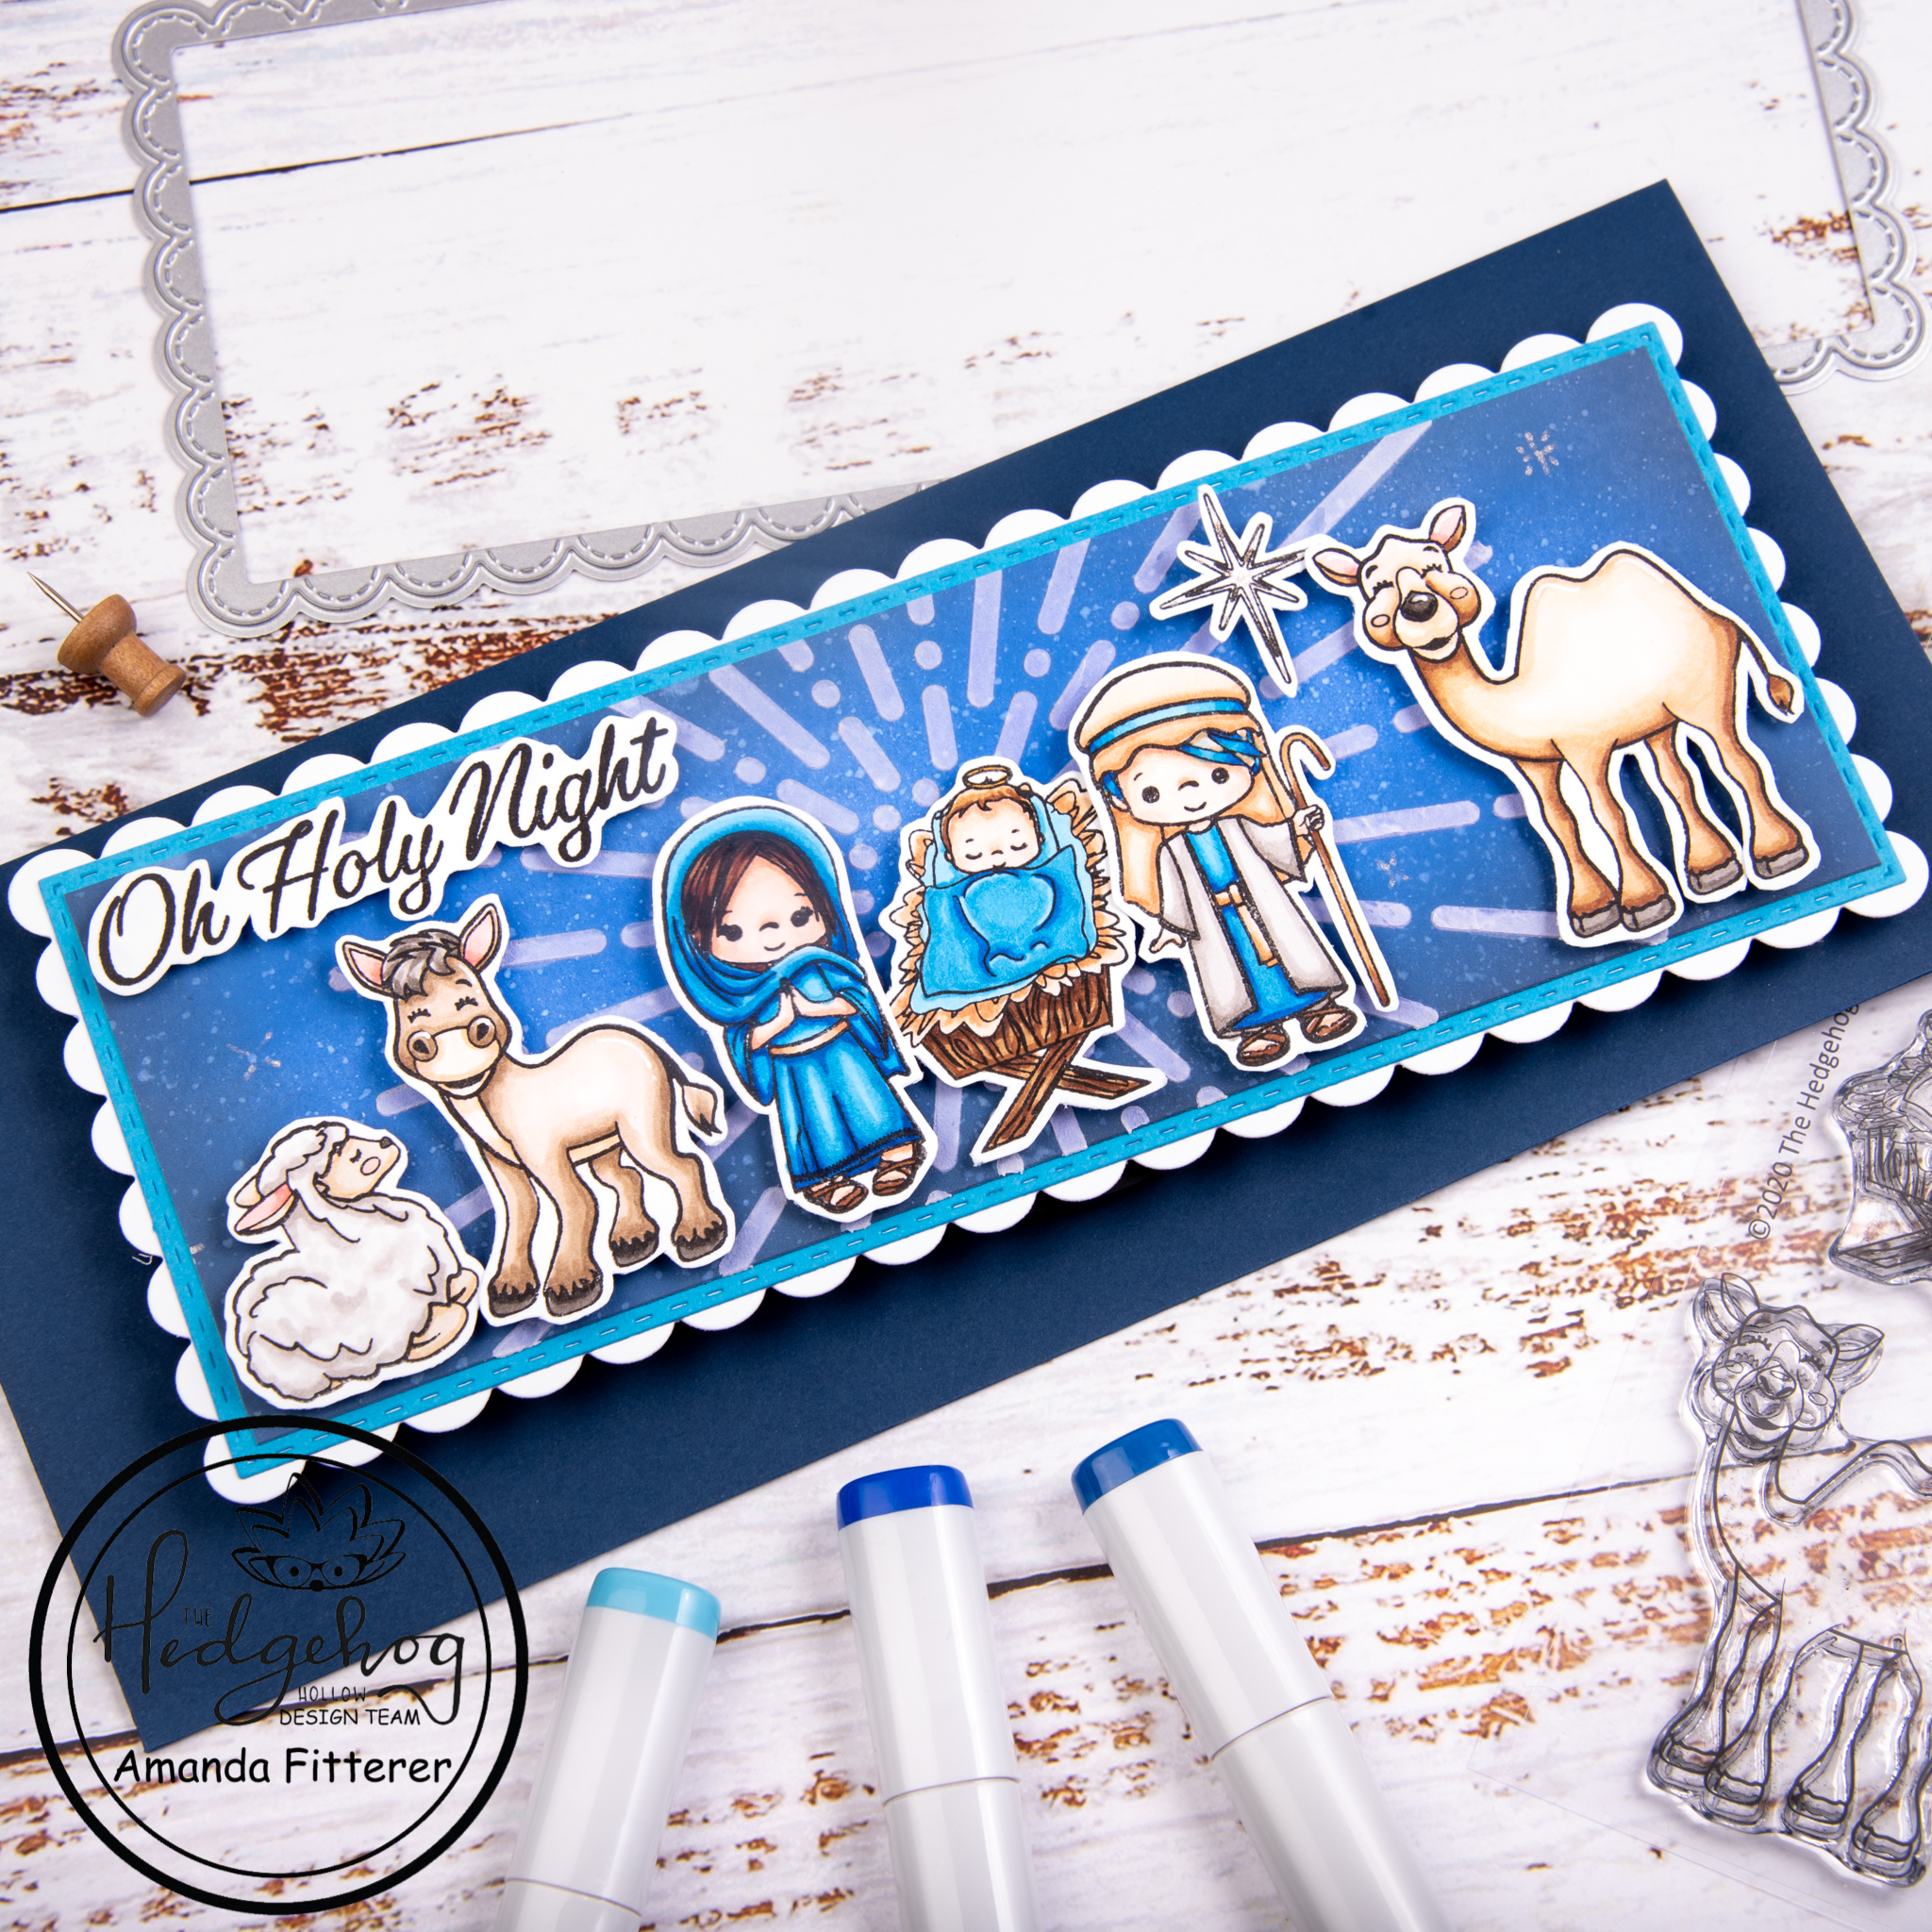
Today, I am sharing this Nativity Scene card with you! I think these images are just so sweet!


To create this card, I started with this AHHHHMAZING cardstock called “Perfect Blend Slimline Mini Strips” by Maker Forte. Blending Distress Inks and Oxides on this cardstock is just a breeze! I blended Faded Jeans, Blueprint Sketch, and Black Soot to create a dark background. I flecked water onto the background to create a “starry” effect.

I used the Simply Radiant Stencil from Heffy Doodle to create a starburst in my background. Using a spatula, I lightly applied some embossing paste.

While that dried, I stamped my images from the “Nativity” stamp set that was included in the November Subscription Box. I colored my images with Copic markers and then fussy cut each image out with detail scissors.


I adhered all my images using 3D foam squares. To create my card base, I used Pink and Main’s Stitched Slimeline Dies and Sympathy Slimline Dies.

I love the way all of these images from the Nativity stamp set go together! They make the perfect little Christmas scene!
I hope you enjoyed my post! If you’re not already following me on Instagram, you can find me here. Later this week, I will be back with another project using the November Subscription Box! I can’t wait to keep sharing some more inspiration!
Don’t forget to scoop up the November Subscription Box before it sells out!
Xoxo, Amanda


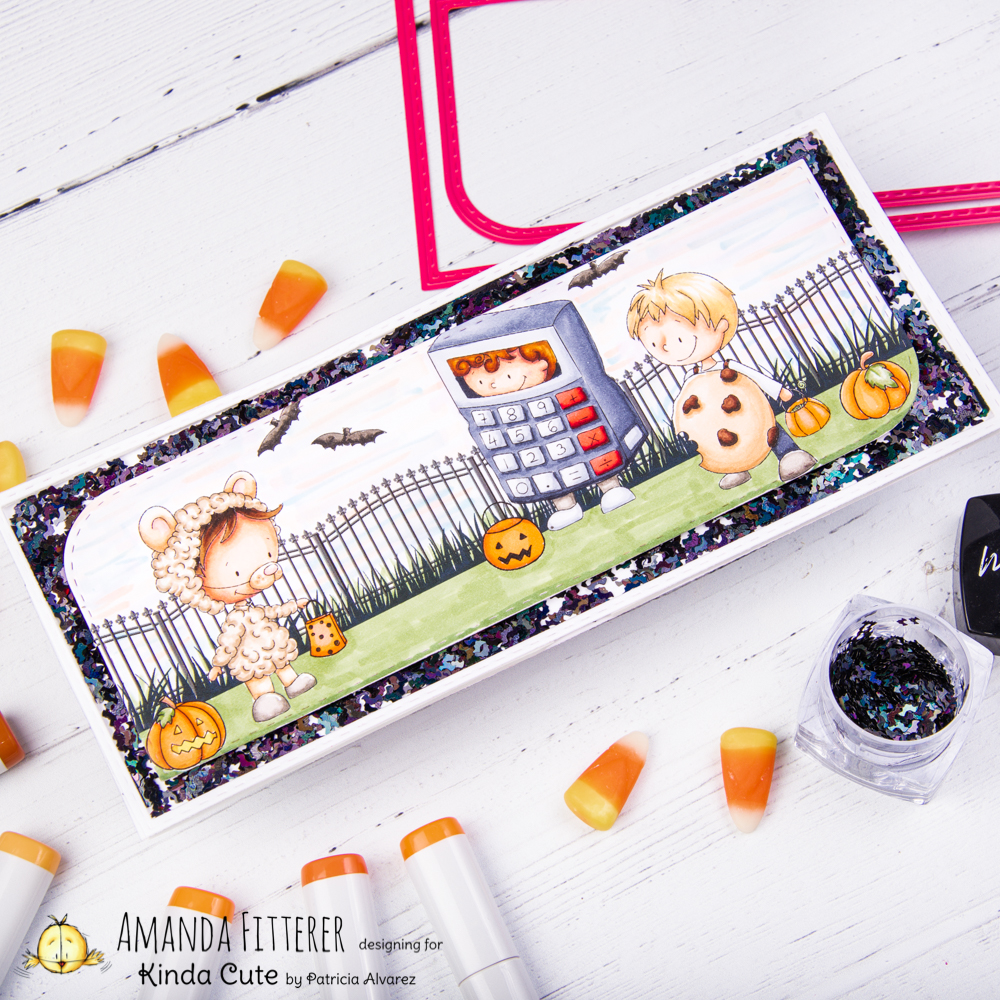

Hello friends! Can you believe it’s almost Halloween!? I blinked and it turned into Fall! This card definitely makes it feel real!


The images I used for this card can be found here:
Halloween Fillers
Kid in Bear Costume
Calculator Boy
Boy in a Cookie Costume
Thanks for stopping by my blog! If you have any questions, please free to leave a comment on this post! Xoxo, Amanda

Happy Monday! I hope your week is off to a good start! I hope this sweet slimline shaker card puts a smile on your face!
Have you gotten your Hedgehog Hollow October subscription box?! I just love the “Around Winter” stamp set that is included in the box. It’s so versatile! In my post a few weeks ago, I used it as a background and a focal point on 2 different cards! For this interactive card, I used it as a patterned background! The little gift boxes are just so cute they make the perfect pattern!

To make this card, I am starting with a few slimline dies. For my card base, I’m using Pink and Main’s Stitched Slimline Dies. I also cut a border using Pink and Main’s Blessings Slimline Dies, which you can see in the photo below. In the end, I didn’t end up using the border for this card because it distracted from the rest of the card. I saved it for another project! The windows that I’ll use for the shaker portion of the card are created from Heffy Doodle’s Stitched Slimline Trio Dies. On my card base, I’m going to create a subtle green background for each of my windows using Twisted Citron Distress Oxide.


Now I’m going to grab my super adorbs “Around Winter” stamp set and the ever-juicy Catherine Pooler Tutti Frutti ink pad. I’m using a clear acrylic block to mount my stamp. I almost always use my MISTI while stamping with clear stamps because I know that with most inks and stamps, I will need to stamp it more than once. However, this ink pad is so juicy that I know I’ll get a perfect image the first time, so I am using the acrylic block to make the stamping go faster.

For my shaker elements, I’m loading each window up with Dress My Craft’s Carnival Candies and Red Hearts Sequins.

I have stamped my images using the Mama Elephant Santa Baby stamp set and alcohol-friendly ink. Now I’m ready to start coloring with my Copic markers!


After prepping my black cardstock with my anti-static tool, I’m going to stamp my sentiments with VersaMark Watermark ink. Using white embossing powder and my heat tool, I’m going to emboss my sentiment. Using scissors and my paper trimmer, I’ll cut these little guys down to fit on my card.

Now I’m ready to assemble my card! I am using 3D foam squares to adhere my images and sentiments to the front of my card.

Here are some close-ups of the completed card! I love a good shaker card, don’t you?


If you’ve made some cards with this Hedgehog Hollow October Box, I would love to see them! Tag me in the post @craftyandcreativevibes or leave a comment here on the blog with your IG account and I’ll check it out!
If you’d like to see a video of the October Box goodies, you can find it here. For all the subscription options, click here.
Remember, if you want this box, you must sign up by October 14th! Otherwise, check here to see if it’s available as a one-off!
Thank you so much for stopping by my blog! I still have one more project coming up next Monday with the October box! I hope you come back by and check it out! Xoxo, Amanda

Hello everyone! I hope you’re all having a great week so far!
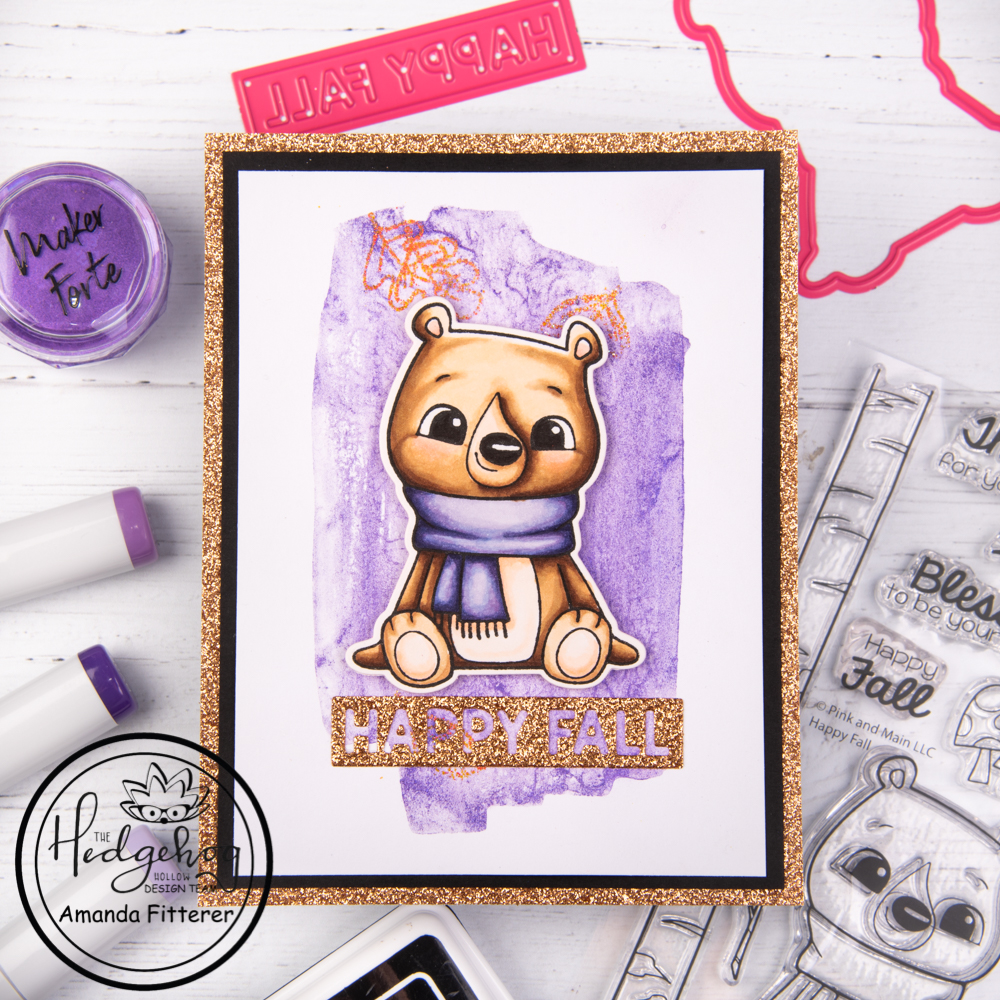
I am loving this card I made using Pink and Main’s Happy Fall stamp and die set! It is so simple, but yet so elegant! I love the idea of taking a non-traditional Fall color and using it to make a card that really stands out!
Plus, I used a few of Maker Forte’s newest gems: Kaleidoscope Powder – Interference – Nebula and Easy Watercolors by Hedgehog Hollow.

To make this card, I’m starting with the Kaleidoscope Powder – Interference – Nebula and a water brush. Putting a small puddle of water on my workspace, I am mixing in a bit of the powder. Using my water brush, I can mix it into a watercolor medium.
On a piece of watercolor cardstock, I am taking the largest of the Easy Watercolors by Hedgehog Hollow stamps and am brushing on my watercolor mixture straight onto my clear stamp. Once it’s completely covered, I can stamp the image. I am going to repeat this process twice to get a better coverage.


After waiting for that to dry, I am placing some leaf stamps from the Pink and Main’s Happy Fall stamp set on top of my watercolor. I am using the Color Hive Clear Embossing Glue Ink Pad to create a sticky image of the leaves. Then, I can apply my gold embossing powder to my images and melt it with my heat tool.


I’m ready to go ahead and stamp my adorable bear from the Pink and Main’s Happy Fall stamp set! (This bear is definitely the cutest bear EVER!) I am going to stamp him with Hero Arts Intensified Black ink and color him with Copic markers.


I cut my watercolor cardstock down to 3.75″ x 5″. Behind that, I’m layering a piece of black cardstock and a piece of gold cardstock.
The last thing I need to do is create my sentiment! I am using the same gold cardstock as I used for my base and cutting out the “Happy Fall” banner from the Pink and Main Blessings Slimline Die. I saved the little insides of the A’s and P’s to glue in after I get my sentiment down!

Next, I am ready to glue everything down and use 3D foam squares to adhere my bear!

I’d love it if you left a comment below or on my Instagram page to let me know if you enjoyed this post!
Don’t forget that you have until October 14th to get the October Subscription Box! It’s filled with some really fun stuff! If you didn’t get a chance to see the goodies, you can watch the video here! Or, if you’re already signed up for the subscription, you should be getting your box soon! Yipee!!
I hope you all enjoy the rest of your week! I’ll be back next Monday with another fun project!! I can’t wait! Xoxo, Amanda