Hey friends! Have you heard the good news?! There’s a new release coming.. and boy, is this a FUN one!! StampNation Members can shop the new collection EARLY on Tues, March 21st! General ordering opens on Weds, March 22nd!
Shop now:
All the cards I share in the next few weeks will be using the In the Amazon Bundle and the Part Tres Extras Bundle:
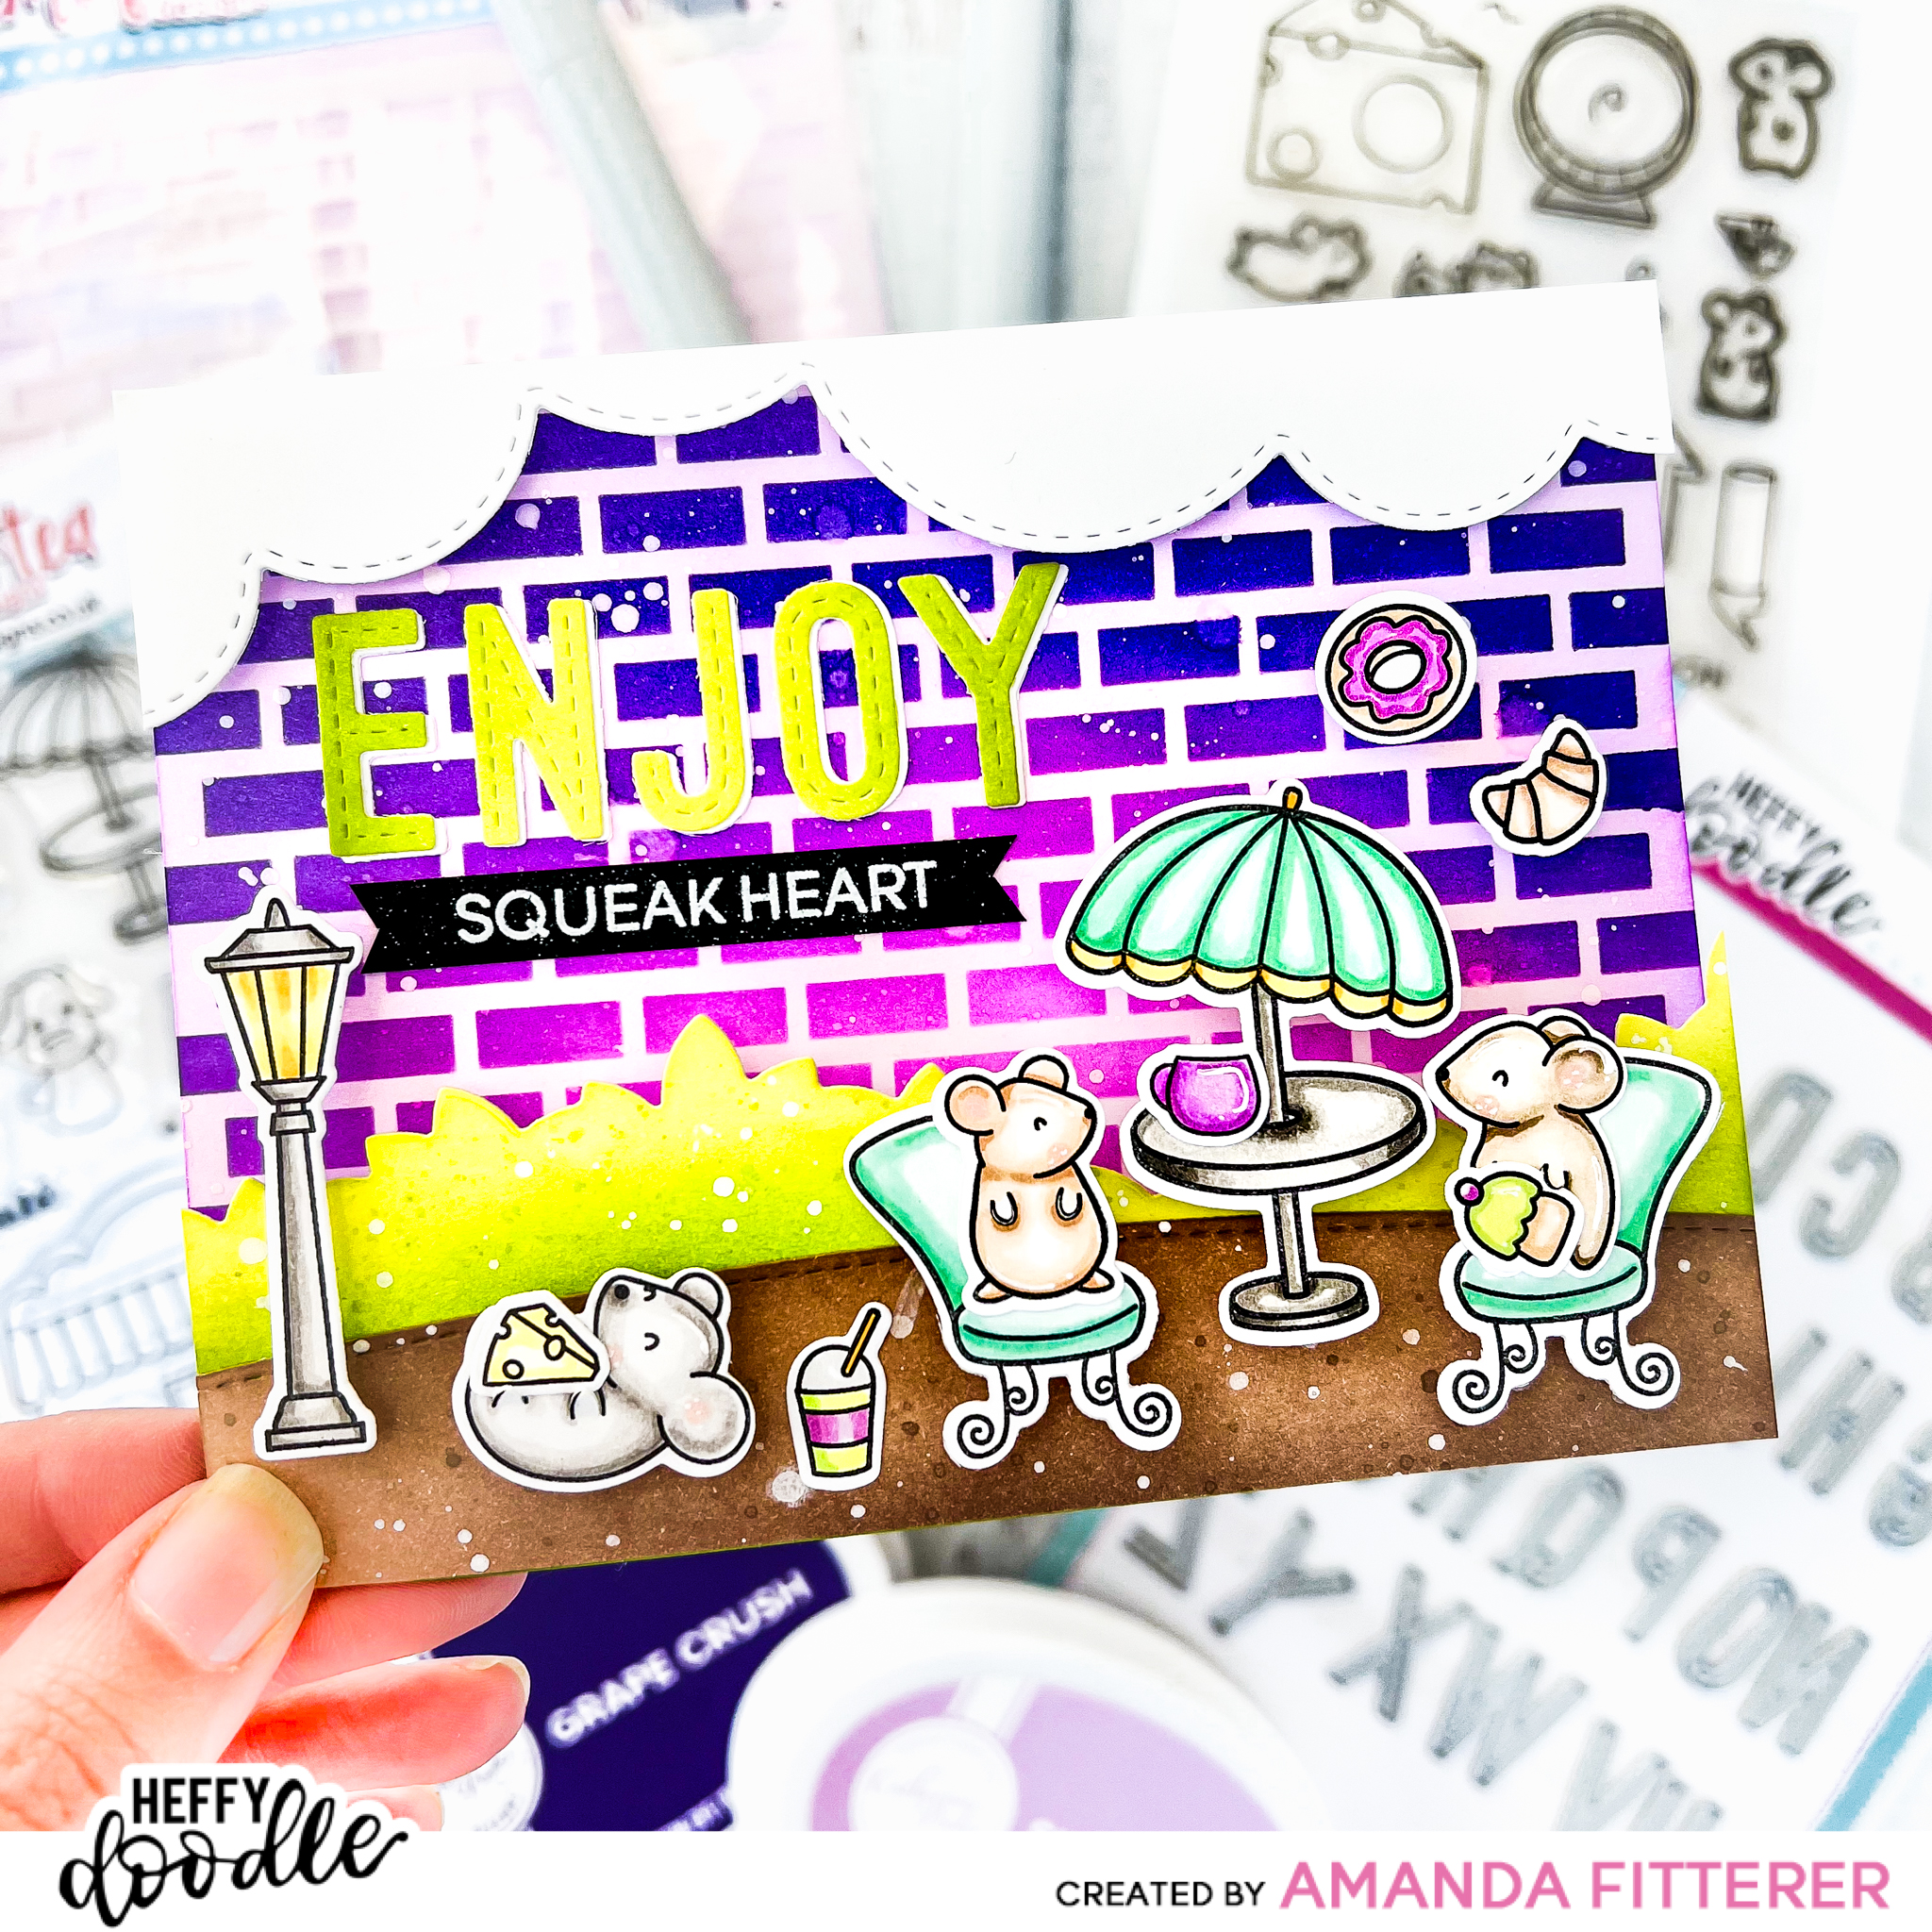
Jungle Amigos Stamp Set
Jungle Amigos Dies
Peruvian Market Patterned Paper
Lima Sequin Mix
Deepest Darkest Peru Cover Plate
Scallop Square Dies
Tickets & Tape Dies
Just Right Duos Sentiments Stamp Set

I started by die cutting the Peruvian Market Patterned Paper with the Scallop Square Dies. Next, I stamped my images from the Jungle Amigos Stamp Set and then colored them with Copic alcohol markers. Once I was finished coloring, I cut them using the Jungle Amigos Dies.
For my sentiment, I’ve used the Wow! Embossing Glue Pad with Wow! White Embossing Powder on black cardstock. Then, I die cut it using the new Tickets & Tape Dies.

I propped my patterned paper up using 3D foam tape to create depth between the layers. Then, I attached my card panel to a pre-scored card base. I propped all of my cute critters and flowers up using my favorite 3D foam squares.

The final step was to add some gorgeous sequins from the Lima Sequin Mix! I always use the Bearly Arts Precision Glue when working with small embellishments.

Don’t forget: If you’re a Catherine Pooler StampNation member, you get EARLY ACCESS to every new release (plus SOOO many other benefits)! Sign up now! It’s worth it!
Thanks for using my affiliate links! You all are the BEST! Using an affiliate link in this post above or down below costs you nothing, but it gives me a teeny percentage of your sale to buy more crafty goodies to continue to share card tutorials with YOU! So, thank YOU! Xx, Amanda
Scrapbook.com Affiliate Link | Catherine Pooler Affiliate Link | Become a Catherine Pooler StampNation member
👇🏻👇🏻 Subscribe 👇🏻👇🏻 to be alerted of new posts by yours truly!
Xx, Amanda