Posted on Leave a comment

Making an Autumn Stamp Work for Christmas

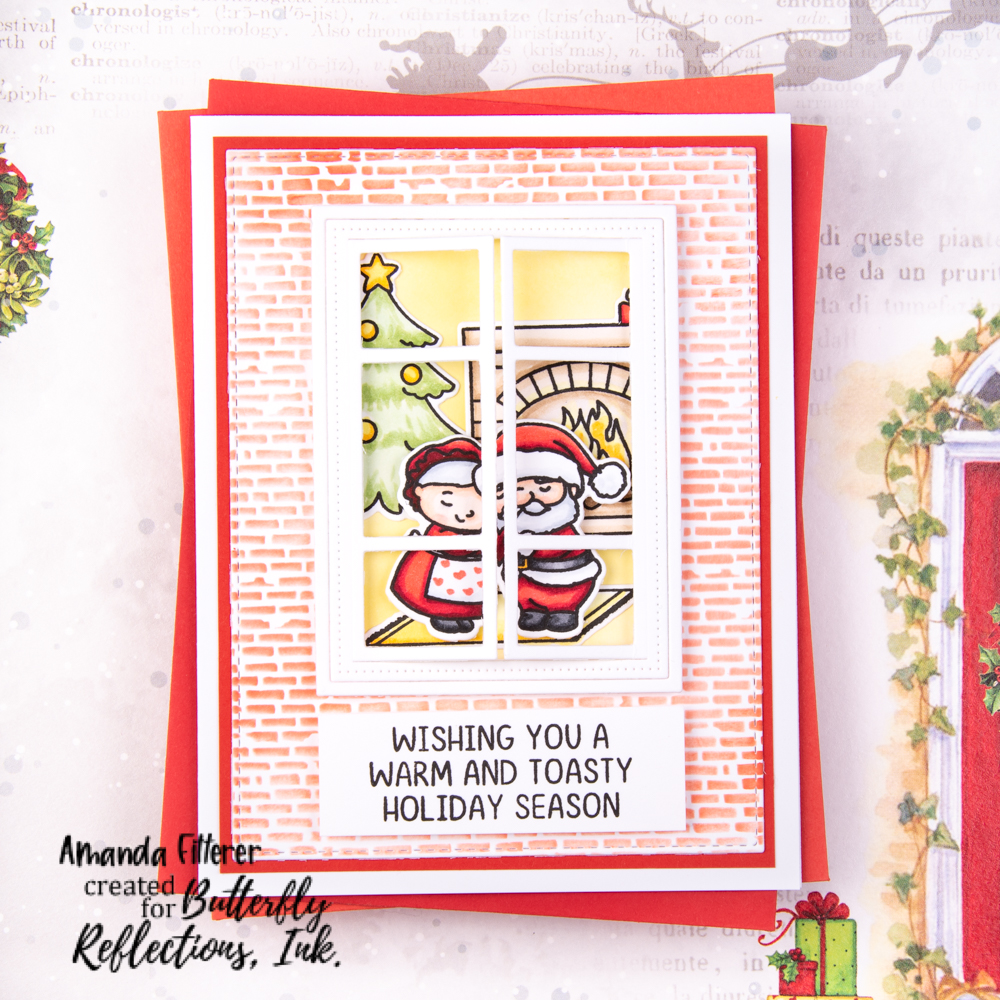
Hey guys! I hope your week is off to a great start! Today, I’m sharing a card I made as a Guest Designer for Sunny Studio Stamps.

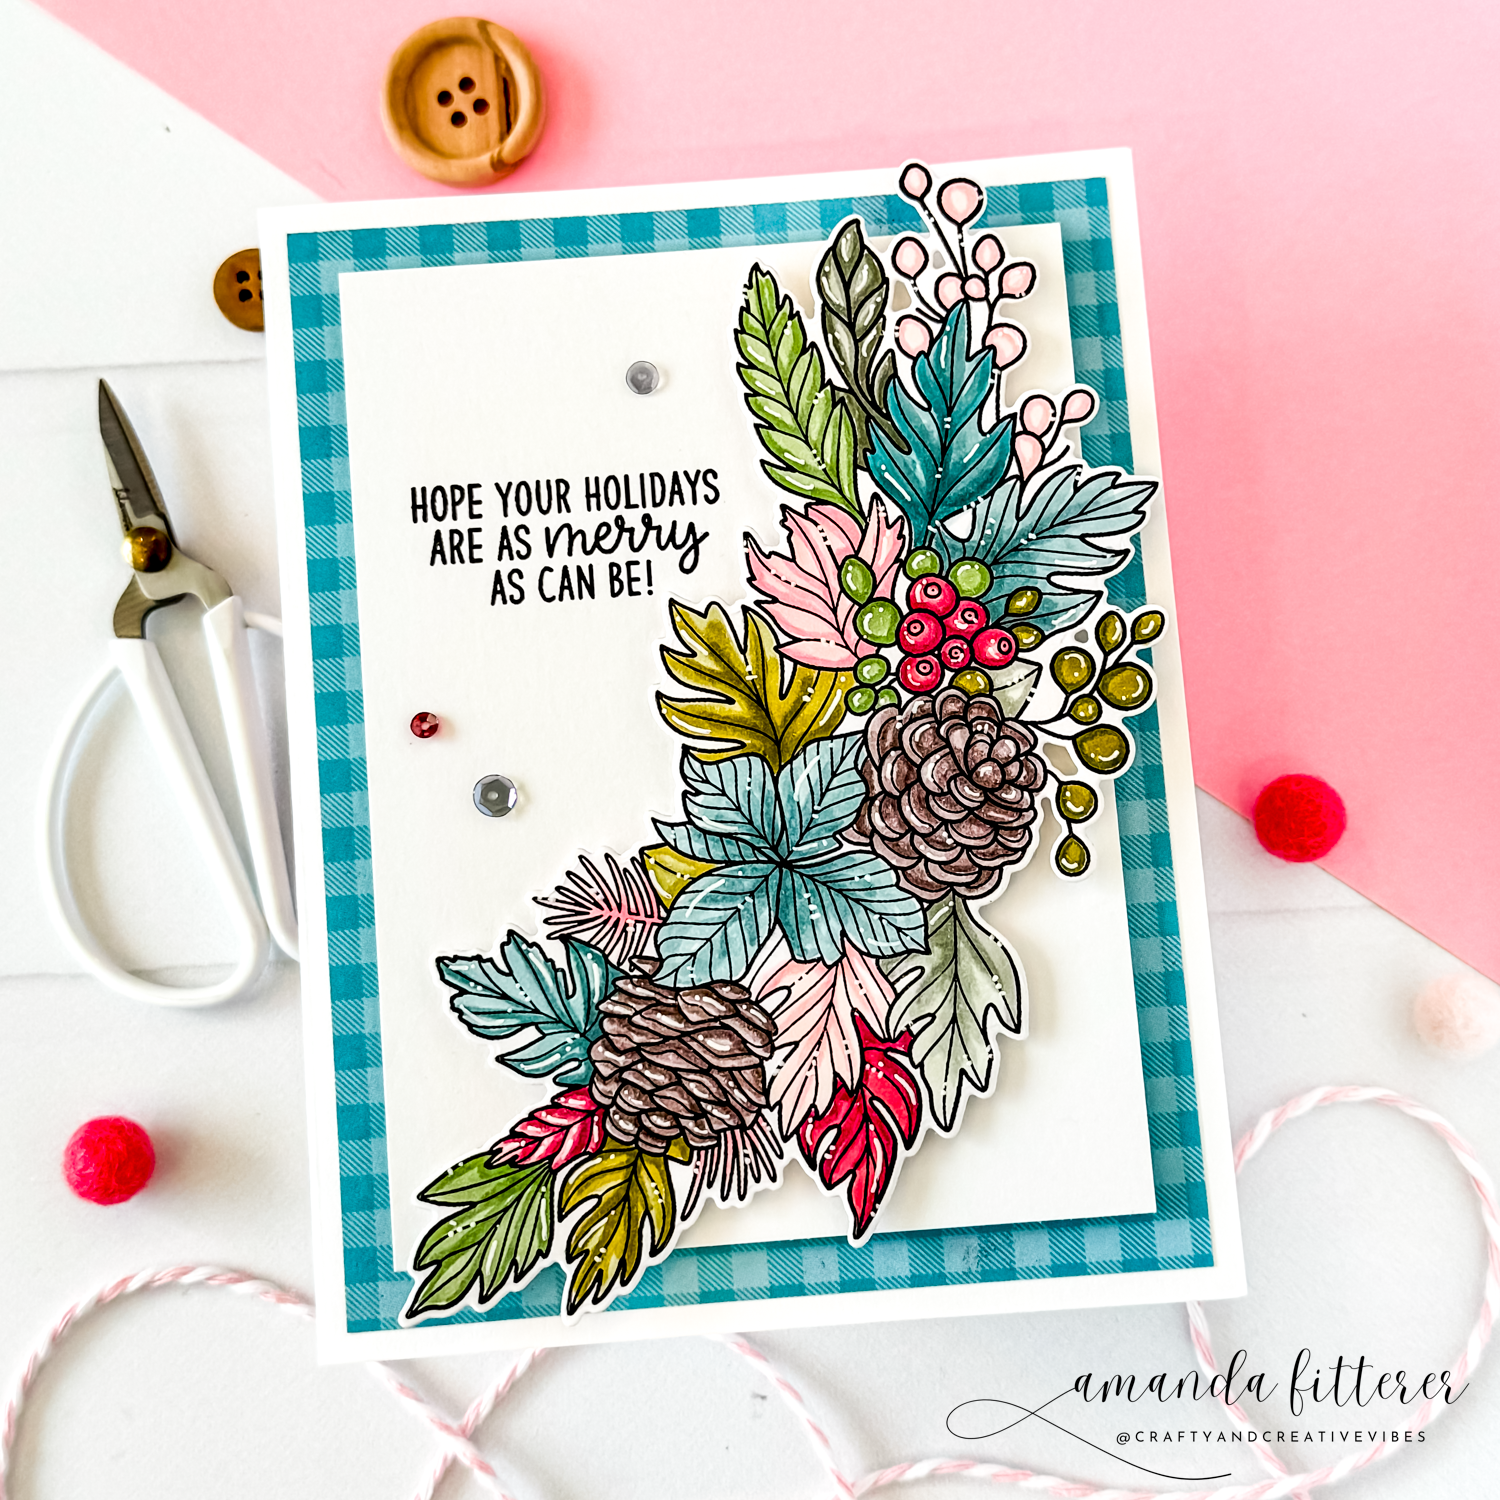
This stamp is actually from the Autumn Garland Stamps, but I wanted to show you how it could also be used for a Winter card!!  

Do you ever have those days where you don’t really feel like crafting, but you want to do something in your craftroom?  That’s what happened to me!  I just decided to stamp out this beautiful garland, put on a show, and use my Copics to color it in!  I added some highlights and dots with a white Gelly Roll pen.

I die cut the image out using the Autumn Garland Dies.  Then, I trimmed a piece of white cardstock to 3.5”x4.75”.  I added a sentiment from the Inside Greetings Seasons Stamps directly onto my white cardstock.   The background paper is from the Joyful Holiday Paper.  I trimmed this paper down to 4”x5.25” and glued it directly to my card base.  I used 3D foam tape to adhere my white cardstock to my patterned paper.  Then, I used 3D foam squares to adhere my garland to the white cardstock.  


I added a few sequins on the left to help balance out the entire card.  Here’s another photo of the finished card!

Thanks for using my affiliate links! You all are the BEST! Using an affiliate link in this post above or down below costs you nothing, but it gives me a teeny percentage of your sale to buy more crafty goodies to continue to share card tutorials with YOU! So, thank YOU! Xx, Amanda

Scrapbook.com Affiliate Link | Catherine Pooler Affiliate Link | Become a Catherine Pooler StampNation member

👇🏻👇🏻 Subscribe 👇🏻👇🏻 to be alerted of new posts by yours truly!

Xx, Amanda

Shop Scrapbook.com dickblick.com
Posted on 1 Comment

A Cozy Card for Christmas

Hey there, crafty friends!  Today, I’m sharing a card I made using some fun products from the Sunny Studio Stamps New Release!  I had so much playing with these products and creating some festive Holiday cards!


To create this cozy little card, I die-cut the pieces from the Decorative Door Dies.  I also die-cut the wreath, bow, trees, and Christmas lights from the Distinctive Door Holiday Add-on Dies.  I love how versatile these die sets are!  If you missed my Sunny Studio’s 9th Birthday Celebration Blog Hop card using them on a Halloween card, you can view that blog post here!

I used Copic markers to color all of my pieces.  I love using Copic markers – as opposed to colored cardstock or ink blending – because I feel like I can give the pieces more depth this way.  I place the pieces on a piece of scrap paper so that I don’t ruin my workspace!

Next, I stamped my cozy little friends from the Toasty Hugs Stamp Set in my MISTI.  I colored them in with Copic markers and then cut them out using the coordinating dies with my Gemini Jr.


For my background, I used a piece of paper from the Joyful Holiday Paper pack.  The “house” is a piece of cardstock ink blended with Catherine Pooler Melon Ice ink.

I stamped my sentiment from the Inside Greetings Seasons Stamps with black ink on the house.  (PS, I LOVE this stamp set!  All of the sentiments are just perfect for the inside or the front of a holiday card!)

You’ll see I also added a few snowflakes inked up with Catherine Pooler Cummerbund ink.  I borrowed these from the Snowmen in Sweaters Stamps.  Of course, I needed to add a few sequins as well – no card is complete without them!

That’s my adorable holiday card to share with you today!!  I  hope you enjoyed it and I hope you find some time to get crafty today!


Thanks for stopping by my blog today! I hope the rest of your week is amazing! Xx, Amanda

Thanks for using my affiliate links! You all are the BEST! Using an affiliate link in this post above or down below costs you nothing, but it gives me a teeny percentage of your sale to buy more crafty goodies to continue to share card tutorials with YOU! So, thank YOU! Xx, Amanda

Scrapbook.com Affiliate Link | Catherine Pooler Affiliate Link | Become a Catherine Pooler StampNation member

👇🏻👇🏻 Subscribe 👇🏻👇🏻 to be alerted of new posts by yours truly!

Xx, Amanda

Shop Scrapbook.com dickblick.com
Posted on Leave a comment

Spellbinders “Home for the Holidays” Collection is Available Now!

Hey guys! Today, I get to share a card I made using the new Spellbinders “Home for the Holidays” Collection! I made this cheery St. Nick card using the new Poinsettia Spray Etched Dies and the Emerald Cut Labels and Tag Etched Dies.

The color combos I used for this card is Catherine Pooler Inks:
Whipped Honey, Polished, Eucalyptus, Sage, Cranberry Fix, and Rouge.

For this card, I used Catherine Pooler Inks:
Cotton Candy, Polished, and Cranberry Fizz.

If you use the links in this post, they are affiliate links to Spellbinders and Catherine Pooler. This just means that I’ll earn a tiny commission if you buy anything using my links. I’d appreciate it, as that can help me create more content to share with you! Xx, Amanda

Scrapbook.com Affiliate Link | Catherine Pooler Affiliate Link | Become a Catherine Pooler StampNation member

👇🏻👇🏻 Subscribe 👇🏻👇🏻 to be alerted of new posts by yours truly!

Xx, Amanda

Posted on 1 Comment

Spellbinders “Home for the Holidays” Collection is Available Now!

Hey guys! Today, I get to share a card I made using the new Spellbinders “Home for the Holidays” Collection! I made this cheery St. Nick card using the new St. Nick Etched Dies.

My color combo is Catherine Pooler Inks:
Sage, Spruce, Buttercream, Rockin’ Red, Cranberry Fizz, and Sand Castle

Tomorrow, I’ll be sharing another card I made using this new collection!

If you use the links in this post, they are affiliate links to Spellbinders. This just means that I’ll earn a tiny commission if you buy anything using my links. I’d appreciate it, as that can help me create more content to share with you! Xx, Amanda

Scrapbook.com Affiliate Link | Catherine Pooler Affiliate Link | Become a Catherine Pooler StampNation member

👇🏻👇🏻 Subscribe 👇🏻👇🏻 to be alerted of new posts by yours truly!

Xx, Amanda

Posted on 30 Comments

Alex Syberia Designs November Collection Blog Hop & Giveaway

Hello and welcome to the Alex Syberia Designs November Release Blog Hop! I hope you’re getting lots of inspiration from all the Designers! The New Release is available now!!

To make this card, I made this super cool background using the NEW Snowflake Petals Cover Die. I simply cut the die out of white cardstock and glued it to an A2 card base.

My adorable little mice are from the new Merry Christmice Stamp Set. And those gorgeous flowers are from the new Midnight Blooms Stamp Set. You can get the coordinating Midnight Blooms Layering Stencil Set to easily ink blend the flower, however, I colored all of my images with Copic markers.

To create my sentiment, I stamped it on black cardstock using my Wow! Embossing Glue Pad. Then, I applied White Opaque Embossing Powder on it. I melted the powder using my favorite heat gun. I cut it out using the coordinating die!

Here’s more info about the Blog Hop:

Alex Syberia Designs is giving away a £85 ($100) gift certificate to 1 lucky winner and a £15 ($18) gift card to 5 winners.

Open internationally. All 6 winners will be drawn from the entrants that have played along with this Blog hop by midnight BST November 26th, 2023. Winners will be announced on the Alex Syberia Designs blog ‘Giveaway Winners’ page on November 27th, 2023.

If you want to start at the beginning of the Hop, you can start on the Alex Syberia Designs Blog!

Blog Hop Order:
Alex Syberia Designs
Amanda <<- That’s ME!
Anne <<– Go HERE next!
Bobbi
Bonnie
Brenda
Colleen
Emelie
Emily
Erica
Hannelie
Ilda
Jo
Kavya
Lien
Lisa
Nicoletta
Sandi
Sheila
Sylvie
Virginia

I hope you have a great time Hopping along!!

👇🏻👇🏻 Subscribe 👇🏻👇🏻 to be alerted of new posts by yours truly!

Thanks for using my affiliate links! You all are the BEST! Using an affiliate link in this post above or down below costs you nothing, but it gives me a teeny percentage of your sale to buy more crafty goodies to continue to share card tutorials with YOU! So, thank YOU! Xx, Amanda

Posted on Leave a comment

Have You Been NAUGHTY or NICE?

Hey, friends! The new Holly Jolly Christmas Collection from Catherine Pooler is available for purchase now!

If you want to buy the whole Christmas Critters Bundle of goodies, you can use this link here.

To create this card, I’ve used the Better Not Pout Patterned Paper Pack, the Naughty List Stamp Set, and the Merriest Sentiments Stamp Set.

I stamped my images from the Naughty List Stamp Set, colored them with Copic markers, and then die cut them with the coordinating die set. I cut my Better Not Pout Patterned Paper Pack at an angle and then adhered it straight to my card front. I propped up my stamped image with 3D foam squares.

Thank you SO much for stopping by my blog today! I appreciate you so much!!

Don’t forget to use my affiliate link while shopping the Catherine Pooler site! It costs you nothing, but it gives me a teeny percentage back to help fund my crafty tutorials to share with YOU! Thank you SO much for your support!! Xx, Amanda

Shop Scrapbook.com
Posted on Leave a comment

Making a Pocketfold Tri-fold Card with a Bookmark

Hello, my fav crafty peeps! How are you doing? I’m doing AMAZING because I get to share this fun card with you! The new Holly Jolly Christmas Collection from Catherine Pooler is available for purchase now! So make sure you get your goodies before they sell out!!

If you want to buy the whole Christmas Critters Bundle of goodies, you can use this link here.

To create this card, I’ve used the Better Not Pout Patterned Paper Pack, the Naughty List Stamp Set, the Merriest Sentiments Stamp Set, and the Tree Trimmings Die.

I stamped my images from the Naughty List Stamp Set, colored them with Copic markers, and then die cut them with the coordinating die set.

For my center panel, I stamped my sentiment from the Naughty List Stamp Set and then cut it out with the Circles Dies. I also added my dotted circles using the Circle Party Stamp Set and Melon Ice. On a piece of Better Not Pout Patterned Paper, I die cut the Tree Trimmings Die in the center. Then, I adhered my circle cutout in the center with my favorite Bearly Art Glue.

For my bookmark, I trimmed down a piece of Better Not Pout Patterned Paper to 2″x 5″. I rounded off the edges with my most favorite 3-in-1 Corner Punch. I added my hole reinforcer from the Notecard Frame & Tag Dies. I just love the “Fa La La La La’ sentiment from the Merriest Sentiments Stamp Set, so I stamped that in the corner using Midnight Ink. Finally, I added a few pieces of Tuxedo Turquoise Twine.

To get my scalloped edge, I used the Decorate Edge Dies.

To tie the whole thing together, I used a brad and the Party Twist Twine.

Such a fun card filled with cheeriness! Thank you SO much for stopping by my blog today! I appreciate you so much!!

Don’t forget to use my affiliate link while shopping the Catherine Pooler site! It costs you nothing, but it gives me a teeny percentage back to help fund my crafty tutorials to share with YOU! Thank you SO much for your support!! Xx, Amanda

Shop Scrapbook.com
Posted on Leave a comment

Belly Laughs!

It’s time! It’s time!! The Holly Jolly Christmas is available for purchase NOW!

PLUS, you’ll get this FREE STAMP SET on orders over $50!! Get yours NOW!

To create this card, I’ve used the Belly Laughs Cover Plate, which is absolutely AMAZING! How cute is that background?

For my ink blended background, I used Sea Glass and Bay Breeze and the world’s best blending brushes!

For the sentiment, I’ve used the Old Saint Nick Stamp Set. I’ve also used the Better Not Pout Patterned Paper for my banner flag.

What are you buying from this release?! Leave a comment and let me know!

Don’t forget to use my affiliate link while shopping the Catherine Pooler site! It costs you nothing, but it gives me a teeny percentage back to help fund my crafty tutorials to share with YOU! Thank you SO much for your support!! Xx, Amanda

Shop Scrapbook.com
Posted on Leave a comment

Feelin’ Holly Jolly!

DID YOU SEE?! Catherine Pooler has a NEW COLLECTION coming out!! It’s called Holly Jolly Christmas and it’s full of the CUTEST holiday products!! This release isn’t available quite yet, but it will be available on Sept 14th! If you’re a StampNation member, you get EARLY ACCESS on Sept 13th (along with tons of other perks!!!

Plus, get this FREE DASHER STAMP SET on orders of $50 or more!

To create this card, I’ve used the New Naughty List Stamp Set. I’ve paired it with a sentiment from the Merriest Sentiments Stamp Set.

I love using non-traditional colors for holiday cards, don’t you!? I am not a big fan of red and green 😛! So, for this card, I made my entire background Chiffon and Limoncello.

What are you excited about getting from this release??! Leave me a comment!! I can’t wait to hear!

Don’t forget to use my affiliate link while shopping the Catherine Pooler site! It costs you nothing, but it gives me a teeny percentage back to help fund my crafty tutorials to share with YOU! Thank you SO much for your support!! Xx, Amanda

Shop Scrapbook.com
Posted on Leave a comment

I Found Santa’s Jammies!

DID YOU SEE?! Catherine Pooler has a NEW COLLECTION coming out!! It’s called Holly Jolly Christmas and it’s full of the CUTEST holiday products!! This release isn’t available quite yet, but it will be available on Sept 14th! If you’re a StampNation member, you get EARLY ACCESS on Sept 13th (along with tons of other perks!!!

To create this card, I’ve used the Old Saint Nick Stamp Set. I’ve paired it with a sentiment from the Merriest Sentiments Stamp Set. I’ve also used the Better Not Pout Patterned Paper for my background!

What are you excited about getting from this release??! Leave me a comment!! I can’t wait to hear!

Don’t forget to use my affiliate link while shopping the Catherine Pooler site! It costs you nothing, but it gives me a teeny percentage back to help fund my crafty tutorials to share with YOU! Thank you SO much for your support!! Xx, Amanda

Shop Scrapbook.com
Posted on Leave a comment

Oh, Holy Night!

Hey crafty friends! Did you see the latest release from Maker Forte?! Eek! It’s got some AMAZING holiday products!

I made this card using the new “Oh Holy Night” stamp set and the Dutch Villages stamp set.

To make this card, I started by creating a beautifully blended background with the Circle Spotlight stencil and some Color Hive inks. I started with Coral Keys on the bottom, then English Mustard in the middle, then Limewired, and then finally Pop Art at the top.

To add some finishing touches, I used the Splatter stamp and the Stars Confetti.

I’m just loving this release! How about you?!

Thank you so much for stopping by my blog today!! Xx, Amanda

Posted on Leave a comment

It’s Christmas in July!

Hey crafty friends! Today, I’m sharing some inspiration from the new Maker Forte Christmas in July Release!

You can shop the entire New Release here.

Have you purchased anything from the New Release! Leave a comment and let me know or tag me in your Instagram posts @craftyandcreativevibes !

Posted on Leave a comment

Believe Slimline Blended Cards

Hello all you crafty people! I hope you had a fantastic Thanksgiving! I guess it’s time to start thinking about Christmas cards now! I can’t believe how quickly Christmas will be here!

Today, I’m excited to share some slimline cards I made using some products from the November Subscription Box!

The Subscription Box came with some Maker Forte Perfect Blend Slimine Mini Strips. These are made specifically for Distress Ink and Oxide blending, so the colors go on super smooth!

For the green background, I blended Lucky Clover, Twisted Citron, and Black Soot. Once I was finished blending, I spritzed the card front with water.

For the red background, I used Candied Apple, Abandoned Coral, and Black Soot. Again, I misted some water on it to create a fun effect.

The November Subscription Box also had a “Believe” stencil included! This stencil is the perfect size for a slimline card! I used some embossing paste with the stencil to create a textured, 3 dimensional look. I used a white slimline card base to frame the card fronts.

These cards were so easy to make, but are so beautiful and elegant! They’d be perfect holiday cards to make in bulk, don’t you think?

The November box isn’t available now, but if you want to see the Subscription Box Options, you can click here to sign up for the December box! You can also check in December to see if the November box is available as a One-Off Box!

I can’t wait to see what the December box has in store for us! It’s always so exciting to see that package waiting for me in my mailbox! I love a good surprise!

Thanks again for stopping by my blog today! I hope you enjoy the rest of your weekend! Xoxo, Amanda