Posted on 1 Comment

A Cozy Card for Christmas

Hey there, crafty friends!  Today, I’m sharing a card I made using some fun products from the Sunny Studio Stamps New Release!  I had so much playing with these products and creating some festive Holiday cards!


To create this cozy little card, I die-cut the pieces from the Decorative Door Dies.  I also die-cut the wreath, bow, trees, and Christmas lights from the Distinctive Door Holiday Add-on Dies.  I love how versatile these die sets are!  If you missed my Sunny Studio’s 9th Birthday Celebration Blog Hop card using them on a Halloween card, you can view that blog post here!

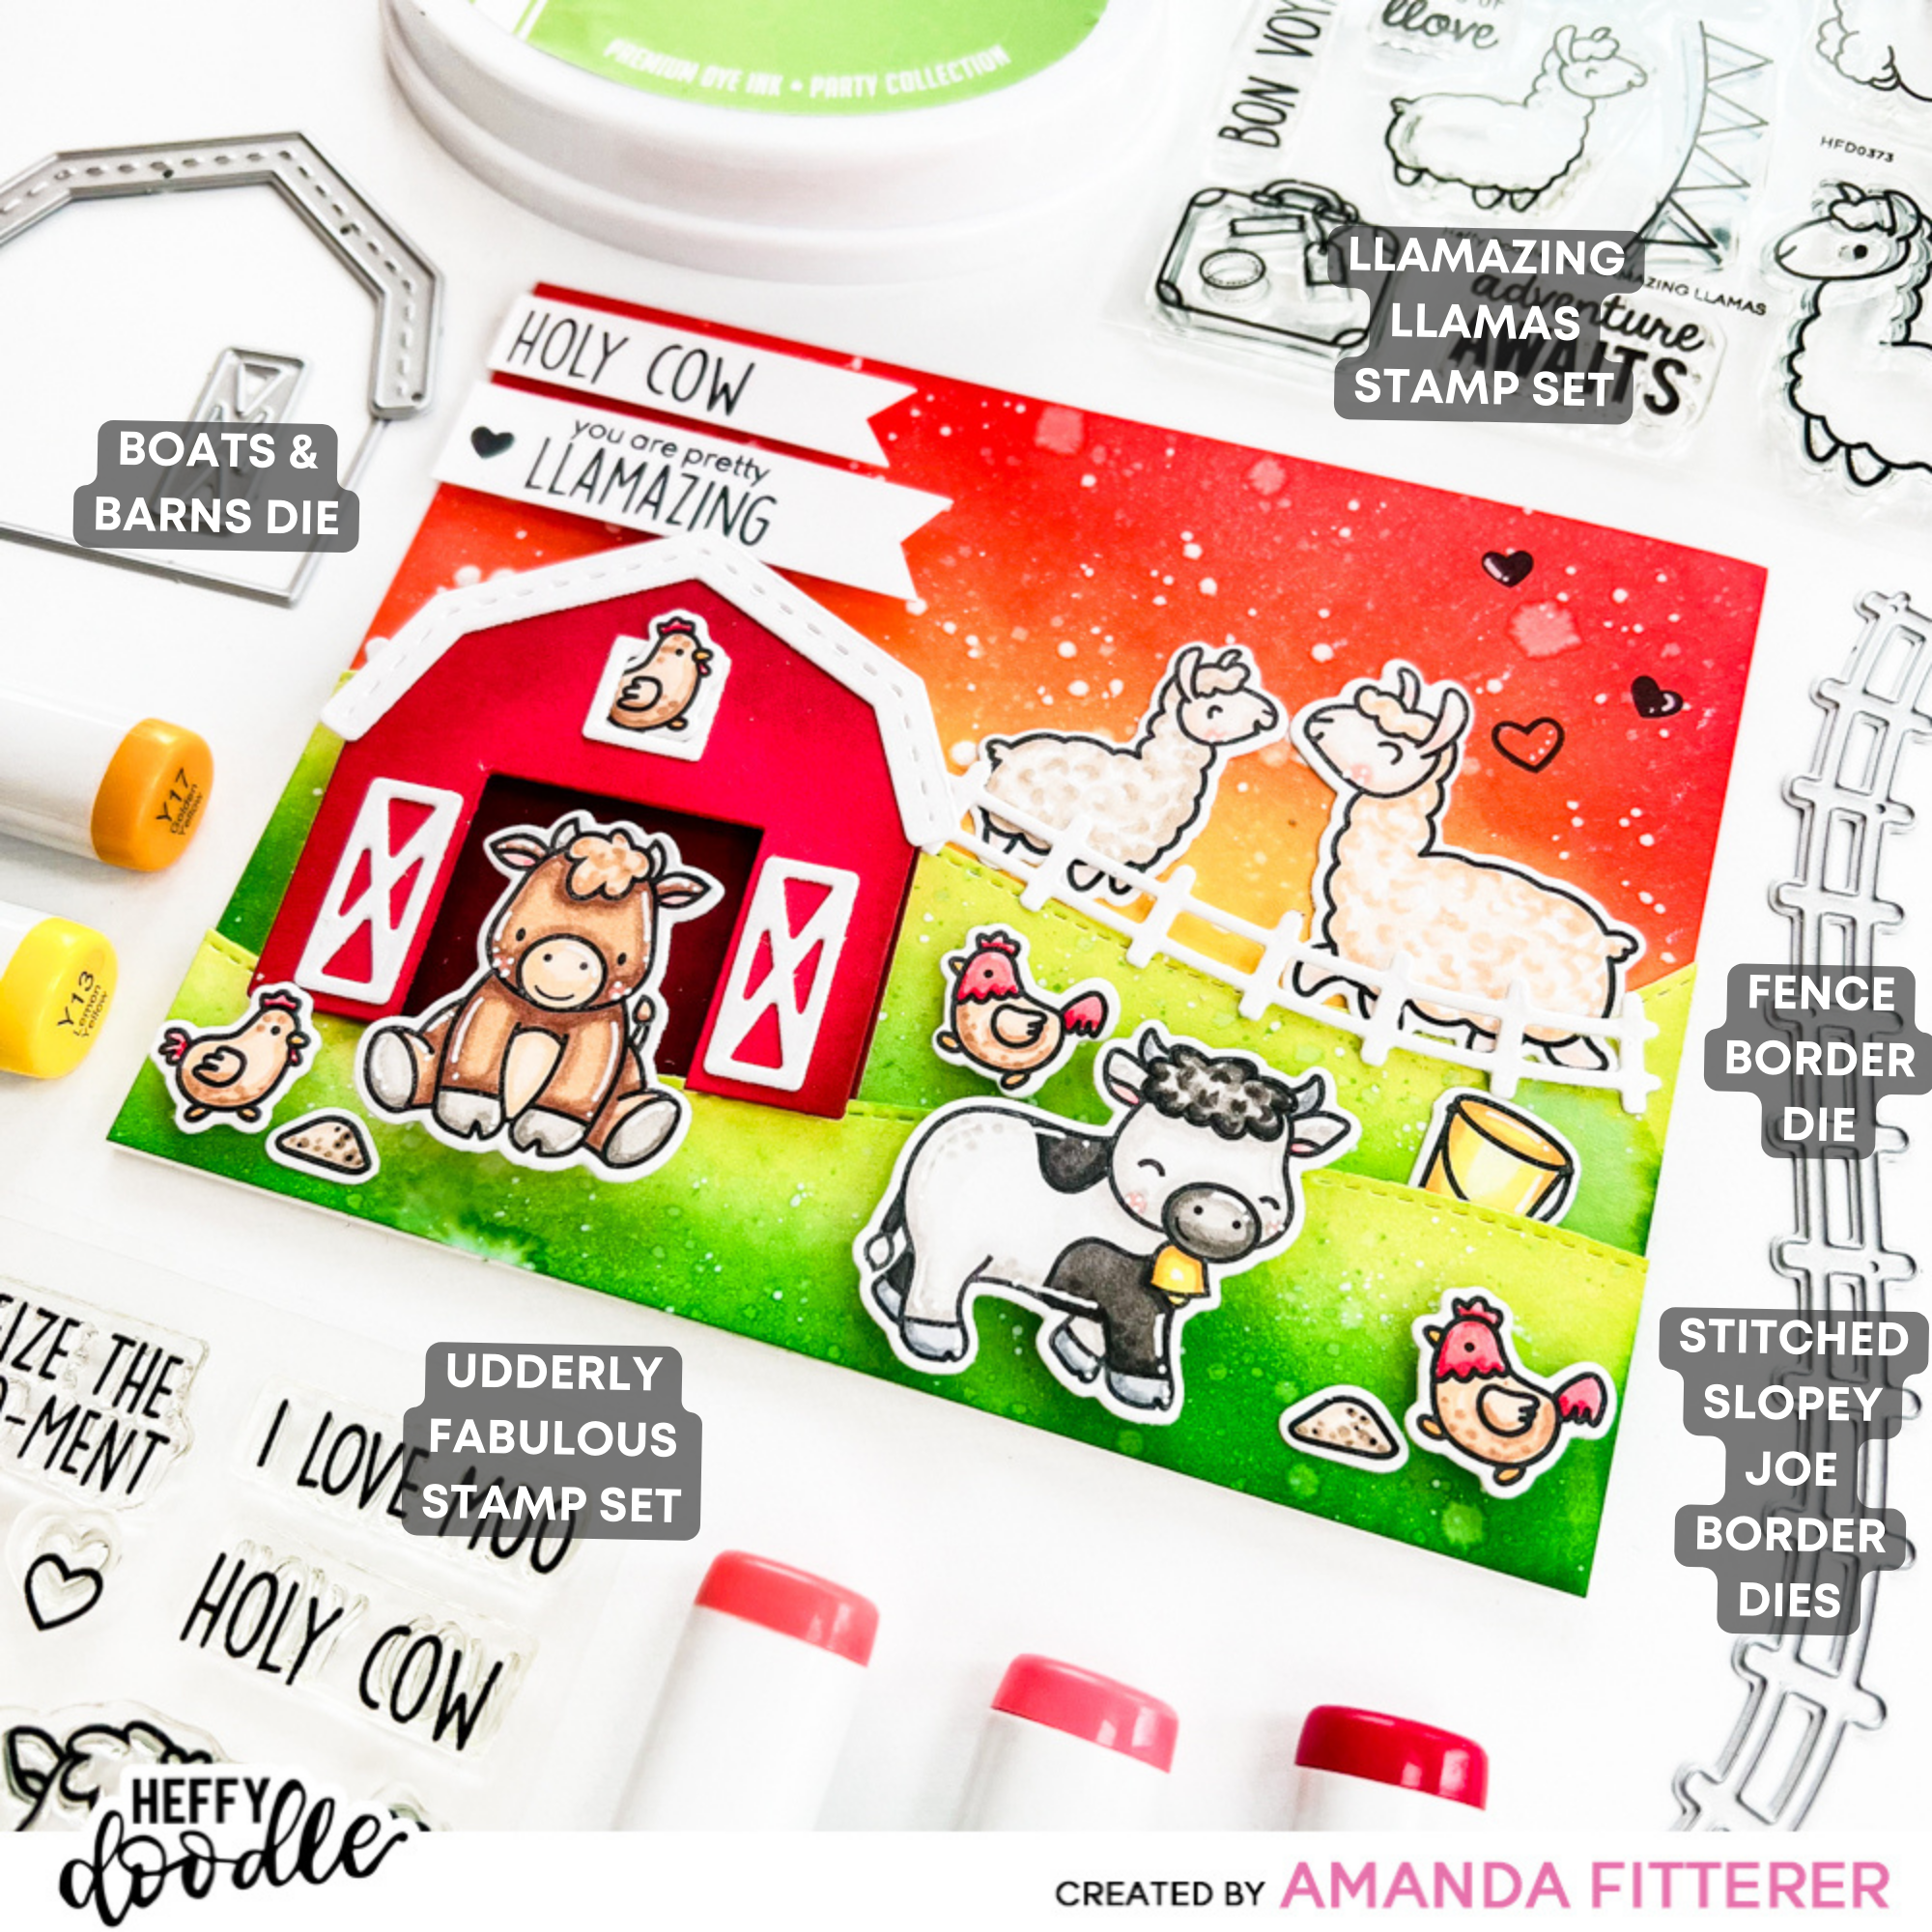
I used Copic markers to color all of my pieces.  I love using Copic markers – as opposed to colored cardstock or ink blending – because I feel like I can give the pieces more depth this way.  I place the pieces on a piece of scrap paper so that I don’t ruin my workspace!

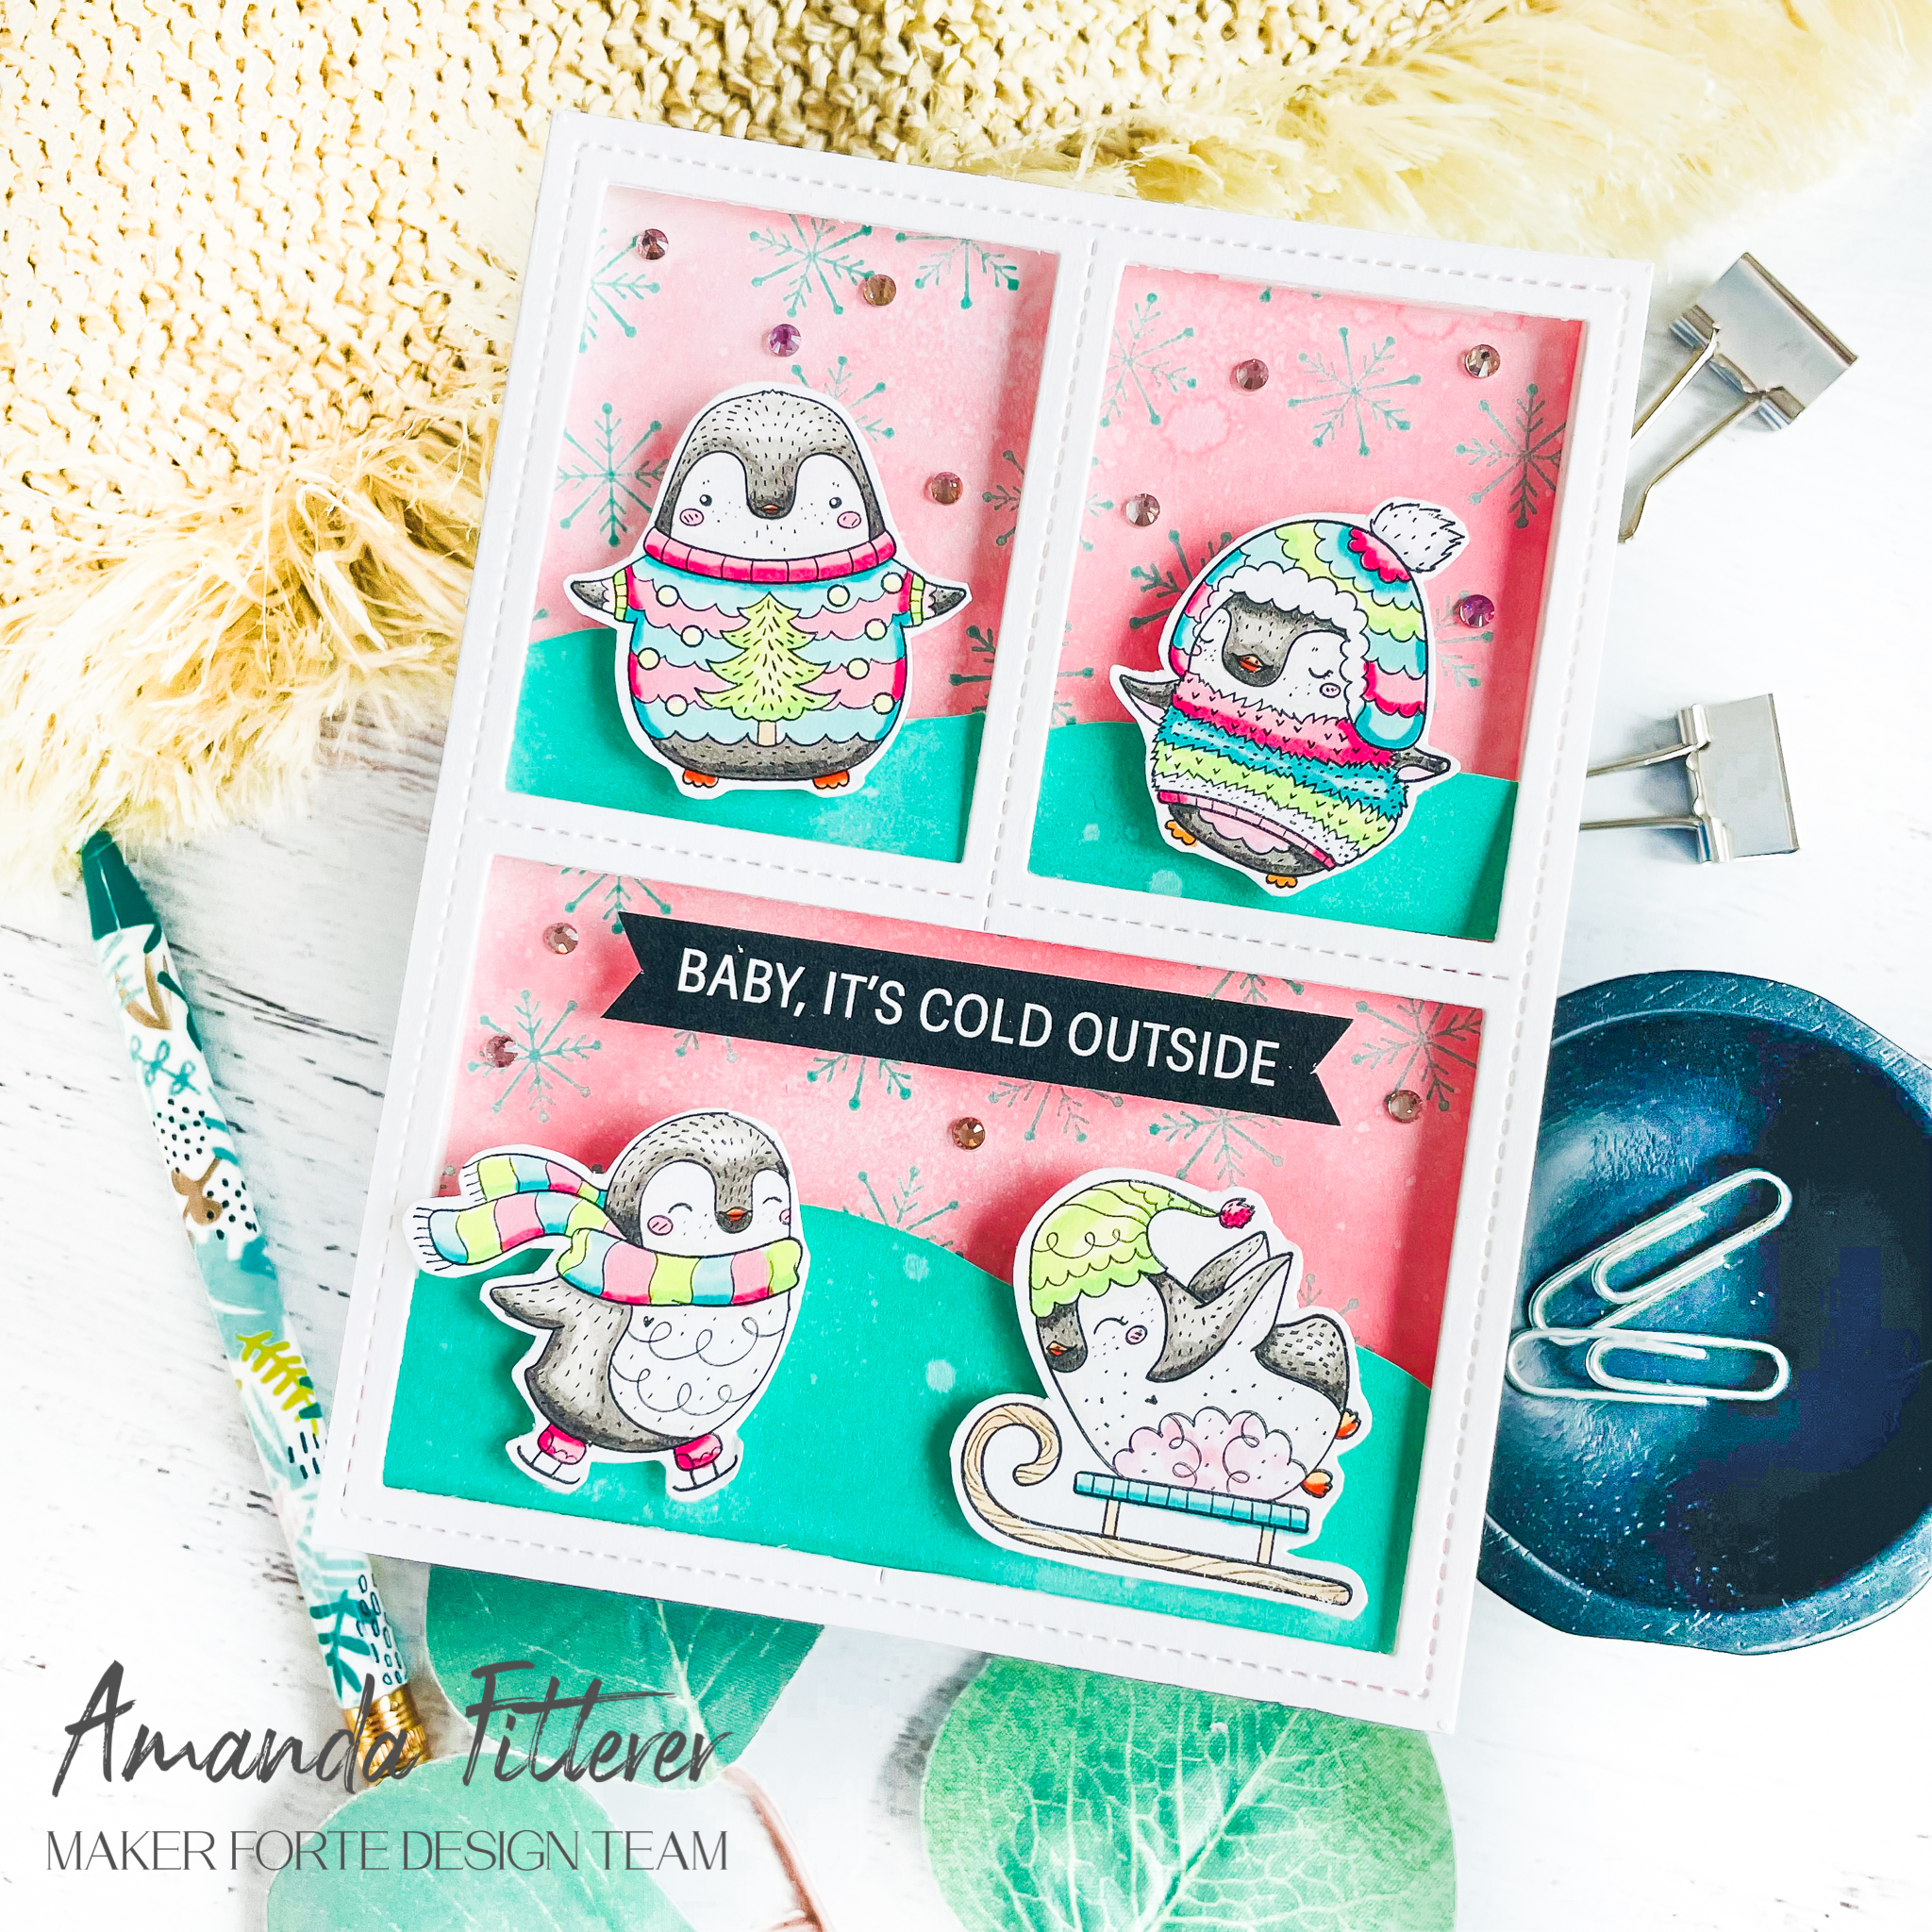
Next, I stamped my cozy little friends from the Toasty Hugs Stamp Set in my MISTI.  I colored them in with Copic markers and then cut them out using the coordinating dies with my Gemini Jr.


For my background, I used a piece of paper from the Joyful Holiday Paper pack.  The “house” is a piece of cardstock ink blended with Catherine Pooler Melon Ice ink.

I stamped my sentiment from the Inside Greetings Seasons Stamps with black ink on the house.  (PS, I LOVE this stamp set!  All of the sentiments are just perfect for the inside or the front of a holiday card!)

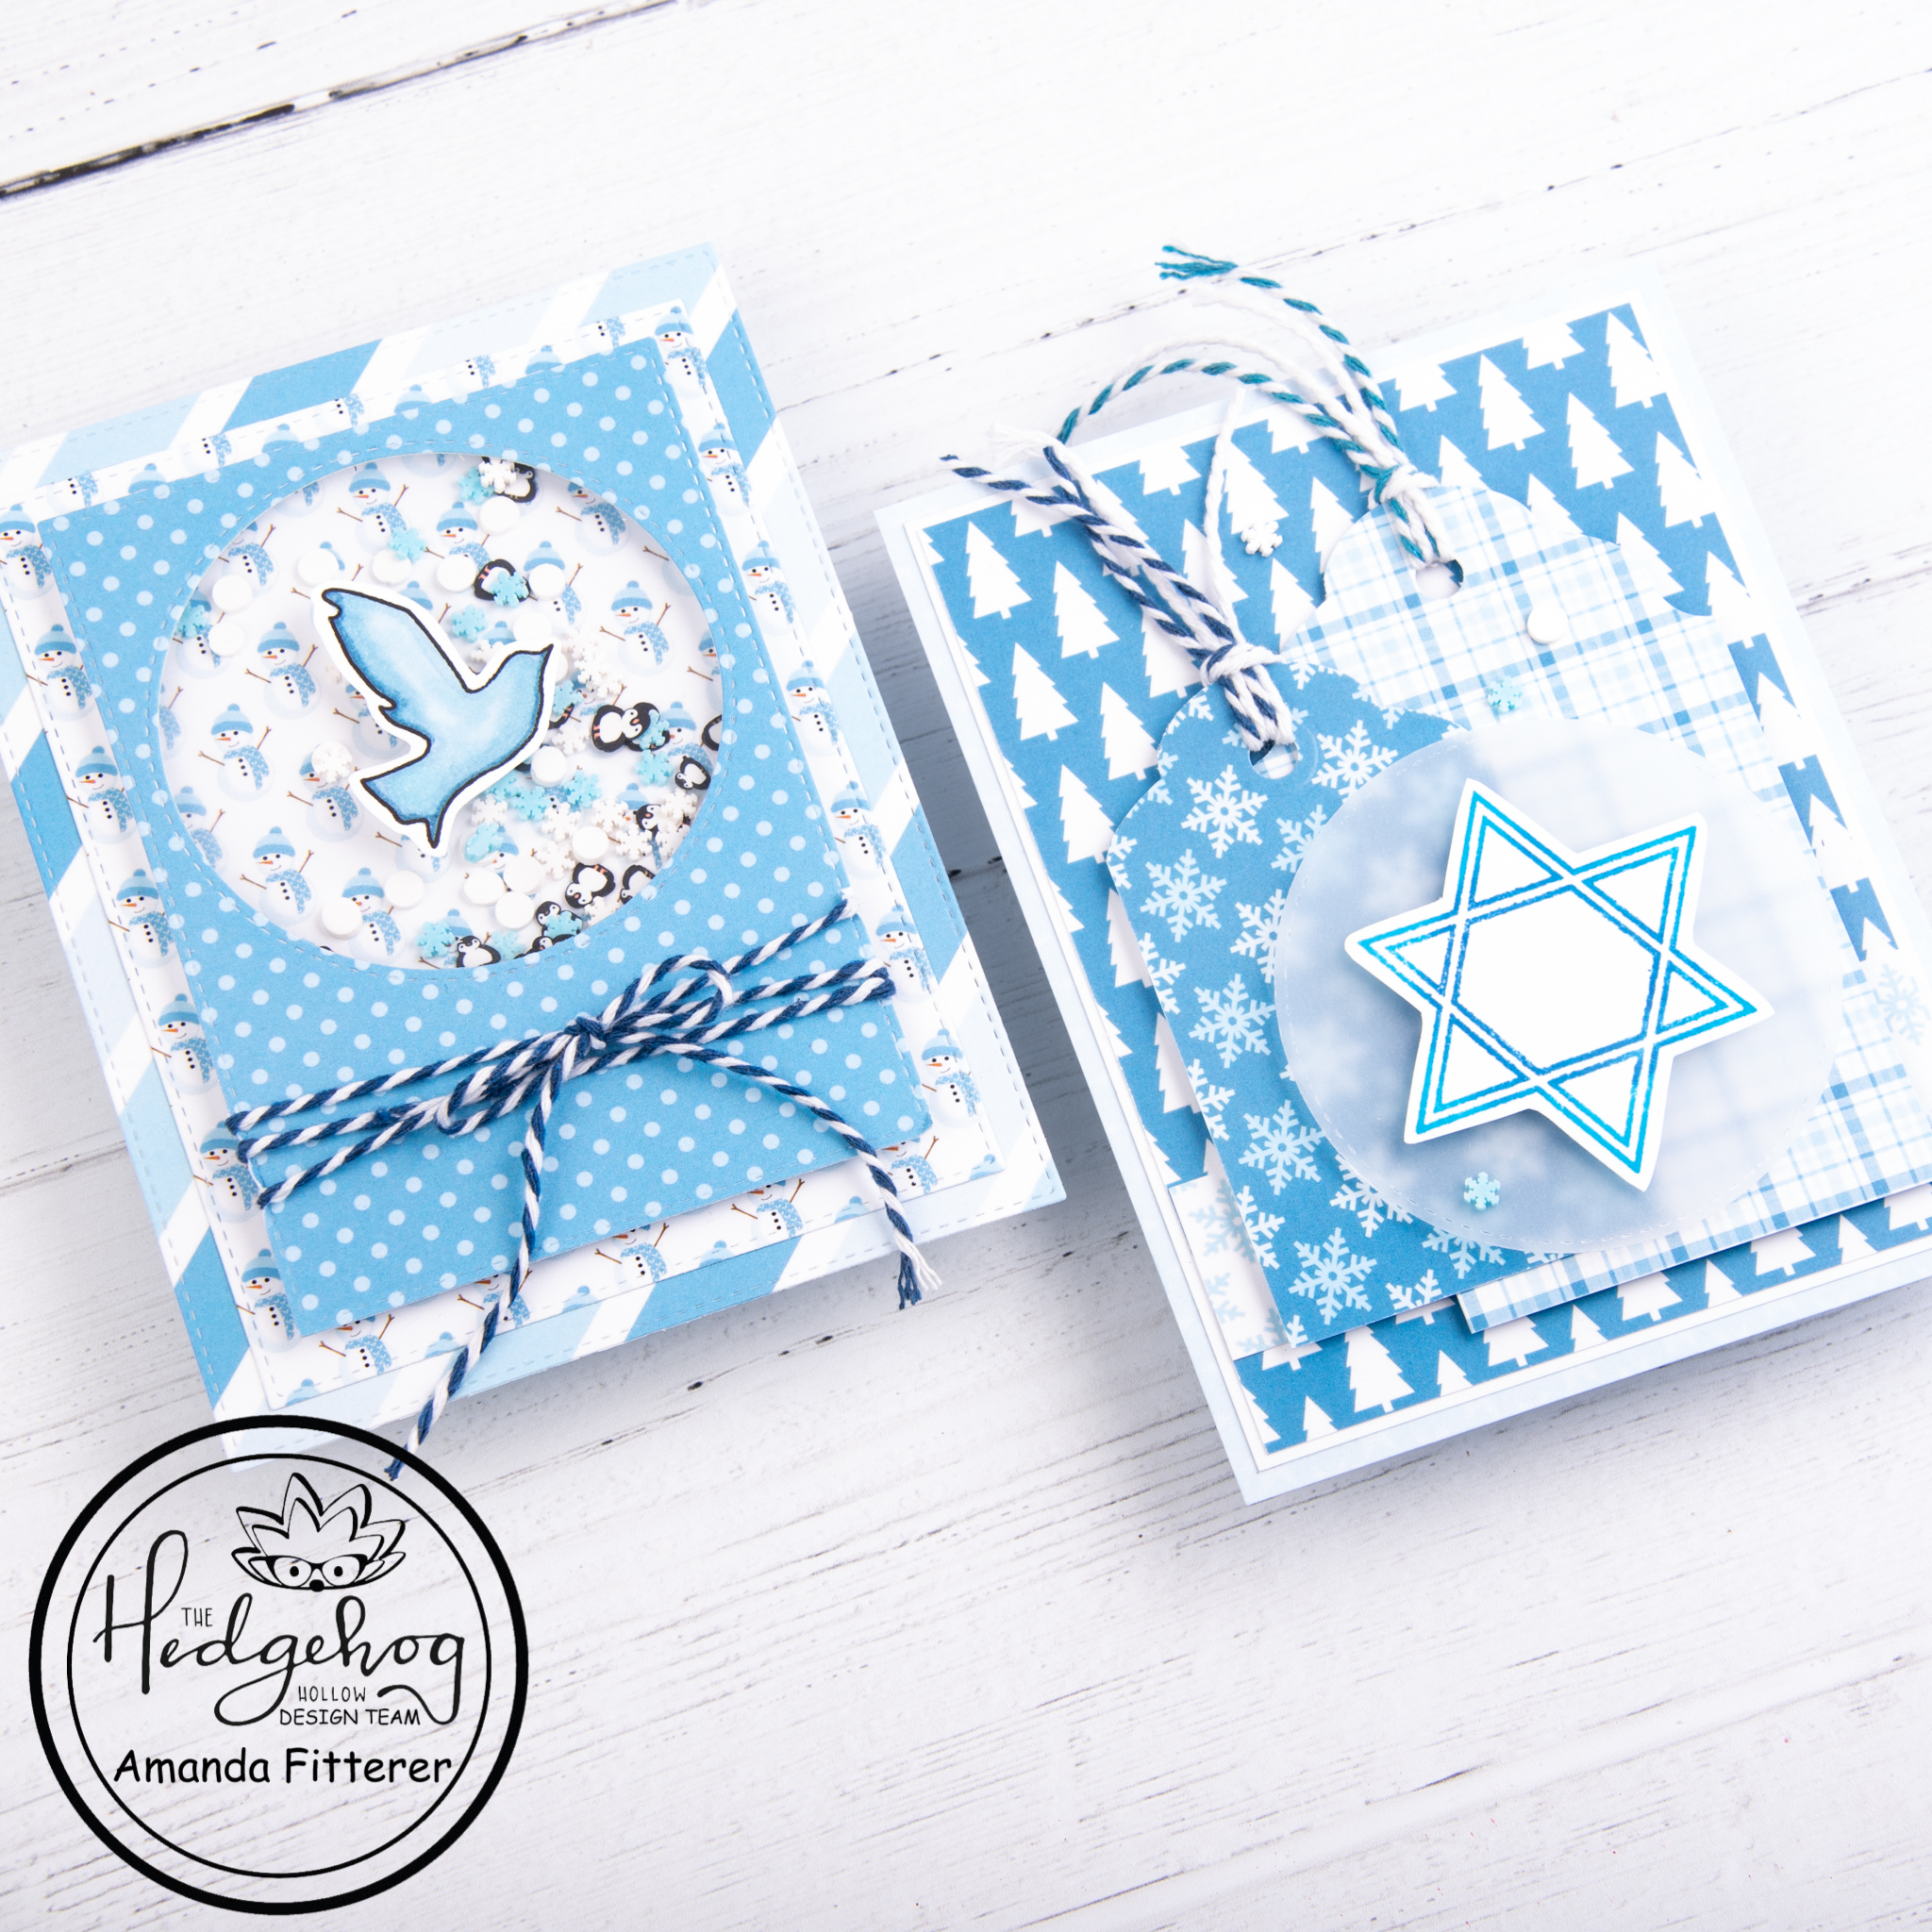
You’ll see I also added a few snowflakes inked up with Catherine Pooler Cummerbund ink.  I borrowed these from the Snowmen in Sweaters Stamps.  Of course, I needed to add a few sequins as well – no card is complete without them!

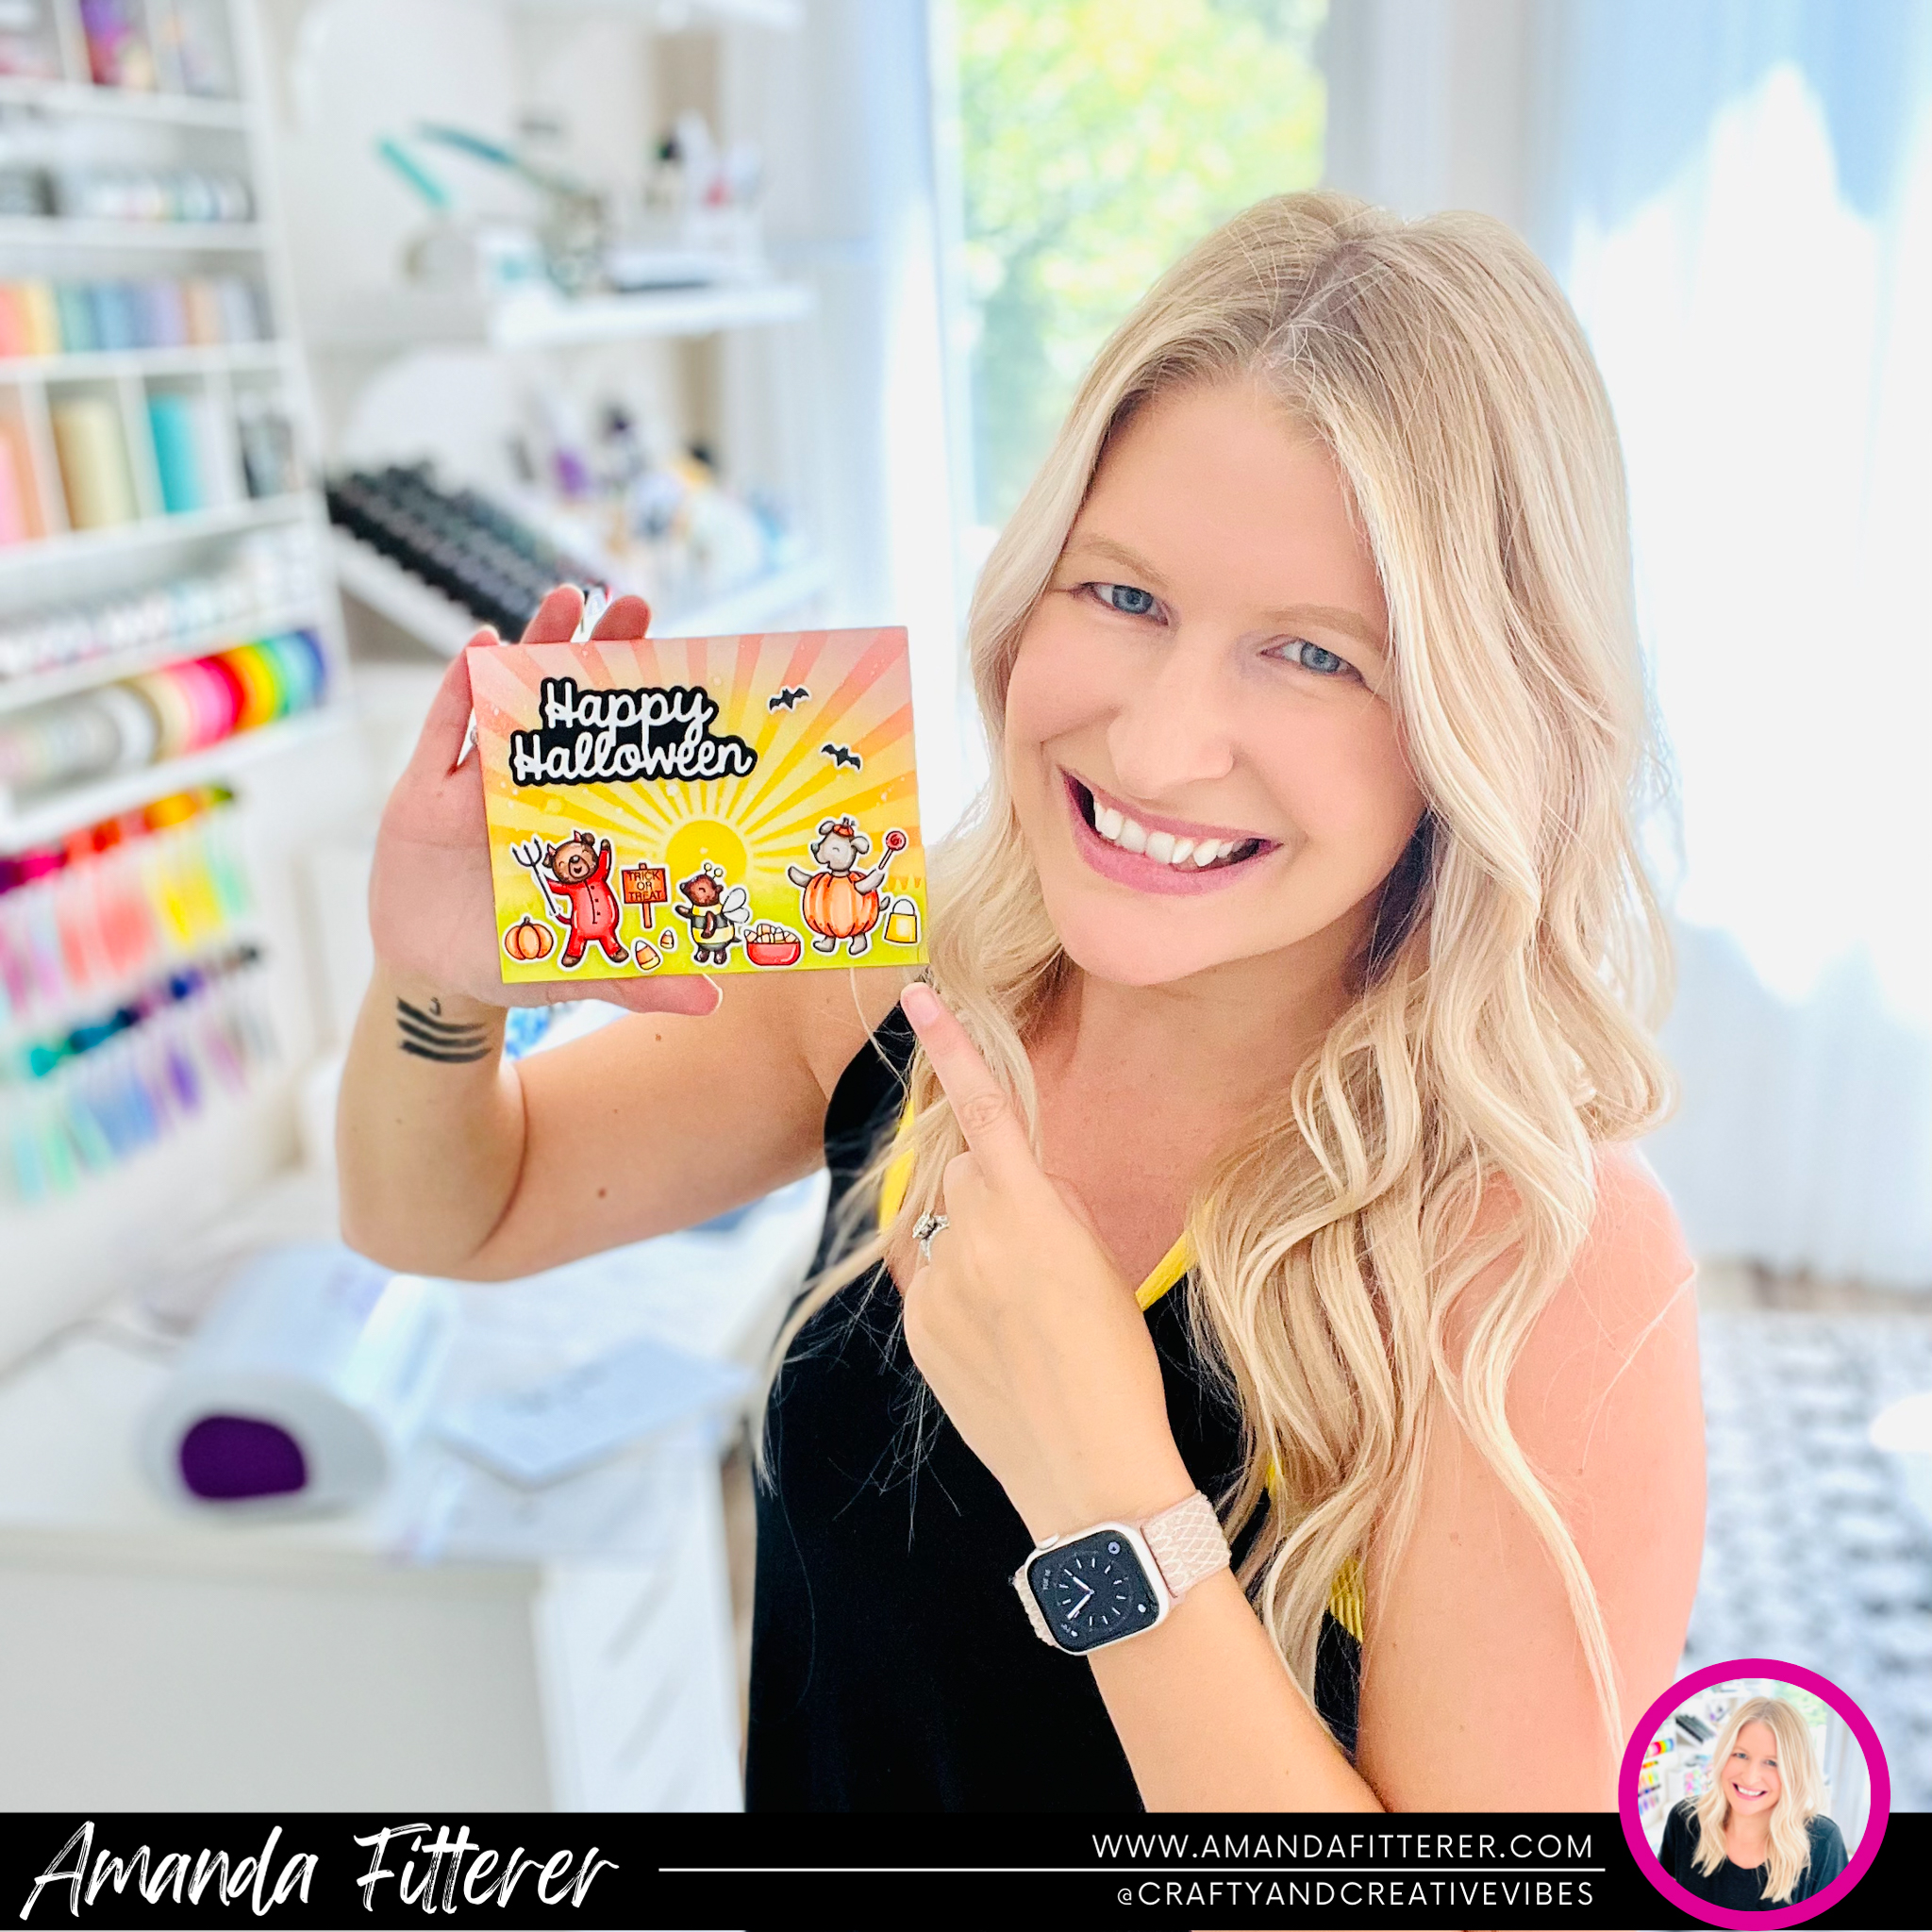
That’s my adorable holiday card to share with you today!!  I  hope you enjoyed it and I hope you find some time to get crafty today!


Thanks for stopping by my blog today! I hope the rest of your week is amazing! Xx, Amanda

Thanks for using my affiliate links! You all are the BEST! Using an affiliate link in this post above or down below costs you nothing, but it gives me a teeny percentage of your sale to buy more crafty goodies to continue to share card tutorials with YOU! So, thank YOU! Xx, Amanda

Scrapbook.com Affiliate Link | Catherine Pooler Affiliate Link | Become a Catherine Pooler StampNation member

👇🏻👇🏻 Subscribe 👇🏻👇🏻 to be alerted of new posts by yours truly!

Xx, Amanda

Shop Scrapbook.com dickblick.com
Posted on Leave a comment

Twiddler’s Nook Spooktacular Instagram Hop

Hey guys! I wanted to share how I put together this shaker card for the Twiddler’s Nook Spooktacular Instagram Hop! To win, you’ll have to head to the Hop on Instagram, but definitely scroll down to see how to make this card and all the awesome supplies I used!!

I used the Heffy Doodle Stitched Birthday Trio Dies with a piece of white cardstock. I then created 3 “scenes” with the 3 cut out pieces. On the top one, I blended Catherine Pooler’s Flirty Fuchsia and Glam inks. I also added some stars using a gold gel pen and the Starfall Stencil. I used Bellini and Mandarin Spice for the middle one. I added a background using the Sleepy Hollow Stencil. The bottom one is blended with Melon Ice and Garden Party and the Sleepy Hollow Stencil.

Next, I stamped my images from the Let’s Hang Out Stamp Set. I colored them with Copic markers and then cut them out with the coordinating dies.

I used the magnets from my White Glass Magnetic Craft Mat to hold my card base in place while I glued the 3 “scenes” down.

Now, I’m ready to create the shaker portion of the card. I used double sided tape on the back of the frame. Then, I cut down a piece of acetate to fit behind the frame and adhered it.

Then, I added 3D Foam Tape all around the frame.

Now for the super fun part!! Adding shaker mixes! I kept each section separate with the foam tape, so I wanted to use different mixes for each section. On the top, we have the Twiddler’s Nook Burning Embers Embellishment Mix. The middle one contains a mix of the Happy Jacks and the Mulan Princess Rings. The bottom is the Tiana Princess Rings.

Once I added my frame to the top, I added all my cute stamped images to the front of the card.

Just take a look at these embellishments up close!

My favorite craft essentials:
Heffy Doodle Mini Die Cutting Machine
* MISTI
Smart Craft Glue
*  Petal Pink Gemini Jr. Die Cutting Machine
* 3D Foam Squares
* 3D Foam Tape
*Pre-scored Card Base
* Catherine Pooler Inks
* Catherine Pooler Blending Brushes

* White Glass Magnetic Craft Mat (Use code AMANDA20 for 20% off your order!)

Don’t forget: If you’re a Catherine Pooler StampNation member, you get EARLY ACCESS to every new release (plus SOOO many other benefits)! Sign up now! It’s worth it!

👇🏻👇🏻 Subscribe 👇🏻👇🏻 to be alerted of new posts by yours truly!

Xx, Amanda

Shop Scrapbook.com dickblick.com
Posted on 7 Comments

Pear Blossom Press and Heffy Doodle Collaboration Blog Hop

Hey friends!  Today, we’re kicking off a CRAFTY Collaboration Blog Hop with Pear Blossom Press and Heffy Doodle !  Come hop along with us and see some awesome light-up cards!  Plus, each company will be giving away £20/$25 PRIZES!  All you have to do to be entered to win is to leave a comment at each stop along our Hop Lineup before May 29th at 11:59 PM EDT.  Winners will be announced on the Pear Blossom Press & Heffy Doodle Blogs on 5.31.24! Scroll down for the Blog Hop Lineup!

To create this card, I used the Man Cave Paper Pad with the Imperial Storyboard Backdrop Die.

On a plain piece of white cardstock, I used some Heffy Memo Tape to mask off the top half of the card. I ink blended Catherine Pooler’s Wintergreen ink. Then, I removed the Heffy Memo Tape and ink blended the bottom half of the card. I stamped my sentiments – one from the Koality Hugs stamp set and one from the PRESS Stamp and Die Bundle.

I also grabbed my “Hey” Heffy Cuts die and my Catherine Pooler Coral Cabana and Do-Si-Do inks. I cut one of each color.

Next, I stamped all of my images from the Koality Hugs stamp set and colored them with Copic markers. Then, I die cut them out using the coordinating dies.

Now, I can make the card light up! I poked a hole through my koala where I wanted him to light up. Then, I placed him on the card where he’ll chill permanently. I, then, made a mark where the light should go.

Then, I used double sided tape to adhere my Pear Blossom Press One Light where my pencil mark was. Then, I used the World’s Best Foam Tape all over the card base. This tape is the same depth as the EZ-Lights battery component. (This will keep the light from sticking out.)

Then, I assembled the rest of the card using liquid glue and 3D foam squares.

Blog Hop Lineup:

Pear Blossom Press 

April Leithner

Amanda Fitterer

Kavya N

Natasha Davies

Sylvie

Cassie Trask

Heffy Doodle

My favorite craft essentials:
Heffy Doodle Mini Die Cutting Machine
* MISTI
Smart Craft Glue
*  Petal Pink Gemini Jr. Die Cutting Machine
* 3D Foam Squares
* 3D Foam Tape
*Pre-scored Card Base
* Catherine Pooler Inks
* Catherine Pooler Blending Brushes

* White Glass Magnetic Craft Mat (Use code AMANDA20 for 20% off your order!)

Don’t forget: If you’re a Catherine Pooler StampNation member, you get EARLY ACCESS to every new release (plus SOOO many other benefits)! Sign up now! It’s worth it!

👇🏻👇🏻 Subscribe 👇🏻👇🏻 to be alerted of new posts by yours truly!

Xx, Amanda

Shop Scrapbook.com dickblick.com
Posted on 30 Comments

Alex Syberia Designs November Collection Blog Hop & Giveaway

Hello and welcome to the Alex Syberia Designs November Release Blog Hop! I hope you’re getting lots of inspiration from all the Designers! The New Release is available now!!

To make this card, I made this super cool background using the NEW Snowflake Petals Cover Die. I simply cut the die out of white cardstock and glued it to an A2 card base.

My adorable little mice are from the new Merry Christmice Stamp Set. And those gorgeous flowers are from the new Midnight Blooms Stamp Set. You can get the coordinating Midnight Blooms Layering Stencil Set to easily ink blend the flower, however, I colored all of my images with Copic markers.

To create my sentiment, I stamped it on black cardstock using my Wow! Embossing Glue Pad. Then, I applied White Opaque Embossing Powder on it. I melted the powder using my favorite heat gun. I cut it out using the coordinating die!

Here’s more info about the Blog Hop:

Alex Syberia Designs is giving away a £85 ($100) gift certificate to 1 lucky winner and a £15 ($18) gift card to 5 winners.

Open internationally. All 6 winners will be drawn from the entrants that have played along with this Blog hop by midnight BST November 26th, 2023. Winners will be announced on the Alex Syberia Designs blog ‘Giveaway Winners’ page on November 27th, 2023.

If you want to start at the beginning of the Hop, you can start on the Alex Syberia Designs Blog!

Blog Hop Order:
Alex Syberia Designs
Amanda <<- That’s ME!
Anne <<– Go HERE next!
Bobbi
Bonnie
Brenda
Colleen
Emelie
Emily
Erica
Hannelie
Ilda
Jo
Kavya
Lien
Lisa
Nicoletta
Sandi
Sheila
Sylvie
Virginia

I hope you have a great time Hopping along!!

👇🏻👇🏻 Subscribe 👇🏻👇🏻 to be alerted of new posts by yours truly!

Thanks for using my affiliate links! You all are the BEST! Using an affiliate link in this post above or down below costs you nothing, but it gives me a teeny percentage of your sale to buy more crafty goodies to continue to share card tutorials with YOU! So, thank YOU! Xx, Amanda

Posted on Leave a comment

Catherine Pooler’s NEW Global Adventure Pt. Tres!

Hey friends! Have you heard the good news?! There’s a new release coming.. and boy, is this a FUN one!! StampNation Members can shop the new collection EARLY on Tues, March 21st! General ordering opens on Weds, March 22nd!

Shop now:

All the cards I share in the next few weeks will be using the In the Amazon Bundle and the Part Tres Extras Bundle:
Jungle Amigos Stamp Set
Jungle Amigos Dies
Peruvian Market Patterned Paper
Lima Sequin Mix
Deepest Darkest Peru Cover Plate
Scallop Square Dies
Tickets & Tape Dies
Just Right Duos Sentiments Stamp Set

I started by die cutting the Peruvian Market Patterned Paper with the Scallop Square Dies. Next, I stamped my images from the Jungle Amigos Stamp Set and then colored them with Copic alcohol markers. Once I was finished coloring, I cut them using the Jungle Amigos Dies.

For my sentiment, I’ve used the Wow! Embossing Glue Pad with Wow! White Embossing Powder on black cardstock. Then, I die cut it using the new Tickets & Tape Dies.

I propped my patterned paper up using 3D foam tape to create depth between the layers. Then, I attached my card panel to a pre-scored card base. I propped all of my cute critters and flowers up using my favorite 3D foam squares.

The final step was to add some gorgeous sequins from the Lima Sequin Mix! I always use the Bearly Arts Precision Glue when working with small embellishments.

Don’t forget: If you’re a Catherine Pooler StampNation member, you get EARLY ACCESS to every new release (plus SOOO many other benefits)! Sign up now! It’s worth it!

Thanks for using my affiliate links! You all are the BEST! Using an affiliate link in this post above or down below costs you nothing, but it gives me a teeny percentage of your sale to buy more crafty goodies to continue to share card tutorials with YOU! So, thank YOU! Xx, Amanda

Scrapbook.com Affiliate Link | Catherine Pooler Affiliate Link | Become a Catherine Pooler StampNation member

👇🏻👇🏻 Subscribe 👇🏻👇🏻 to be alerted of new posts by yours truly!

Xx, Amanda

Shop Scrapbook.com dickblick.com
Posted on Leave a comment

My Favorite Halloween Cards

Hello crafty friends! It’s only 20 days until Halloween! I thought I’d share my favorite spooky cards with you today!

First off – who doesn’t LOVE a glow-in-the-dark card?! I know I do! For this card, I used the glow-in-dark-embossing powder on the stars and the spider webs!

Buy the products used:


Next up, we have another scene using the same products, but this one is a shaker card! For the background, I used the Heffy Doodle Brick-by-Brick Stencil! For my shaker, I used the Hocus Pocus Sparkle Mix.

Next up, I just LOOOVE these cuties from the Maker Forte Magical Brew Stamp Set! Are they just so cute colored in with alcohol markers or what?! Plus, that stunning Stargazer Background!! Perfection!


Next, we have some of my favorites from the Catherine Pooler Sweet-n-Spooky Collection! This bundle is ON SALE and has already went out of stock once! Don’t miss out on the cutest Halloween papers, stamps, and dies!


We can’t have a Halloween post without some cute critters wearing costumes!! Check out these Heffy Doodle Costume Critters! I love how adorable they look colored in with OLO markers! I paired these critters with the Sunburst Stencil to create a focal point!


Oh and I CANNOT forget this stunning scene! I love mixing and matching stamp sets! For this card, I used the Let’s Hang Out, Costume Critters, and Veggie Patch stamp sets.

Thank you SO much for coming to my blog today! As always, I REALLY appreciate when you use my affiliate links (which can be found throughout my post). It doesn’t cost you anything or affect your order in any way, other than giving me a teeny percentage of your sale! This allows me to continue to buy crafty goodies and share tutorials and cards with you! So THANK YOU! Xx, Amanda

Scrapbook.com Affiliate Link | Catherine Pooler Affiliate Link

Subscribe to be notified of new posts!

Posted on Leave a comment

Holy Cow! You’re Pretty Llamazing!

Hello, crafty friends! I hope your week is off to an amazing start!! If it’s not, hopefully this bright and happy card will cheer you right up!

To make this card, I started by blending my beautiful sky background on a piece of A2 cardstock. I spritzed it with water and added some white paint drops. Next, I used my Stitched Slopey Joe Border Dies and blended them with inks as well.

I just love that the Fence Border Die works with the Slopey Joe Dies! So, I just cut that guy out with white cardstock and didn’t add anything to it.

Next, I cut my pieces from the Boats and Barns Die, including 2 barn structures. I ink blended one of the barn structures very dark red and the other barn a lighter red. I placed my darker one behind to be the “inside” of the barn. The lighter red die cut, I cut out the barn door opening and the window opening and added my other die cut pieces with glue.

Once I had my background all set, I stamped my images from the Llamazing Llamas and Udderly Fabulous Stamp Sets. Then, I colored them with Copic markers and die cut them out with the coordinating dies.

The last step is to assemble the card! I grabbed my Glubert Glue and 3D foam squares and strips and got to work!

That’s it for me today! I hope you enjoyed this post! Enjoy the rest of your week!

Xx, Amanda


Heffy Doodle – Heffy Cuts – Dies – Fence Border
Heffy Doodle - Heffy Cuts - Dies - Boats and Barns Heffy Doodle - Clear Photopolymer Stamps - Llamazing Llamas Heffy Doodle - Clear Photopolymer Stamps - Udderly Fabulous Heffy Doodle - Precision Craft Glue - Glubert Heffy Doodle - Foam Strips - Double Sided - 3mm Deep

Just a note to say that by clicking the links in my blog post, you may be using my affiliate link! This is great for me, because I get a teeny percentage of your sale. And it’s great for you because it doesn’t cost you anything at all and you’re helping a friend!

Shop Scrapbook.com Scrapbook.com's Coupons Page
Posted on Leave a comment

Maker Forte “Winter” Release

Hey crafty friends! The New WINTER Release from Maker Forte is available for purchase now! I have created so many wonderful cards using the new products!

If you use this affiliate link to make your purchase, I’ll get a small percentage back from your order! (Thank you!!)

Check out some of these fun winter cards I made!

If you use this affiliate link to make your purchase, I’ll get a small percentage back from your order! (Thank you for your support!!)

Xx, Amanda

Posted on Leave a comment

There’s Always One Duck!

Hey there crafty friends! Today, I’m sharing a card using the Kinda Cute by Patricia “There’s Always One Duck” digital stamp!

Aren’t these little ducks so sweet?! And the little mischievous one just has my heart!

To make this card, I stamped some images from the Miss Ink Stamps “Rise and Shine” stamp set and the “Punny Farm Pigs” stamp set. Then, I used Copic markers to color the images in.

After my images were colored in completely, I grabbed a sentiment from the Heffy Doodle “Hot Diggity Dog” stamp set and stamped it directly onto my background.

I adhered my ducks using 3D foam adhesives, and voila! Finished!

Thank you so much for stopping by my blog today! I hope you enjoyed my blog post and enjoy the rest of your week!

Posted on Leave a comment

Happy Hanukkah – 2 Quick and Easy Cards

Hello friends and welcome back to The Hedgehog Hollow Blog! It’s Amanda Fitterer back today with some more holiday cards!

The November Subscription Box is available now, but you only have until November 14th to get yours! If you want to see the reveal video, you can find it here. The box is full of lots of goodies, including the double-sided patterned paper that I used for these cards! There’s also a really cool product called WoodUBend that is super fun to play with. If you haven’t seen my video using the product, you can find the post here.

Now onto these beautiful Hanukkah cards!

To create my first card, I used the double-sided patterned paper with Dress My Craft’s Rounded Tag Punch. I tied baker’s twine to each of my tags and popped them up with 3D foam squares. I used Danube Blue and Bahama Blue Memento ink to stamp my image from the “Happy Hanukkah” stamp set. This stamp set is included in the November box and has loads of great images and sentiments. I cut a circle of vellum to frame my Star of David. I used 3D foam squares to adhere the Star and vellum to the front of the card. To finish the card off, I placed a few embellishments from Dress My Craft’s Penguins and Snowflakes Mix.

To create my shaker card, I used Stitched Dies and the double-sided patterned paper to create my frames and base. I filled my shaker with Penguin Slices and Penguins and Snowflakes Mix. I tied some baker’s twine to the bottom of the card. I stamped and fussy cut the Dove out from the “Happy Hanukkah” stamp set. I colored the image with B95, B93, and B91. I used 3D foam squares to adhere the image to my card.

And voila! You have 2 quick and easy Hanukkah cards!

Thank you so much for coming by The Hedgehog Hollow blog! It’s almost the weekend! Hang in there! I’ll have one more post on the November box on November 28th, so keep an eye out!

Xoxo, Amanda

Posted on Leave a comment

More Halloween Kids!

More kids in Halloween costumes?! Of course! I love seeing kids dress up for Halloween!! These kids by Kinda Cute by Patricia Alvarez are just so sweet!

The images I used for this card can be found here:
Super Hero Girl
Mummy Boy
Halloween Fillers

Here are the Copic markers I used to color the images:

Thank you so much for stopping by today!
Xoxo, Amanda

Posted on Leave a comment

Happy Fall!

Hello everyone! I hope you’re all having a great week so far!

I am loving this card I made using Pink and Main’s Happy Fall stamp and die set! It is so simple, but yet so elegant! I love the idea of taking a non-traditional Fall color and using it to make a card that really stands out!

Plus, I used a few of Maker Forte’s newest gems: Kaleidoscope Powder – Interference – Nebula and Easy Watercolors by Hedgehog Hollow.

To make this card, I’m starting with the Kaleidoscope Powder – Interference – Nebula and a water brush. Putting a small puddle of water on my workspace, I am mixing in a bit of the powder. Using my water brush, I can mix it into a watercolor medium.

On a piece of watercolor cardstock, I am taking the largest of the Easy Watercolors by Hedgehog Hollow stamps and am brushing on my watercolor mixture straight onto my clear stamp. Once it’s completely covered, I can stamp the image. I am going to repeat this process twice to get a better coverage.

After waiting for that to dry, I am placing some leaf stamps from the Pink and Main’s Happy Fall stamp set on top of my watercolor. I am using the Color Hive Clear Embossing Glue Ink Pad to create a sticky image of the leaves. Then, I can apply my gold embossing powder to my images and melt it with my heat tool.

I’m ready to go ahead and stamp my adorable bear from the Pink and Main’s Happy Fall stamp set! (This bear is definitely the cutest bear EVER!) I am going to stamp him with Hero Arts Intensified Black ink and color him with Copic markers.

I cut my watercolor cardstock down to 3.75″ x 5″. Behind that, I’m layering a piece of black cardstock and a piece of gold cardstock.

The last thing I need to do is create my sentiment! I am using the same gold cardstock as I used for my base and cutting out the “Happy Fall” banner from the Pink and Main Blessings Slimline Die. I saved the little insides of the A’s and P’s to glue in after I get my sentiment down!

Next, I am ready to glue everything down and use 3D foam squares to adhere my bear!

I’d love it if you left a comment below or on my Instagram page to let me know if you enjoyed this post!

Don’t forget that you have until October 14th to get the October Subscription Box! It’s filled with some really fun stuff! If you didn’t get a chance to see the goodies, you can watch the video here! Or, if you’re already signed up for the subscription, you should be getting your box soon! Yipee!!

I hope you all enjoy the rest of your week! I’ll be back next Monday with another fun project!! I can’t wait! Xoxo, Amanda

Posted on 2 Comments

Papa Bear – Best Dad Ever!

Hey there! I’m so happy you’ve come to my blog to see this adorable card I made using Kinda Cute’s Papa Bear and Baby digital stamp! I think Father’s Day cards can be one of the hardest cards to make. Well, really, any masculine card is difficult in my opinion! But when I saw this digital stamp, I thought it was PERFECT for a dad! I hope you like it!

To make this card, I pulled the digital stamps into Adobe Illustrator and put the trees from the Tree Filler set behind the Bears. I printed them out on 80lb. Neenah Solar White cardstock.

Now, I’m ready to color them! I’m using my Copic markers to color in the trees. For the trunks, I’m using E23, E25, and E29. For the trees, I’m using G07, G05, G28, and G29.

For the bears, I’m using E44 (Papa only), E43, E42, E41, R20 (baby only), E50, E51, and E53. I also am using my white Gelly Roll pen for the baby’s cheeks.

I’m taking a textured towel and soaking a corner of it with Alcohol Blending Solution. Then, I’m carefully dabbing the Papa’s body with it, avoiding his face, the baby, and the trees.

Finally, I’m ready to assemble my card using double sided tape!


Such a simple and fun card to make for Dad! Thanks again for stopping by my blog! I hope you enjoy the rest of your week!

Xoxo, Amanda