Posted on 29 Comments

Heffy Doodle and Newton’s Nook Designs Collaboration Blog Hop

Welcome to the Heffy Doodle and Newton’s Nook Designs Collaboration Blog Hop!
Design Team members from both companies are sharing inspiration using products from both companies! I am super excited to share my card with you!

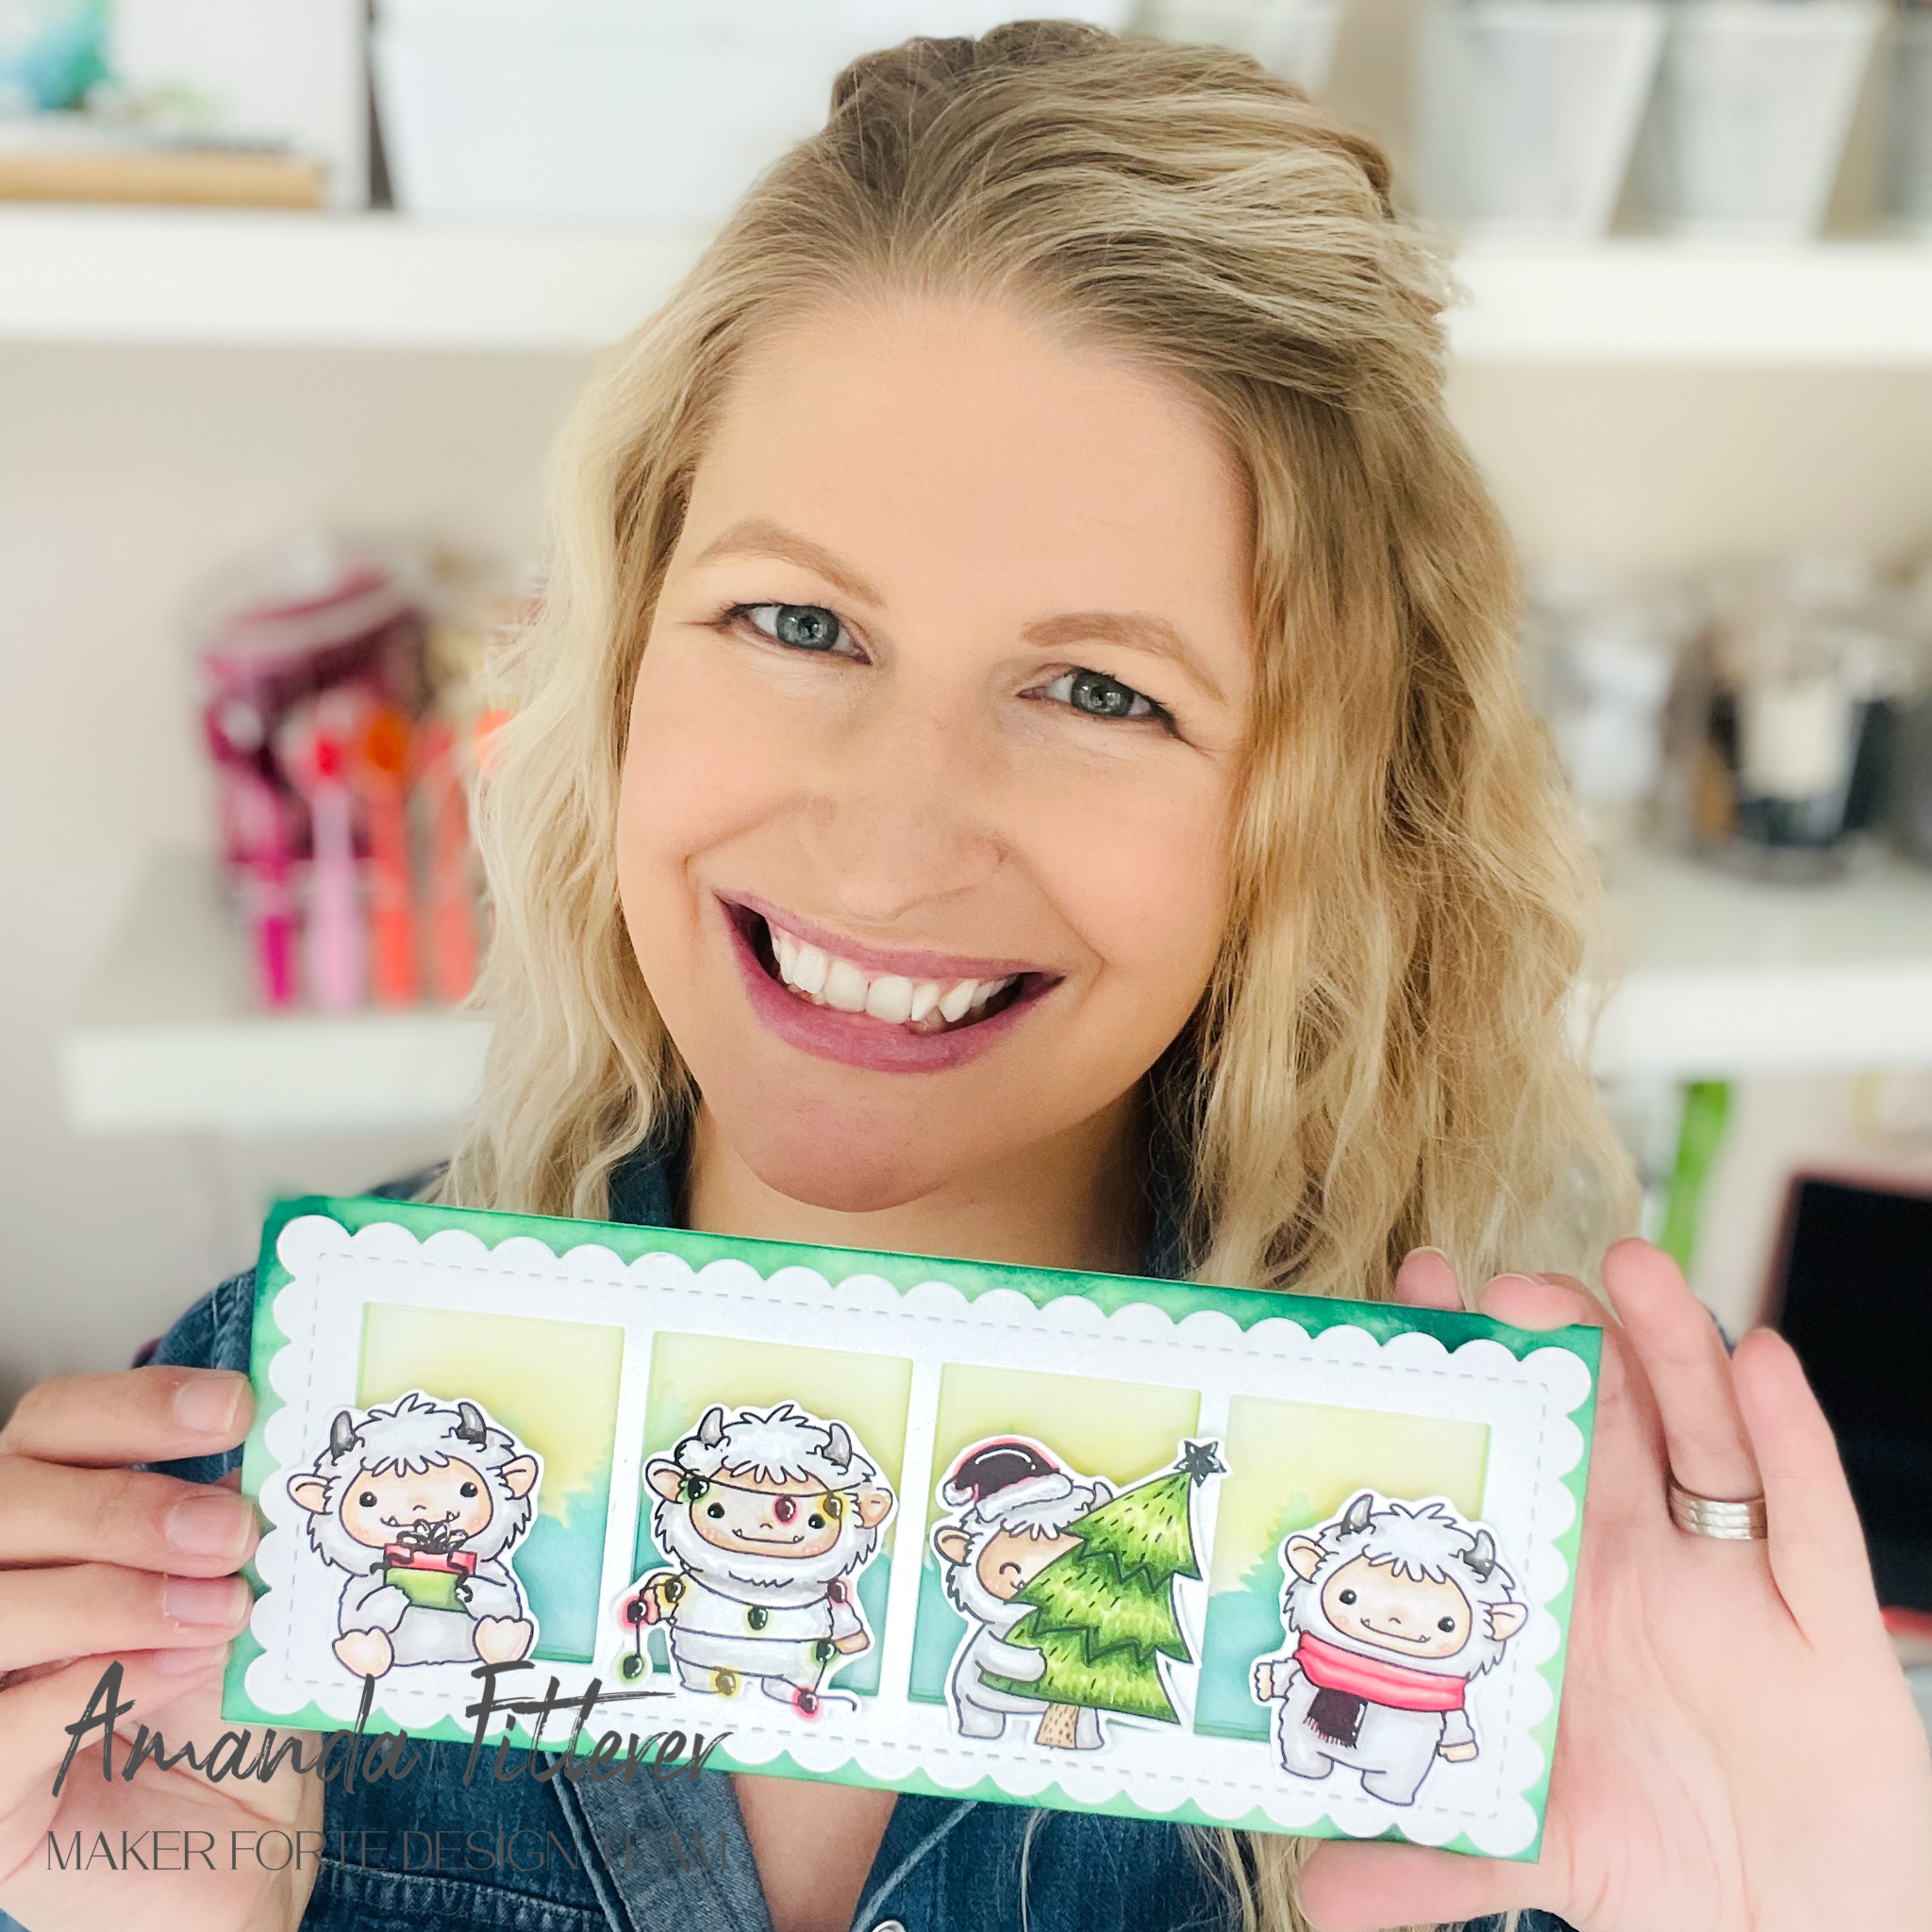
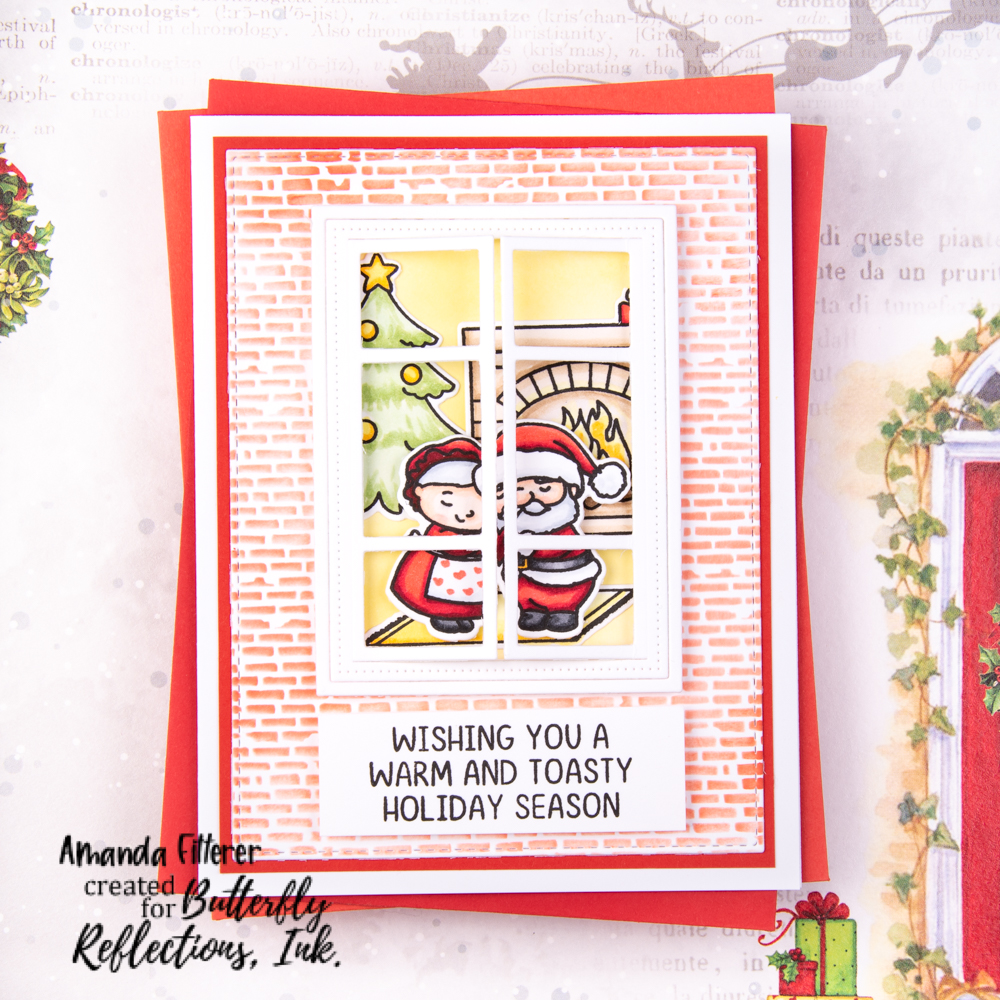
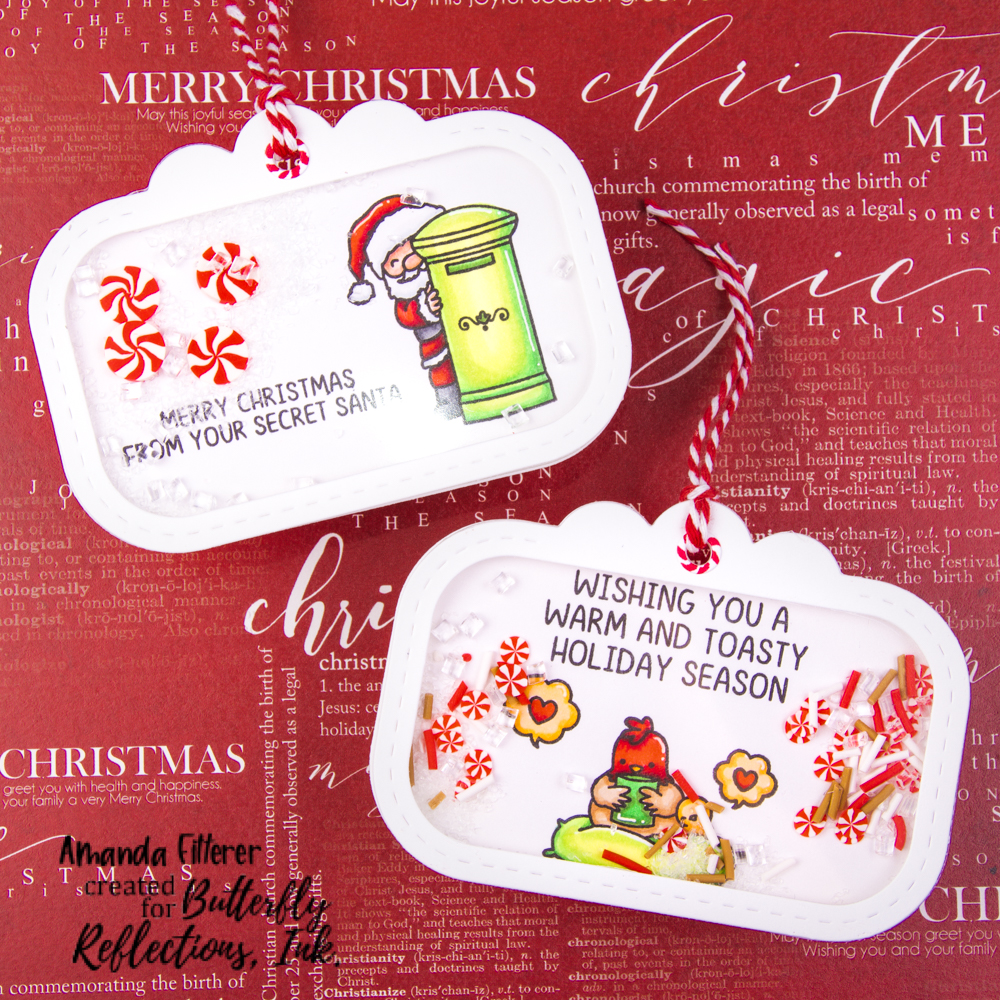
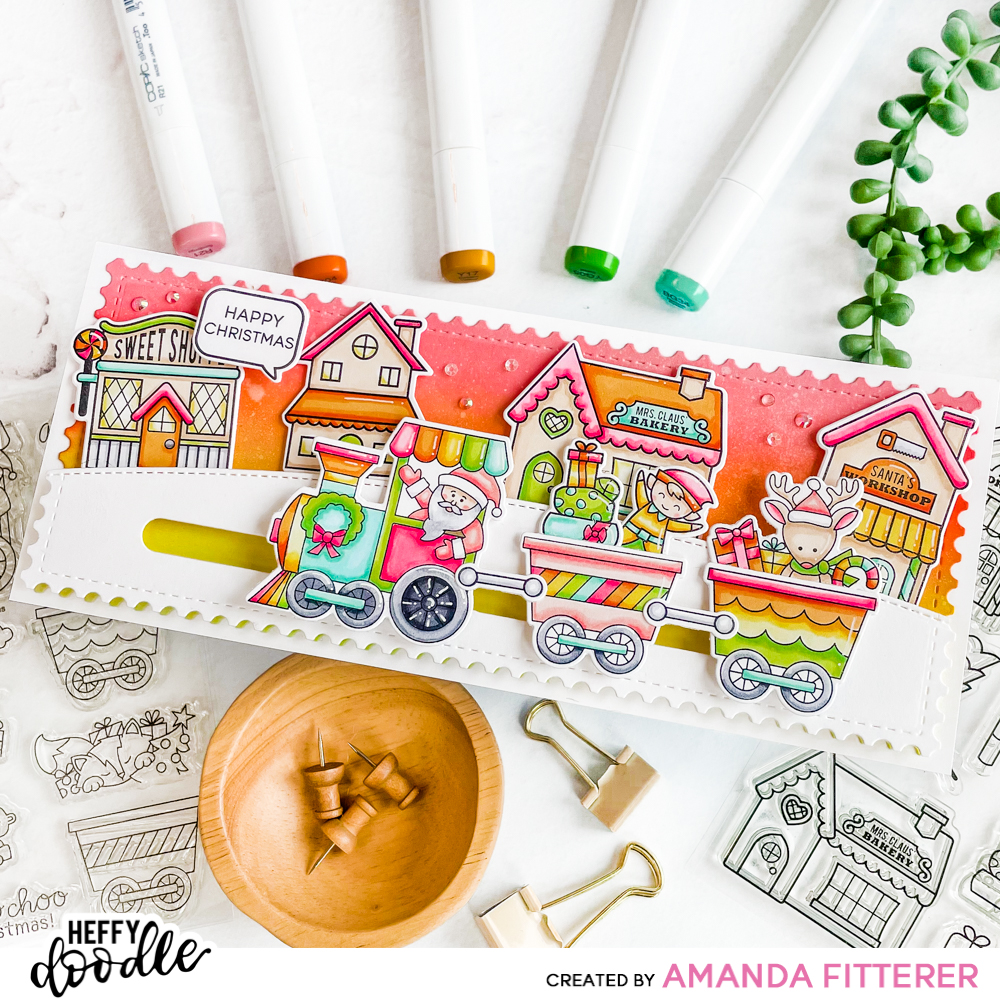
To create this card, I’m starting with the Heffy Doodle Slimline Mini Mails Die and a piece of white cardstock trimmed to slimline size (3.5″x8.5″).

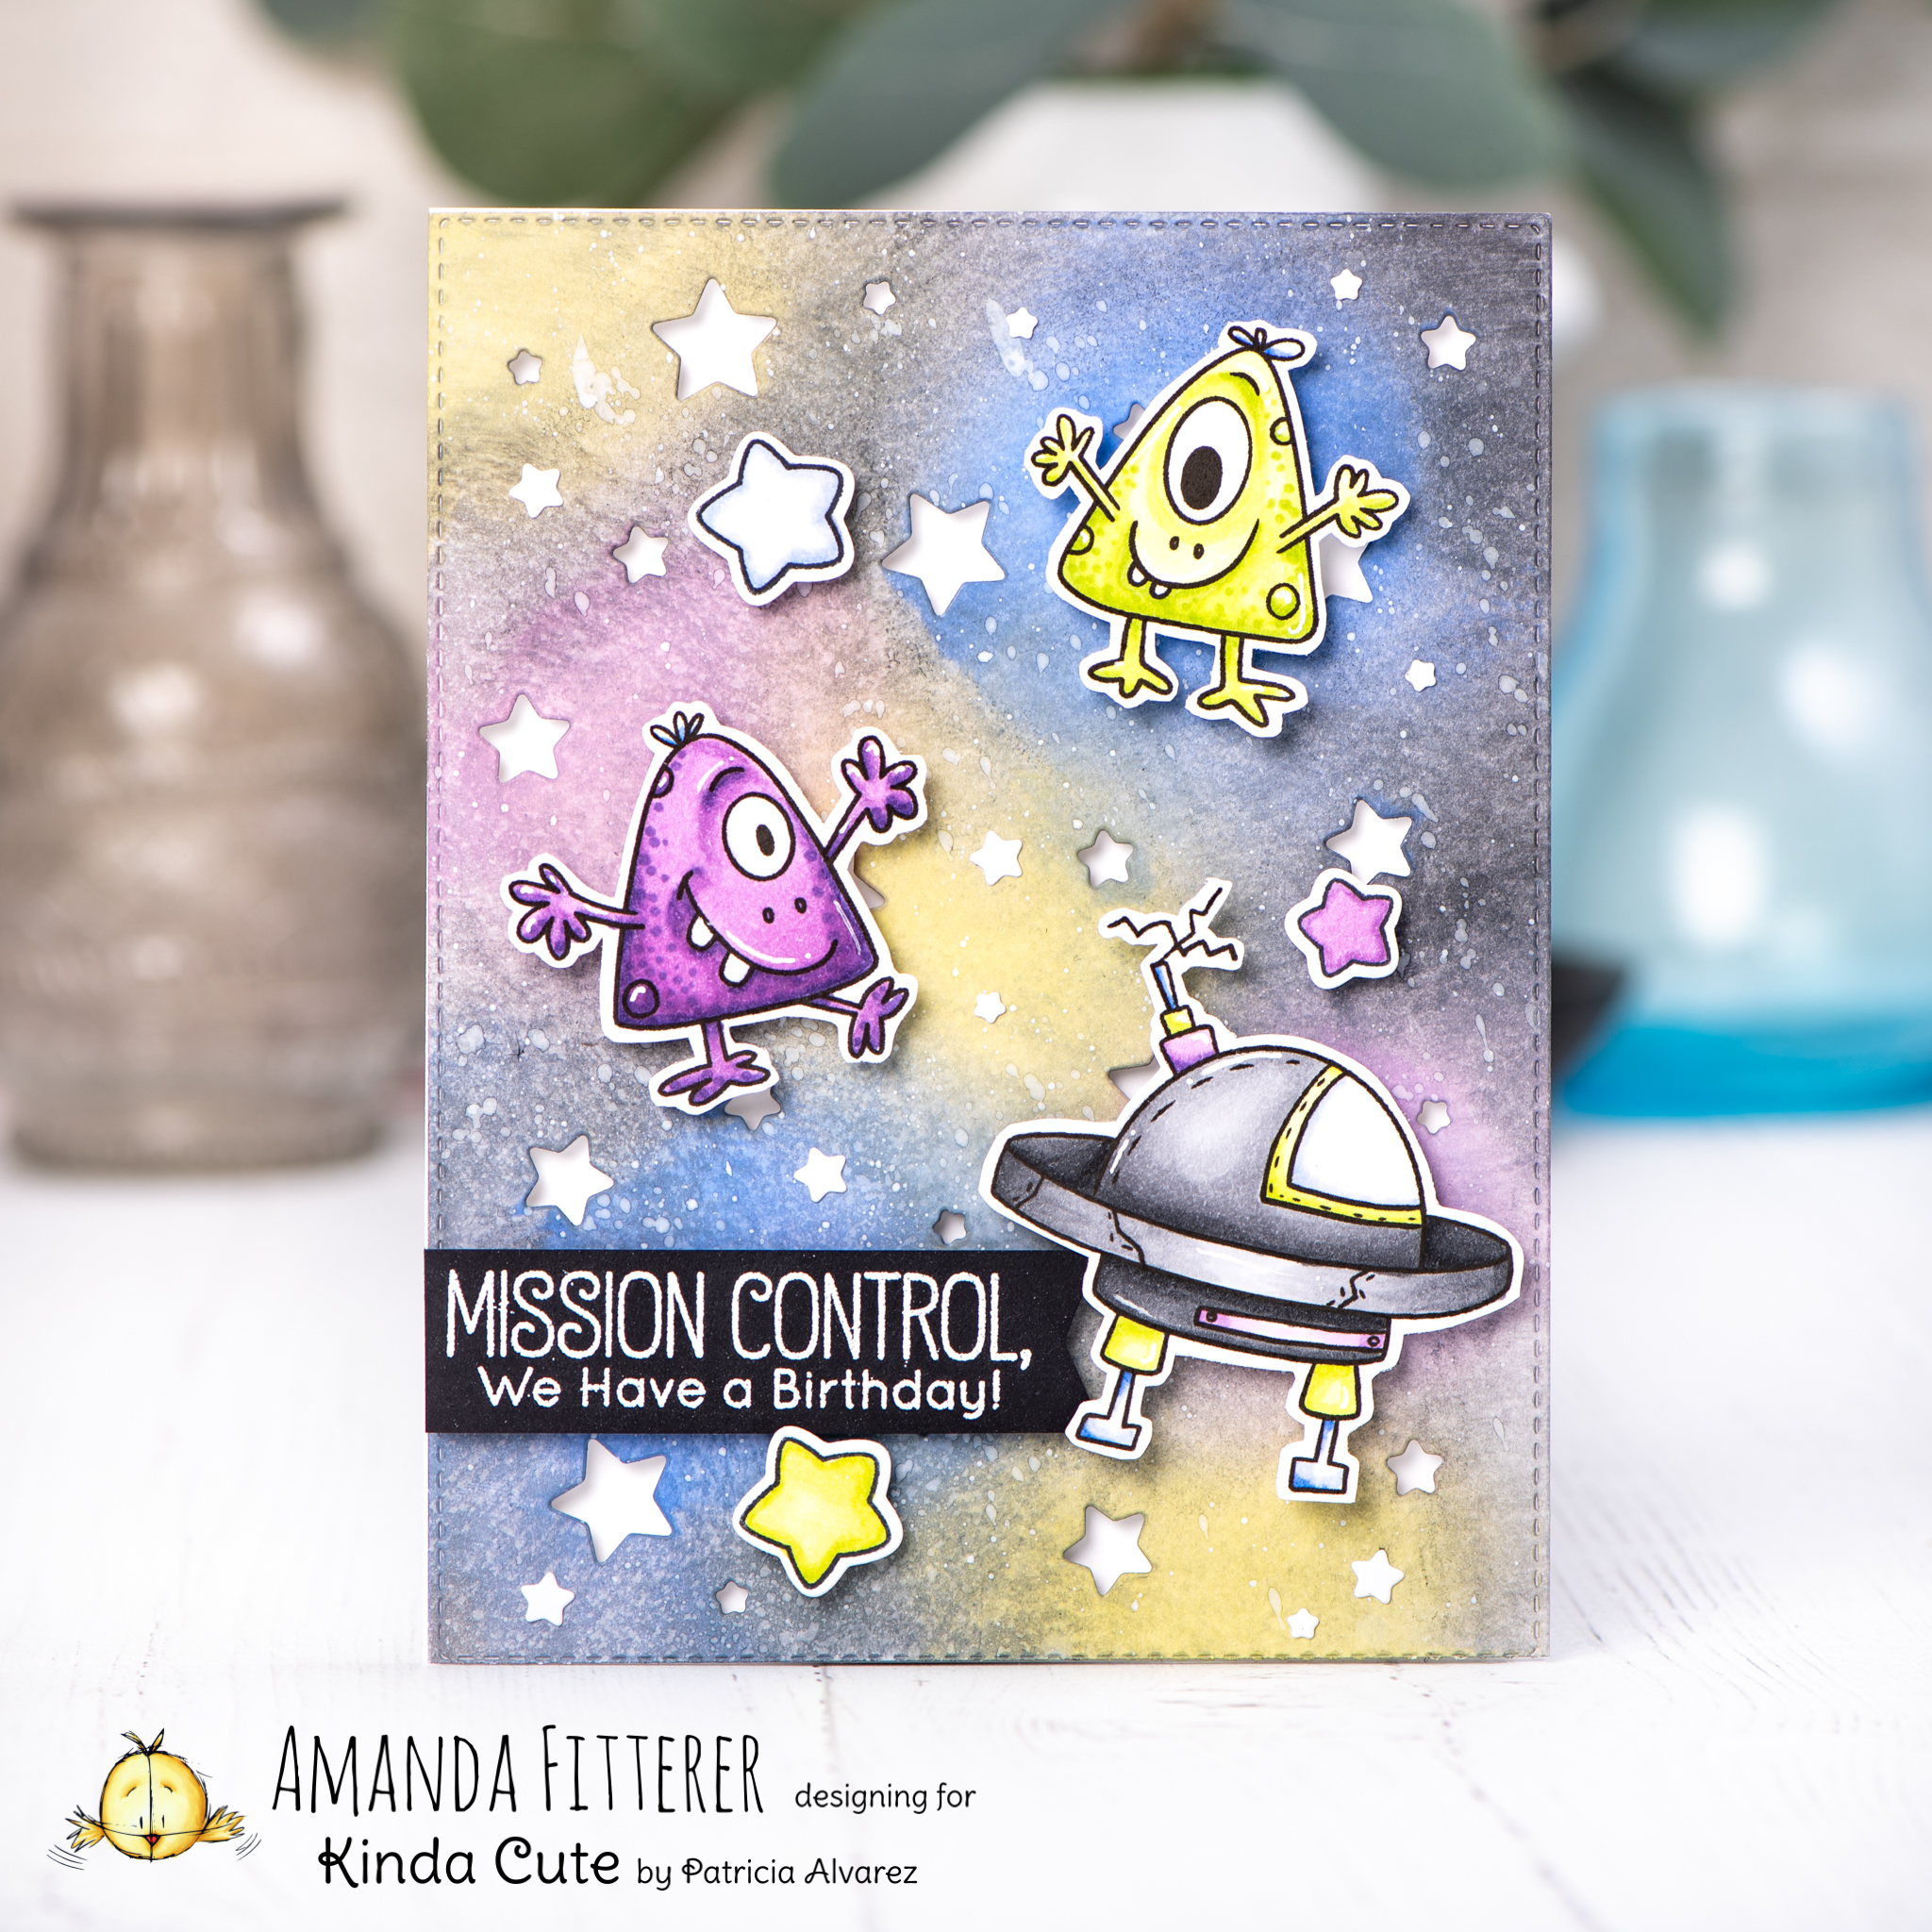
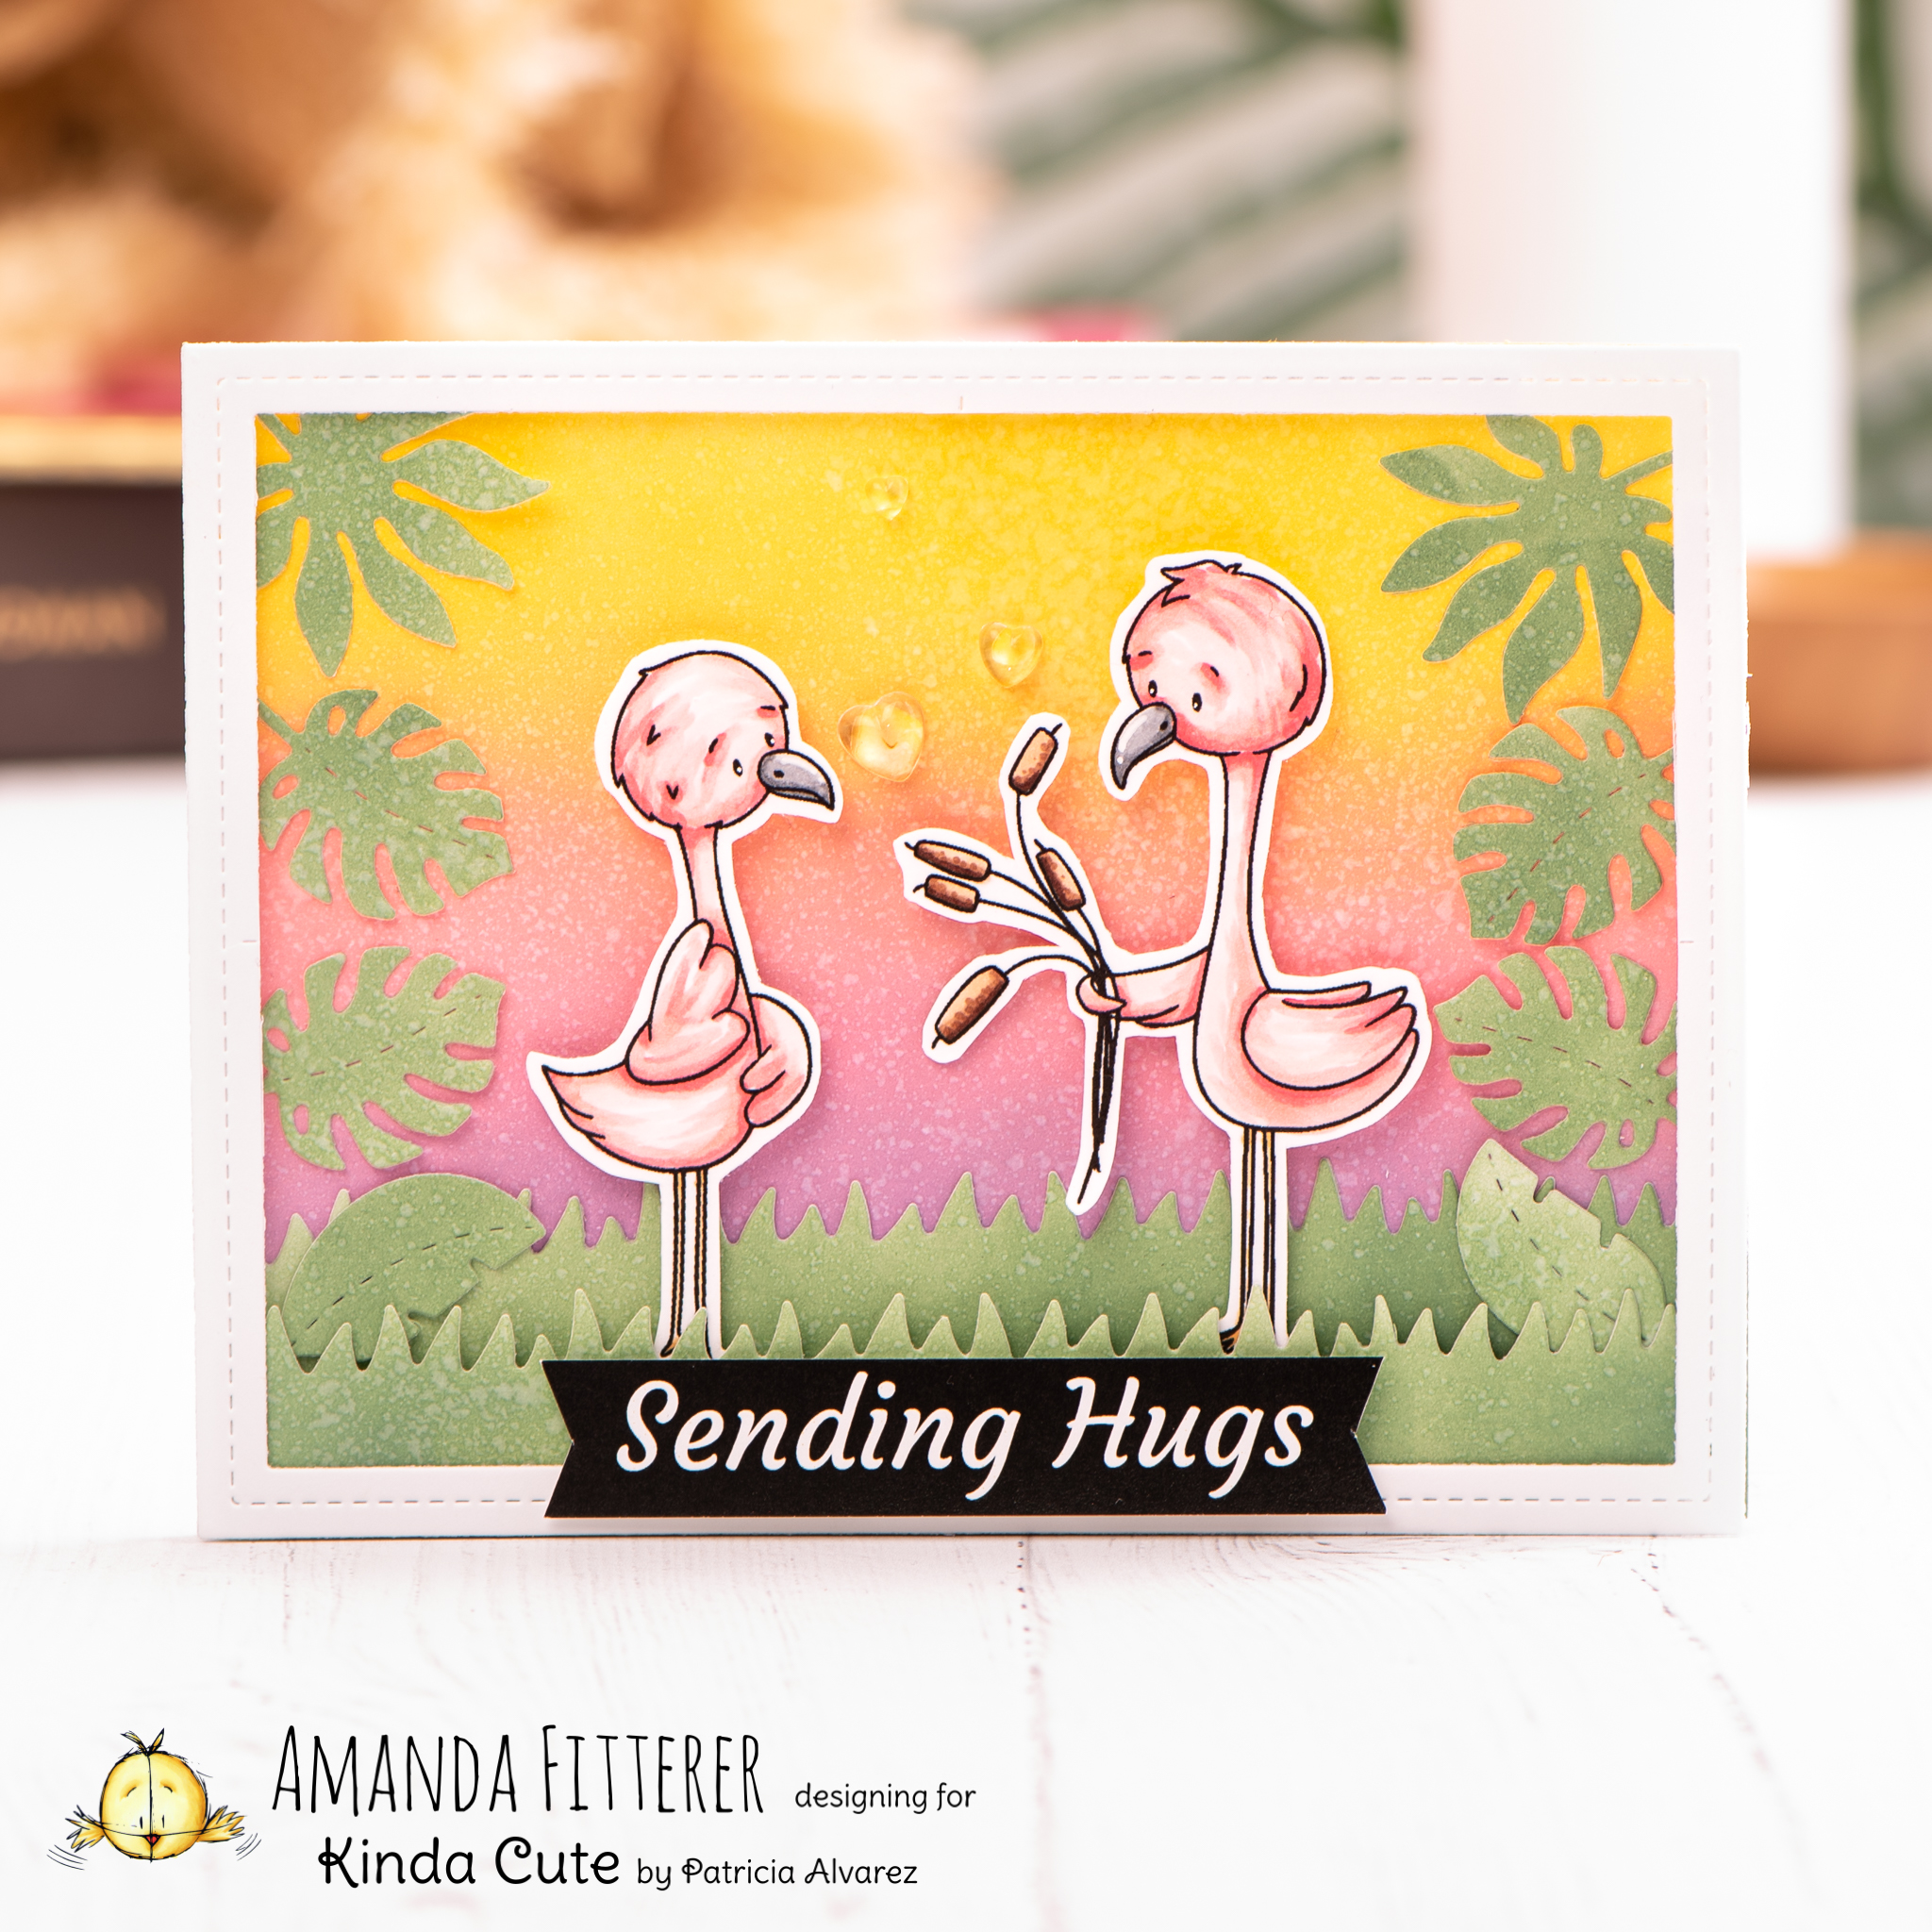
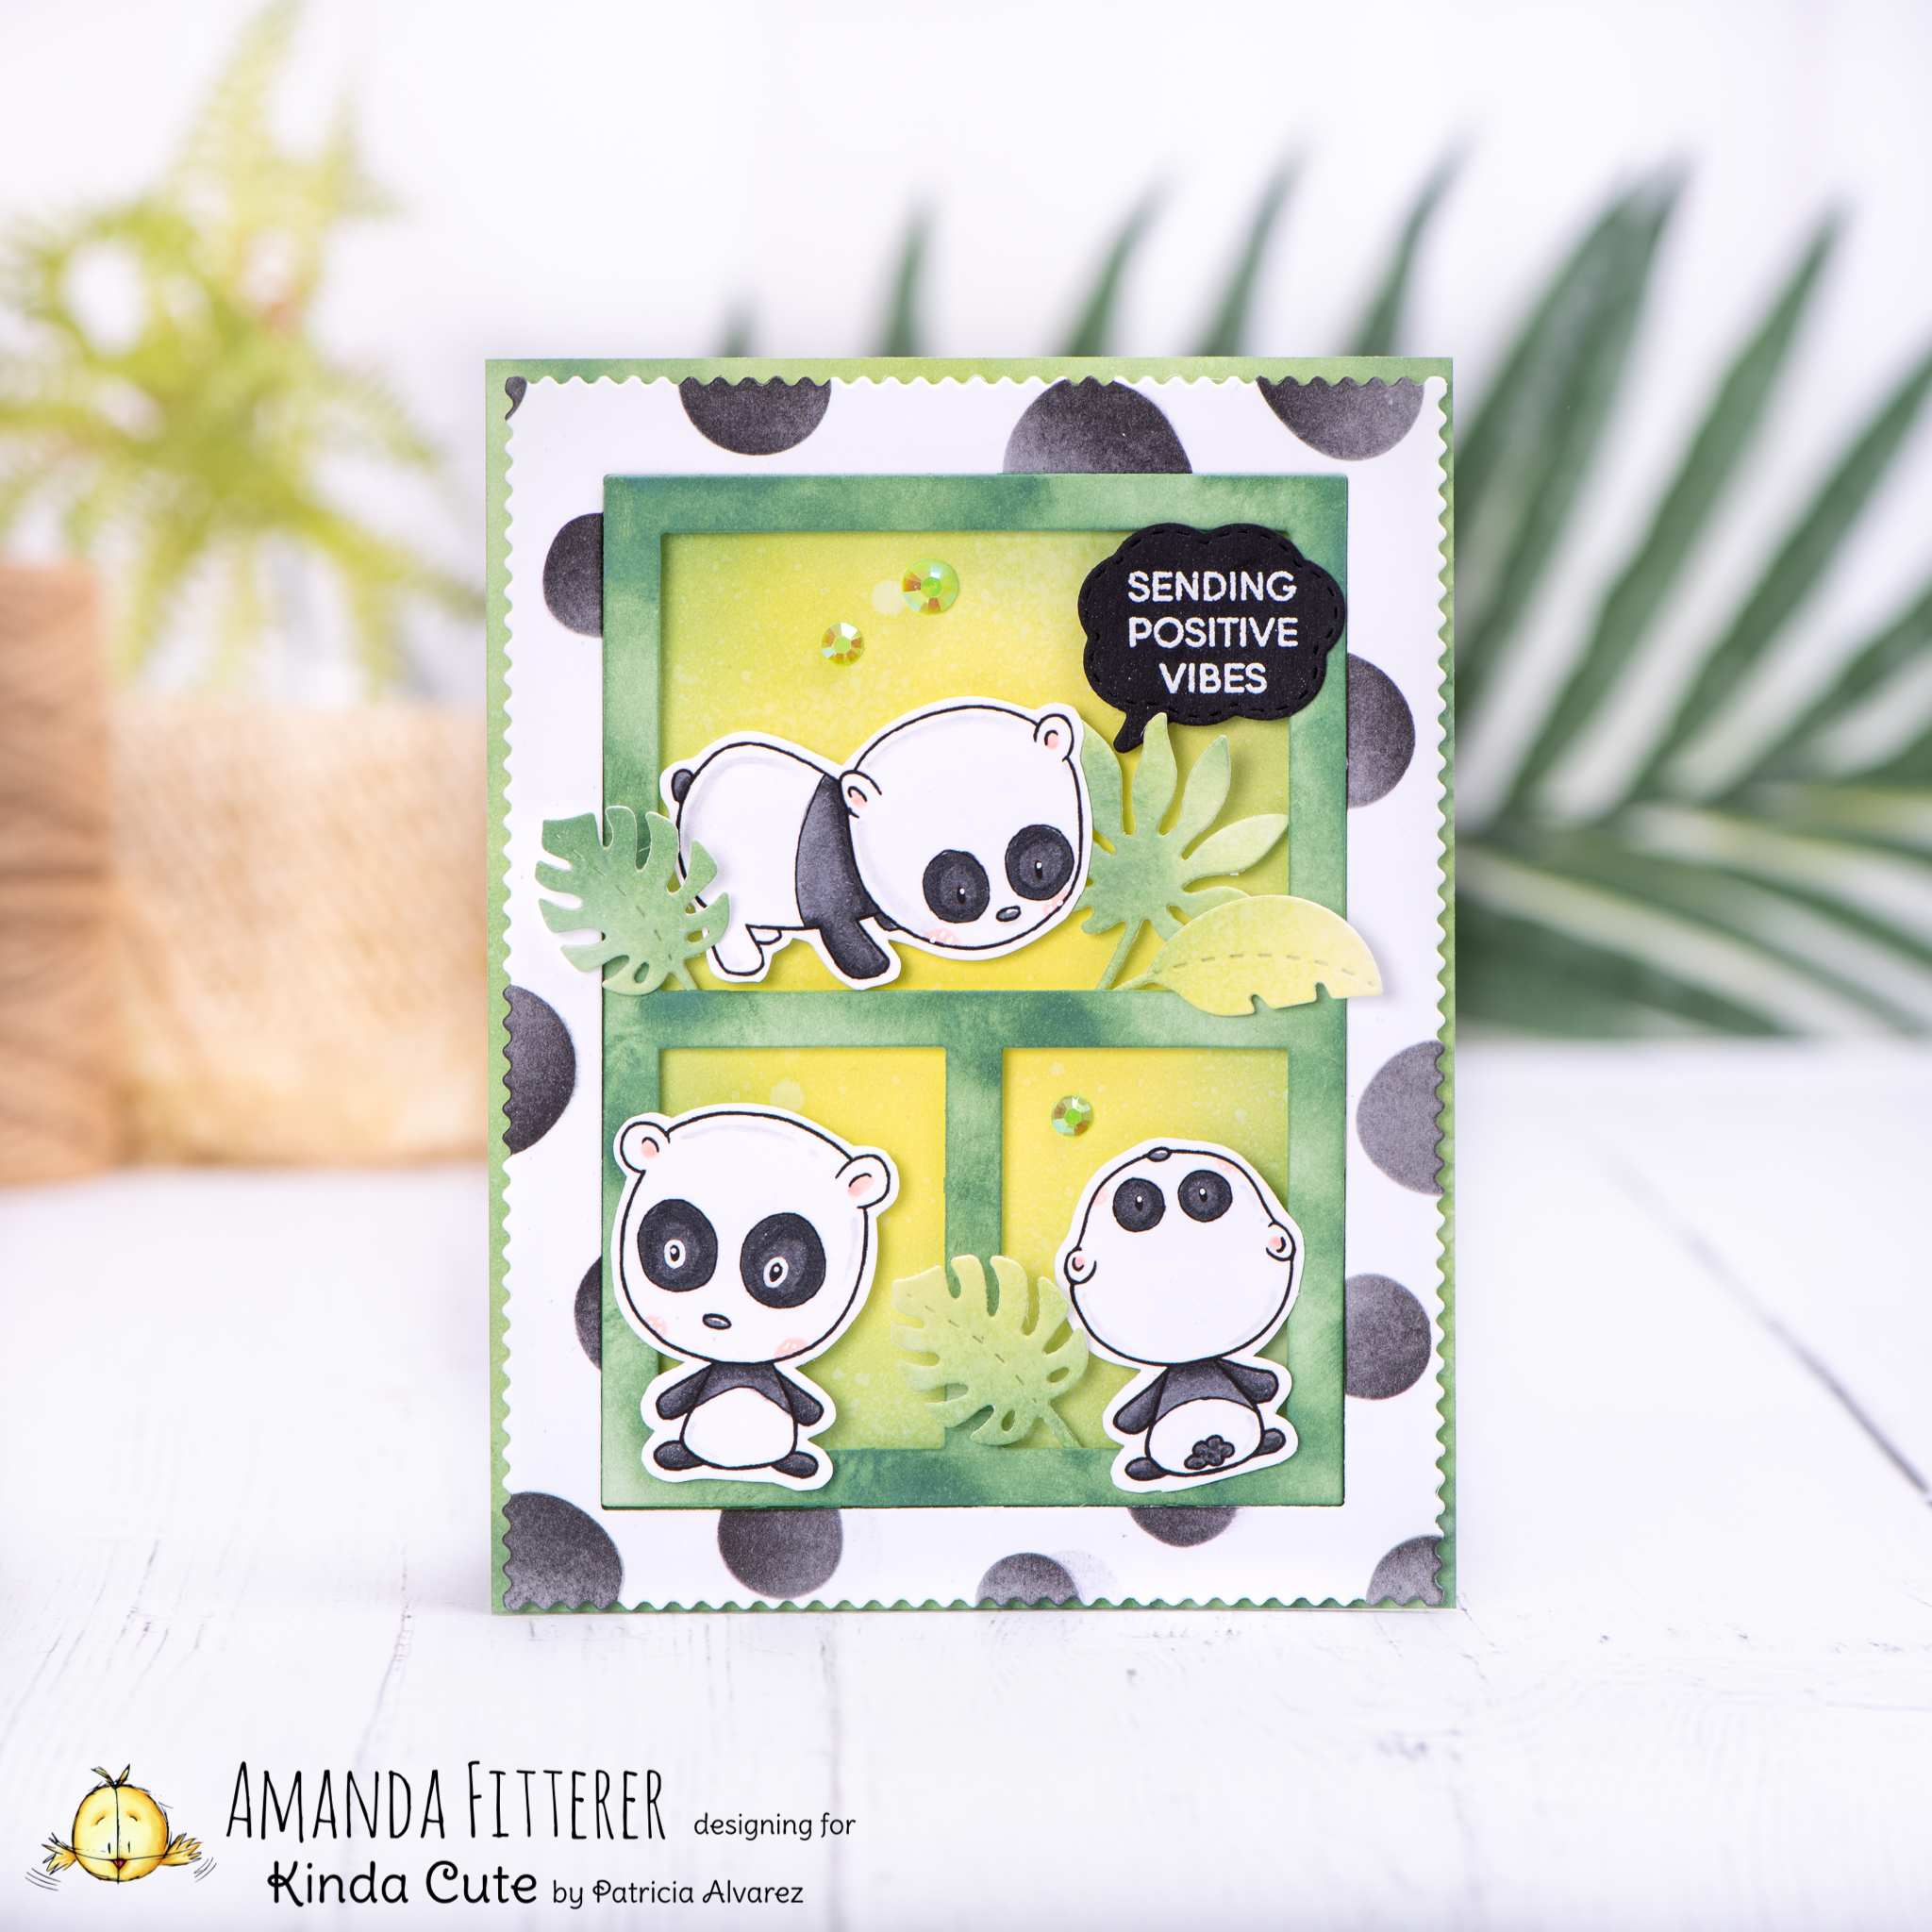
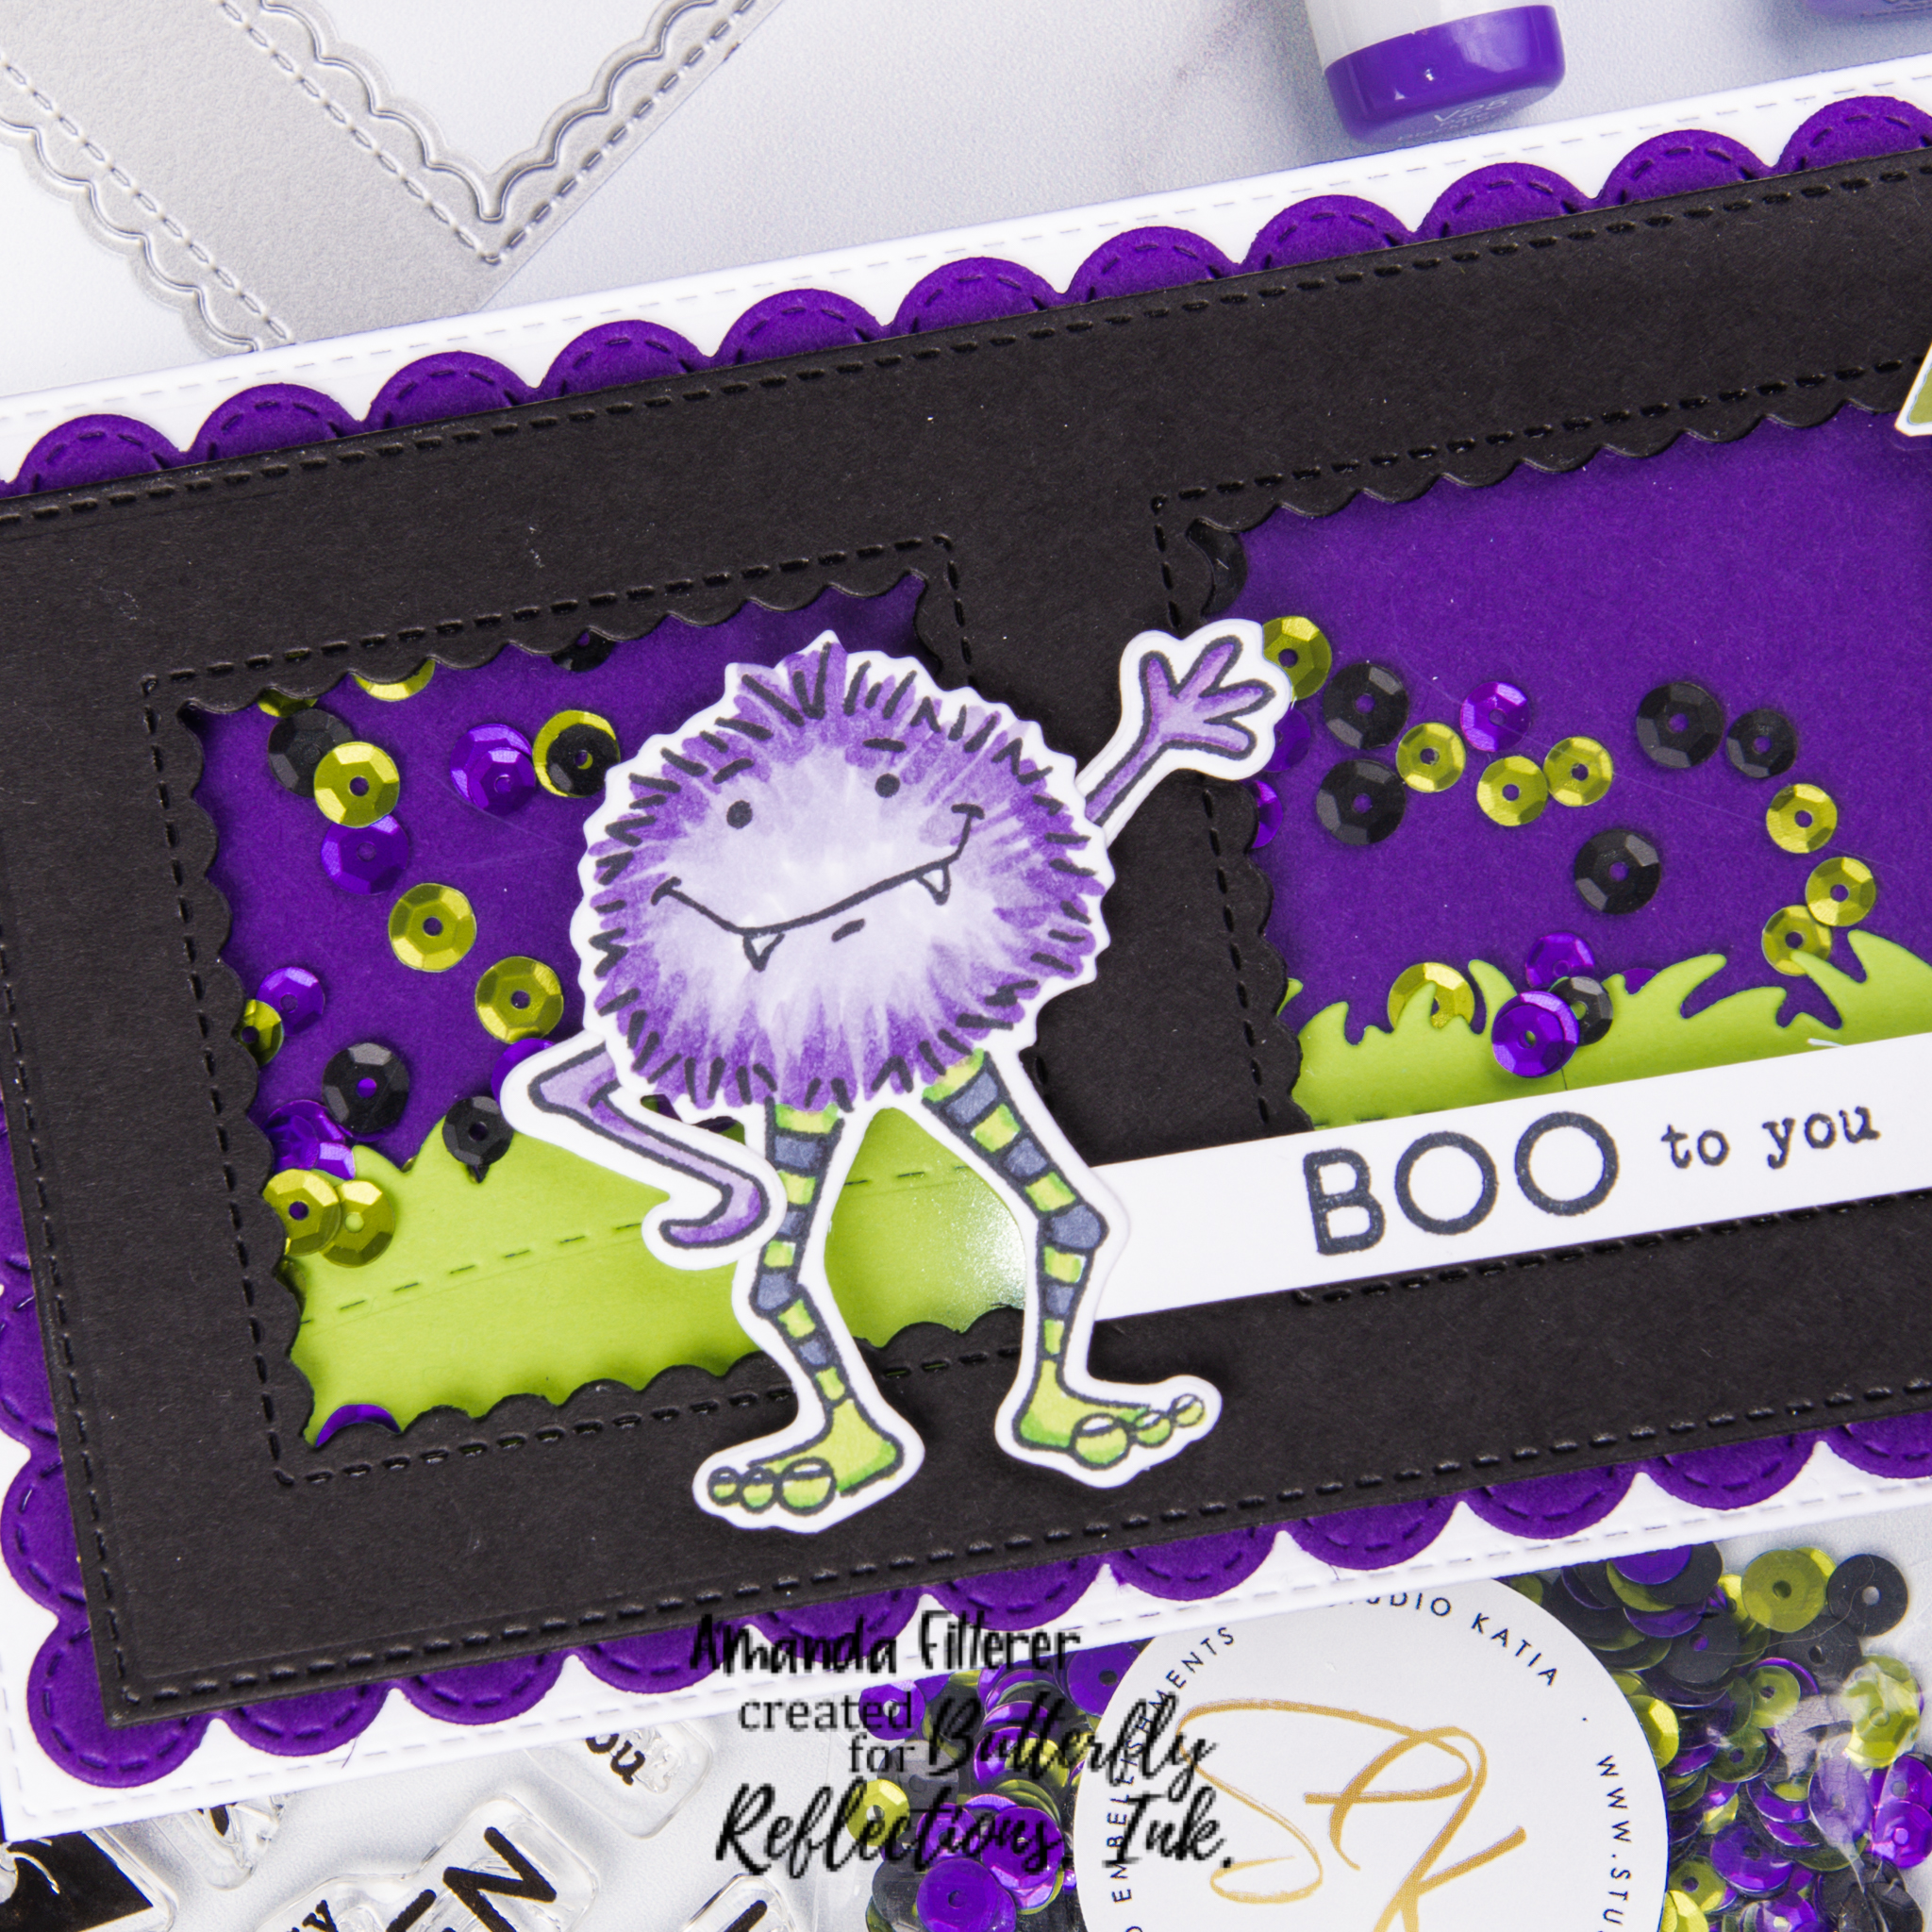
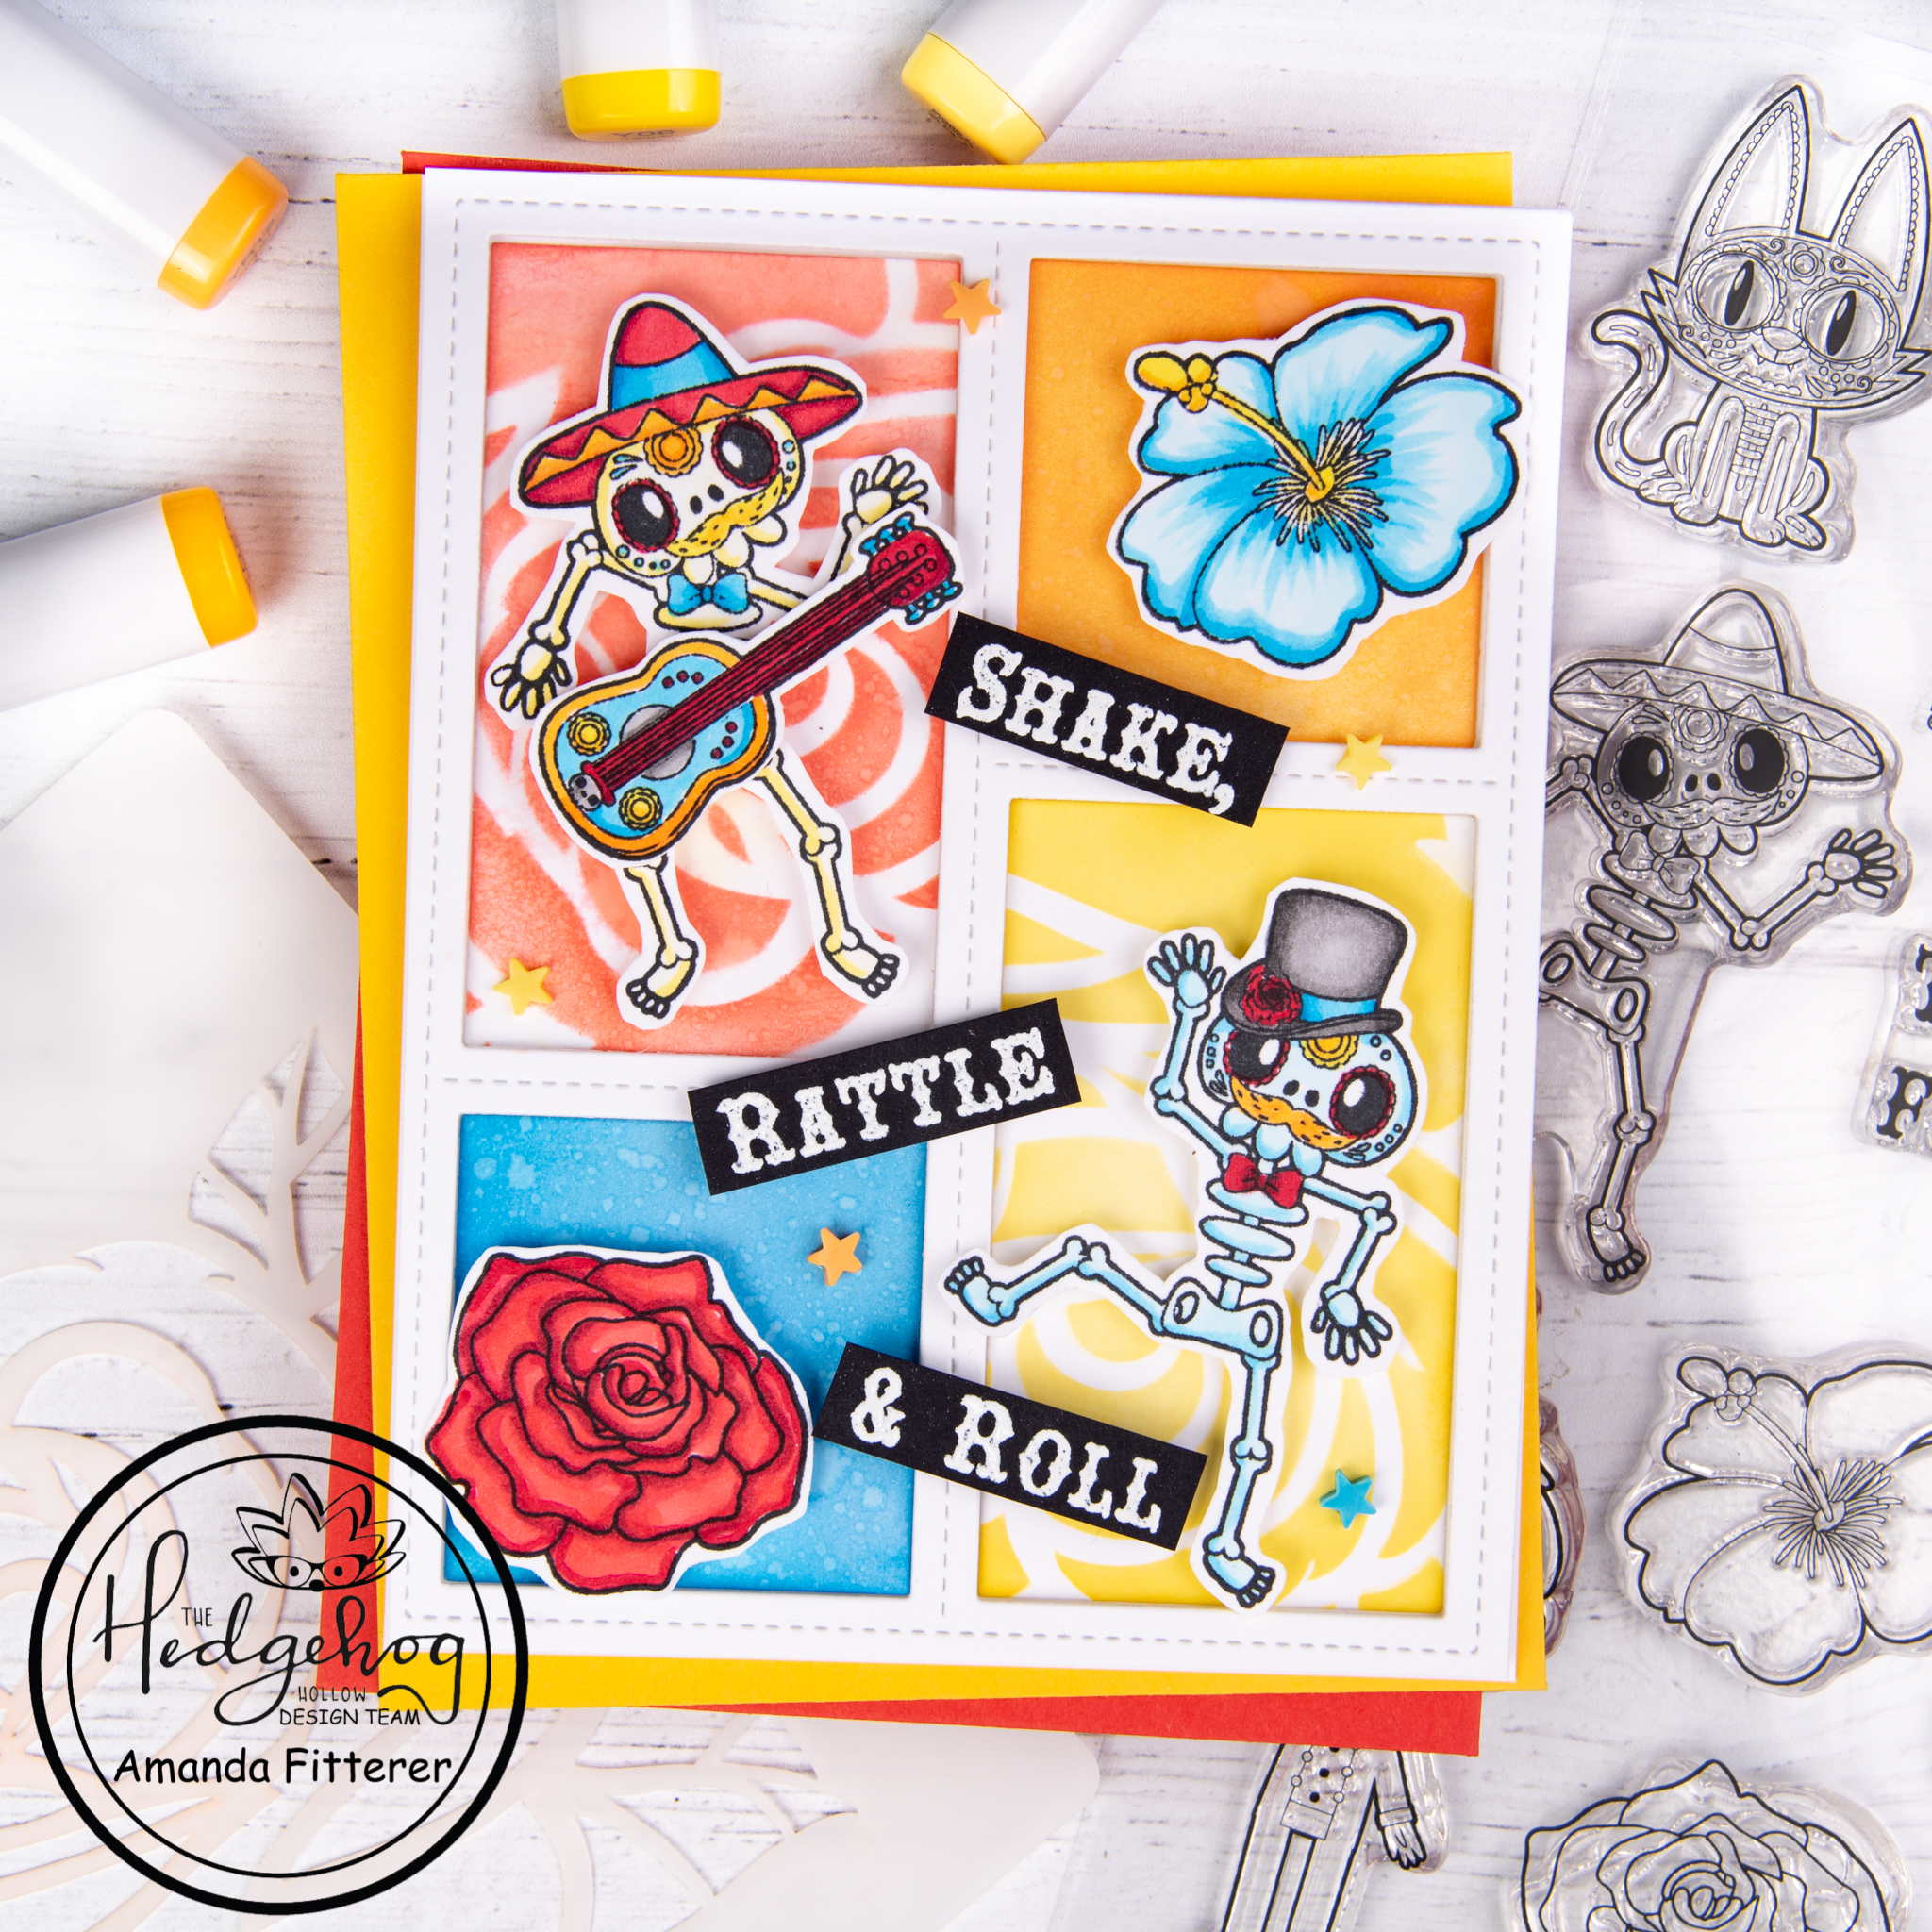
Next, I am stamping my images from the Newton’s Nook All About for Christmas stamp set and the Heffy Doodle Santa’s Village stamp set with the Maker Forte ReMARKable Eclipse Black ink. This is my favorite alcohol-friendly black ink!

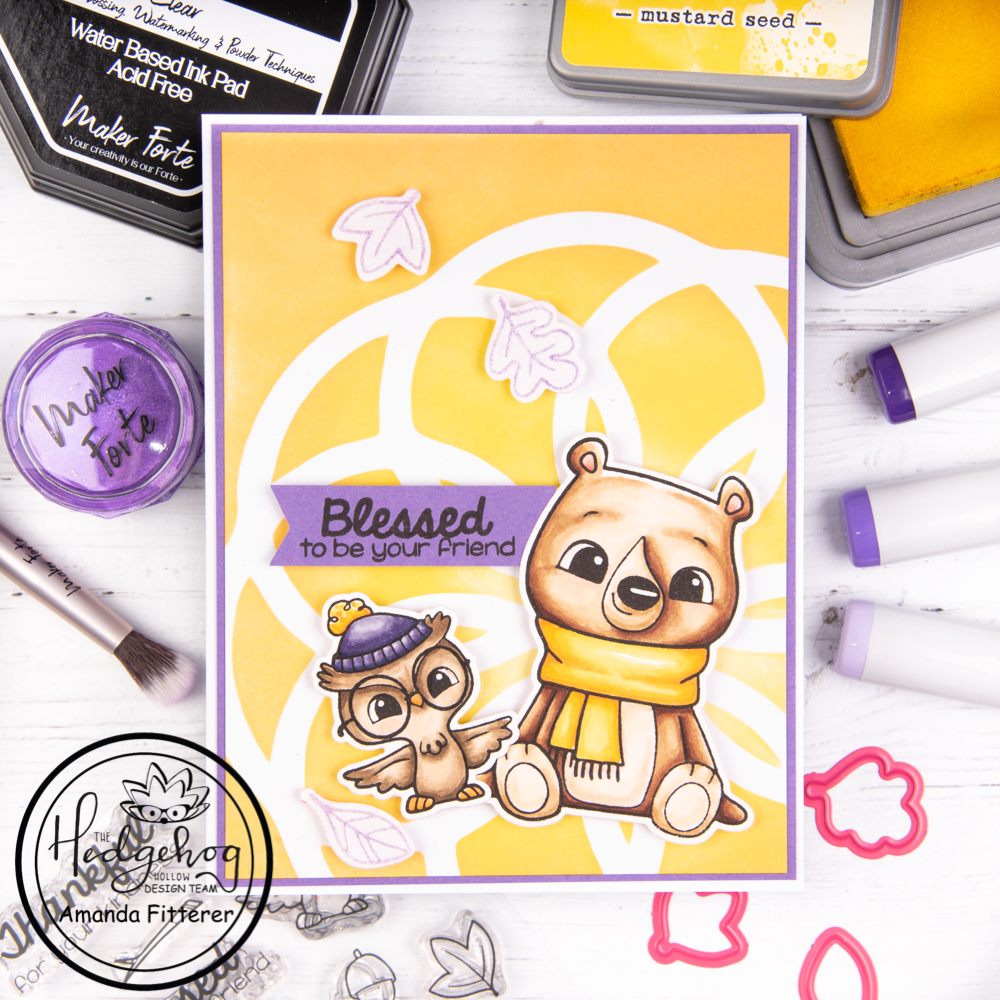
Now, onto coloring my adorable images with Copic markers!

For my background, I’m blending Catherine Pooler’s Chiffon, Maker Forte’s Yellowstone, Bubblegum, and Coral Keys inks.

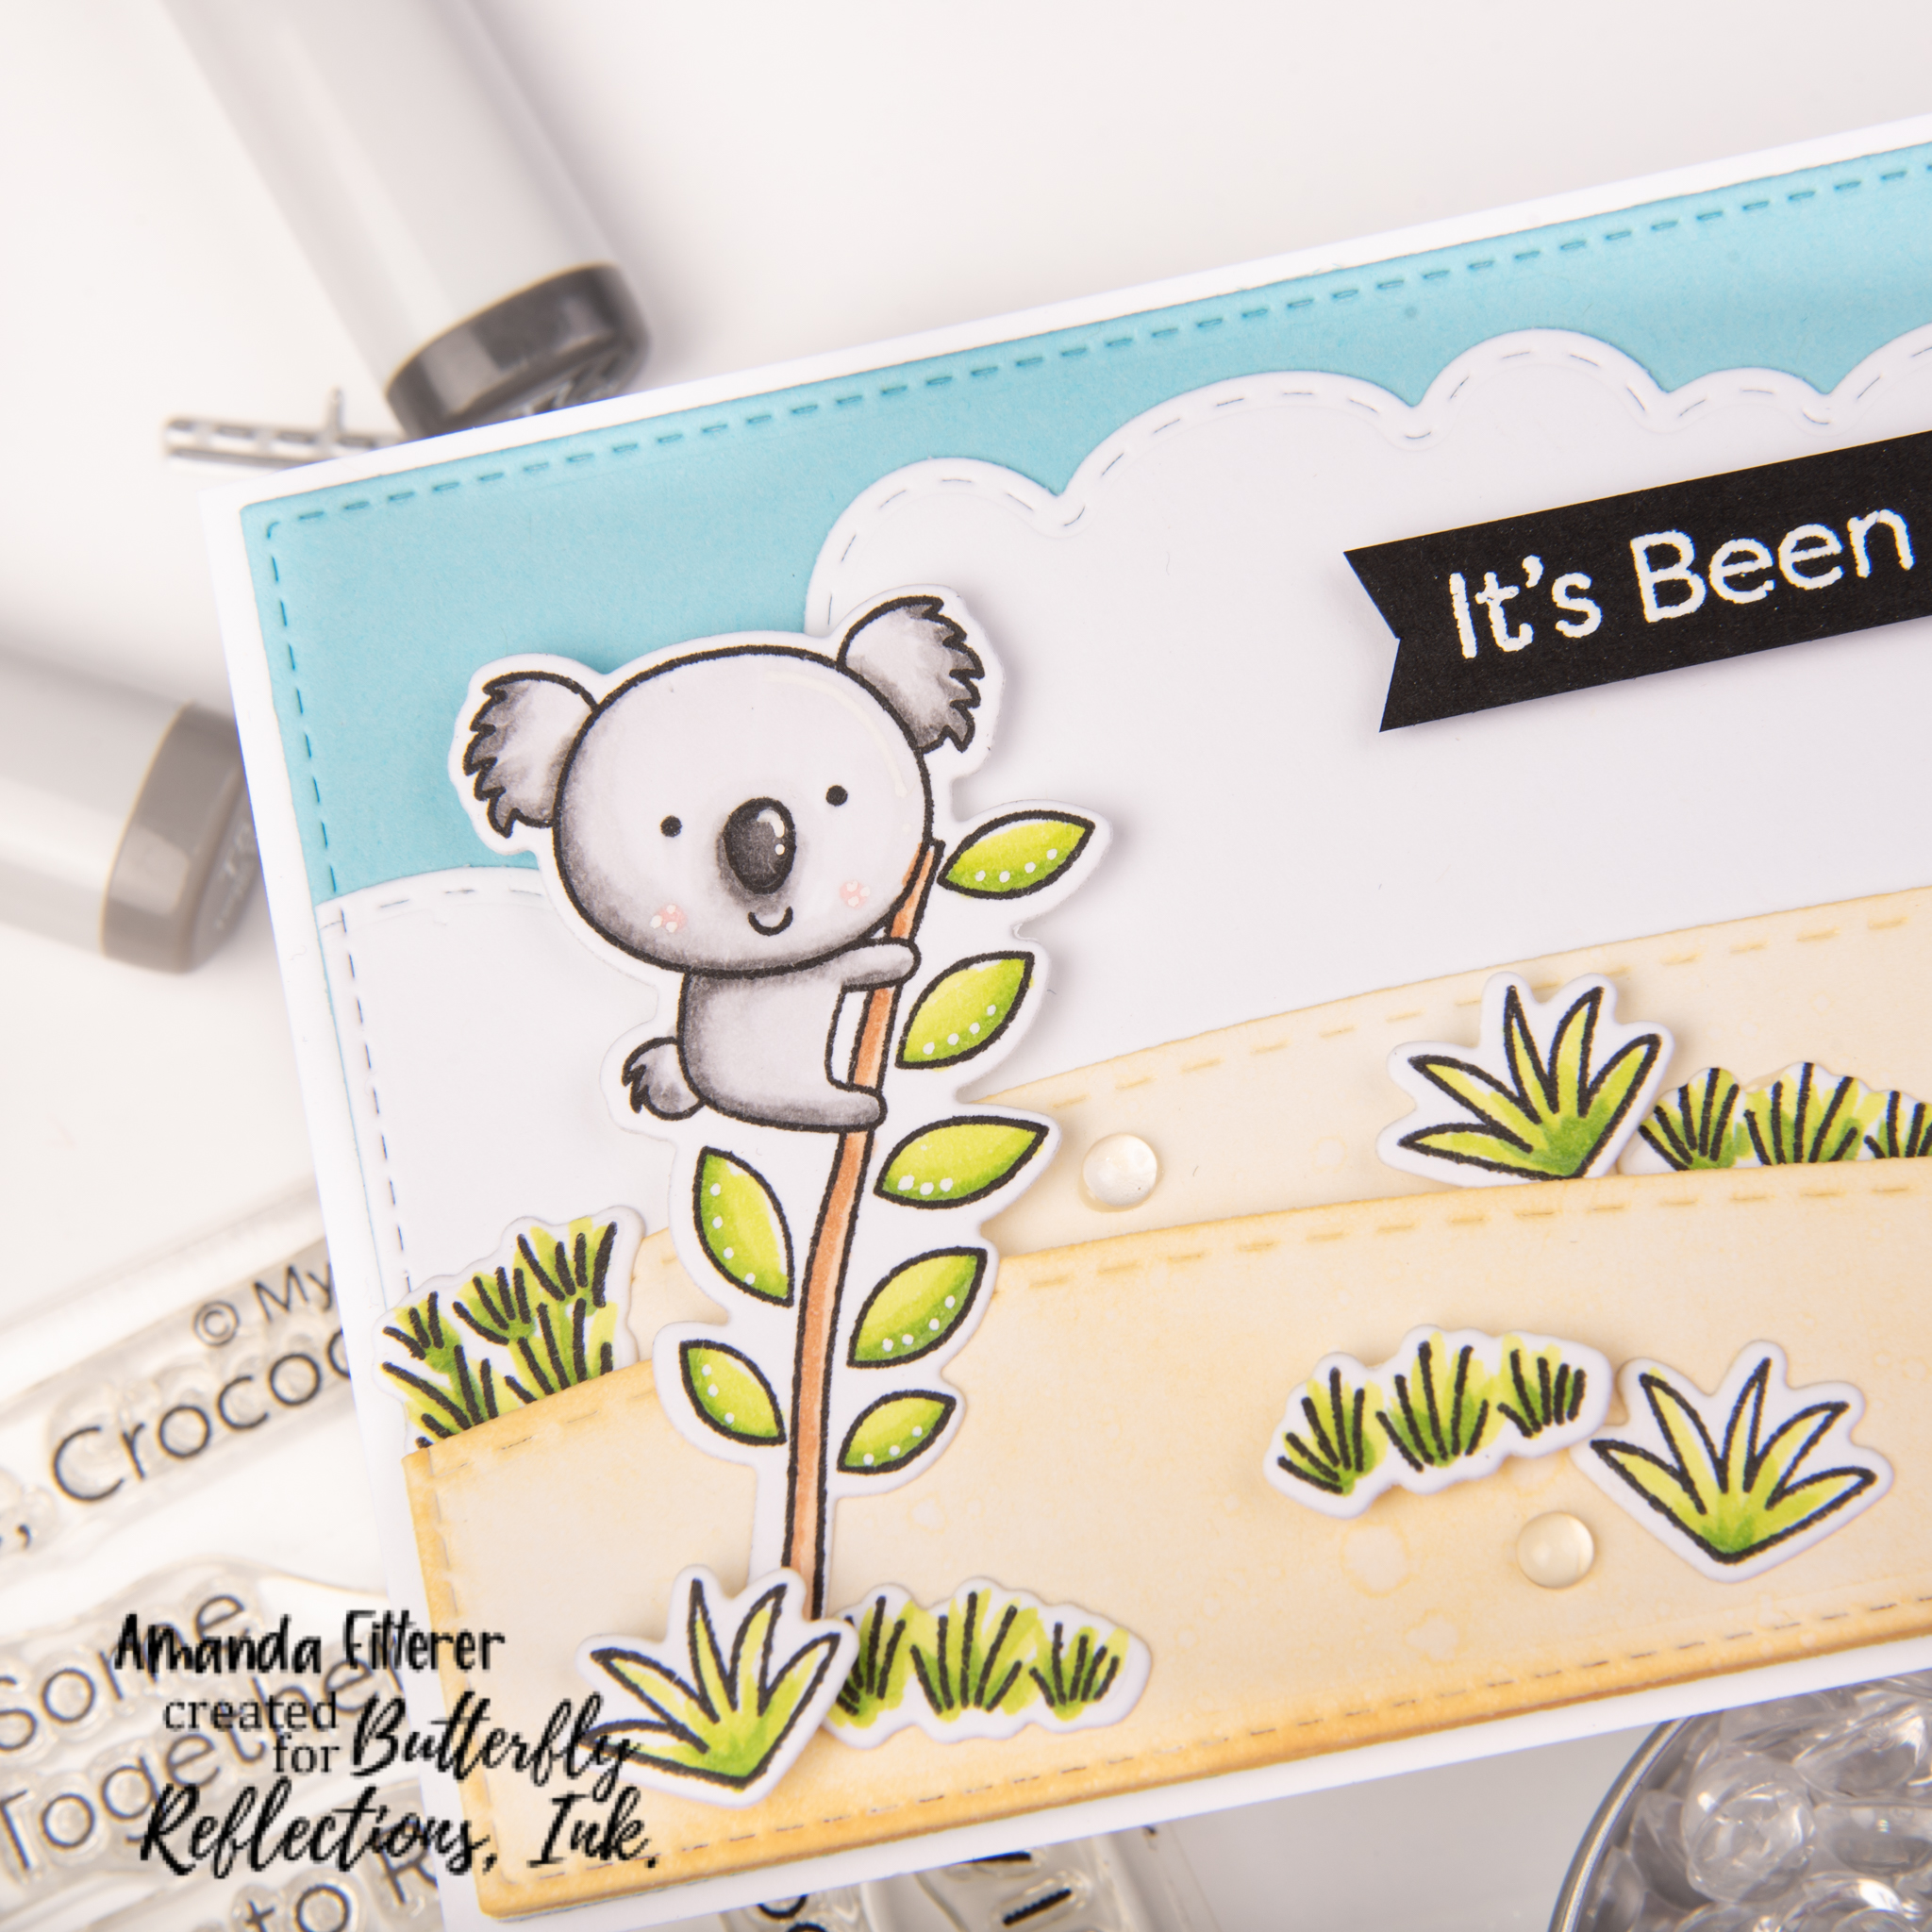
To create my hill and slider element, I’m using the Heffy Doodle Slimline Scenery Dies and the Straight Slider Dies. To create a longer slider, I’m die cutting 2 of the sliders right next to each other.

Using Deep Foam tape, I’m propping up my hill to give me room for a button to use as my sliding element. After attaching my trains to the buttons, I can start assembling the rest of the card using 3D foam squares and glue!

Here’s another photo of the finished card and some close-ups!

And that’s it for my card!! I hope you enjoyed my part in the Blog Hop!

To be entered to win the giveaway, all you need to do is comment at each stop along the Blog Hop!
Newton’s Nook Designs will be giving away $35 and Heffy Doodle will be giving away £25 to their respective stores!  Be sure to comment before 11:59 PM EST on Dec 28th to be entered to win!

Each company will post their random winner on Dec 29th at 10AM EST!  Make sure to check the Heffy Doodle Blog and Newton’s Nook Designs Blog to see if you’re a winner!


Blog Hop Lineup:

Heffy Doodle Blog

Tatiana Trafimovich

Tina Herbeck

Amanda Fitterer (you are here!)

Maria Russell (GO HERE NEXT!)

Cassie Trask

Samantha Mann

Amanda Stevens

Zsofia Molnar

Newton’s Nook Designs Blog

Please note, some of the links above may be affiliate links. Feel free to use them and help a fellow crafter out! Thank you!!

Posted on 33 Comments

Heffy Doodle and Catherine Pooler Collaboration Blog Hop

Welcome to the Heffy Doodle and Catherine Pooler Collaboration Blog Hop!
Design Team members from both companies are sharing inspiration using products from both companies!

I’m so excited to share TWO cards with you today!

For my first card, I used a plethora of stamp sets! I stamped images from the Heffy Doodle Who Let the Dogs Out Stamp Set and the Flying High Stamp Set. From Catherine Pooler, I stamped my images from the Special Delivery Stamp Set. I colored my images with Copic markers.

For my background, I use the Heffy Doodle Imperial Stitched Rectangle Dies, and the Grassy Lass Dies. I blended my Simply Radiant Stencil using Chiffon, Tiara, and Coral Cabana Catherine Pooler inks. For my grass, I used Garden Party.

I assembled my card using 3D foam squares and liquid glue.

Now, onto my 2nd card!

To make this card, I stamped my images from the Who Let the Dogs Out, Hot Diggity Dog and Special Delivery Stamp Sets. I colored my images with Copic makers again. For my background, I blended the background using Chiffon and Tiara and the Marvellous Mountains Stencil. I used my mini Midnight Ink and a white gel pen to create a road using the Loads of Roads Stencil.

I assembled my card using liquid glue and 3D foam squares.

Now, onto the Blog Hop Giveaway Details:

To be entered to win the giveaway, all you need to do is comment at each stop along the Blog Hop!
Catherine Pooler will be giving away $35 and Heffy Doodle will be giving away £25 to their respective stores!  Be sure to comment before 11:59 PM EST on Nov 24th to be entered to win!Each company will post their random winner on Nov 25th at 10AM EST!  Make sure to check the Heffy Doodle Blog and Catherine Pooler Blog to see if you’re a winner!

Blog Hop Lineup:

Heffy Doodle Blog

Ali Farmer

Ilina Crouse

Amanda Fitterer (you are here!)

Allison Cope (go here next!)

Ashley Young

Karen Baker

Claudia Mauri

Daniel West

Catherine Pooler Blog

Posted on 1 Comment

It’s a Good Day to Have a Good Day!

Hey crafty friends! Happy Friday! I hope you’re all having a lovely day! I just got this Newton’s Nook Woodland Picnic stamp set and I couldn’t WAIT to make a card with it!

To create this card, I started by grabbing my Heffy Doodle Tree-mendous Peekaboo Tree Die. I love this die for so many reasons, but I love using the tree foliage as grass!

I’m also going to cut my Lawn Fawn Foursquare Backdrop Landscape Die and then cutting out one strip to make it 1 large rectangle. I’ve stamped images with my new favorite Black ink – the Maker Forte Eclipse Black Remarkable Ink. It’s Copic friendly and stamps crisply.

Now, for my favorite part! Coloring with Copics!! Eek! I kept to a basic palette of greens, reds, and a little bit of YR’s.

For my card base, I blended Catherine Pooler’s Do-si-do ink and then spritzed it with water. Catherine Pooler’s inks react beautifully with water! For my grass, I blended Garden Party.

The next step is to just assemble the card! To create the MOST dimension, I use Heffy Doodle’s Deep Foam Tape.

Thank you so much for hanging out with me on my blog today! I hope you enjoy this card and my little tutorial!

If you shop Scrapbook.com using this link or Simon Says Stamp using this link, I will get a little bit of money from your purchase. This helps me keep my craftiness going and lets me share inspiration and tutorials with you! Plus, if you use the links above, they are affiliate links as well! I can get a small portion from your purchase! Thank you for your support! I really appreciate it! Every little bit helps!

Many crafty hugs!! Amanda

Posted on Leave a comment

Oh, Holy Night!

Hey crafty friends! Did you see the latest release from Maker Forte?! Eek! It’s got some AMAZING holiday products!

I made this card using the new “Oh Holy Night” stamp set and the Dutch Villages stamp set.

To make this card, I started by creating a beautifully blended background with the Circle Spotlight stencil and some Color Hive inks. I started with Coral Keys on the bottom, then English Mustard in the middle, then Limewired, and then finally Pop Art at the top.

To add some finishing touches, I used the Splatter stamp and the Stars Confetti.

I’m just loving this release! How about you?!

Thank you so much for stopping by my blog today!! Xx, Amanda

Posted on Leave a comment

Maker Forte New “Christmas” Release

Hey friends! Maker Forte’s New Release is available NOW for purchase!! Get your goodies here.

I have a few cards I made using the new “Get Yeti for Christmas” Stamp Set. Are these guys just the cutest?! I have 2 cards to share with you using this stamp set!

I used Heffy Doodle’s Slimline Quartet Die for my frame. I used Hyde Park and Palm Tree Color Hive inks to blend my background. I colored my cute yetis in with Copic markers.

I also made another card with the “Get Yeti for Christmas” Stamp Set because I just couldn’t help myself!

To make this card, I used the Straight Slider Dies from Heffy Doodle to create an interactive element to my card! The little yeti can now sled back and forth! I used Pop Art and Tartan Teal for my background. My clouds were created with the Clouds Stencil.

If you missed the Live YouTube Reveal Party, you can watch it here!

Thank you all so much for stopping by my blog!! Xx, Amanda

Posted on 34 Comments

Heffy Doodle, Maker Forte, and SugarPea Designs Collaboration Blog Hop

Welcome to the Heffy Doodle, Maker Forte, and SugarPea Designs Collaboration Blog Hop!
Design Team members from all three companies are sharing inspiration using products from all three companies!

Today, I am sharing 2 cards that I made using tons of awesome products from these companies!

For my interactive pull tab and slider card, I’m starting by stamping my images from the Heffy Doodle Otter Side and You Go, Gull stamp sets and the Sugar Pea Designs Captain of My Heart and Waves of Love stamp sets. To ensure I get a really crisp stamped image, I’m using my Smoosher Tool from Maker Forte and my MISTI. I’m coloring my images with Copic markers and then cutting the images out with my Die Cutting Machine.

Next, I’m ready to create my background and pull tab element. I am blending Yellowstone Color Hive ink and Rah Rah Skirt Ink to create my sky. I’ve also used a Splatter Stamp, Clear Ink, and Kaleidoscope Powder to create some metallic gold splatters in my background. For my pull-tab element, I’m using the Slimline Pull Tab Dies.

Now I’m ready to create my waves. I’m using some colored cardstock and the Breaking Waves Dies, plus the Wavy Water Slides to create my coordinating wave slider.

I’m ready to start assembling! I’m using Deep Foam tape, Glubert Glue and SuperTape to adhere my pieces to my card.

To create this shadow box card, I first cut my pieces out using the Heffy Doodle Big Shadow Box Dies. I cut the front piece and side pieces down using the Slopey Joe Border Dies. For my sides, I blended Yellowstone Color Hive ink and then added crabs using the Rah Rah Skirt Ink and the Just a Pinch Stencil.

For my front, I created sand using Copic markers. For my waves, I used the Breaking Waves Dies.

For my images, I am using the same sets as my first card. I’ve stamped my images, used Copic markers to color them, and now I’m attaching my little fishies and birds to small strips of acetate.

To make assembling my card easier, I am using my favorite Rainbow Tweezers.

And, that’s it! Both cards completed!

To be entered to win the giveaway, all you need to do is comment at each stop along the Blog Hop!
Maker Forte will be giving away $35, Heffy Doodle will be giving away £25, and SugarPea Designs will be giving away $25 to their respective stores!  Be sure to comment before 11:59 PM EST on Aug 20th to be entered to win!

Each company will post their random winner on Aug 21st at 10AM EST!  Make sure to check the Heffy Doodle Blog,  Maker Forte Blog, and SugarPea Designs Blog to see if you’re a winner!


Blog Hop Lineup:

Heffy Doodle Blog

Amanda Fitterer (you are here!)

Amy Kolling (YOUR NEXT STOP!)

Kim Boliver

Cassie Trask

Kari VanNoy

Vera Yates

SugarPea Designs Blog

Maker Forte Blog

Posted on Leave a comment

There’s Always One Duck!

Hey there crafty friends! Today, I’m sharing a card using the Kinda Cute by Patricia “There’s Always One Duck” digital stamp!

Aren’t these little ducks so sweet?! And the little mischievous one just has my heart!

To make this card, I stamped some images from the Miss Ink Stamps “Rise and Shine” stamp set and the “Punny Farm Pigs” stamp set. Then, I used Copic markers to color the images in.

After my images were colored in completely, I grabbed a sentiment from the Heffy Doodle “Hot Diggity Dog” stamp set and stamped it directly onto my background.

I adhered my ducks using 3D foam adhesives, and voila! Finished!

Thank you so much for stopping by my blog today! I hope you enjoyed my blog post and enjoy the rest of your week!

Posted on Leave a comment

Gnome Sweet Gnome Light-Up Card with Amanda

Hello there all you crafty people!
If you’re not already following me, you can find me on Instagram, YouTube, and my Website!

Today, I am sharing a “Gnome Love” card that lights up!

For the video tutorial, please click here.

To create this card, I stamped images from the “Gnome Love” Stamp Set. I colored the images with Copic markers and then fussy cut the images out using scissors.

To create my galaxy background, I used Snow Flurries Perfect Blend Cardstock and Distress Oxides.

I created my own mix of water and Picket Fence White Distress Ink Refill in my Mister Perfect spray bottle and then flicked “stars” onto the background.

I poked holes through the galaxy background where I wanted the stars to shine through using my Picker and Poker Tool.

Then, using a gel pen, I marked the stars through the holes onto my black cardstock. I also marked where the button would go.

Using my white gel pen guides, I taped down my EZ-Lights using Purple Tape. The Purple Tape allows me some wiggle room to move my lights and wires around without ripping my cardstock.
Because the button is pretty thick, I used Heffy Doodle’s Deep Foam Tape on the black cardstock. This will keep the button from making a “bump” in the finished card.

I adhered my card front to my card base and the stamped images to my card front. For my finishing touches, I added a few clear gem stones to my stars. These magnified the light shining from the EZ-Lights!

Here’s another look at the finished card!

Thank you so much for stopping by my blog today! I hope this tutorial inspired you to create something today! Xoxo, Amanda

This blog post uses affiliate links to help me fund my crafting! If you click through and make a purchase using one of the links above, I am able to receive a small commission from the sale! It won’t cost you any extra, but you will help be helping me out and I really appreciate that!

Posted on Leave a comment

Kinda Cute Alien Birthday

Hey there! I’m so glad you stopped by my blog today! Today, I am sharing a birthday card using Kinda Cute by Patricia’s Alien Digital Stamp Set.

To make this card, I am starting with the galaxy background. I used Heffy Doodle’s Stargazer Backdrop on a piece of white cardstock. Then, I created the galaxy effect by blending Dusty Concord, Faded Jeans, Blueprint Sketch, Twisted Citron, and Black Soot Distress Oxide Inks.

Next, I colored my images using Copic markers and then cut them out using scissors.

For my sentiment, I used the MFT Space Explorer stamp set. I also grabbed a few stars from this stamp set and used 3D foam squares to adhere them to my card front.

Here’s a few closeups of the finished card!

Posted on Leave a comment

Flamingo Couple

Hello all you fellow crafters! I hope your week was amazing! I’m so glad it’s finally Friday! We even had a snow day this week, but it still felt like a long week! 🙂

Today, I’m sharing a card I made using Kinda Cute by Patricia’s Flamingo Couple digital stamp.

To make this card, I started by printing the Flamingo Couple on 80 lb. Neenah Solar White cardstock. This cardstock is perfect for coloring with Copic markers.

Once I finished coloring my images in, I cut them out with Cutter Bee Scissors. I always use these scissors for fussy cutting.

I created a white frame using Lawn Fawn’s Four Square Backdrop Landscape Die.

For my background, I blended Dusty Concord, Worn Lipstick and Mustard Seed Distress Oxides. I spritzed the cardstock with my Nuvo Mist Spray Bottle and then patted it dry with a paper towel.

For my grass, I used Heffy Doodle’s Grassy Lass dies and Rustic Wilderness Distress Oxide.

I added some Amazonian Leaves and some Heart Drops to finish the card off!

Such a sweet Valentine’s card for a friend or an associate!

Thank you so much for stopping by my blog!

Xoxo, Amanda

This blog uses affiliate links to help me fund my crafting! If you click through and make a purchase using one of the links above, I am able to receive a small commission from the sale! It won’t cost you any extra, but you will help be helping me out and I really appreciate that!

Posted on 1 Comment

Puppy Love with the Hedgehog Hollow Feb Box

Hello there my fellow crafters! Have you received your February Subscription Box yet?? It’s FULL of all kinds of cute pet stencils, stamps, and paper!

To create these 2 cards, I cut down 2 pieces of black cardstock to 4″ x 5.25″. Then, I trimmed down the patterned paper that was included in the Subscription Box, leaving a small black border all the way around.

Grabbing the stamp sets from the box, I stamped a couple of cute images using black ink.

Using the Who Let the Dogs Out stamp set by Heffy Doodle, I stamped 2 puppies and colored them with Copic markers.

I cut out all the images and then put double sided foam adhesive on the back. I tied pink and white baker’s twine around the card fronts and then placed the images where I wanted them. As a finishing touch, I added a few pink hearts.

Then, I adhered my card fronts to the card base using 3D foam adhesive strips.

I love all the little paw prints! They’re just so sweet!

Thank you so much for stopping by my blog! Xoxo, Amanda

Posted on Leave a comment

Pandas Sending Good Vibes

Hey there crafty friends! I hope you are all having wonderful celebrations with your families for the holidays!

Today, I am sharing this bright and happy card using Kinda Cute by Patricia Alvarez Panda Bear Digital Stamp.

I printed the images on 80# Neenah Solar White cardstock and then colored the images with Copic markers. I cut the images out using precision scissors.

To create my card base and background, I used the Hello Bluebird Gallery Frames #4 Die. I created spots using the Heffy Doodle Dotty Lottie Stencil. I blended Twisted Citron, Rustic Wilderness, and Black Soot Distress Inks and Oxides for the background and only used Rustic Wilderness for my frame. I also cut some leaves using the Heffy Doodle Amazonian Leaves Dies.

I adhered everything to the card base using liquid glue, 3D foam squares and strips.

I love how cheery this card! I think it would brighten up anybody’s day, don’t you?!

Thank you so much for stopping by my blog today! I hope you have a wonderful New Years!

Xoxo, Amanda

Posted on Leave a comment

Blessed to Be Your Friend

https://youtu.be/7JGkraDBg-E


I have been busy playing with the October Subscription Box.

I’m sharing a video tutorial with you today making this super sweet fall card. I hope you have some time to watch it! If you’re interested in how to color with Copic markers, I walk through coloring in these cute little guys!

I used the stencil that was included in the October Subscription Box to create this bright and beautifully blended background! I blended Squeezed Lemon, Mustard Seed, and Carved Pumpkin Distress Oxides. To keep my stencil in place, I used Pixie Spray Adhesive. The cardstock that I use to get the BEST blending is the Snow Flurries Perfect Blend Card Fronts.

For my images, I used Pink and Main’s Happy Fall stamp set. I stamped using Hero Arts Intensified Black ink because it is alcohol-friendly ink. I colored the images with Copic markers and then die cut them using the coordinating dies.

To make these glittery leaves, I stamped the images with Color Hive Hexagonal Embossing Glue Ink Pad. I brushed on a bit of the Nebula Kaleidoscope Powder using the Rose Gold Dual Tip Powder Brush. All of these items were included in the October Subscription Box!


I trimmed the yellow stenciled background cardstock down to 4″ x 5.25″. I cut a piece of purple cardstock down so that it was just a bit larger. I adhered these card fronts to a card base that was 8.5″ x 5.5″. I adhered my stamped images to my card front using 3D foam squares.

If you weren’t signed up before October 14th and missed out on this box, you can check back later here to see if it’s available as a One-Off. All the subscription options can be found here.

I cannot wait to see what’s in the November box! How about you?!

I really hope you enjoyed my post! I can’t wait to share some more posts with you in November!! Xoxo, Amanda

Posted on Leave a comment

Slimline Halloween Shaker – Sneak Peek!

Hey there friends! Happy Tuesday! I hope you’re all having a great week so far!

I have a new post up on the Butterfly Reflections Ink blog today! Click here to see the rest of this card, including process photos!

Posted on Leave a comment

Hedgehog Hollow – Shake, Rattle & Roll

Happy Saturday, you all! I hope you’re all having a great day today! Thank you for coming to my blog to check out my card! Do you have The Hedgehog Hollow’s September subscription box?? It is SO fun!

I just love this colorful card to celebrate the Day of the Dead!

Using the Dios De Los Muertos stamp set, I’m going to stamp my images and sentiment. I’m using my Copic markers to color my images. To finish the card off, I’m using glue, 3D foam squares, and some Multicolored Stars embellishments.

I think this card turned out so happy and bright! I hope you enjoyed this post and thanks again for coming to my blog!

I would love for you to follow me on Social Media!
My links:
Instagram | Website | YouTube

Don’t forget – this box is only available until September 14th! To see all the products you’ll get in the box, click here. To see the subscription options, click here.

‘Til next time!! Xoxo, Amanda

Posted on 1 Comment

Back to School Kiddos

It’s back to school time! My daughter starts school TODAY! The 1st grade! It’s so exciting! I wanted to make a back to school card for all those kiddos out there!

These cute school kids are perfect for the “Back to School” theme, don’t you think?!

Here are the products I’m using:
School Girl Digital Stamp
School Boy Digital Stamp
Honey Bee Stamps Perfect Bricks Stencil
Ink Blot Shop Get Grounded Stamp Set

To start, I printed my images on 80# Neenah cardstock. I’m going to use my Copic markers to color the cutie.

Next, I’m creating my background using the Perfect Bricks stencil and the Get Grounded stamps.

Thank you so much for stopping by my blog! I hope you’ve been inspired!
XOXO, Amanda

Posted on Leave a comment

Chick at the Beach

Hello there, friends! I hope you are all doing well this lovely Thursday!
How much would you love making sand castles with this little cute chick?!

To make this card, I’m using the digital stamp: Chicken on the Sand.
I colored this little cutie with Copic markers:
YG00, YG01, YG05, YG07
B00, B24, B26
Y32, YR21, YR12
Y0000, Y000, Y11, Y13

For the sand, I used E50, E41, and E42. For the sky, I used B0000 and B000.

I think he turned out super adorable! Thank you so much for stopping by! Have a great rest of the week!!
Xoxo, Amanda

Posted on Leave a comment

3 Chickens and a Windmill

Hey there! I hope you’re all having a fantastic week so far! It’s almost the weekend! Yay!
I have a new card to share with you today using some Kinda Cute digital stamps!

For this card, I used the following digital stamps:
Chickens
Old Windmill

As well as:
Green Fields Stencil
Salvaged Brick Stencil

I started by creating my grassy background with the Green Fields Stencil and Shabby Shutters distress oxide.

Next, I used Scattered Straw and Pumice Stone and a tiny brush with the Salvaged Brick stencil for my windmill.

I used Copic markers to color in the rest of the windmill.
I used: W1, W2, W3, W4, W5, E42, E23, and E25.

For my chickies, I used R05, R24, R27, YR16, YR30, Y000, Y00, Y11, Y21, Y23, and Y26.

I cut each of my chicks and the windmill out and used 3D foam adhesive to attach it to my card base.


Thank you so much for stopping by! Xoxo, Amanda

Posted on Leave a comment

Sweet Koalas

Hello all of my crafty friends! Today, I am sharing these super sweet koalas with you!

These koalas are a digital stamp by Kinda Cute. The Thank You Sentiments are also digital and printable.

I printed the images on 80lb. Neenah Solar White cardstock. I used my Copic markers to color the koalas. I used: N0, N1, N2, N3, N4, N6, R20. I used precision scissors to cut out the koalas.

The slimline dies are newly released from Heffy Doodle. The heart stencil I used for the background is also from Heffy Doodle! I used “Worn Lipstick” distress oxide to blend the background.

Thank you so much for stopping by my blog to see this post!
‘Til next time!! Xoxo, Amanda

Posted on 36 Comments

Heffy Doodle and Studio Katia Hop

Hi everyone and welcome to the Heffy Doodle and Studio Katia Collaboration Blog Hop! Our design teams have come together to share some amazing inspiration featuring Heffy Doodle and Studio Katia products, and there is a prize up for grabs, too!

To make my first card, I am using the “You’re Weird” stamp set from Heffy Doodle. I stamp the images and color them with my Copic markers. I am using distress oxides and a water spritzer to create my backgrounds for the card. For my front piece, I am using the Stargazer Backdrop die from Heffy Doodle and the Scallop Window die from Studio Katia. For my sentiment, I’m using the I Love You Shadow Heffy Cuts die. For my shaker, I’m using the Rainbow Dots Glitter.

For my 2nd card, I am using the European Window die from Studio Katia. I am also using the same Scallop Window die as I did on the last card to create my curtain. For my background “inside the house”, I am using the Fancy Foliage stencil and distress oxide. To create my bushes and grass, I am using the Forest Builder dies and the Grassy Lass Border dies and then coloring them with Copic markers. I am stamping my kitty from the Purrfect Day stamp set and coloring her with Copic markers. Lastly, I’m finishing off my card with some Poseidon Crystals and some Dazzling Celery Petals (which were thrown in for free with my order! Yay!)

For my slimline card, I used the same European Window die, the Hello Squeakheart stamp set and the Purrfect Day stamp set. The sentiment is from the Sweet Stuff stamp set from Heffy Doodle.

GIVEAWAY INFO:

Heffy Doodle will be giving away a 25£ CG and Studio Katia a 25$ CG to their stores.
Winners will be chosen randomly and announced on July 7th on the Heffy Doodle and Studio Katia blogs.

Don’t forget to comment on every stop along the way to win!

Blog Hop Lineup:

Studio Katia Blog
Ashley Ebben
Kaja Vezenšek
Zsofia Molnar
Galina Filippenko
Cassie Trask
Ilda Dias
Cassie Tezak
Tracy Freeman
Ali Farmer
Tracey McNeely
Amanda Fitterer
Dana Gong
Heffy Doodle Blog

If you’re following along with the lineup, you’re next stop is: Dana Gong

Posted on Leave a comment

Geometric Keychain, Earrings, and Cards

Hi friends! I’m back again with some more projects with the Hedgehog Hollow June 2020 subscription box! I had so much fun guest designing for them!

My first project is these adorable earrings I made using Shrink Prink (by Dress My Craft).  I stamped the images using Staz-On ink so it would dry quickly and not smear.

I colored the images with colored pencils on the matte (opposite) side.

I cut the images out with precision scissors and then used a 1/8″ hole punch on both leaves to create a whole for my earring wires.  

I used my heat tool to shrink them down and then added the earring wires.

The 2nd project I created was an elephant keychain.  I used the same steps as the earrings, but used a 1/4″ hole punch instead.

The next project I created was this beautiful watercolor elephant card.

I stamped the image with Catherine Pooler Midnight Black ink.  This ink pad is waterproof so I don’t have to worry about the watercolor smearing the ink.


I used Altenew watercolor markers and a water brush to color the image.  I then splattered the watercolor all over the card front.

The last project I did was a fun light-up card using Pear Blossom Press’s EZ Lights.

I used some dies to create a “window” for my card front.  I cut down a piece of vellum and folded it in half to make it thicker.  

I stamped my image with Staz-On ink so that it would dry quickly and not smear.

I colored the backside of the image with Copic markers.

I taped my vellum to the backside of the window with tape.  I also stamped my sentiments on black cardstock with VersaMark Watermark ink.  I used white embossing powder and heat embossed the sentiment with my heat gun.  I used scissors to cut the sentiments down.

I added 3D foam strips to the back of my card and taped my EZ Lights onto my card.  I used double sided tape and 3D foam strips to assemble the card so that when you press the sentiment “kind”, the card lights up!

I had such a fun time guest designing with this box!  Thank you so much for checking out my posts!  Xoxo, Amanda

Posted on Leave a comment

Monster Lemonade Stand

Hello lovely friends! Thanks for stopping by my blog to to see this adorable monster selling lemonade! This cute digital stamp can be printed as one scene or as separate pieces and arranged in your own scene! You can find this stamp on Kinda Cute’s website!

I’m going to start by printing the digital stamp on 80lb. Neenah Solar White cardstock. I’m printing the images separately so that I can arrange my own scene. I’m also going to print a few extra lemonade pitchers!

I’m ready to color my images now! For the lemonade, I’m using Y00, Y04, and Y08. For the lemonade stand, I’m using E30, E31, E33, E35, and E37.

Now, I’m going to use YG00, YG01, and YG03 for the awning. I’m also using BG000, BG10 and BG11.

For my cute little monster, I’m using YG17, YG03, YG01, YG00. For his outfit and eye, I’m using BG0000, BG000, BG01, BG02, and 100 (to make stripes). I’m using T5, T6, T8, and T10 for his hairs.

Now, I’m going to cut all of my images out with some precision scissors. After I’m finished with that, I’m ready to arrange my scene. I am using some stencils and dies and distress oxides to create my background. The stencils are from Simon Says Stamp and the die is from Heffy Doodle.


I am going to heat emboss some sentiments with white embossing powder on black cardstock and then adhere everything to my card using 3D foam squares and strips.

Thank you so much for stopping by my site! Xoxo, Amanda

Posted on 2 Comments

Papa Bear – Best Dad Ever!

Hey there! I’m so happy you’ve come to my blog to see this adorable card I made using Kinda Cute’s Papa Bear and Baby digital stamp! I think Father’s Day cards can be one of the hardest cards to make. Well, really, any masculine card is difficult in my opinion! But when I saw this digital stamp, I thought it was PERFECT for a dad! I hope you like it!

To make this card, I pulled the digital stamps into Adobe Illustrator and put the trees from the Tree Filler set behind the Bears. I printed them out on 80lb. Neenah Solar White cardstock.

Now, I’m ready to color them! I’m using my Copic markers to color in the trees. For the trunks, I’m using E23, E25, and E29. For the trees, I’m using G07, G05, G28, and G29.

For the bears, I’m using E44 (Papa only), E43, E42, E41, R20 (baby only), E50, E51, and E53. I also am using my white Gelly Roll pen for the baby’s cheeks.

I’m taking a textured towel and soaking a corner of it with Alcohol Blending Solution. Then, I’m carefully dabbing the Papa’s body with it, avoiding his face, the baby, and the trees.

Finally, I’m ready to assemble my card using double sided tape!


Such a simple and fun card to make for Dad! Thanks again for stopping by my blog! I hope you enjoy the rest of your week!

Xoxo, Amanda

Posted on Leave a comment

Sending Smiles

To create this fun tropical card, I used products from many of my favorite companies!  

I wanted to think a little “outside the box” so I decided to create a 2 part card!  For my outer pocket measuring 4.25” x 5.5”, I am using Heffy Doodle’s yellow cardstock.  I scored it with my 12” x 12” scoring board and cut it with scissors to create tabs to fold over and adhere.  To create a subtle background, I used Pretty Pink Posh’s “Tropical Background Stencil” and Mustard Seed distress oxide.  To create a little peek-a-boo hole, I used some stitched circle dies.

I cut down a piece of white cardstock to 4” x 5.25” to be my inner card.  Using the “Clouds for Days stencil” from Simon Says Stamp, I created a very subtle blue sky background using leftover ink on my blue blender brush.

I don’t have any waves dies, but I wanted to create a scene for my penguin that had waves!  I got a little crafty and decided to use Heffy Doodle’s “Silver Linings Cloud Dies”!  I focused on parts of the dies that looked the most like waves.  I cut them with my Easy Cuts die cutting machine and then colored them with Copic markers.

Since I don’t have a beach die either, I decided to get a little creative again!  I used Heffy Doodle’s “Forest Builder dies” and grabbed a tree that resembled the beach!  I cut it down to make it fit in corner of my card.  I also cut some “Swirly Clouds” out for my sky.

I grabbed a whole bunch of tropical stamp sets and picked a palm tree (from Pretty Pink Posh’s “Tropical Birds”), a penguin (from MFT’s “Penguins in Paradise”), and the little accessories (from Mama Elephant’s “Summer Days”).  I colored in all of my images with Copic markers.

For my 2 sentiments, I used Honey Bee Stamps “Blown Away” and Heffy Doodle’s “Whatcha Sayin’” stamp sets.

I put the whole scene together using 3D foam squares, strips, and glue.  I added a little bling by adding some Ink Road Stamps Crystal Sunshine beads as coconuts and some yellow twine on the outer pocket.

Thanks so much for checking out this blog post!! I hope you enjoyed it! Xoxo, Amanda

Products Used:
Tools:
12”x12” Dress My Craft Score Board (affiliate link)
Dress My Craft Easy Cuts Die Cutting Machine (affiliate link)

Cardstock:
Heffy Doodle Cardstock

Stamps:
Pretty Pink Posh “Tropical Birds”
My Favorite Things “Penguins in Paradise” (discontinued)
Mama Elephant “Summer Days”
Honey Bee Stamps “Blown Away”
Heffy Doodle “Whatcha Sayin'”

Dies:
Heffy Doodle “Silver Linings Cloud Border Dies”
Heffy Doodle “Forest Builder Dies”
Heffy Doodle “Swirly Clouds Die”

Stencils:
Pretty Pink Posh “Tropical Background Stencil”
Simon Says Stamp “Clouds for Days Stencil”

Bling:
Ink Road Stamps “Crystal Sunshine half beads
(Use code Amanda10 for 10% off order)

Posted on Leave a comment

Aloha Pop-up Card

Hello my friends!! This post is a little bit longer than usual, but I wanted to show you step-by-step how I assembled this fun pop-up card!

I am starting with Pretty Pink Posh’s “Tropical Birds” stamp set and Mama Elephant’s “Summer Days” stamp set. I’m stamping everything on 110 lb. Neenah Solar White cardstock and coloring with Copic markers. Click on any photo to see the images zoomed in!

I’m cutting out everything using my Easy Cuts die cutting machine from Dress My Craft. I use purple tape to hold my dies in place so they don’t shift.

Now, I’m ready to start making my pop-up box. This die set is from Lawn Fawn.

I’m ready to start adhering my stamped images to the box! And then, I’m all done!!

Thank you so much for stopping by! I hope you enjoyed this card as much as I did!

Posted on Leave a comment

Wishing you Loads of FUN

Hello all my crafty friends! I hope you are all staying healthy and sane during this crazy time!

To create this funny little birthday card, I used Art Impression’s Loads of Fun stamp set. I also used Heffy Doodle’s Confetti Hearts stencil for the background.

For this lovely lady’s hair, I used V0000, T0, T2, T3, and BV23. The pinks are R83, R81 and RV34. The greens are BG93 and BG90. The oranges are YR20, YR30, and YR21.

I used scissors to cut out the stamped images. I adhered the images with 3D foam squares.

Stay healthy, friends! Xoxo, Amanda

Posted on 2 Comments

Retail Therapy – City Streets

Hello crafty friends! I hope everyone is staying happy and healthy!

I made this card before this terrible Coronavirus epidemic. Now, I’m posting it because we all need a little reminder of what’s to come after this is all over! (Or, if you’re like me, you are already treating yourself to a little online retail therapy!!)

To make this card, I started with creating my own street using a ruler and my Copic markers. I used T7, T6, T5, and T4 to create the street.

I used Antique Linen distress ink and this cloud stencil to create a neutral sky.

I stamped my images from the Sunny Studio City Streets stamp set and colored them in with my Copic markers. To keep a certain color palette, I used the same markers throughout all the stamped images.

I stamped my sentiment with Versamark Watermark ink and used white detail embossing powder. I used my heat tool to emboss the sentiment.

I cut the images out with the coordinating dies and adhered them to my card front with 3D foam adhesive.

Here are a few close-up photos!

Thanks so much for stopping by! Stay healthy!! Xoxo, Amanda

Posted on 1 Comment

Happy Purrthday!

Hello crafty friends! I hope everyone is staying healthy!

I wanted to share this cute card I made using Heffy Doodle’s Hello Squeakheart and Purrfect Day stamp sets.

I’m using Tuxedo Black Memento ink to stamp all of my images.

I’m coloring in my images with Copic markers.

For my background, I’m using this brick background stamp and Hickory Smoke distress oxide. I’m also cutting a stitched border with a die and black cardstock.

I’m using 3D foam squares, strips, and glue to adhere everything to my card.

Here are a few close-ups of the finished card!

Thanks so much for stopping by! Xoxo, Amanda

Posted on 95 Comments

Heffy Doodle Catherine Pooler Collaboration Blog Hop

Hi everyone! Welcome to the Heffy Doodle and Catherine Pooler Designs Collaboration Blog Hop! Our design teams have come together to share some inspiration with the new Heffy Doodle and Catherine Pooler releases, and there is a prize up for grabs, too!

I had such a fun time playing with the new releases! The Catherine Pooler inks are so juicy and amazing! I had to make more than just one card!

Card 1

For the first card, I’m starting with these beautiful colors of Catherine Pooler inks: Mardi Gras, Aquatini, Mint To Be, Tutti Frutti, and Coral Cabana. The flowers are from the So Happy stamp set.

I am using one of the dies from the Fancy Nancy Frames set to create a cutout in the center of the top of my card front.

I’m using the Happy X Three dies to cut out a black inline and a white outline for my sentiment.

On a piece of Heffy Doodle Cherry on Top cardstock that I cut down to A2 size, I am placing my Fancy Foliage stencil and blending the pattern using Candied Apple and Fired Brick distress ink/oxide.

Now, I’m ready to stamp my Quill You Be Mine images with Memento Tuxedo Black ink. This ink works well with Copic markers, which I will use to color in my stamped images.
Body: E41, E42, E43, R21, white Gelly Roll pen
Quills: E44, E43, and E42
Balloons (on 2nd attempt!): G0000, G00, and G02

After using the coordinating dies to cut my images out, I’m ready to start putting my card together. I’m using foam tape and squares to create a 3D layers.

I’m stamping my sentiment on black cardstock using Versamark Watermark ink. I’m adding white detail embossing powder and using my heat gun to emboss it. I am cutting down small strips of 1/8” foam tape and putting it on the back of my “happy” piece.

Now I’m ready to add my sentiments and it’s all done!

Card 2

For the next card, I’m going to make a slimline card, using the same Catherine Pooler inks and So Happy stamp set. I’m starting by laying out where I want things to be. I’m going to use some masking tape to cover the sentiment “HAPPY” because I’m going to stamp that in a different color. After stamping my sentiments, I’m using one of the Fancy Nancy frames to create some peek-a-boo cutouts. I’m using the Mint to Be ink pad to blend a background that will be peeking through my cutouts.

I’m stamping my bugs from the Big Bug Hugs and coloring them with Copic markers.

Now, I’m ready to adhere everything to the card using 3D foam adhesive!

Catherine Pooler and Heffy Doodle will be respectively giving away a $25 and a 25£ gift certificate to their stores! Make sure to comment on each post in the hop for your chance to win!
Winner will be chosen randomly and announced on Tuesday, February 25th on the Heffy Doodle and Catherine Pooler blogs.

You’re next stop is Jen Carter!

BLOG HOP LINEUP:
Catherine Pooler Blog
Heffy Doodle Blog
Karen Baker
Davina Cantrell
Nanette Tracy
Amanda Fitterer (you are here!)
Jen Carter
Laura Volpes
Erica Andersson
Cassie Trask
Erin Thompson
Jenn Bena

Posted on 1 Comment

Just One More Chapter

Hey crafty friends!! It’s time for a new card! There is quite a mix of products in this card! Check it out!

The first thing I’m going to do is make a window using Dress My Craft’s Window and Pocket Die. I’m using the Heffy Doodle Fancy Foliage stencil to create a pattern on my curtain.

I’m going to create a background using Heffy Doodle’s Sun Moon and Stars Dies. I’m also going to blend a background with some distress oxides and my blending brushes. I’m creating some very light stars with white distress ink and the Heffy Doodle Starfall Stencil. For my foreground, I’m using a brick stencil that I made myself and distress oxide.

I’m ready to stamp and color my Mama Elephant Book Worm images and my Good Reads sentiment!

After adhering everything to the card, it’s all done!

Thanks so much for stopping by! Til next time!! Xoxo, Amanda

Posted on 8 Comments

Heffy Doodle New Release Blog Hop

Hi everyone and welcome to the Heffy Doodle Release Blog Hop! The new release is now available for purchase from Heffy Doodle and official retailers, and we are celebrating with lots of inspiration and a giveaway, too!

I am so in love with this new stamp set Pasta La Vista! It’s so versatile because you can add the hands, legs, faces and bows or leave them out! Plus, the sentiments are seriously amazing! Of course, you’ll want the coordinating dies as well!

To make this card, I am starting with a piece of white 110# Neenah Solar White cardstock. I am creating a blue background by blending “Tumbled Glass”, “Salty Ocean” and “Blueprint Sketch” distress oxides.

Tip: To avoid fingerprints on your background, use a piece of Memo Tape to hold your cardstock in place.

Next, I am cutting a Lawn Fawn PeekaBoo Backdrop. I have not glued my frame down yet, I’m just using it as a guide to place my sentiment. I am stamping my sentiment with Memento Tuxedo Black ink pad.

I am using Darice 3D foam adhesive strips on the back of my backdrop.

Now, I’m ready to stamp my Pasta La Vista images! I am using Memento Tuxedo Black ink again because it’s Copic-friendly and I’m going to be using my Copic markers to color my images.

Tip: If you stamp more than you need, stick your extras back in the your stamp/die envelope!

Another tip: Use a pencil eraser to control your new stamps, since they are stickier and harder to handle with your fingers.

Time to color (my fav!!!)

We’re ready to die cut with the coordinating Pasta La Vista dies!

I’m putting 3D foam adhesive squares on the back of my pasta images.

Tip: Don’t remove the backing yet. Lay everything on your card where you think you like it first. That way, you can see what it looks like 3D before committing.

I’m thinking I need more leaves and another bow, so I’m going to go ahead and stamp and die cut those now!

Now, I’m ready to remove my backing from all my 3D foam and place my stamped images on the card! I’m using this little sticky tool to help place my legs and arms where I want them before I glue them all down.

I’m going to use a glue pen to adhere my little legs and arms because they’re so tiny.

The legs that are together have too much white space in them, so I’m just going to cut them down with my scissors.

I feel like the card is lacking something, so I’m using the Whatcha Sayin’ Stamp and Dies to add another little fun element to the card!

Now, I’m just going to adhere my word bubble down and it’s all finished!

Thank you so much for hopping along with us!

GIVEAWAY INFO!!

Prize – A fun prize pack including an exclusive Heffy Doodle T-Shirt, a Heffy Doodle pencil and a 50£ voucher to the Heffy Doodle Store!

The winner will be chosen randomly and announced on Friday, January 10th on the Heffy Doodle Blog!

If you’re following along with the lineup below, you’ll want to go here next!

Blog Hop Lineup

Heffy Doodle Blog

Tallie Clewley

Ashley Ebben

Jenn Bena

Amanda Fitterer

Davina Cantrell

Mindy Baxter