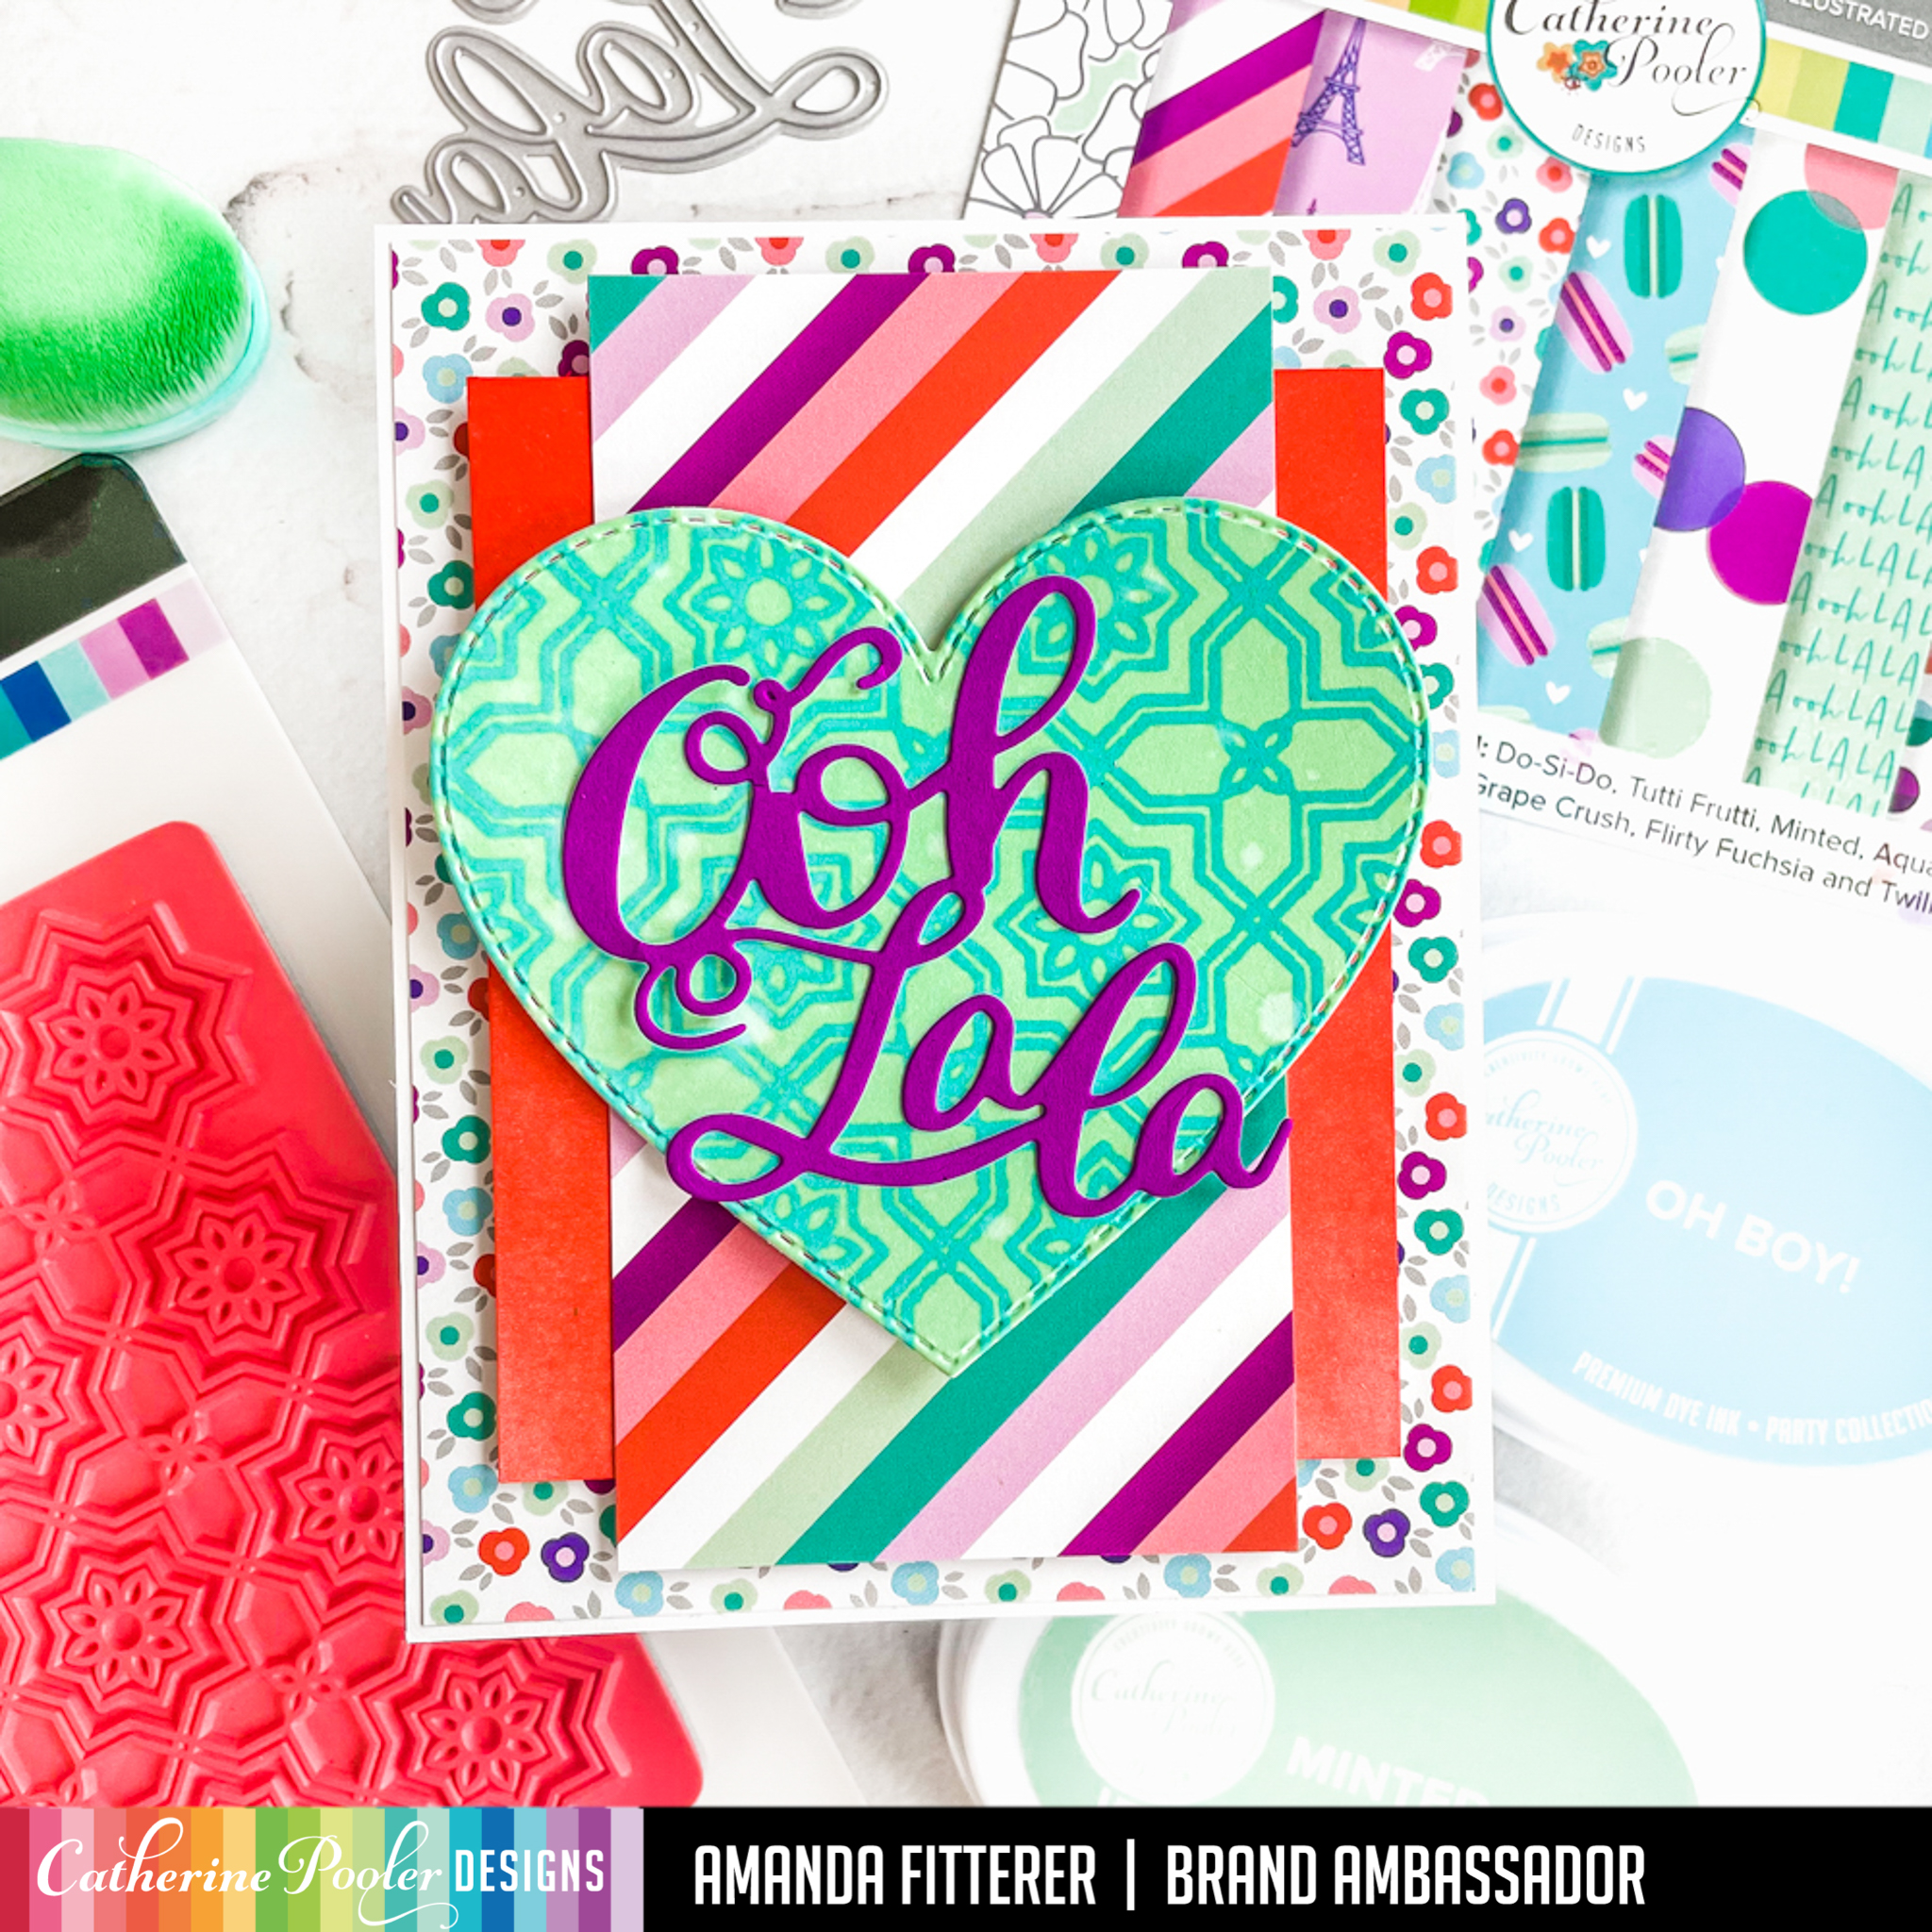
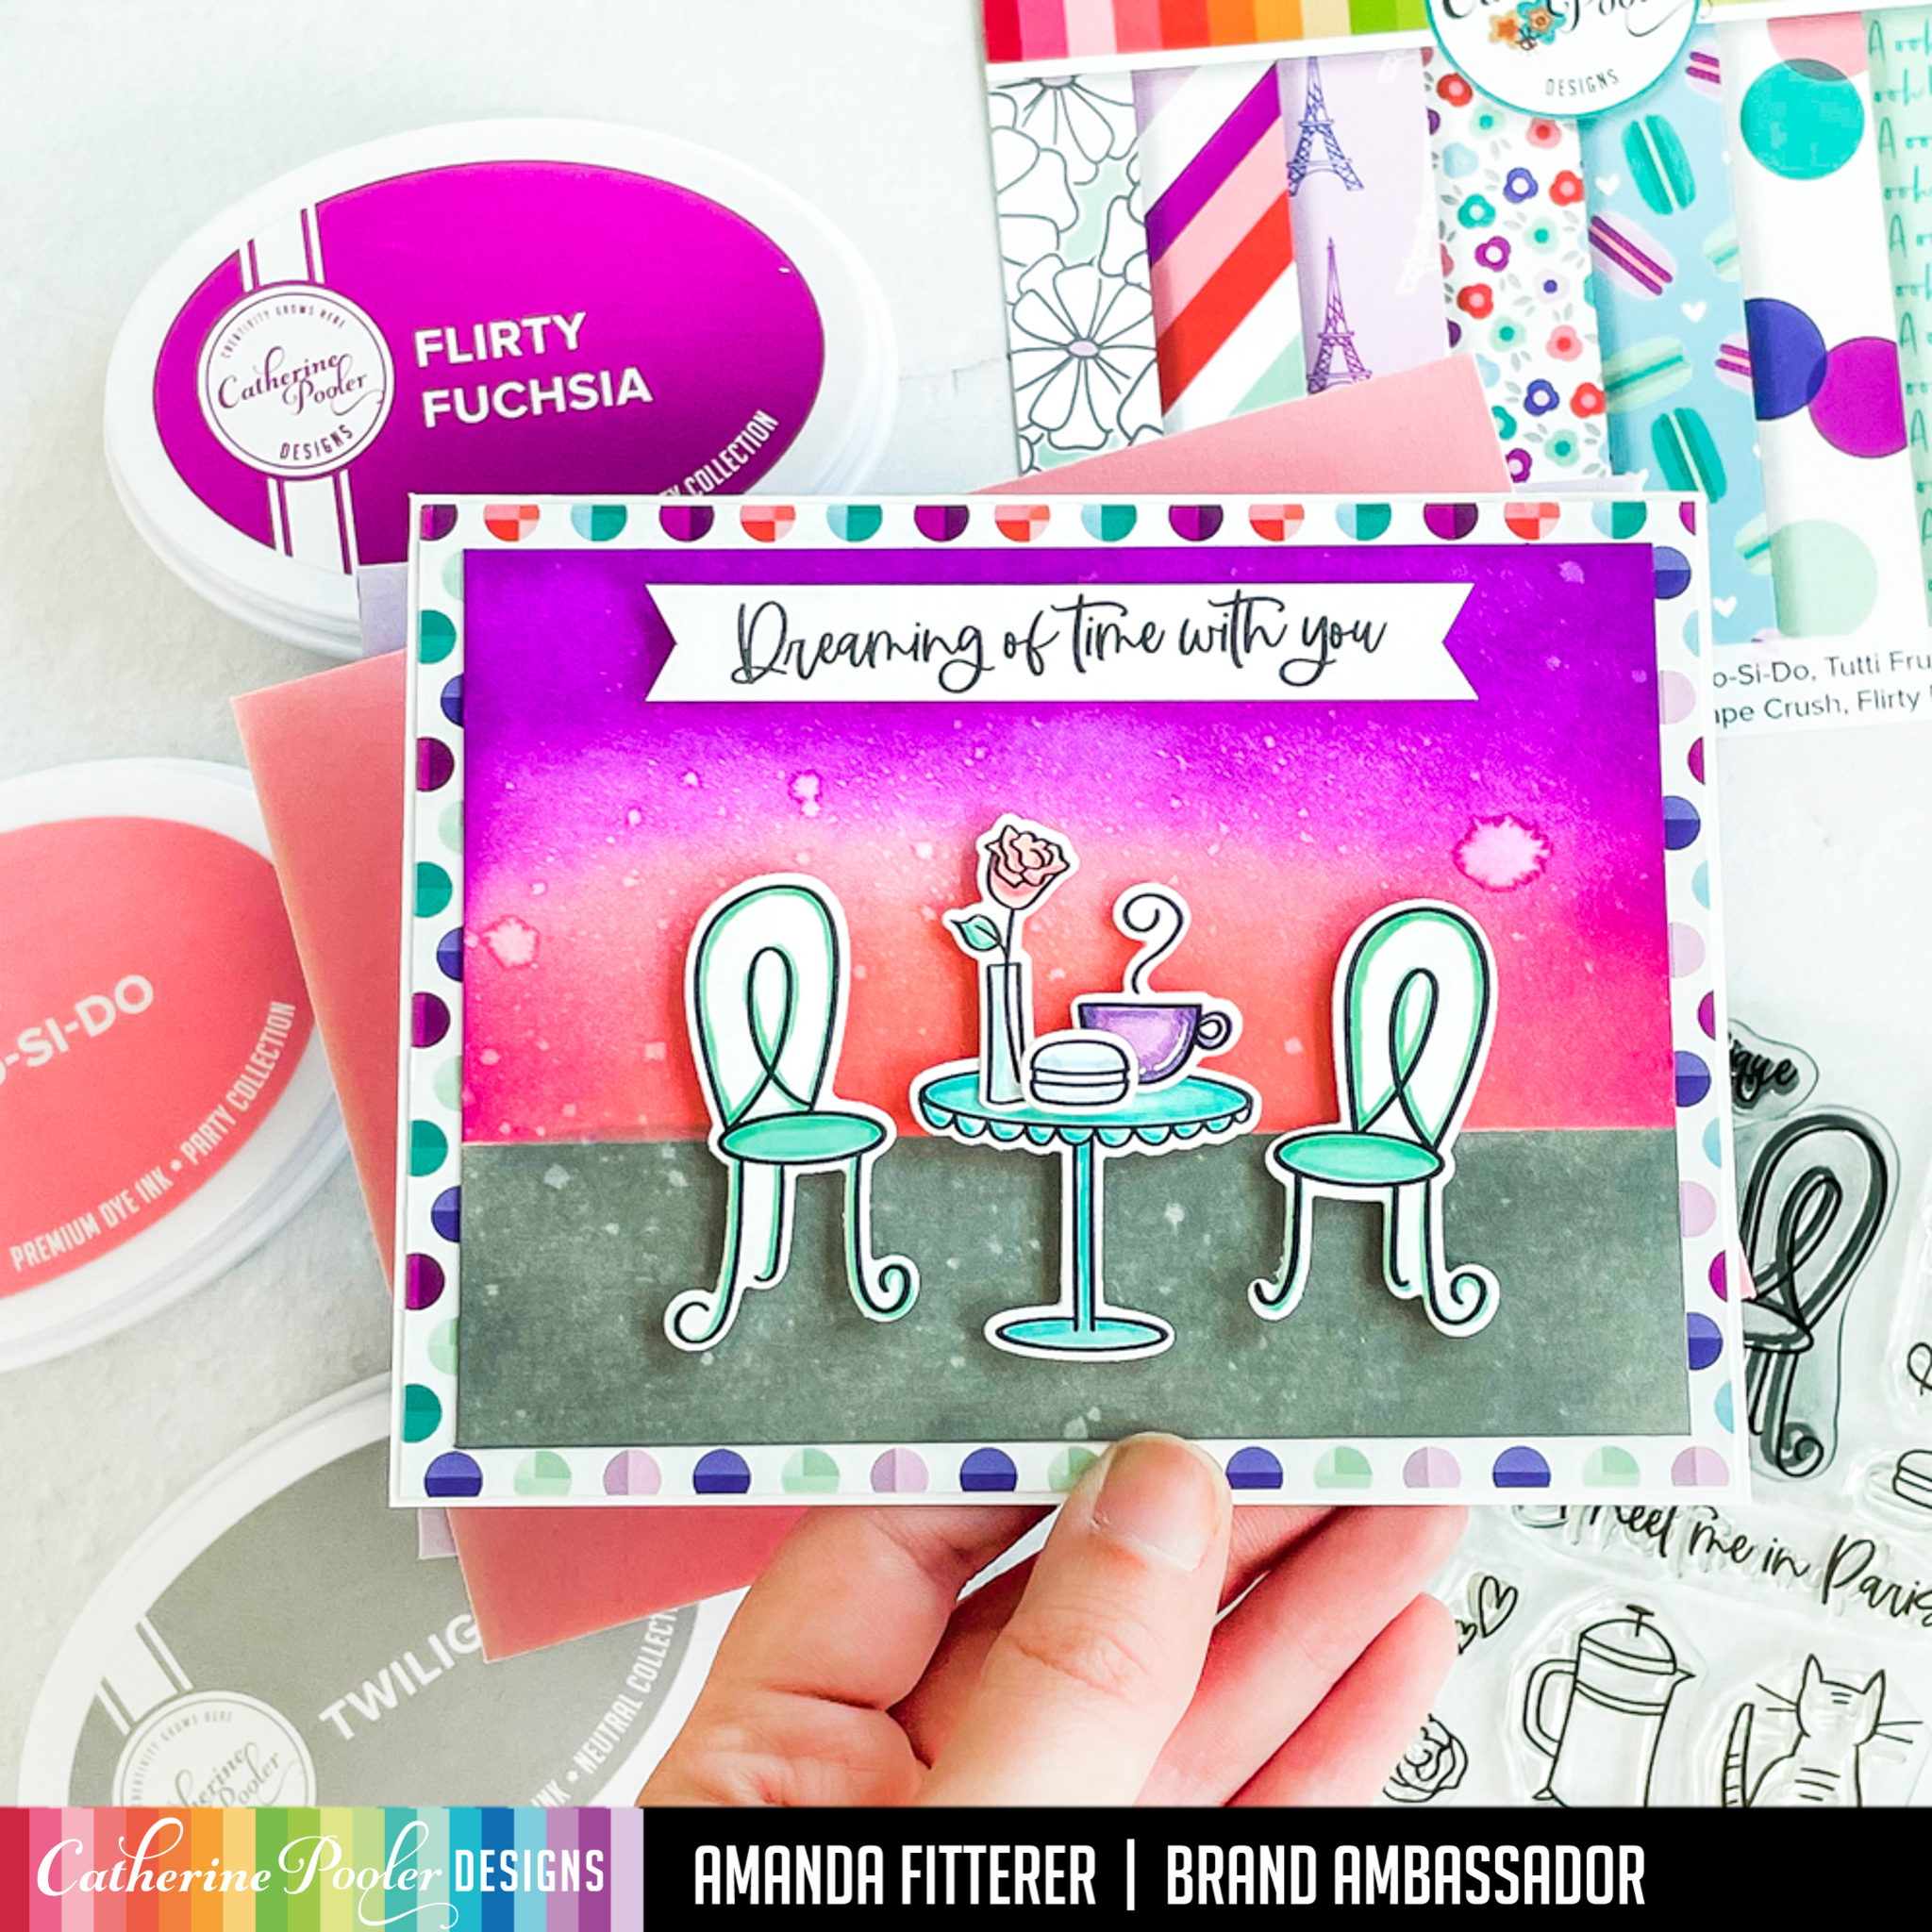
Did you catch the release of the new Global Adventure Pt. Deux Release from Catherine Pooler?! Omgoodness! The cuteness! This collection is taking you around the world! You HAVE to check it out!
Stay tuned for even MORE cards with this New Release!
–> If you want to use my affiliate link to shop the New Release, click here.Thank you for all your support!!All the links in this post are affiliate links. This helps me to get some extra crafty cash to buy more goodies to share more projects with you!It is SO appreciated! <–
INSTAHOP + GIVEAWAY Today, the NEW 🌏 Global Adventure Collection Pt. Deux hits the CPD shop along with the three NEW 🌈 Refresh Inks !!! This is cause for a celebratory Insta Hop! Someone is going to WIN a $50 Gift Card to the CPD Shop 🎁!
I will continue to share more projects using this New Release over the next few days!!
–> If you want to use my affiliate link to shop the New Release, click here.Thank you for all your support!!All the links in this post are affiliate links. This helps me to get some extra crafty cash to buy more goodies to share more projects with you!It is SO appreciated! <–
Did you catch the release of the new Global Adventure Pt. Deux Release from Catherine Pooler?! Omgoodness! The cuteness! This collection is taking you around the world! You HAVE to check it out!
I will be back in the next few days to share some more cards using this New Release!
–> If you want to use my affiliate link to shop the New Release, click here.Thank you for all your support!!All the links in this post are affiliate links. This helps me to get some extra crafty cash to buy more goodies to share more projects with you!It is SO appreciated! <–
Well hey there, crafty friends! I sure hope you had a wonderful Christmas! Did you get any crafty goodies?! I hope so!!
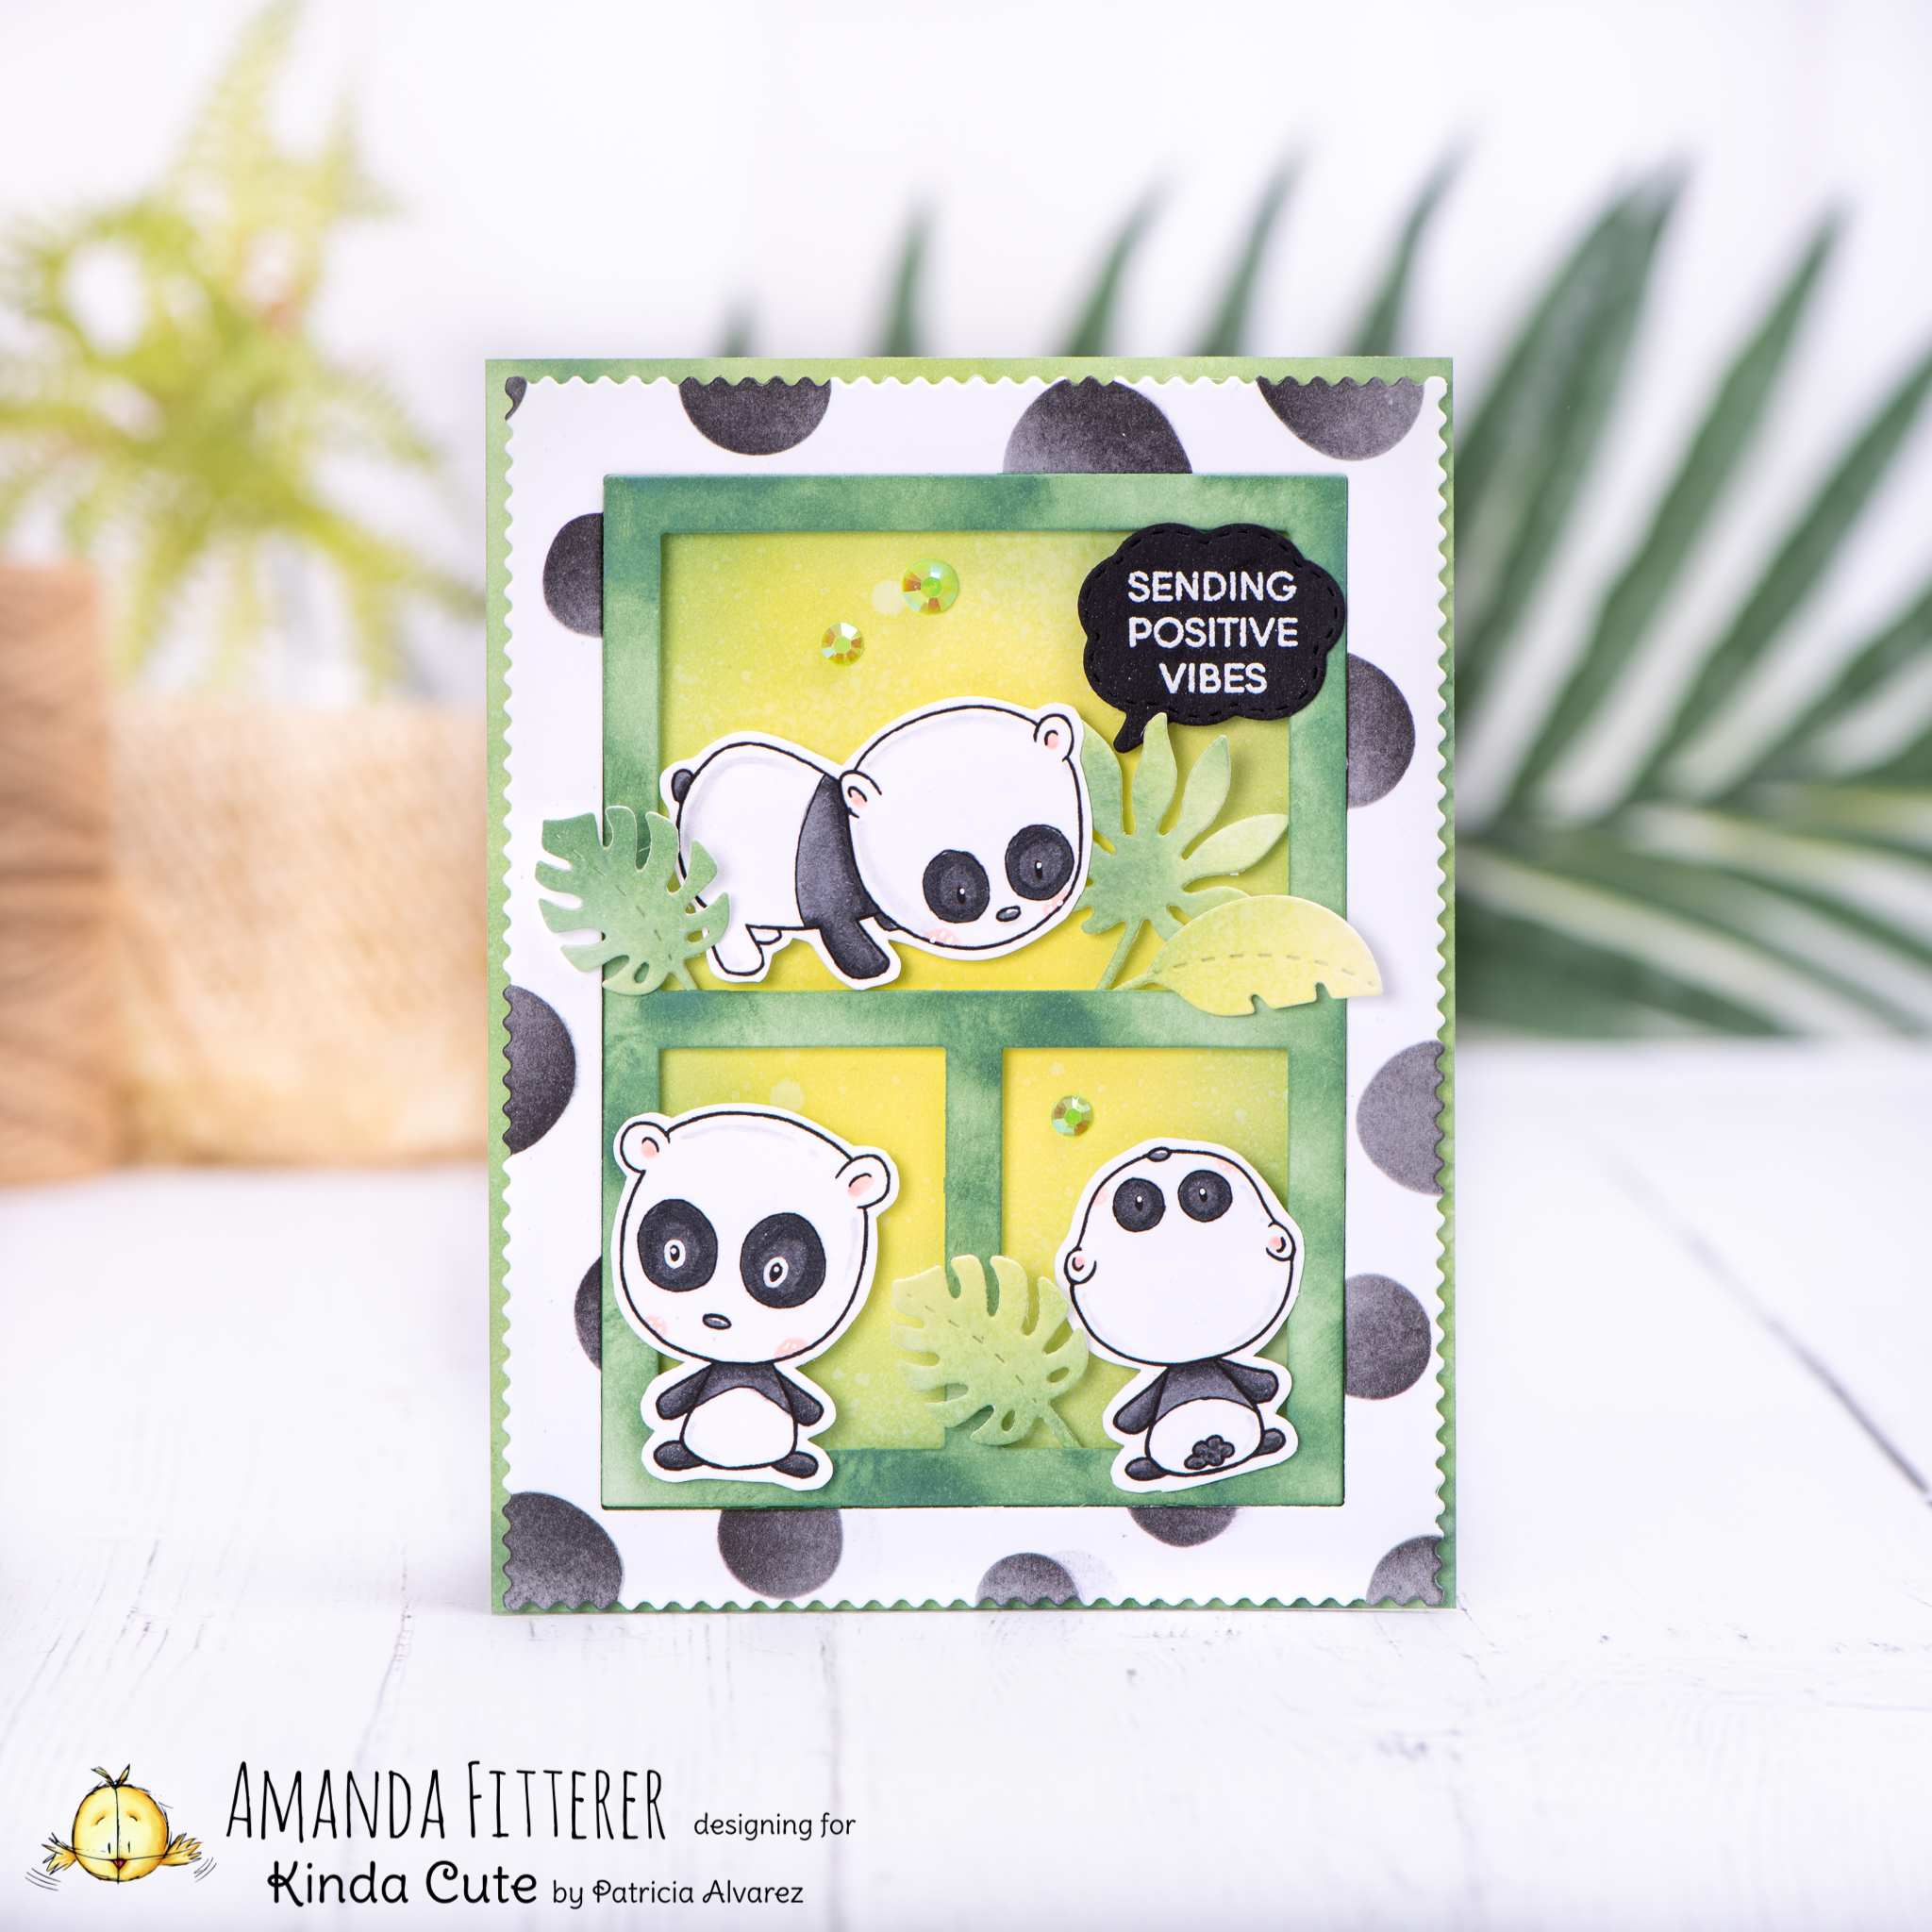
Today, I’m sharing a Baby Shower card! I love interactive cards and the Slider Pop-up Dies make it so easy to make one quickly!
To create this card, I have blended some gorgeous Catherine Pooler blues on my cutouts from the Slider Pop-up Dies . Next, I’m spritzing the ink with water.
I’ve stamped my images from the Beary Big Heart and Chimply the Best stamp sets. Now, I’m ready to start coloring the images with Copic markers!
To create my leaves, I am using both the Amazonian Leaves and Forest Leaves Dies. To color the leaves, I used Limoncello and Tiara inks. I am gluing my leaves, sequins, and monkey on using Glubert Glue.
Using the Classic Sentiments stamp set and the Chimply the Best stamp set, I’ve created my sentiment on a piece of white cardstock.
Voila! So easy and fun! Plus, it will make a great Baby Shower card that is sure to be gushed over!
Thank you so much for stopping by my blog today! I hope you’ve enjoyed this post as much as I’ve enjoyed sharing it with you!! Xx, Amanda
Welcome to the Heffy Doodle and Newton’s Nook Designs Collaboration Blog Hop! Design Team members from both companies are sharing inspiration using products from both companies! I am super excited to share my card with you!
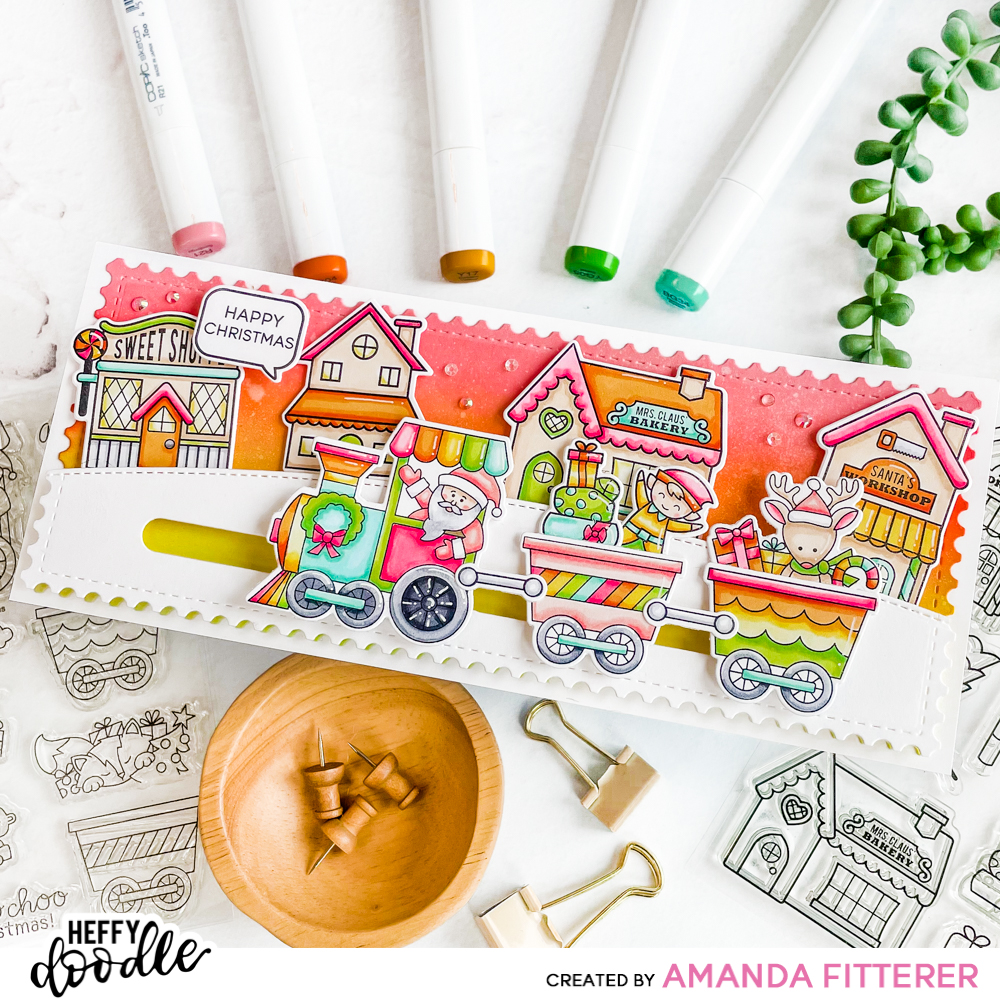
To create this card, I’m starting with the Heffy Doodle Slimline Mini Mails Die and a piece of white cardstock trimmed to slimline size (3.5″x8.5″).
Next, I am stamping my images from the Newton’s Nook All About for Christmas stamp set and the Heffy Doodle Santa’s Village stamp set with the Maker Forte ReMARKable Eclipse Black ink. This is my favorite alcohol-friendly black ink!
Now, onto coloring my adorable images with Copic markers!
To create my hill and slider element, I’m using the Heffy Doodle Slimline Scenery Dies and the Straight Slider Dies. To create a longer slider, I’m die cutting 2 of the sliders right next to each other.
Using Deep Foam tape, I’m propping up my hill to give me room for a button to use as my sliding element. After attaching my trains to the buttons, I can start assembling the rest of the card using 3D foam squares and glue!
Here’s another photo of the finished card and some close-ups!
And that’s it for my card!! I hope you enjoyed my part in the Blog Hop!
To be entered to win the giveaway, all you need to do is comment at each stop along the Blog Hop! Newton’s Nook Designs will be giving away $35 and Heffy Doodle will be giving away £25 to their respective stores! Be sure to comment before 11:59 PM EST on Dec 28th to be entered to win!
Welcome to the Heffy Doodle and Catherine Pooler Collaboration Blog Hop! Design Team members from both companies are sharing inspiration using products from both companies!
I assembled my card using liquid glue and 3D foam squares.
Now, onto the Blog Hop Giveaway Details:
To be entered to win the giveaway, all you need to do is comment at each stop along the Blog Hop! Catherine Pooler will be giving away $35 and Heffy Doodle will be giving away £25 to their respective stores! Be sure to comment before 11:59 PM EST on Nov 24th to be entered to win!Each company will post their random winner on Nov 25th at 10AM EST! Make sure to check the Heffy Doodle Blog and Catherine Pooler Blog to see if you’re a winner!
Hey friends! Maker Forte’s New Release is available NOW for purchase!! Get your goodies here.
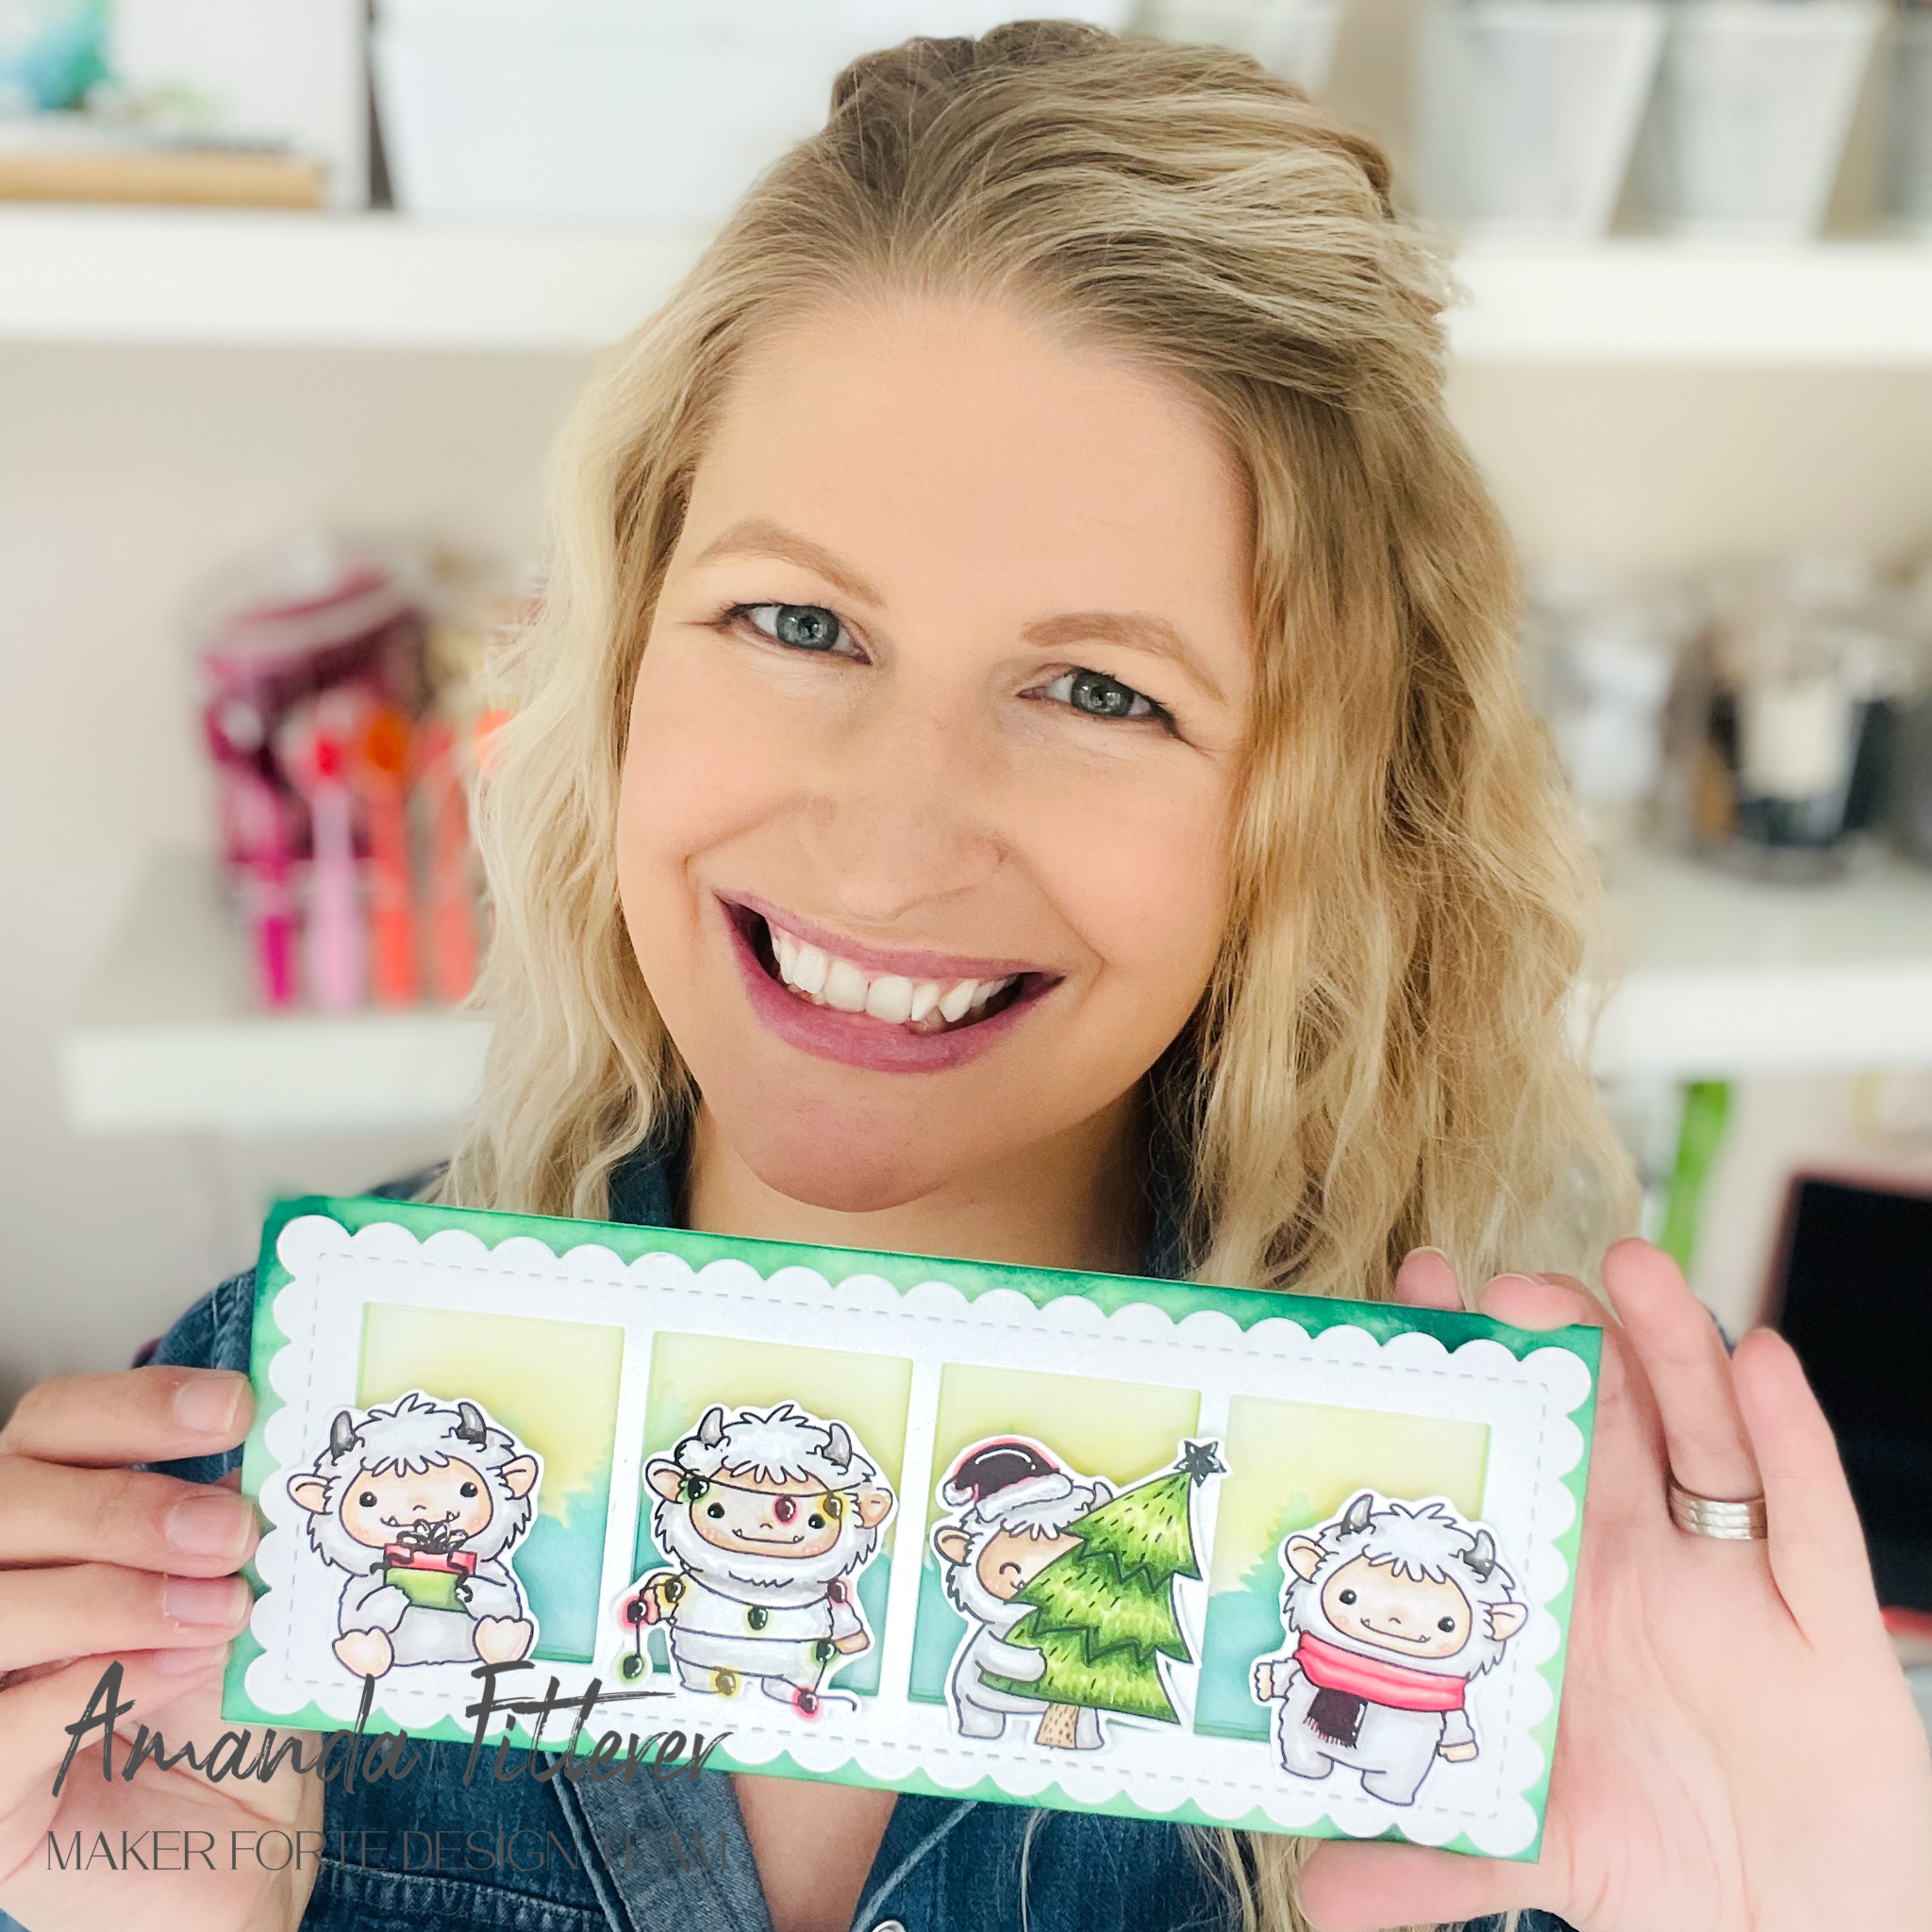
I have a few cards I made using the new “Get Yeti for Christmas” Stamp Set. Are these guys just the cutest?! I have 2 cards to share with you using this stamp set!
To make this card, I used the Straight Slider Dies from Heffy Doodle to create an interactive element to my card! The little yeti can now sled back and forth! I used Pop Art and Tartan Teal for my background. My clouds were created with the Clouds Stencil.
If you missed the Live YouTube Reveal Party, you can watch it here!
Thank you all so much for stopping by my blog!! Xx, Amanda
Welcome to the Heffy Doodle, Maker Forte, and SugarPea Designs Collaboration Blog Hop! Design Team members from all three companies are sharing inspiration using products from all three companies!
Today, I am sharing 2 cards that I made using tons of awesome products from these companies!
For my interactive pull tab and slider card, I’m starting by stamping my images from the Heffy Doodle Otter Side and You Go, Gull stamp sets and the Sugar Pea Designs Captain of My Heart and Waves of Love stamp sets. To ensure I get a really crisp stamped image, I’m using my Smoosher Tool from Maker Forte and my MISTI. I’m coloring my images with Copic markers and then cutting the images out with my Die Cutting Machine.
Now I’m ready to create my waves. I’m using some colored cardstock and the Breaking Waves Dies, plus the Wavy Water Slides to create my coordinating wave slider.
For my front, I created sand using Copic markers. For my waves, I used the Breaking Waves Dies.
For my images, I am using the same sets as my first card. I’ve stamped my images, used Copic markers to color them, and now I’m attaching my little fishies and birds to small strips of acetate.
To make assembling my card easier, I am using my favorite Rainbow Tweezers.
And, that’s it! Both cards completed!
To be entered to win the giveaway, all you need to do is comment at each stop along the Blog Hop! Maker Forte will be giving away $35, Heffy Doodle will be giving away £25, and SugarPea Designs will be giving away $25 to their respective stores! Be sure to comment before 11:59 PM EST on Aug 20th to be entered to win!
Hey crafty friends!!! It’s another Christmas in July post! Scrapbook.com just released some really fun Christmas products and they asked ME to make some projects with them! How could I refuse?! I love their products!
If you want to shop Scrapbook.com using my affiliate link, click here. That will get me a little percentage of your purchase so I can keep buying new crafty supplies and sharing inspiration with you! 🙂
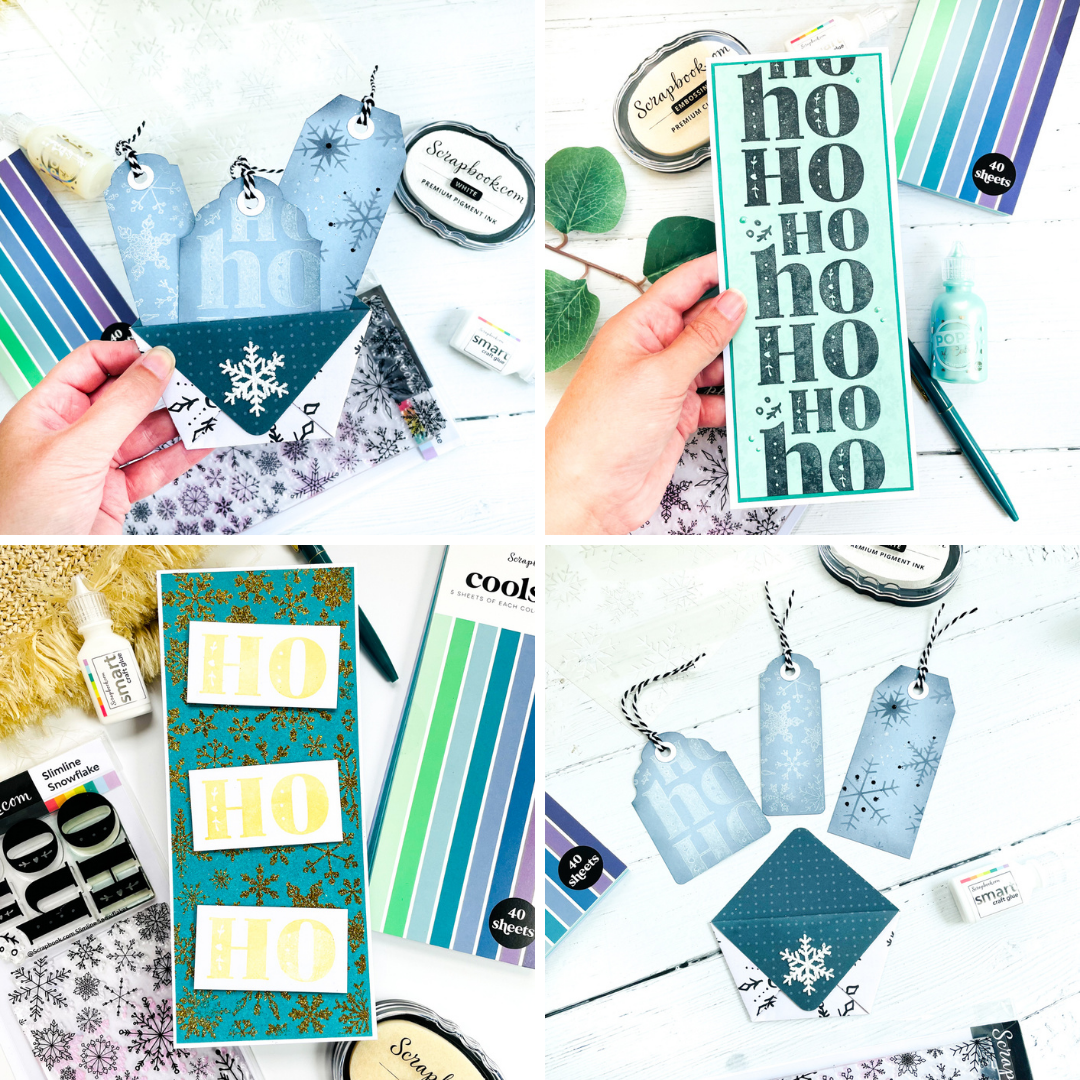
Now onto my projects! My first project is a slimline card!
I’m grabbing my Scrapbook.com Premium Clear Ink Pad and the Slimline Snowflake stamp set. Using my MISTI, I’m placing my Cools Smooth Slimline colored cardstock into the MISTI and stamping the snowflakes with the clear ink. This will create a “watermark” effect in my background that looks really cool in person. Next, I’m stamping my “Ho Ho Ho” all the way down the front of the card with Memento Tuxedo Black Ink. I’m using the Smart Glue to adhere my layers together and then adding some Seafoam Pops of Color for a finishing touch!
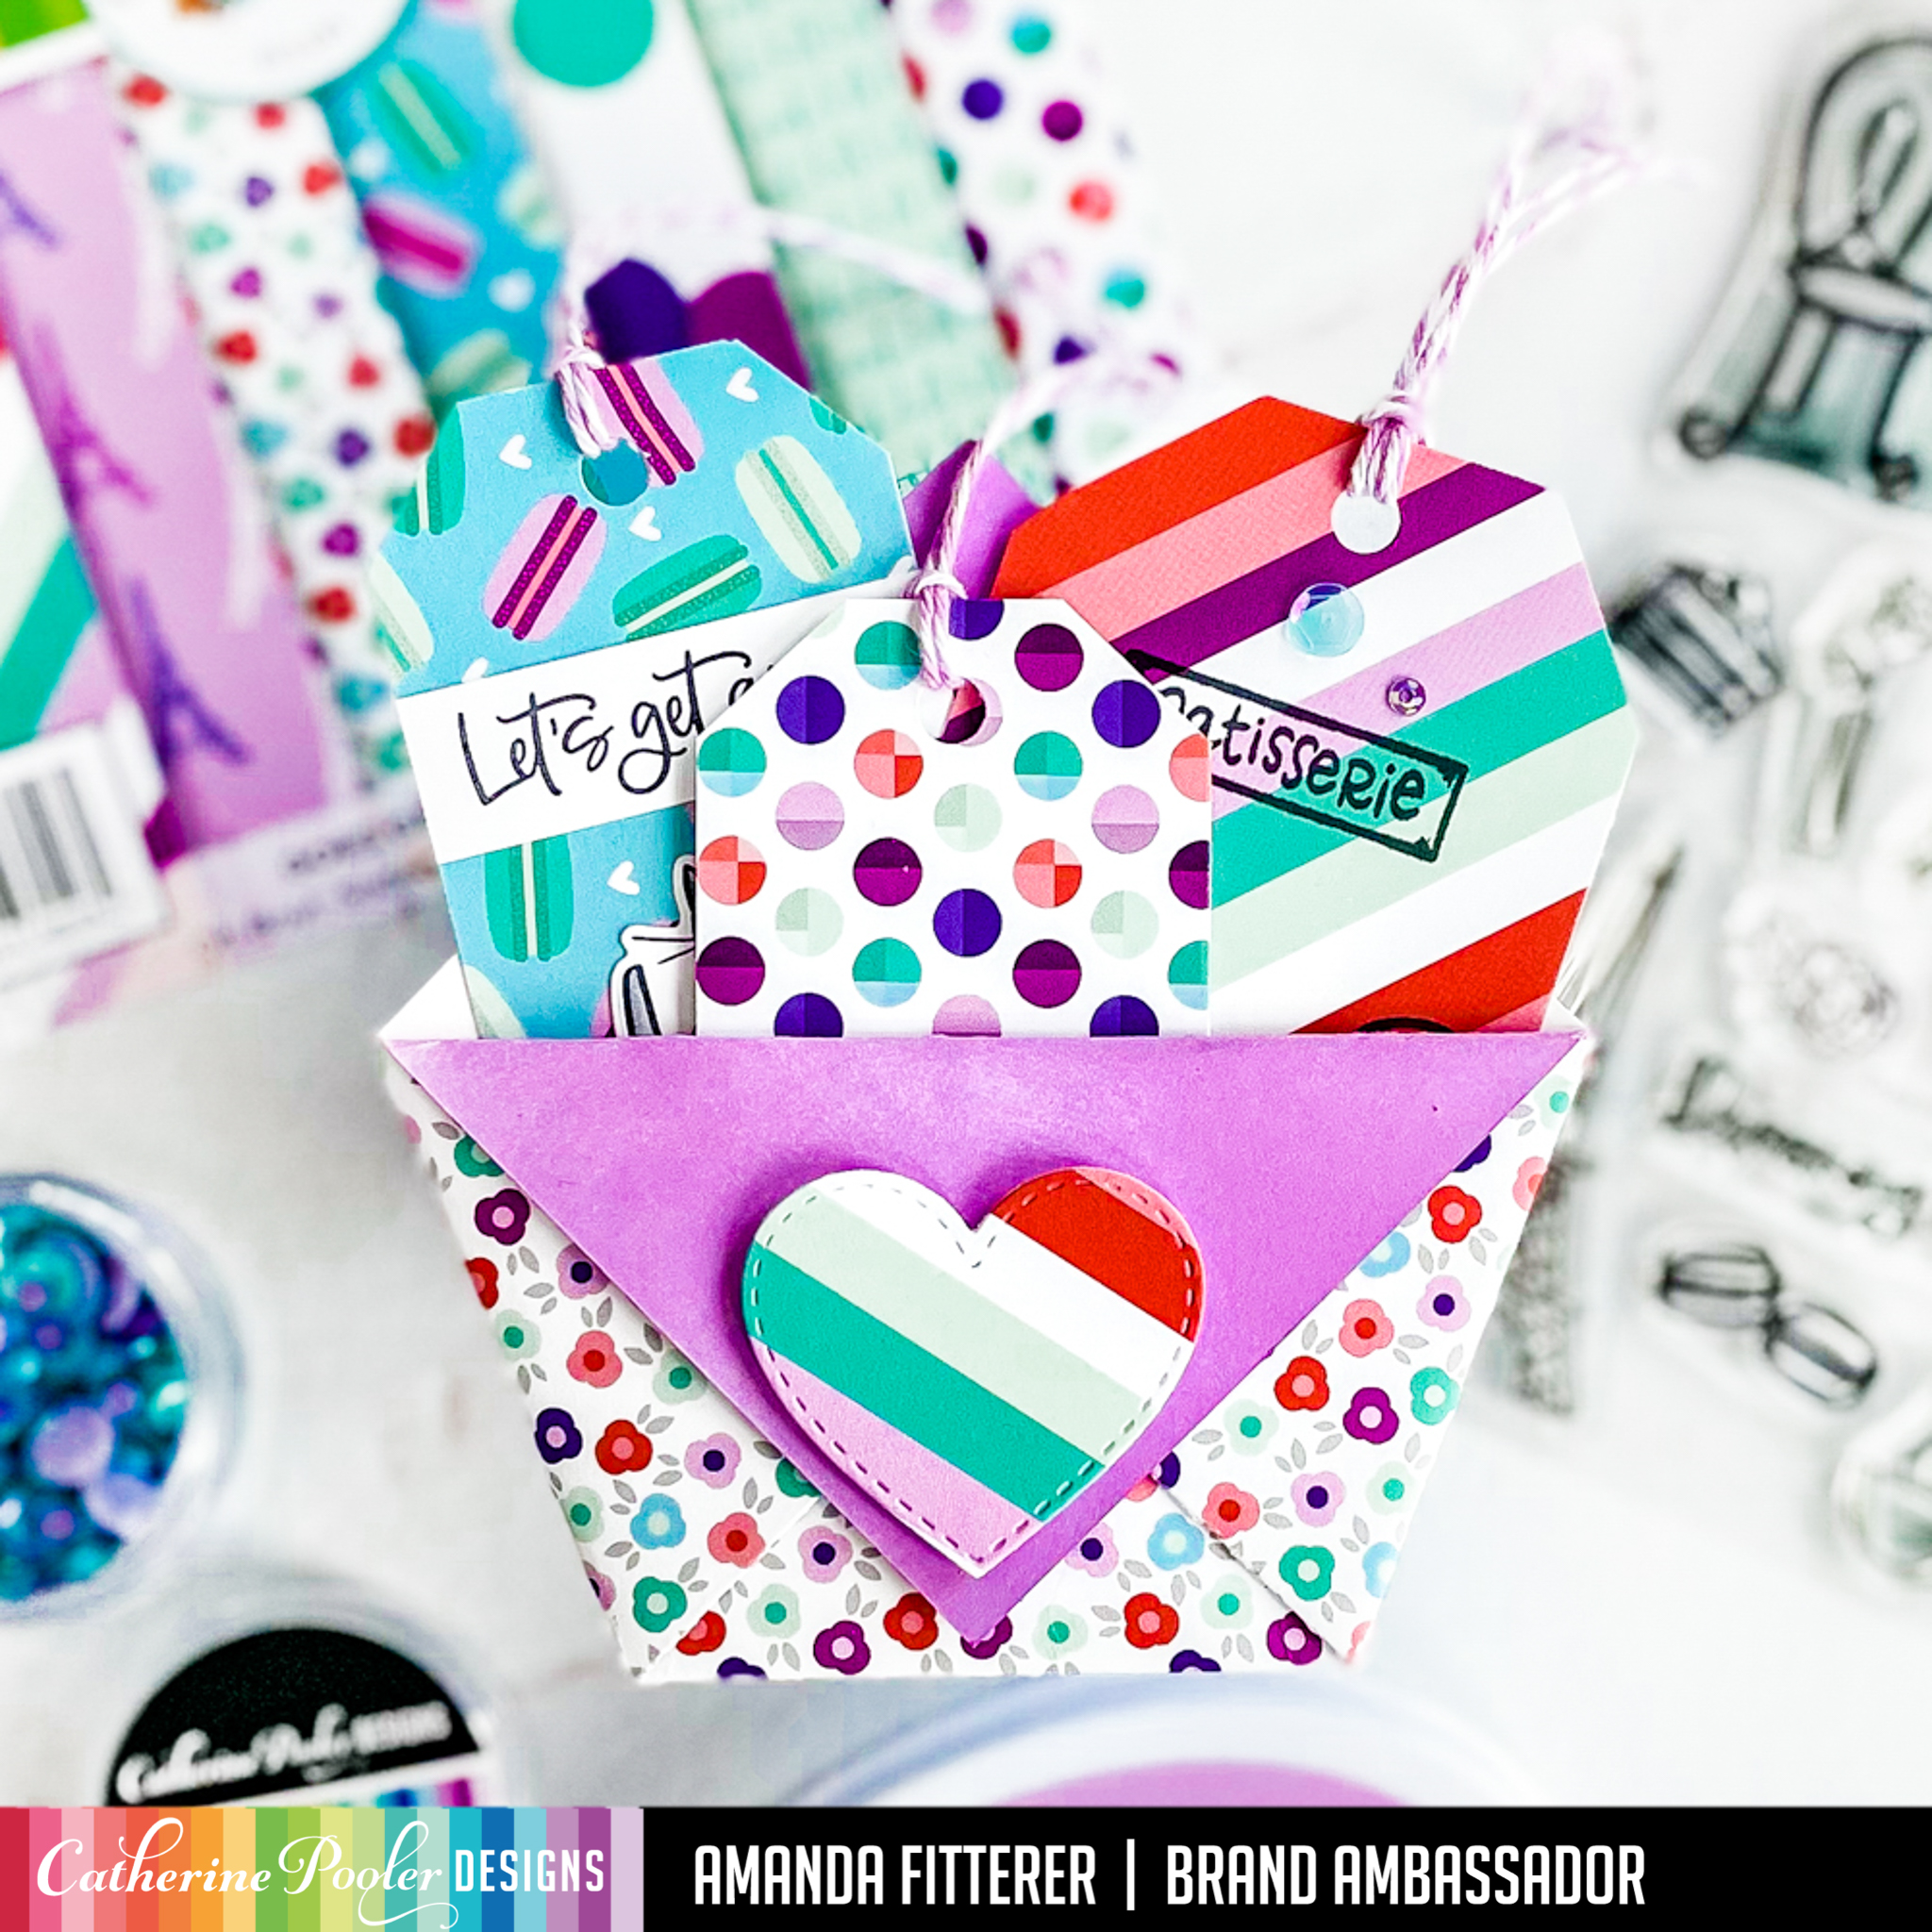
For my next project, I’m going to make a folded envelope with some tags inside!
To create this cute little pocketfold envelope, I’m starting with a piece of double sided Snowflakes Crate Paper. See the gallery below to watch me fold it step-by-step:
To round off the edges of the envelope, I’m using the 3-in-1 Corner Punch. I’m using my Smart Glue again to adhere the flaps down.
Now that my pocketfold is ready, I’m ready to move onto my tags.
For my sentiment, I’m stamping with Metallic Gold Ink. I’m masking off the part of the stamp I don’t want to ink up with Memo Tape.
Thank you SO much for stopping by my blog today! I appreciate YOU so much!
Just a reminder, clicking on the products above will go to my affiliate links for those products! I appreciate all the extra spending money I can get! I enjoy sharing my inspiration with you!
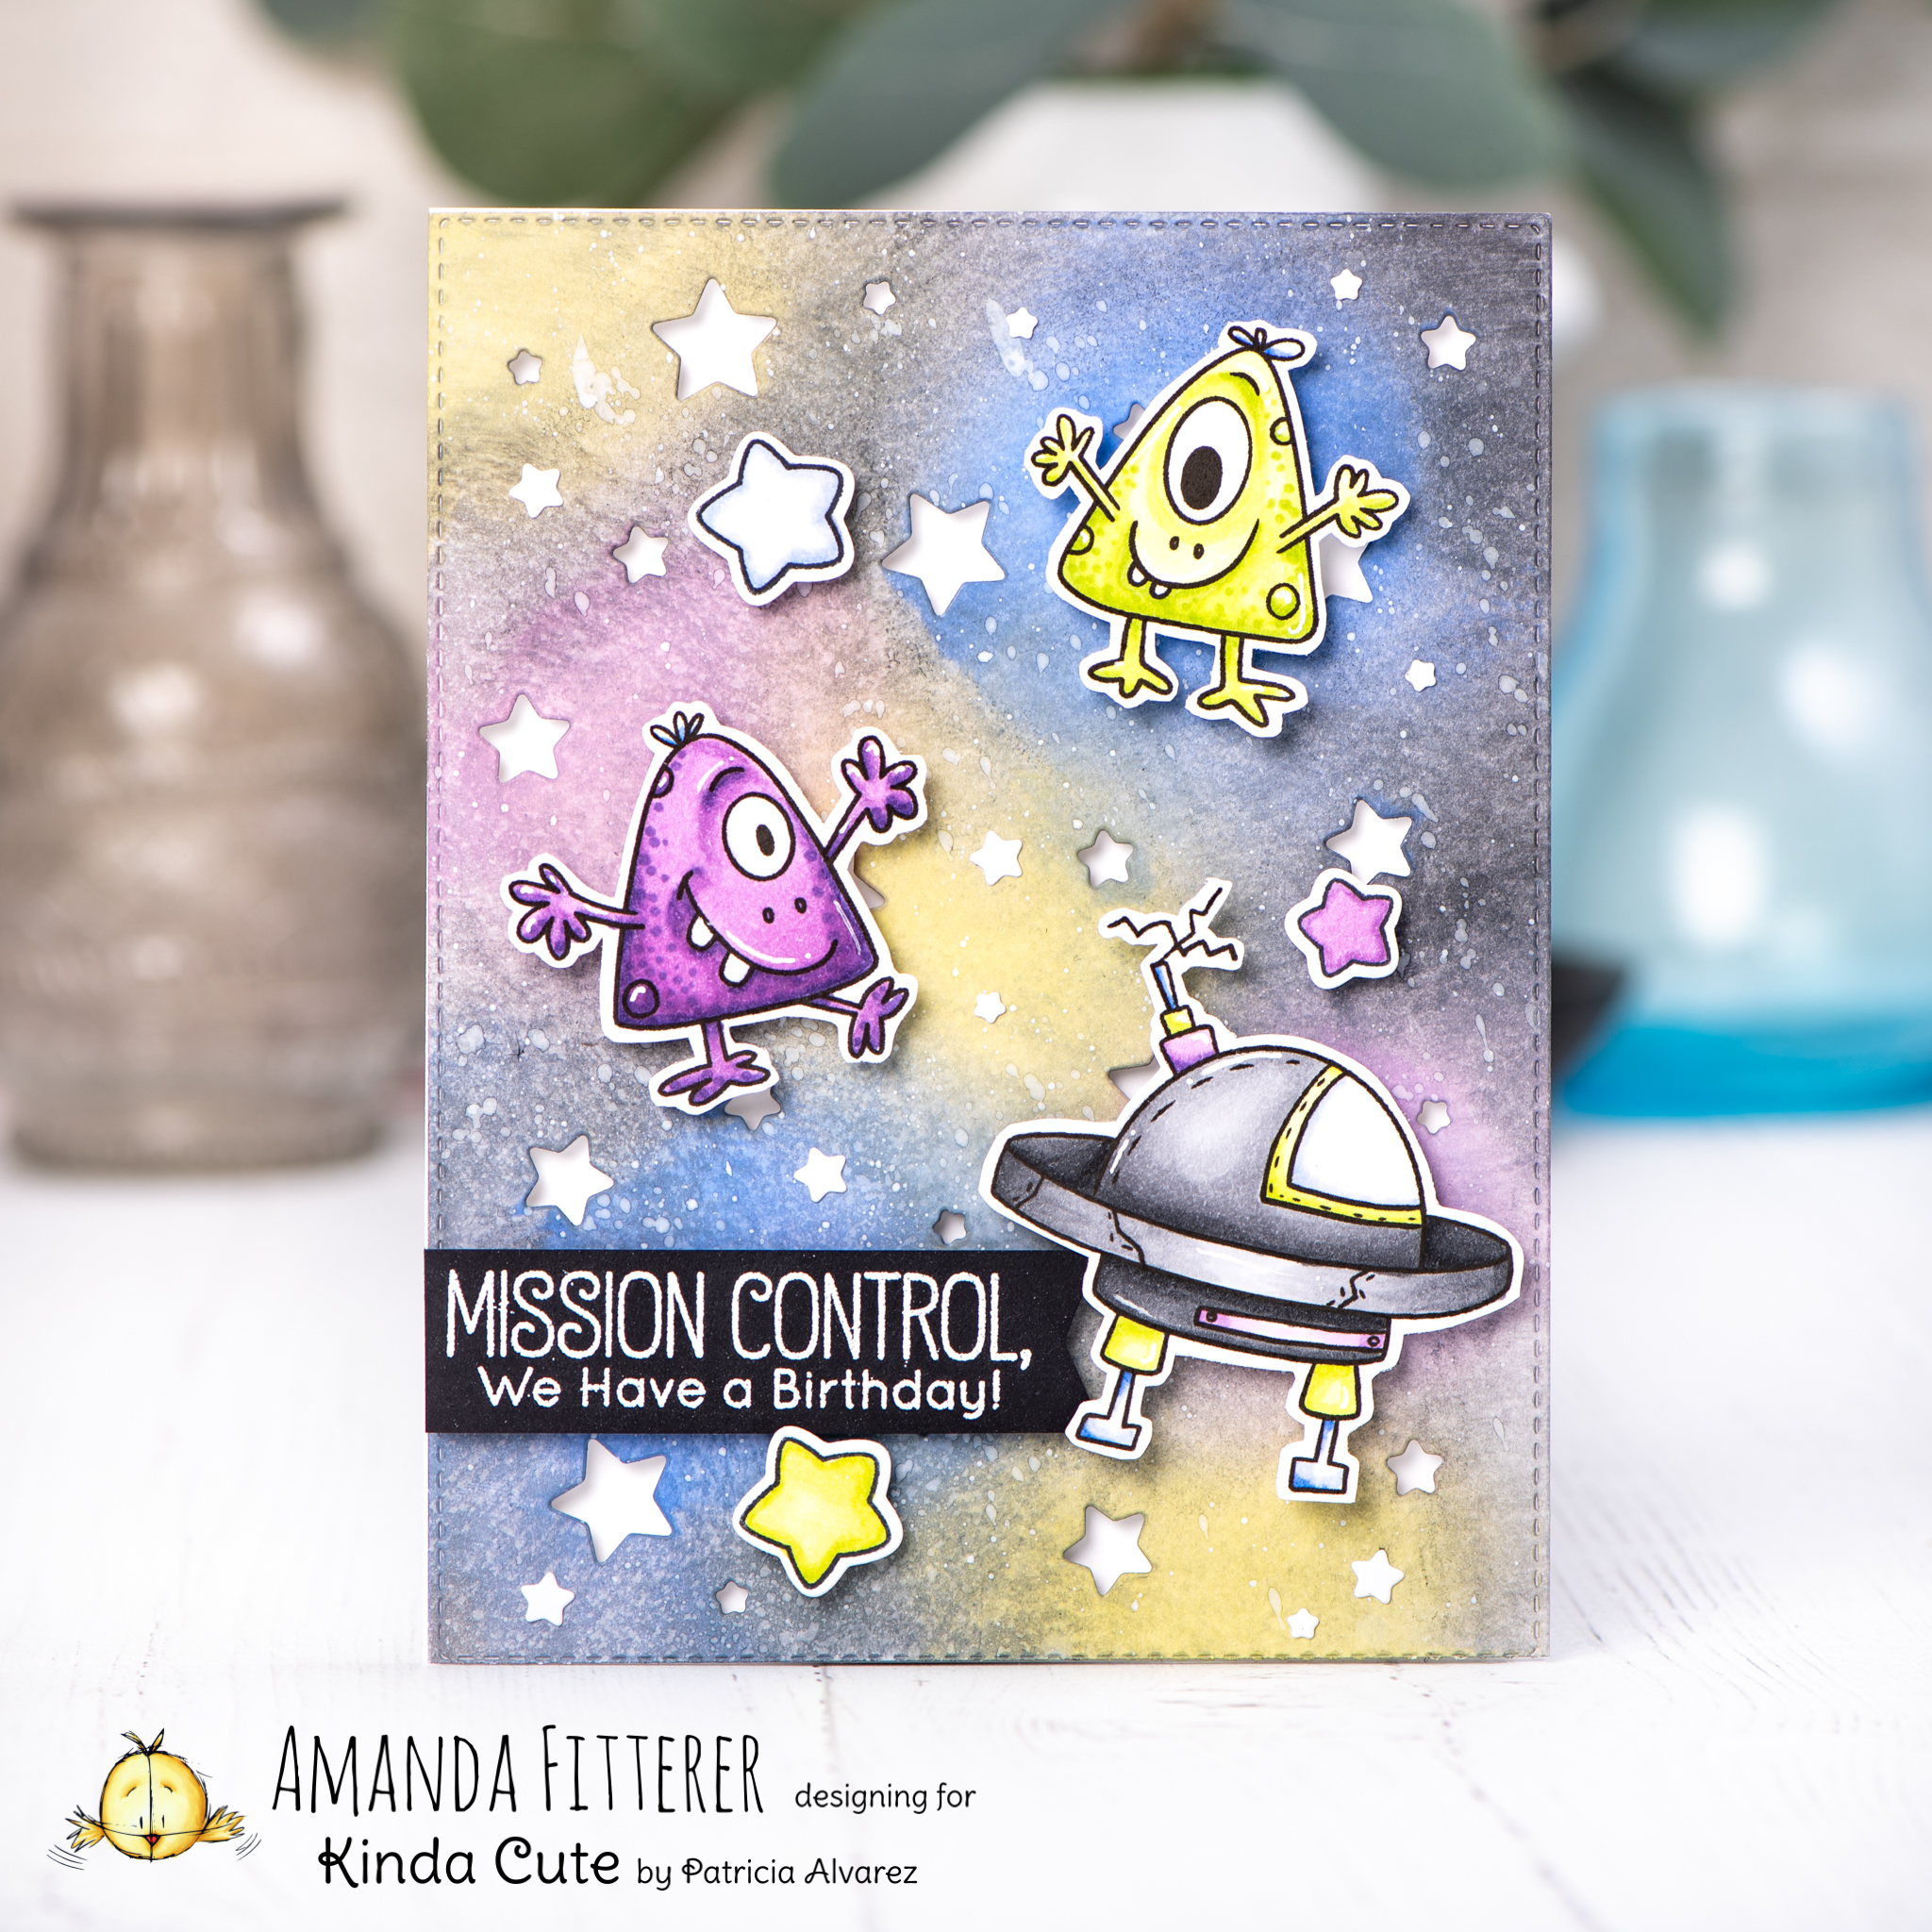
To make this card, I am starting with the galaxy background. I used Heffy Doodle’s Stargazer Backdrop on a piece of white cardstock. Then, I created the galaxy effect by blending Dusty Concord, Faded Jeans, Blueprint Sketch, Twisted Citron, and Black Soot Distress Oxide Inks.
Next, I colored my images using Copic markers and then cut them out using scissors.
For my sentiment, I used the MFT Space Explorer stamp set. I also grabbed a few stars from this stamp set and used 3D foam squares to adhere them to my card front.
First, I set up my images in Adobe Illustrator. Then, I printed them on 80 lb. Neenah Solar White cardstock. Then, I colored the images using Copic markers.
After I had it all colored, I used a stitched rectangle die and a trimmer to create my layers. I stamped my sentiment underneath the image and assembled the card!
Thank you so much for stopping by my blog today! Xoxo, Amanda
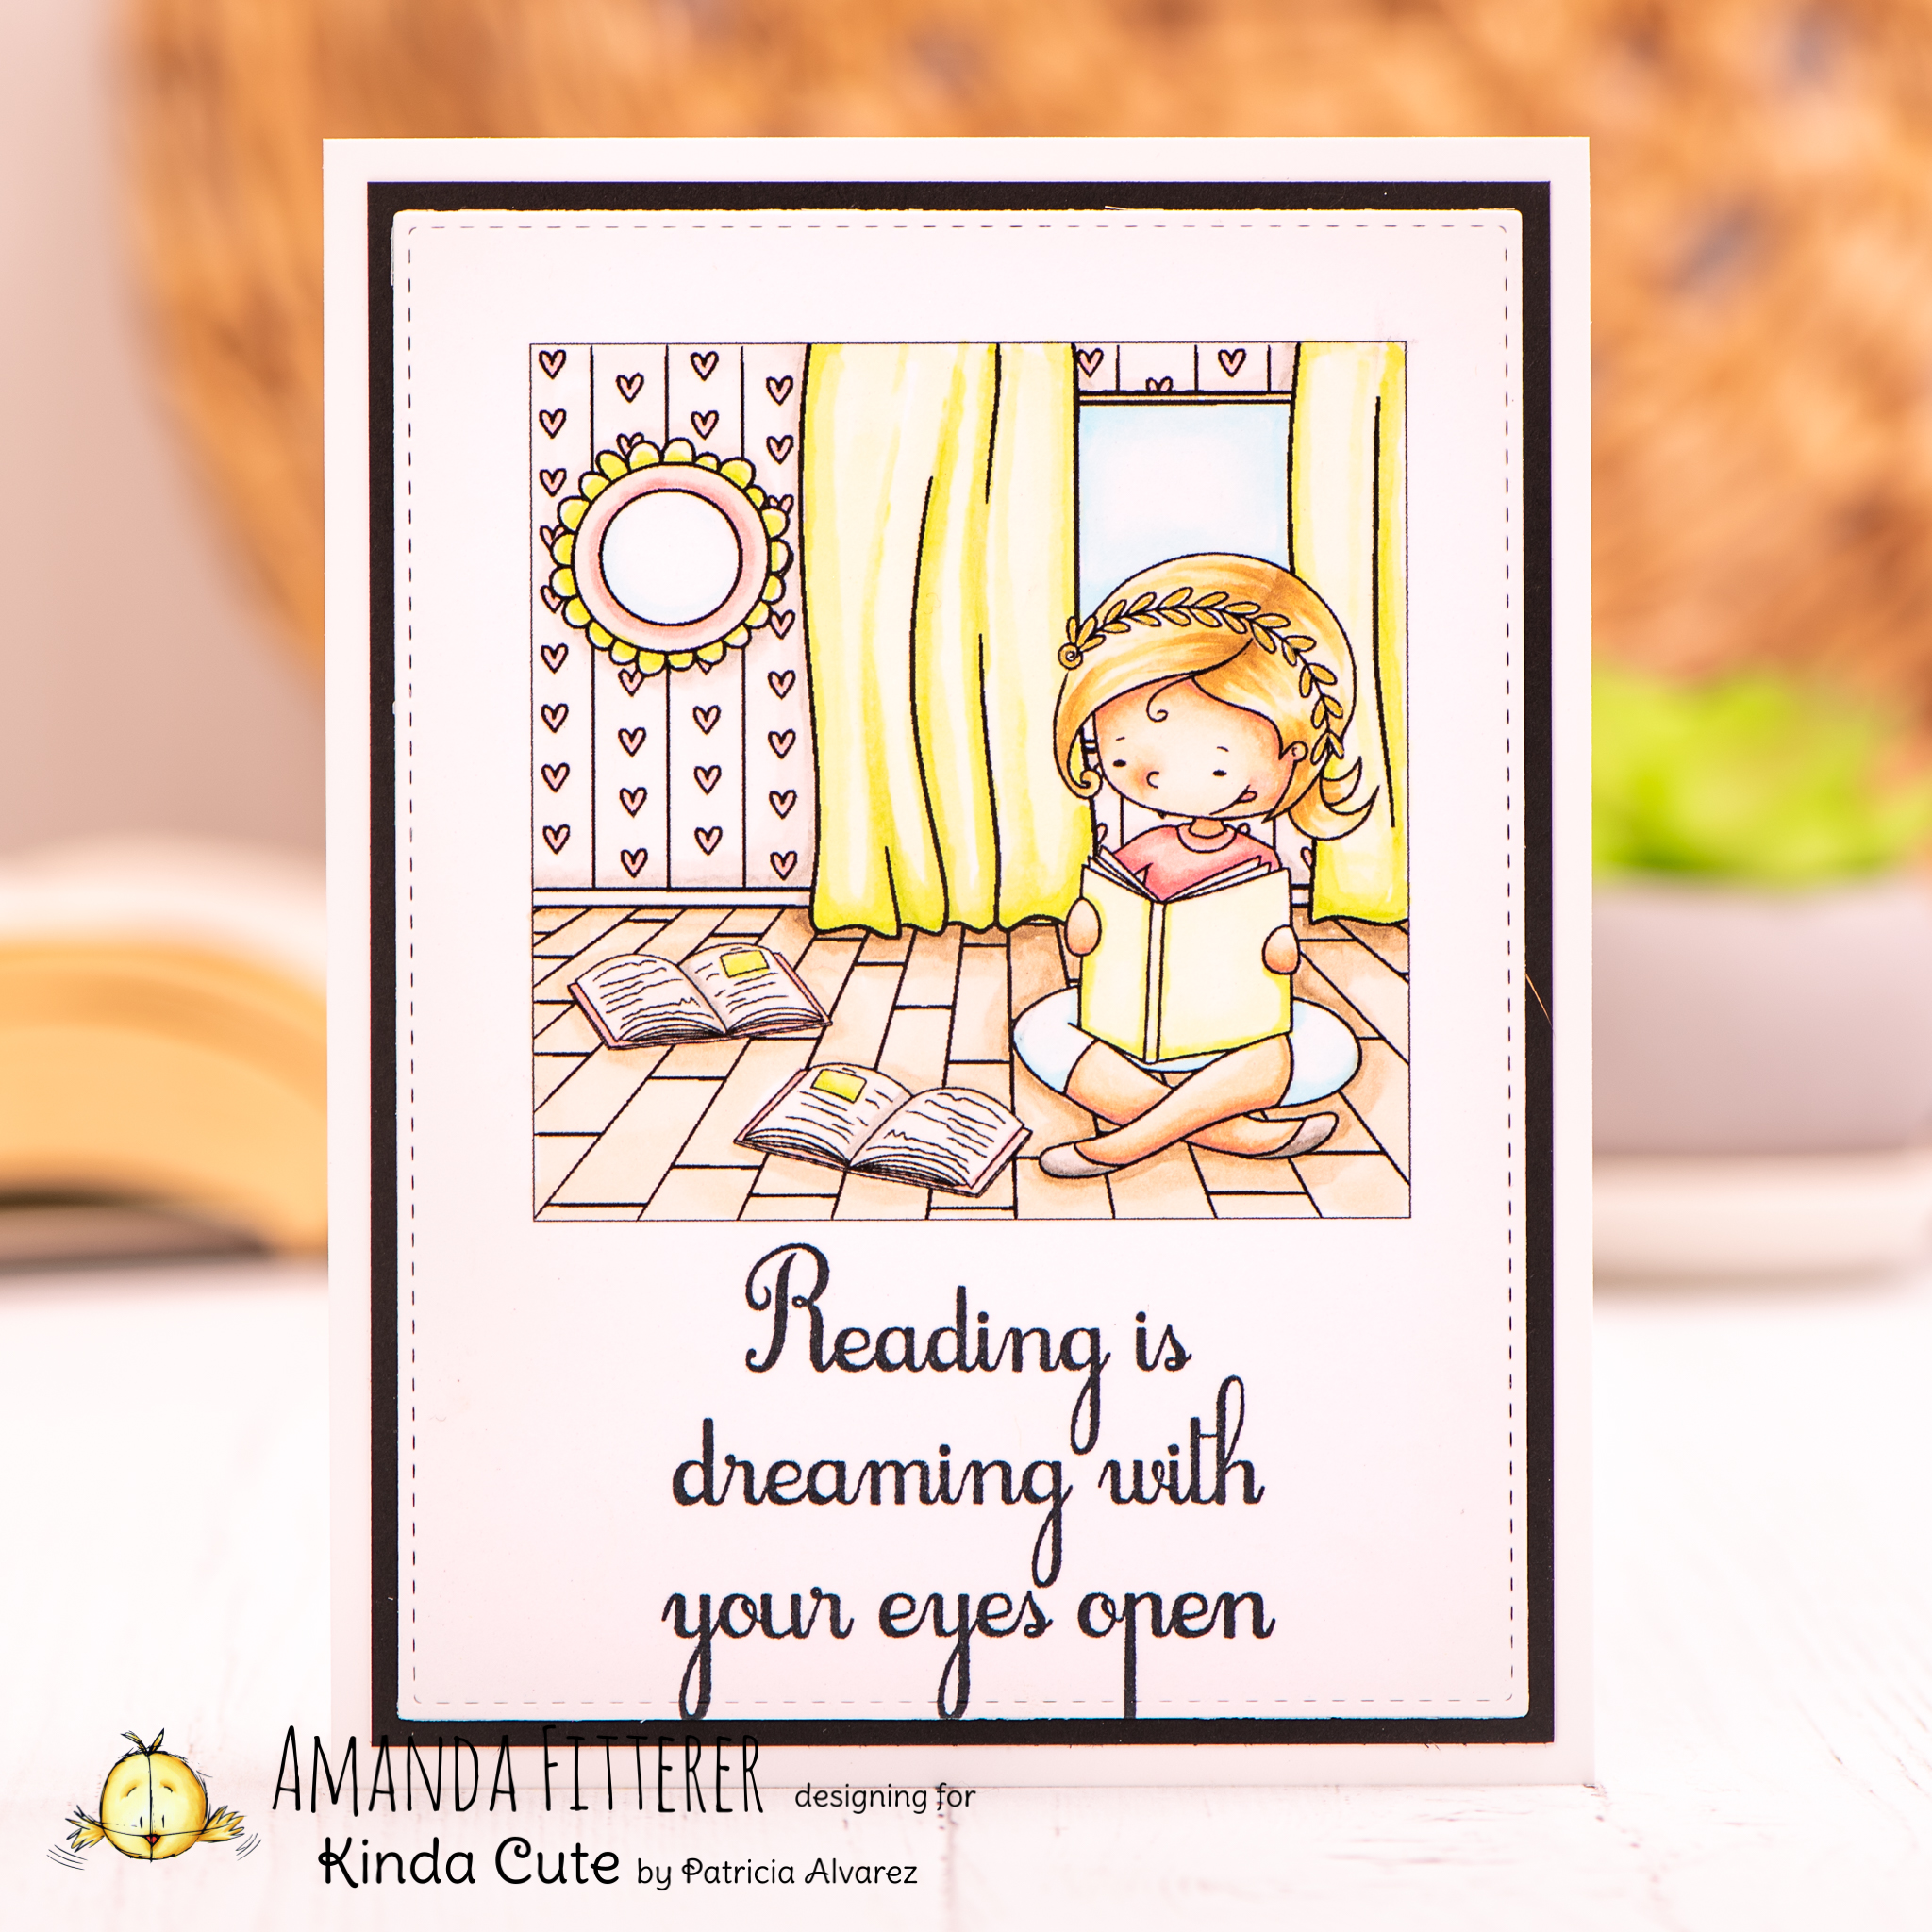
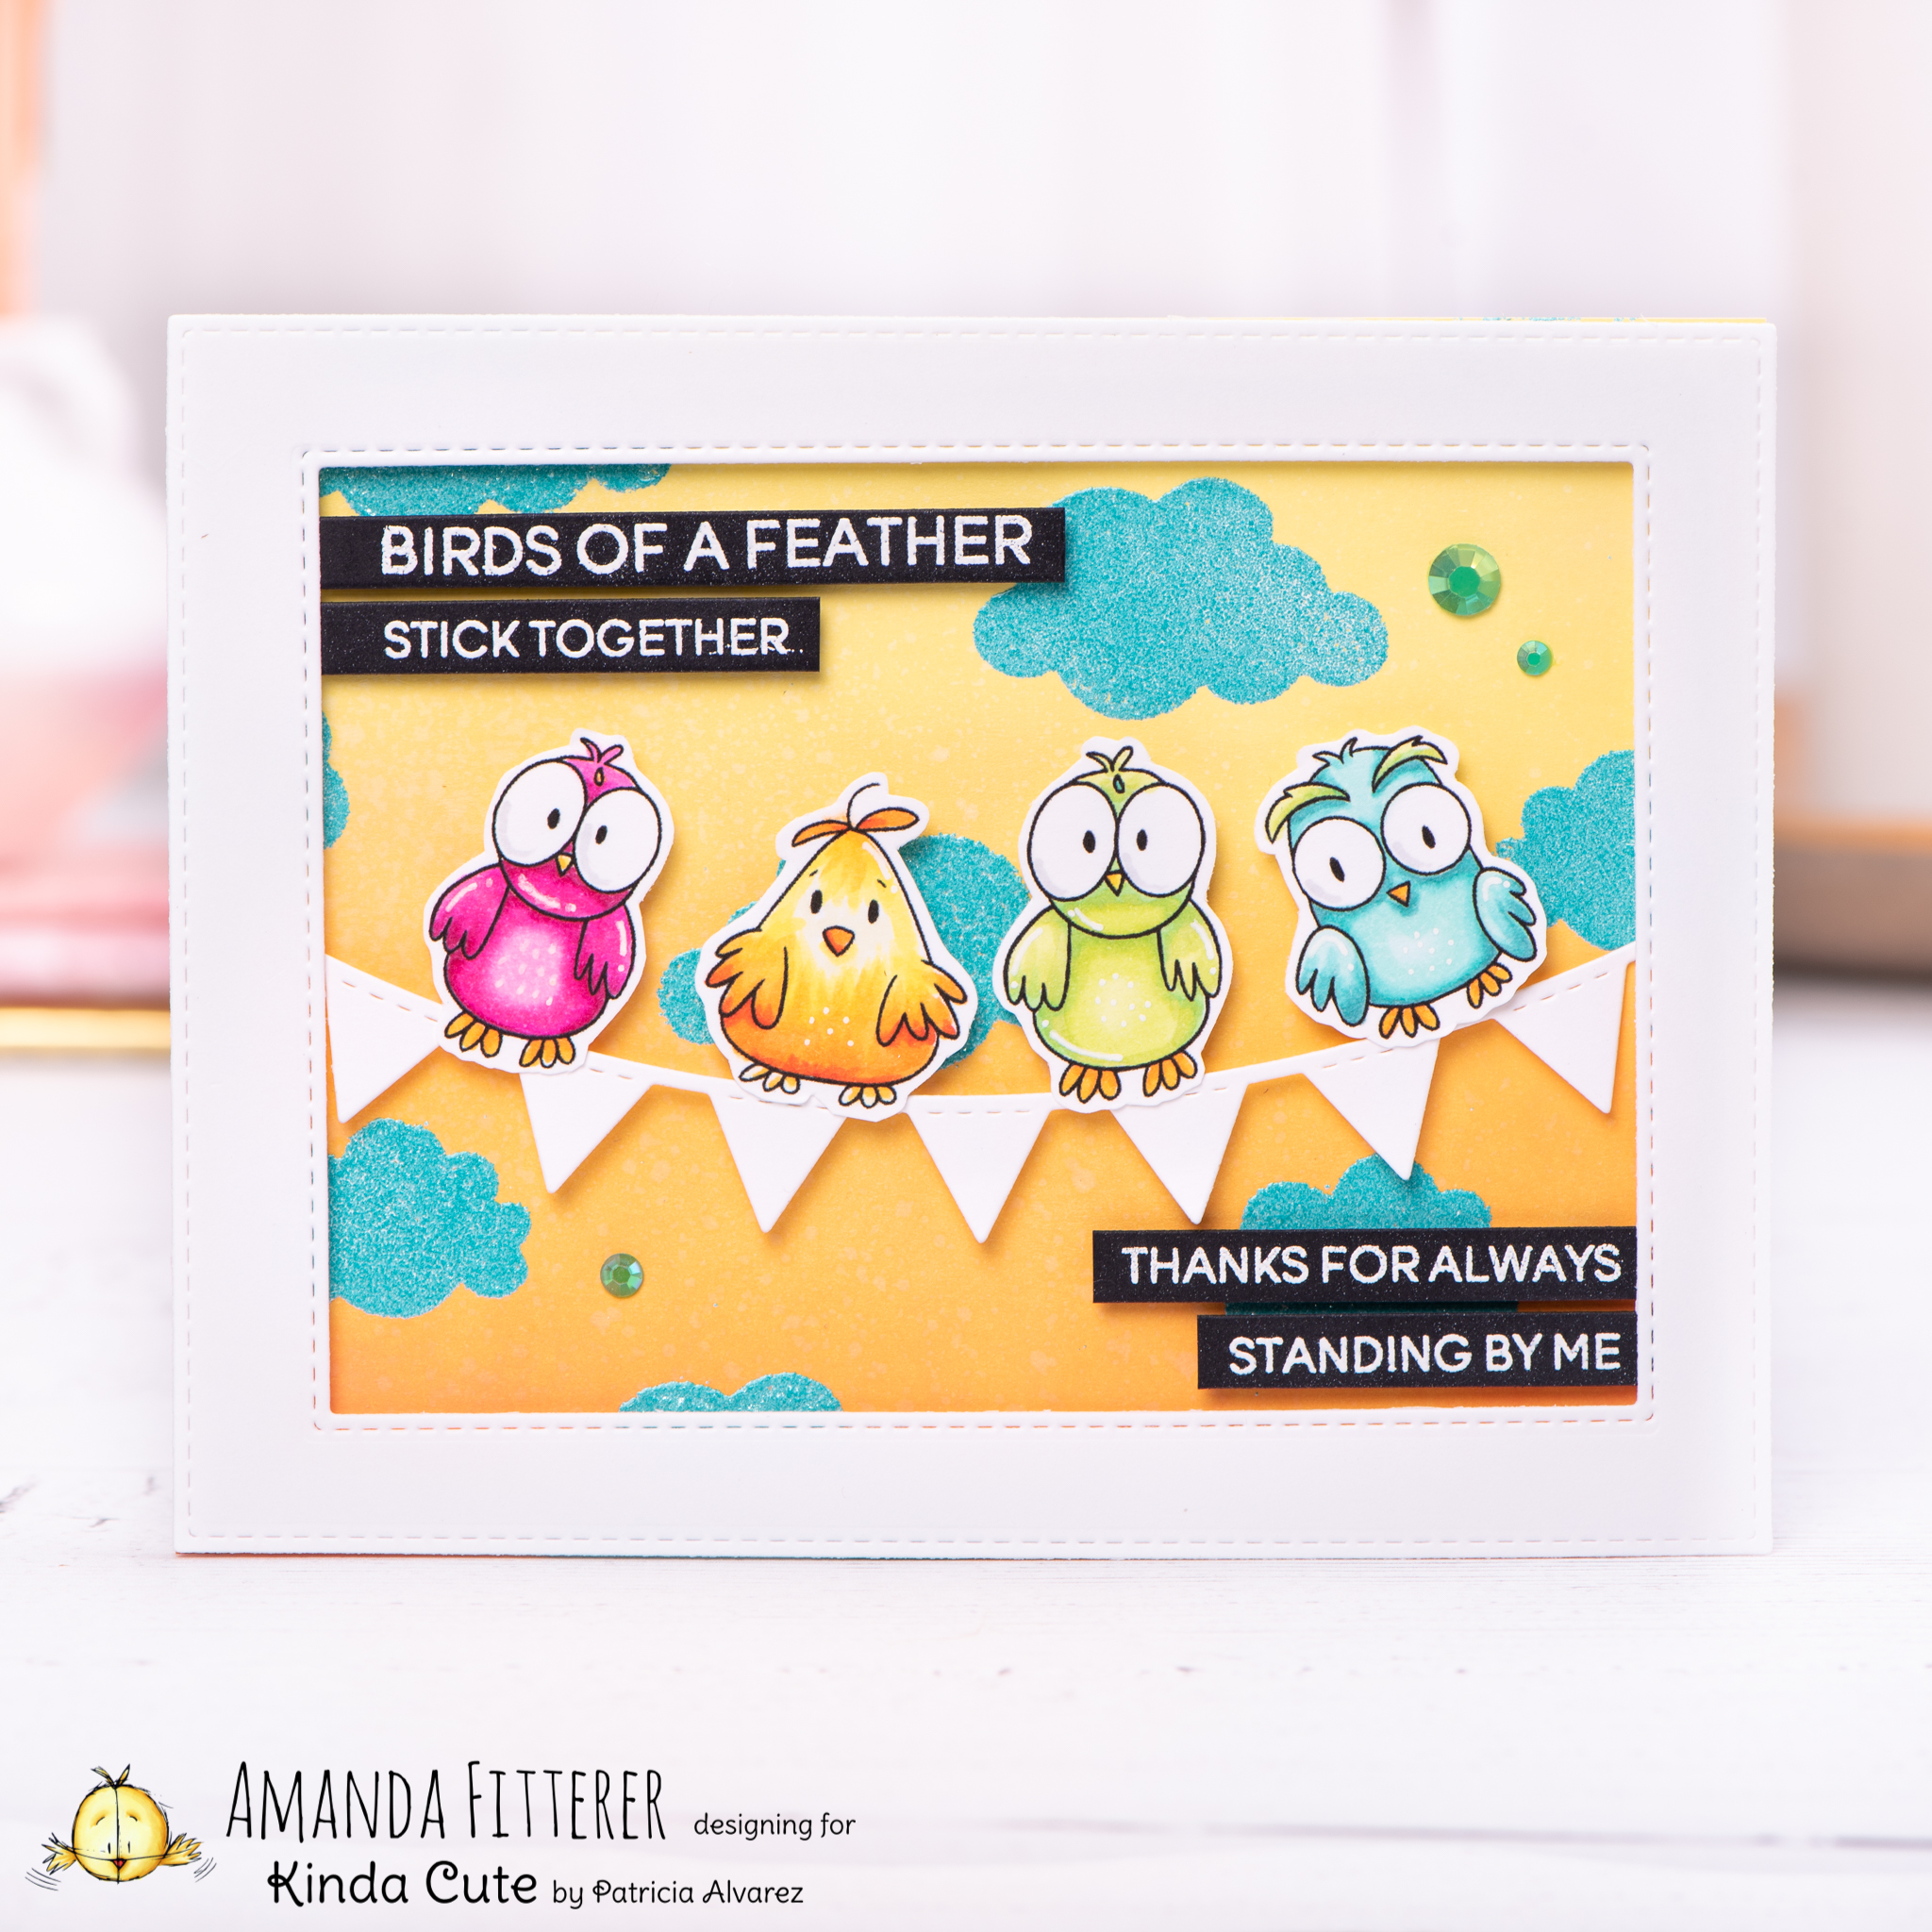
Hello there, crafty peeps! I hope you’re all fully recovered from the holidays! I feel like I’m finally getting back into the hang of things and finally getting back into the craftroom after all the madness!
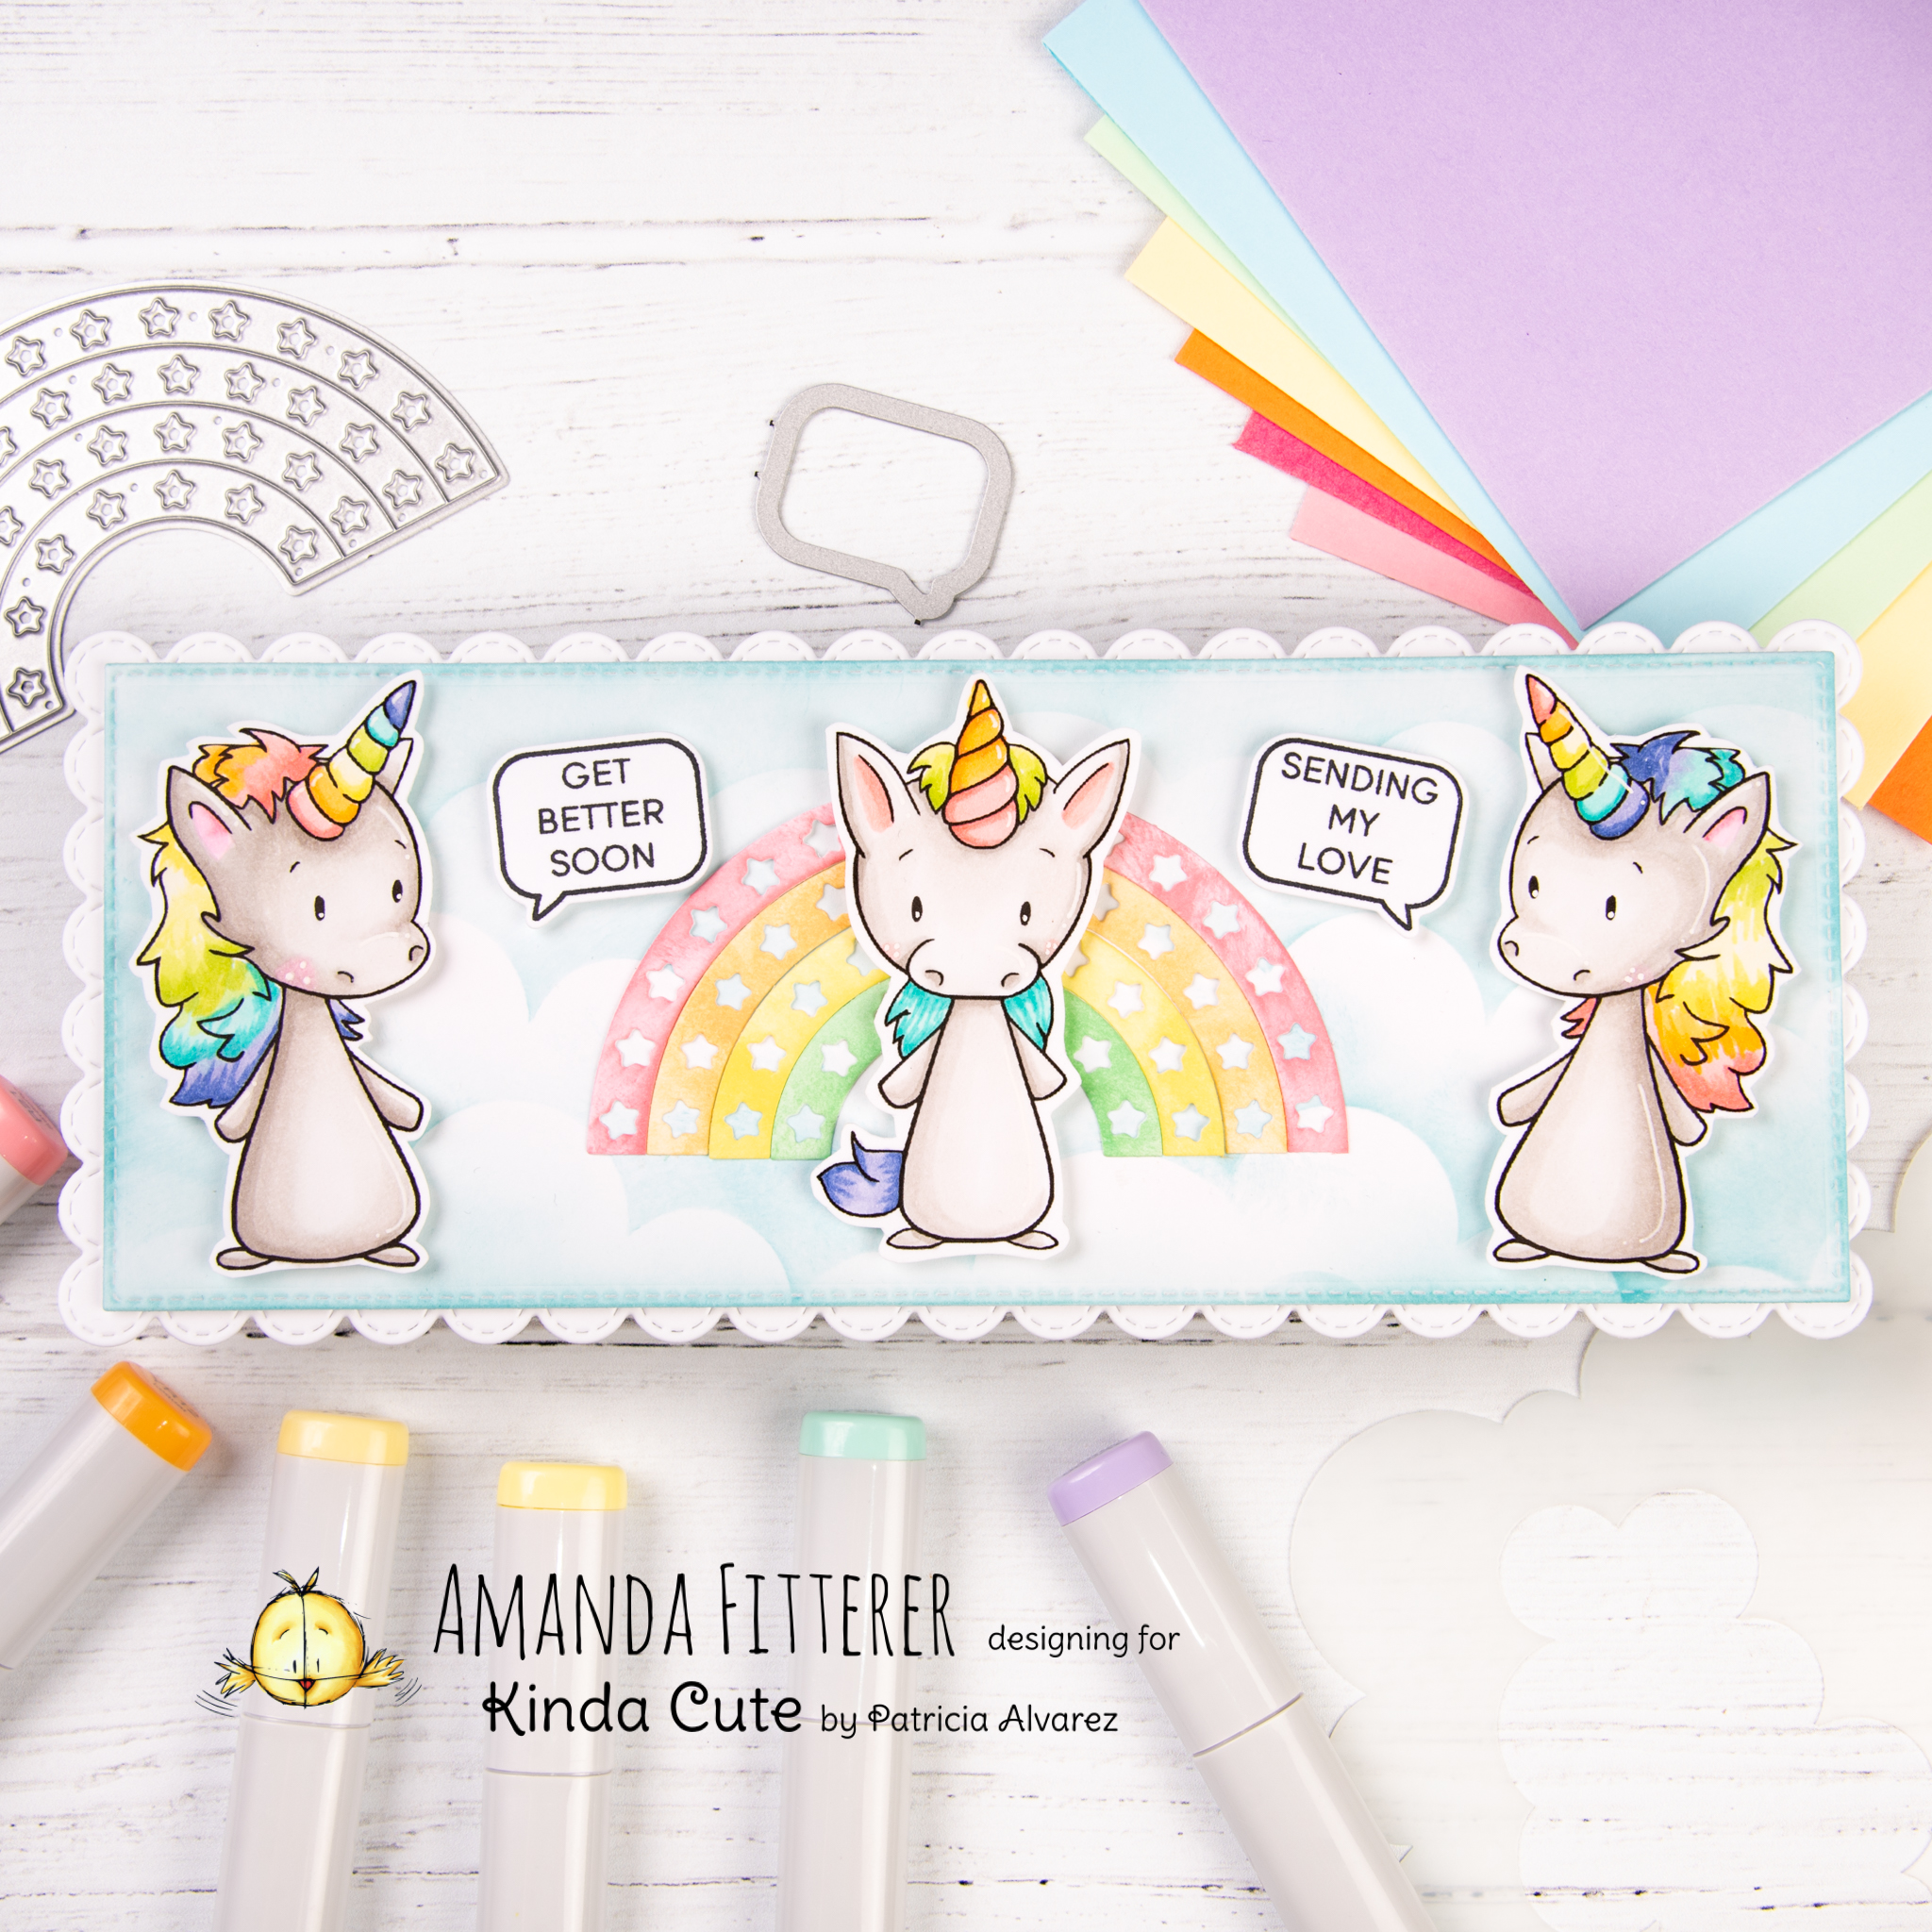
Today, I’m on the blog to show you this bright and cheery little card I made using the Kinda Cute “Cute Shaped Animals” digital stamp to create this card!
I printed the images on 80# Neenah Solar White Cardstock and then colored the little cuties in with Copic markers.
Then, I created a gorgeous and bright background using Squeezed Lemonade and Carved Pumpkin Distress Oxides.
To create some fun (albeit not true to life) clouds, I used the “Angel Eyes”Wow! Embossing Powder with Heffy Doodle’s “Head in the Clouds” stencil.
I grabbed some sentiments from the Heffy Doodle “Wingman” stamp set and used white embossing powder on black cardstock. I adhered everything to my card using 3D foam strips and squares!
Here are a few close-up photos of the finished card!
Thank you so much for dropping by today! I hope you’re staying healthy and happy! Xoxo, Amanda
I printed the images on 80# Neenah Solar White cardstock and then colored the images with Copic markers. I cut the images out using precision scissors.
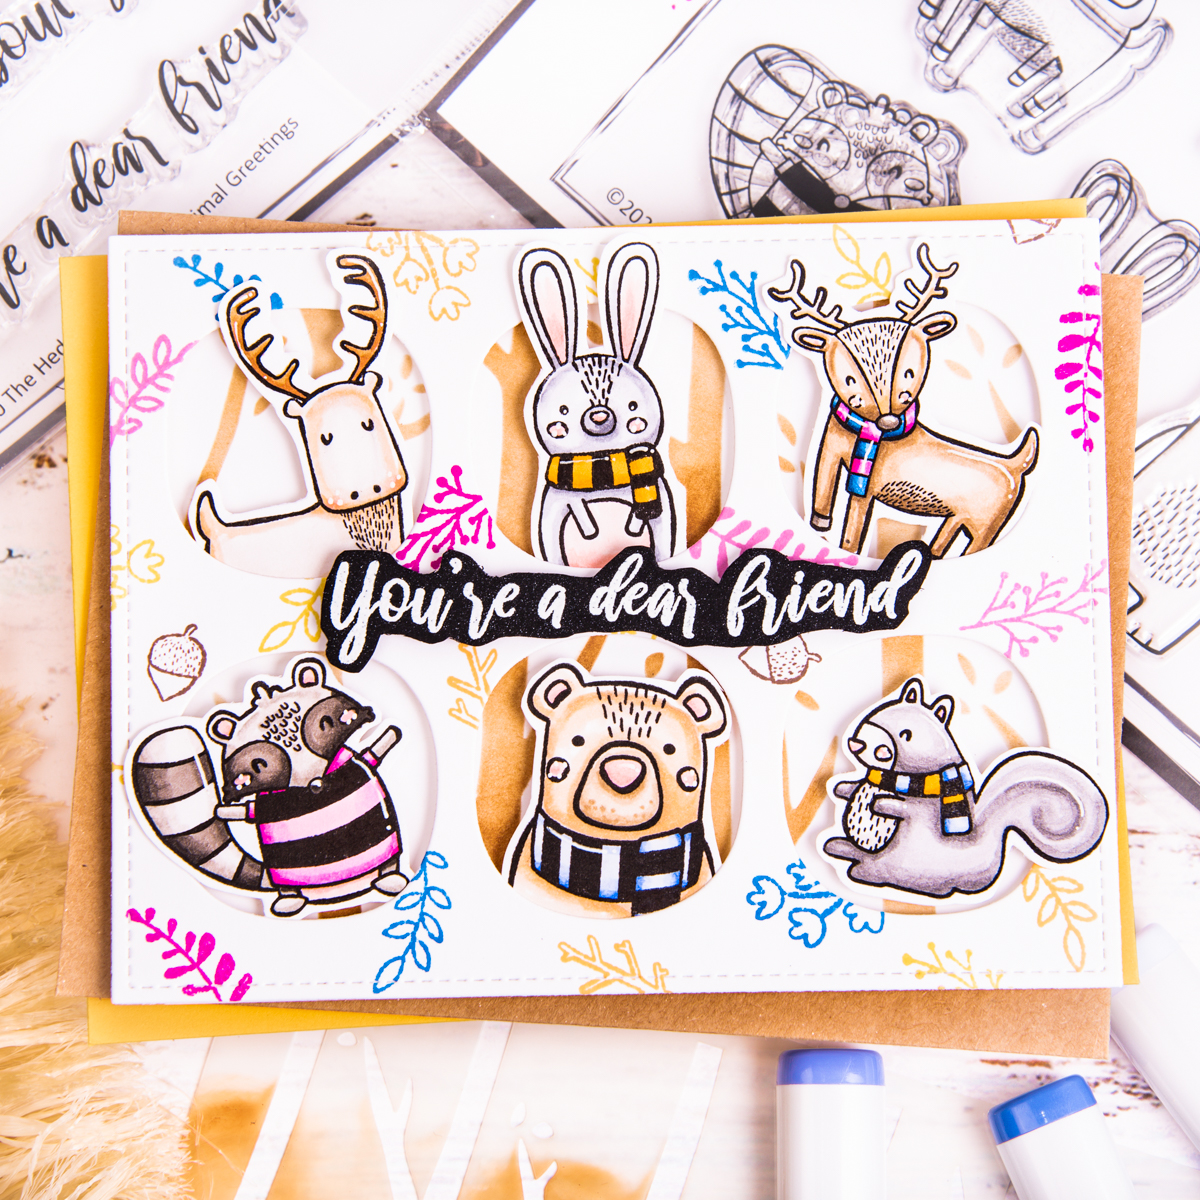
Hello there, crafty friends! Today, I am on the Hedgehog Hollow Blog sharing this absolutely adorable card that I made using items from the December 2020 Subscription Box! This box is probably my favorite one yet! I am a sucker for woodland animals and this box has 3 fun stamp sets! To see the stamp sets and the rest of the contents of the box, you can click here to see the reveal video!
For my card base, I used the Trees Stencil that was also in the December Box. I blended the trees with Vintage Photo Distress Oxide.
Now onto my favorite part – The Forest Friends! I stamped my images with Hero Arts Intensified Black Ink and then colored them in with Copic markers. I used detail scissors to cut out each image. I really need to get a Scan n Cut machine, but fussy cutting can be relaxing when I have the time!
For my sentiment, I grabbed the Animal Greetings Stamp Set again and stamped the sentiment with Versamark Watermark Ink onto black cardstock. I used white embossing powder and my heat tool to melt the powder. I fussy cut this sentiment out as well.
I adhered everything to my card base with 3D foam strips and squares. Here are some close-ups of the finished card!
I hope you enjoyed this blog post! I am pretty excited to get back into the craft room and make some more Forest Friend creations! There’s another stamp set not shown in this project that is calling my name!
Remember, if you want these stamp sets and stencils, you have to get the December Subscription Box! You have until December 14th to buy it! To see all the Subscription Options, you can go here.
Hi friends! Thank you so much for stopping by my blog today! I really appreciate your love and support!
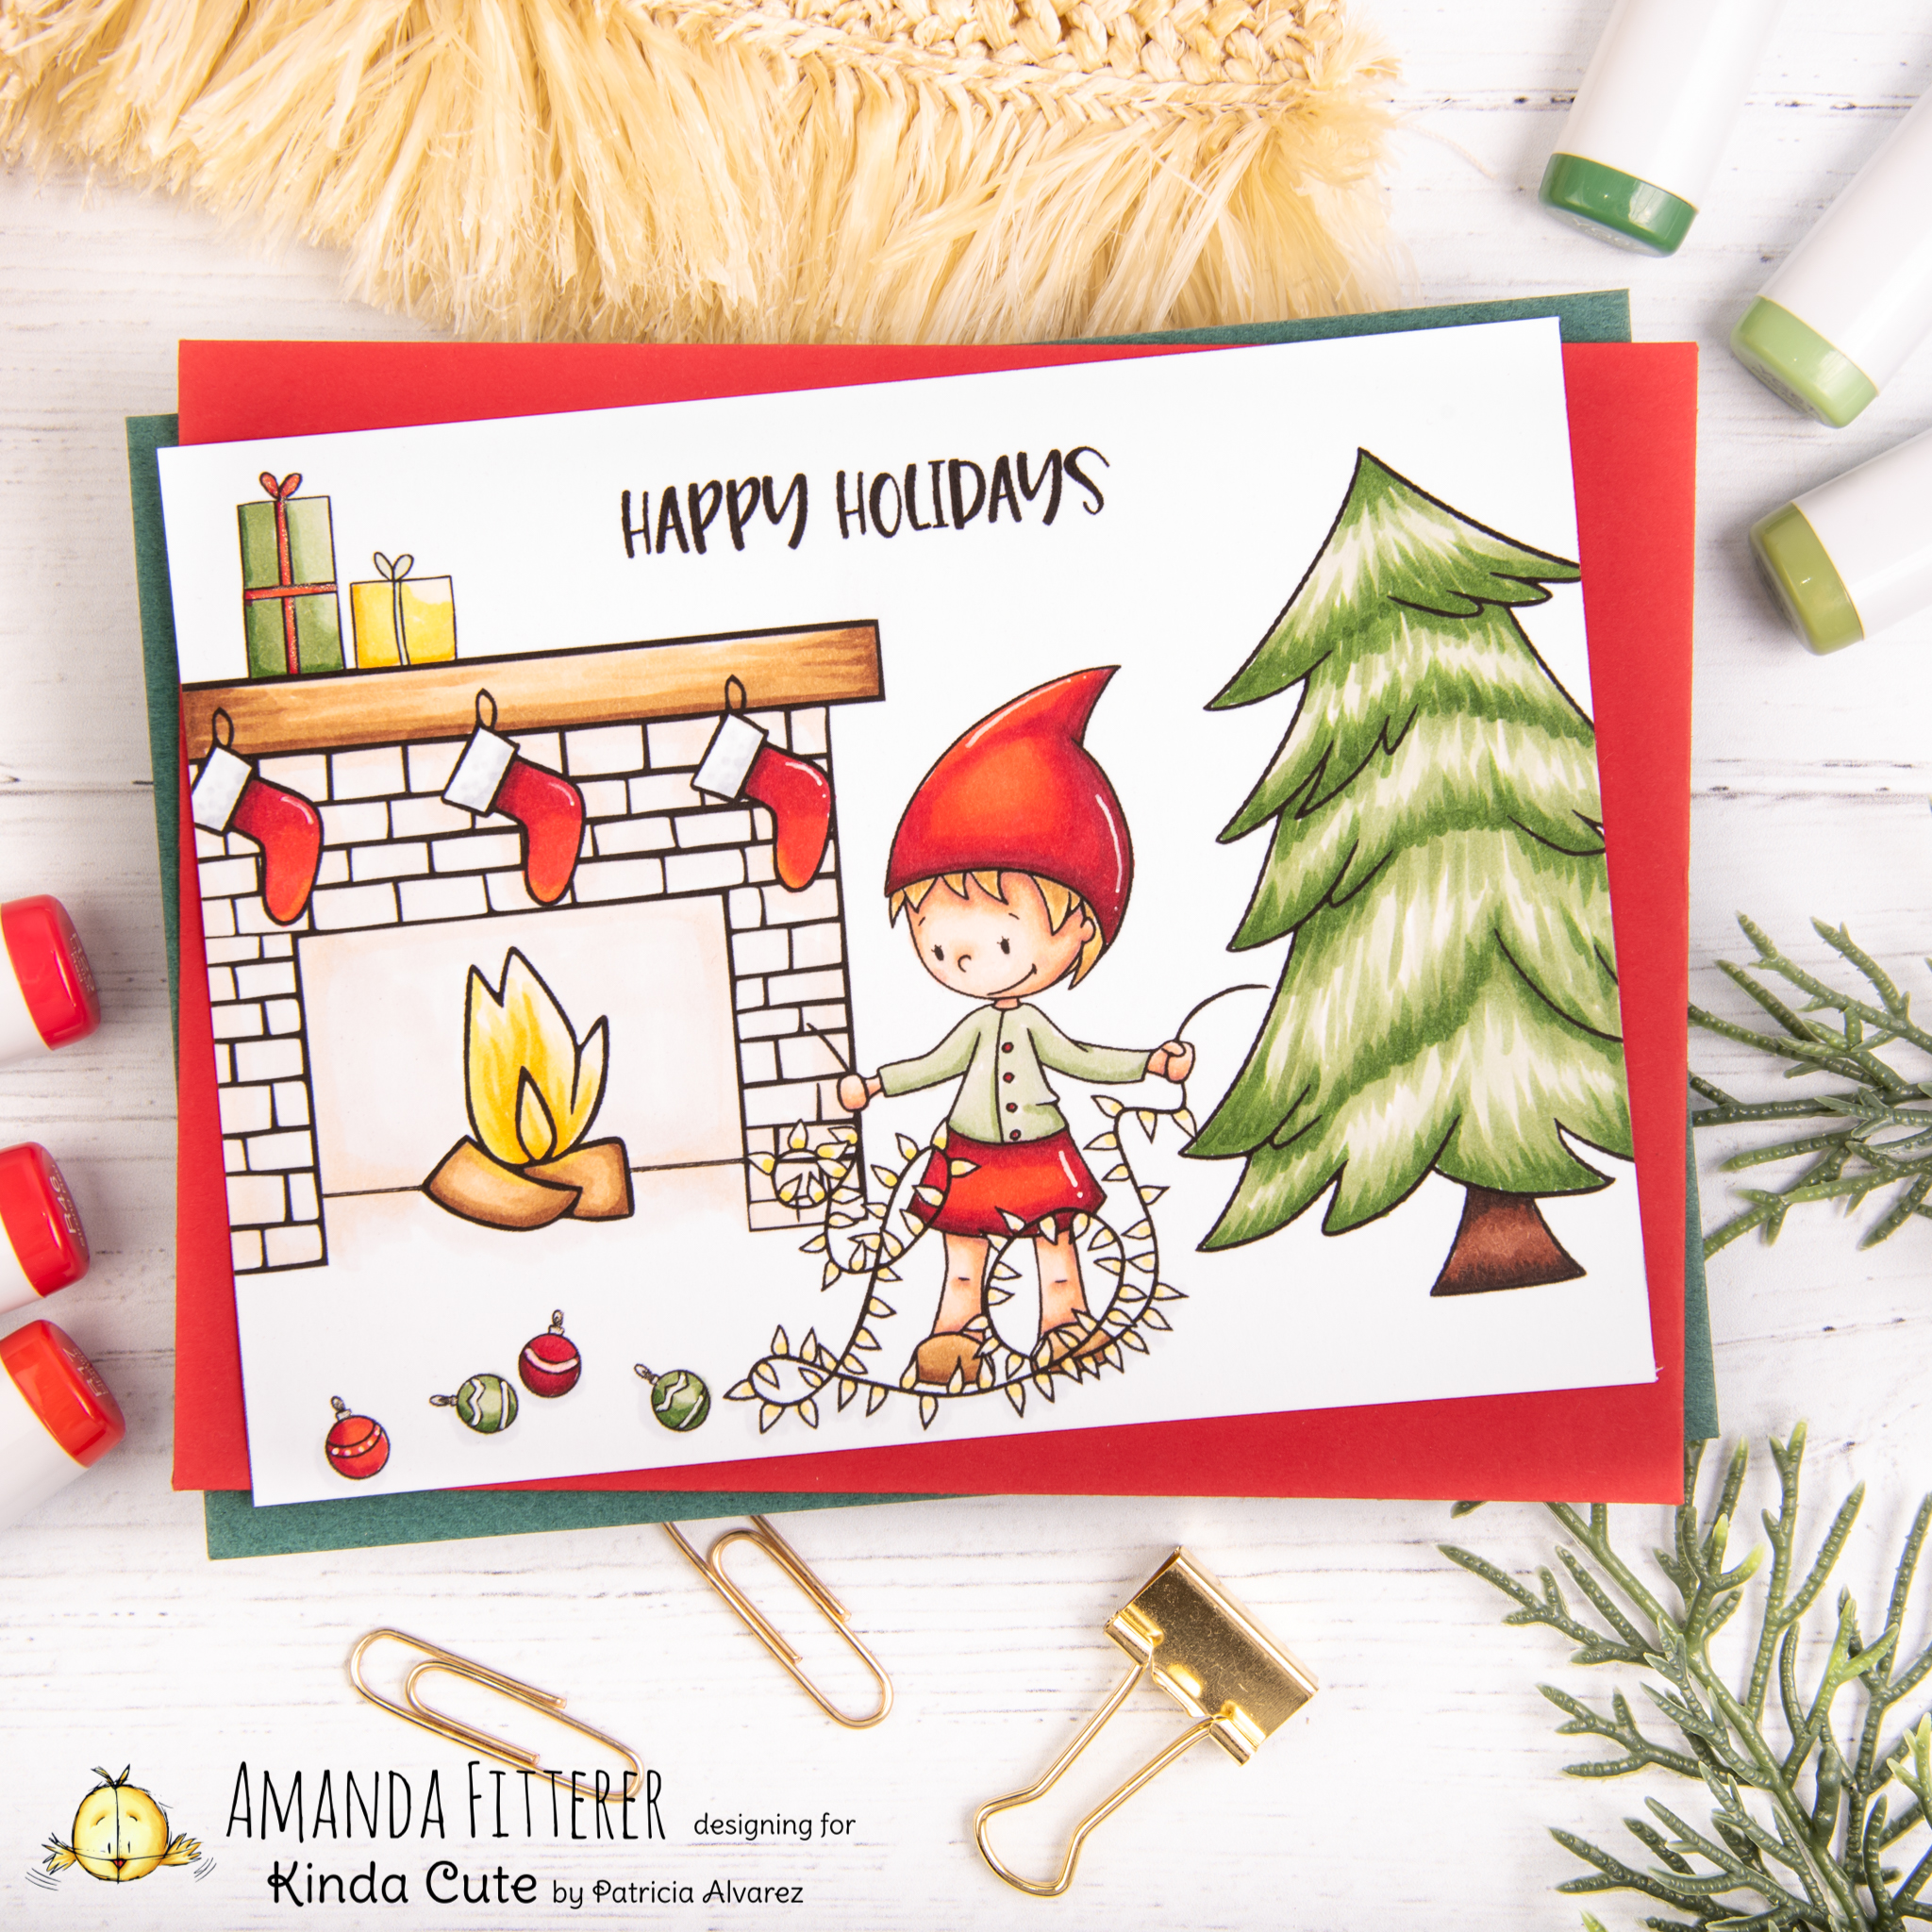
Today, I’m sharing this adorable holiday scene that I created using a few Kinda Cute by Patricia Alvarez digital stamps. I used the Lights are Tangled Gnome and Christmas Filler Digital Stamps.
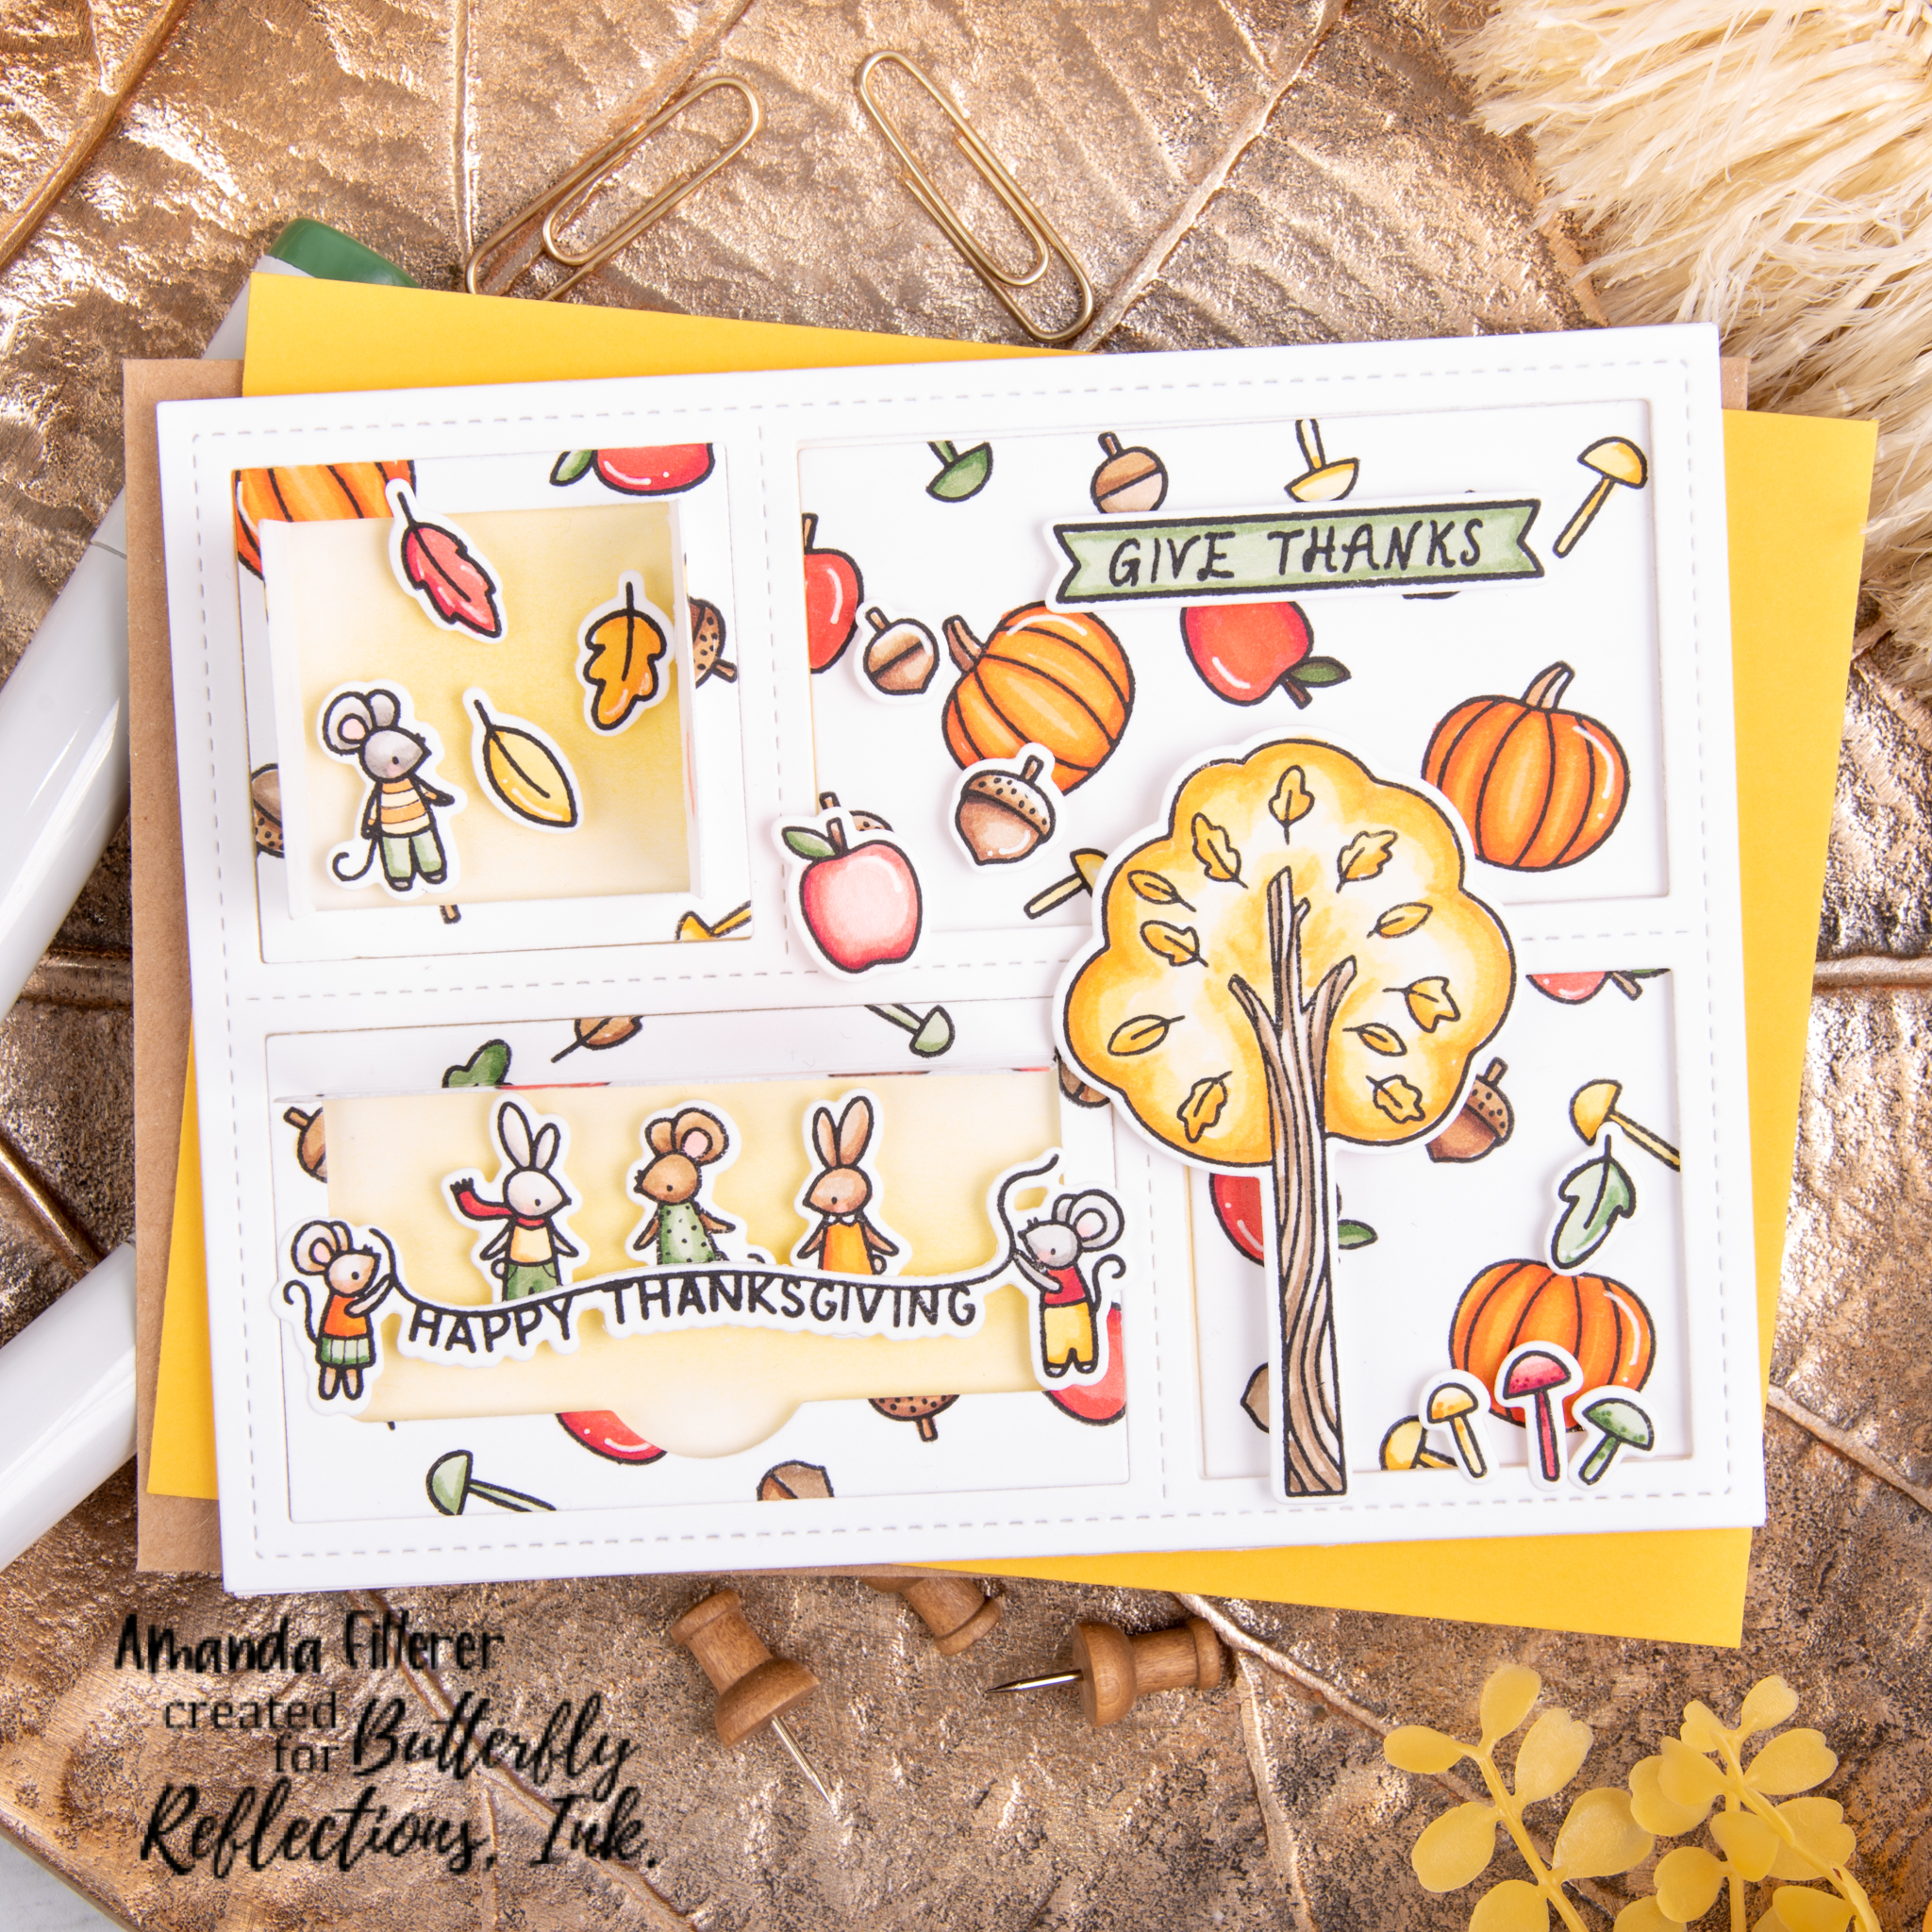
Hello my friends! I hope you’re all doing well! Today, I’m on the Butterfly Reflections, Ink blog with this colorful, interactive Thanksgiving card! Click here to check it out!
Hi everyone and welcome to the Heffy Doodle, Catherine Pooler, and WOW! Blog Hop! Our design teams have come together to share some amazing inspiration featuring products from all 3 companies. Plus, each company is giving away a prize!
Once I die cut all of my images, I adhered everything to my card with 3D foam squares, strips, and liquid glue!
Thanks for making a stop on the hop to my blog today! I hope you feel inspired by my card and all of the amazing cards that are part of the hop!
Blog Hop Details: Make sure to comment along the way for your chance to win! Both WOW! and Catherine Pooler will be giving away $25 to their stores and Heffy Doodle will be giving away £20 to their store!
I’m sharing a video tutorial with you today making this super sweet fall card. I hope you have some time to watch it! If you’re interested in how to color with Copic markers, I walk through coloring in these cute little guys!
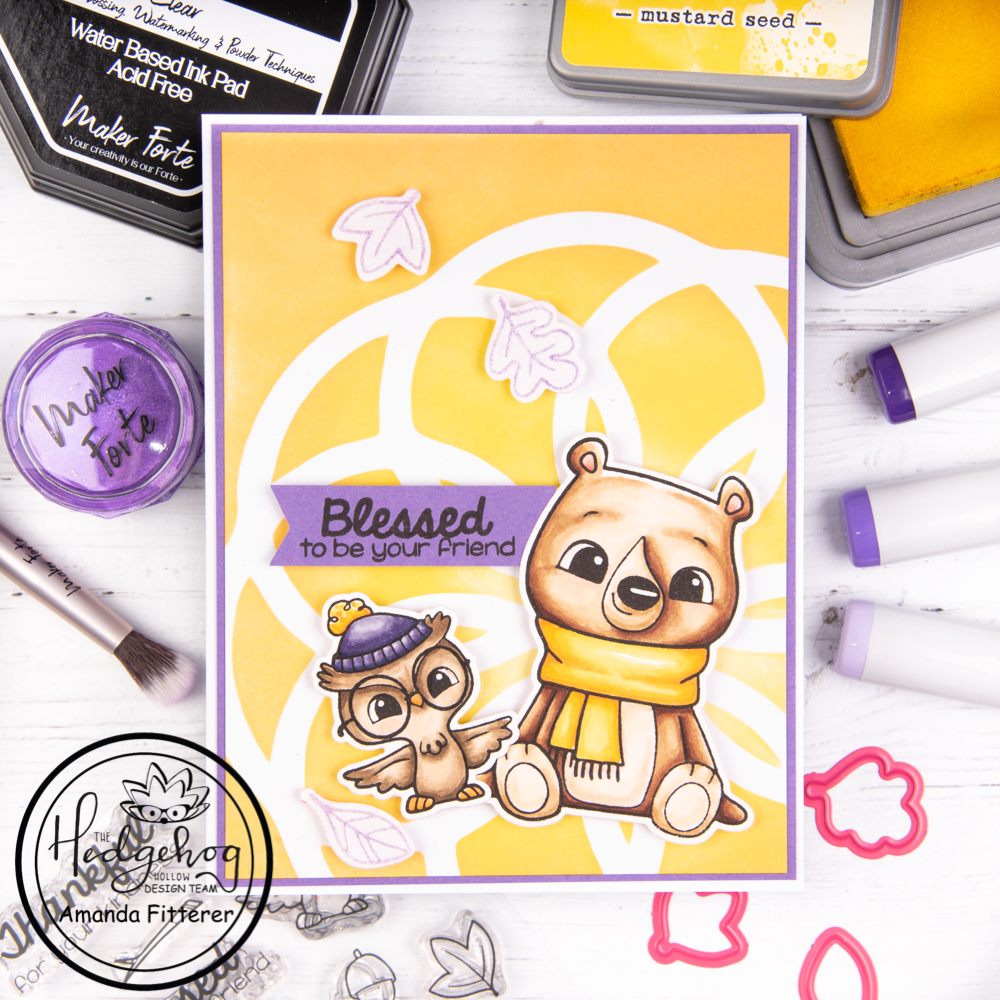
I used the stencil that was included in the October Subscription Box to create this bright and beautifully blended background! I blended Squeezed Lemon, Mustard Seed, and Carved Pumpkin Distress Oxides. To keep my stencil in place, I used Pixie Spray Adhesive. The cardstock that I use to get the BEST blending is the Snow Flurries Perfect Blend Card Fronts. For my images, I used Pink and Main’s Happy Fall stamp set. I stamped using Hero Arts Intensified Black ink because it is alcohol-friendly ink. I colored the images with Copic markers and then die cut them using the coordinating dies. To make these glittery leaves, I stamped the images with Color Hive Hexagonal Embossing Glue Ink Pad. I brushed on a bit of the Nebula Kaleidoscope Powder using the Rose Gold Dual Tip Powder Brush. All of these items were included in the October Subscription Box! I trimmed the yellow stenciled background cardstock down to 4″ x 5.25″. I cut a piece of purple cardstock down so that it was just a bit larger. I adhered these card fronts to a card base that was 8.5″ x 5.5″. I adhered my stamped images to my card front using 3D foam squares. If you weren’t signed up before October 14th and missed out on this box, you can check back later here to see if it’s available as a One-Off. All the subscription options can be found here.
I cannot wait to see what’s in the November box! How about you?!
I really hope you enjoyed my post! I can’t wait to share some more posts with you in November!! Xoxo, Amanda
Hello everyone! I hope you’re all having a great week so far!
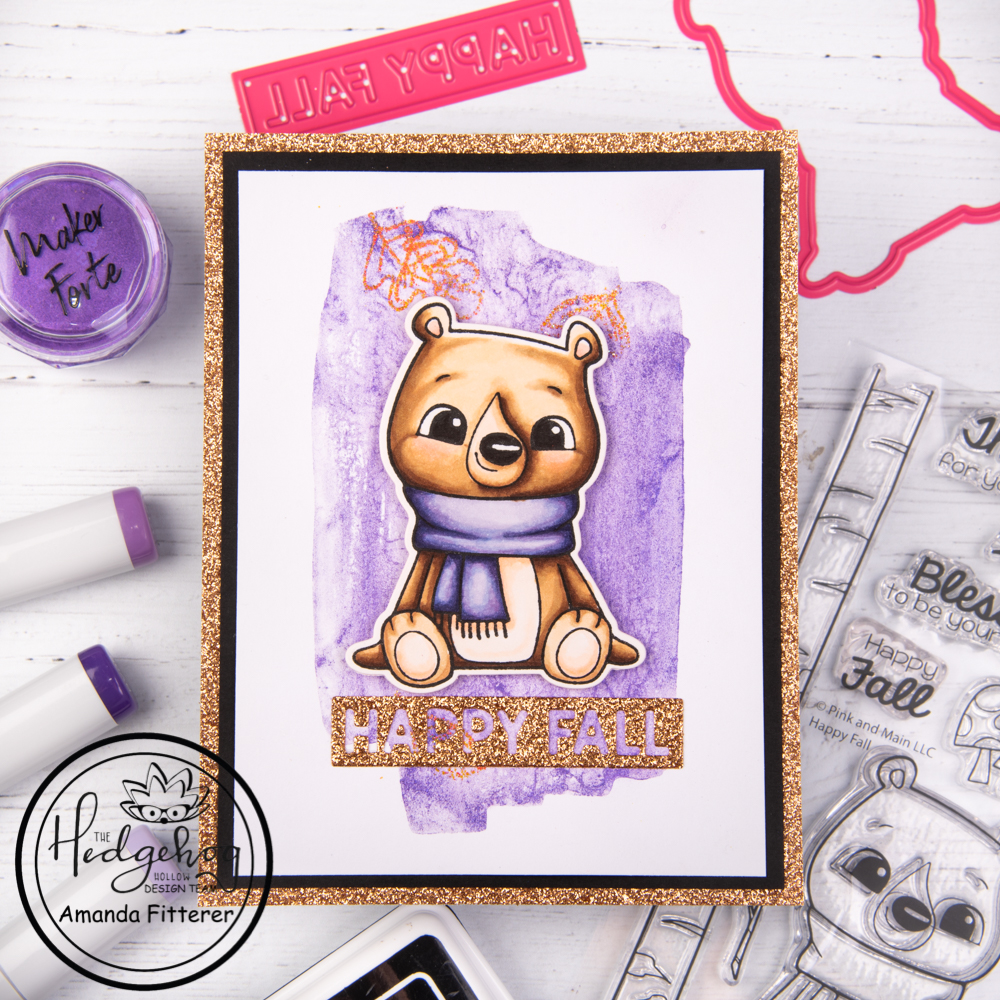
I am loving this card I made using Pink and Main’s Happy Fall stamp and die set! It is so simple, but yet so elegant! I love the idea of taking a non-traditional Fall color and using it to make a card that really stands out!
To make this card, I’m starting with the Kaleidoscope Powder – Interference – Nebula and a water brush. Putting a small puddle of water on my workspace, I am mixing in a bit of the powder. Using my water brush, I can mix it into a watercolor medium.
On a piece of watercolor cardstock, I am taking the largest of the Easy Watercolors by Hedgehog Hollow stamps and am brushing on my watercolor mixture straight onto my clear stamp. Once it’s completely covered, I can stamp the image. I am going to repeat this process twice to get a better coverage.
After waiting for that to dry, I am placing some leaf stamps from the Pink and Main’s Happy Fall stamp set on top of my watercolor. I am using the Color Hive Clear Embossing Glue Ink Pad to create a sticky image of the leaves. Then, I can apply my gold embossing powder to my images and melt it with my heat tool.
I’m ready to go ahead and stamp my adorable bear from the Pink and Main’s Happy Fall stamp set! (This bear is definitely the cutest bear EVER!) I am going to stamp him with Hero Arts Intensified Black ink and color him with Copic markers.
I cut my watercolor cardstock down to 3.75″ x 5″. Behind that, I’m layering a piece of black cardstock and a piece of gold cardstock.
The last thing I need to do is create my sentiment! I am using the same gold cardstock as I used for my base and cutting out the “Happy Fall” banner from the Pink and Main Blessings Slimline Die. I saved the little insides of the A’s and P’s to glue in after I get my sentiment down!
Next, I am ready to glue everything down and use 3D foam squares to adhere my bear!
I’d love it if you left a comment below or on my Instagram page to let me know if you enjoyed this post!
Don’t forget that you have until October 14th to get the October Subscription Box! It’s filled with some really fun stuff! If you didn’t get a chance to see the goodies, you can watch the video here! Or, if you’re already signed up for the subscription, you should be getting your box soon! Yipee!!
I hope you all enjoy the rest of your week! I’ll be back next Monday with another fun project!! I can’t wait! Xoxo, Amanda
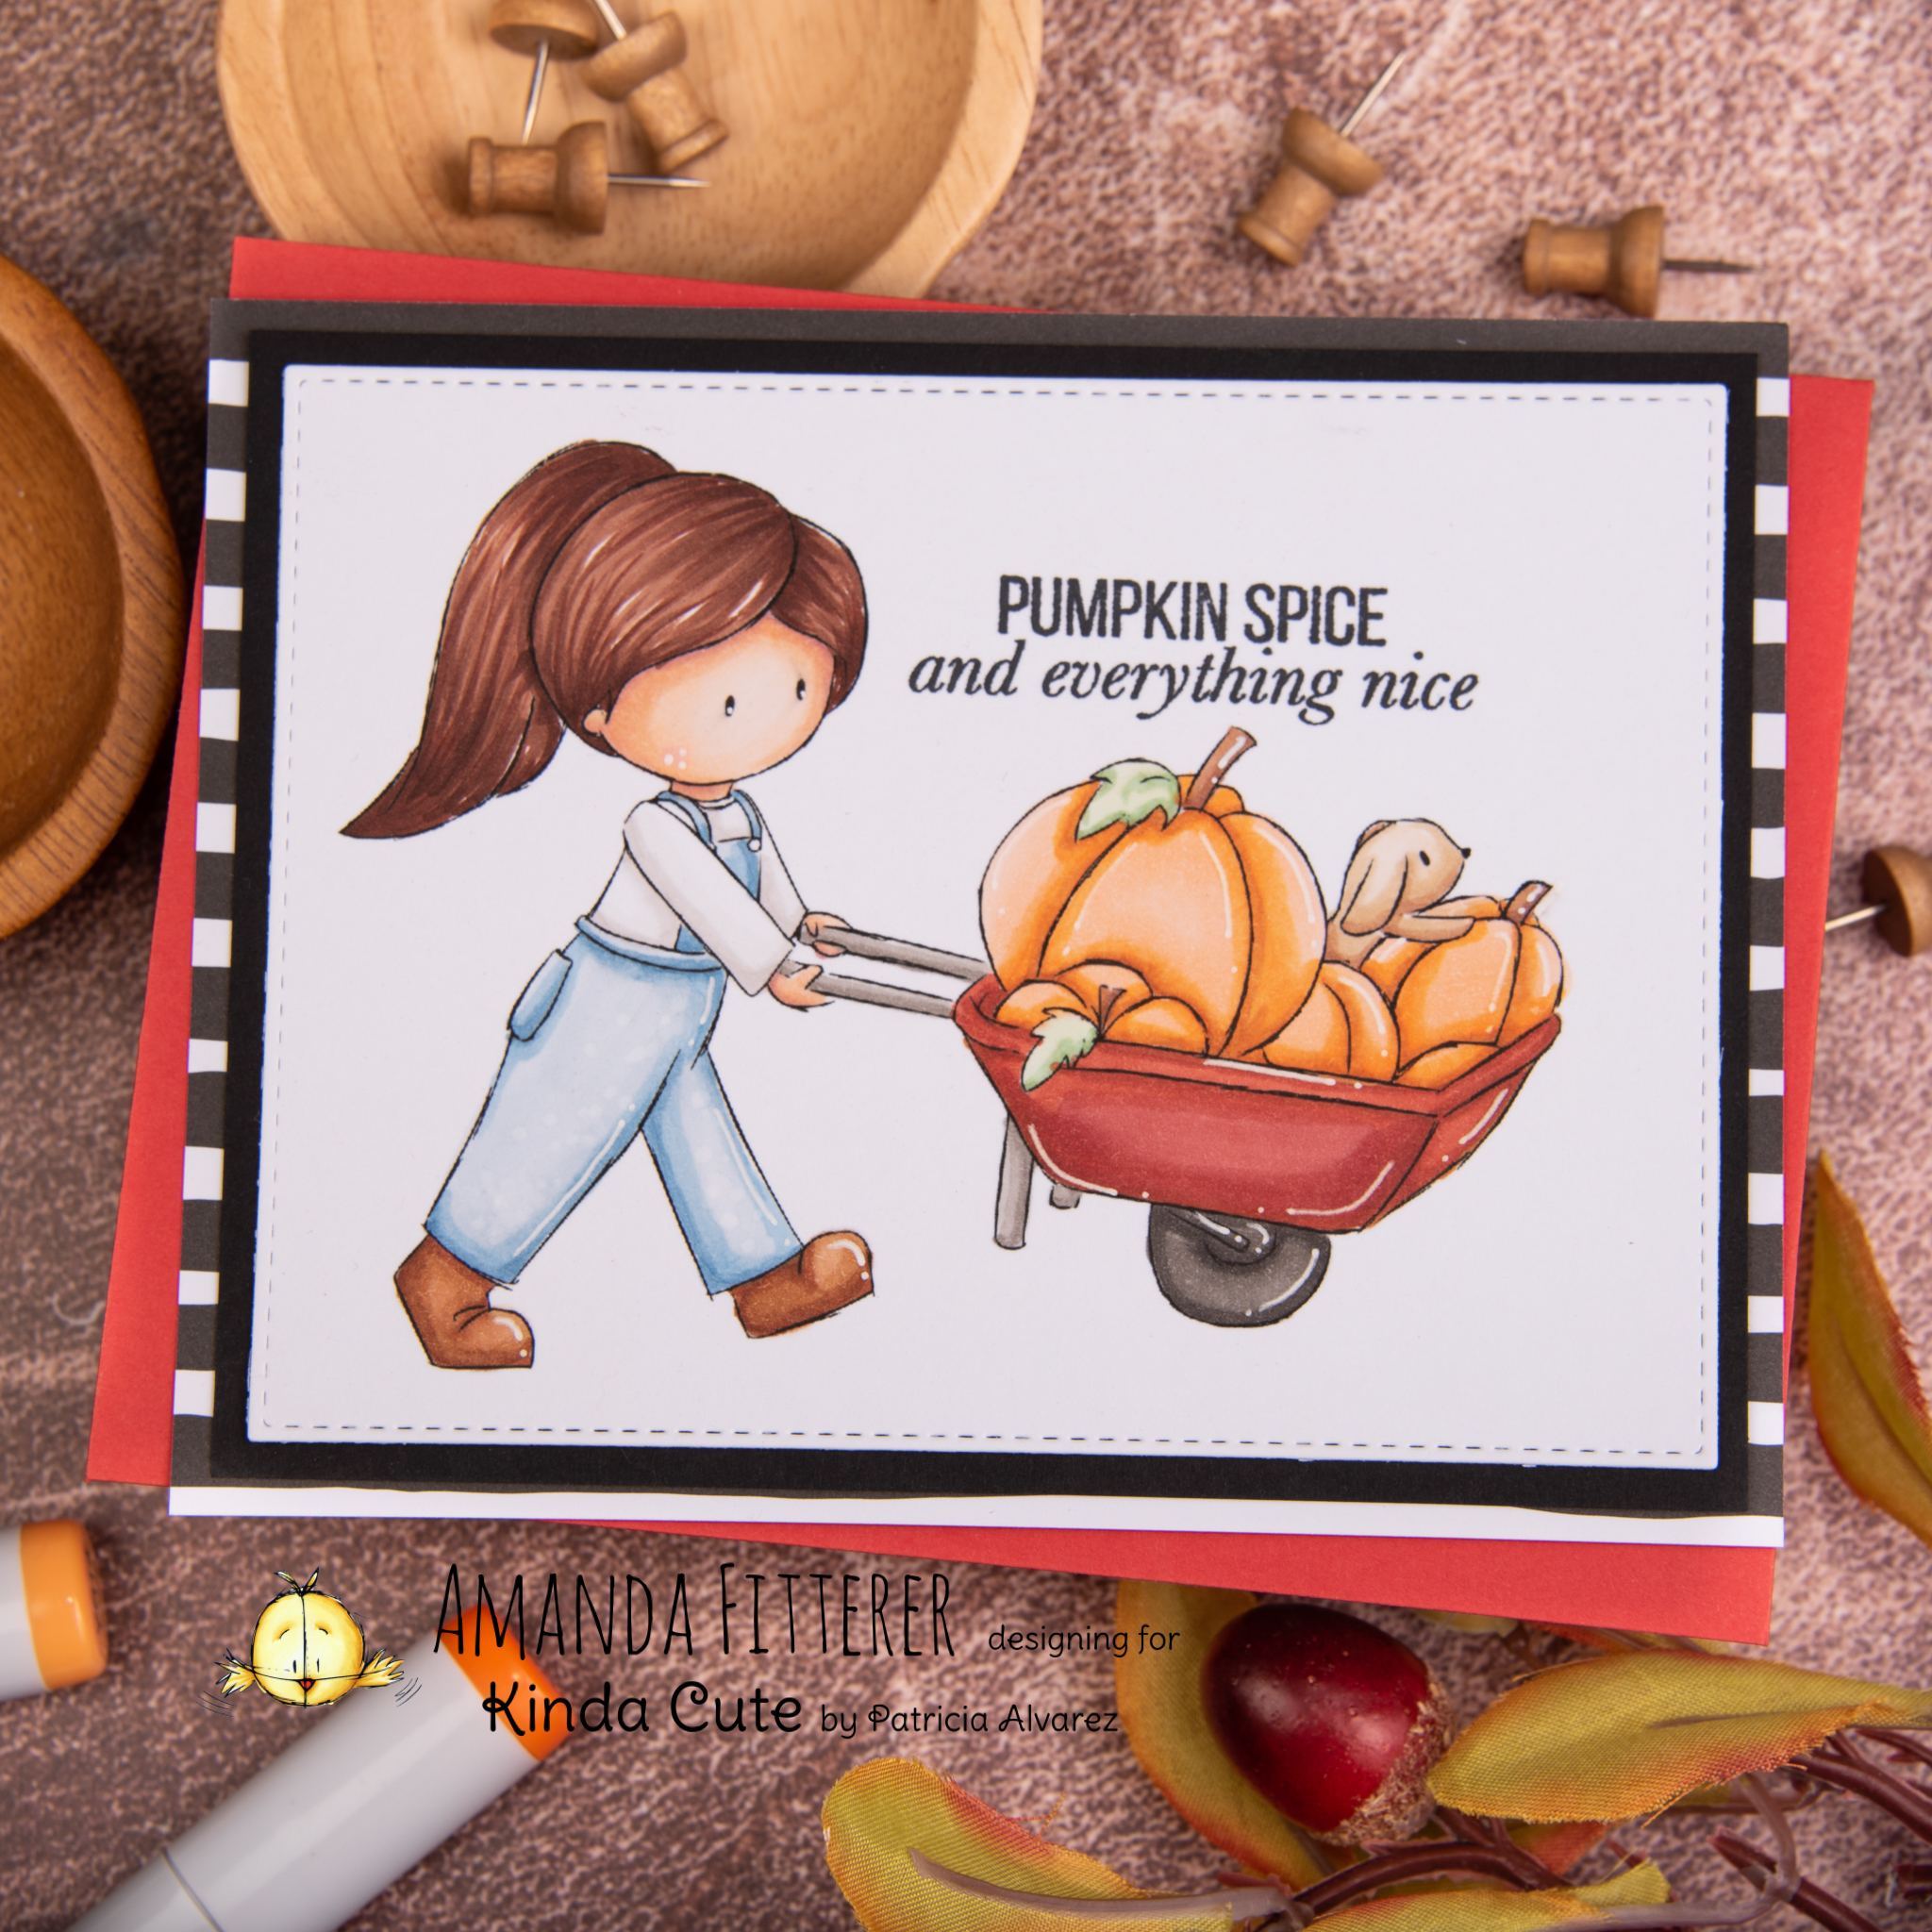
Have you picked out pumpkins for carving yet?? We have the cutest little local farm here that has a huge pumpkin patch that we love to go to every year! They have hay rides, corn mazes, and lots of treats! The kids just love going there!
This sweet girl on this card reminds me of my 6 year old daughter! I just HAD to make a card with her. She’s a digital stamp from Kinda Cute called “Girl with Wheelbarrow“.
I printed the image on 80# Neenah cardstock and then colored her in with Copic markers.
I finished the card off by adding some black cardstock and then patterned paper behind it! I hope you were inspired by my post and I hope you’re having a great week so far! Thank you so much for stopping by my blog! It really means a lot to me! Xoxo, Amanda
It’s that time of year! Are you excited for Autumn or dreading it? Summer is definitely my favorite season, but I do love getting out the fall boots and sweaters! My doggies are definitely happy it’s cooling down! It definitely looks like this cute little dog is having a blast in the leaves!
Happy Saturday, you all! I hope you’re all having a great day today! Thank you for coming to my blog to check out my card! Do you have The Hedgehog Hollow’s September subscription box?? It is SO fun!
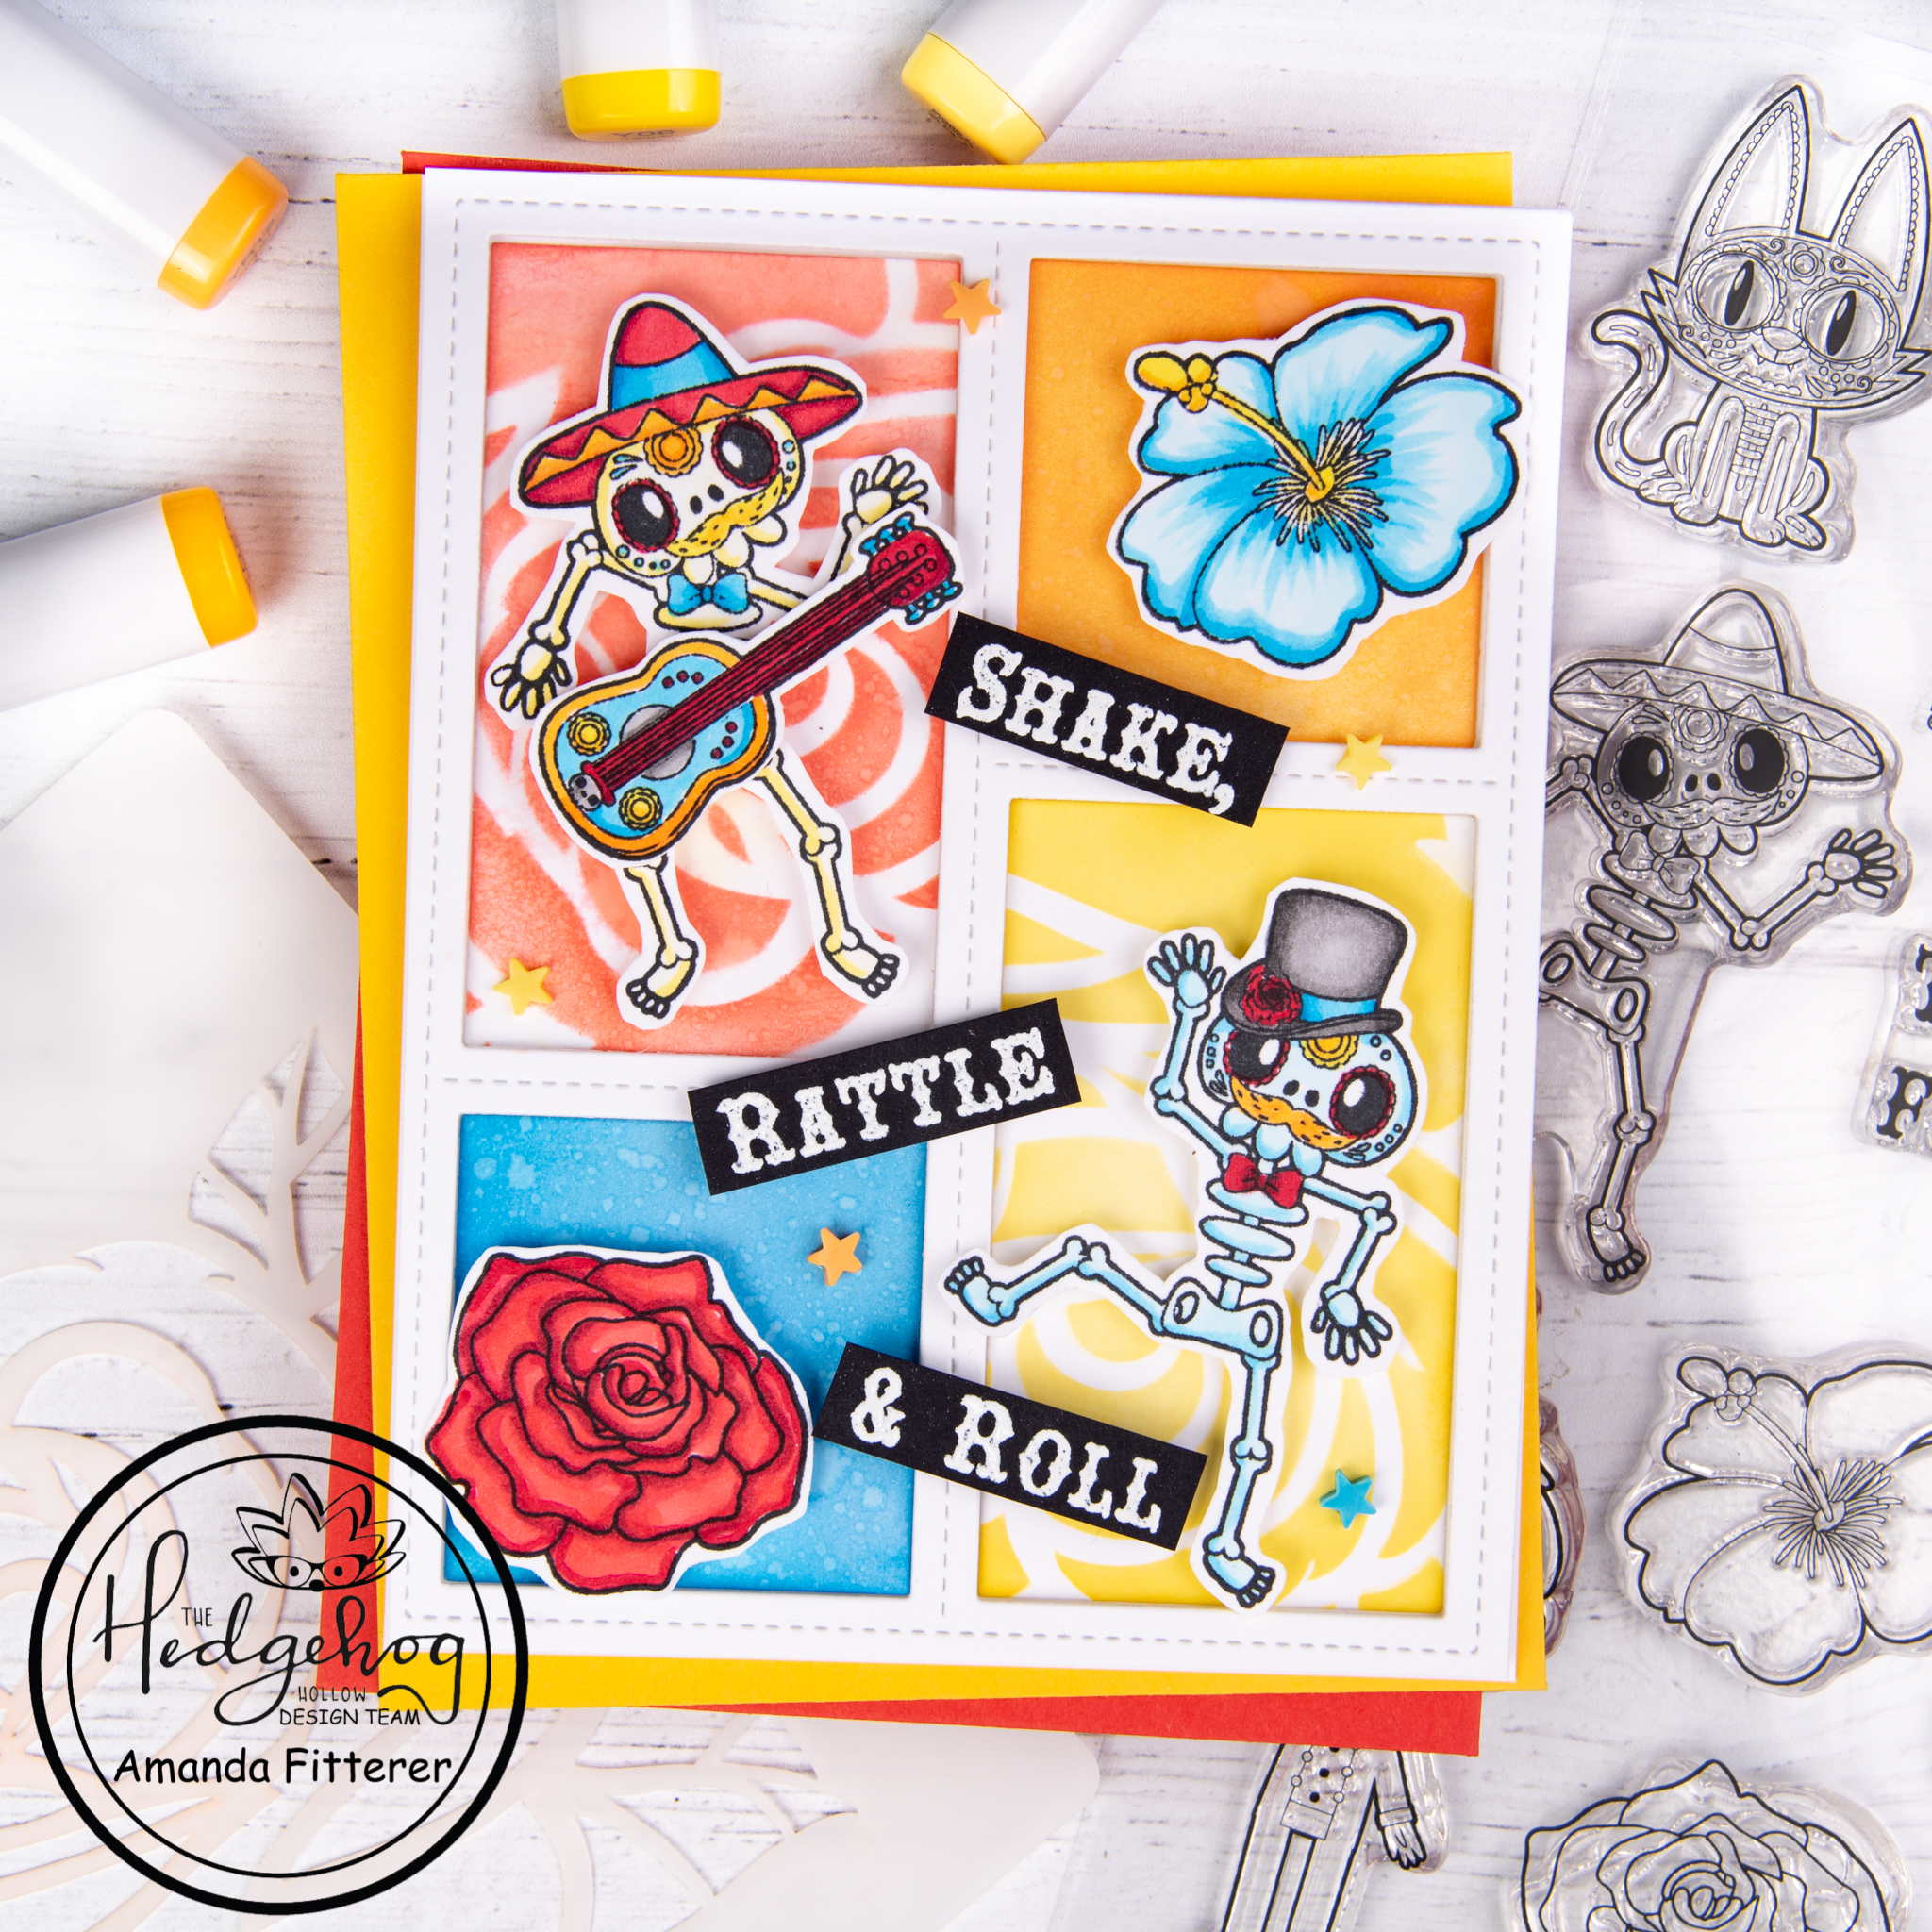
I just love this colorful card to celebrate the Day of the Dead!
Using the Dios De Los Muertos stamp set, I’m going to stamp my images and sentiment. I’m using my Copic markers to color my images. To finish the card off, I’m using glue, 3D foam squares, and some Multicolored Stars embellishments.
2
I think this card turned out so happy and bright! I hope you enjoyed this post and thanks again for coming to my blog!
Don’t forget – this box is only available until September 14th! To see all the products you’ll get in the box, click here. To see the subscription options, click here.
Hellooo! I hope you’re all having a great week so far! Are you getting ready for Fall? I’m not quite ready yet… Still enjoying the warmth and sunshine!
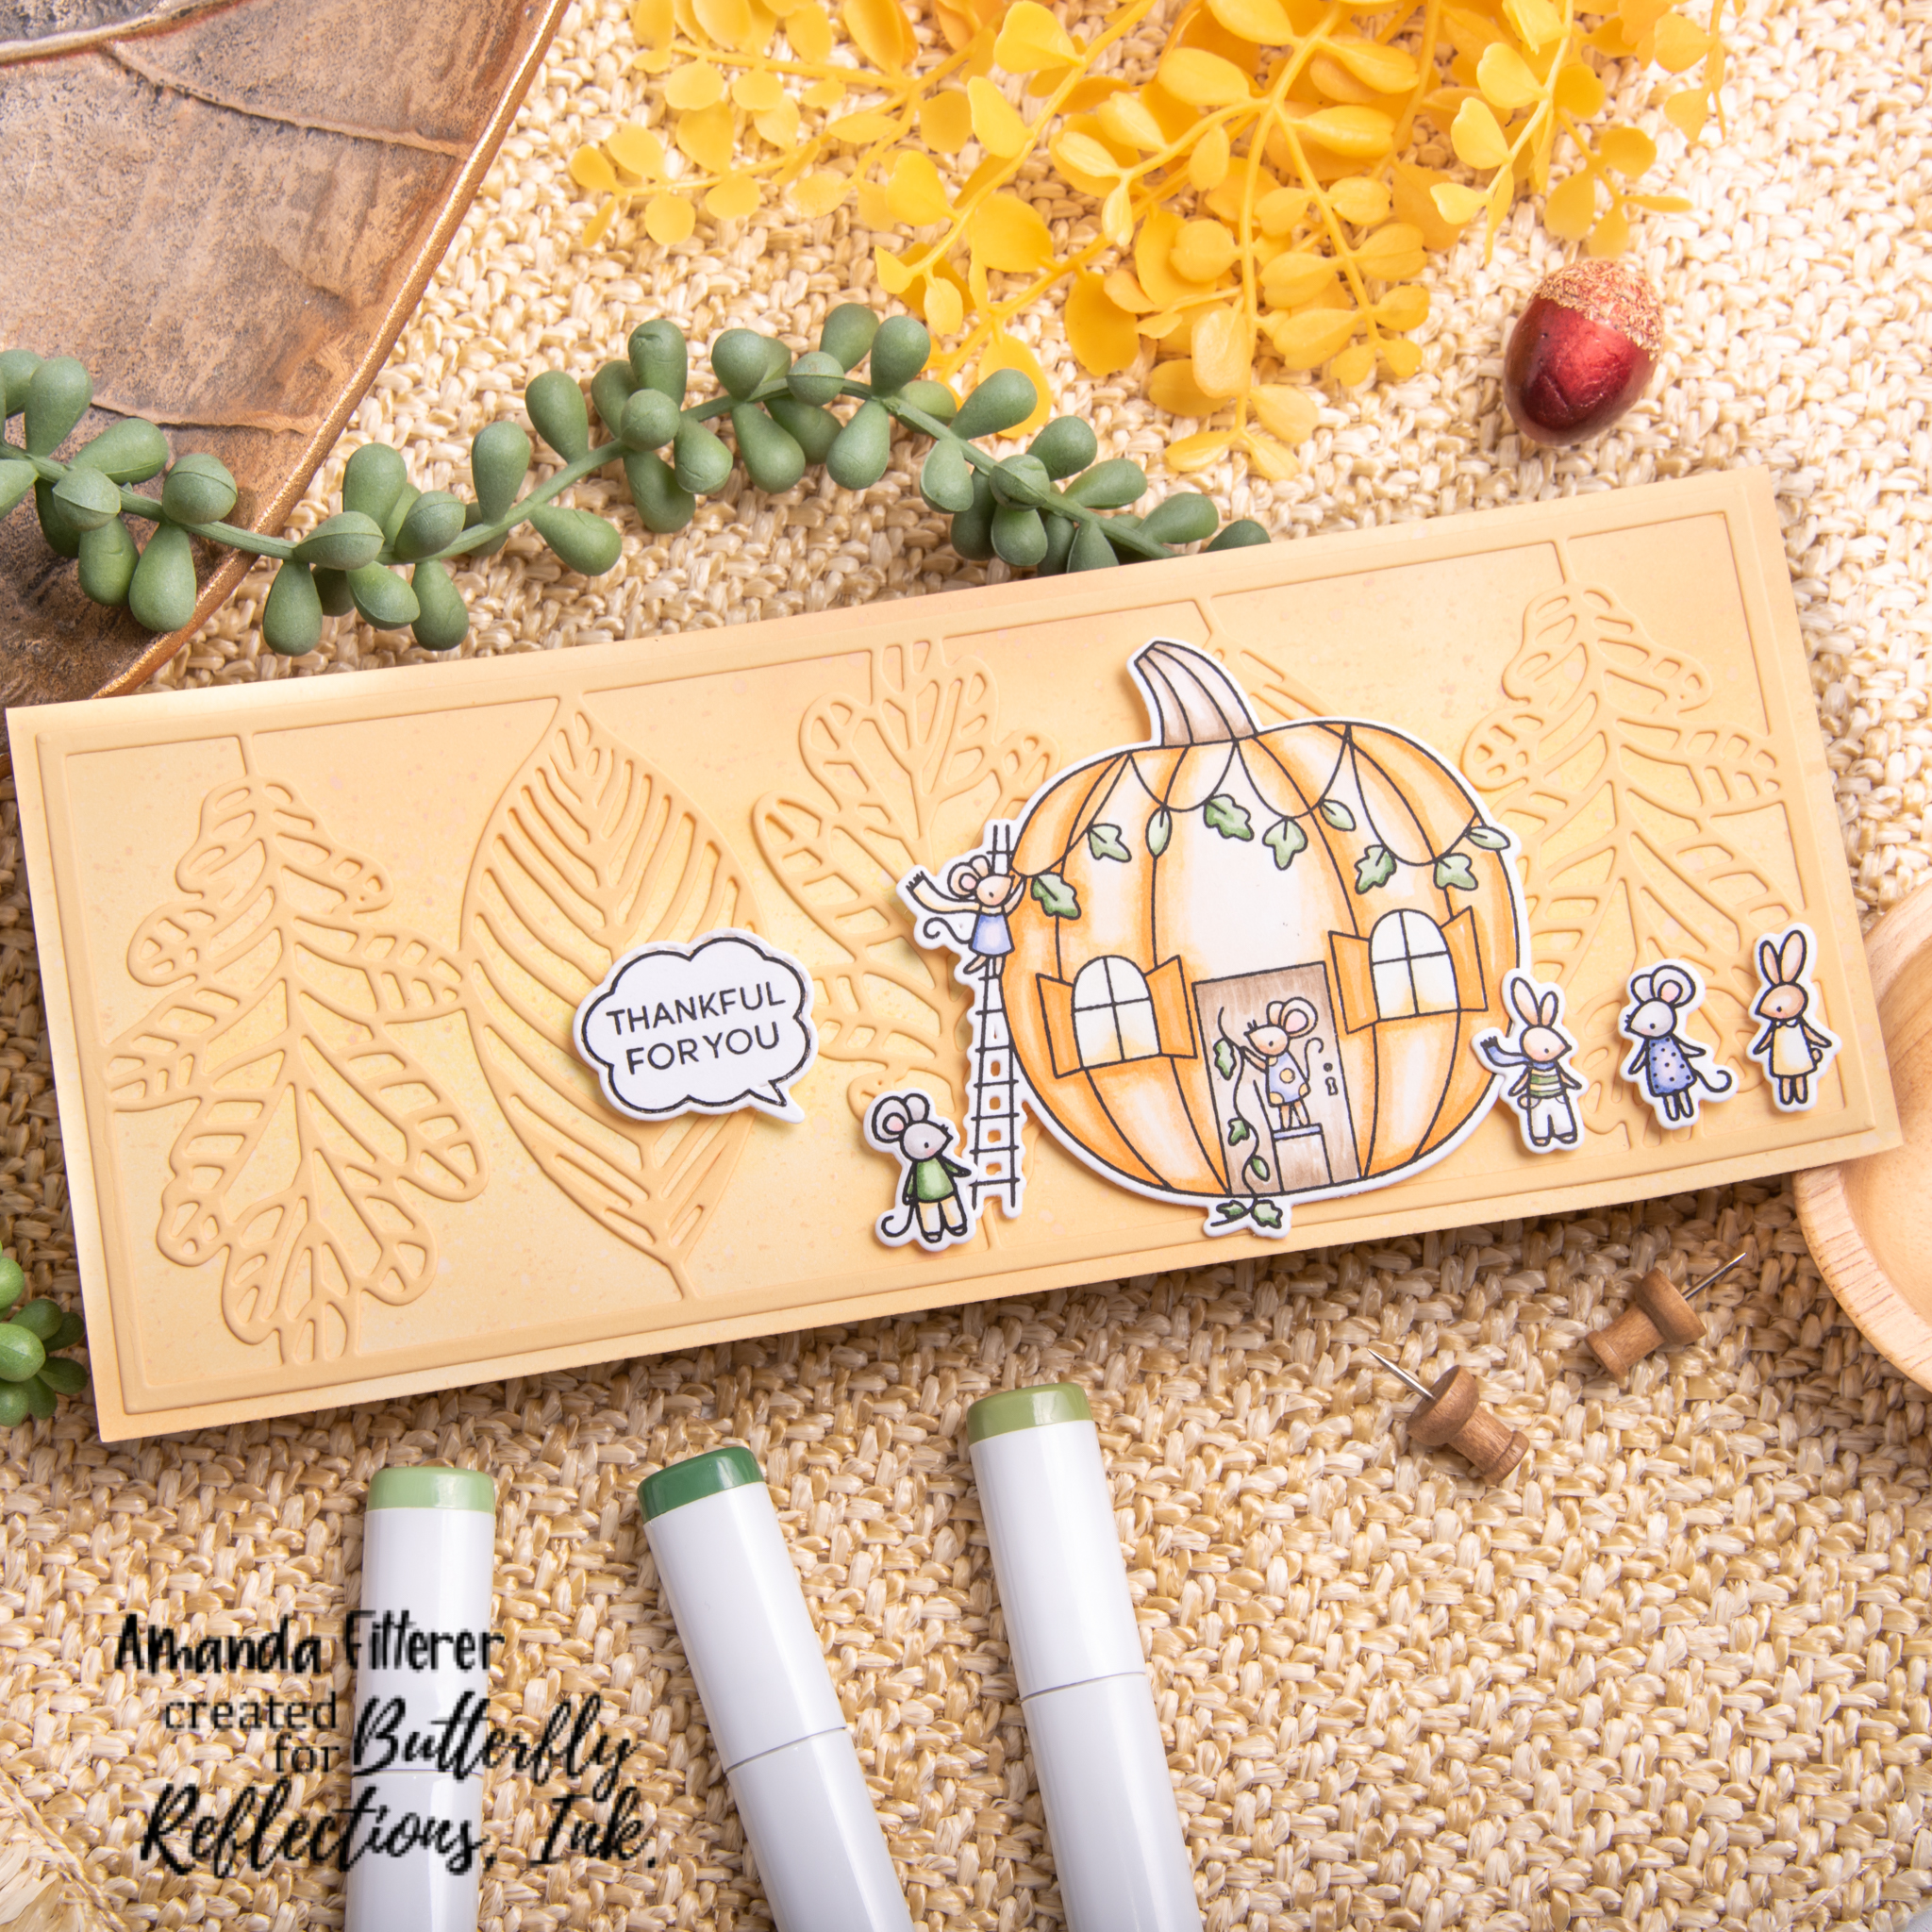
But… I know it’s around the corner and it’s time to get ready with some Fall cards! Today, I’m sharing a sneak peek of my FIRST card as a Butterfly Reflections Ink Design Team member!
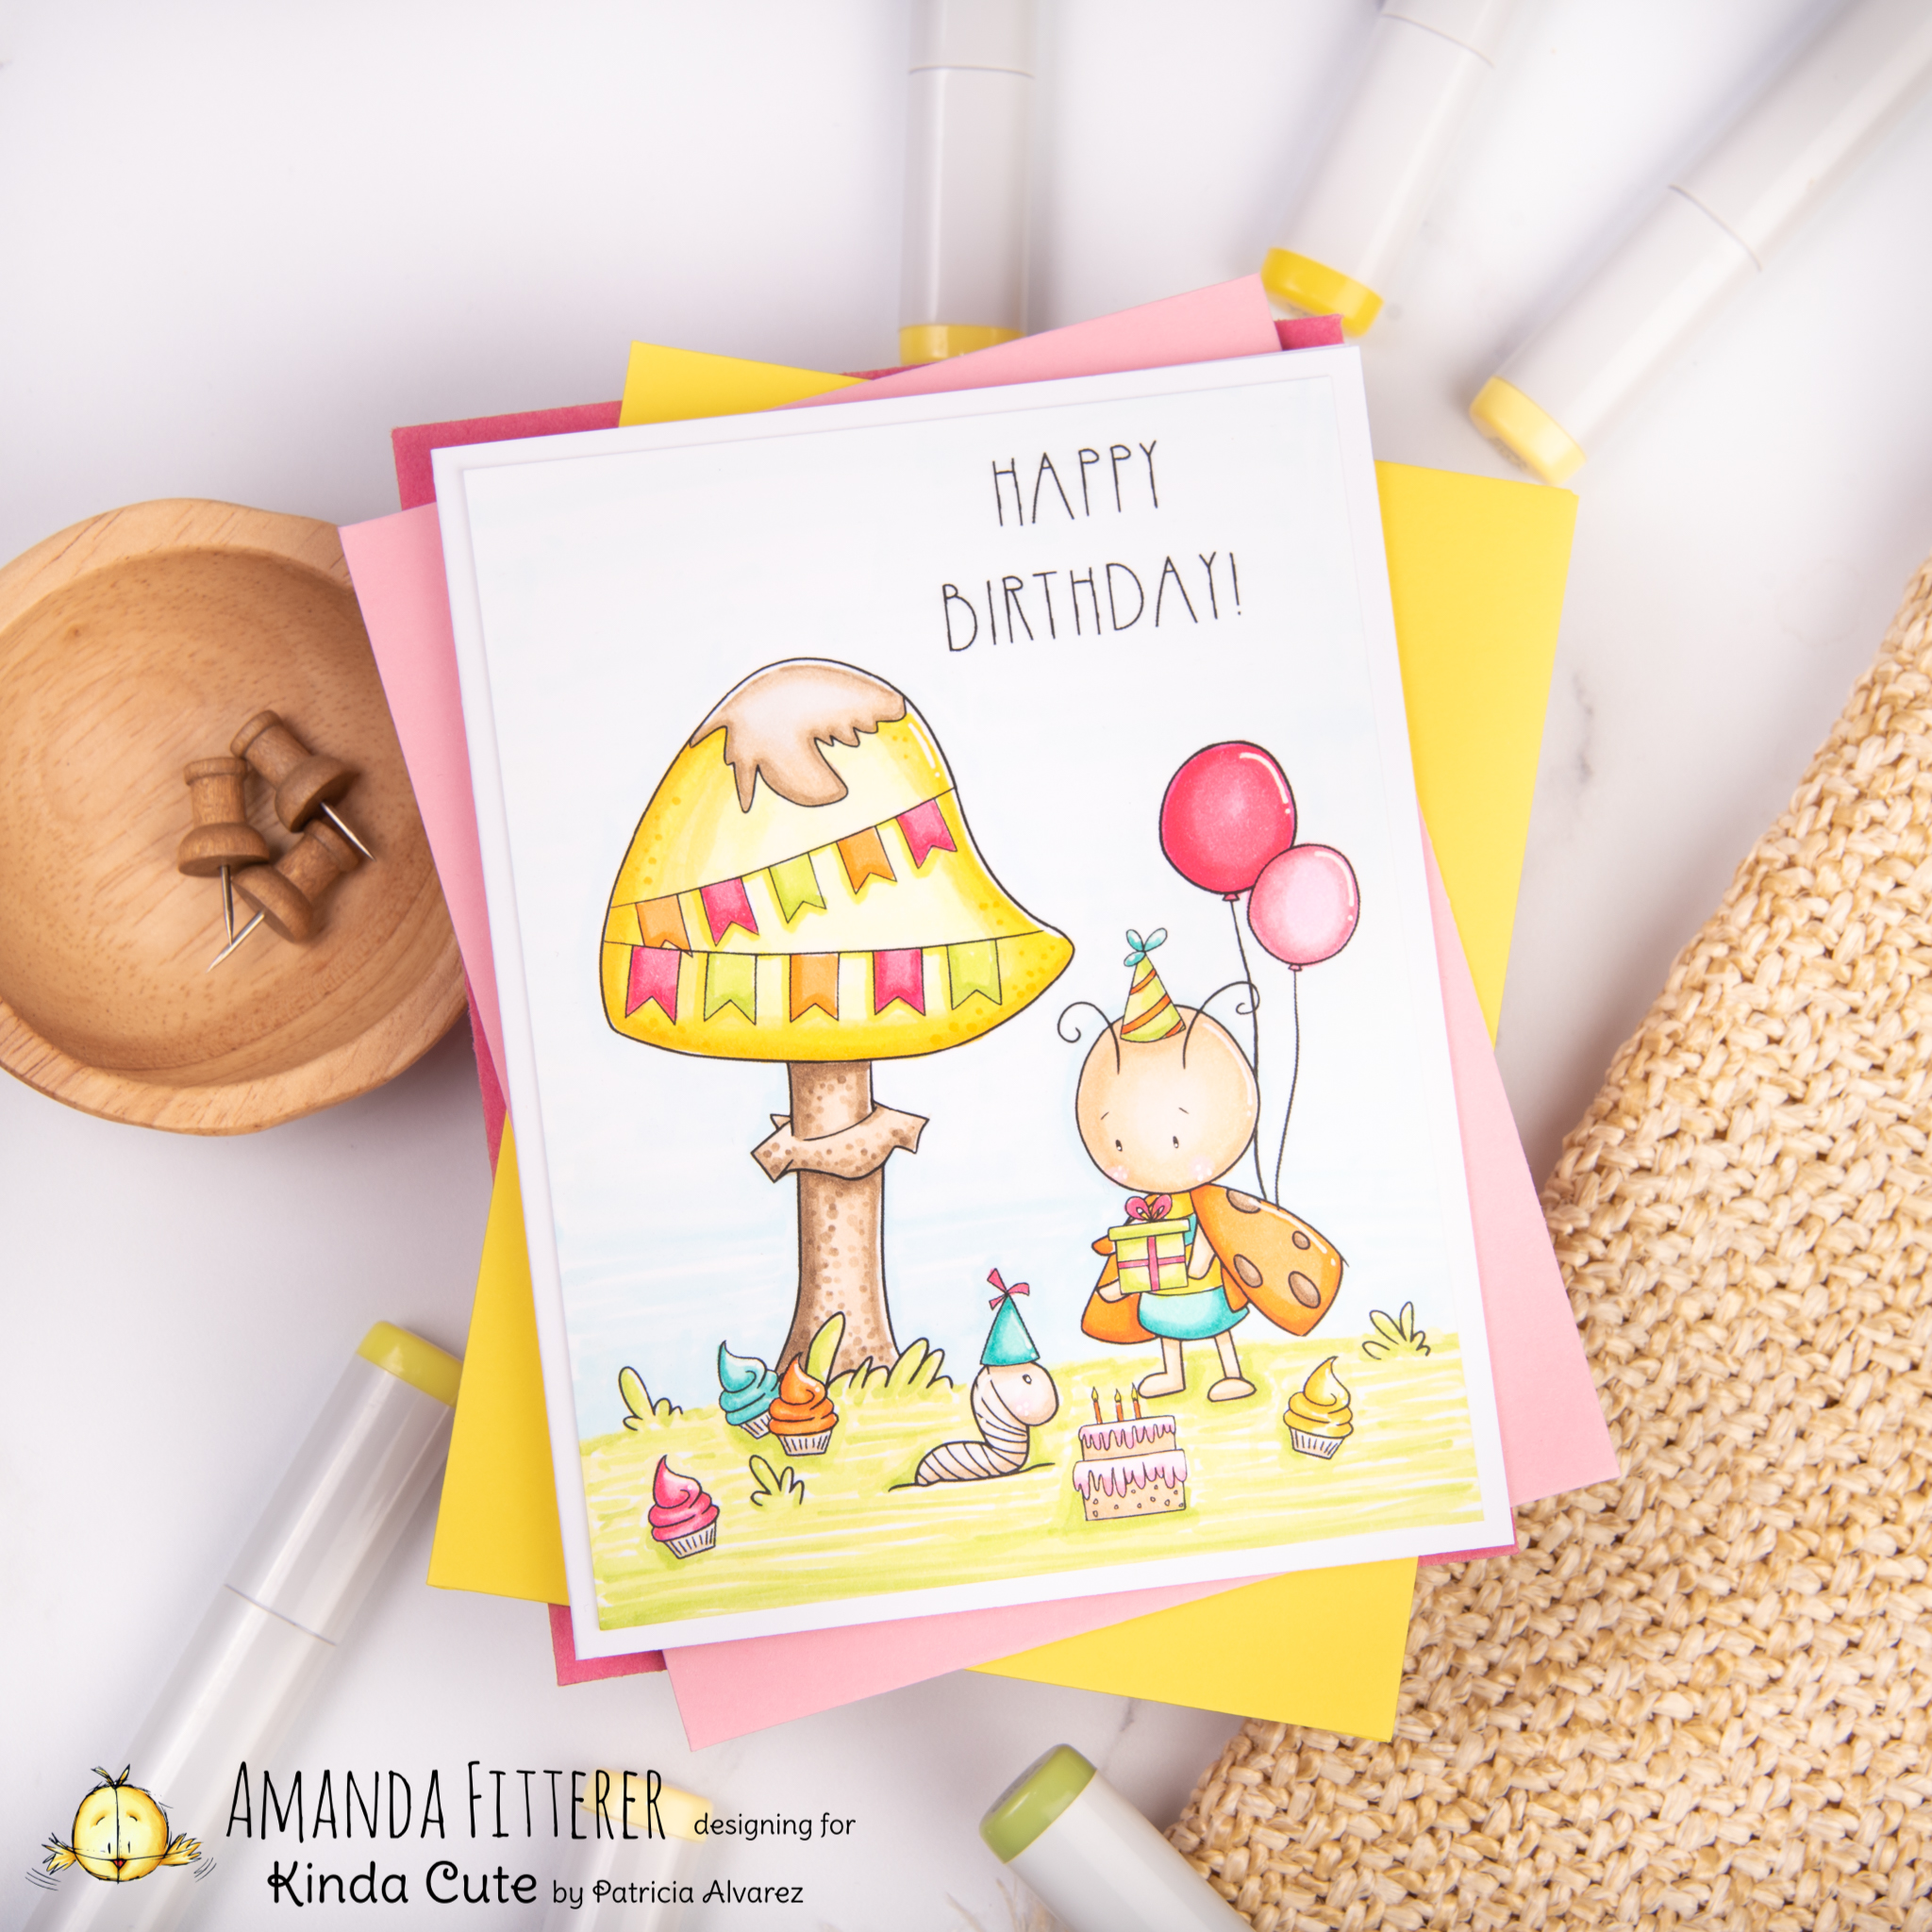
It’s back to school time! My daughter starts school TODAY! The 1st grade! It’s so exciting! I wanted to make a back to school card for all those kiddos out there!
These cute school kids are perfect for the “Back to School” theme, don’t you think?!
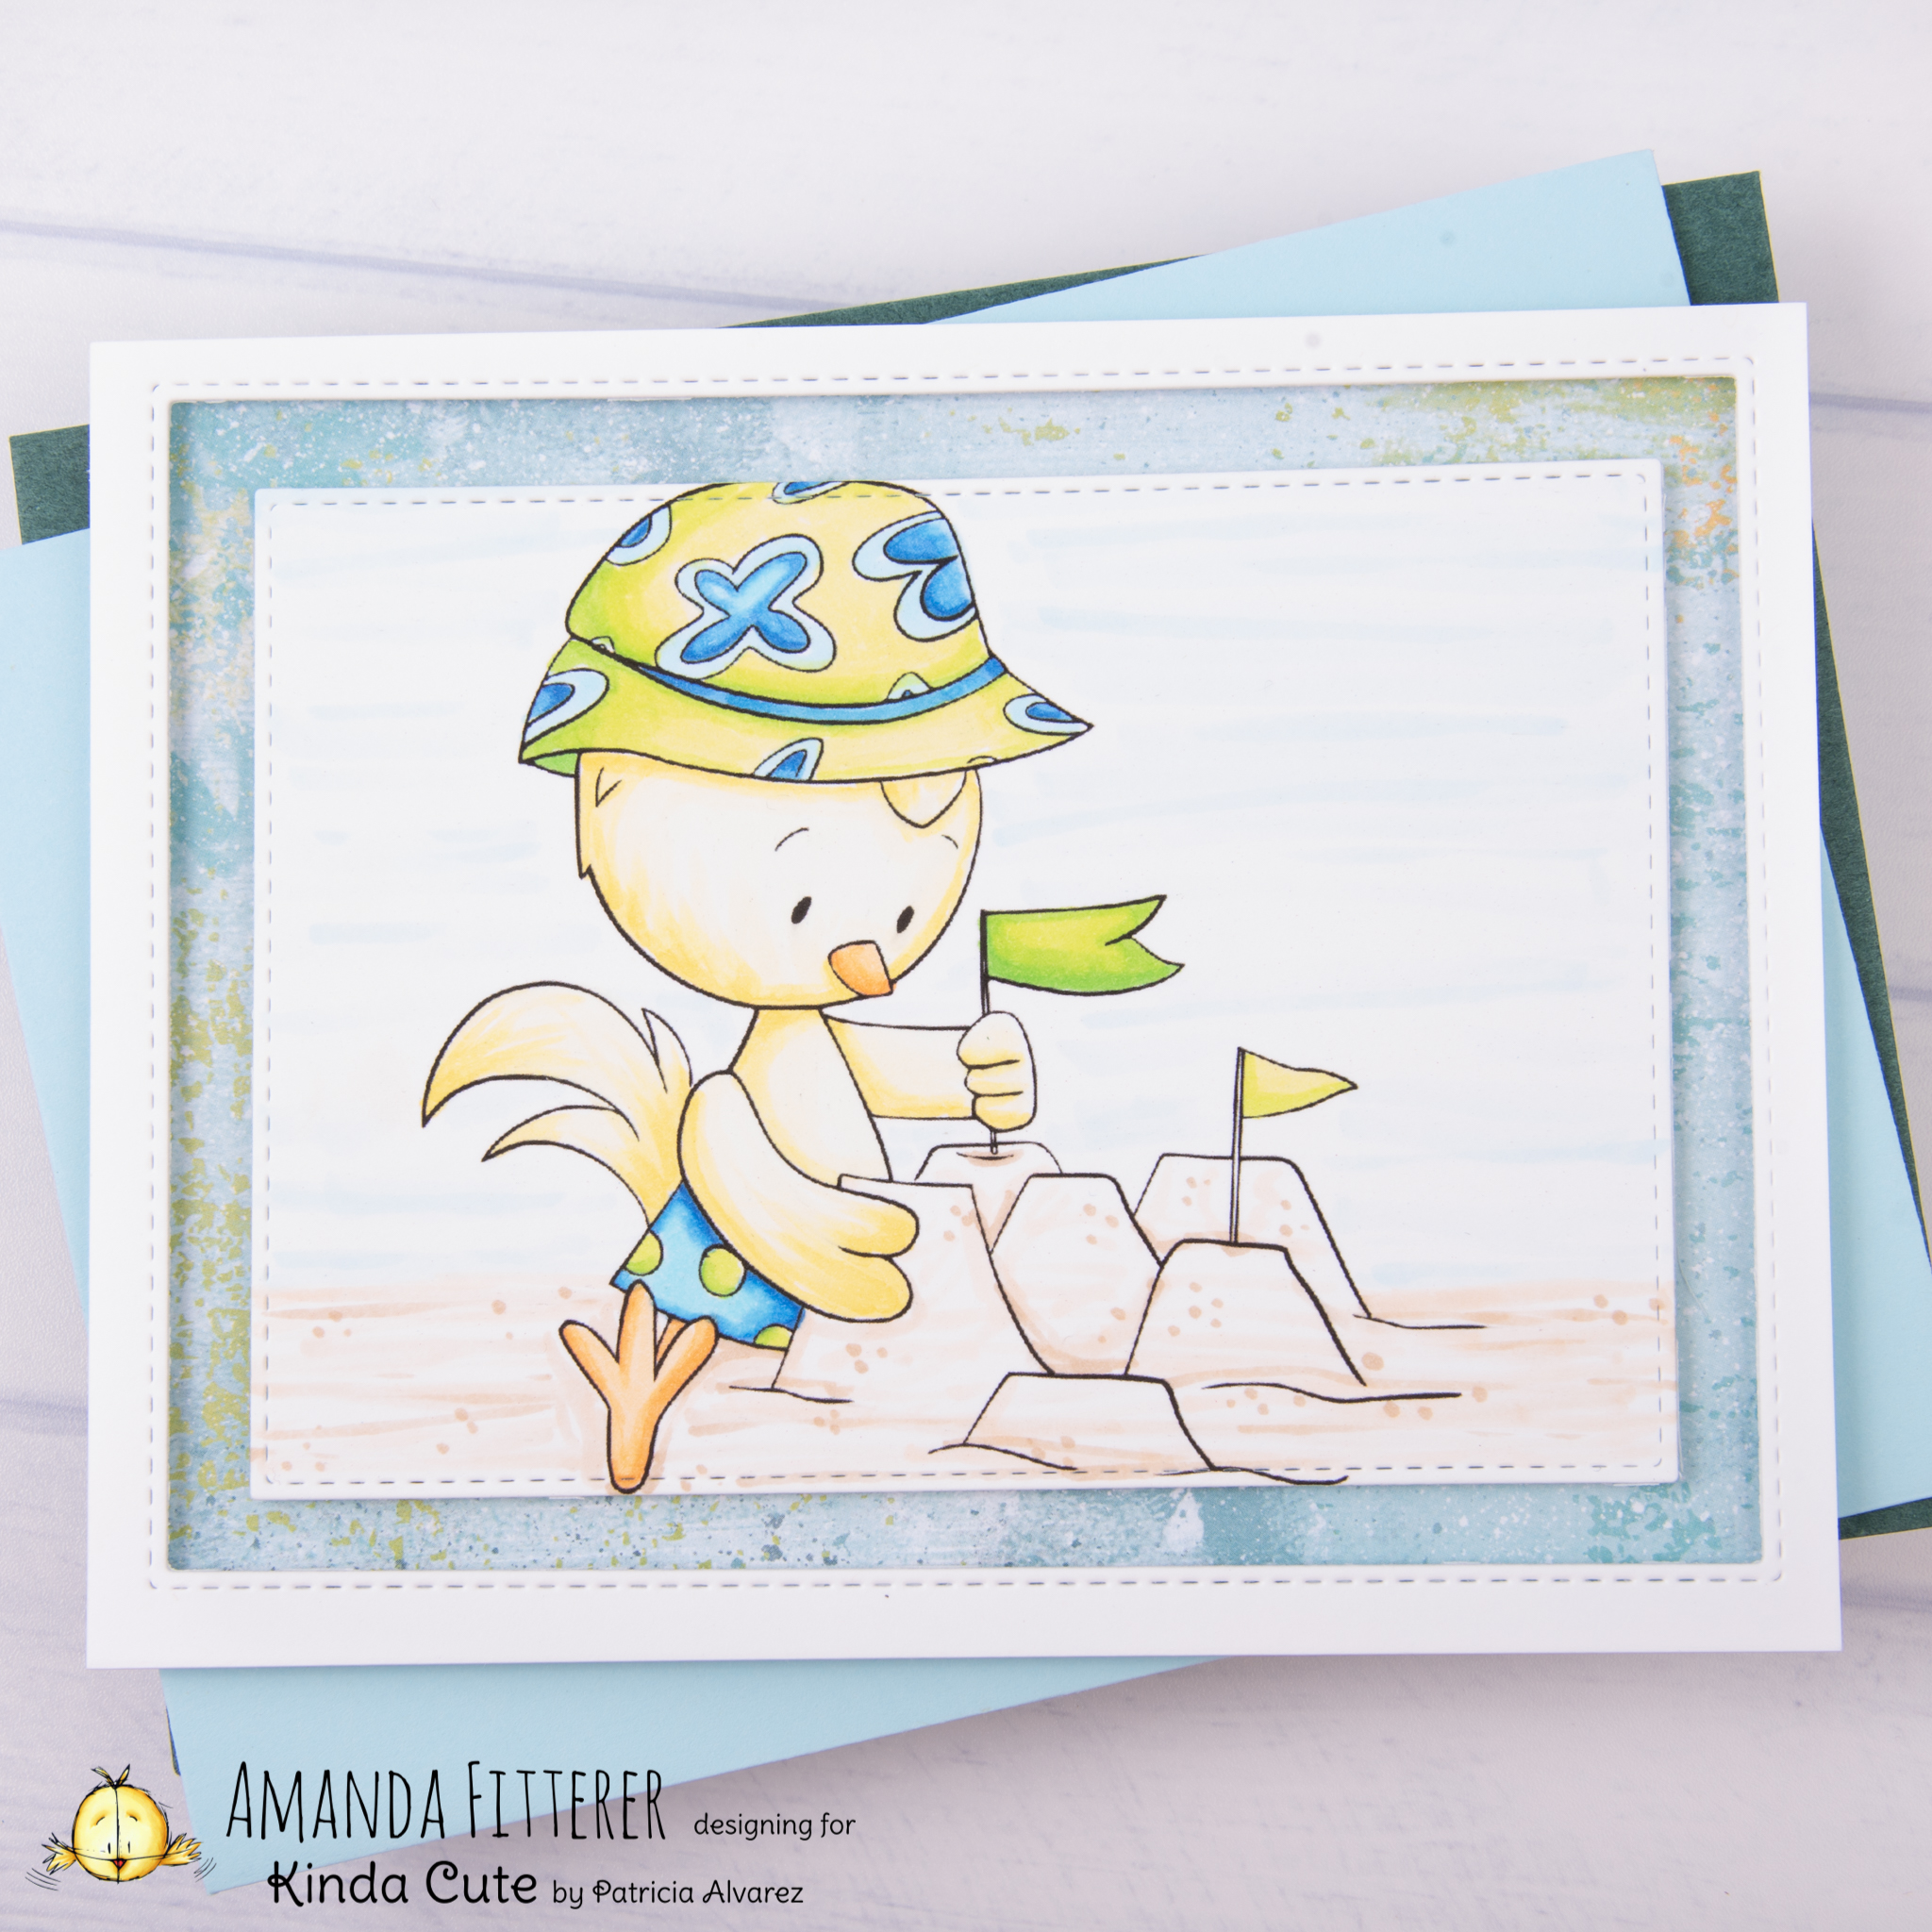
Hello there, friends! I hope you are all doing well this lovely Thursday! How much would you love making sand castles with this little cute chick?!
To make this card, I’m using the digital stamp: Chicken on the Sand. I colored this little cutie with Copic markers: YG00, YG01, YG05, YG07 B00, B24, B26 Y32, YR21, YR12 Y0000, Y000, Y11, Y13
For the sand, I used E50, E41, and E42. For the sky, I used B0000 and B000.
I think he turned out super adorable! Thank you so much for stopping by! Have a great rest of the week!! Xoxo, Amanda
Hey there! I hope you’re all having a fantastic week so far! It’s almost the weekend! Yay! I have a new card to share with you today using some Kinda Cute digital stamps!
Welcome to the Honey Bee Stamps Summer Release Blog Hop – Day 2! To celebrate this huge release, Honey Bee Stamps is giving away a $25 gift certificate to the store for each day of the Hop! Be sure to comment on every stop along the way for Day 1 and Day 2 to win!
I’m going to make a different roof for each house! I’m die cutting the roof from the Beach House Add-On Honey Cuts. For my first house, I’m using Scattered Straw and Frayed Burlap distress ink and oxide. I’m also adding E34 to the embossed parts. For the 2nd house, I’m using Copic markers and a flicking motion to color in the entire roof. I am using E41, E42, E43, and E44. For the last house, I’m using the Scattered Straw and Frayed Burlap again, but doing a lighter coat.
I’m using the doors and windows that come with the House Builder Base for the 2nd and 3rd houses and coloring them with Copic markers.
Now I’m going to start stamping my images from the Beach House Add-On Stamps and coloring them with Copic markers. Click on any image to view it larger! For my “Welcome” sign, I’m using a paddle as my stick!
For my palm trees, I’m going to blend Mowed Lawn and Twisted Citron distress inks on a piece of white card stock and then die cut my leaves. For the trunk, I’m using E50, E31, E23, and E55.
Now I’m ready to start adhering my cards together! The process is the same for each card, so I’m only showing one house below. I am using 3D foam squares and strips for items I want to stick out (such as the palm tree, bike, and tiki torches). I am using a glue pen for tiny things, such as the leaves on the wreath and the palm leaves. I am using double sided tape for the fence.
Here’s another look at the finished cards!
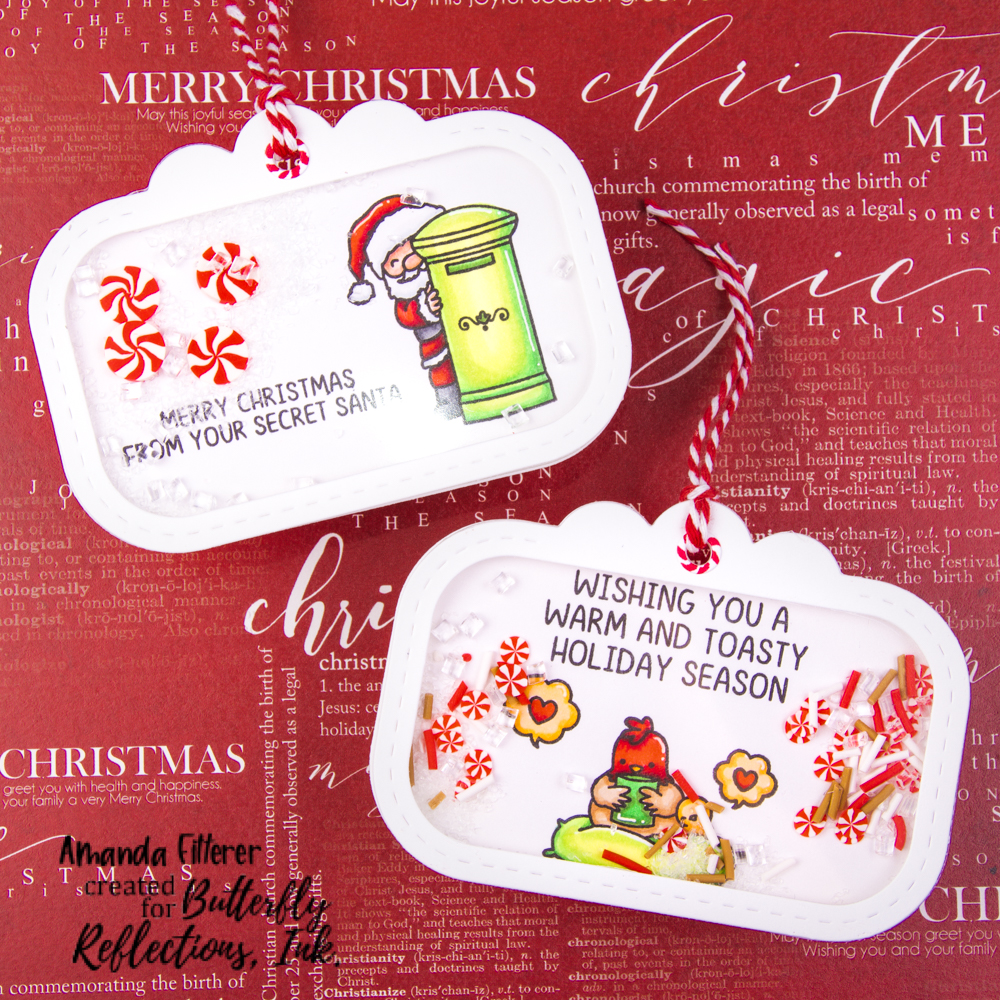
For my 2nd project, I created these shaker tags!
To make these tags, I am using the Tag Along dies from Heffy Doodle. I am using the same tag die to cut the acetate for my shaker portion so that it fits perfectly. Next, I’m blending some backgrounds with distress oxides and stencils.
I’m stamping my images using Memento Tuxedo Black ink and then using my Copic markers to color my images.
I am adding “margarita salt” to the rim of my margarita using liquid glue and Frosted Sugar Powder from Dress My Craft. For my shakers, I’m using the Frosted Sugar Powder and Crystal Ice Cubes from Dress My Craft.
Thank you so much for stopping by my post! If you’re not already following me on Instagram, please follow me if you want to see more cards from me! @craftyandcreativevibes Xoxo, Amanda
I printed the images on 80lb. Neenah Solar White cardstock. I used my Copic markers to color the koalas. I used: N0, N1, N2, N3, N4, N6, R20. I used precision scissors to cut out the koalas.
The slimline dies are newly released from Heffy Doodle. The heart stencil I used for the background is also from Heffy Doodle! I used “Worn Lipstick” distress oxide to blend the background.
Thank you so much for stopping by my blog to see this post! ‘Til next time!! Xoxo, Amanda
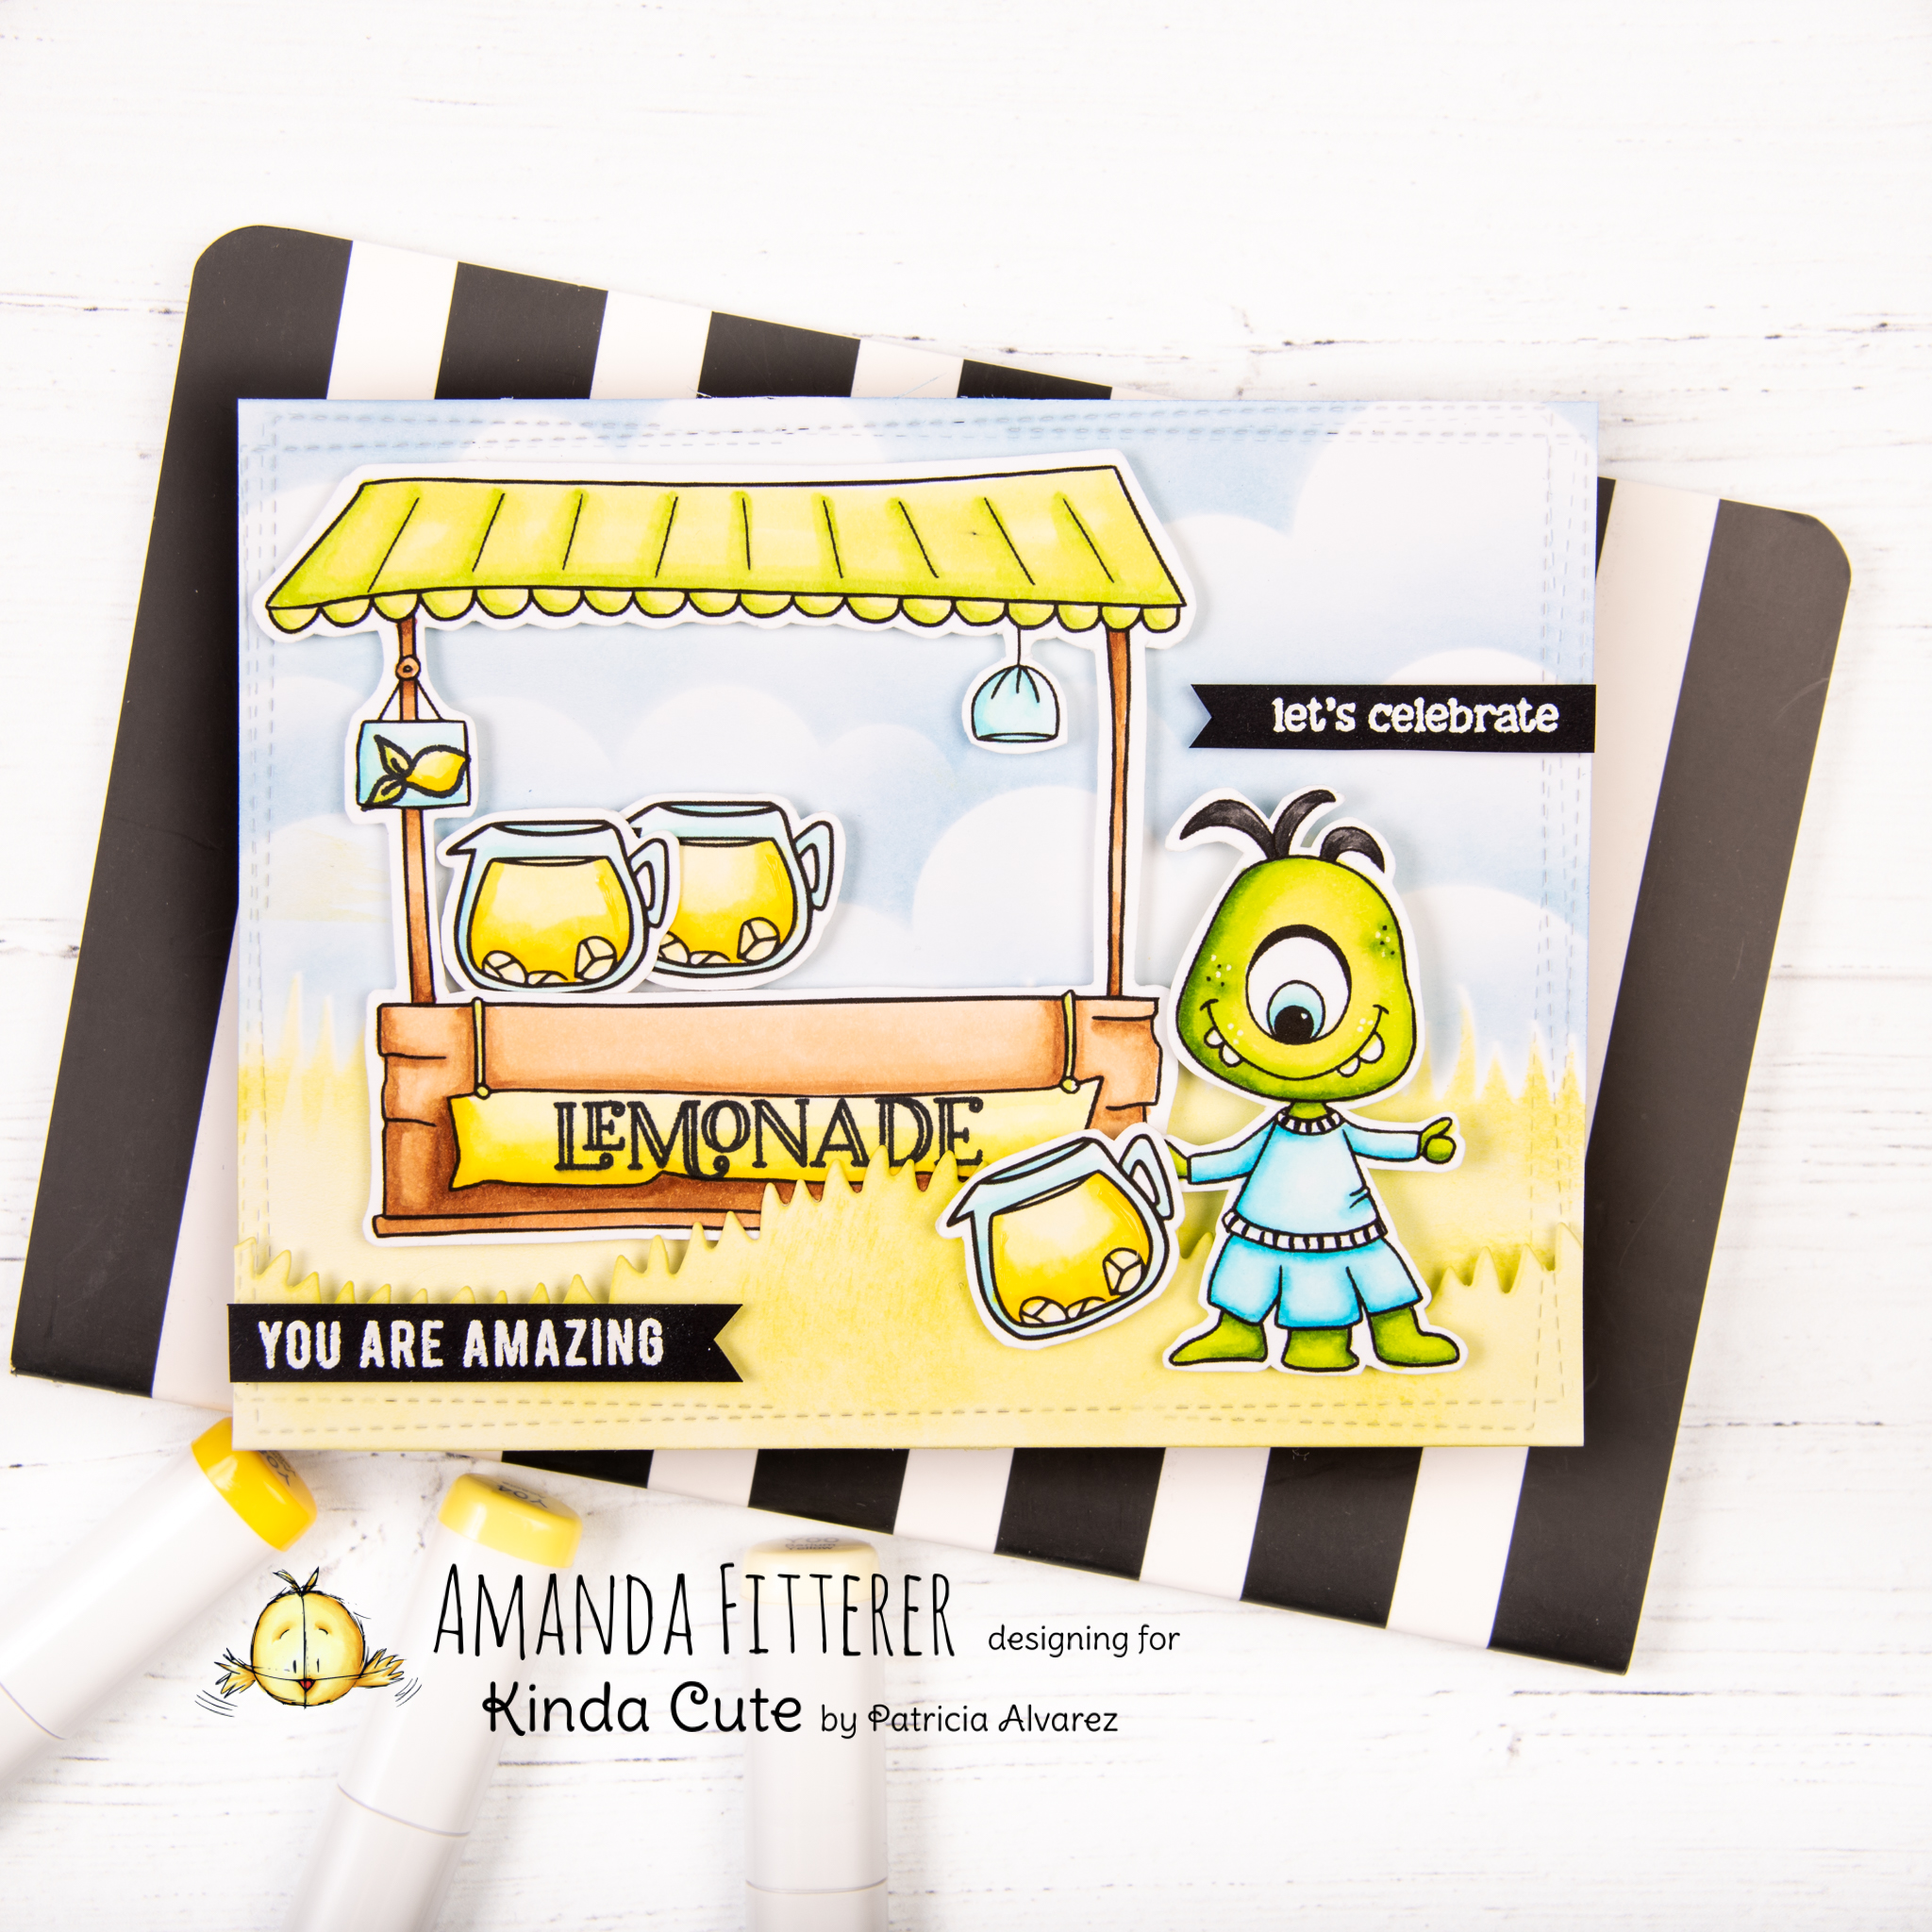
Hello lovely friends! Thanks for stopping by my blog to to see this adorable monster selling lemonade! This cute digital stamp can be printed as one scene or as separate pieces and arranged in your own scene! You can find this stamp on Kinda Cute’s website!
I’m going to start by printing the digital stamp on 80lb. Neenah Solar White cardstock. I’m printing the images separately so that I can arrange my own scene. I’m also going to print a few extra lemonade pitchers!
I’m ready to color my images now! For the lemonade, I’m using Y00, Y04, and Y08. For the lemonade stand, I’m using E30, E31, E33, E35, and E37.
Now, I’m going to use YG00, YG01, and YG03 for the awning. I’m also using BG000, BG10 and BG11.
For my cute little monster, I’m using YG17, YG03, YG01, YG00. For his outfit and eye, I’m using BG0000, BG000, BG01, BG02, and 100 (to make stripes). I’m using T5, T6, T8, and T10 for his hairs.
Now, I’m going to cut all of my images out with some precision scissors. After I’m finished with that, I’m ready to arrange my scene. I am using some stencils and dies and distress oxides to create my background. The stencils are from Simon Says Stamp and the die is from Heffy Doodle.
I am going to heat emboss some sentiments with white embossing powder on black cardstock and then adhere everything to my card using 3D foam squares and strips.
Thank you so much for stopping by my site! Xoxo, Amanda
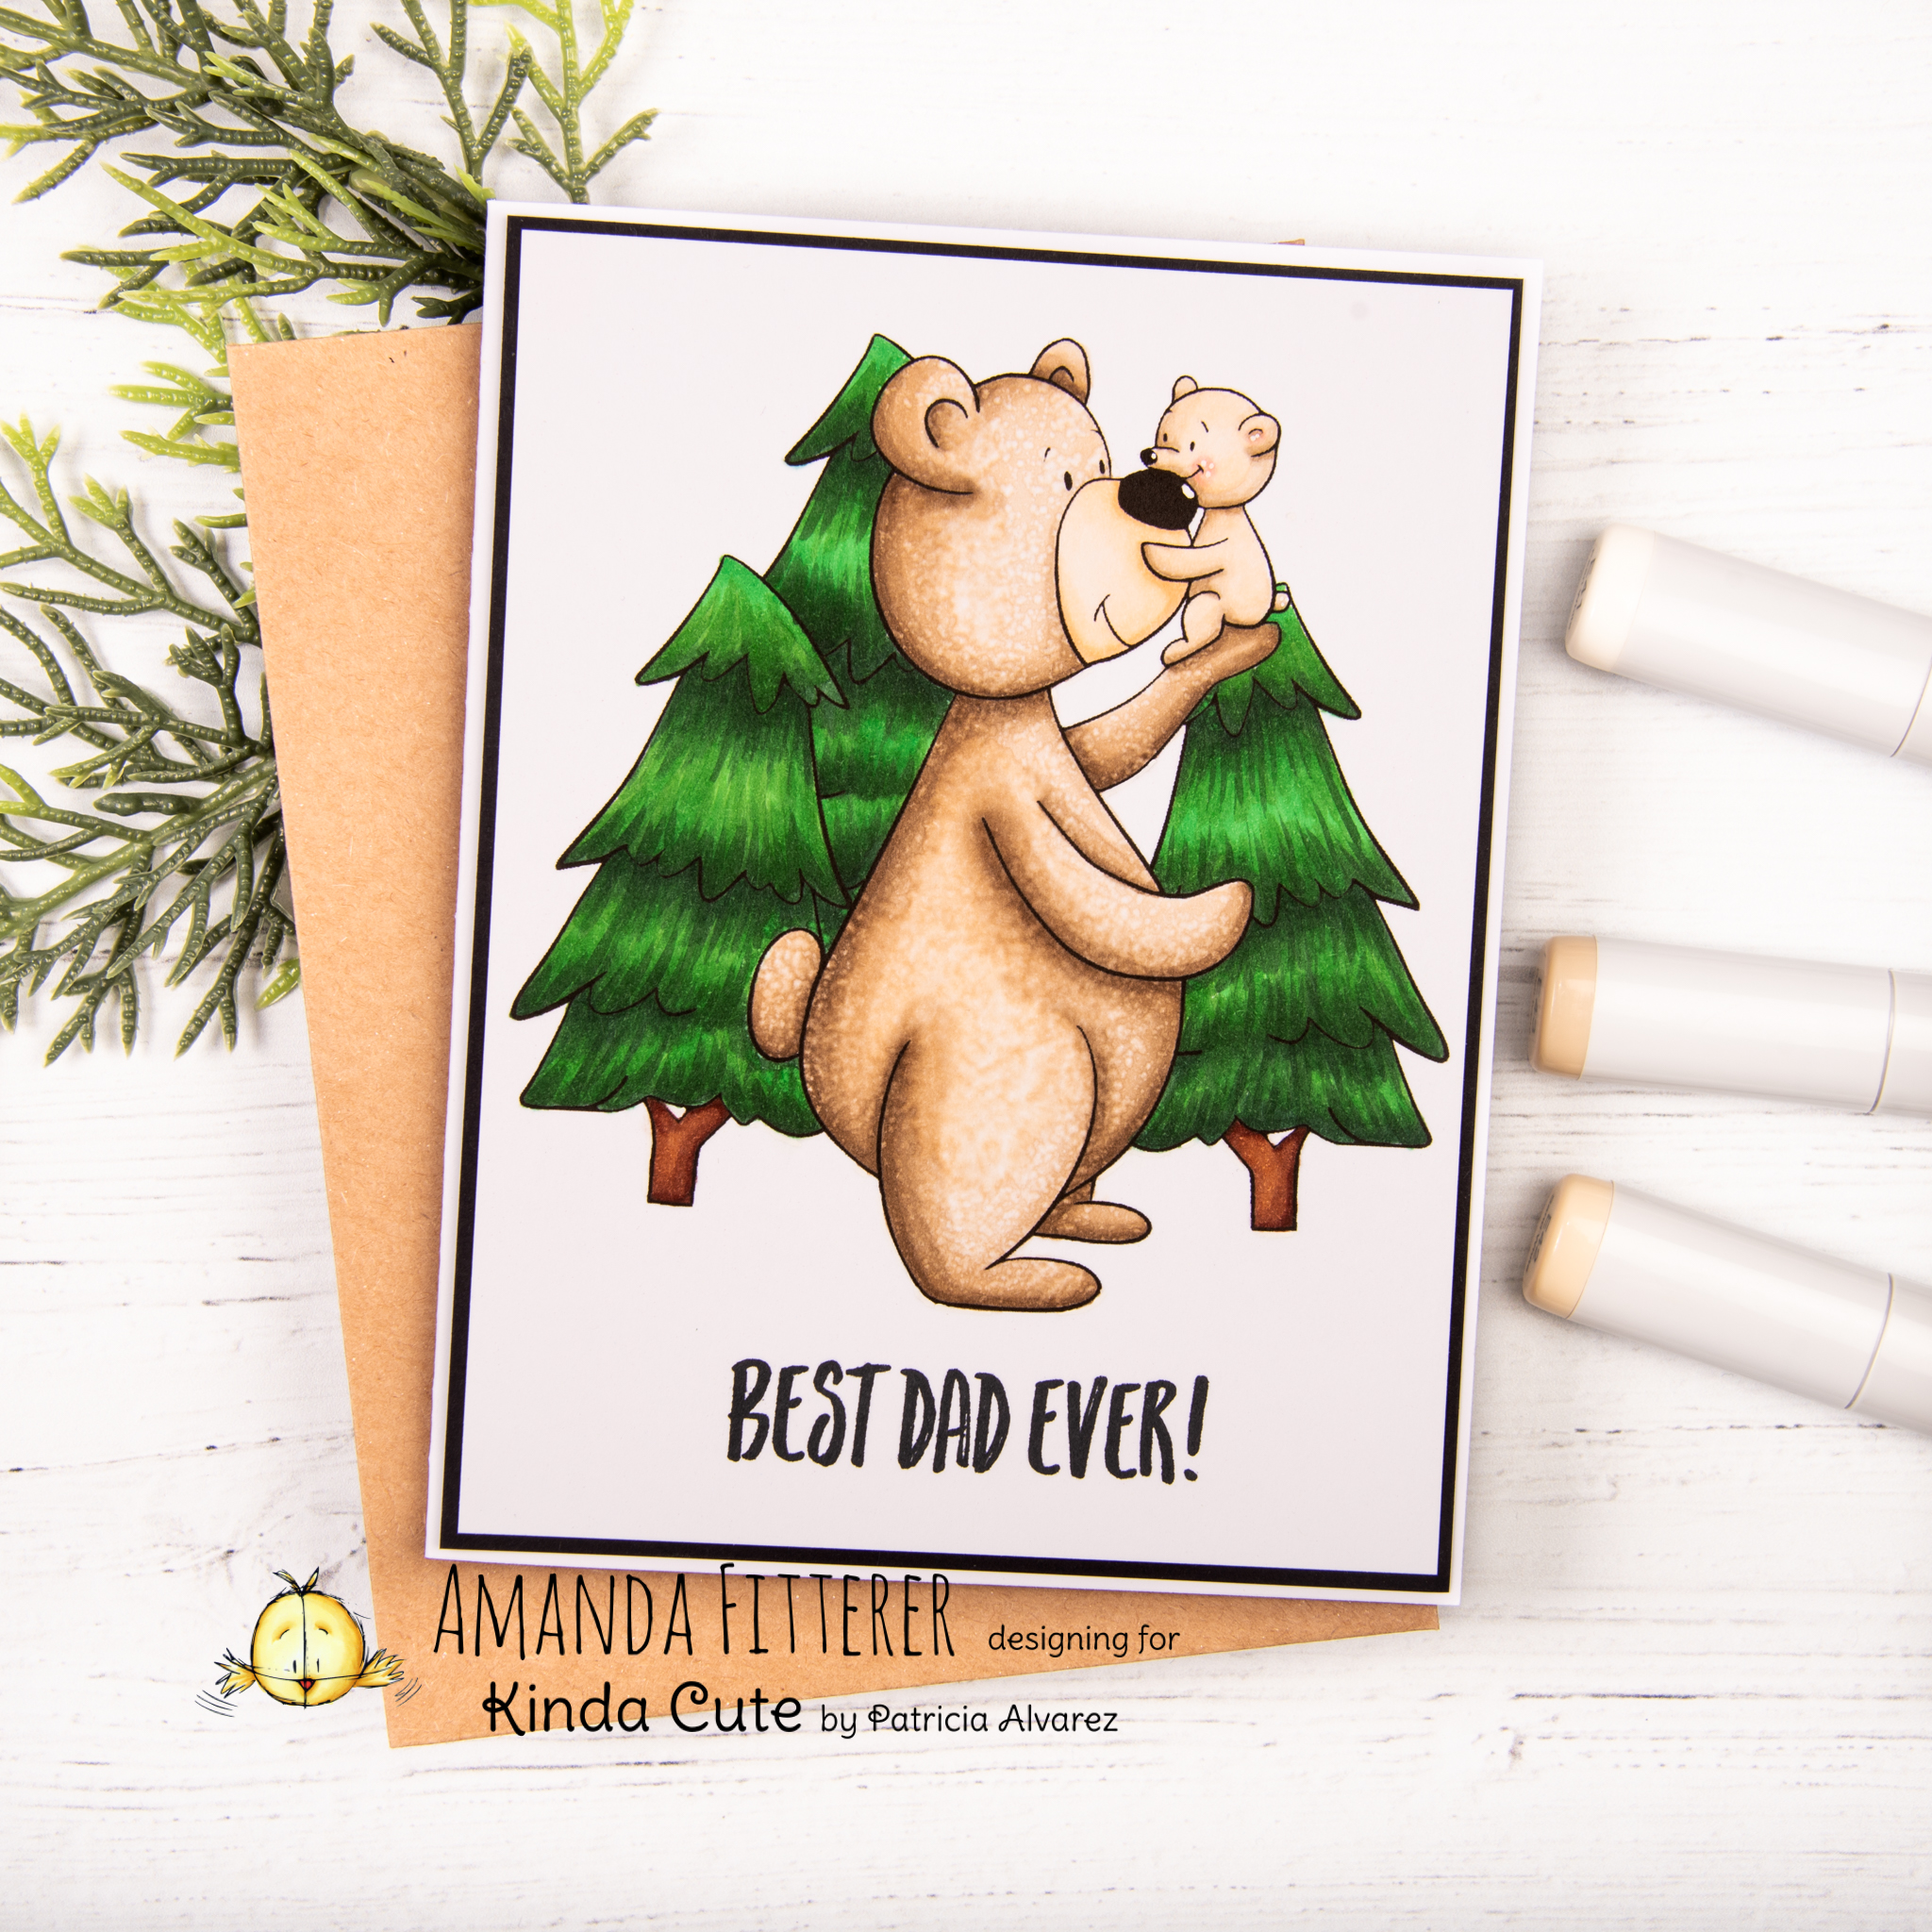
Hey there! I’m so happy you’ve come to my blog to see this adorable card I made using Kinda Cute’s Papa Bear and Baby digital stamp! I think Father’s Day cards can be one of the hardest cards to make. Well, really, any masculine card is difficult in my opinion! But when I saw this digital stamp, I thought it was PERFECT for a dad! I hope you like it!
To make this card, I pulled the digital stamps into Adobe Illustrator and put the trees from the Tree Filler set behind the Bears. I printed them out on 80lb. Neenah Solar White cardstock.
Now, I’m ready to color them! I’m using my Copic markers to color in the trees. For the trunks, I’m using E23, E25, and E29. For the trees, I’m using G07, G05, G28, and G29.
For the bears, I’m using E44 (Papa only), E43, E42, E41, R20 (baby only), E50, E51, and E53. I also am using my white Gelly Roll pen for the baby’s cheeks.
I’m taking a textured towel and soaking a corner of it with Alcohol Blending Solution. Then, I’m carefully dabbing the Papa’s body with it, avoiding his face, the baby, and the trees.
Finally, I’m ready to assemble my card using double sided tape!
Such a simple and fun card to make for Dad! Thanks again for stopping by my blog! I hope you enjoy the rest of your week!