Oh my gosh, guys!! Did you see all the amazing new powders, sparkles, and foils WOW! just released?! Holy moly! You can see all the products here. Keep scrolling to see some fun cards I made!
Here are some of the cards I made using the NEW Hot Foils! The Black Glass is gorgeous and so fun to use! Also, do you see the new Silver Squares sparkles?! It comes in 2 sizes!
For these cards, I used the new Sahara sparkles! This color is BY FAR my favorite in this release!! For the top card, I applied the glitter on top of a mixed media paste. For the bottom card, I mixed it into the paste! I love the 2 different looks with the same products!
For this stunning shaker card, I used the Mixed Media Embossing Brush and a stiff paint brush. I brushed on some of the glue and then applied Ray of Sunshine embossing powder. I used my heat tool to melt the powder. Then I applied more of the glue, and applied Primary Indigo Ultra High, and melted that powder. I repeated the process with Violet Aurora and Bordeaux. I used the Ray of Sunshine for the sentiment as well! What a gorgeous mix of colors!!
I used a similar technique for this card! I applied the glue a little thicker (using the brush it comes with.). I applied Primary Indigo Ultra High and Pastel Pearl Mist Ultra High. As I was melting the powders with my heat gun, I used my fingers to sprinkle a little bit of the opposite powder.
I have a few more really cool cards I made on my Instagram feed, if you want to go check them out! Click on the photo to see the post!
I hope you got some crafty inspiration from this post!! You can shop all the WOW! New Release here.
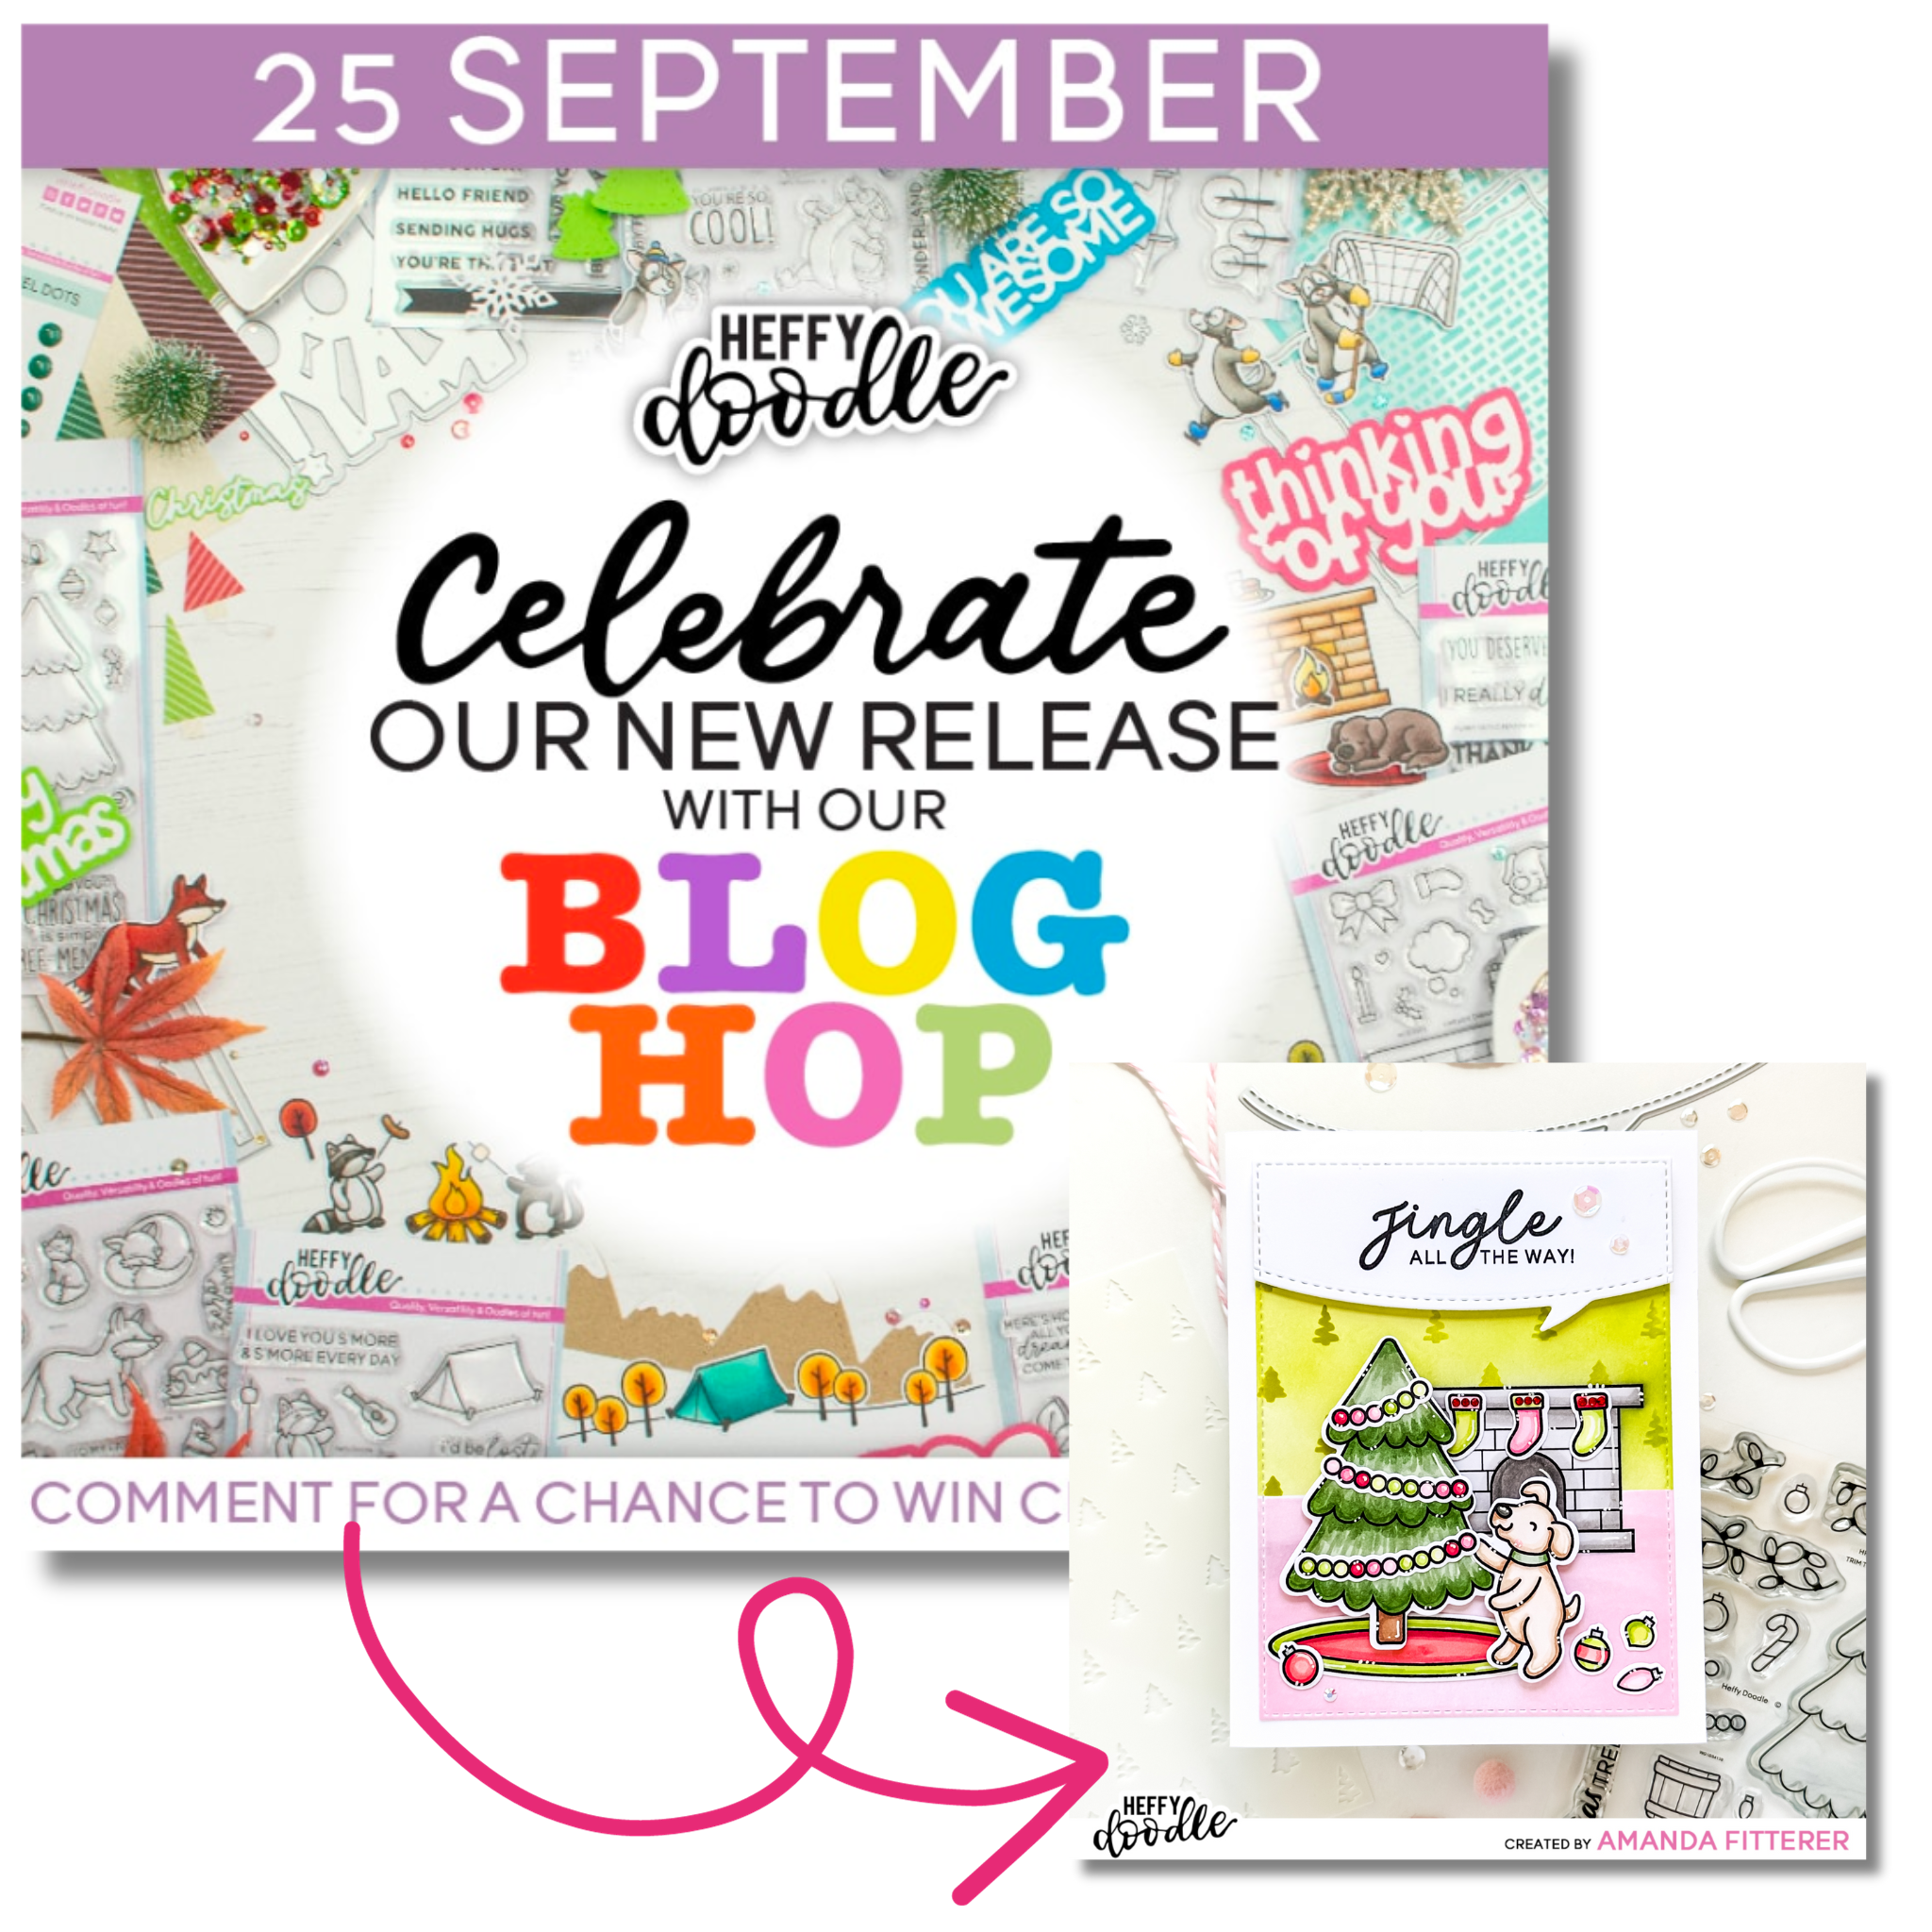
Welcome to the Heffy Doodle New Release Inspiration Blog Hop! We are so excited to share amazing cards from our Design Team members using the new release! For today’s special Blog Hop, you can win a £50 voucher to the Heffy Doodle store!
To be entered to win the giveaway, all you need to do is comment at each stop along the Blog Hop before Sep 29, 2023 at 11:59 PM EST. The winner will be announced on the Heffy Doodle Blog on Sep 30th at 10:00 AM EST!
I’m excited to share my card for this Blog Hop with you! I had such a fun time mixing and matching lots of different new products to create this card!
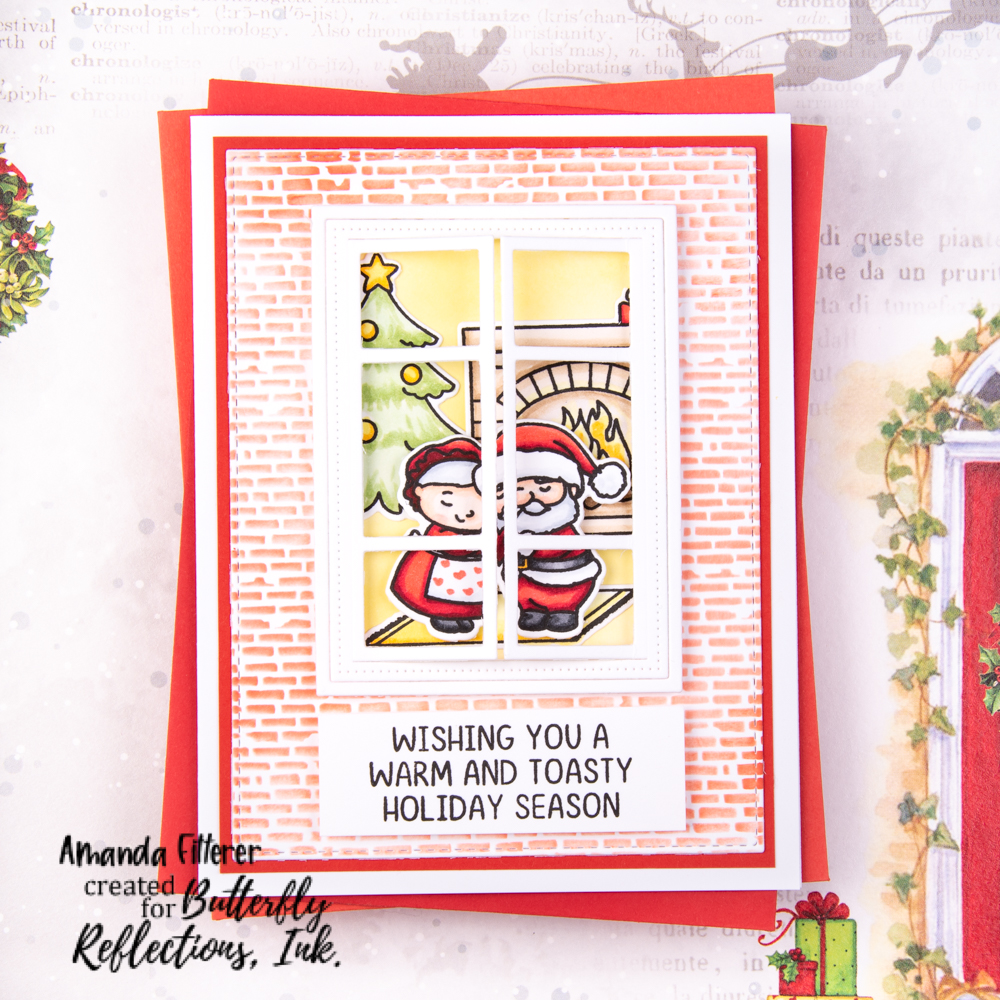
Step 3: Stamp the fireplace from the Fireside Dreams Stamp Set onto your panel. Stamp it again on some Heffy Memo Tape and then cut it out with scissors. Use this as a mask to keep the ink from getting on your fireplace.
Step 4: Mask off the bottom of your panel with Heffy Memo Tape.
Step 5: Lightly blend Catherine Pooler’s Lemongrass ink all over the background. Then, blend Melon Ice through the NEW Feeling Mighty Pine Stencil.
Step 6: Blend Cotton Candy ink all along the bottom.
Step 7: Color in the fireplace with Copic markers.
Step 10: Assemble the card! Glue your background panel directly onto an A2 card base. Use 3D foam tape to add dimension to your word bubble, tree, and pup. Use liquid glue to adhere the rest of the stamped images. Finally, add a few sequins from the new Strawberry Milk Sparkle Mix.
Thanks so much for hopping along with us! I hope you’ve enjoyed my card! Now, let’s get hopping to the next stop, which is Jarle Franceus!
Welcome to the Heffy Doodle and Alex Syberia Designs Collaboration Blog Hop! Design Team members from both companies are sharing inspiration using products from both companies!
I’m going to stamp my sentiment on black cardstock with Wow! Embossing Glue and then apply white embossing powder. I’ll heat the powder with my heat tool to melt the powder.
To be entered to win the giveaway, all you need to do is comment at each stop along the Blog Hop! Alex Syberia Designs and Heffy Doodle will be giving away £20 to their stores! Be sure to comment before 11:59 PM EST on June 6th to be entered to win!Each company will post their random winner on June 8th at 10AM EST! Make sure to check the Heffy Doodle Blog and Alex Syberia Designs Blog to see if you’re a winner!
Thanks for using my affiliate links! You all are the BEST! Using an affiliate link in this post above or down below costs you nothing, but it gives me a teeny percentage of your sale to buy more crafty goodies to continue to share card tutorials with YOU! So, thank YOU! Xx, Amanda
Welcome to the Heffy Doodle and Alex Syberia Designs Collaboration Instagram Hop! Design Team members from both companies are sharing inspiration using products from both companies on Instagram!
Thanks for using my affiliate links! You all are the BEST! Using an affiliate link in this post above or down below costs you nothing, but it gives me a teeny percentage of your sale to buy more crafty goodies to continue to share card tutorials with YOU! So, thank YOU! Xx, Amanda
Hello and Happy Tuesday, crafty friends!! I hope your week is off to a great start so far! Let’s make this Heffy Doodle Mix and Match card together!
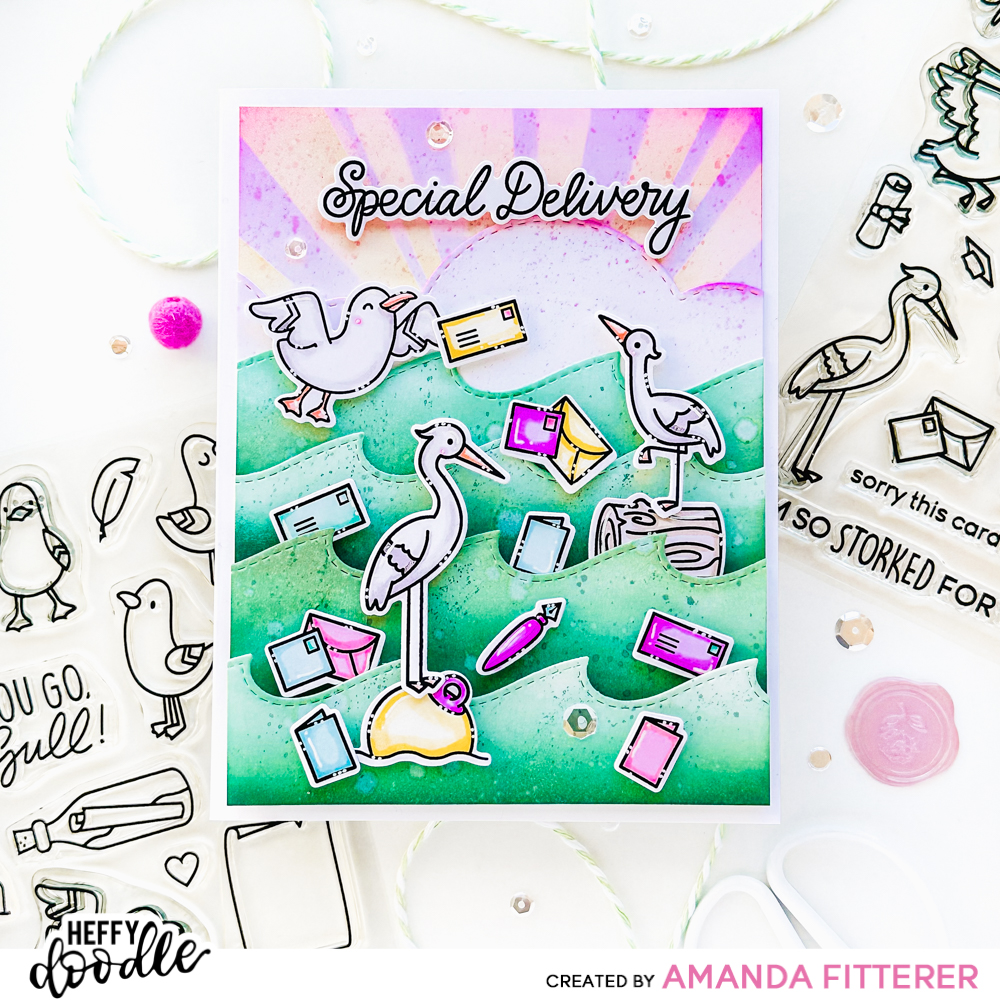
Let’s start with the background! First, we’re going to blend a piece of white cardstock trimmed down to 4″x5.25″. Blend the top of the panel (that will be visible) with Catherine Pooler’s Pucker Up ink. Then, blend Catching Rays ink through the Rays the Roof Stencil. The Simple Sunburst Stencil would also work great here. Next, die cut one of the Silver Linings Cloud Border Dies and add a bit of the Pucker Up ink to the top of it. Now, die cut 4 of the Breaking Waves Border Dies. Ink blend the waves with Minted, Seafoam, and Skylight inks. Spritz all the ink blended areas with water. For the waves, take a bit of the Skylight and flick it with a water brush onto the waves. Do the same with the sky and clouds using Pucker Up.
Now that we have our background done and drying, we can start working on stamping and coloring! Stamp the images from the You Go, Gull and Special Delivery stamp sets. Color them with whatever medium you like! I’m using the OLO alcohol markers. Once they’re all colored, they’re ready to be die cut with the coordinating dies.
The final step is to adhere everything down to an A2 sized white card base! I’ve used my favorite Bearly Arts Precision Craft Glue to attach my clouds and top 2 waves. I’ve used 3D foam tape to attach the bottom 2 waves. Then, I’ve used 3D foam squares for the stamped images and sentiment!
For the finishing touch, I added a few sequins! Did you see the Heffy Doodlers Challenge this month on Facebook? If you like adding sequins to your projects, you might want to enter and maybe win a prize!! You can JOIN HERE!
Well, friends, I hope you’re feeling inspired from this post! Tag me on Instagram if you make a project using this as inspiration!! I’d love to see how you made it your own!! Xx, Amanda
Thanks for using my affiliate links! You all are the BEST! Using an affiliate link in this post above or down below costs you nothing, but it gives me a teeny percentage of your sale to buy more crafty goodies to continue to share card tutorials with YOU! So, thank YOU! Xx, Amanda
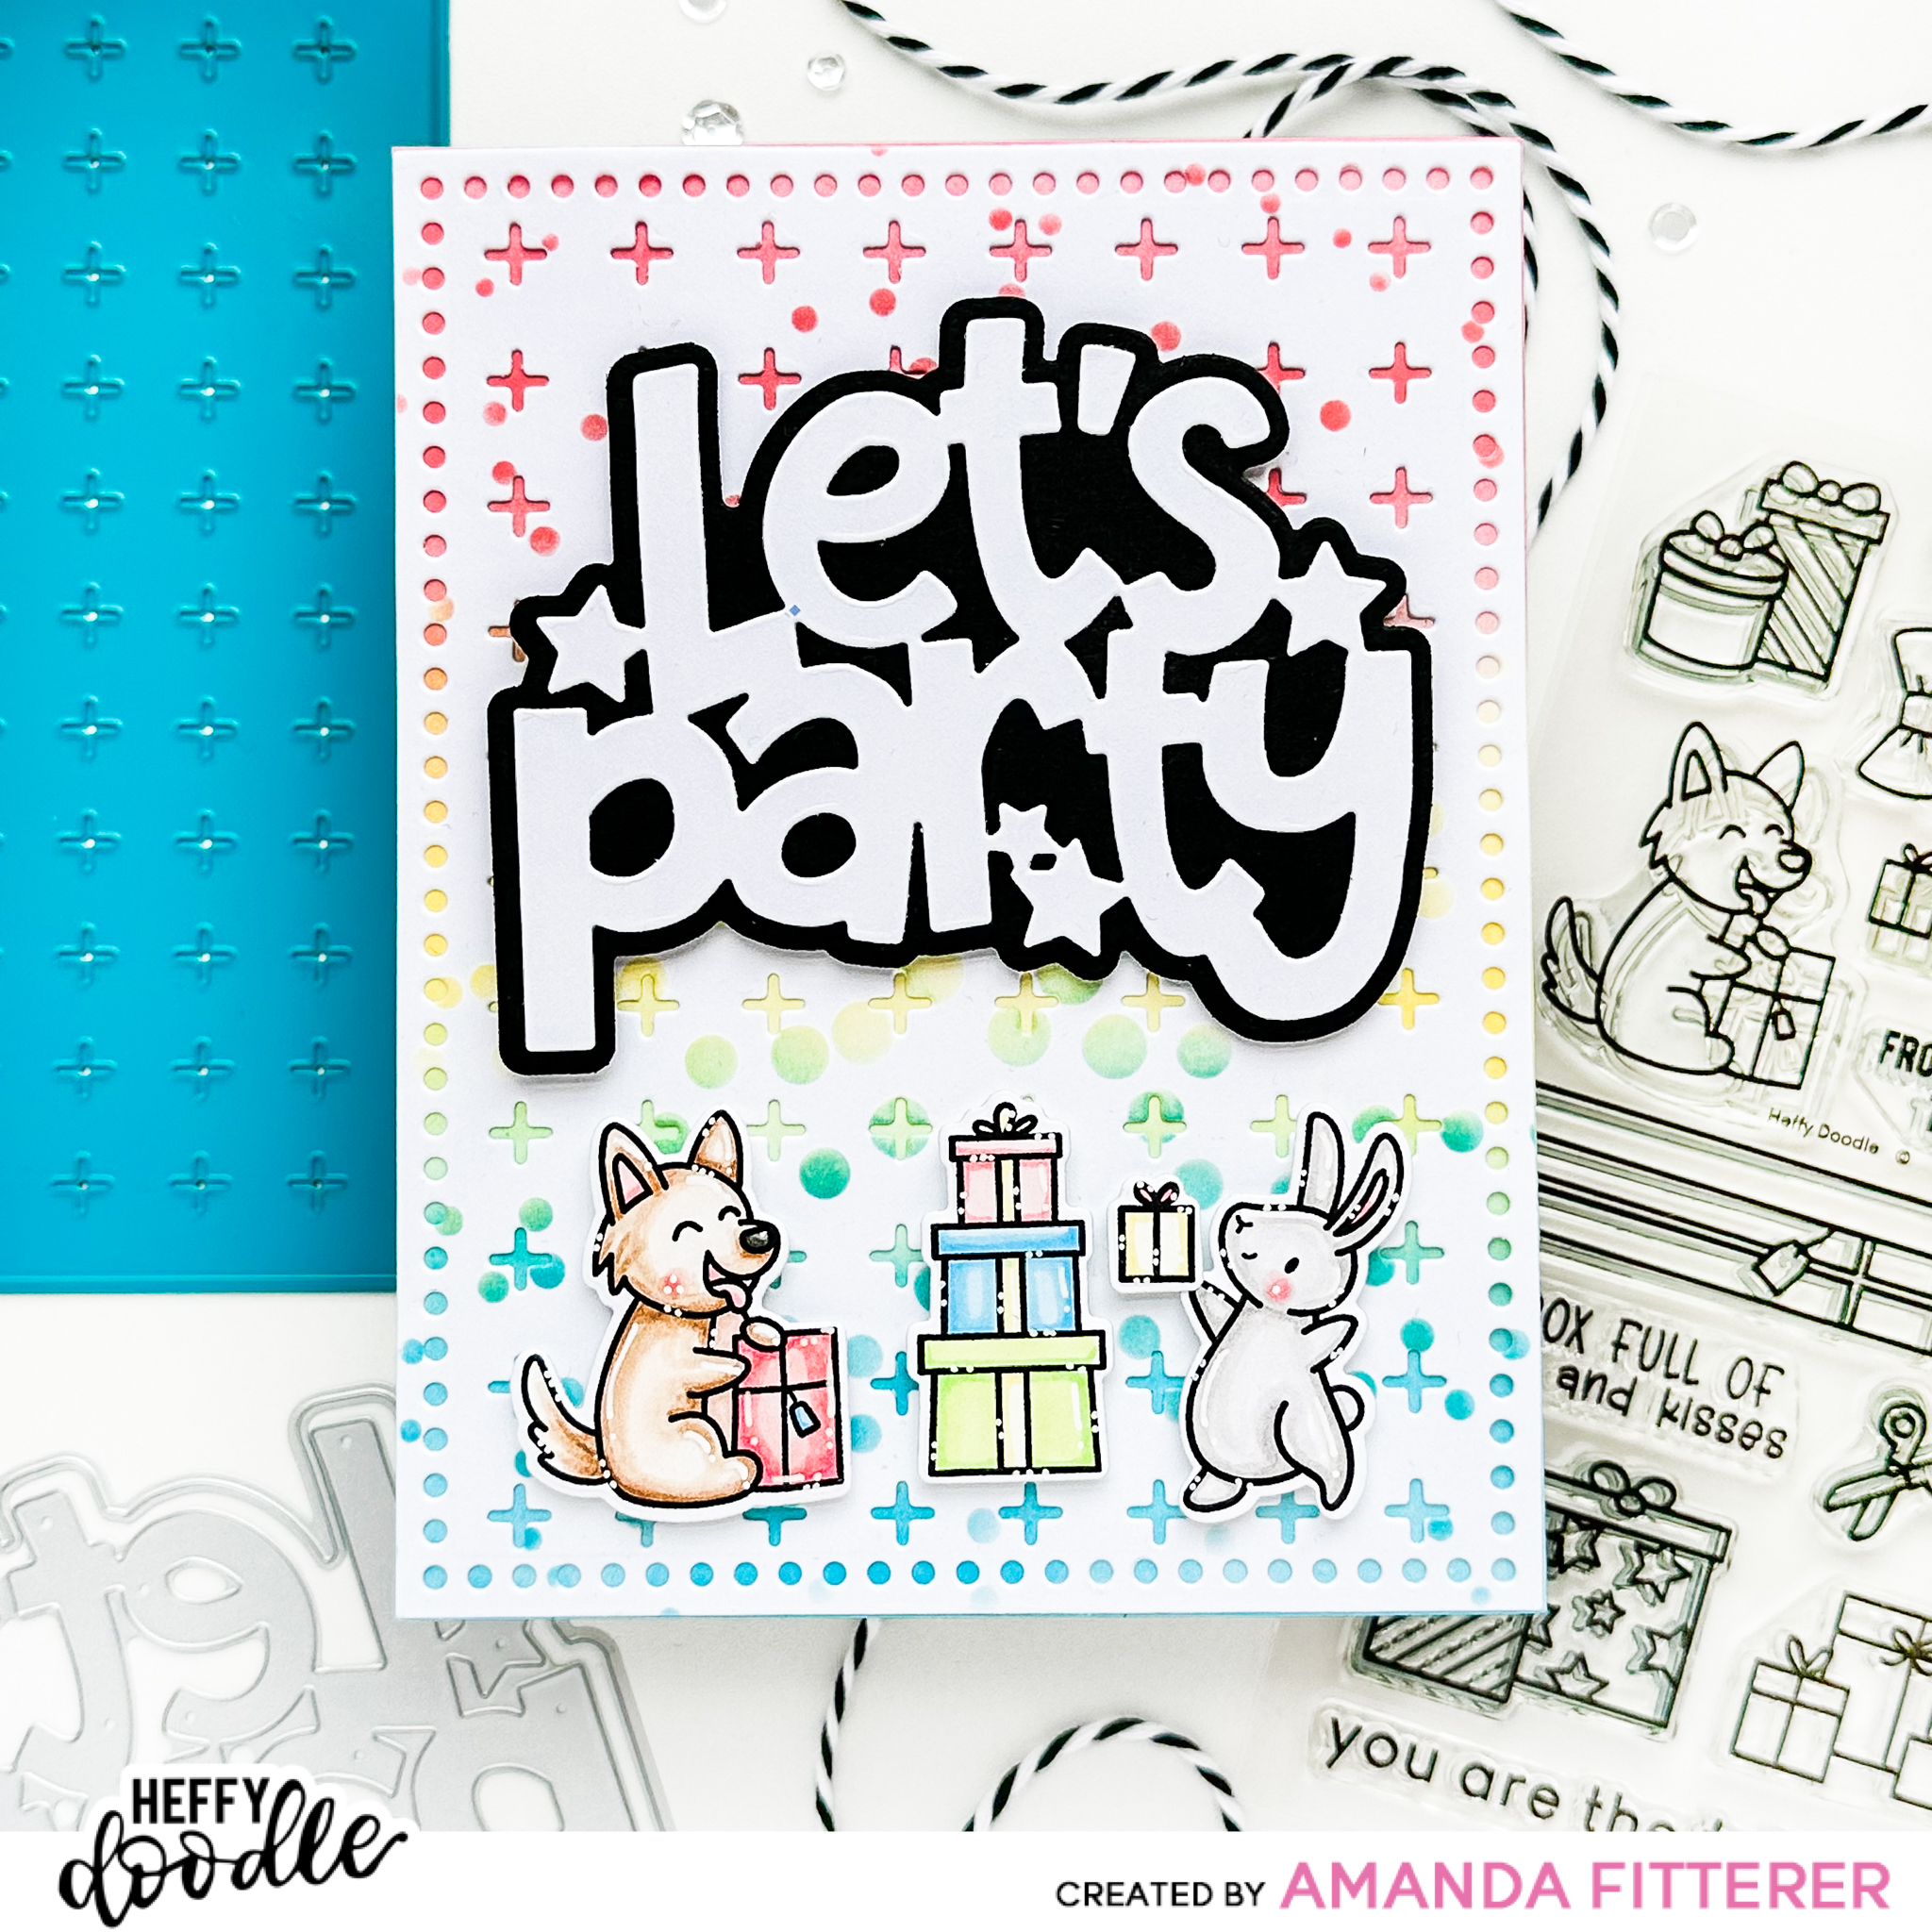
Welcome to the Heffy Doodle New Release Inspiration Blog Hop! We are so excited to share amazing cards from our Design Team members using the new release! For today’s special Blog Hop, you can win a £50 voucher to the Heffy Doodle store!
I love seeing how people “sketch out” their ideas for their cards, so I wanted to show you how I do it! This is how I visual the card: I knew I wanted to use the Stitched Birthday Trio Frame so I die cut that out first. Then, I lay out my stamped images and any other dies I want to use. I then take a photo so I can remember how I have things laid out!
Now, I’m going to ink blend my pond and grass and 1 panel cutout. I’m using Catherine Pooler’s Melon Ice and Martini for the grass. I’m also using All That Jazz and Uptown for the Ripple Waves Stencil pond. I LOVE this color combo! I like to do my ink blending before coloring my stamped images so that I can make sure my stamped images coordinate with the ink colors.
So, now I can color my images! I’m using OLO Alcohol Markers to color my images. I add highlights with my ABSOLUTE FAV white Gelly Roll pen.
Let’s cut these little guys out now! Like I mentioned earlier, I use 3″ wide cardstock so that I can run it through my Mini Die Cutting Machine! If you don’t have a mini die cutting machine, you HAVE to get one! They’re also available on Scrapbook.com, if you’re in the US!
Using my frame as a guide (held in place with washi tape), I’m gluing my panels down with Glubert Glue.
For my frame, I’m using Deep Foam Tape because I want it to really have a LOT of dimension!
The last step is to add my images with 3D foam squares! For some of the images, I used 2 foam squares on top of each other to get even more dimension!
Here are some close-up images!
To be entered to win the giveaway, all you need to do is comment at each stop along the Blog Hop before March 14th, 2023 at 11:59 PM EST. The winner will be announced on the Heffy Doodle Blog on March 16th at 10:00 AM EST!
Thank you so much for stopping by my part of the Blog Hop today! I really appreciate your love and support! Happy Hopping, friends!
Thanks for using my affiliate links! You all are the BEST! Using an affiliate link in this post above or down below costs you nothing, but it gives me a teeny percentage of your sale to buy more crafty goodies to continue to share card tutorials with YOU! So, thank YOU! Xx, Amanda
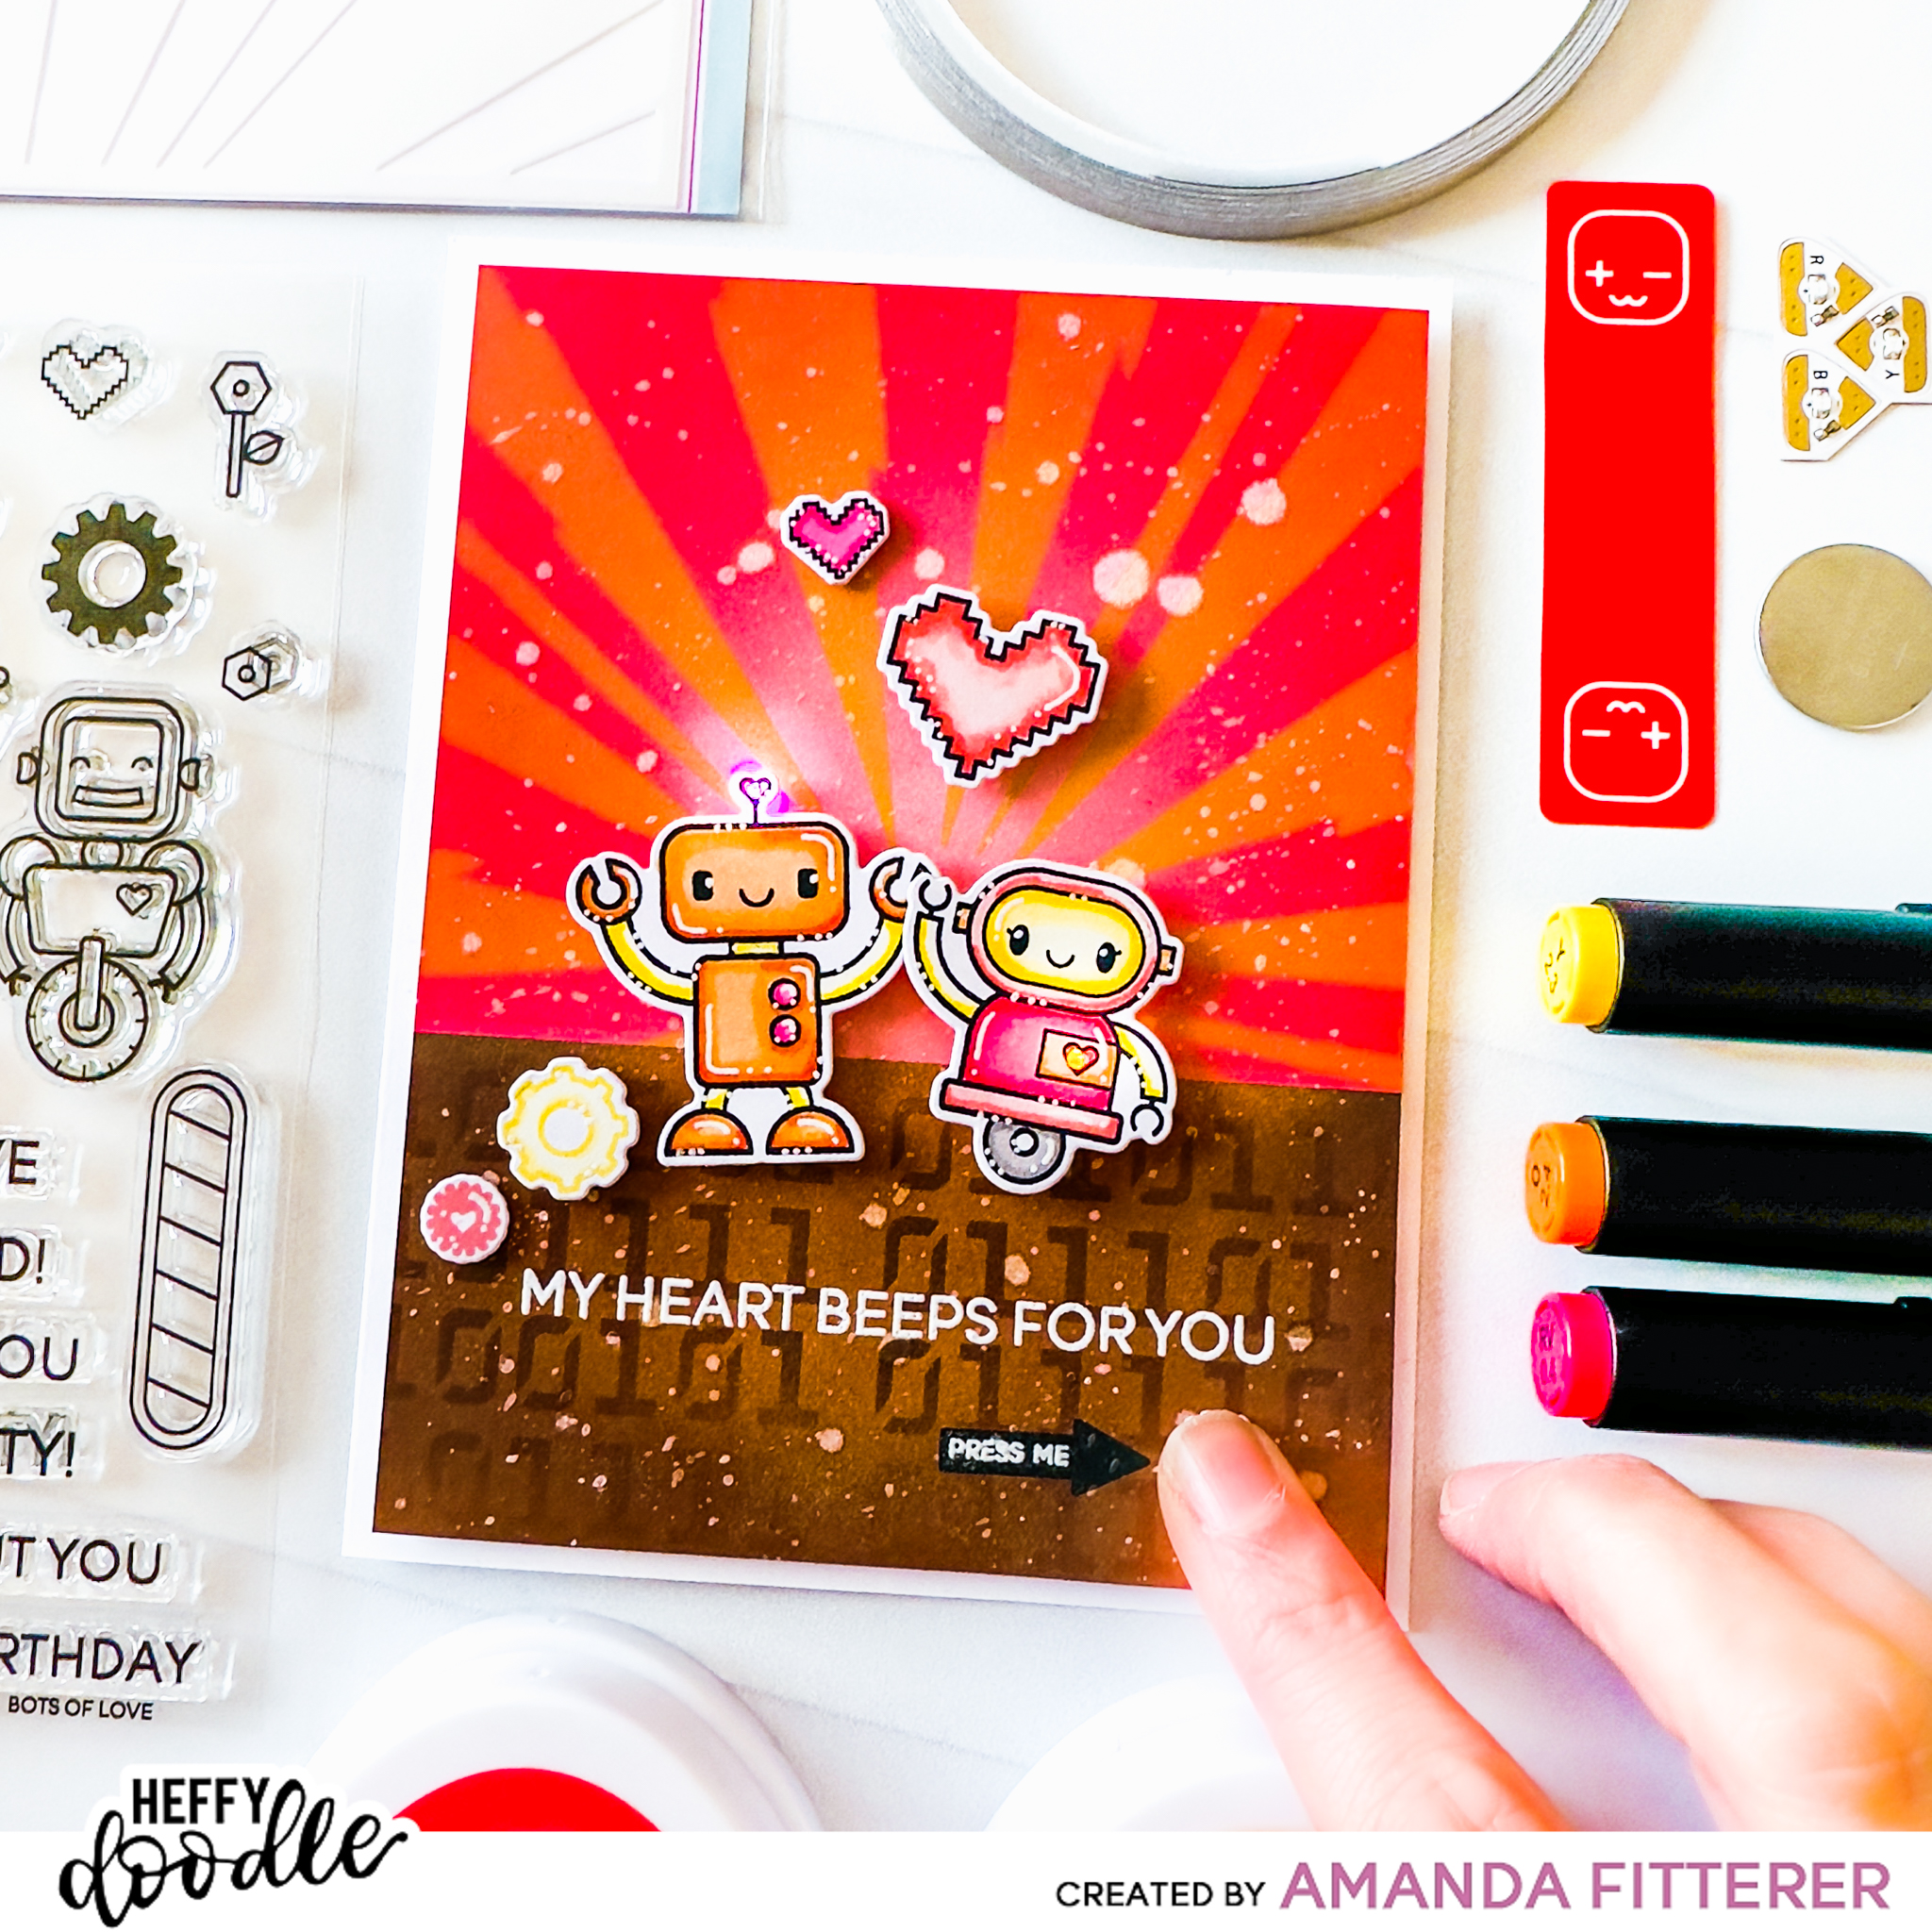
I created this fun light-up card using the Craft with Light Kit – White by Chibitronics. I used lots of Heffy Doodle products! Keep reading on for those links!
First, I created my bright background! I blended some Catherine Pooler inks through my Zapp Attack and Cogs & Code Stencil. I used Heffy Memo Tapeto mask off the top and bottom of my card.
Once I decided where I wanted my lights, I started to prepare for the wiring.
I poked holes through the robots’ hearts where I want the bulbs to show.
Then, I placed the robots on the background where they were going to be glued down once the card is assembled. I made a mark with a pencil through the robots’ heart holes onto the background.
Then, I poked holes through the pencil marks on the background panel.
Lastly, I used a pencil to make marks on my card base where the lights need to be placed.
On my card base, using the pencil marks I made in the last step as a guide, I’ve made marks where the + and – wires need to line up. I did this by taking the lights and placing them down onto my card base so the light was right over top of the pencil mark. Then, I looked at where the copper + and – are on the light unit and drew lines where I need the wires to be lined up to touch the copper part.
I’ve also created a “housing unit” for my battery with a plus and minus sign on it, so I know which way to insert the battery once it’s time. I also marked where I want the battery to be on the card base.
Next, I started by taking my tape and cutting it in half down the center to create smaller/narrower pieces. This isn’t necessary, but was helpful with navigating the tape.
I adhered my battery housing unit to my card base and started placing my + tape. This tape is the top wire which goes to the base of the battery housing unit.
Then, I placed my – tape which starts on the flap of the battery housing unit.
Next, I used 3D foam tape around the whole base of the card to “lift” my card front up so the battery doesn’t stick out farther than the rest of front panel. I attached the stamped images with 3D foam squares, making sure to line the robots up to the lights properly.
Come join in the IG HOP to enter to win the prizes from Heffy Doodle and Chibitronics!
Thank you so much for stopping by my blog today! Enjoy the Hop!
Thanks for using my affiliate links! You all are the BEST! Using an affiliate link in this post above or down below costs you nothing, but it gives me a teeny percentage of your sale to buy more crafty goodies to continue to share card tutorials with YOU! So, thank YOU! Xx, Amanda
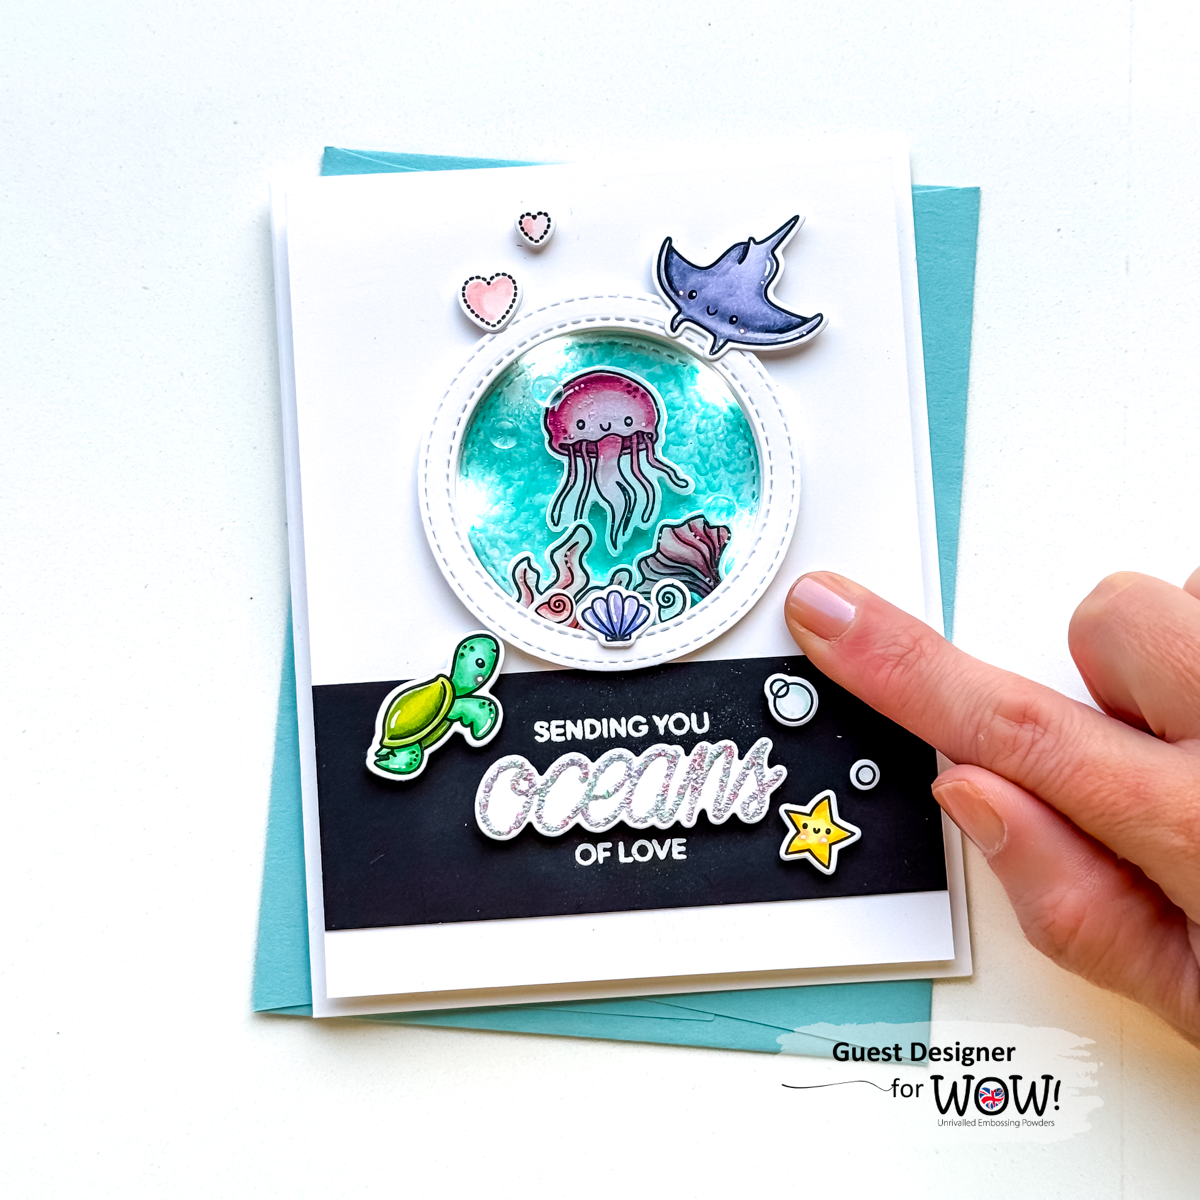
Welcome to the Heffy Doodle and WOW! Embossing Powders Collaboration Blog Hop! Design Team members from both companies are sharing inspiration using products from both companies!
I’m super excited to be taking part in the collaboration because I get to use products from two of my FAVORITE companies! I’m going to walk you through how I made this fun GLOW IN THE DARK Halloween card!
Cut out a circle using either a punch or circle die. Any size will work!
10. Color your images with any medium (I prefer OLO or Copic markers!)
11. Die cut your images with the coordinating die sets.
12. Use 3D foam squares to adhere your images and sentiment to your card!
13. Turn off the lights and see how amazing the WOW! Glow in the Dark Embossing Powder looks!
To be entered to win the giveaway, all you need to do is comment at each stop along the Blog Hop! WOW! Embossing Powders will be giving away $25/£25 and Heffy Doodle will be giving away £25 to their respective stores! Be sure to comment before 11:59 PM EST on Oct 25th to be entered to win!
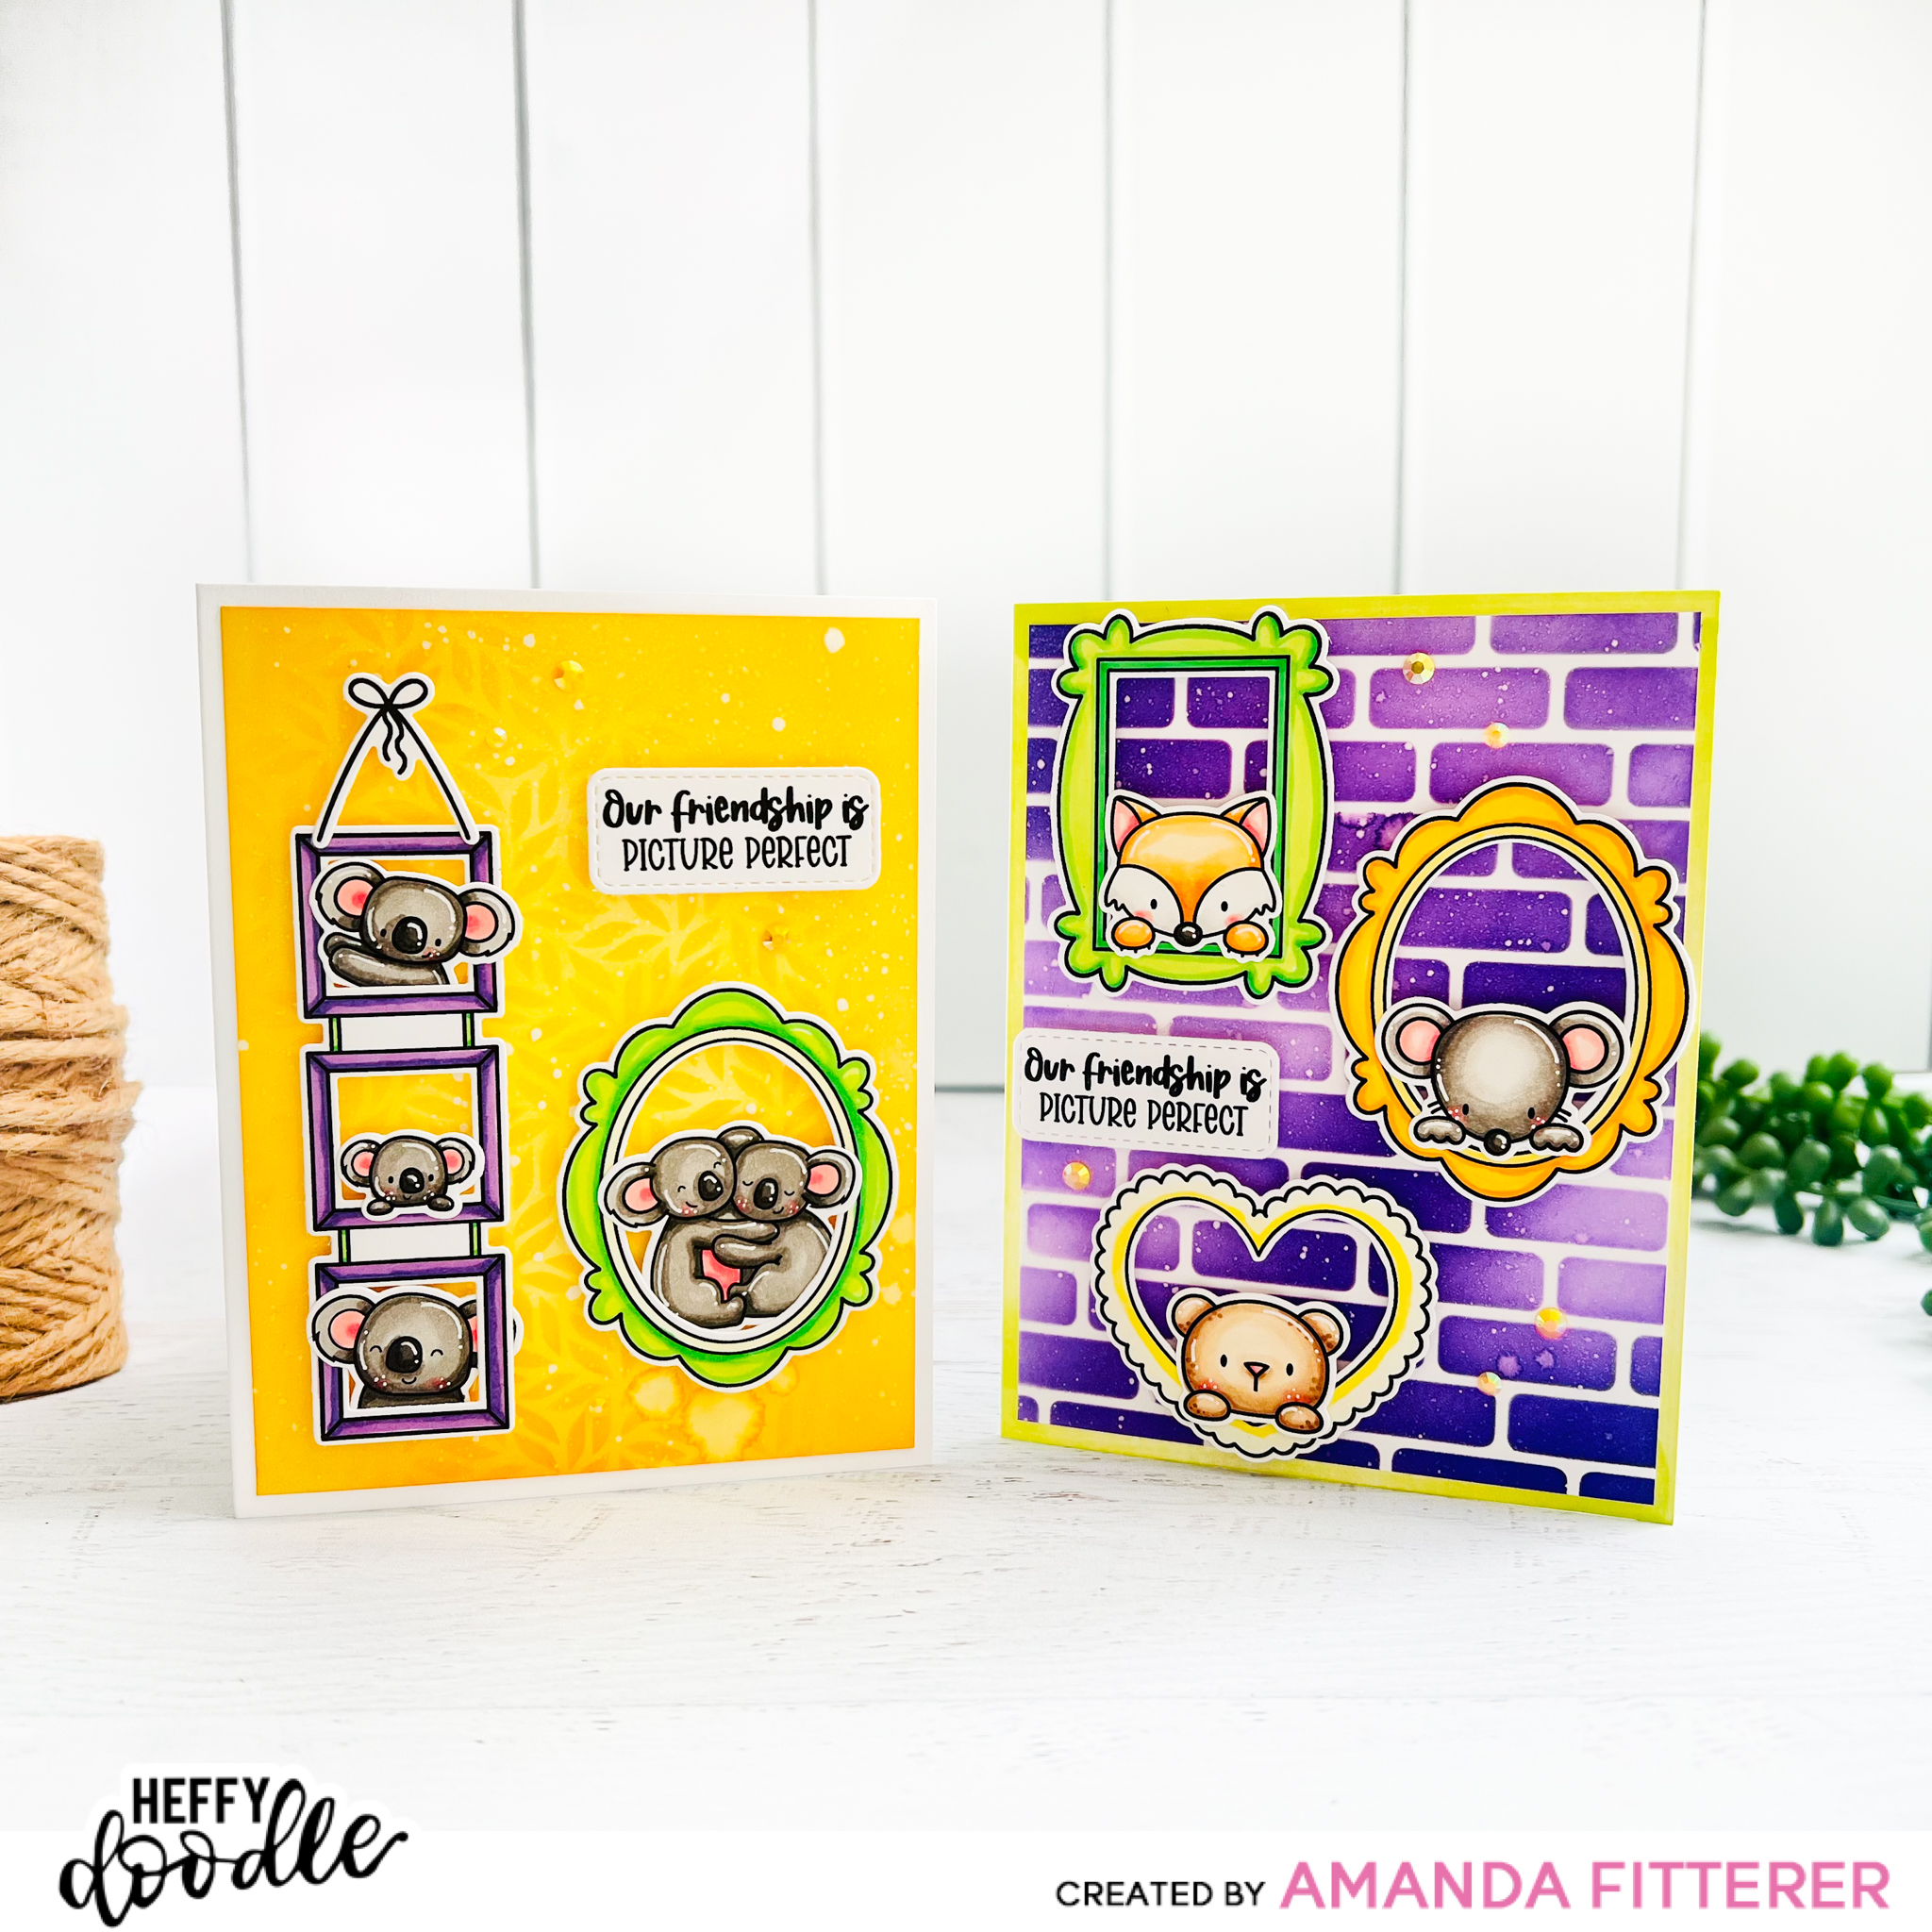
Welcome to the Heffy Doodle and Pawsome Stamps Collaboration Blog Hop! Design Team members from both companies are sharing inspiration using products from both companies! Plus, you have a chance to win prizes from both companies!
I have 2 cards to share with you today that I made using products from both companies!
For my first card, I’m going to start off with the Heffy Doodle Brick by Brick Stencil. I’m blending Catherine Pooler’s Grape Crush and Pixie Dust inks through the stencil and then spritzing with water and flicking on some white paint/water mix onto my background.
Next, I’m grabbing the Pawsome Stamps Picture Perfect Stamp Set, stamping my images and then coloring them with Copic markers.
Now I’m ready to assemble my card! I’m using 3D foam squares to adhere my stamped images onto my card front. I’m using Glubert Glue to adhere some gems as well!
For my second card, I’m grabbing my Heffy Doodle Fancy Foliage Stencil and Catherine Pooler’s Chiffon, Glitz, and Limoncello inks. I’m blending the inks, then spritzing the background with water and flicking on some white paint mixed with water.
After stamping and die cutting my images, I’m using 3D foam squares to adhere my stamped images onto my card front. I’m using Glubert Glue to adhere some gems on this card as well!
I hope you loved my 2 cards I made using products from both companies! Now, onto the GIVEAWAY INFORMATION!!
To be entered to win the giveaway, all you need to do is comment at each stop along the Blog Hop! Pawsome Stamps will be giving away $30 and Heffy Doodle will be giving away £25 to their respective stores! Be sure to comment before 11:59 PM EST on June 24th to be entered to win! Each company will post their random winner on June 25th at 10AM EST! Make sure to check the Heffy Doodle Blog and Pawsome Stamps Blog to see if you’re a winner!
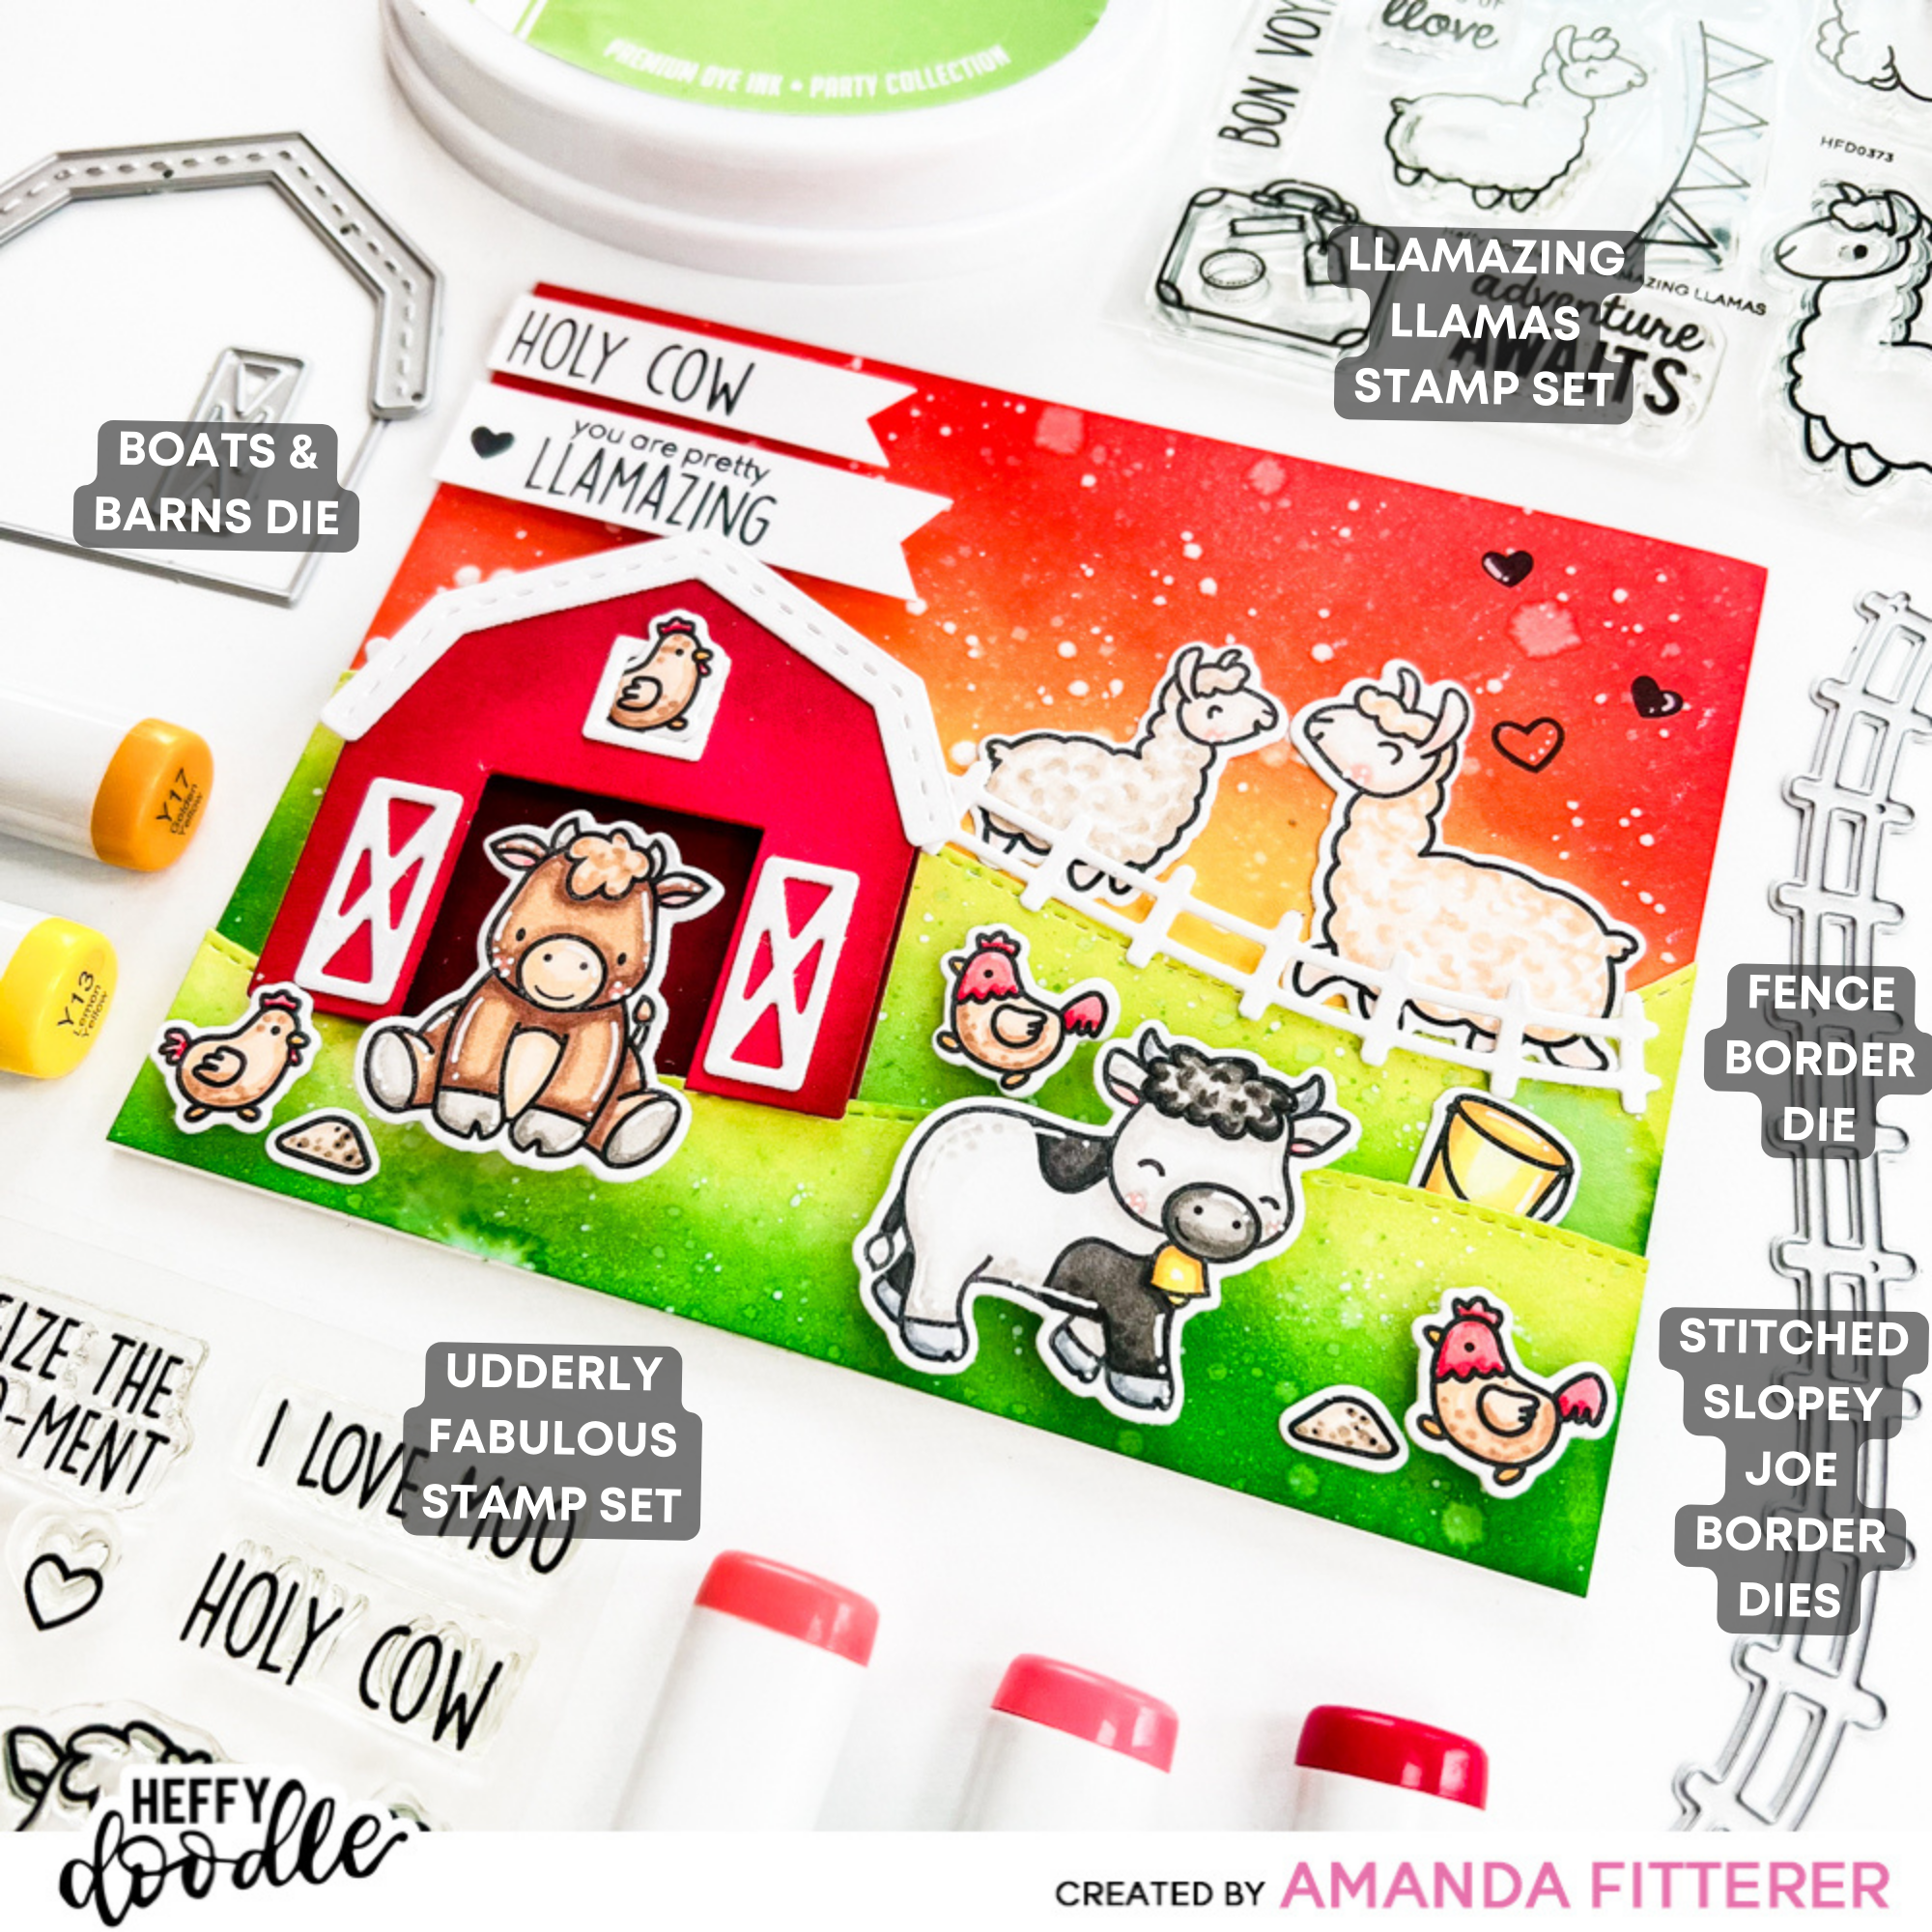
Hello, crafty friends! I hope your week is off to an amazing start!! If it’s not, hopefully this bright and happy card will cheer you right up!
To make this card, I started by blending my beautiful sky background on a piece of A2 cardstock. I spritzed it with water and added some white paint drops. Next, I used my Stitched Slopey Joe Border Dies and blended them with inks as well.
I just love that the Fence Border Die works with the Slopey Joe Dies! So, I just cut that guy out with white cardstock and didn’t add anything to it.
Next, I cut my pieces from the Boats and Barns Die, including 2 barn structures. I ink blended one of the barn structures very dark red and the other barn a lighter red. I placed my darker one behind to be the “inside” of the barn. The lighter red die cut, I cut out the barn door opening and the window opening and added my other die cut pieces with glue.
Once I had my background all set, I stamped my images from the Llamazing Llamas and Udderly Fabulous Stamp Sets. Then, I colored them with Copic markers and die cut them out with the coordinating dies.
The last step is to assemble the card! I grabbed my Glubert Glue and 3D foam squares and strips and got to work!
That’s it for me today! I hope you enjoyed this post! Enjoy the rest of your week!
Just a note to say that by clicking the links in my blog post, you may be using my affiliate link! This is great for me, because I get a teeny percentage of your sale. And it’s great for you because it doesn’t cost you anything at all and you’re helping a friend!
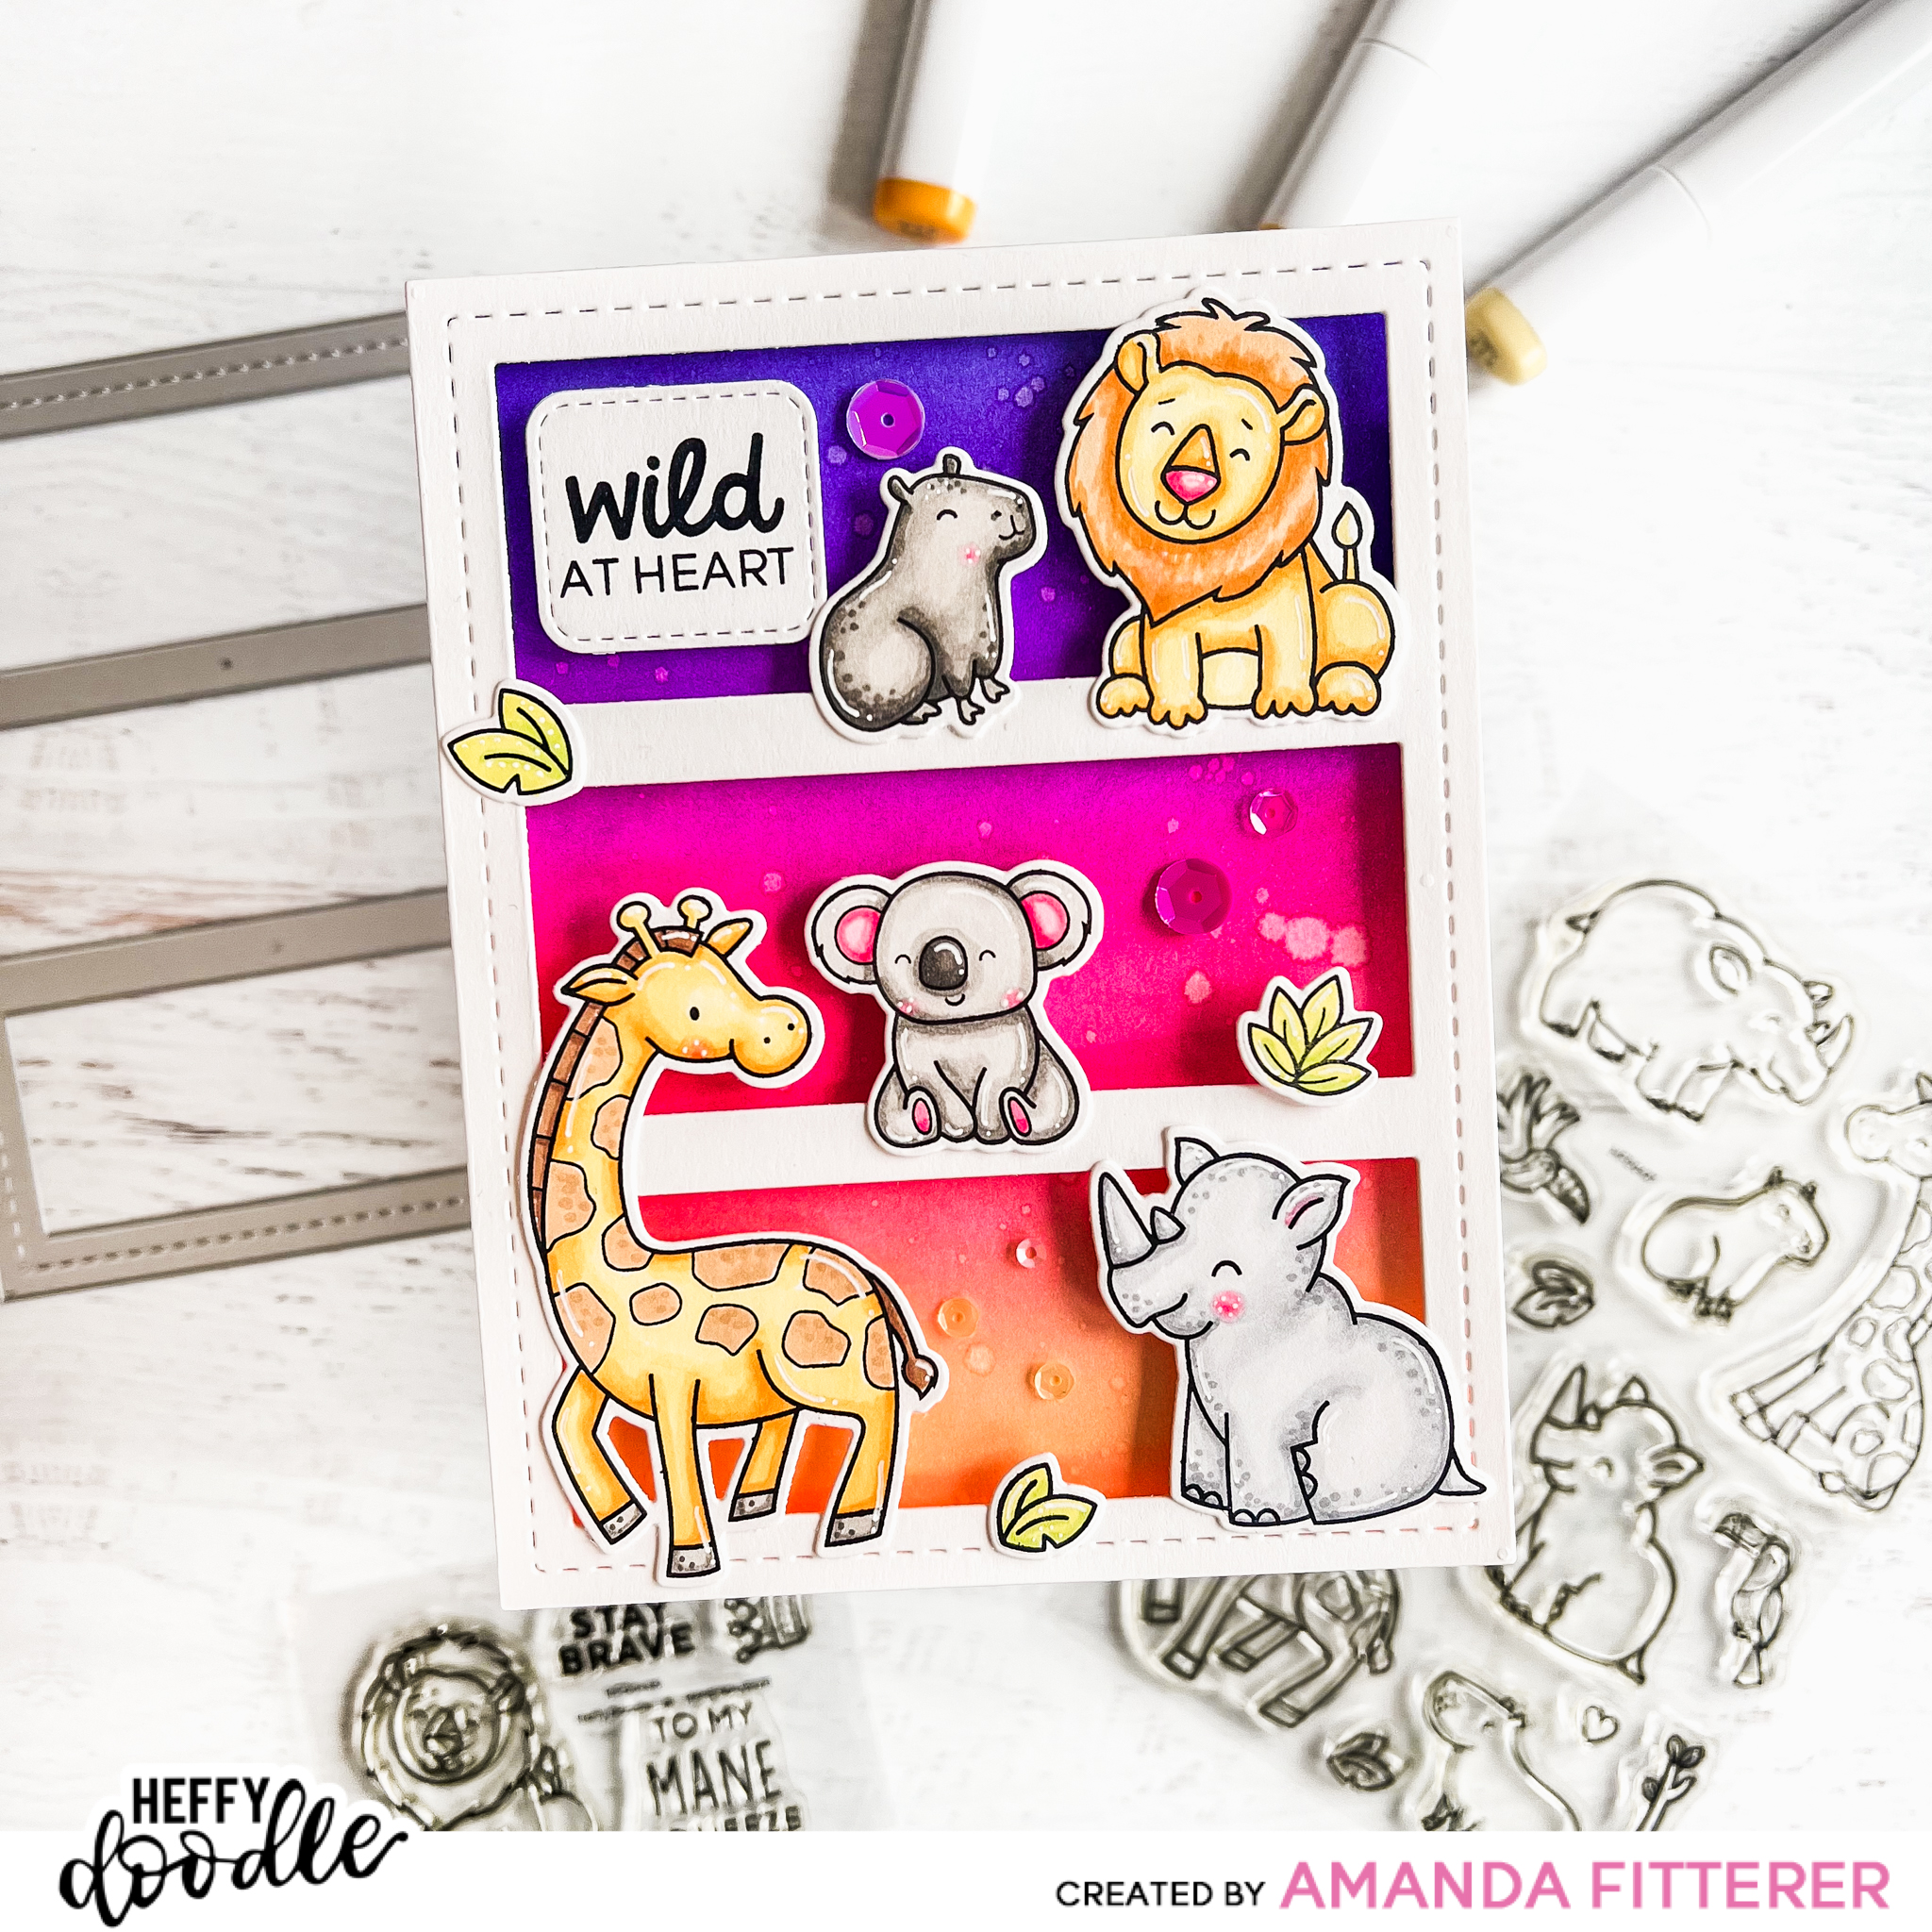
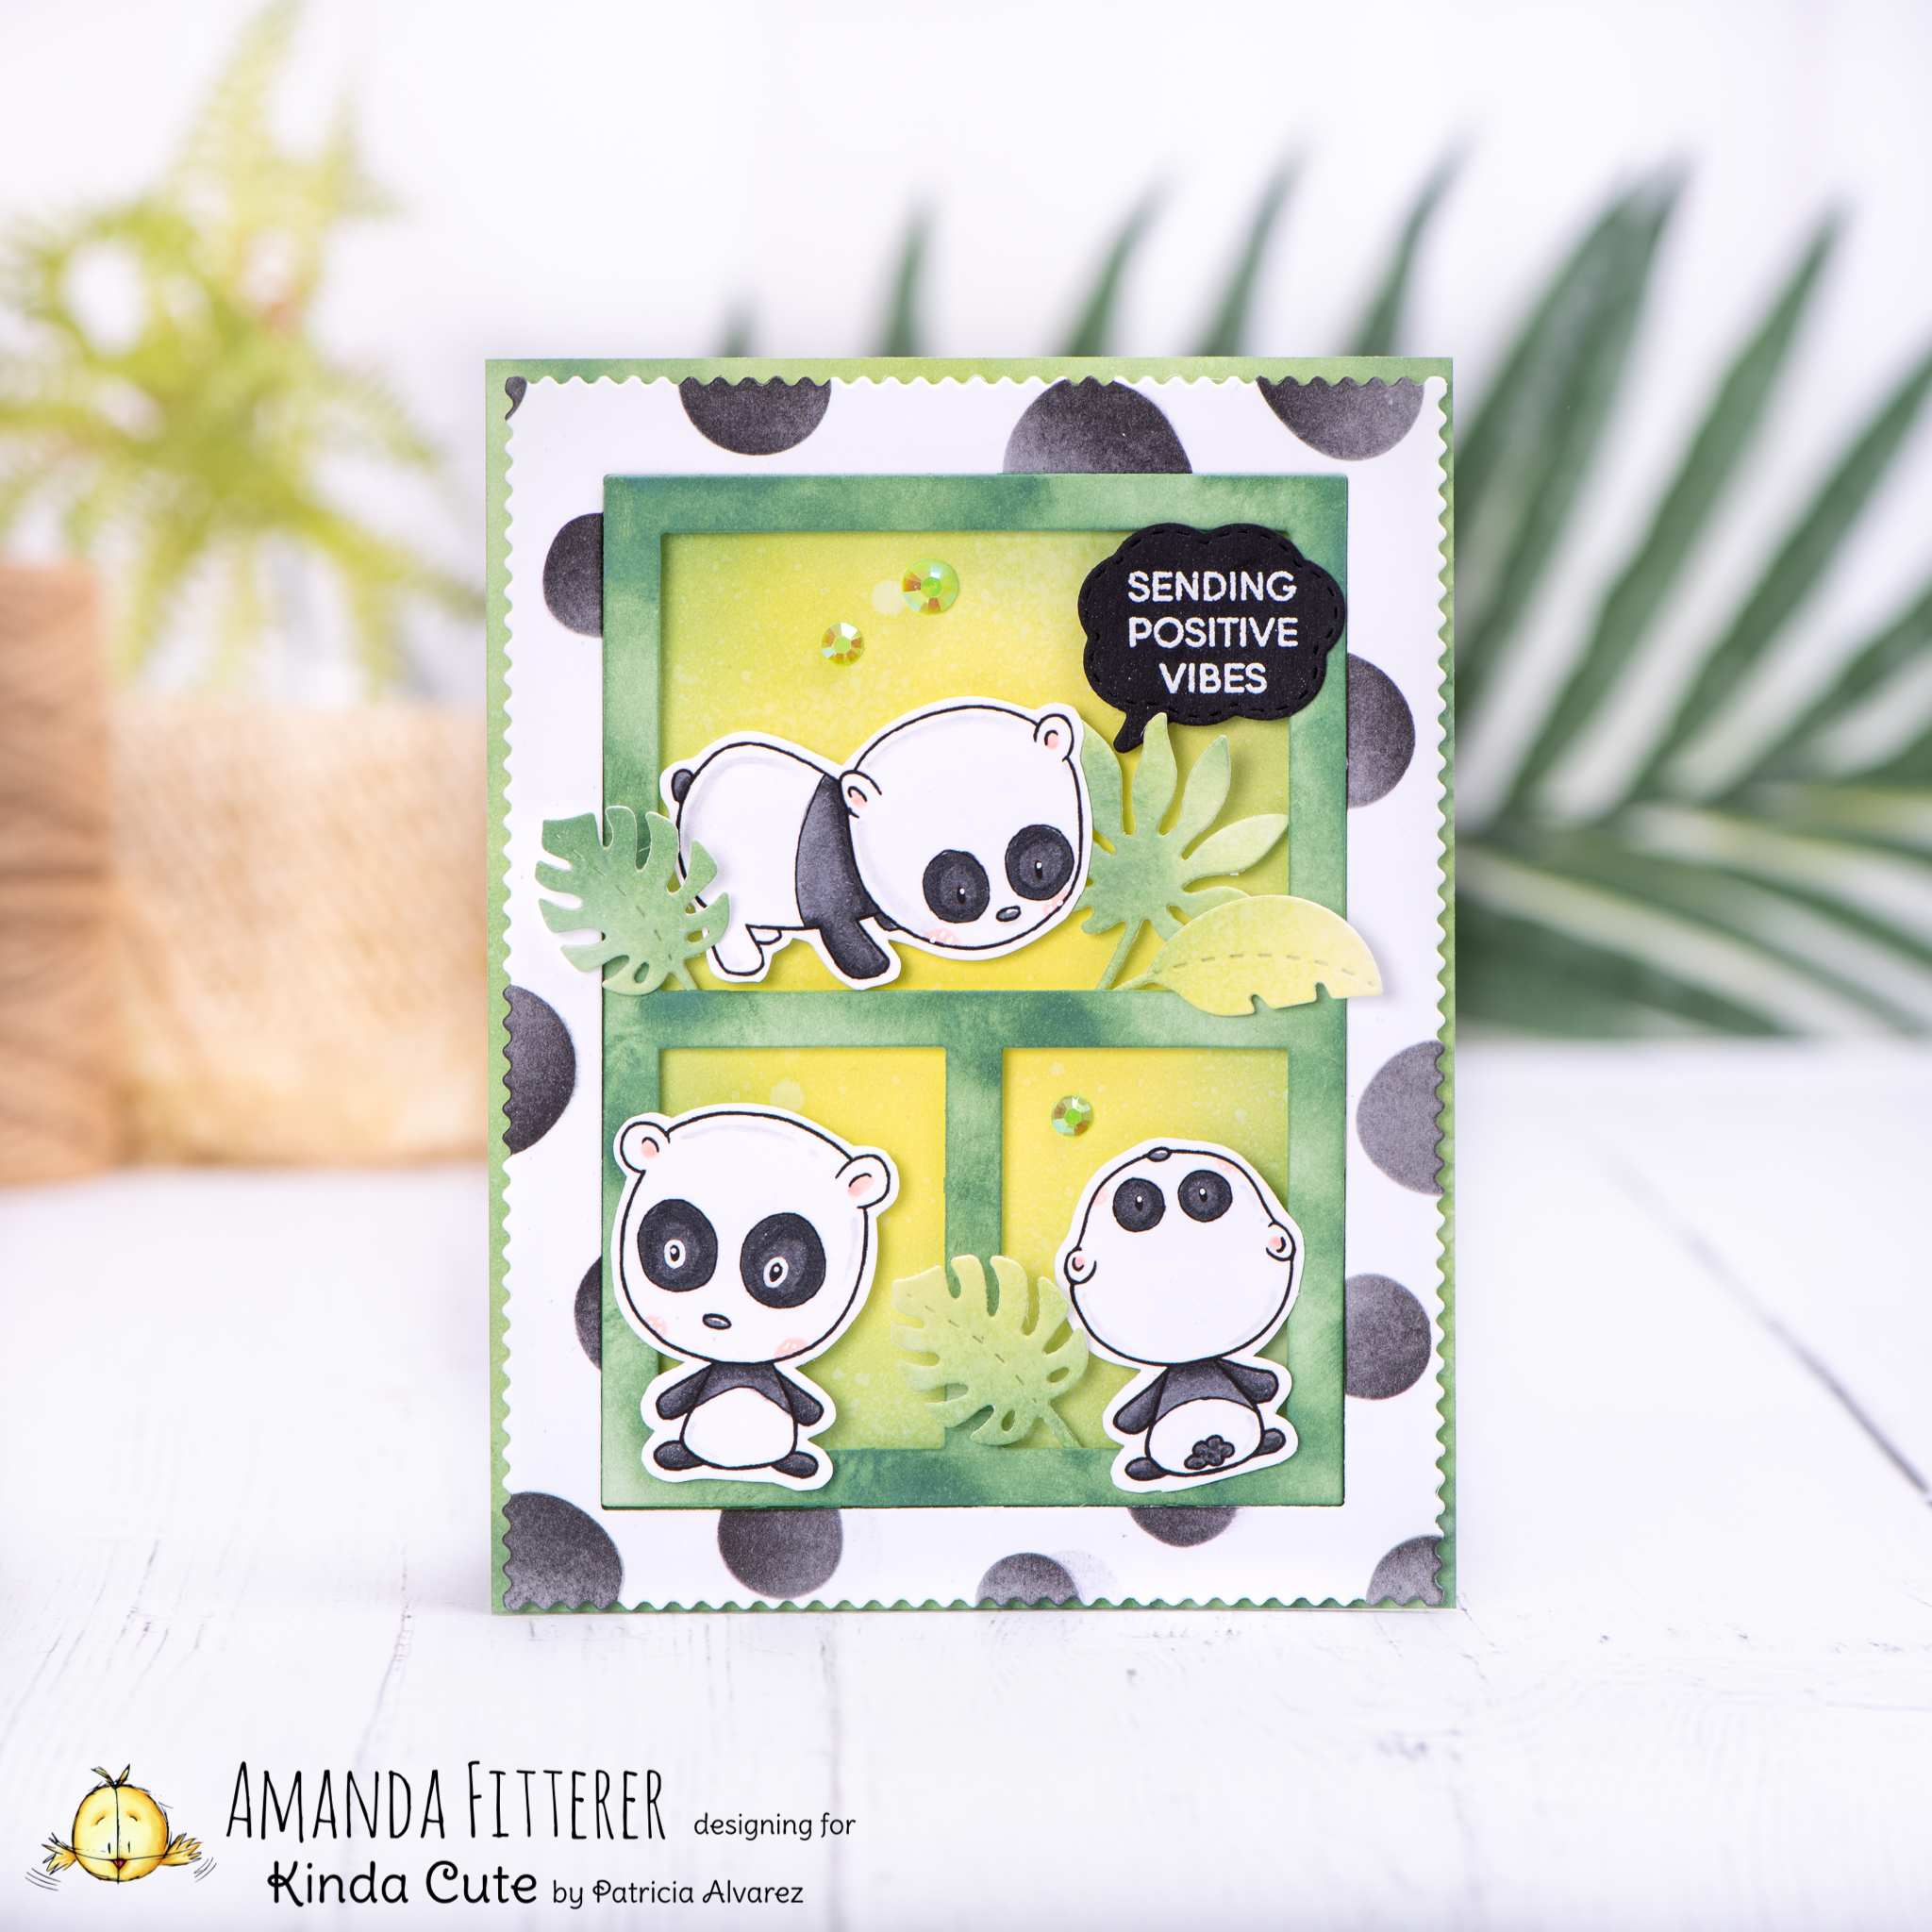
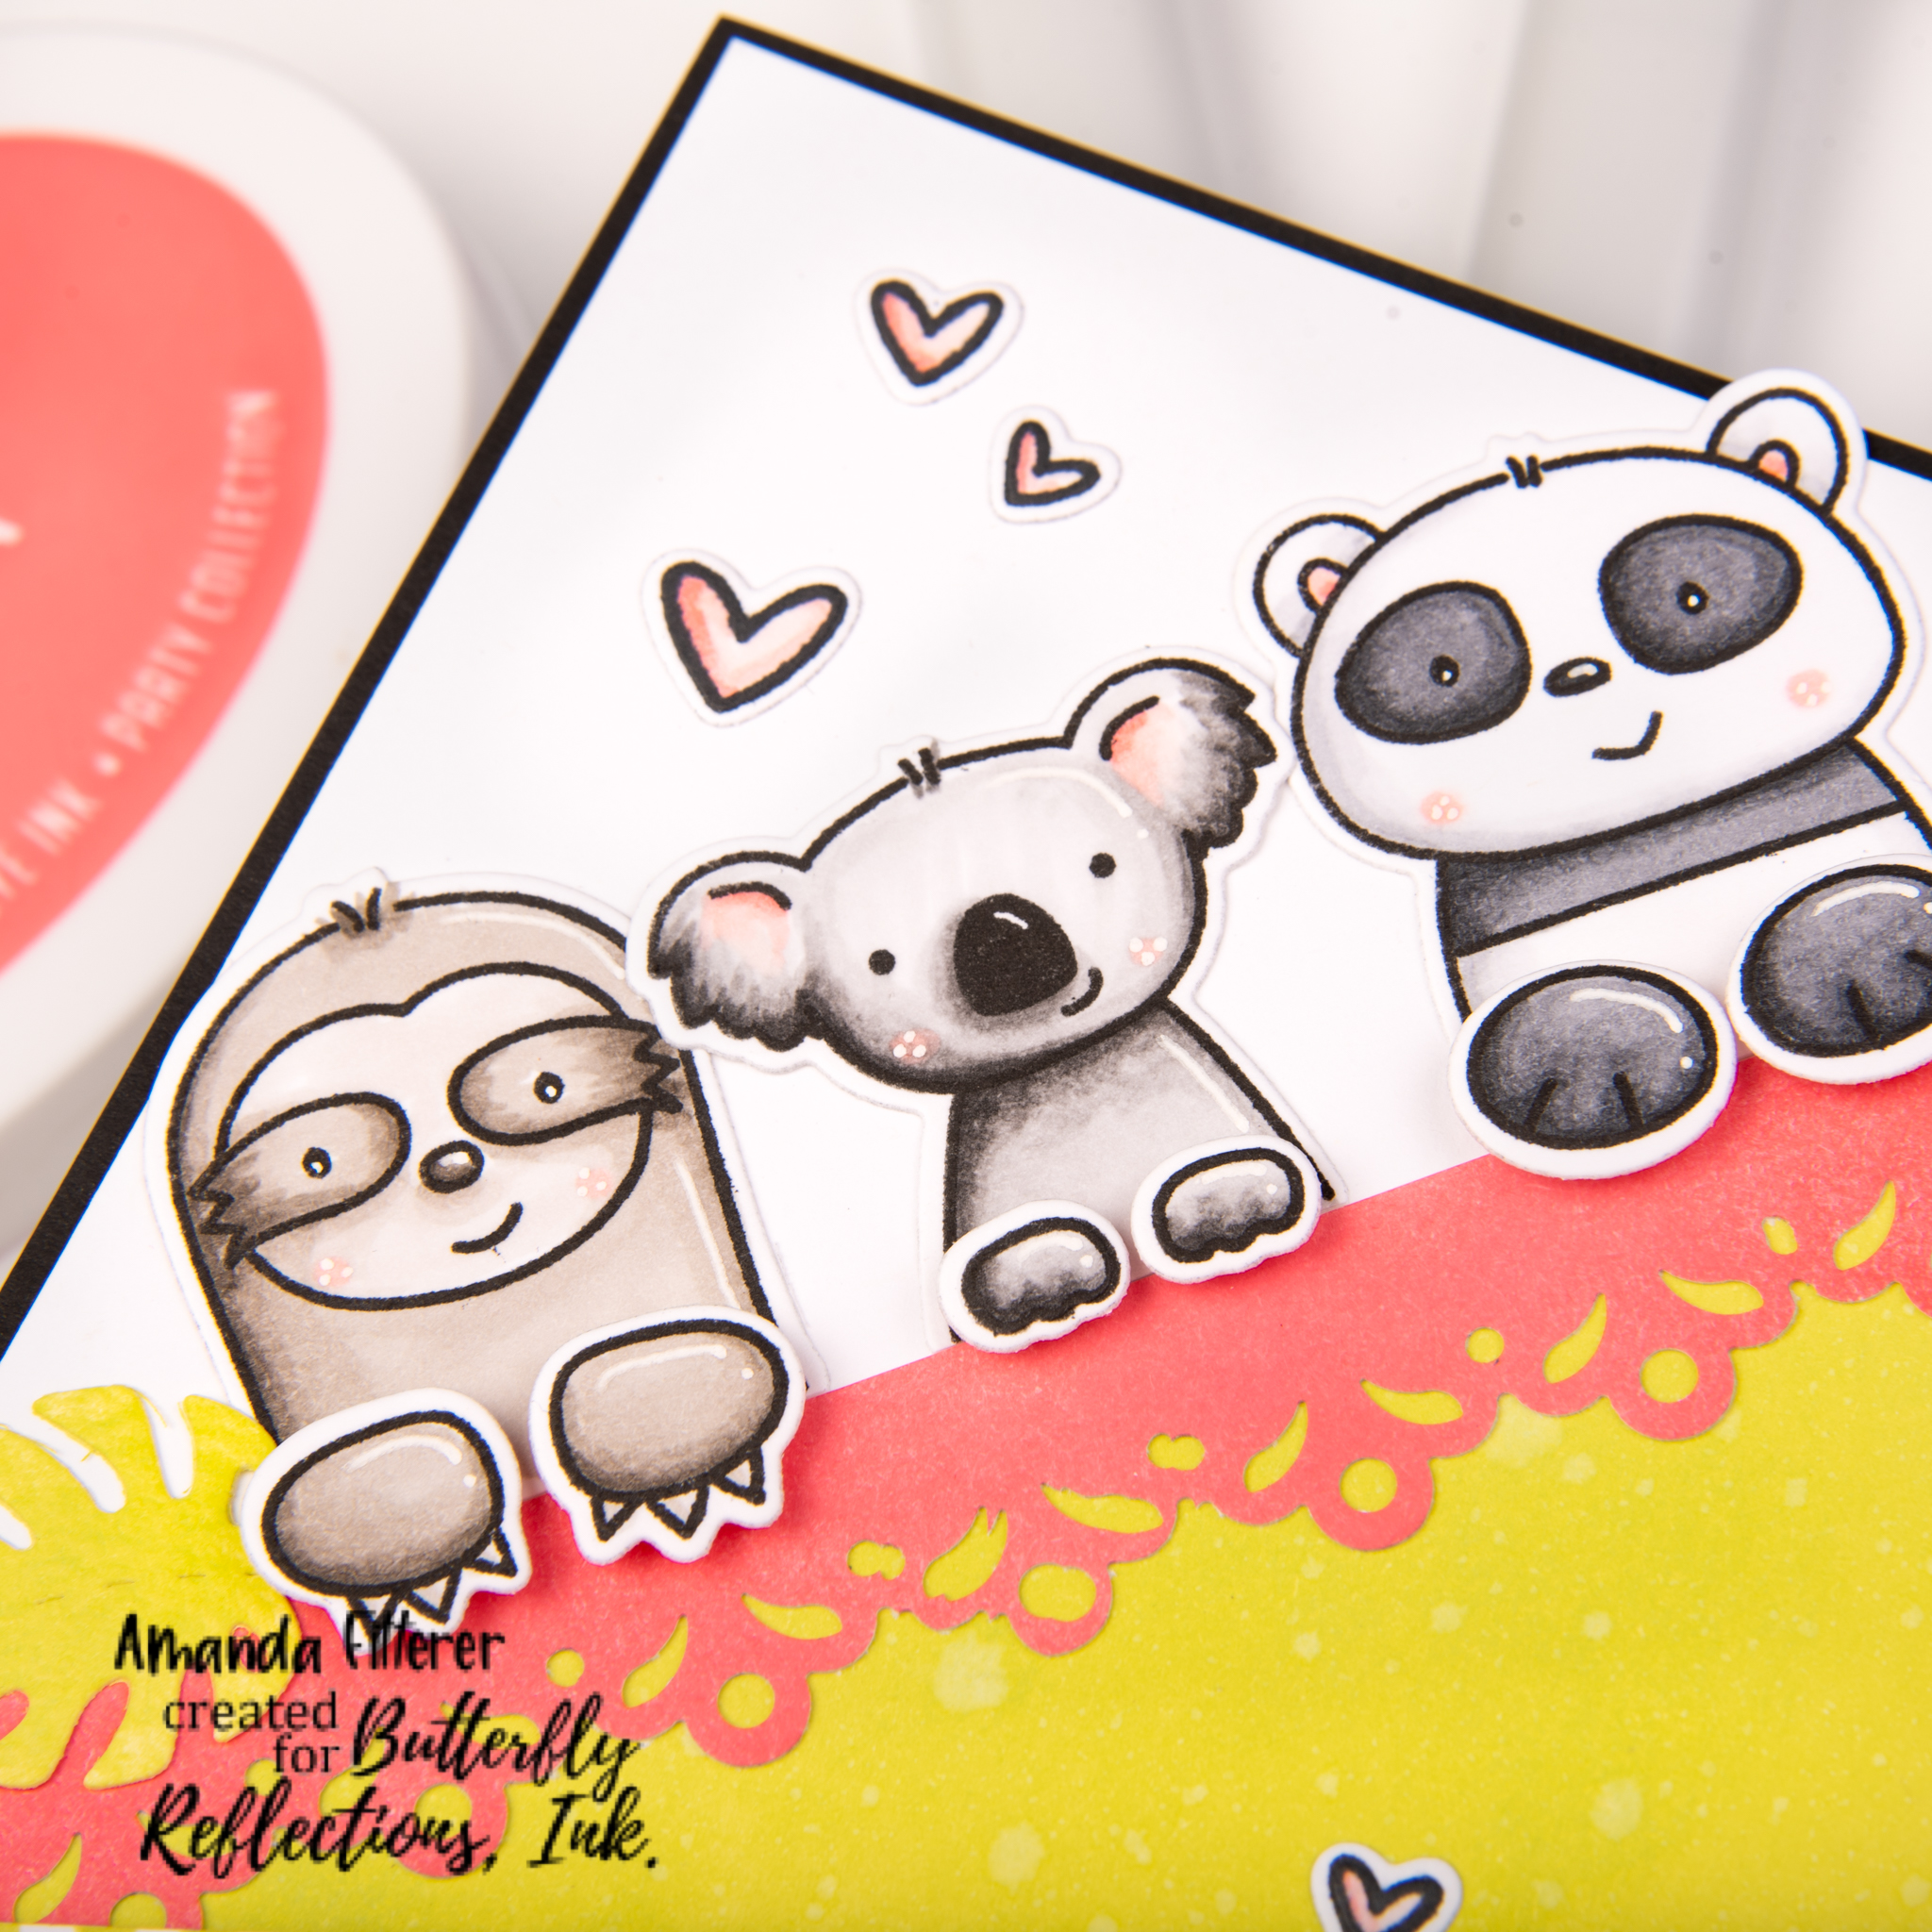
Welcome to the Heffy Doodle New Release Inspiration Blog Hop! We are so excited to share amazing cards from 8 Design Team members using the new release! For today’s special Blog Hop, you can win a £50 voucher to the Heffy Doodle store!
As part of the Blog Hop, I get to share this fun and happy card showcasing some of the brand new products!! Read on to see how I made this card!
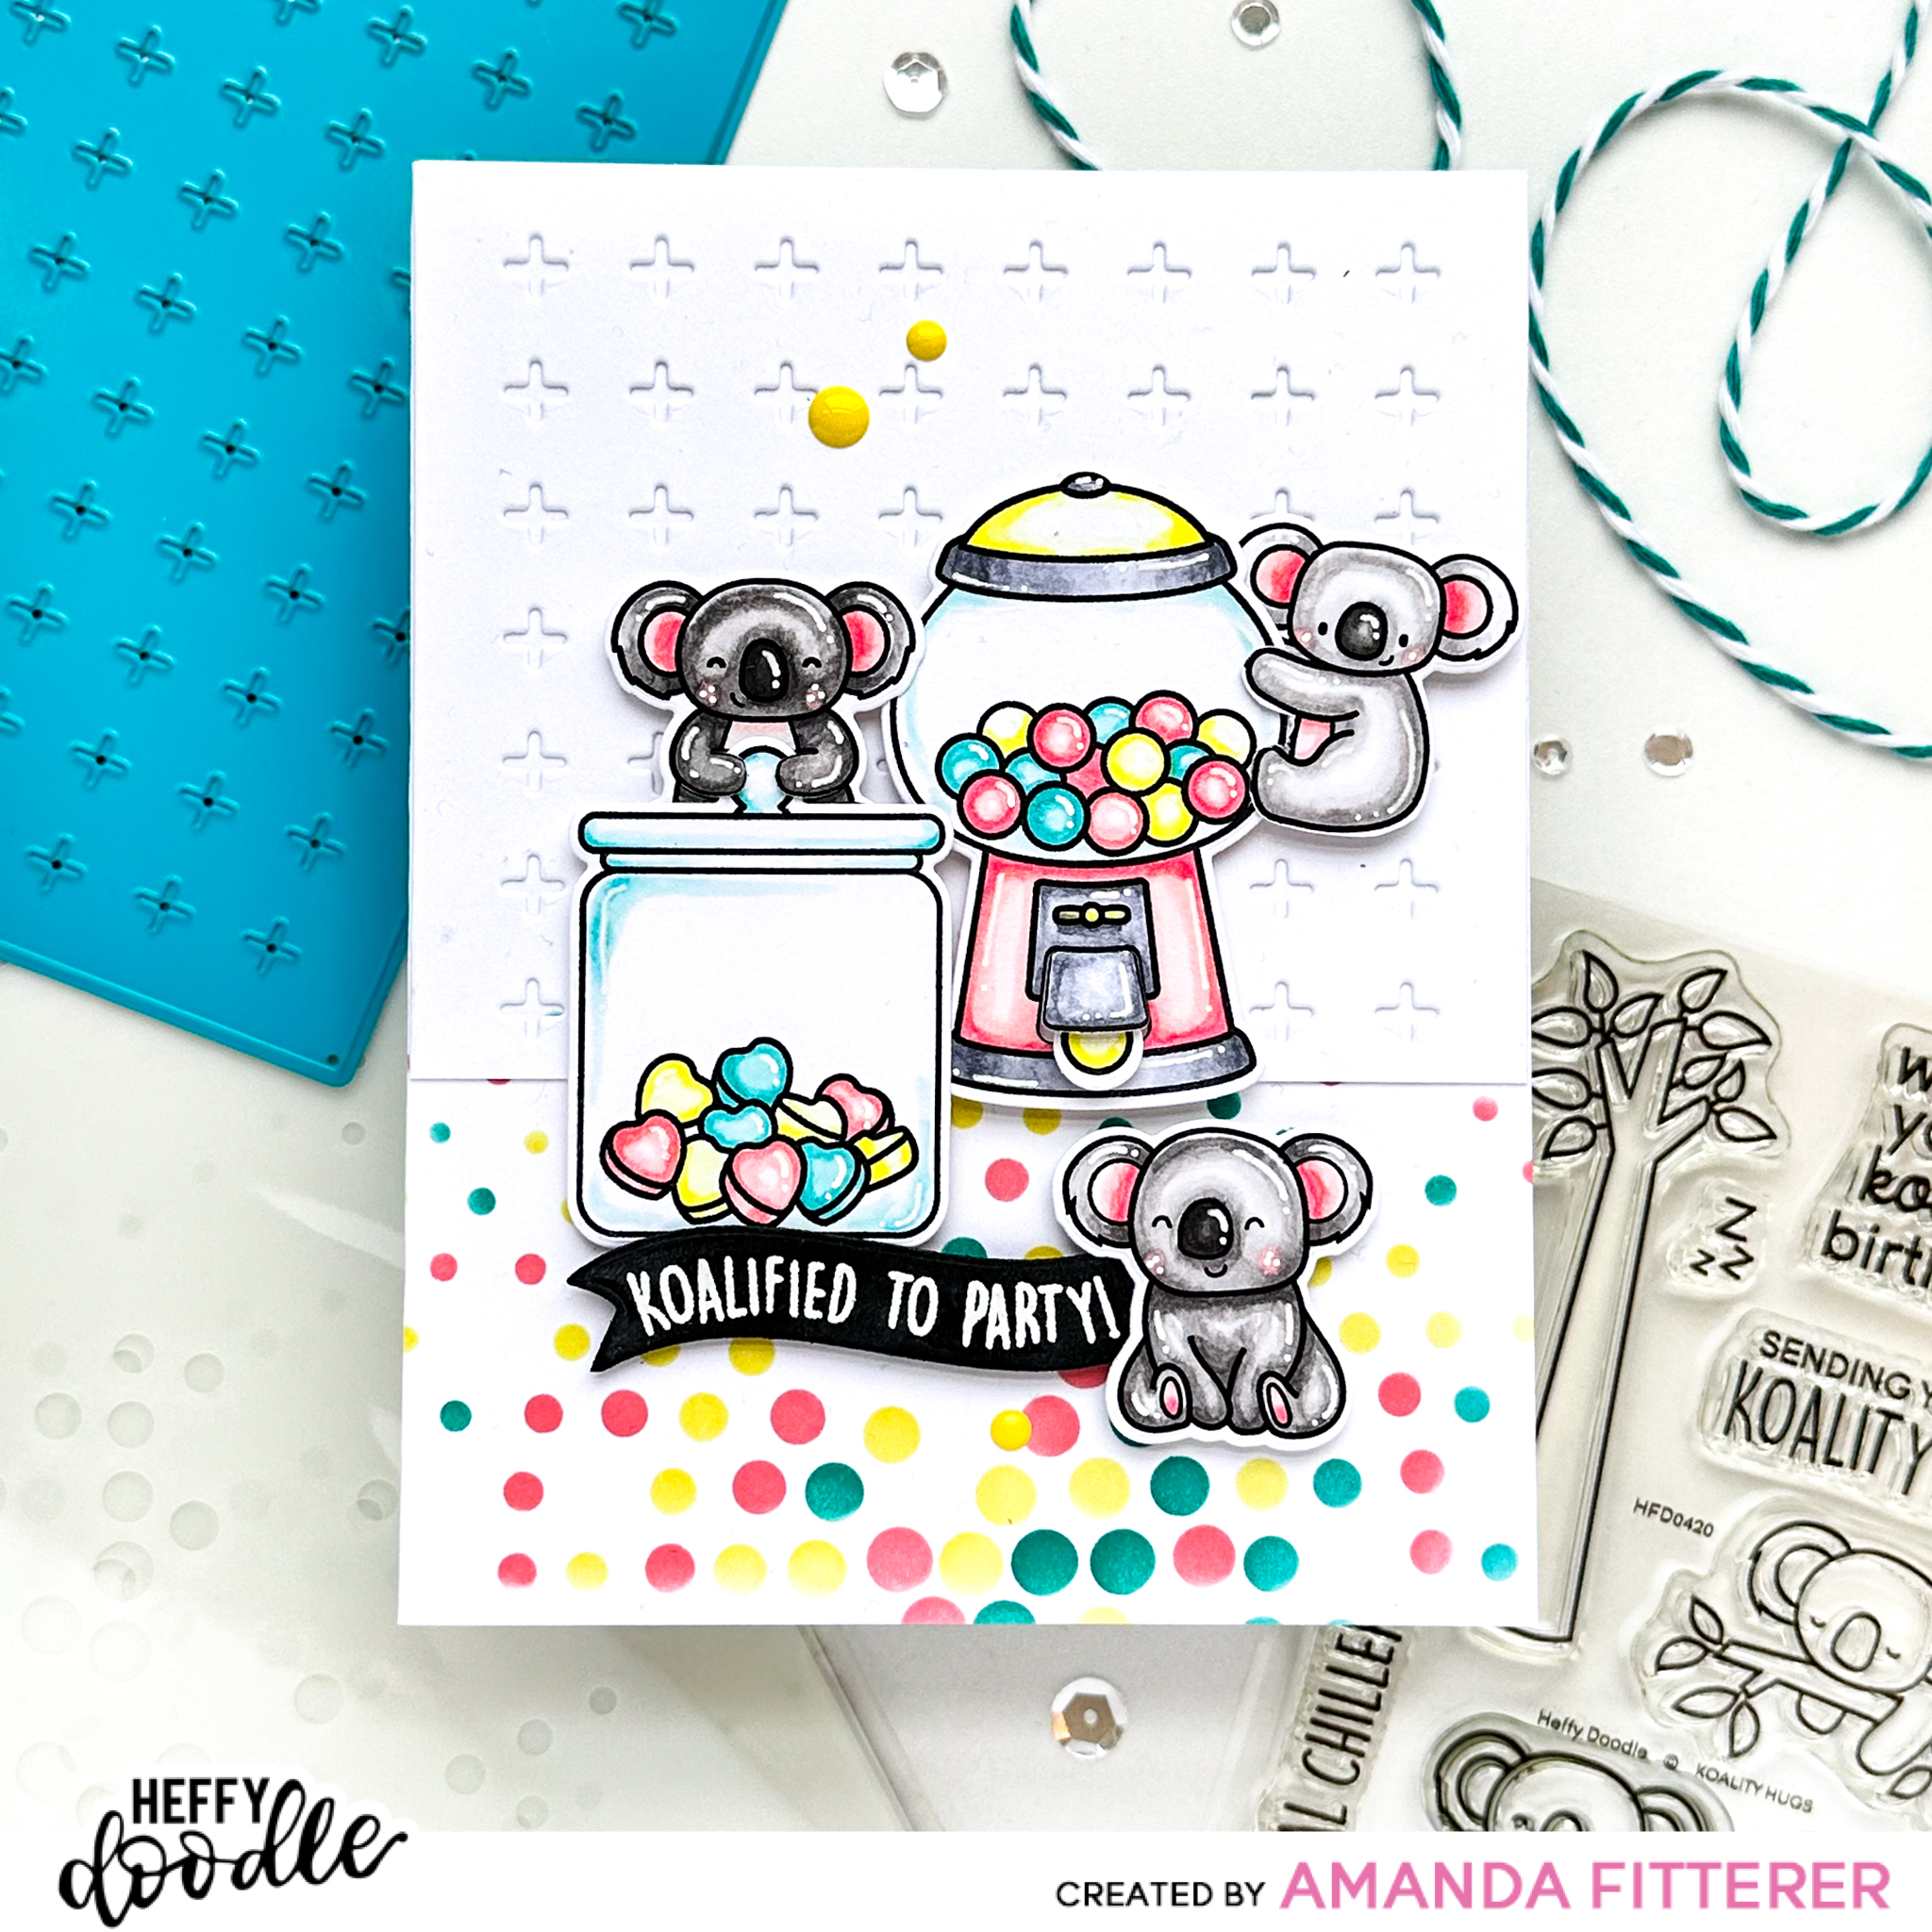
To create this card, I am blending a piece of A2 white cardstock with Drive-In, Flirty Fuchsia, Party Dress, and Bellini inks. I am using the brand new Heffy Doodle Stitched Birthday Trio Frame Dies to create a frame for my A2 card.
Next, I’m going to place my stamps where I think I’ll want them to go. This helps me see the finished card without committing to anything just yet!
Once I have my selected stamps from the NEW Safari Animals, Koality Hugs, and Mane Squeezestamp sets, I am coloring them in with Copic markers and then cutting them out with the coordinating die sets.
My final step is to assemble the card and add some accents! I’m using the Heffy Doodle Deep Foam Tape to adhere my trio frame to the ink blended background. I’m using 3D foam squares to attach my stamped images and sentiment. For my sequins, I’m using Glubert glue to hold them down.
Here are some close-ups of the finished card!
To be entered to win the giveaway, all you need to do is comment at each stop along the Blog Hop before May 4th, 2022 at 11:59 PM EST. The winner will be announced on the Heffy Doodle Blog on May 5th at 10:00 AM EST!
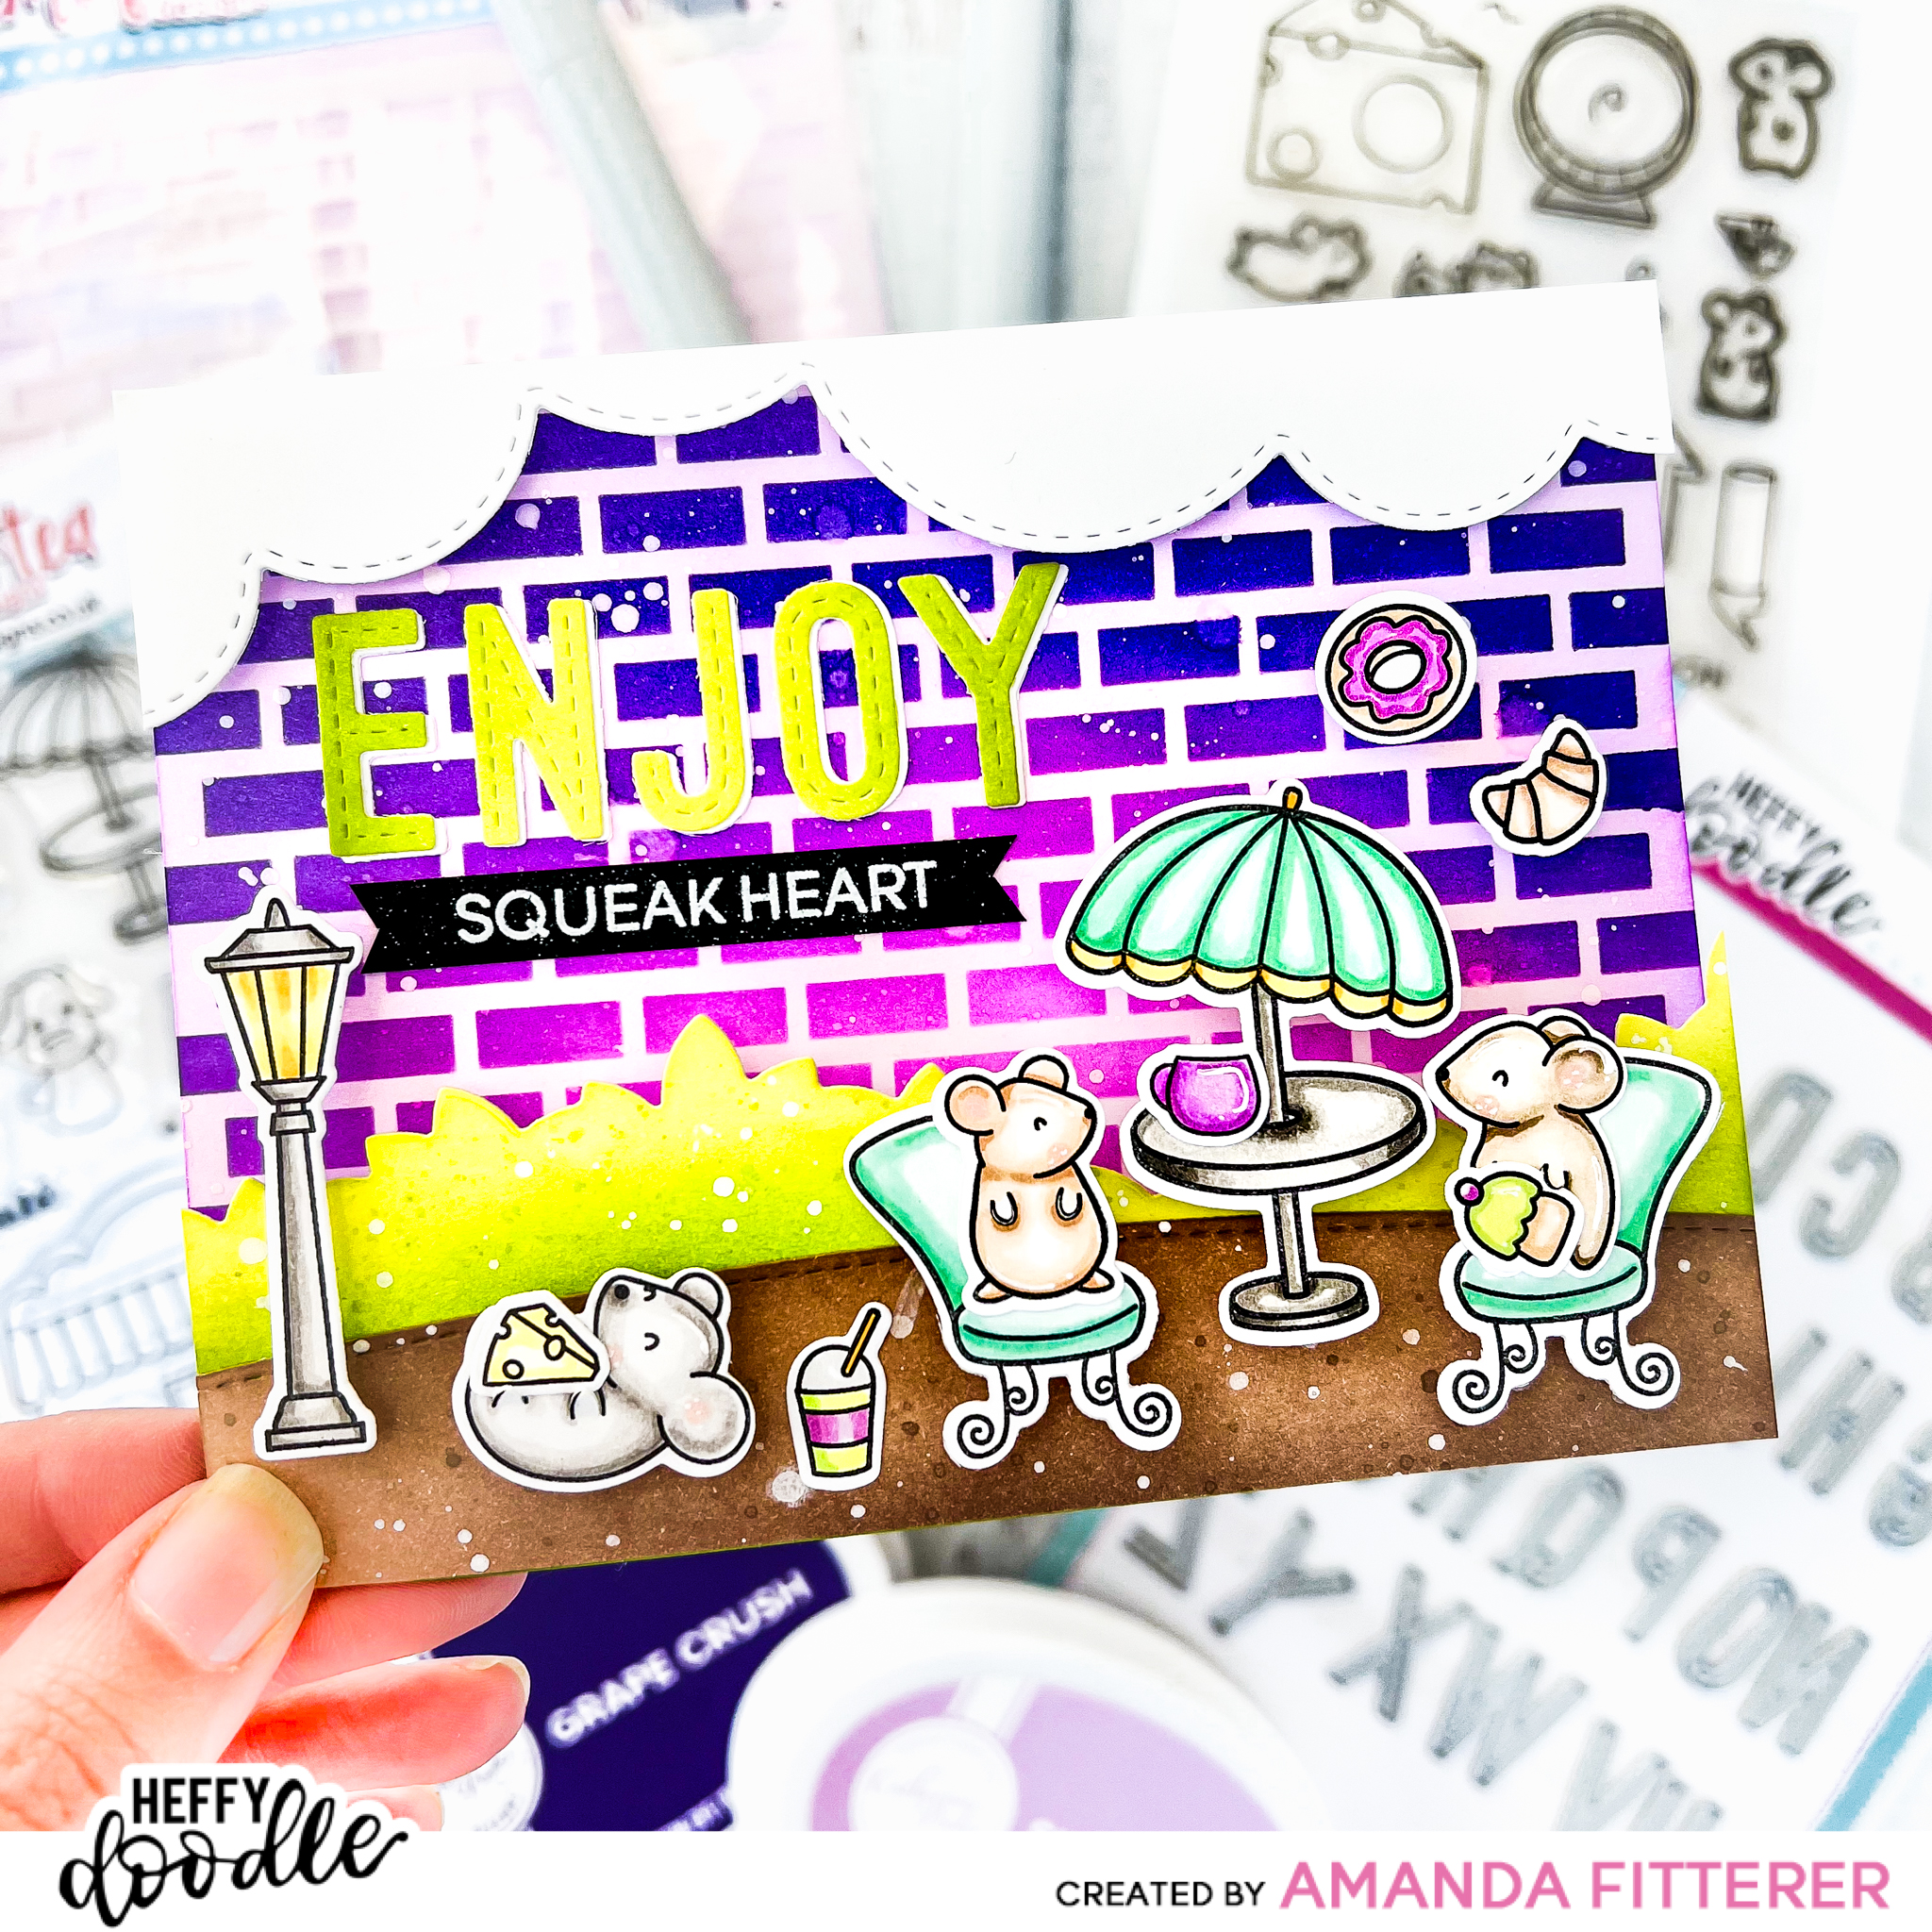
Welcome to the Heffy Doodle and Time for Tea Collaboration Blog Hop! Design Team members from both companies are sharing inspiration using products from both companies!
I’m so excited to share this card I made with you! I absolutely adore both of these companies’ products! They work SO WELL together! Can you guess which products are from which company? Read on to see!
To create my super vibrant background, I am blending Sixteen Candles, Pixie Dust and Grape Crush through the Time for Tea Tiled Wall Stencil. Once that’s done, I am going to very gently go over the entire background with a blending brush that has leftover Sixteen Candles ink on it.
To create the forefront of my scene, I am using the leaves from the Heffy Doodle Tree-mendous Peekaboo Tree Die and blending Melon Ice and Lime Rickey onto my cutout. For the dirt hill, I am using the Heffy Doodle Slimline Scenery Dies and blending Sand Castle and Over Coffee ink onto it. I am then splattering some white acrylic paint mixed with water using a small paintbrush. I’ve also used the Silver Linings Border Dies to create some clouds for the top portion of my scene and have left them white.
Now I’m ready to stamp my little cuties! I am grabbing the Heffy Doodle Hello Squeakheart Stamp Set and the Time for Tea Cafe Critters Stamp Set. I’m coloring them with my Copic markers using purples, greens, and yellows.
I’ve cut out the word “ENJOY” using the Heffy Doodle Stitched Alphabetters Dies and used Melon Ice and Lime Rickey to color them. Once I’ve cut my stamped images out using the coordinating dies, I’m ready to start assembling my card! I’m using Heffy Doodle’s Deep Foam Tape and Glubert Glue. I’m also creating one last sentiment by stamping the word “SQUEAKHEART” from the Hello Squeakheart stamp set on black cardstock with Versamark watermark ink. Then, I’m applying white embossing powder to it and cutting the sentiment into a ribbon using my scissors.
And, voila! Don’t those little cuties look so cute?! 🙂
That’s it for me on this Hop! I hope you enjoyed my card and all the love I put into it!
GIVEAWAY INFO: To be entered to win the giveaway, all you need to do is comment at each stop along the Blog Hop! Time for Tea will be giving away £25 and Heffy Doodle will be giving away £25 to their respective stores! Be sure to comment before 11:59 PM EST on Mar 2nd to be entered to win!
Each company will post their random winner on Mar 3rd at 10AM EST! Make sure to check the Heffy Doodle Blog and Time for Tea Blog to see if you’re a winner!
–> If you want to use my affiliate link to shop the New Release, click here.Thank you for all your support!!All the links in this post are affiliate links. This helps me to get some extra crafty cash to buy more goodies to share more projects with you!It is SO appreciated! <–
–> If you want to use my affiliate link to shop the New Release, click here.Thank you for all your support!!All the links in this post are affiliate links. This helps me to get some extra crafty cash to buy more goodies to share more projects with you!It is SO appreciated! <–
–> If you want to use my affiliate link to shop the New Release, click here.Thank you for all your support!!All the links in this post are affiliate links. This helps me to get some extra crafty cash to buy more goodies to share more projects with you!It is SO appreciated! <–
Well hey there, crafty friends! I sure hope you had a wonderful Christmas! Did you get any crafty goodies?! I hope so!!
Today, I’m sharing a Baby Shower card! I love interactive cards and the Slider Pop-up Dies make it so easy to make one quickly!
To create this card, I have blended some gorgeous Catherine Pooler blues on my cutouts from the Slider Pop-up Dies . Next, I’m spritzing the ink with water.
I’ve stamped my images from the Beary Big Heart and Chimply the Best stamp sets. Now, I’m ready to start coloring the images with Copic markers!
To create my leaves, I am using both the Amazonian Leaves and Forest Leaves Dies. To color the leaves, I used Limoncello and Tiara inks. I am gluing my leaves, sequins, and monkey on using Glubert Glue.
Using the Classic Sentiments stamp set and the Chimply the Best stamp set, I’ve created my sentiment on a piece of white cardstock.
Voila! So easy and fun! Plus, it will make a great Baby Shower card that is sure to be gushed over!
Thank you so much for stopping by my blog today! I hope you’ve enjoyed this post as much as I’ve enjoyed sharing it with you!! Xx, Amanda
Welcome to the Heffy Doodle and Newton’s Nook Designs Collaboration Blog Hop! Design Team members from both companies are sharing inspiration using products from both companies! I am super excited to share my card with you!
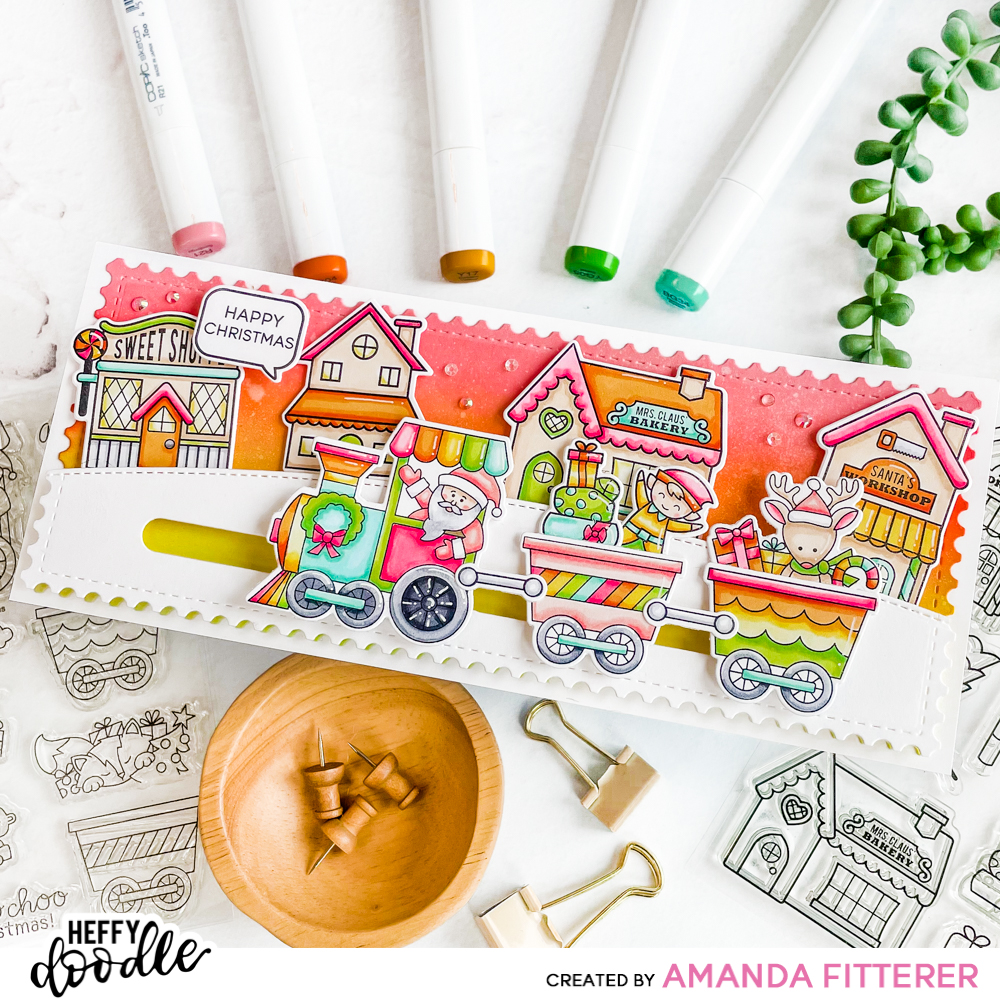
To create this card, I’m starting with the Heffy Doodle Slimline Mini Mails Die and a piece of white cardstock trimmed to slimline size (3.5″x8.5″).
Next, I am stamping my images from the Newton’s Nook All About for Christmas stamp set and the Heffy Doodle Santa’s Village stamp set with the Maker Forte ReMARKable Eclipse Black ink. This is my favorite alcohol-friendly black ink!
Now, onto coloring my adorable images with Copic markers!
To create my hill and slider element, I’m using the Heffy Doodle Slimline Scenery Dies and the Straight Slider Dies. To create a longer slider, I’m die cutting 2 of the sliders right next to each other.
Using Deep Foam tape, I’m propping up my hill to give me room for a button to use as my sliding element. After attaching my trains to the buttons, I can start assembling the rest of the card using 3D foam squares and glue!
Here’s another photo of the finished card and some close-ups!
And that’s it for my card!! I hope you enjoyed my part in the Blog Hop!
To be entered to win the giveaway, all you need to do is comment at each stop along the Blog Hop! Newton’s Nook Designs will be giving away $35 and Heffy Doodle will be giving away £25 to their respective stores! Be sure to comment before 11:59 PM EST on Dec 28th to be entered to win!
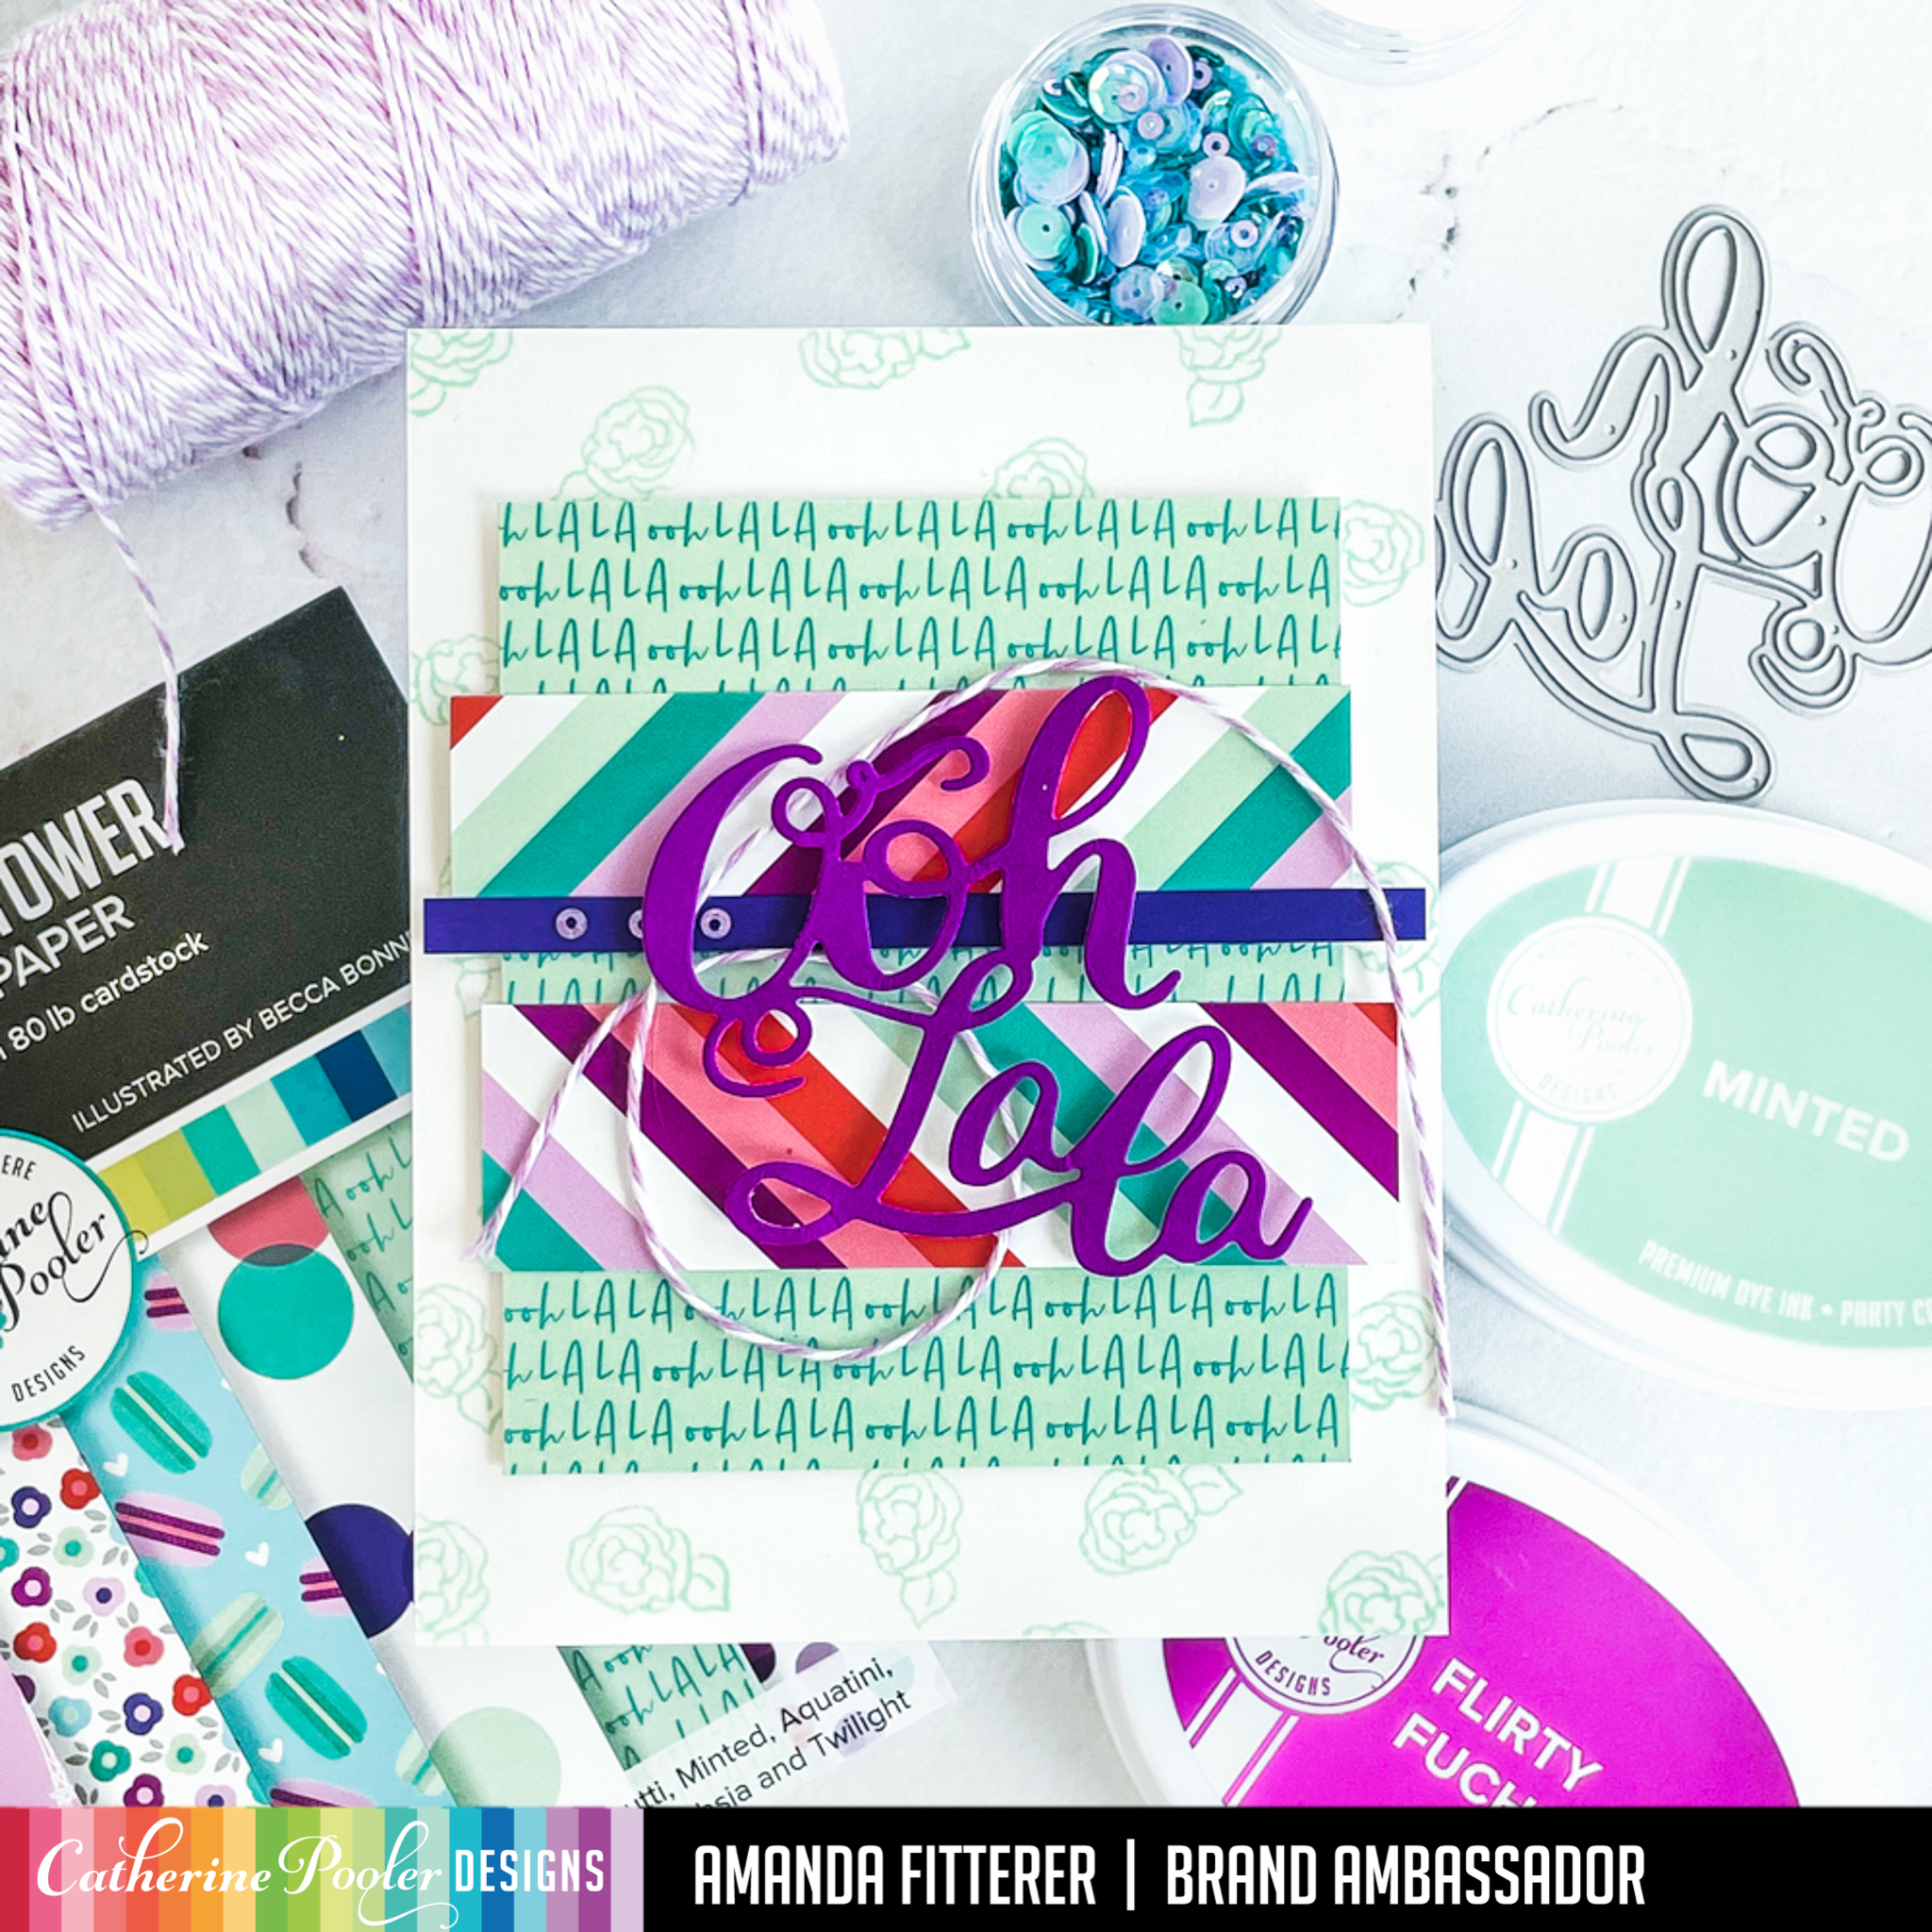
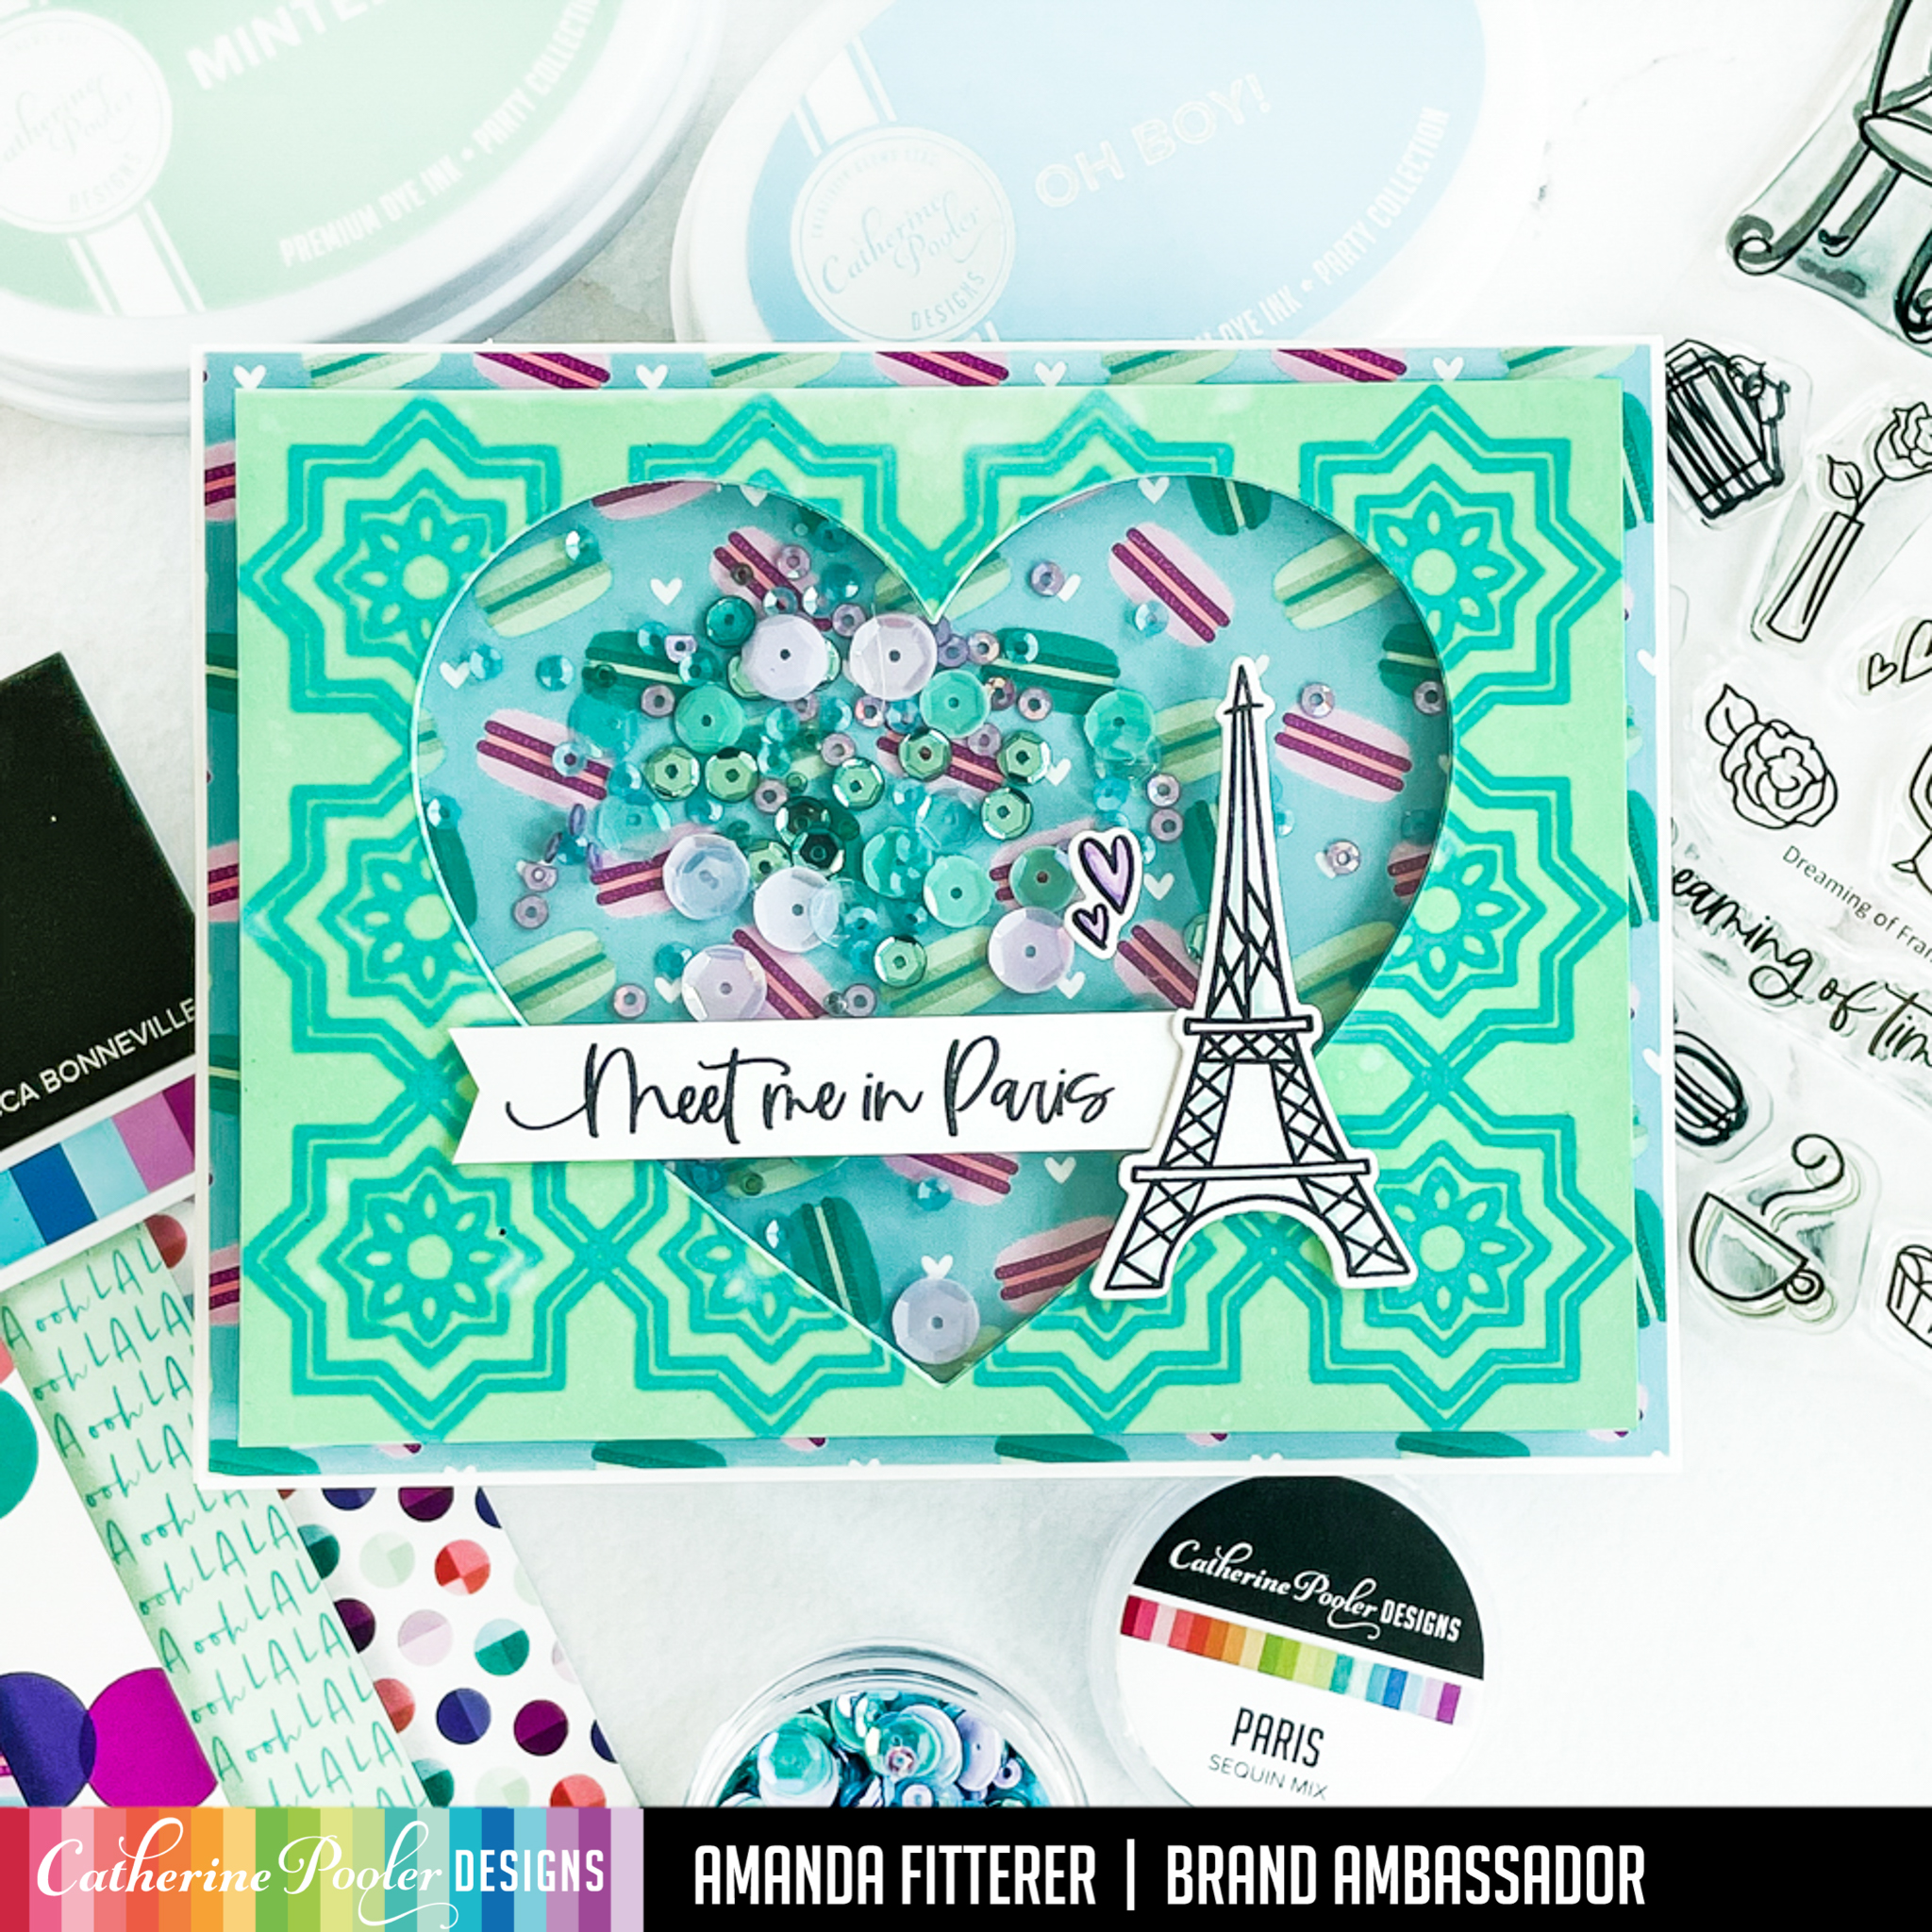
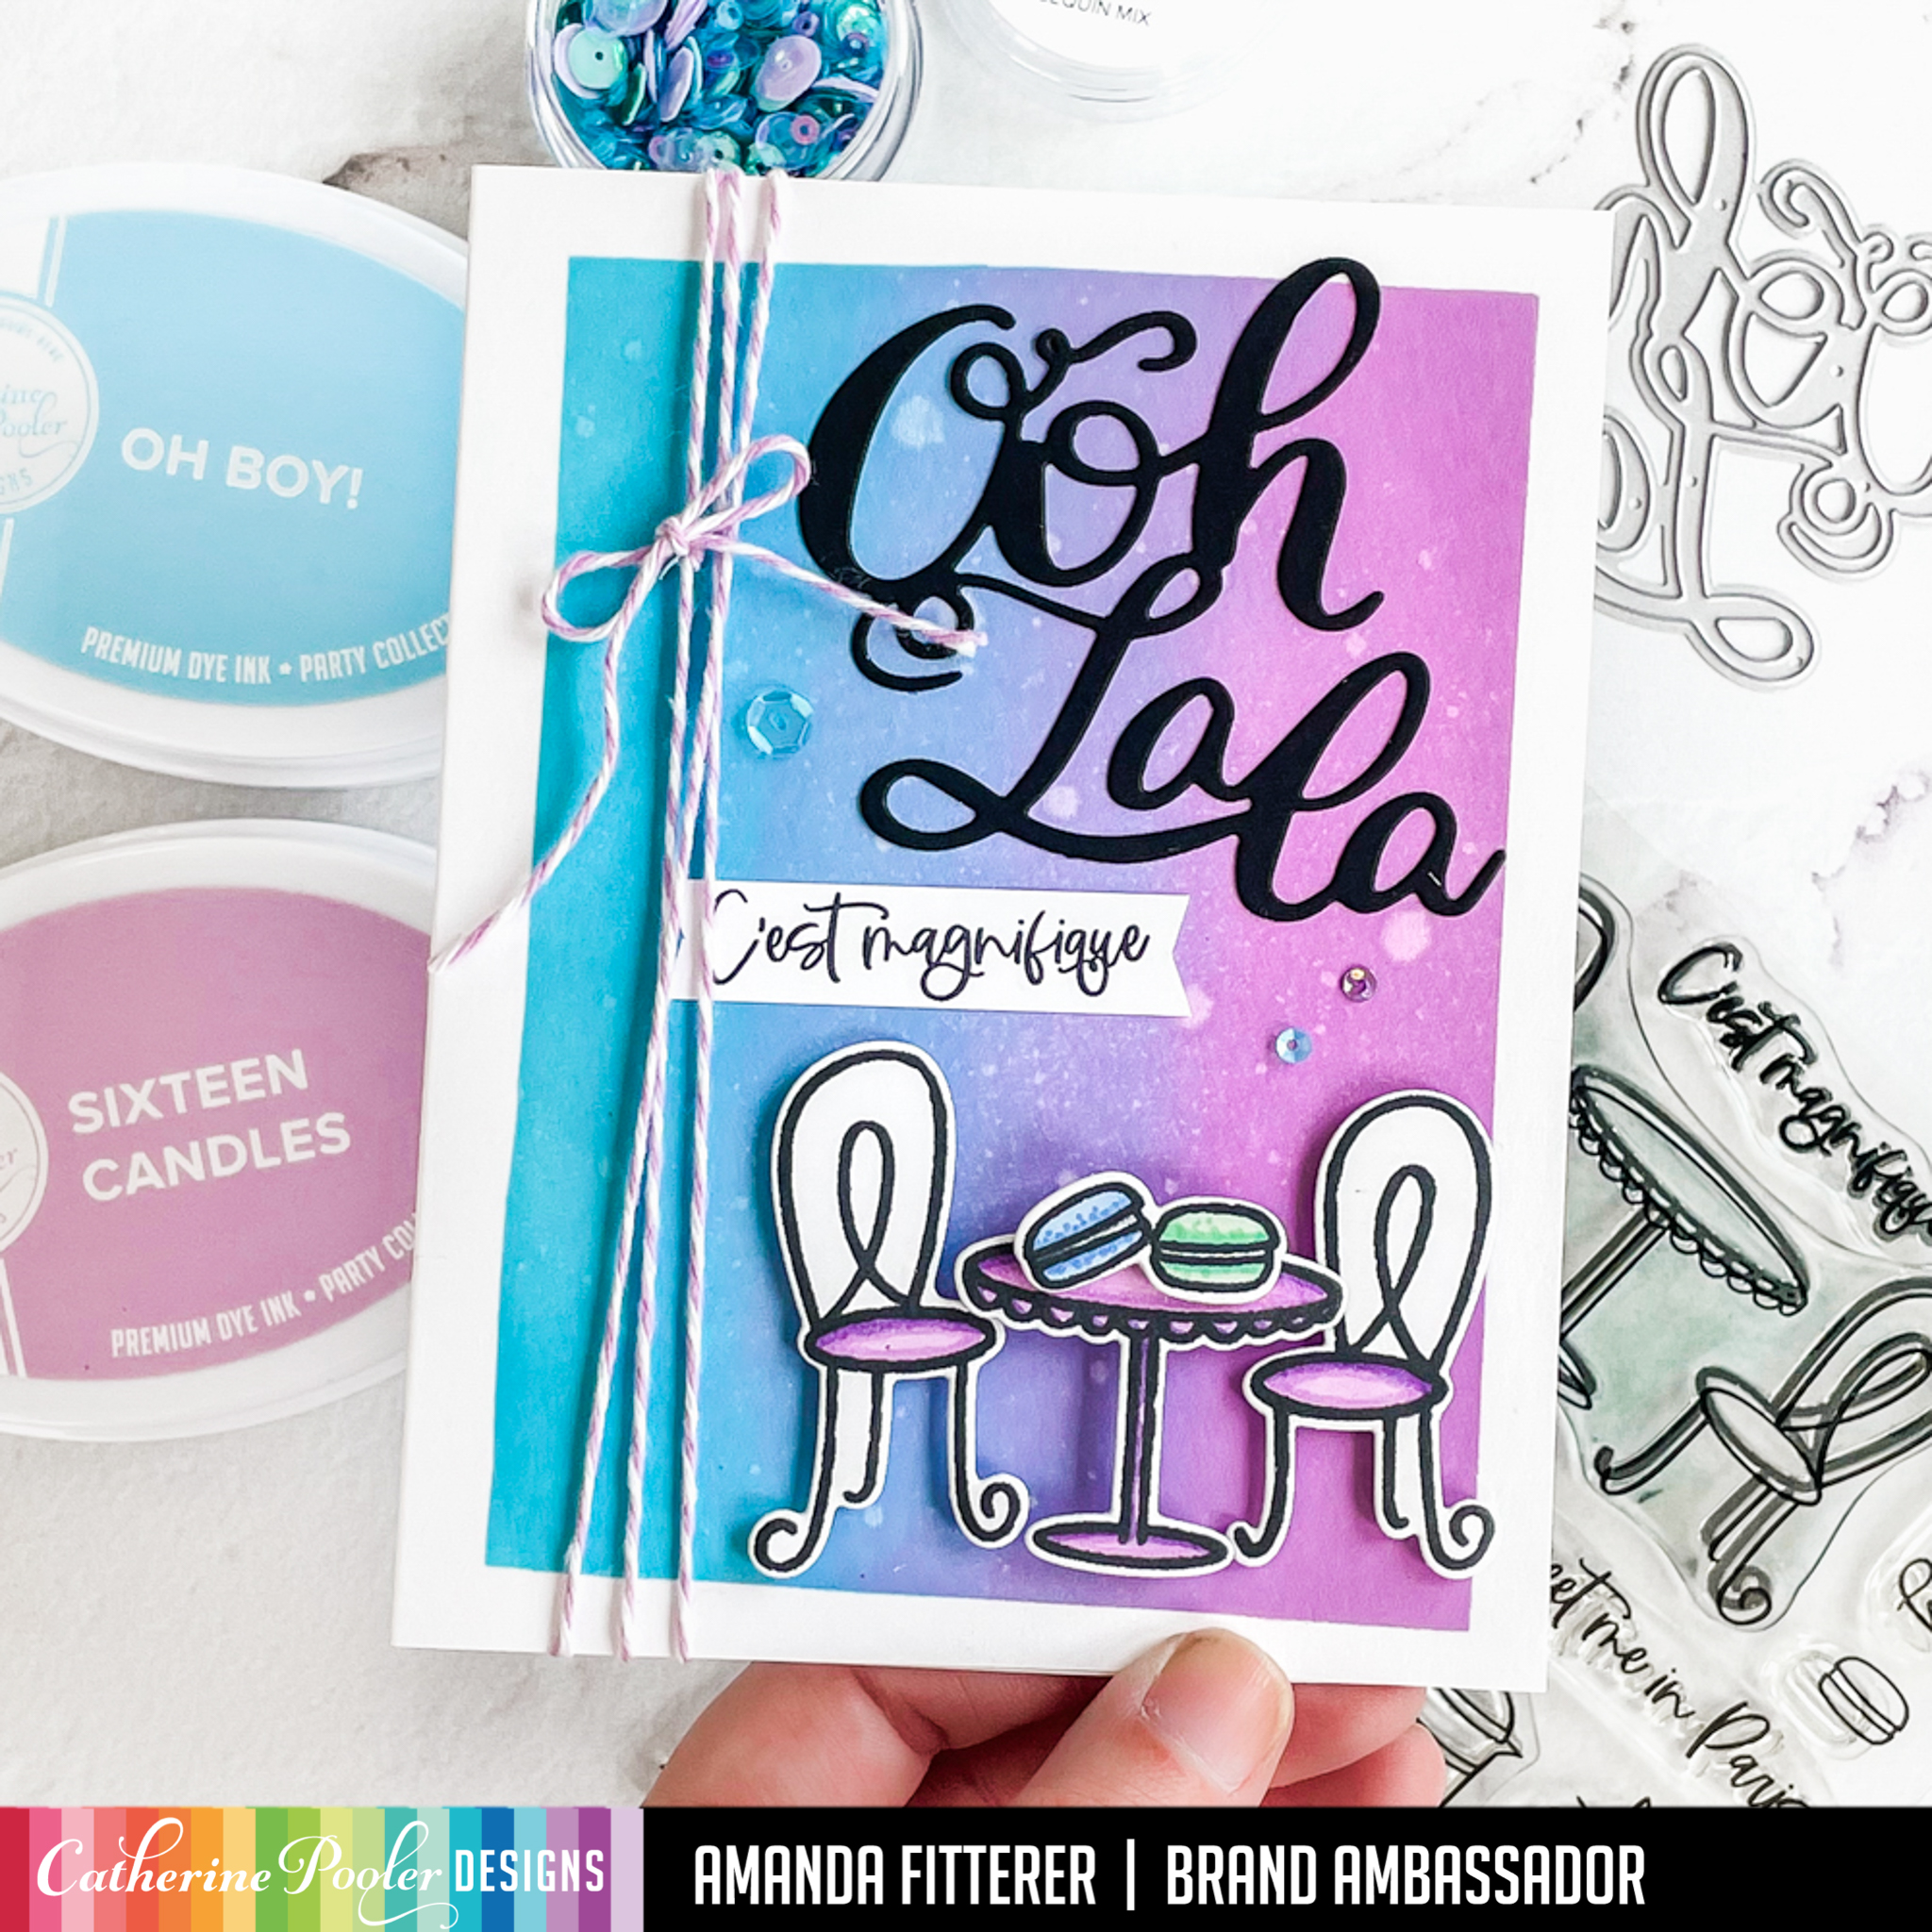
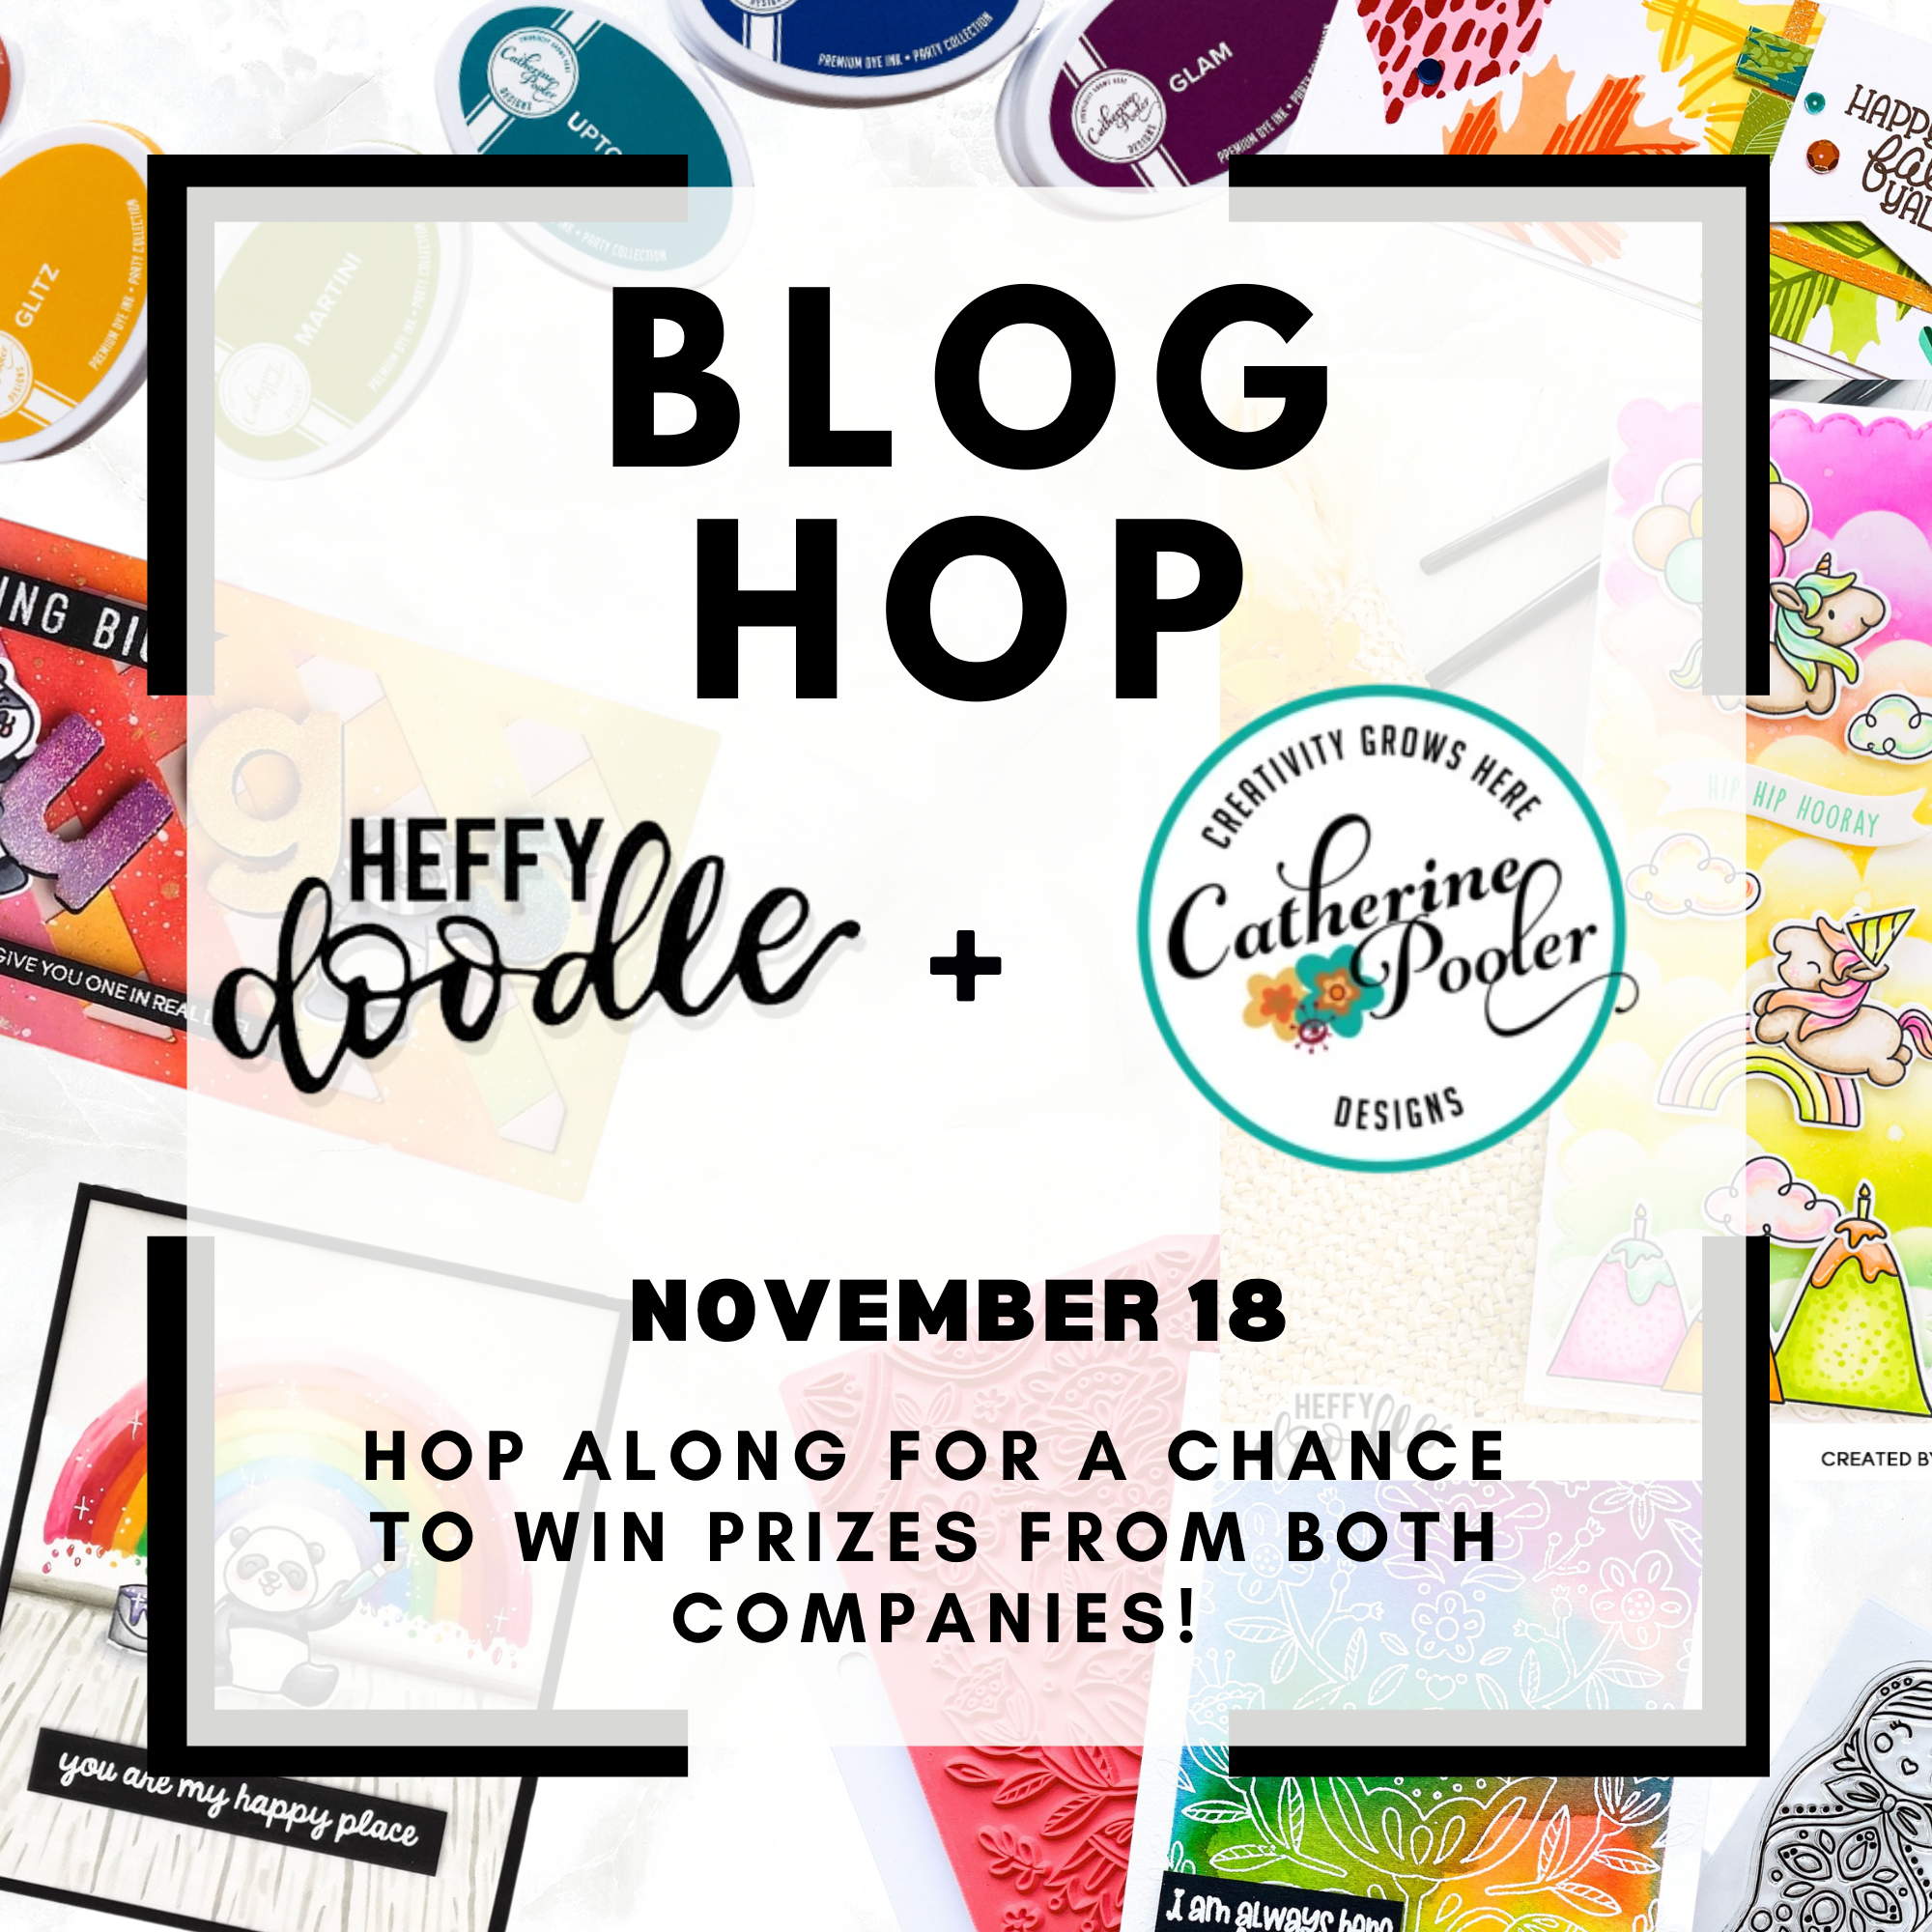
Welcome to the Heffy Doodle and Catherine Pooler Collaboration Blog Hop! Design Team members from both companies are sharing inspiration using products from both companies!
I assembled my card using liquid glue and 3D foam squares.
Now, onto the Blog Hop Giveaway Details:
To be entered to win the giveaway, all you need to do is comment at each stop along the Blog Hop! Catherine Pooler will be giving away $35 and Heffy Doodle will be giving away £25 to their respective stores! Be sure to comment before 11:59 PM EST on Nov 24th to be entered to win!Each company will post their random winner on Nov 25th at 10AM EST! Make sure to check the Heffy Doodle Blog and Catherine Pooler Blog to see if you’re a winner!
Welcome to the Heffy Doodle, Maker Forte, and SugarPea Designs Collaboration Blog Hop! Design Team members from all three companies are sharing inspiration using products from all three companies!
Today, I am sharing 2 cards that I made using tons of awesome products from these companies!
For my interactive pull tab and slider card, I’m starting by stamping my images from the Heffy Doodle Otter Side and You Go, Gull stamp sets and the Sugar Pea Designs Captain of My Heart and Waves of Love stamp sets. To ensure I get a really crisp stamped image, I’m using my Smoosher Tool from Maker Forte and my MISTI. I’m coloring my images with Copic markers and then cutting the images out with my Die Cutting Machine.
Now I’m ready to create my waves. I’m using some colored cardstock and the Breaking Waves Dies, plus the Wavy Water Slides to create my coordinating wave slider.
For my front, I created sand using Copic markers. For my waves, I used the Breaking Waves Dies.
For my images, I am using the same sets as my first card. I’ve stamped my images, used Copic markers to color them, and now I’m attaching my little fishies and birds to small strips of acetate.
To make assembling my card easier, I am using my favorite Rainbow Tweezers.
And, that’s it! Both cards completed!
To be entered to win the giveaway, all you need to do is comment at each stop along the Blog Hop! Maker Forte will be giving away $35, Heffy Doodle will be giving away £25, and SugarPea Designs will be giving away $25 to their respective stores! Be sure to comment before 11:59 PM EST on Aug 20th to be entered to win!
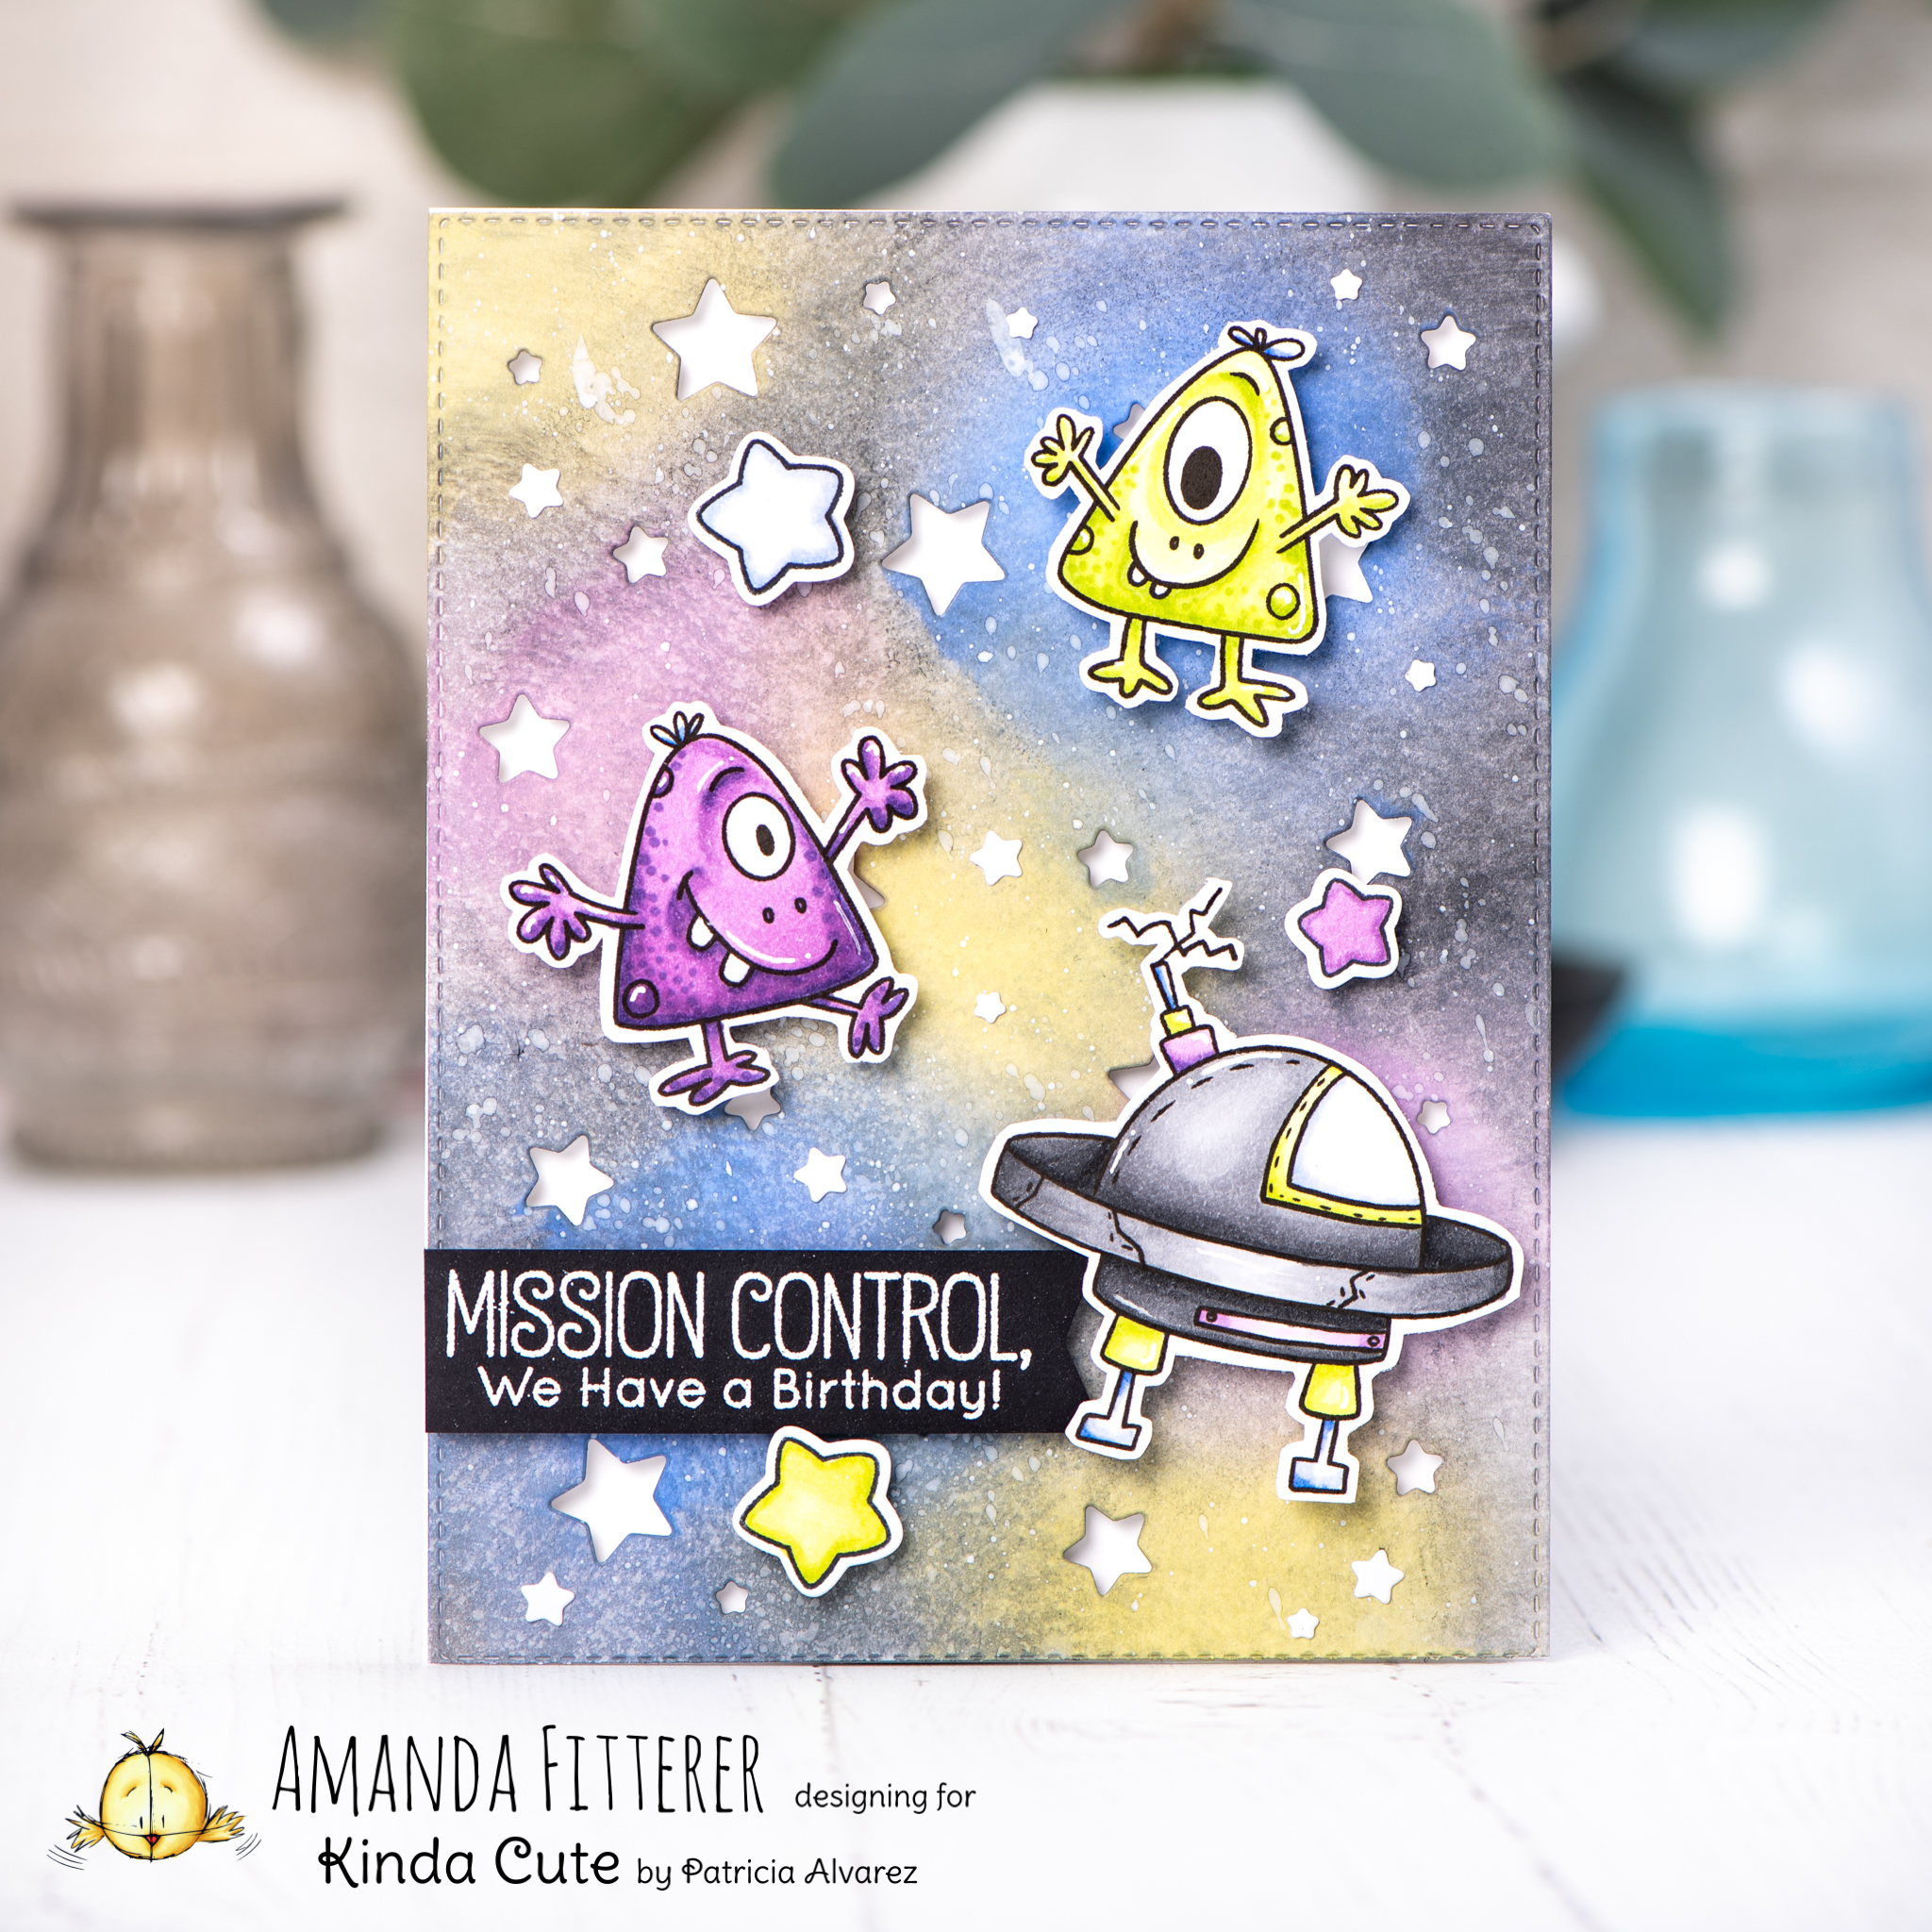
To make this card, I am starting with the galaxy background. I used Heffy Doodle’s Stargazer Backdrop on a piece of white cardstock. Then, I created the galaxy effect by blending Dusty Concord, Faded Jeans, Blueprint Sketch, Twisted Citron, and Black Soot Distress Oxide Inks.
Next, I colored my images using Copic markers and then cut them out using scissors.
For my sentiment, I used the MFT Space Explorer stamp set. I also grabbed a few stars from this stamp set and used 3D foam squares to adhere them to my card front.
Welcome to the Heffy Doodle and Sunny Studio Stamps Collaboration Blog Hop! Design Team members from both companies are sharing inspiration using products from both companies!
I couldn’t choose just 1 card, so I decided to make 2!
Whenever I’m starting a card, I like to lay my stamps out on my card base to get an idea of what the card will look like. After doing that, I got blended my background using Fossilized Amber, Worn Lipstick, and Dusty Concord Distress Oxides.
I created leaves with the Amazonian Leaves Dies and Lucky Clover Distress Oxide. Finally, I started adhering everything to my card front with glue and 3D foam squares and strips.
To be entered to win the giveaway, all you need to do is comment at each stop along the Blog Hop! Sunny Studio Stamps will be giving away $35 and Heffy Doodle will be giving away £25 to their respective stores! Be sure to comment before 11:59 PM on March 3rd to be entered to win!
Hello all you fellow crafters! I hope your week was amazing! I’m so glad it’s finally Friday! We even had a snow day this week, but it still felt like a long week! 🙂
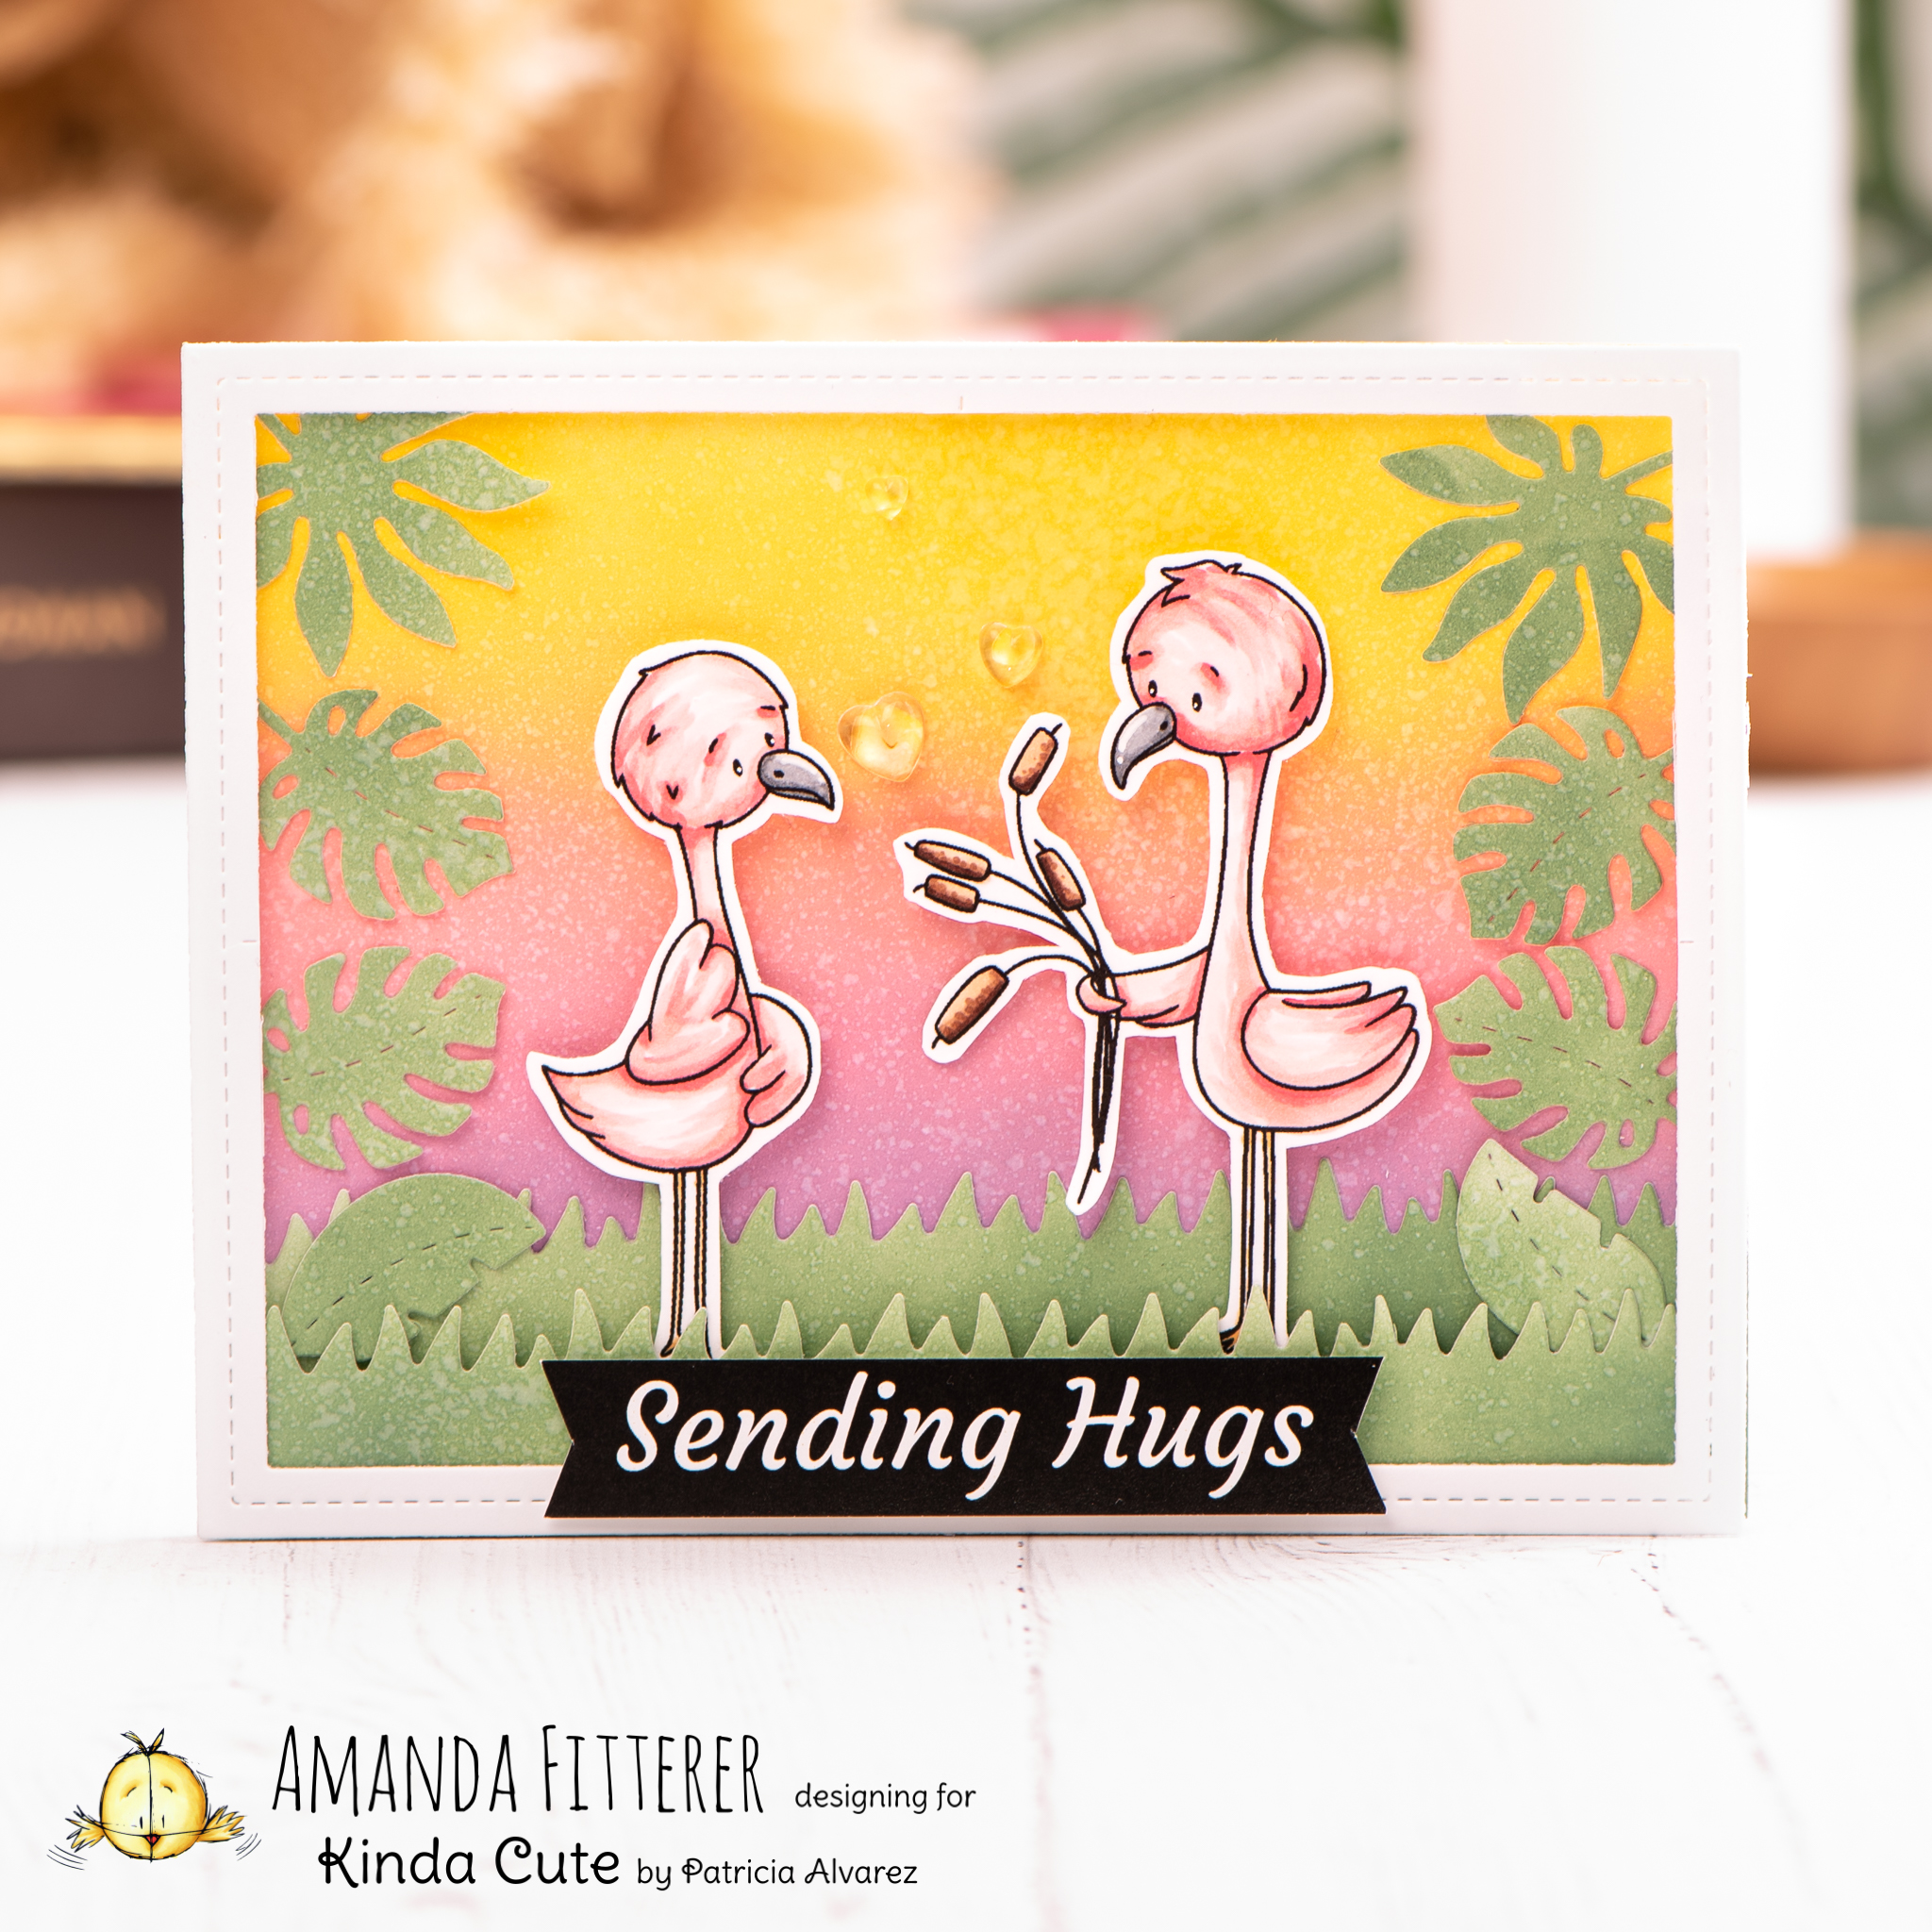
To make this card, I started by printing the Flamingo Couple on 80 lb. Neenah Solar White cardstock. This cardstock is perfect for coloring with Copic markers.
Once I finished coloring my images in, I cut them out with Cutter Bee Scissors. I always use these scissors for fussy cutting.
Such a sweet Valentine’s card for a friend or an associate!
Thank you so much for stopping by my blog!
Xoxo, Amanda
This blog uses affiliate links to help me fund my crafting! If you click through and make a purchase using one of the links above, I am able to receive a small commission from the sale! It won’t cost you any extra, but you will help be helping me out and I really appreciate that!
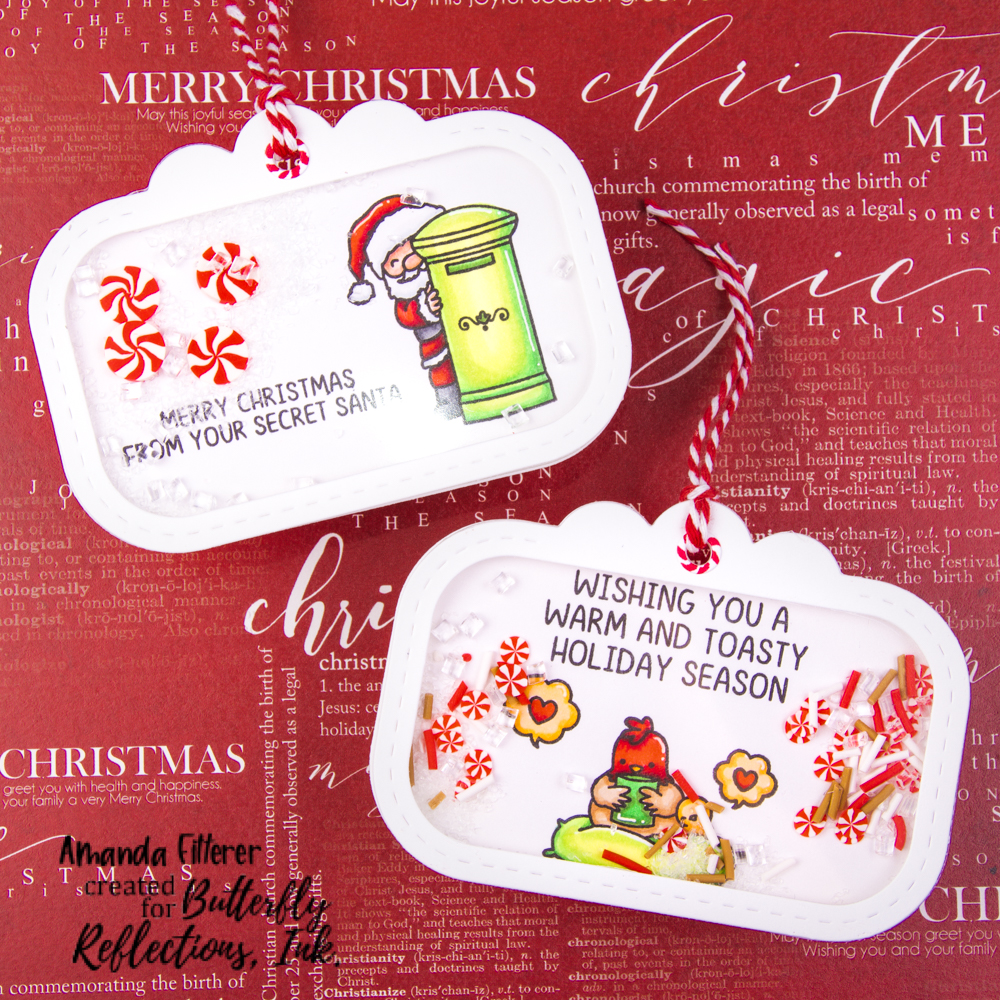
Hello there my fellow crafters! Have you received your February Subscription Box yet?? It’s FULL of all kinds of cute pet stencils, stamps, and paper!
To create these 2 cards, I cut down 2 pieces of black cardstock to 4″ x 5.25″. Then, I trimmed down the patterned paper that was included in the Subscription Box, leaving a small black border all the way around.
Grabbing the stamp sets from the box, I stamped a couple of cute images using black ink.
I cut out all the images and then put double sided foam adhesive on the back. I tied pink and white baker’s twine around the card fronts and then placed the images where I wanted them. As a finishing touch, I added a few pink hearts.
Then, I adhered my card fronts to the card base using 3D foam adhesive strips.
I love all the little paw prints! They’re just so sweet!
Thank you so much for stopping by my blog! Xoxo, Amanda
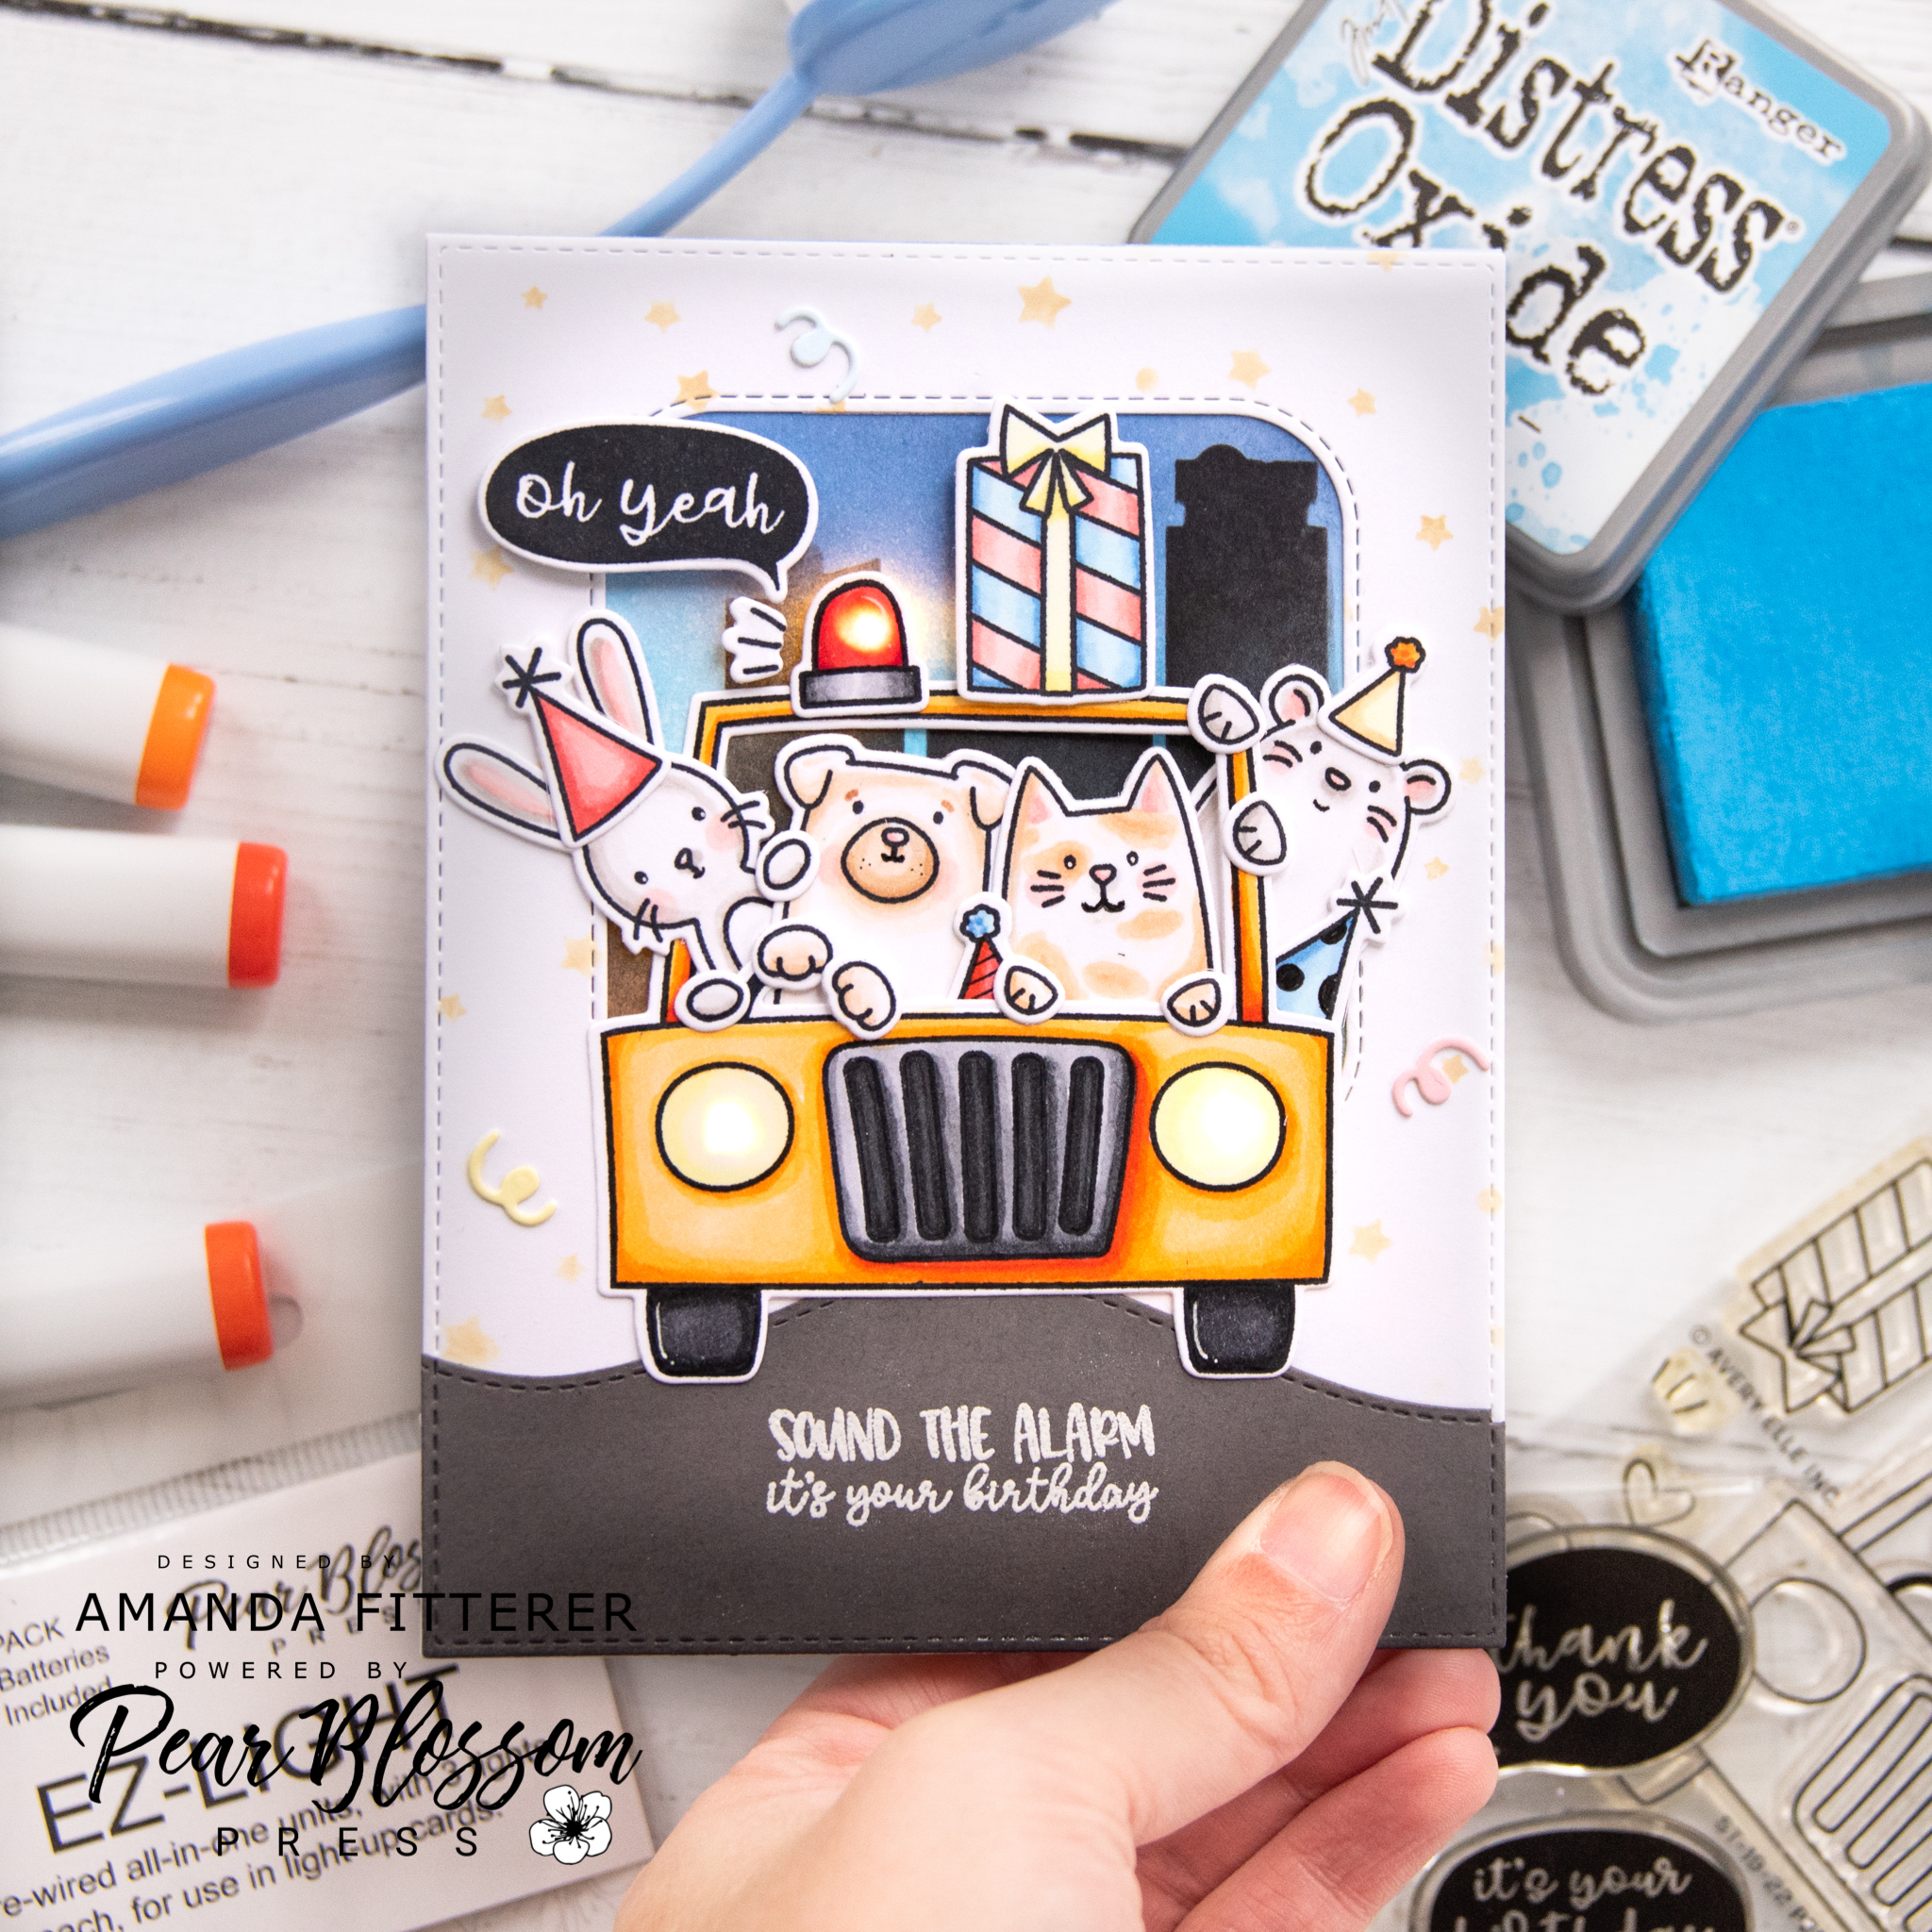
Hello there, crafty friends! I am so happy to be guest designing for Pear Blossom Press using the oh-so-amazing EZ- Lights!
To make this light-up card, I started by stamping some images from the Avery Elle Peek-a-Boo Pets, Peek-a-Boo Pals, and Peek-a-Boo Car stamp sets. I colored all of the images with Copic markers and then cut them out with their coordinating dies.
Now onto creating my background scene! On a piece of white cardstock cut to 5.25″ x 4.5″, I blended Tumbled Glass, Salty Ocean, and Faded Jeans Distress Oxides. I also created a foreground frame using Heffy Doodle’s Stitched Rectangle Dies and My Favorite Things Inside and Out Stitched Rounded Squares Dies. For my street, I grabbed a piece of gray cardstock and used the Heffy Doodle Stitched Slopey Joe Border Dies. I darkened the edges using Black Soot Distress ink to give it some dimension. I also stamped my sentiment on the “street” using Versamark Watermark Ink and used white embossing powder on it.
Using the Heffy Doodle Cityscape Stencil, I created a city in the background with Black Soot Distress Ink. I added some stars with Antique Linen Distress Oxide and the Starfall Stencil.
Now, I’m finally ready to get my EZ-lights installed! I set my colored images up where I wanted them and then used a pencil to make marks on the background where I wanted my lights to shine through. I poked holes through those spots and then used my pencil to create dots on my card base. I put dots where I wanted each of the 3 lights to go, as well as where my push button will be.
Then, on my card base, I lined up the lights and push button on top of my pencil marks. I used some tape to hold the pieces down and used 3mm Deep Foam Tape to prop my card front up. This thick foam tape keeps me from having to double up on regular foam tape!
Now, all I needed to do was adhere all my images to the front of the card using liquid glue and 3D foam squares! And voila! It’s magic! Man, I love these EZ-lights!!
Thank you so much for stopping by my blog! I hope you have a fantastic day! Xoxo, Amanda
I printed the images on 80# Neenah Solar White cardstock and then colored the images with Copic markers. I cut the images out using precision scissors.
Welcome to the Heffy Doodle and Miss Ink Stamps Collaboration Blog Hop! Design team members from both teams are sharing some crafty inspiration using products from both companies! Plus, both stores will be giving away prizes!
Now, let’s get crafty! I couldn’t handle all the cuteness of all the stamps, so I ended up making 3 cards!
I adhered everything to my card base with 3D foam squares, strips, and liquid glue!
Thank you so much for stopping by my blog post! I hope you enjoyed my cards!
Make sure to comment along the way for your chance to win! Miss Ink Stamps will be giving away $25 and Heffy Doodle will be giving away £25 to their respective stores!
Hi everyone and welcome to the Heffy Doodle, Catherine Pooler, and WOW! Blog Hop! Our design teams have come together to share some amazing inspiration featuring products from all 3 companies. Plus, each company is giving away a prize!
Once I die cut all of my images, I adhered everything to my card with 3D foam squares, strips, and liquid glue!
Thanks for making a stop on the hop to my blog today! I hope you feel inspired by my card and all of the amazing cards that are part of the hop!
Blog Hop Details: Make sure to comment along the way for your chance to win! Both WOW! and Catherine Pooler will be giving away $25 to their stores and Heffy Doodle will be giving away £20 to their store!
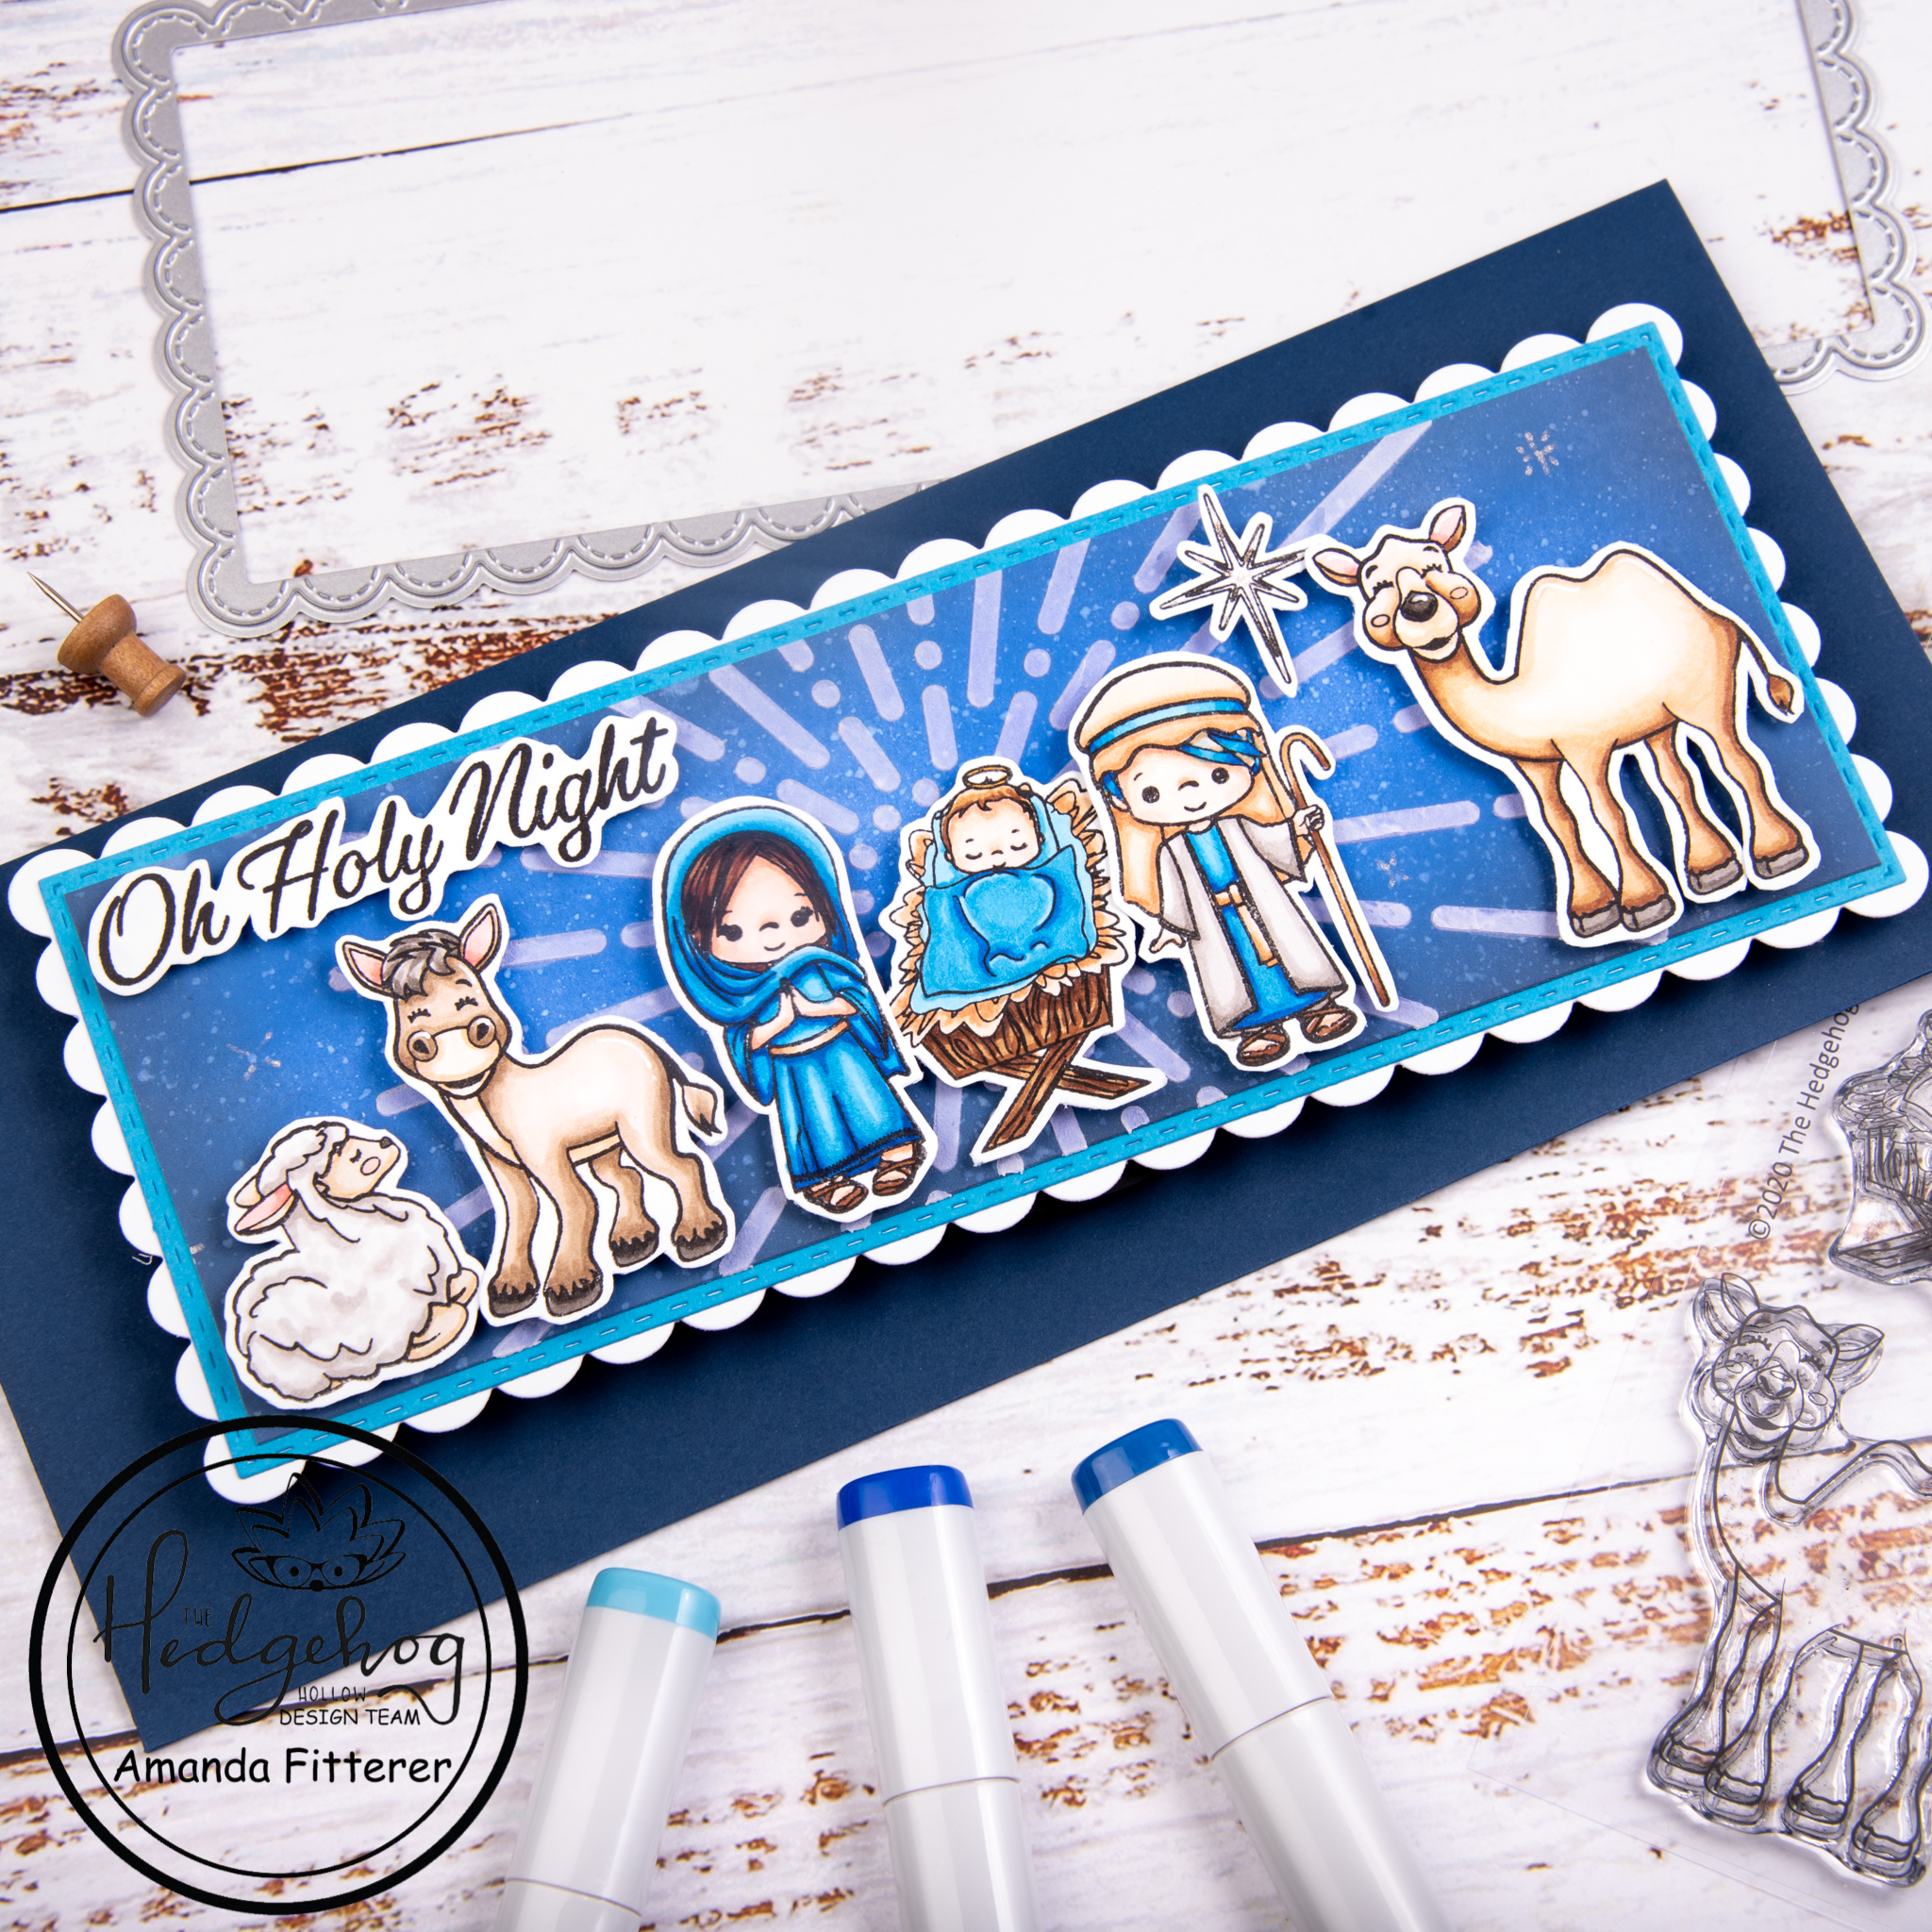
Hello, hello! Can you believe it is November already!? I am sad at how fast the holidays are approaching, but I am EXCITED about the new Hedgehog Hollow Box for November! It’s filled with lots of goodies!! If you didn’t catch the Reveal Video yet, you can find it here! You can also see a list of the products here. If you sign up before November 14th, you can still get this November box! What are you waiting for?!
Today, I am sharing this Nativity Scene card with you! I think these images are just so sweet!
To create this card, I started with this AHHHHMAZING cardstock called “Perfect Blend Slimline Mini Strips” by Maker Forte. Blending Distress Inks and Oxides on this cardstock is just a breeze! I blended Faded Jeans, Blueprint Sketch, and Black Soot to create a dark background. I flecked water onto the background to create a “starry” effect.
I used the Simply Radiant Stencil from Heffy Doodle to create a starburst in my background. Using a spatula, I lightly applied some embossing paste.
While that dried, I stamped my images from the “Nativity” stamp set that was included in the November Subscription Box. I colored my images with Copic markers and then fussy cut each image out with detail scissors.
I love the way all of these images from the Nativity stamp set go together! They make the perfect little Christmas scene!
I hope you enjoyed my post! If you’re not already following me on Instagram, you can find me here. Later this week, I will be back with another project using the November Subscription Box! I can’t wait to keep sharing some more inspiration!
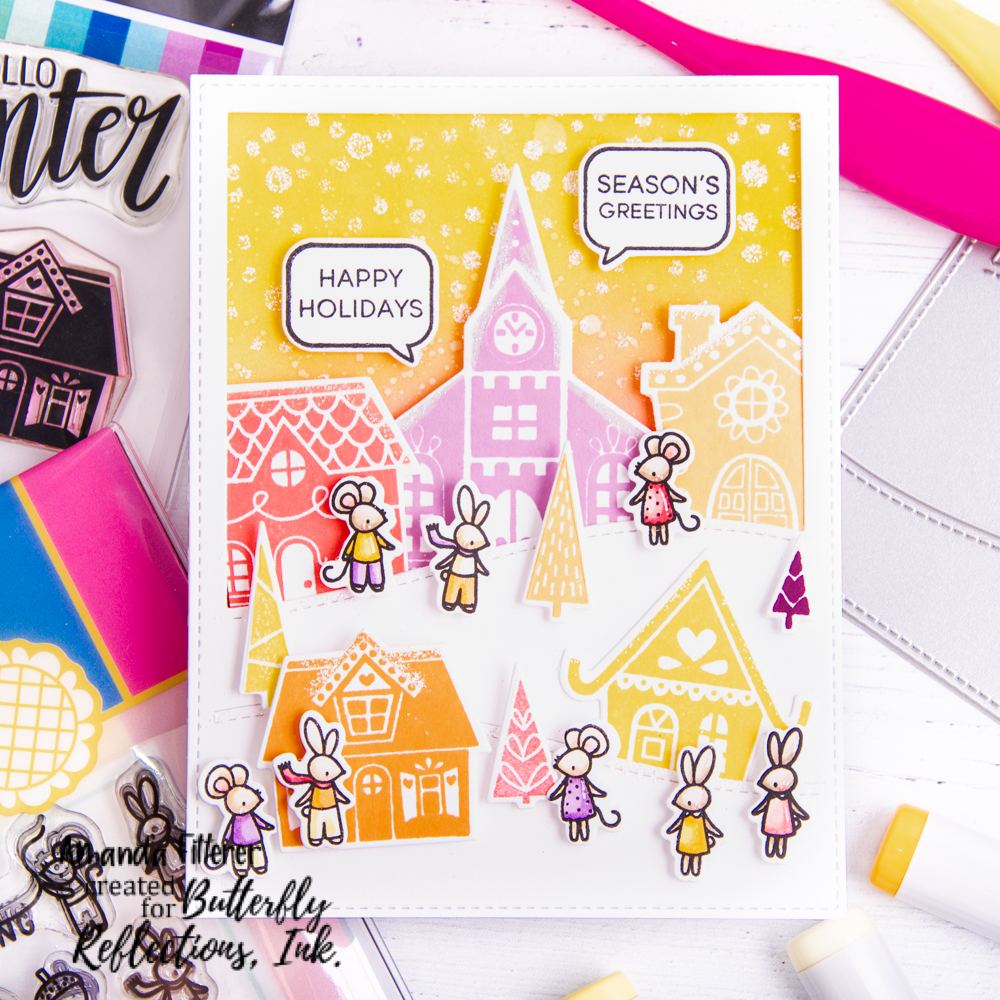
Happy Monday! I hope your week is off to a good start! I hope this sweet slimline shaker card puts a smile on your face!
Have you gotten your Hedgehog Hollow October subscription box?! I just love the “Around Winter” stamp set that is included in the box. It’s so versatile! In my post a few weeks ago, I used it as a background and a focal point on 2 different cards! For this interactive card, I used it as a patterned background! The little gift boxes are just so cute they make the perfect pattern!
To make this card, I am starting with a few slimline dies. For my card base, I’m using Pink and Main’s Stitched Slimline Dies. I also cut a border using Pink and Main’s Blessings Slimline Dies, which you can see in the photo below. In the end, I didn’t end up using the border for this card because it distracted from the rest of the card. I saved it for another project! The windows that I’ll use for the shaker portion of the card are created from Heffy Doodle’s Stitched Slimline Trio Dies. On my card base, I’m going to create a subtle green background for each of my windows using Twisted Citron Distress Oxide.
Now I’m going to grab my super adorbs “Around Winter” stamp set and the ever-juicy Catherine Pooler Tutti Frutti ink pad. I’m using a clear acrylic block to mount my stamp. I almost always use my MISTI while stamping with clear stamps because I know that with most inks and stamps, I will need to stamp it more than once. However, this ink pad is so juicy that I know I’ll get a perfect image the first time, so I am using the acrylic block to make the stamping go faster.
I have stamped my images using the Mama Elephant Santa Baby stamp set and alcohol-friendly ink. Now I’m ready to start coloring with my Copic markers!
After prepping my black cardstock with my anti-static tool, I’m going to stamp my sentiments with VersaMark Watermark ink. Using white embossing powder and my heat tool, I’m going to emboss my sentiment. Using scissors and my paper trimmer, I’ll cut these little guys down to fit on my card.
Now I’m ready to assemble my card! I am using 3D foam squares to adhere my images and sentiments to the front of my card.
Here are some close-ups of the completed card! I love a good shaker card, don’t you?
If you’ve made some cards with this Hedgehog Hollow October Box, I would love to see them! Tag me in the post @craftyandcreativevibes or leave a comment here on the blog with your IG account and I’ll check it out!
If you’d like to see a video of the October Box goodies, you can find it here. For all the subscription options, click here.
Remember, if you want this box, you must sign up by October 14th! Otherwise, check here to see if it’s available as a one-off!
Thank you so much for stopping by my blog! I still have one more project coming up next Monday with the October box! I hope you come back by and check it out! Xoxo, Amanda
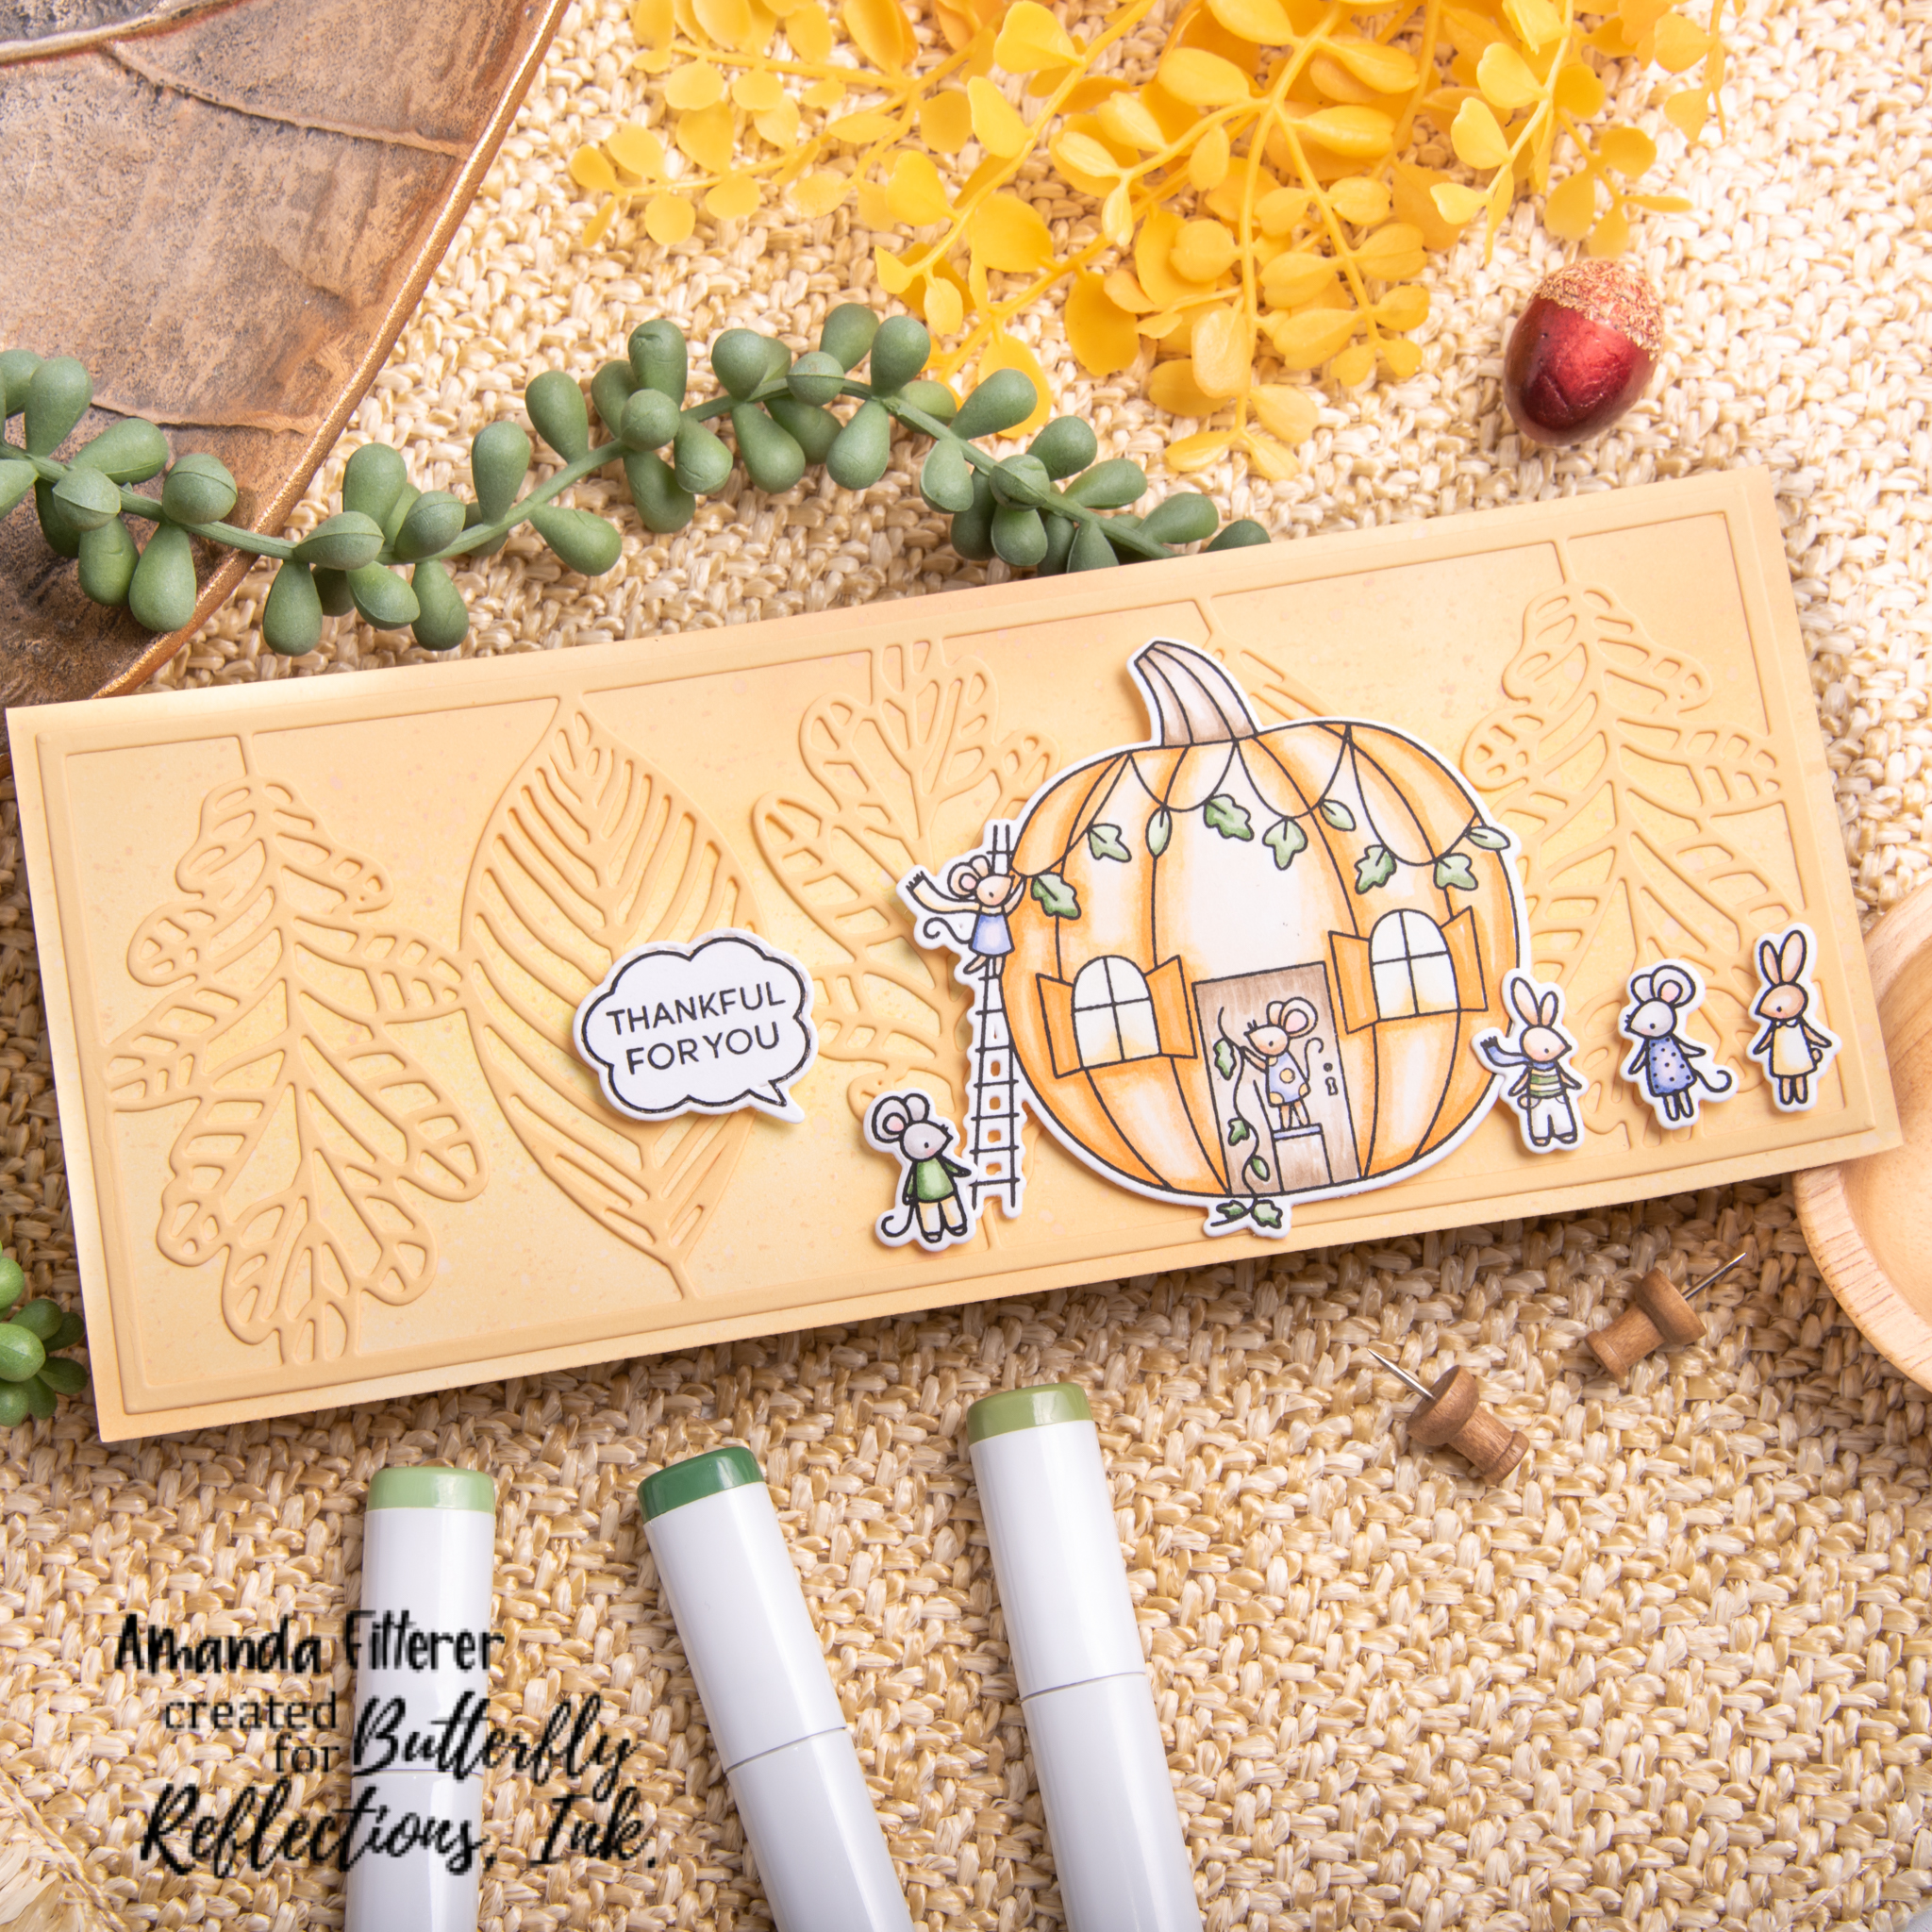
Hellooo! I hope you’re all having a great week so far! Are you getting ready for Fall? I’m not quite ready yet… Still enjoying the warmth and sunshine!
But… I know it’s around the corner and it’s time to get ready with some Fall cards! Today, I’m sharing a sneak peek of my FIRST card as a Butterfly Reflections Ink Design Team member!
Hi everyone and welcome to the Heffy Doodle Release Blog Hop! The new release is now available for purchase from Heffy Doodle and official retailers, and we are celebrating with lots of inspiration and a giveaway, too!
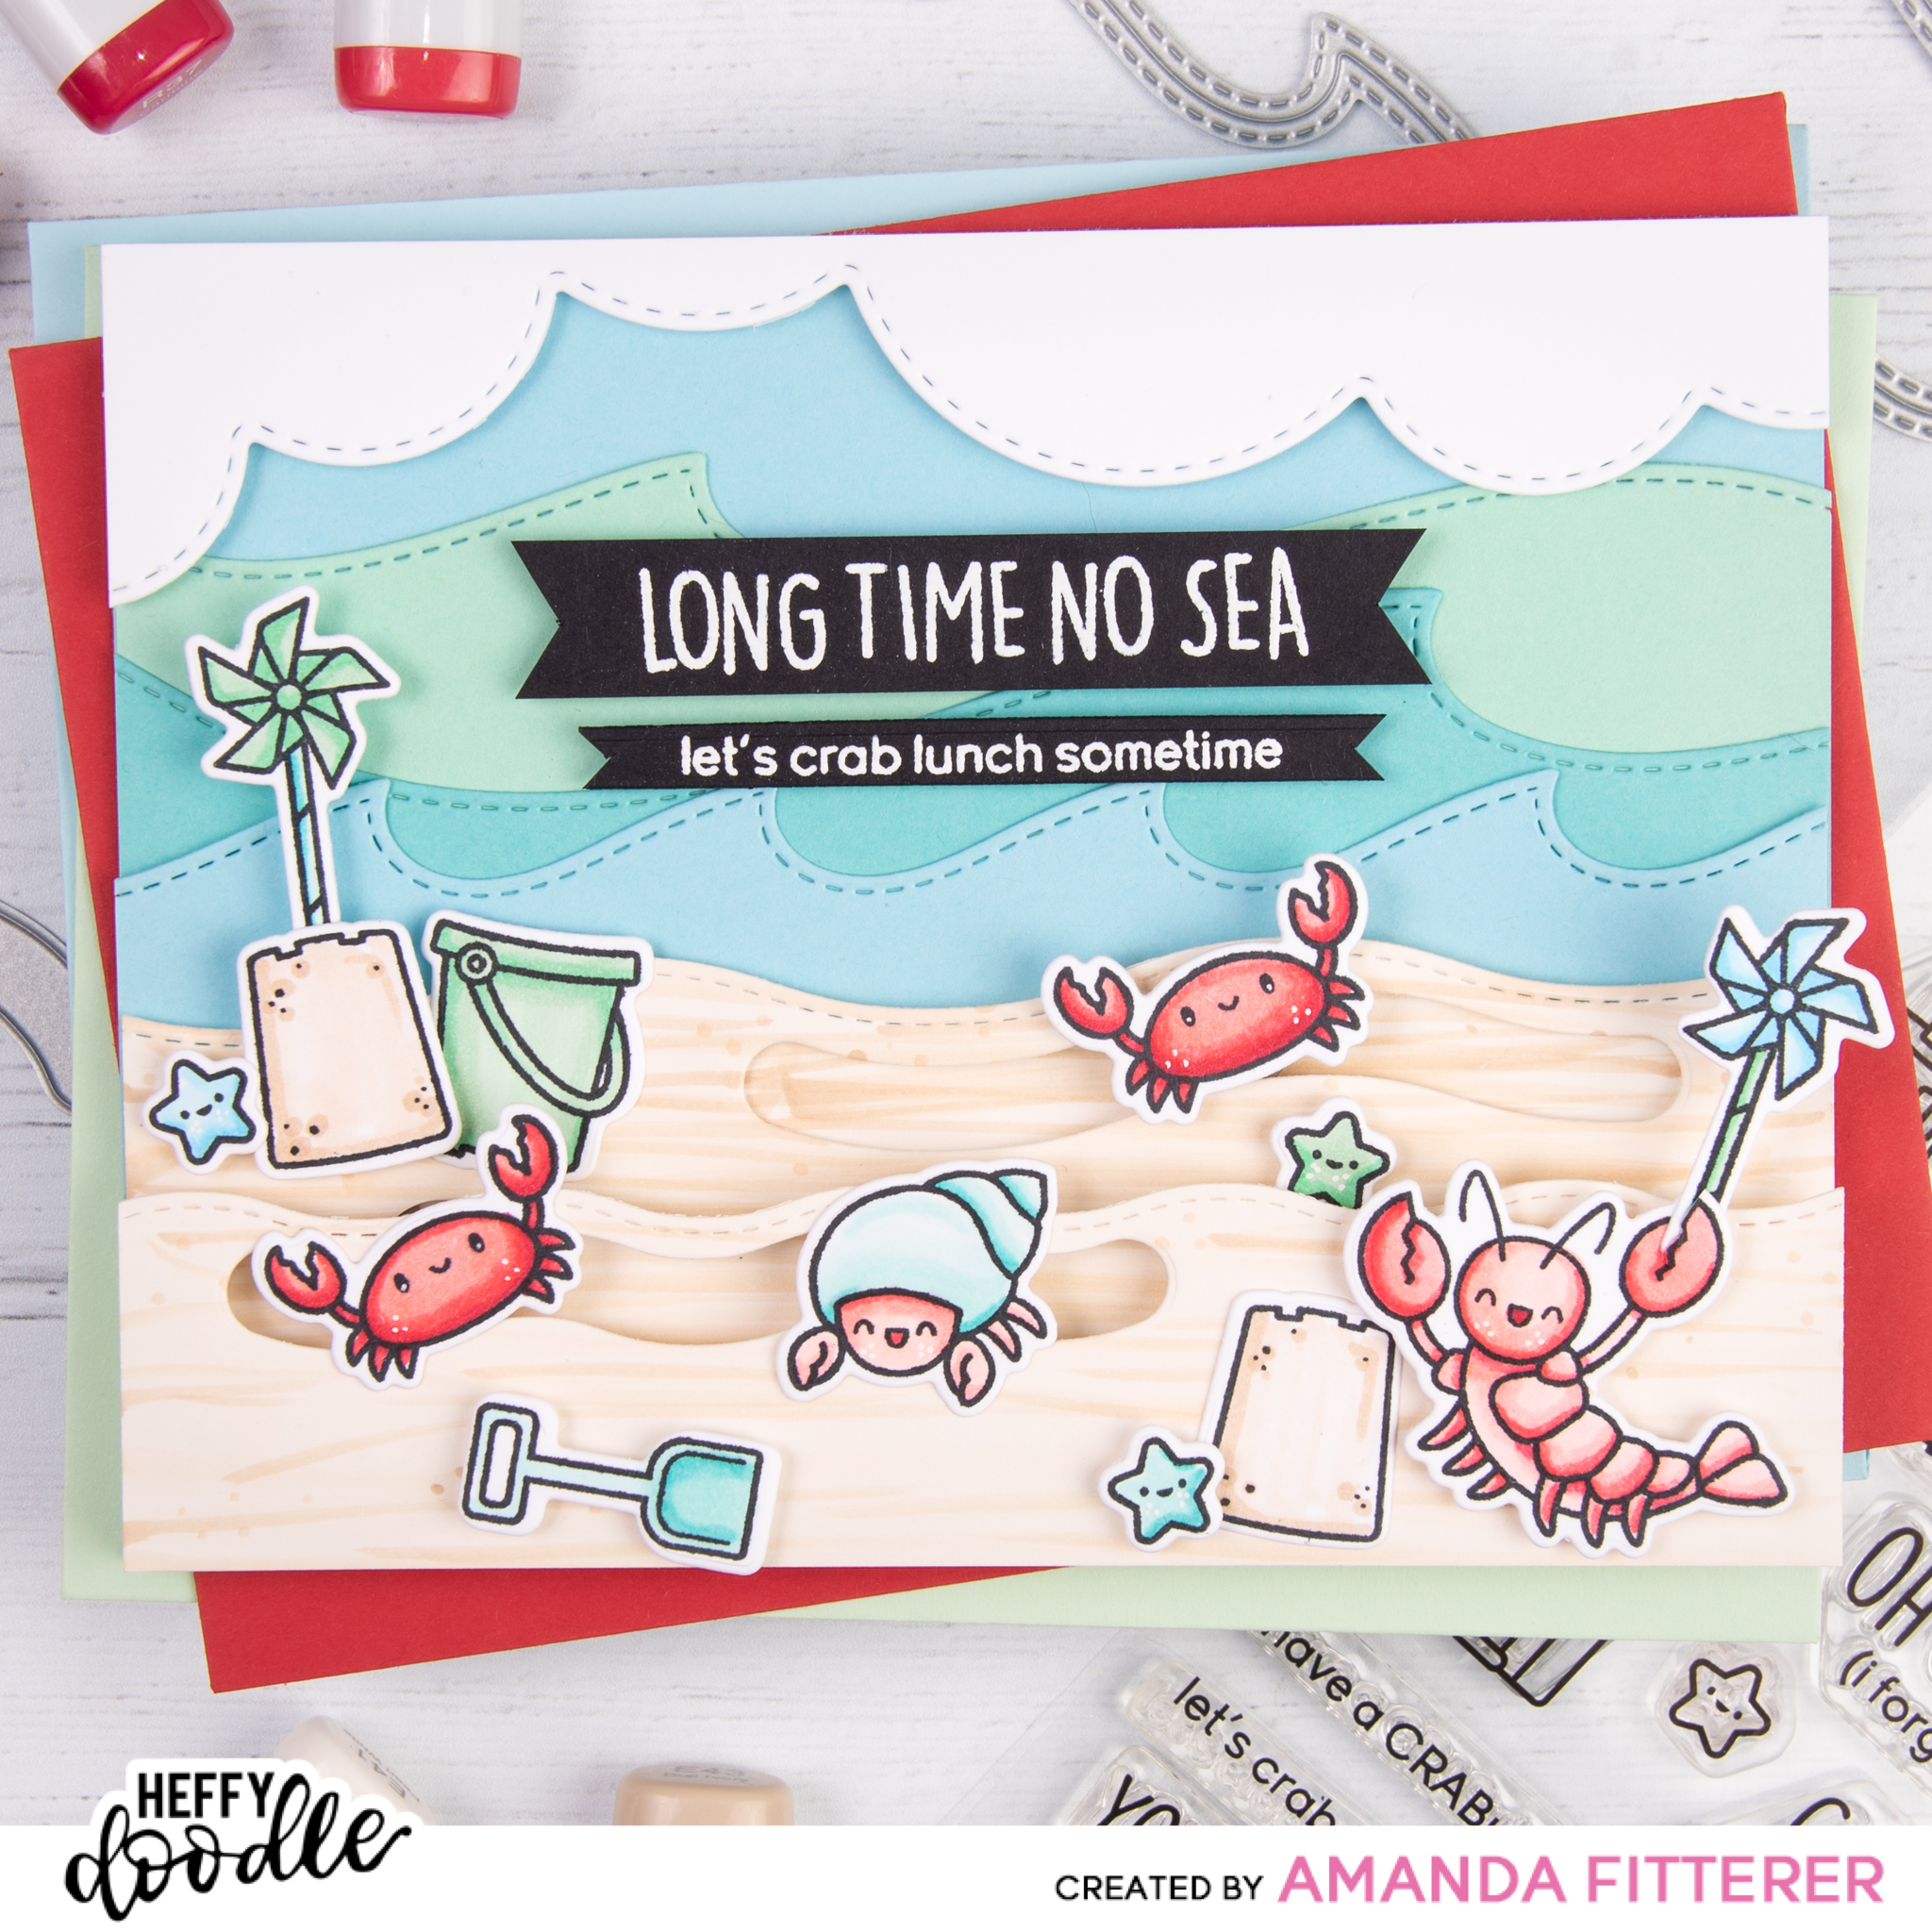
To make this fun interactive card, I’m going to set up my background. With the Breaking Waves Border Dies and the colored cardstock from Heffy Doodle. I’m using 2 of my wave dies as sand, instead of water. For those 2, I’m going to add a little dimension with my Copic E41 and E42 markers. I’m also going to create my slides for my critters using the coordinating Wavy Water Slides Dies.
I stamped my A Little Shellfish images with Memento Tuxedo Black ink and am coloring my images with Copic markers and a white Gelly Roll pen. Blues: B000, B00, B02 Reds: R30, R32, R35, R27 Greens: G12, G02 Blue-Greens: BG10, BG11, BG13 Earth: E41, E42
After laying everything out, I’ve decided to get rid of the dark blue background and use some Silver Linings Clouds and another light blue background instead.
For my sentiments, I’m using Versamark Watermark ink and white embossing powder on black cardstock. I am using scissors, a paper trimmer, and More Strips of Ease die to cut them down.
Now I’m ready to start putting the card together! I’m cutting my lobster’s claw open so he can hold the pinwheel. I’m using buttons and 3D foam squares to adhere my sliding critters. I’m also doubling and tripling up on 3D foam adhesive so the critters can move smoothly! And voila! All done!
GIVEAWAY INFO: To celebrate the new release Heffy Doodle will be giving away a £50 voucher to the Heffy Doodle Store!! Make sure to comment on each stop in the hop to be entered for your chance to win. The winner will be selected randomly and announced on the Heffy Doodle blog on July 25th.
In addition, you can get the free Lil Lighthouse stamp set with any order over £30! If you spend £45, you’ll get the dies free too!
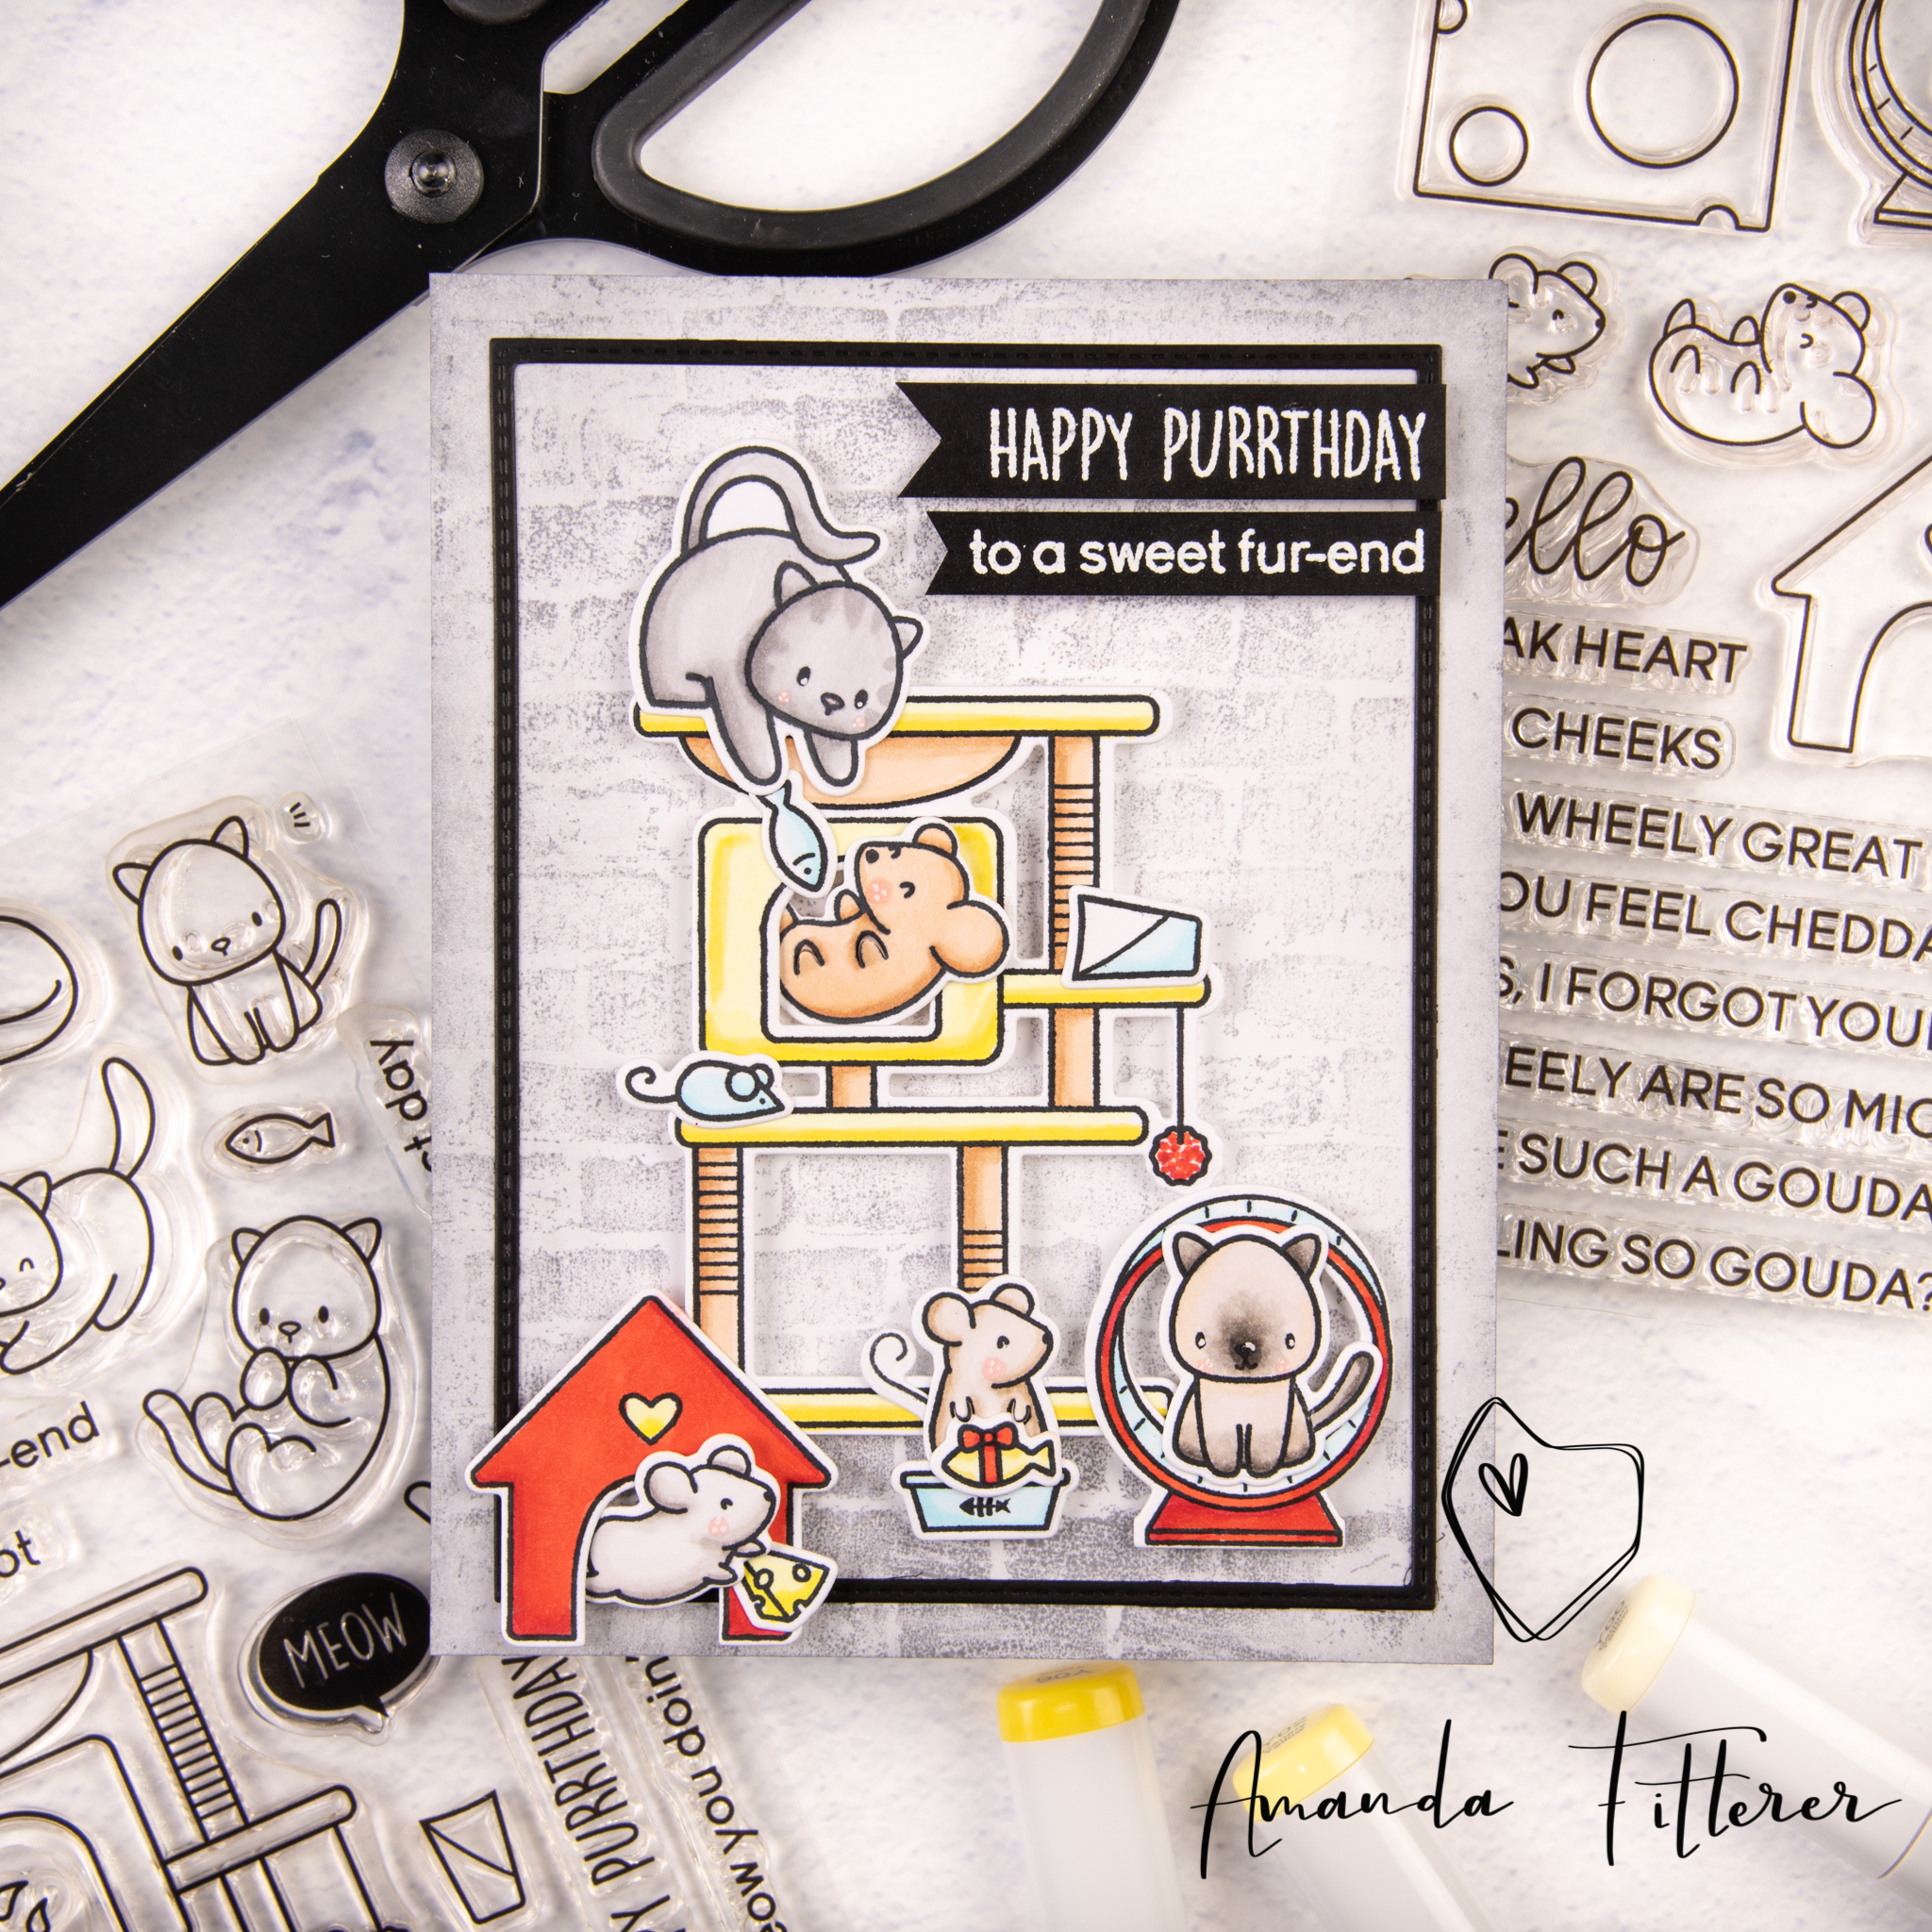
I’m using Tuxedo Black Memento ink to stamp all of my images.
I’m coloring in my images with Copic markers.
For my background, I’m using this brick background stamp and Hickory Smoke distress oxide. I’m also cutting a stitched border with a die and black cardstock.
I’m using 3D foam squares, strips, and glue to adhere everything to my card.